
Popup Upsells let you show product recommendations in a popup when customers perform a specific action or spend a set amount of time on a supported page.
You can control which products trigger the popup, where it appears, when it opens, and which products are recommended.
How to Create a Popup Upsell
From the Recommendation Rules Builder, select Popup Upsell from the left panel and click Create Popup Upsell.
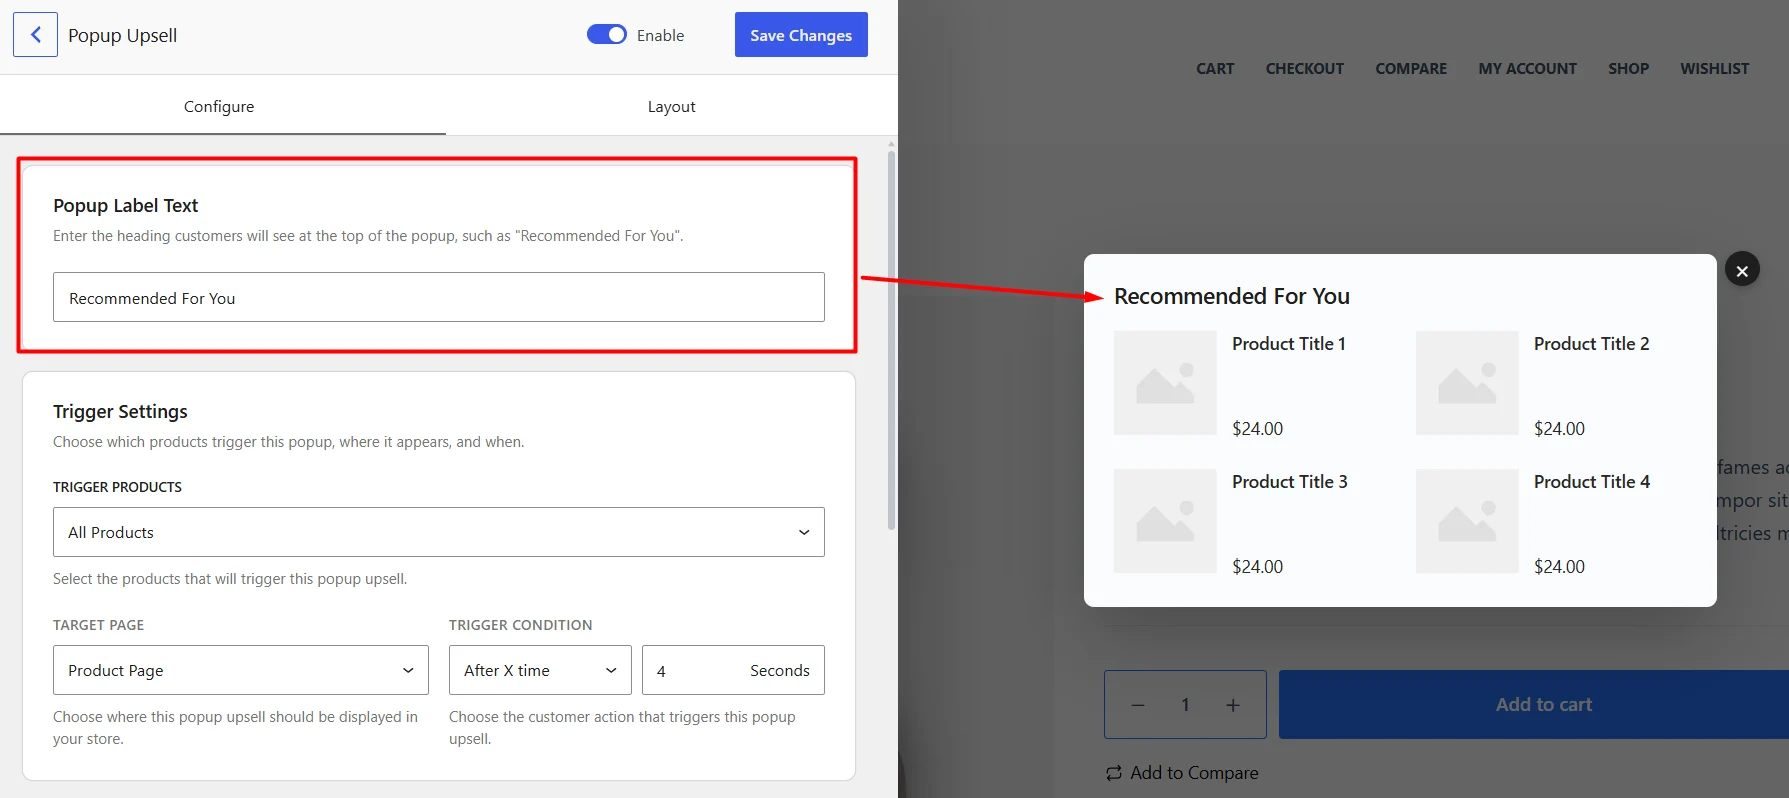
The popup builder opens with the configuration settings on the left and a live preview on the right. Now follow these steps.
1. Add the Popup Label
Under Popup Label Text, enter the heading customers will see at the top of the popup.
For example: Recommended For You.
2. Configure the Trigger Settings
The Trigger Settings determine which products can trigger the popup, which page it appears on, and when it opens.
Set the Trigger Products
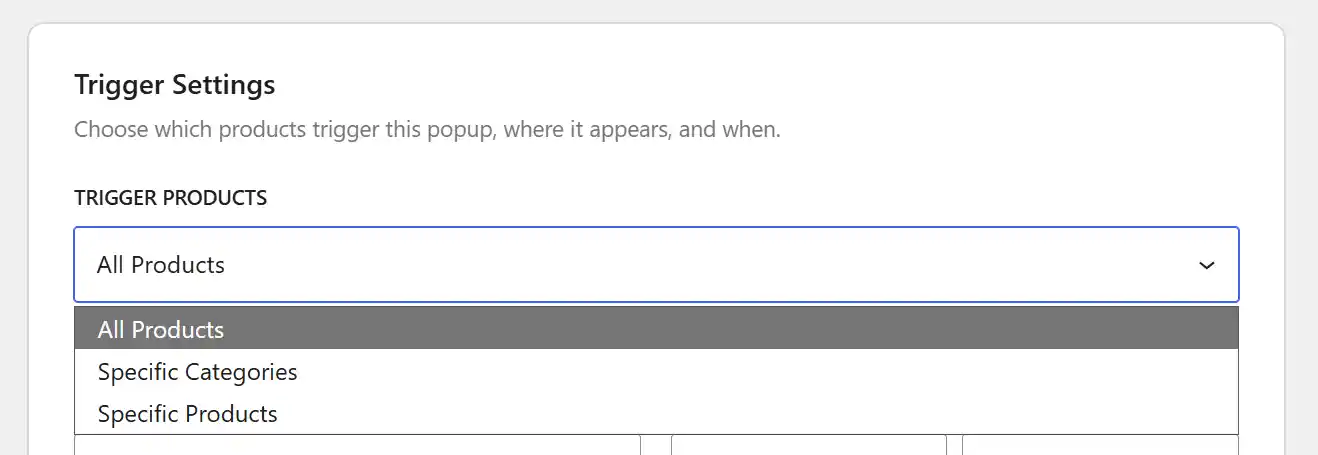
Choose which products should be associated with the popup trigger:
All Products– Apply the popup to all products.Specific Categories– Apply it only to products from selected categories.Specific Products– Apply it only to the products you select.
When using Specific Categories or Specific Products, select the categories or products you want to use in the field beside it.
Choose the Target Page
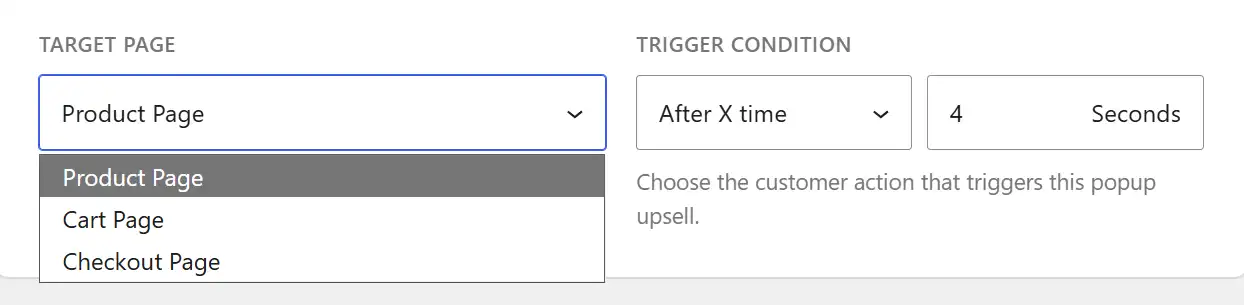
Choose where the popup upsell should appear: Product Page, Cart Page, or Checkout Page
Set Trigger Condition
Choose what should cause the popup to appear.
For the Product Page, you can use:
After product added to cart– Open the popup after the customer adds a product to the cart.Clicked on view cart button– Open the popup when the customer clicks the View Cart button.After X time– Open the popup after the customer remains on the page for a specified number of seconds.
For the Cart Page, available conditions are:
Clicked on proceed to checkout button– Show the popup when the customer clicks Proceed to Checkout.After X time– Show the popup after the specified number of seconds.
For the Checkout Page, you can use:
Clicked on payment button– Display the popup when the customer clicks the payment button.After X time– Open the popup after the selected number of seconds.
When using the After X time condition, enter the delay in seconds. For example, setting After X time → 4 Seconds opens the popup after the customer has been on the selected page for 4 seconds.
3. Choose Which Products to Recommend
Under the Products to Be Recommended Filter, choose which products should appear inside the popup.
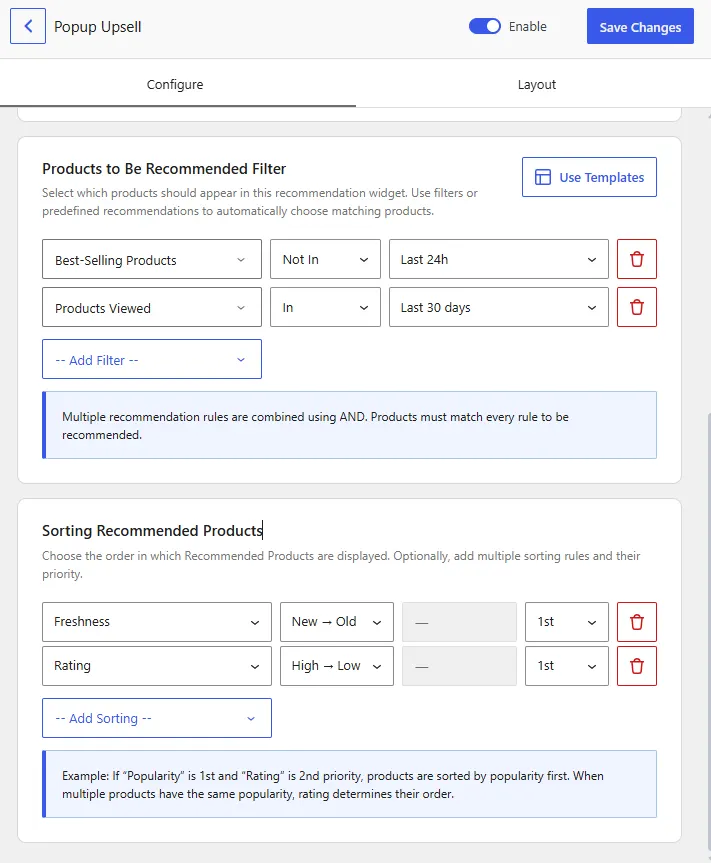
Click Add Filter and use the available Product, Sales & Performance, Customer Behavior, or Product Relationship filters. You can also use Templates for a predefined recommendation setup.
See Recommendation Filters for details on each filter.
4. Sort the Recommended Products (Optional)
If needed, use Sorting Recommended Products to control the order of products inside the popup. Click Add Sorting, choose a sorting method, and set its direction, period, or priority where available.
See Sorting Recommendations for details.
5. Customize the Popup Layout
Switch to the Layout tab to control how the recommended products look inside the popup. You can adjust the layout, product arrangement, content size, and which product elements are displayed.
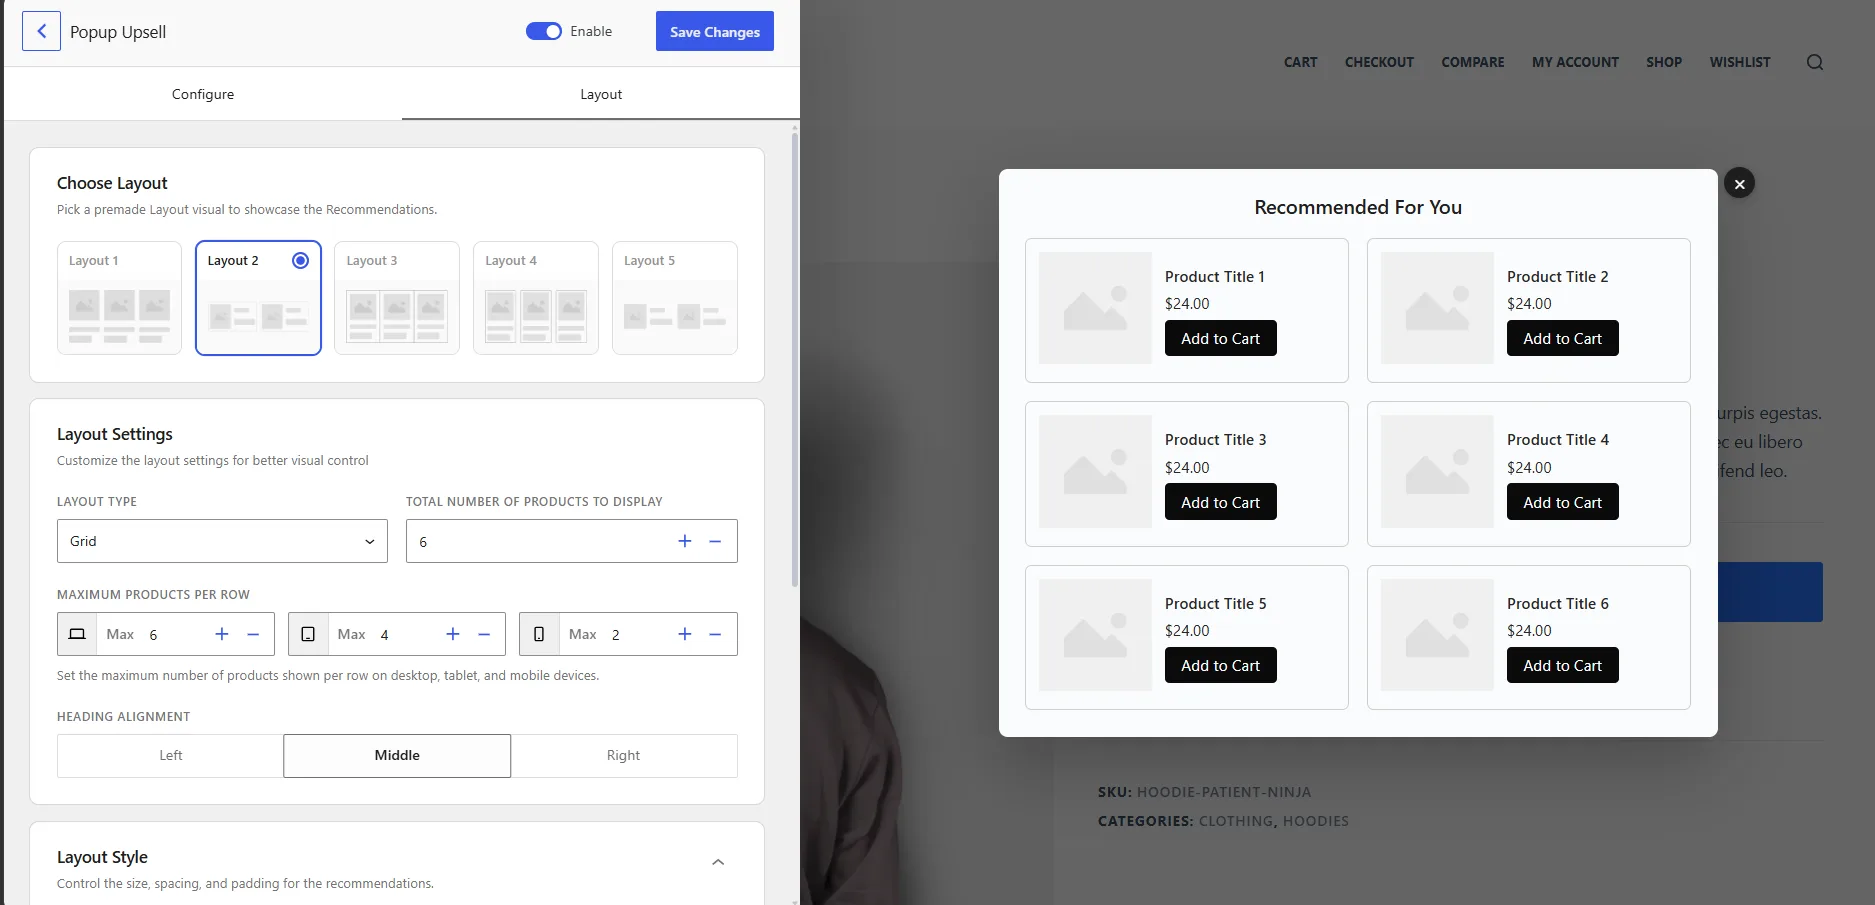
Use the preview on the right to check the popup as you make changes.
Also see Recommendation Design & Styles for details.
6. Enable and Save the Popup
Keep Enable turned on when you want the popup to be active, then click Save Changes. The popup will appear when its selected trigger requirements are met.
How to Manage Popup Upsells
After creating your first Popup Upsell recommendation, the Popup Upsell page will show a table listing all the popup upsells you have created.
The table includes each popup’s ID, Name, Trigger Product, Page, and Status.
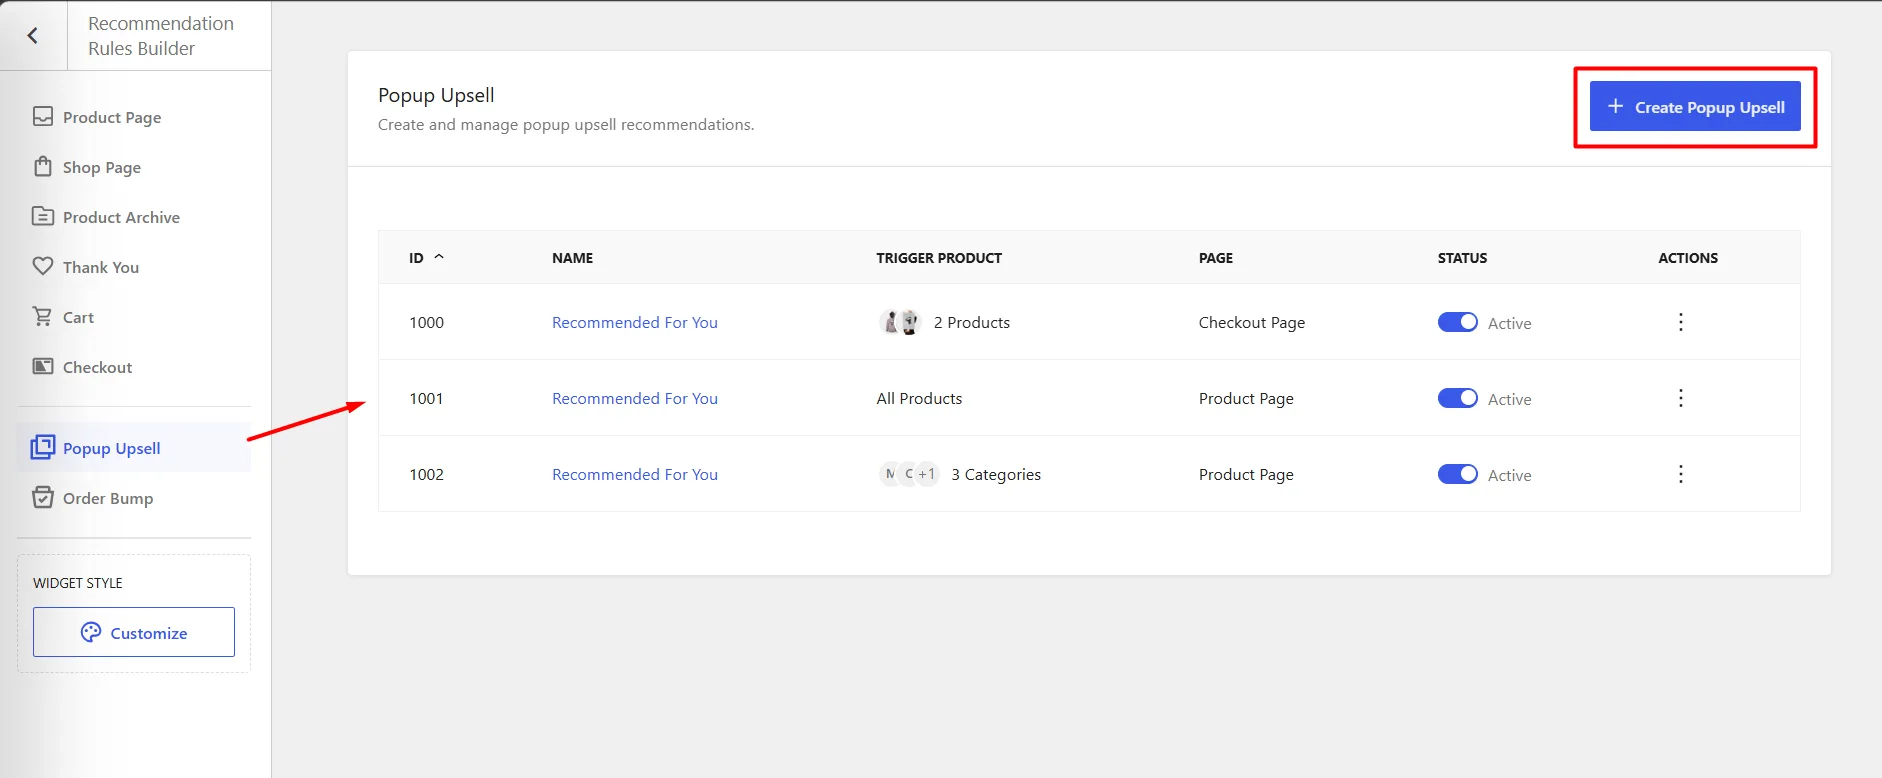
You can use the Status toggle to quickly enable or disable a popup without deleting it. From the Actions menu, you can also:
- Edit – Update the popup settings.
- Duplicate – Create a copy of the existing popup.
- Delete – Permanently remove the popup.
To create another popup, click Create Popup Upsell at the top of the page.