
You can create a product recommendation in WowRecommend by choosing where it appears, selecting which products to recommend, deciding how they are sorted, and publishing the recommendation.
🎬 Watch this video to get a practical understanding of WowRecommend’s features and see how product recommendation setup works step by step.
1. Choose Where to Show the Recommendation
Start by choosing where the recommendation should appear.
In the Recommendation Rules Builder, select a target page from the left panel, such as Product Page, Shop Page, Product Archive, Thank You, Cart, or Checkout.
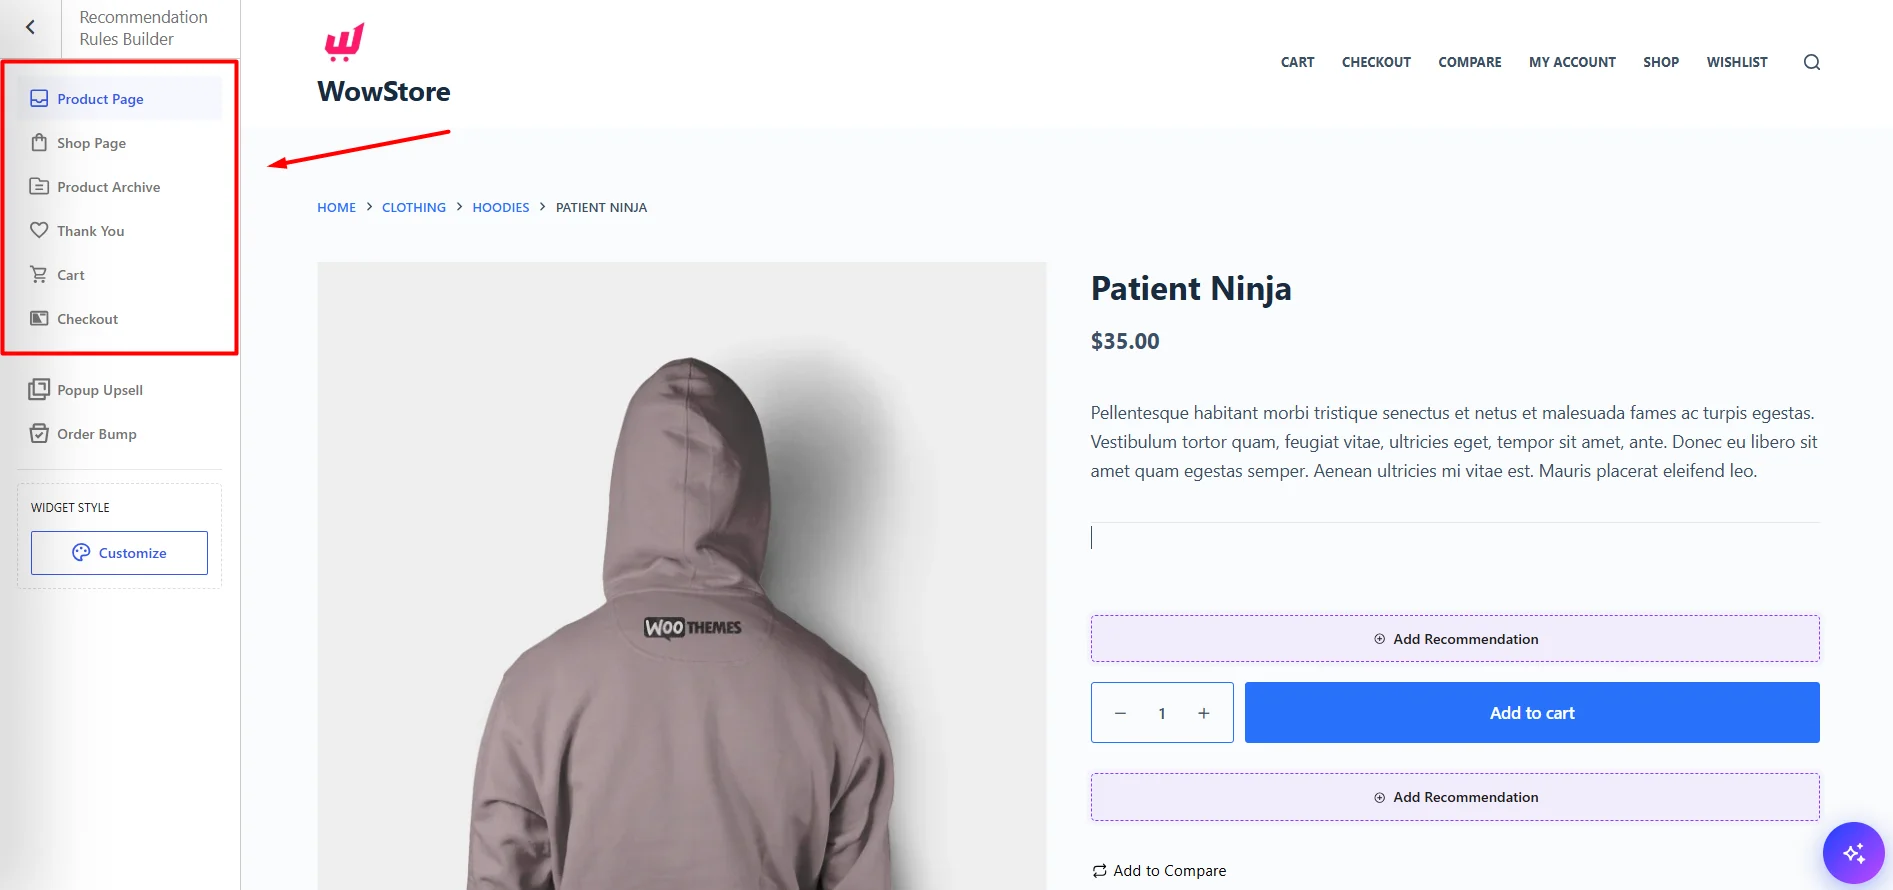
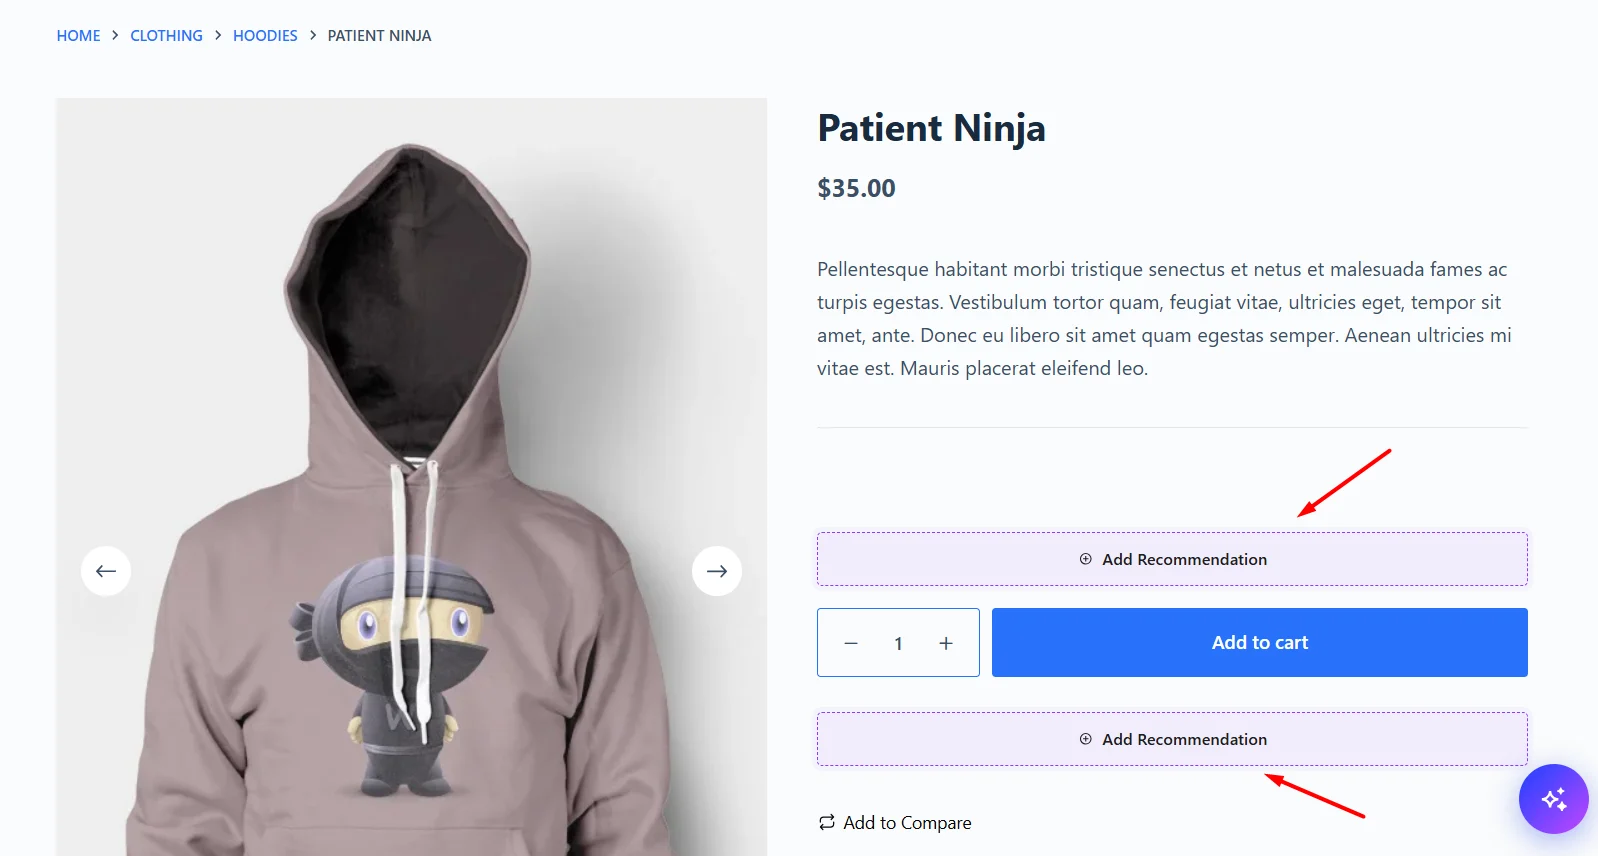
The preview will then display the available recommendation positions for that page, each marked with Add Recommendation.
Click Add Recommendation at your preferred position. This sets both the target page and placement, then opens the recommendation settings so you can configure what products to show.
I can also make it more documentation-style and LLM-friendly to match the rest of your Recommendation docs.
2. Name Your Recommendation
Under Name Your Recommendation, enter a heading for the recommendation section. For example:
- You May Also Like
- Frequently Bought Together
- Recommended for You
This heading will be visible to customers on your store.
3. Choose Which Products to Recommend
Go to the “Products to Be Recommended Filter” section on the left panel and click Add Filter.
Choose a condition that determines which products can appear in the recommendation. Available filters are grouped into categories such as Product, Sales & Performance, Customer Behavior, and Relationship.
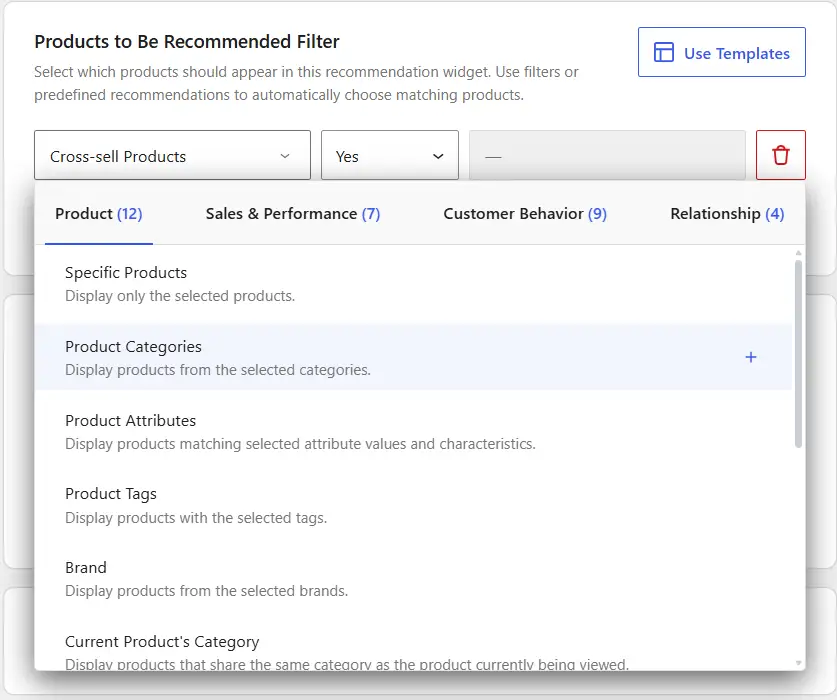
For example, you can recommend:
- Specific products
- Products from selected categories
- Products with particular attributes or tags
- Products from selected brands
- Products related to the product currently being viewed
After selecting a filter, configure its condition and choose the products or values you want to include. You can add more than one filter when you need more control over which products are recommended.
4. Set the Product Sorting
Under the “Sorting Recommended Products” section, click Add Sorting and choose how the matching products should be ordered. For example, you can sort recommendations by:
- Popularity
- Conversion
- Freshness
- Price
- Rating
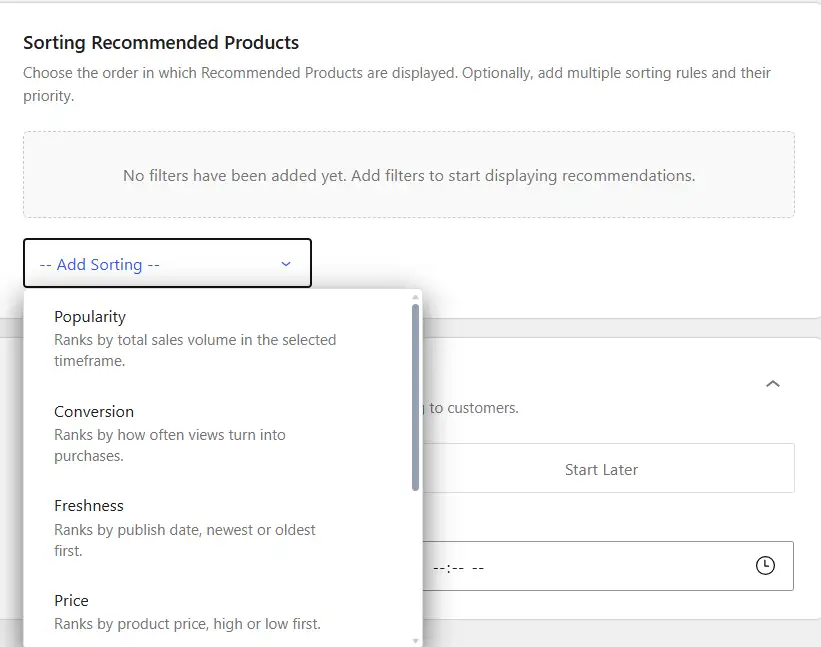
Configure the sorting direction, such as High → Low or Low → High, where applicable. You can also add multiple sorting rules and set their priority for more precise ordering.
5. Schedule the Recommendation (Optional)
Use the “Schedule” section if you want the recommendation to run only during a specific period. Choose one of the following:
- Right Now – Starts showing the recommendation immediately. You can optionally set an End Date & Time to stop it automatically.
- Start Later – Set a Start Date & Time for when the recommendation should begin. You can also set an End Date & Time.
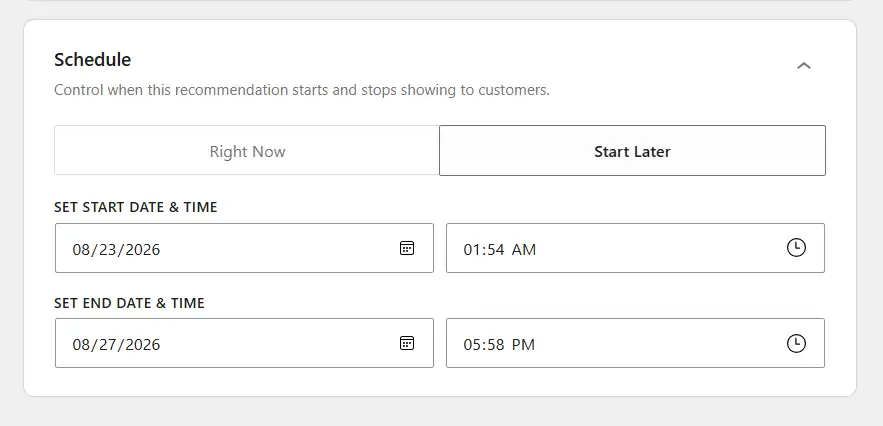
If you do not need a schedule, leave it set to Right Now without an end date.
This is useful for temporary recommendations such as seasonal campaigns, limited-time promotions, or product launches.
6. Customize the Recommendation Layout
Open the Layout tab to control how the recommendation looks on your store.
First, select one of the available premade layouts under Choose Layout. Then adjust the layout settings as needed:
- Layout Type – Choose how the recommended products are displayed, such as a slider.
- Total Number of Products to Display – Set how many products can appear in the recommendation.
- Maximum Products per Row – Set separate limits for desktop, tablet, and mobile devices.
- Heading Alignment – Align the recommendation heading to the left, middle, or right.
- Layout Style – Adjust the visual sizing and other available layout styling options.
- Element Display – Choose which product information to show or hide, including the product image, category, title, rating, price, and Add to Cart button.
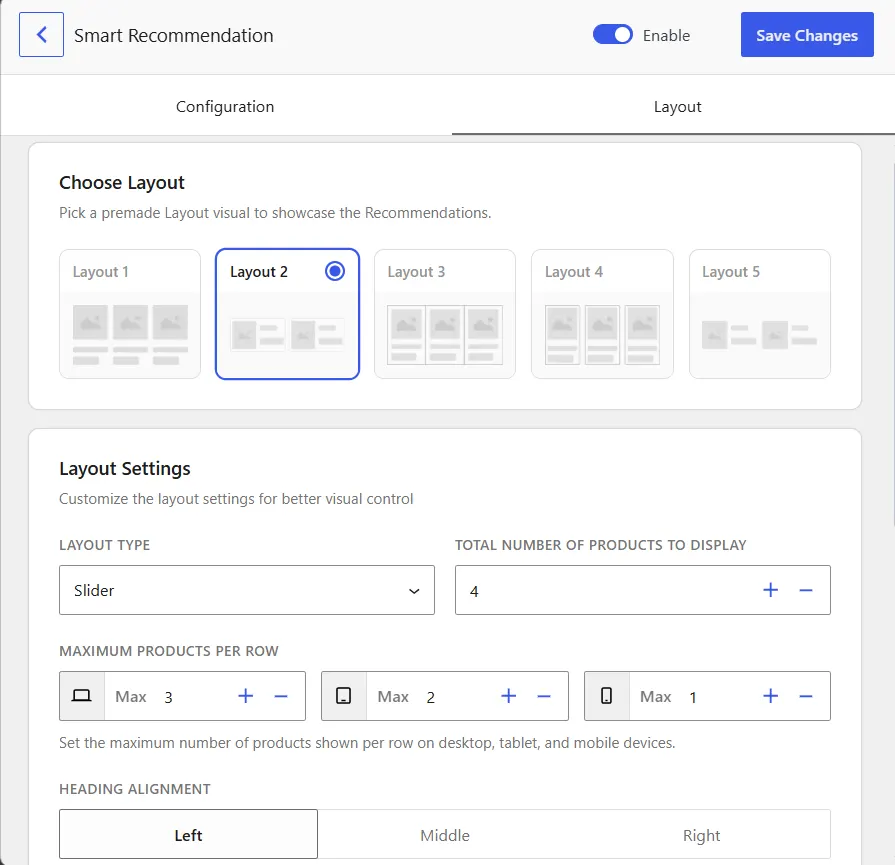
Use the preview while making changes to check how the recommendation will appear to customers.
7. Set Display Conditions (Optional)
Use Display Conditions when multiple recommendation widgets can appear in the same position. Click Display Conditions on the recommendation preview, then choose a Display Dependency Type:
- Always – Shows all eligible recommendation widgets at the same time.
- Sequential – Shows one eligible recommendation at a time based on the configured rule.
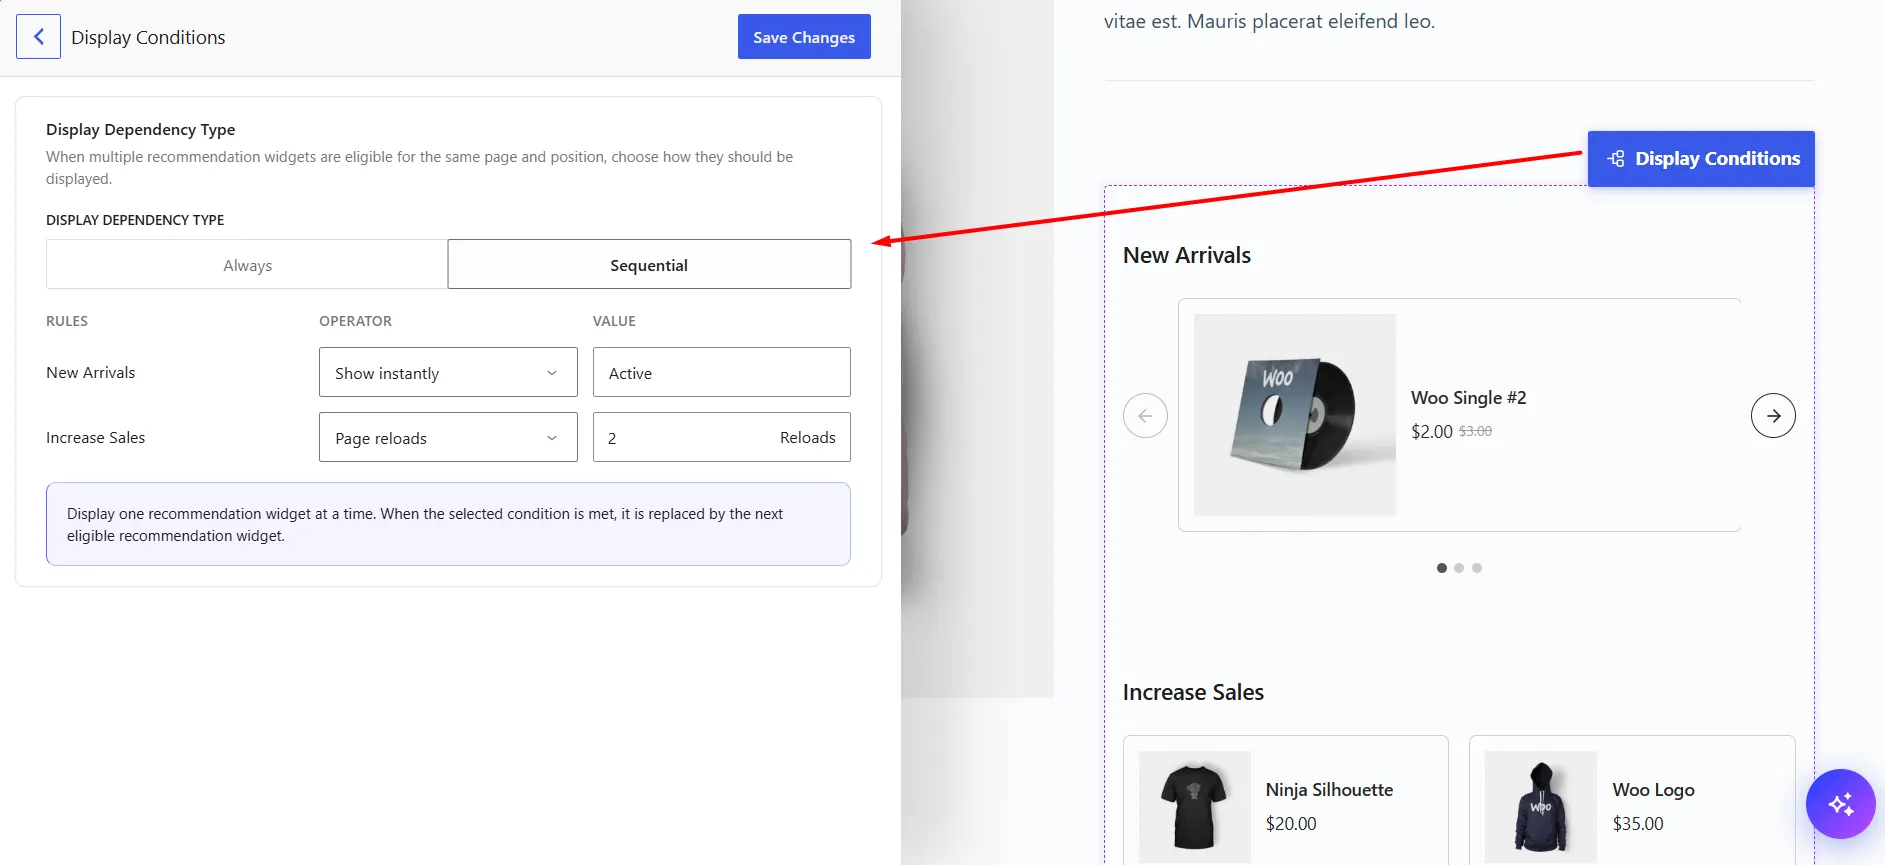
Click Save Changes when finished. If you only have one recommendation for that position, you can skip this step.
8. Publish the Recommendation
Check the preview to make sure the recommendation appears as expected. Keep the Enable option turned on, then click Save Changes.
Your product recommendation is now ready to appear on your WooCommerce store based on the conditions you configured.