
Checkout Order Bumps let you recommend additional products directly on the checkout page, so customers can add relevant items to their order before completing the purchase.
You can control which checkout products trigger the offer, where the order bump appears, which products are recommended, and whether those products receive a discount.
How to Create a Checkout Order Bump
From the Recommendation Rules Builder, select Order Bump from the left panel and click Create Order Bump.
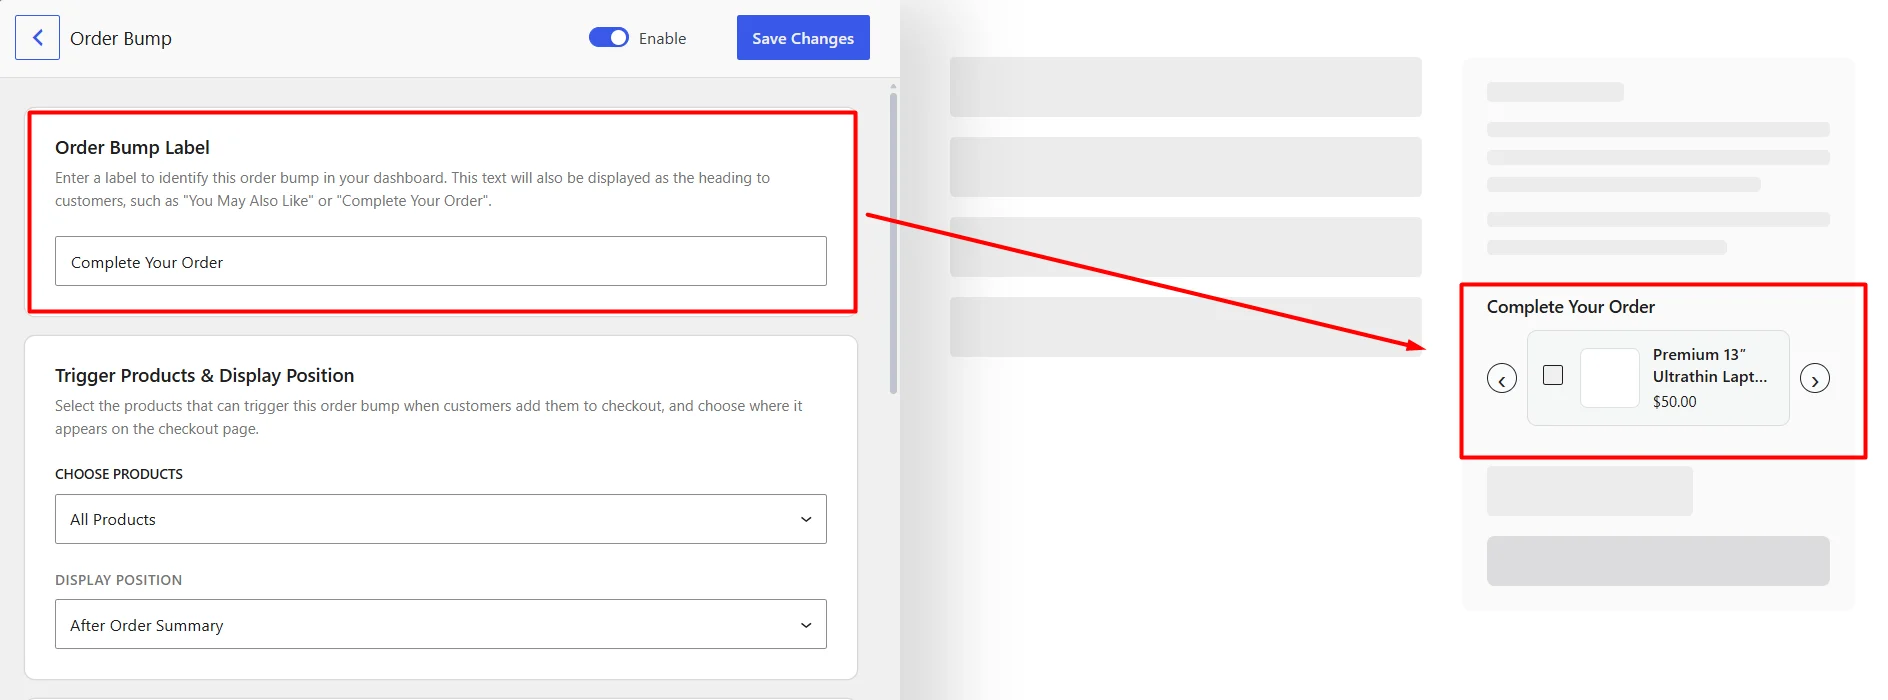
The Order Bump builder opens with the configuration settings on the left and a live checkout preview on the right. Now follow these steps.
1. Add the Order Bump Label
Under Order Bump Label, enter a name for the order bump.
This label identifies the order bump in your dashboard and is also displayed as the heading customers see on the checkout page.
For example: Complete Your Order
2. Set Trigger Products & Display Position
Use Trigger Products & Display Position to decide which products can trigger the order bump and where the offer should appear on checkout.
Choose the Trigger Products
Select which products in the customer’s checkout should trigger the order bump:
All Products– Allow the order bump for any product.Specific Categories– Trigger it only when the checkout contains products from selected categories.Specific Products– Trigger it only when the checkout contains the products you select.
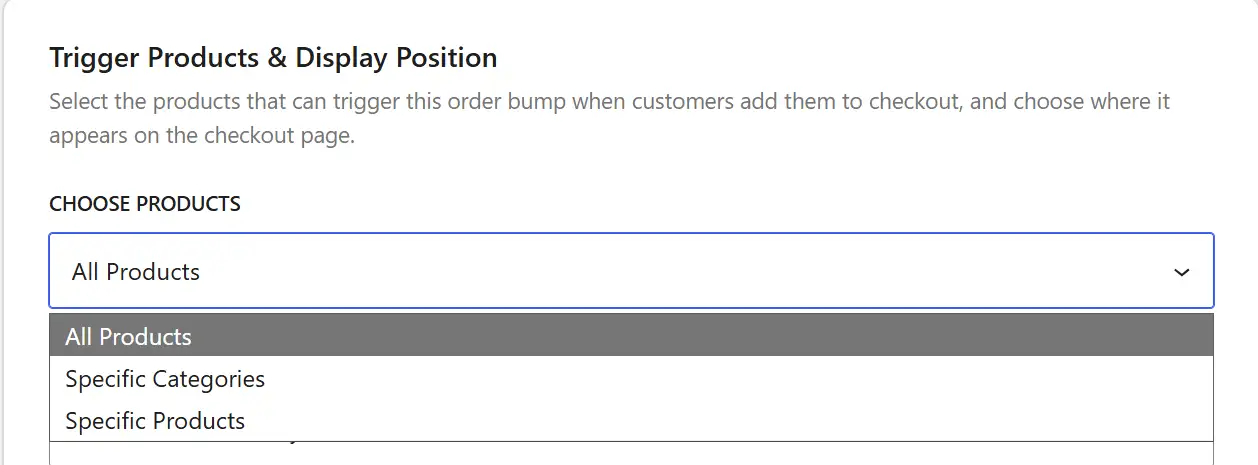
If you choose Specific Categories or Specific Products, select the required categories or products in the field beside it.
Choose the Display Position
Next, choose where the order bump should appear:
After Order Summary– Show it after the checkout order summary.Before Place Order Button– Show it before the Place Order button.After Place Order Button– Show it after the Place Order button.
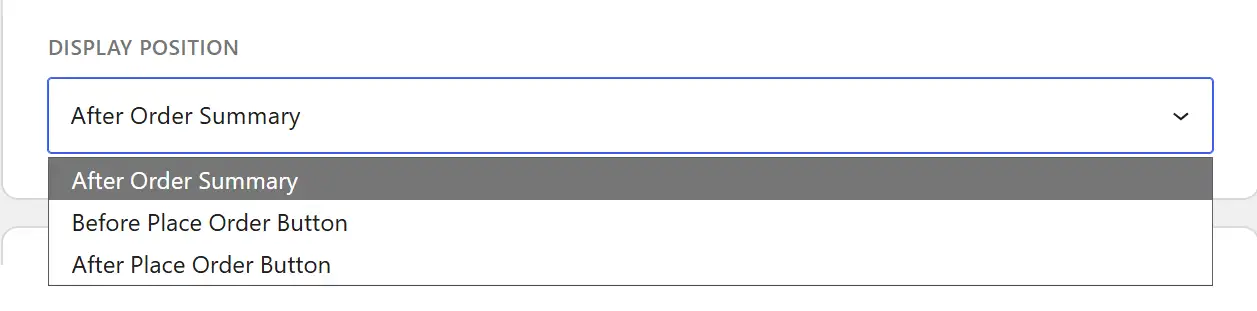
Use the preview on the right to check the selected position.
3. Choose Which Products to Recommend
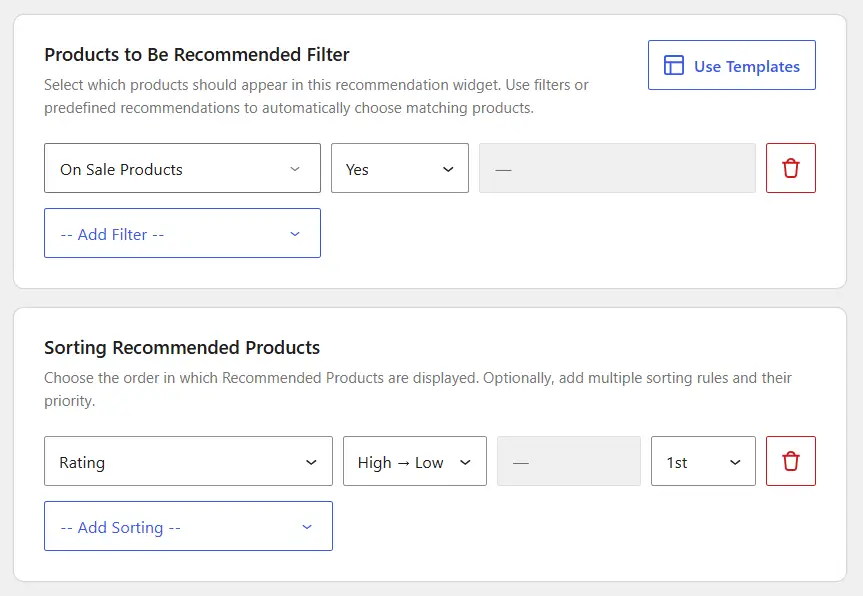
Under the Products to Be Recommended Filter, choose the products that should be offered through the order bump.
Click Add Filter and use the available Product, Sales & Performance, Customer Behavior, or Product Relationship filters. You can also use Templates for a predefined recommendation setup.
See Recommendation Filters for details on each filter.
4. Sort the Recommended Products (Optional)
Use Sorting Recommended Products if you want to control the order in which recommended products appear.
Click Add Sorting, choose a sorting method, and configure its direction, time period, or priority where available.
See Sorting Recommendations for details.
5. Configure Product and Discount Settings
Under Number of Product & Discount Settings, control how many products can appear and whether the order bump includes a discount.
Set the Number of Products
Use Total Number of Products to Display to set how many recommended products should be available in the order bump. You can use the + and – controls to adjust the number.
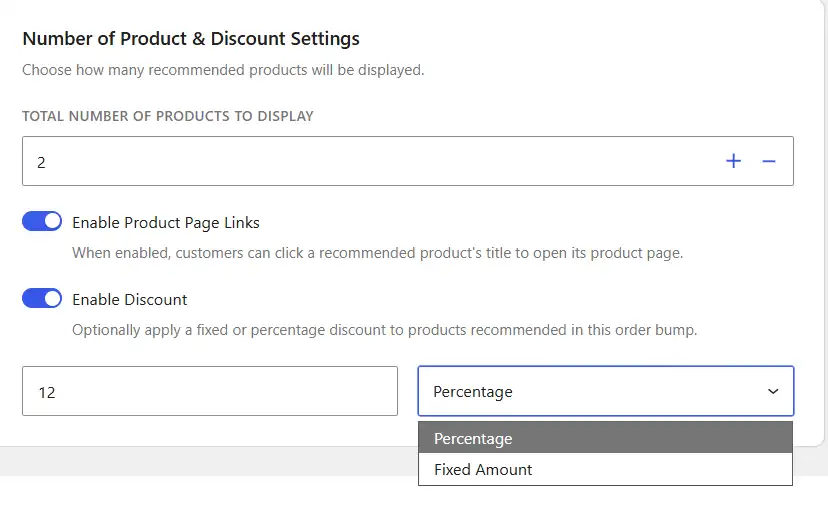
Enable Product Page Links
Turn on Enable Product Page Links to let customers click a recommended product’s title and open its product page. You can leave it disabled if you do not want customers to navigate away from checkout through the order bump.
Add a Discount (Optional)
Turn on Enable Discount if you want to offer a discount on the products recommended through the order bump. Enter the discount value and choose:
Percentage– Apply a percentage discount.Fixed Amount– Apply a fixed-value discount.
For example, enter 10 and select Percentage to apply a 10% discount to the order bump products.
6. Enable and Save the Order Bump
Keep Enable turned on when you want the order bump to be active, then click Save Changes. The order bump will appear at the selected checkout position when its trigger requirements are met.
How to Manage Checkout Order Bumps
After creating your first Order Bump, the Order Bump page will show a table listing all the order bumps you have created.
The table includes each order bump’s ID, Name, Trigger Product, Position, and Status.
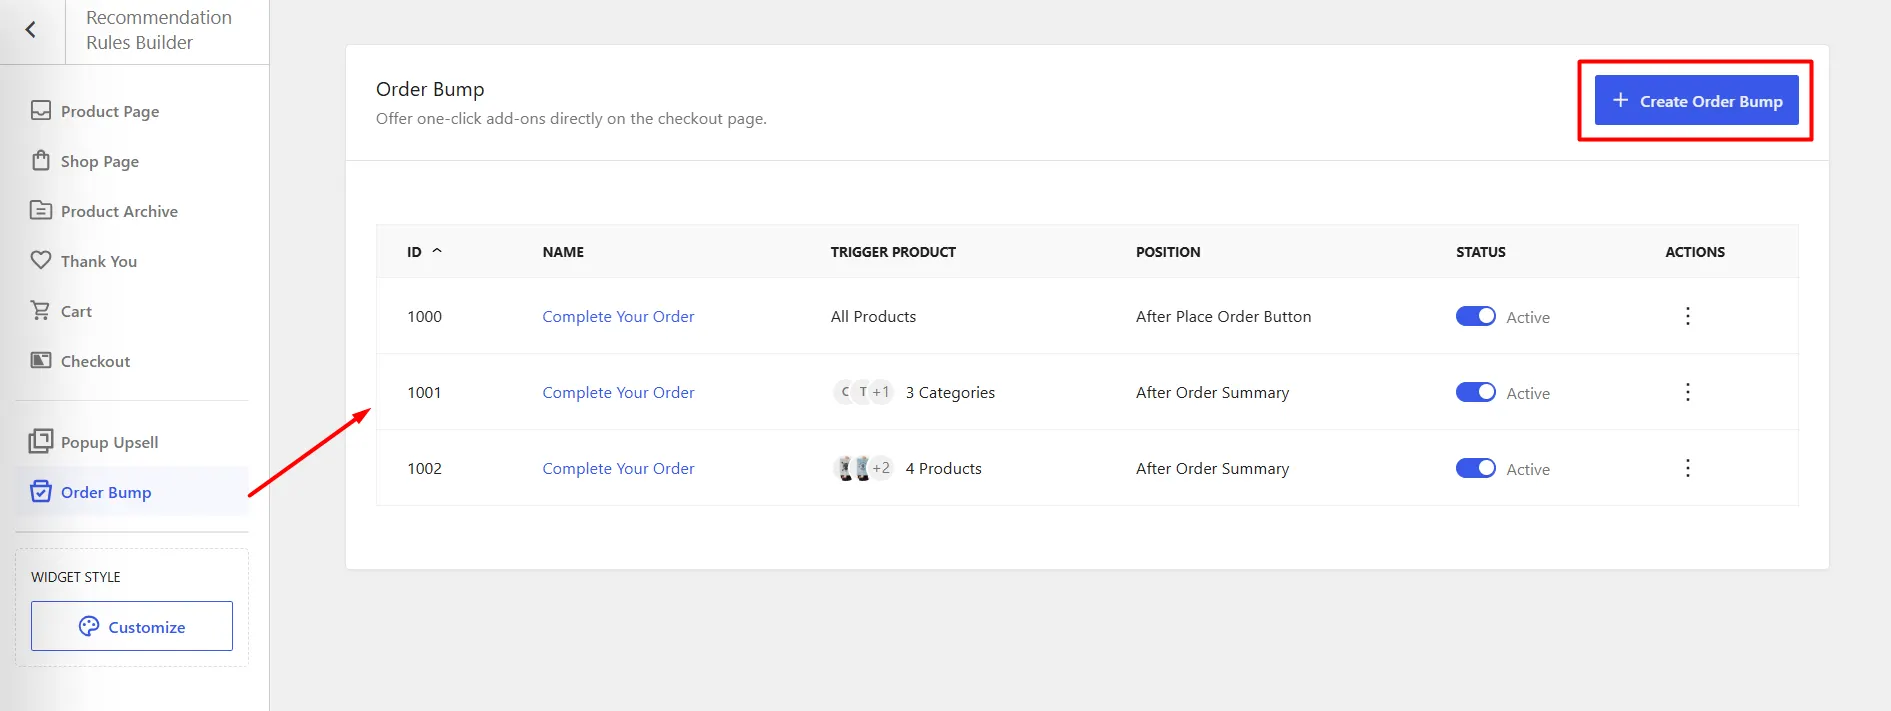
You can use the Status toggle to quickly enable or disable an order bump without deleting it. From the Actions menu, you can also:
- Edit – Update the order bump settings.
- Duplicate – Create a copy of the existing order bump.
- Delete – Permanently remove the order bump.
To create another order bump, click Create Order Bump at the top of the page.