A homepage slider in WordPress can be created using two primary methods: installing a plugin for a no-code approach or building a lightweight custom slider with HTML and CSS. Both options have their advantages depending on your skill level and the level of customization you want to achieve.
1. Using a plugin (beginner-friendly and versatile)
This is the most popular and user-friendly option for those who want a quick setup without writing code.
- Plugins like PostX offer dedicated slider blocks that let you design and customize homepage sliders directly in the block editor with drag-and-drop functionality.
- Start by editing the current homepage
- Add the post slider block of PostX
- Show which post/page by sorting them out with the Query Loop
- Customize the block settings to make the showcase more appealing for your visitors
2. Creating a custom slider with HTML and CSS (developer-friendly)
For those who prefer a lightweight, plugin-free option, you can build a slider directly within WordPress using the Custom HTML block.
- Add a custom HTML block on your homepage
- Paste the code and use the media link or post URL in the designated area
- Save & publish the new homepage
Both methods are effective, but they serve different needs. A plugin is ideal if you want convenience, flexibility, and ongoing updates, while custom code gives you more control and performance benefits if you’re comfortable working with HTML and CSS.
In this guide, we’ll walk you through the process of adding a homepage slider to your WordPress site, both with plugins and without. By the end, you’ll have all the tools you need to make a sleek, professional slider for your homepage.
Why Choose a Homepage Slider for Your WordPress Site?
A homepage slider can significantly boost the visual appeal of your site, creating a more dynamic and engaging experience for visitors.
Instead of relying on static images, sliders allow you to display multiple pieces of content in a compact, rotating format. This is especially useful for showcasing featured posts, promotions, or products.
Here are some key benefits of using a homepage slider:
- Increased Engagement: Sliders keep your homepage fresh and interactive, boosting user engagement and conversions with rotating content.
- Visual Appeal: Sliders enhance your site’s design, allowing multiple images or content without clutter, creating a sleek and professional look.
- SEO Benefits: Well-optimized sliders can improve SEO by highlighting key content with optimized images and alt tags.
- Showcasing Multiple Items Efficiently: Sliders allow you to display multiple items in an organized way, perfect for galleries, products, or blog posts.
- Customization and Flexibility: Sliders offer complete control over design and timing, allowing customization to meet your site’s needs.
- Mobile Optimization: Many sliders are responsive, ensuring your homepage looks great on both desktop and mobile devices.
In summary, homepage sliders are more than just a trendy design element. They are an effective tool for enhancing user experience, improving engagement, and showcasing content in a dynamic, visually appealing way.
Types of WordPress Homepage Sliders
WordPress offers a variety of sliders, each catering to different needs. Here are the most common types of homepage sliders:
- Image Sliders: Rotating images to showcase galleries, products, or promotions.
- Post Sliders: Displaying blog post headlines or summaries in a compact, engaging way.
- Product Sliders: Highlighting multiple products with images, descriptions, and prices.
- Carousel Sliders: Rotating content or images in a continuous loop for an interactive experience.
- Text Sliders: Showcasing quotes, testimonials, or key messages with smooth transitions.
- Video Sliders: Featuring videos for a more engaging and dynamic homepage experience.
Alternatives to Homepage Sliders
While homepage sliders are popular, they may not be suitable for every website. Here are some alternatives to consider:
👉 Static Hero Images: A large, static image that provides a clean, fast-loading visual without rotation.
👉 Full-Width Banners: A simple, non-rotating banner to highlight key content or promotions.
👉 Grid Layouts: Display multiple items or images in a grid for easy navigation and organization.
👉 Image or Content Carousels: A simpler alternative to sliders, allowing users to click through items at their own pace.
These alternatives are worth considering if you prefer a simpler design or if performance is a key concern. They can still make your homepage look attractive and functional without the complexities of a slider.
How to Add a Slider to a WordPress Homepage (With a Plugin)
If you’re looking for an easy way to add a slider to your WordPress homepage, using a plugin is the way to go. Best slider plugins like PostX, Depicter, Slider Revolution, and Soliloquy make the process simple, even for beginners. With just a few clicks, you can install and set up a beautiful, responsive slider that enhances the visual appeal of your site.
Depicter, in particular, is a Free Slider Plugin, which stands out for its intuitive drag-and-drop interface and lightweight design, allowing you to create stunning, fully responsive sliders without touching a single line of code.
For this walkthrough, I’m going with PostX. Why? Because it’s fast, flexible, and honestly saves me from the headache I usually get from bulky slider plugins.
Learn more about why PostX is more powerful than other similar plugins.
Before jumping into the step-by-step process, you have to install and activate the plugin. If you face any issues, just follow the official documentation on the installation process.
Once you have activated PostX, you can follow the steps here.
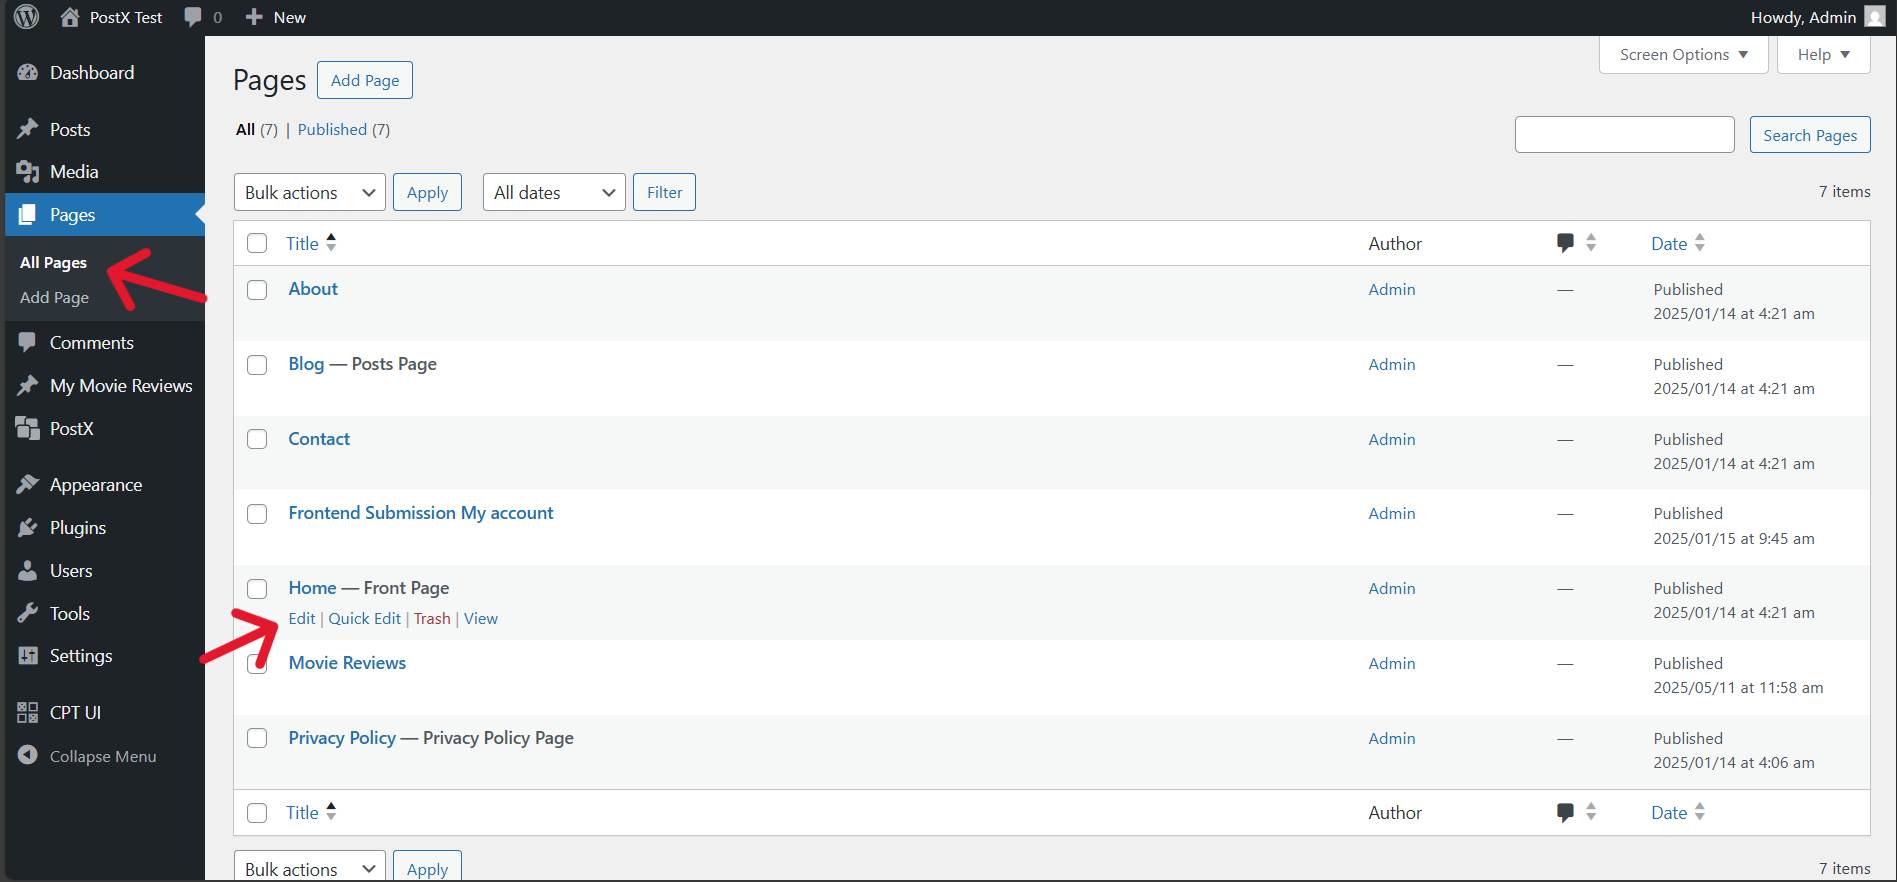
Step 1: Go to the editorial interface on your homepage
First, you have to go to the editorial interface on your homepage. Click the Pages menu on your WordPress admin panel, and you will find all the pages on your website.
Find your home page and click the edit option under it. You will land on the interface where you can add the sliders.
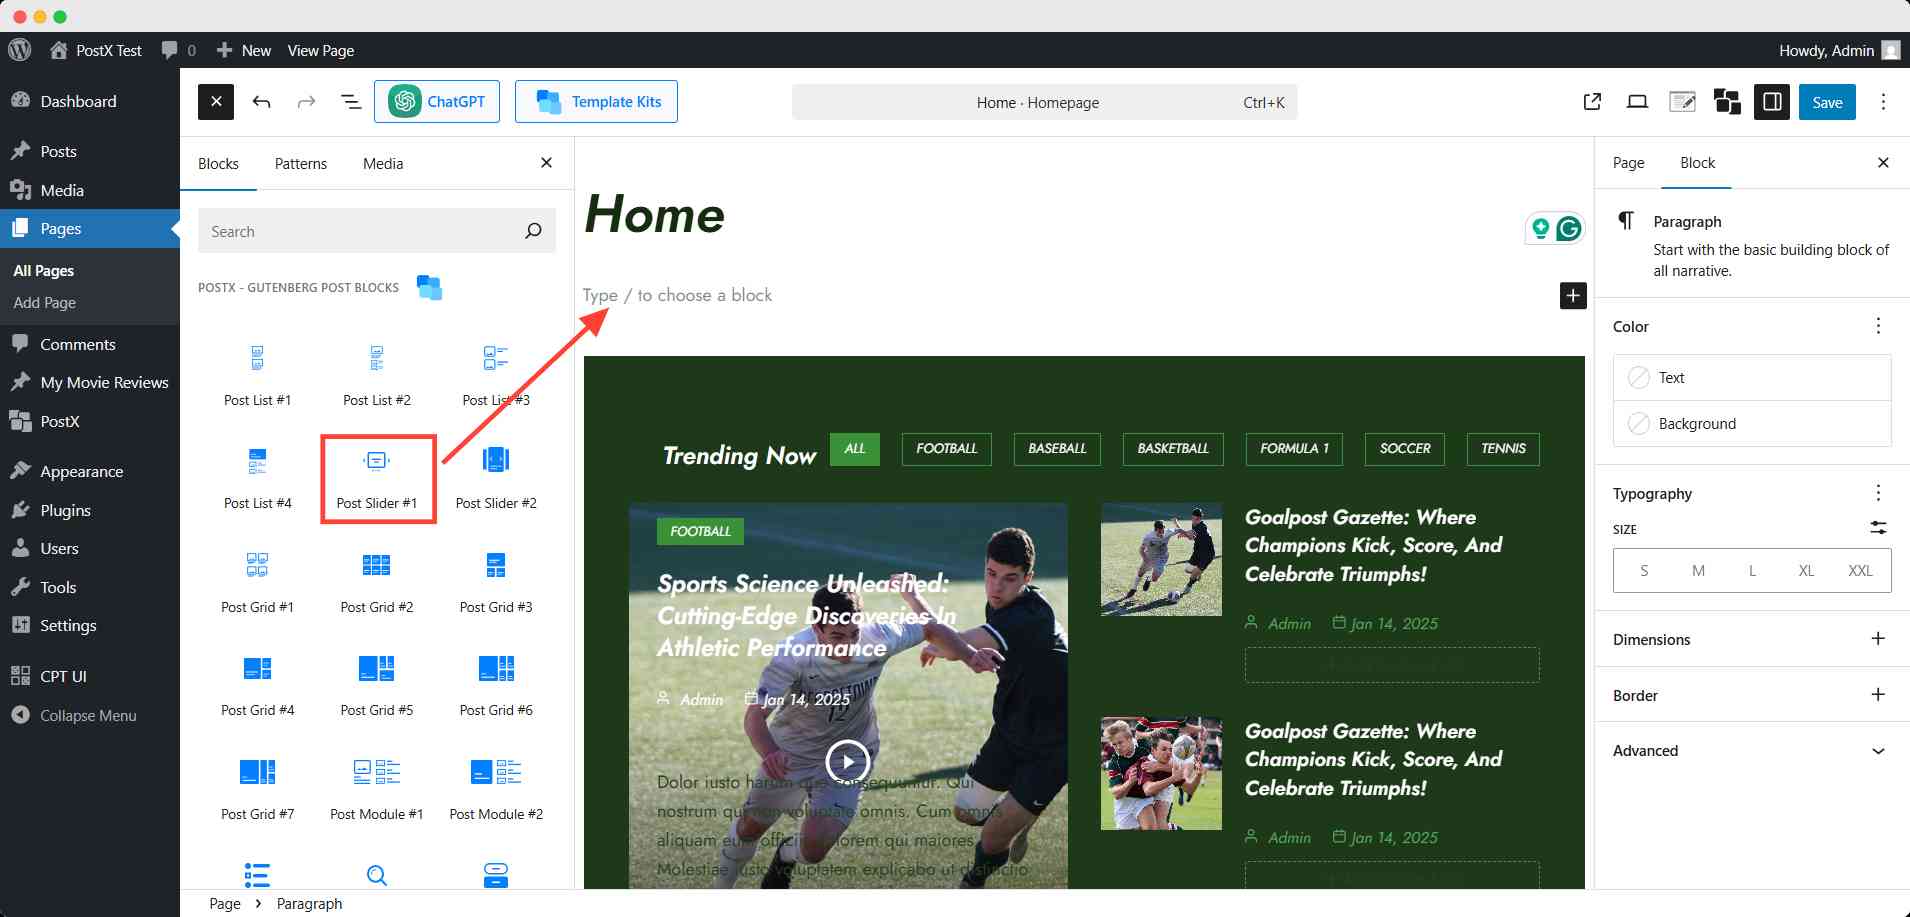
Step 2: Add the post slider block of PostX
Now, at the very top of the site (just under the Heading), add a post slider block. To do that, click the + (plus) icon, and you will find PostX’s blocks. Choose either of the two post slider blocks you want.
Step 3: Choose what you want to show on the slider
After adding the slider block, it will automatically fetch the recent blog post from your site. If you want to show your viewers your recent posts, you can keep them and move on to the customization option.
However, with PostX, you can choose to show any specific blog post, any page, or even custom posts. For that, you can use a powerful feature of PostX – Query Loop.
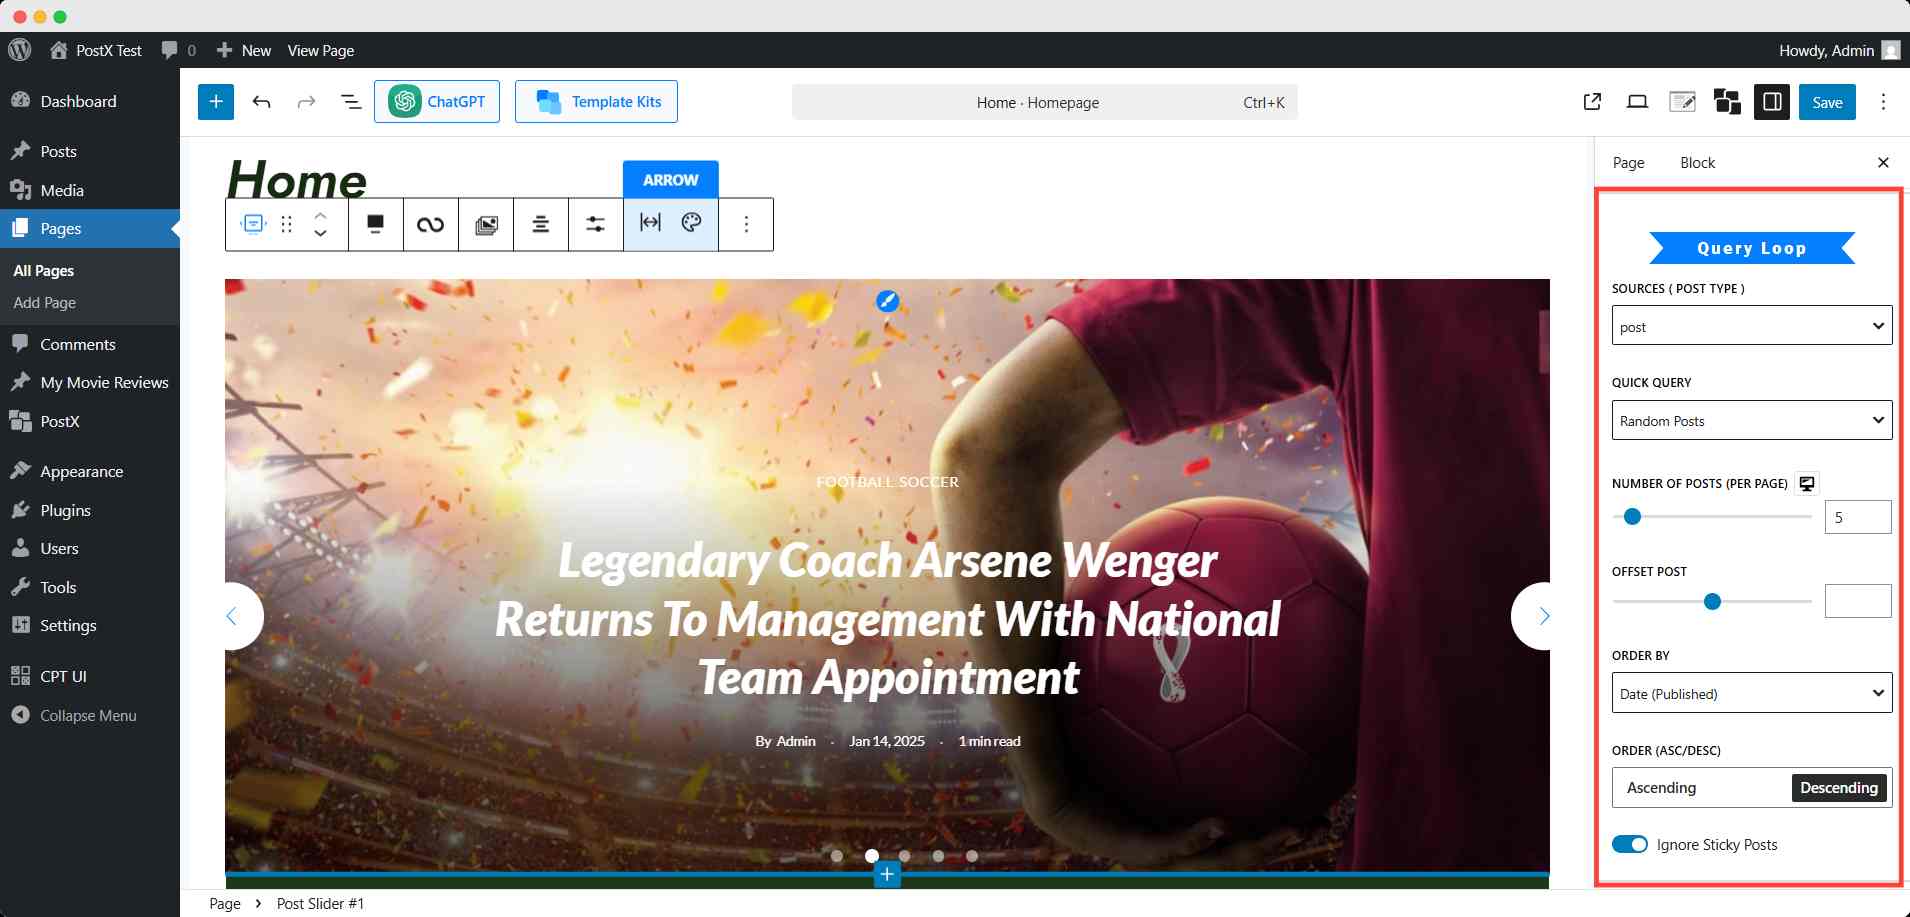
You can personalize your showcase by combining the post type sources and the quick query of this powerful feature. The table below will give you a prompt and brief overview.
| If you choose | You can show |
|---|---|
| Custom selection | Any number of blog posts or pages, but you have to choose them manually |
| Specific posts | Any number of blog posts, only, and you have to choose them manually |
| Post | Dynamically latest or most popular blog posts, in any order from any range |
| Page | Dynamically latest or most popular blog posts or pages, in any order from any range |
Moreover, you can choose from custom post types also. You will find that option in the post sources type field if you have any custom posts on your site.
In short, this slider can become your personal highlight reel – whether that’s blog posts you’re proud of, top-selling products, or even pages you don’t want visitors to miss.
If you want to know more details about the query loop and its ultimate functionality, please visit our blog on PostX query builder for WordPress.
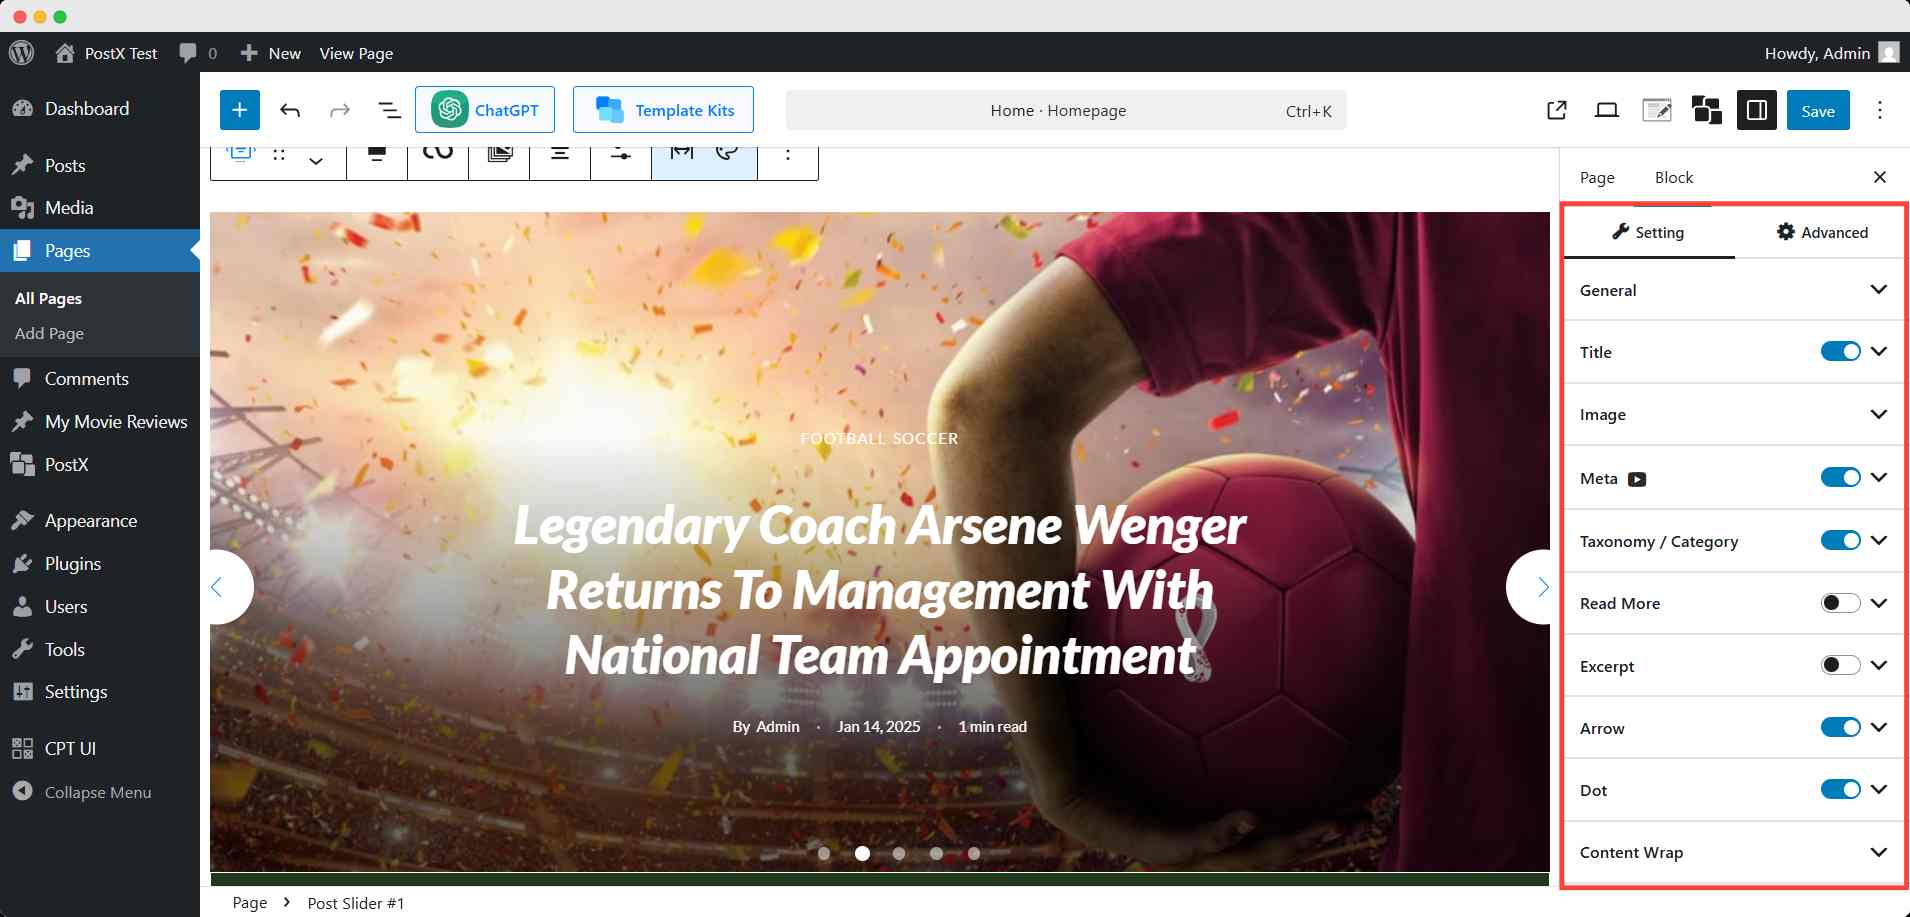
Step 4: Customize the slider block design
After setting up the contents you want to display on the slider, you can make the block more appealing. You can create a brand theme and vibe that can give an aesthetic look for your visitors.
For that, head over to the right sidebar of block settings. From here, you can change the typography, style, and color of every element on that block.
Finally, when you’re satisfied with the design, click the save button and make it live for your visitors.
💡Pro Tip:
You can change the whole design of the post slider very easily by using the Design Library of PostX. Here you can find several premade patterns of the block to choose from.
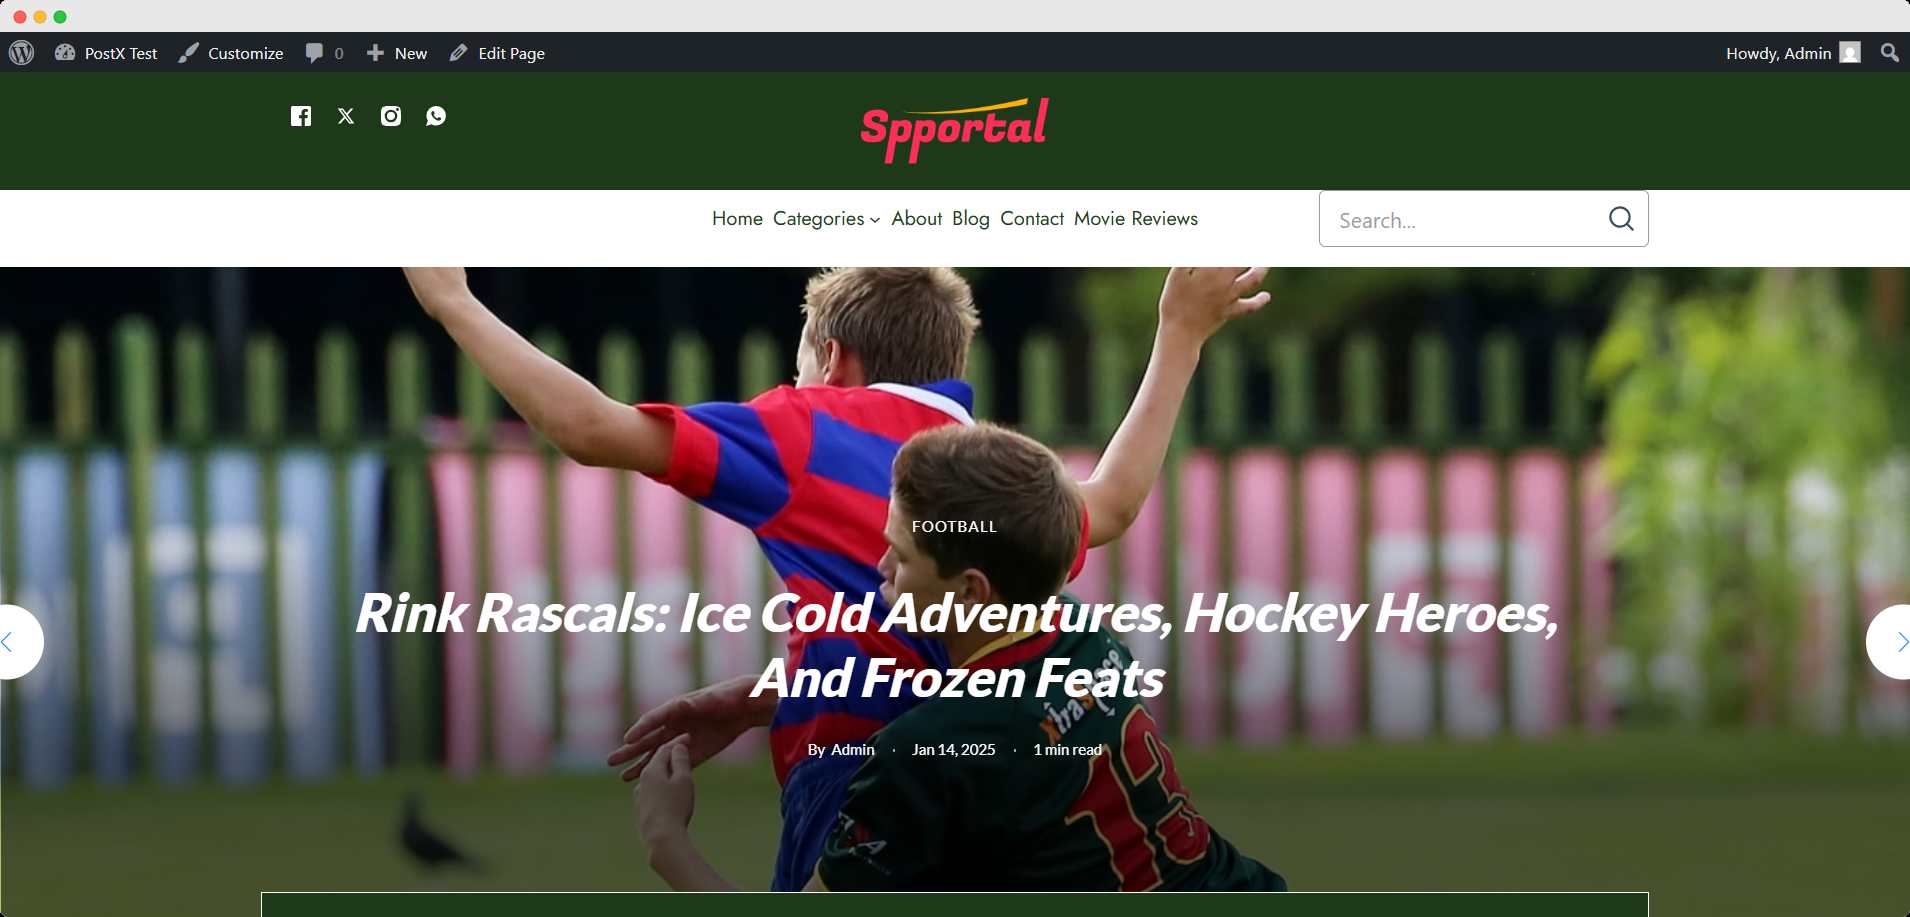
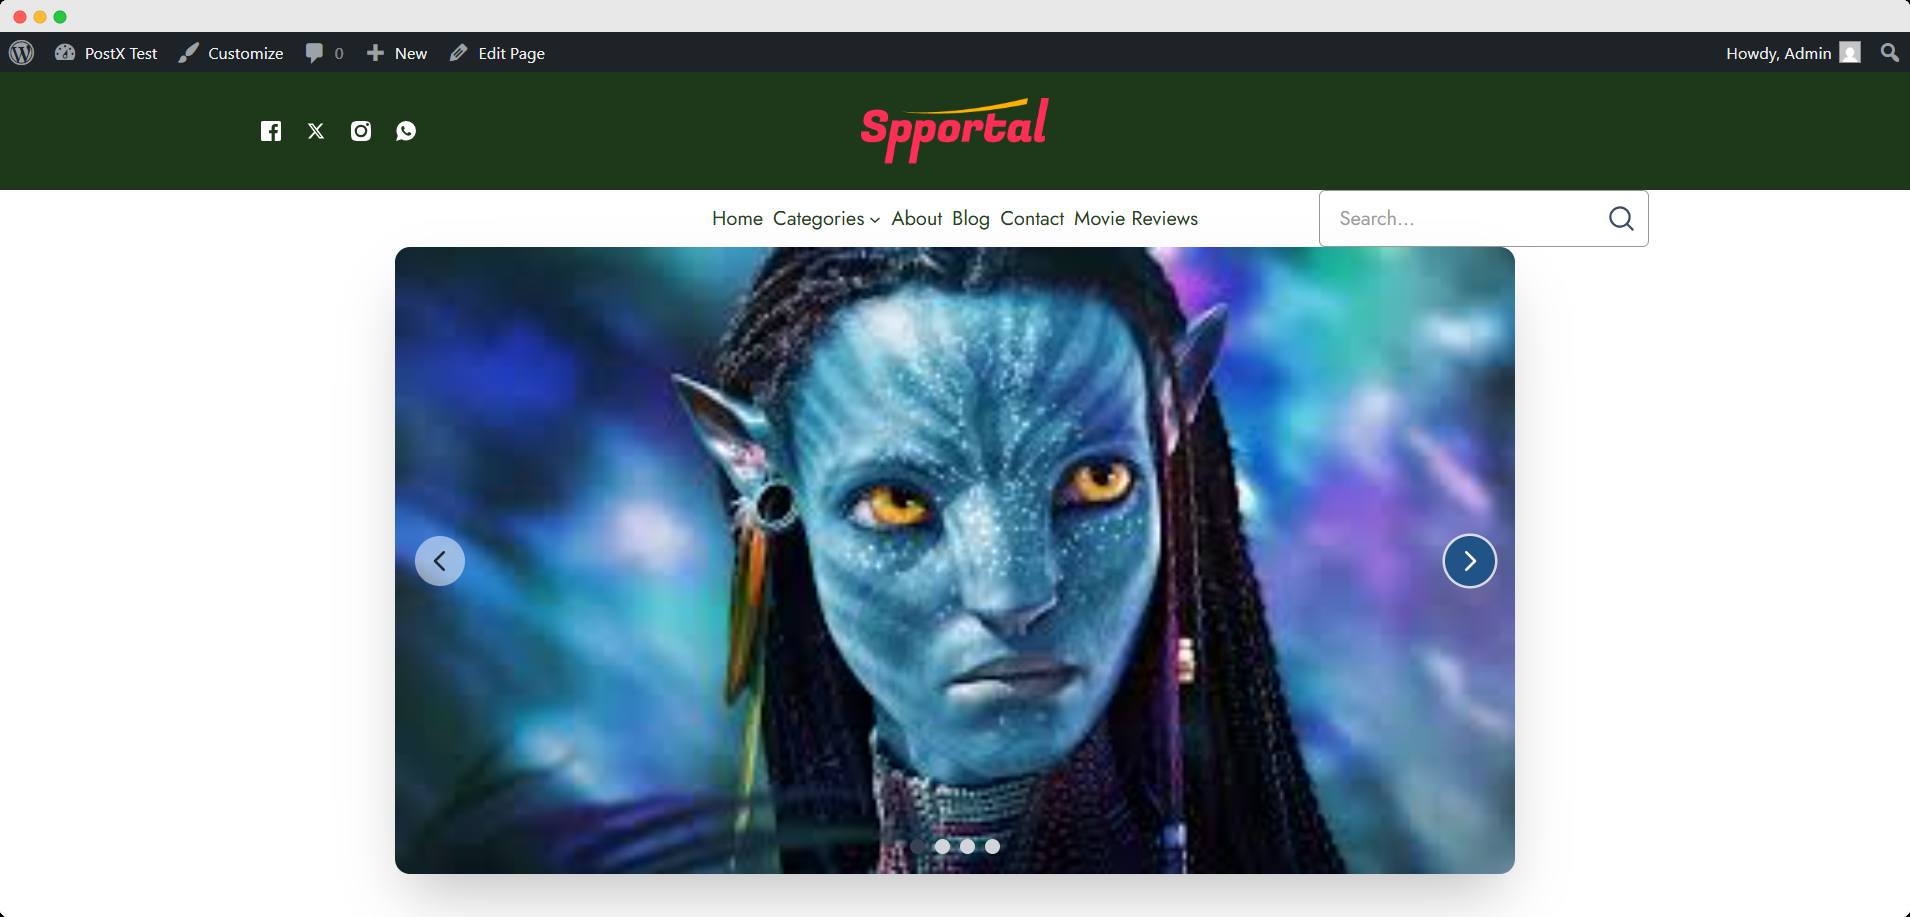
Check the frontend of your new homepage and observe how the new, good-looking slider was made.
How to Add a Slider (Without a Plugin)
If you’d prefer a simple, plugin-free way to add a slider to your WordPress homepage, you can achieve it using a custom HTML block. This method gives you complete control over the design, performance, and functionality of your slider while keeping your site light and fast.
Here’s a step-by-step guide to adding an interactive image slider using a custom HTML block in WordPress:
Step 1: Prepare Your Images
First, gather the images you want to display from the media library. Make sure they are optimized for fast loading.
Step 2: Add Custom HTML
In your WordPress block editor, add a Custom HTML block on your homepage.
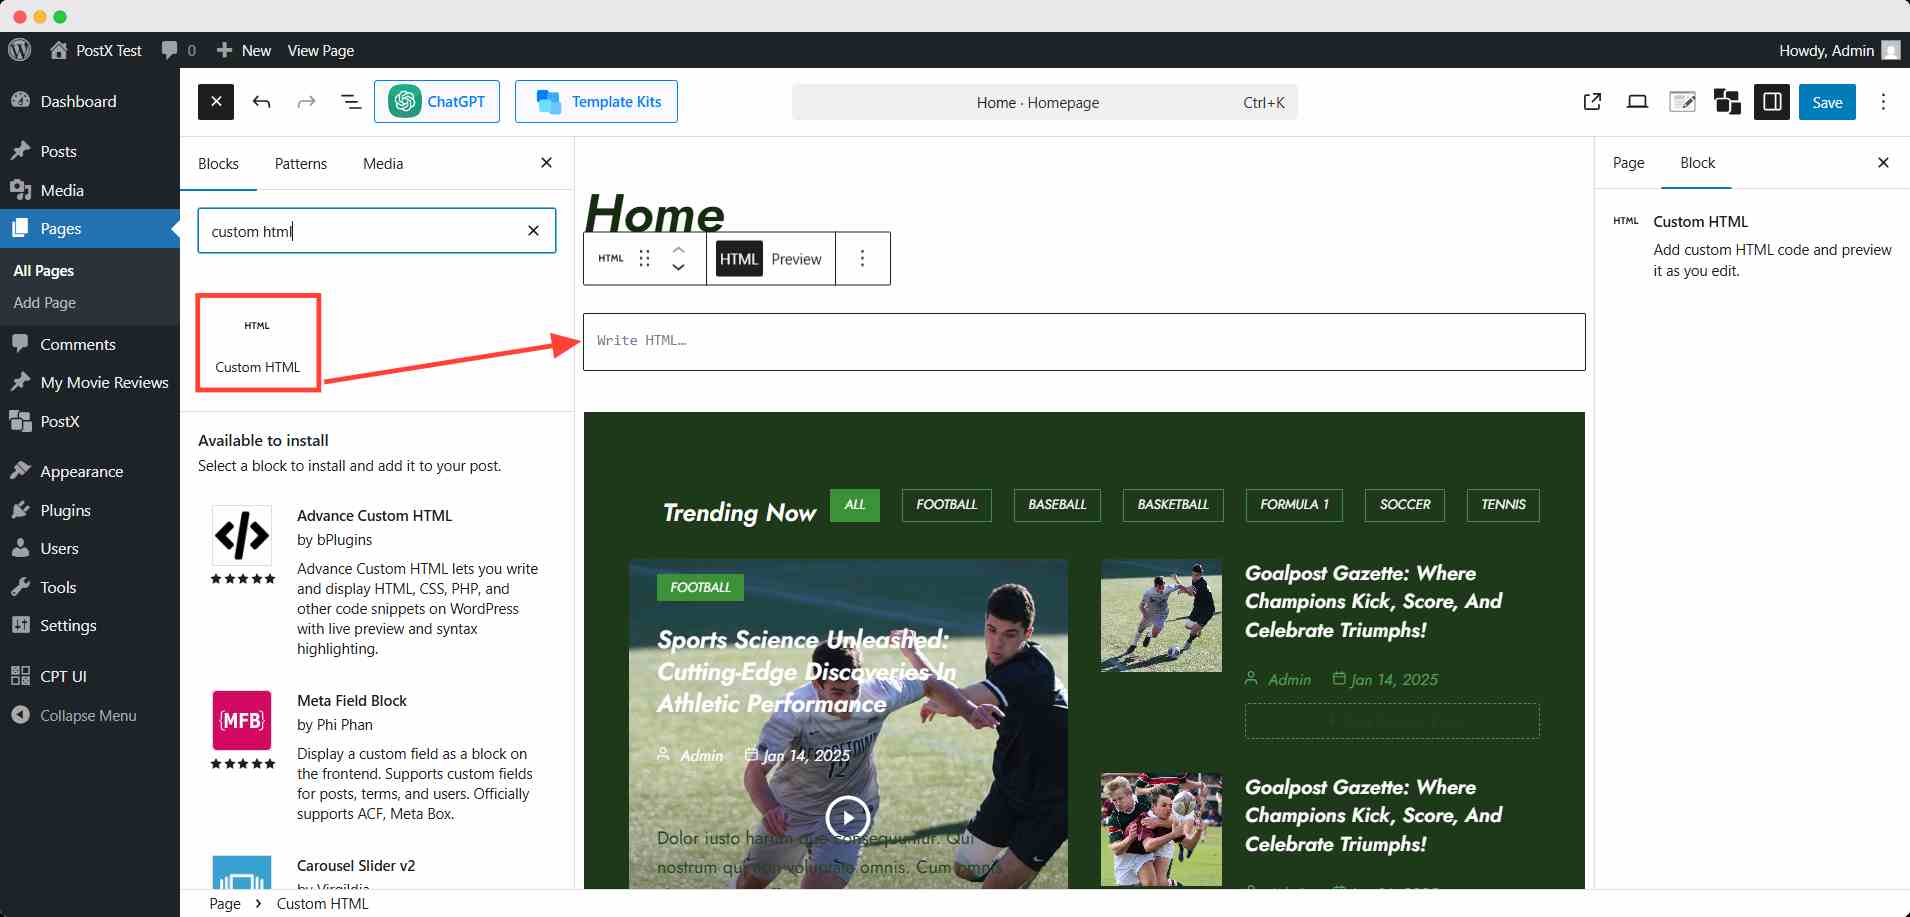
Then paste the following code into the Custom HTML block to create the slider:
HTML code
<!DOCTYPE html>
<html lang="en">
<head>
    <meta charset="UTF-8">
    <meta name="viewport" content="width=device-width, initial-scale=1.0">
    <title>Interactive Image Slider</title>
    <!-- Load Tailwind CSS -->
    <script src="https://cdn.tailwindcss.com"></script>
    <style>
        .slides-container {
            /* This is a flex container that will hold all the images */
            display: flex;
            transition: transform 0.5s ease-in-out;
        }

        .slide-image {
            /* Each image takes up the full width of the container */
            width: 100%;
            flex-shrink: 0;
            object-fit: cover;
            /* Ensures images fill their space without distortion */
        }
    </style>
</head>
<body class="bg-gray-100 flex items-center justify-center min-h-screen font-sans">
    <div class="slider-container relative w-full max-w-4xl mx-auto overflow-hidden rounded-xl shadow-2xl">
        <!-- The container for all slides -->
        <div class="slides-container" id="slides-container">
            <!-- Use placeholder images with alt text for accessibility -->
            <img src="https://placehold.co/1024x576/FF6B6B/FFFFFF?text=Slide+1" alt="Red abstract slide" class="slide-image">
            <img src="https://placehold.co/1024x576/4ECDC4/FFFFFF?text=Slide+2" alt="Teal abstract slide" class="slide-image">
            <img src="https://placehold.co/1024x576/45B7D1/FFFFFF?text=Slide+3" alt="Blue abstract slide" class="slide-image">
            <img src="https://placehold.co/1024x576/99B898/FFFFFF?text=Slide+4" alt="Green abstract slide" class="slide-image">
        </div>

        <!-- Previous button -->
        <button id="prevBtn" class="absolute top-1/2 left-4 transform -translate-y-1/2 p-2 bg-white bg-opacity-50 text-gray-800 hover:bg-opacity-80 transition-all duration-300 rounded-full focus:outline-none focus:ring-2 focus:ring-white focus:ring-opacity-75">
            <svg xmlns="http://www.w3.org/2000/svg" class="h-6 w-6" fill="none" viewBox="0 0 24 24" stroke="currentColor">
                <path stroke-linecap="round" stroke-linejoin="round" stroke-width="2" d="M15 19l-7-7 7-7" />
            </svg>
        </button>

        <!-- Next button -->
        <button id="nextBtn" class="absolute top-1/2 right-4 transform -translate-y-1/2 p-2 bg-white bg-opacity-50 text-gray-800 hover:bg-opacity-80 transition-all duration-300 rounded-full focus:outline-none focus:ring-2 focus:ring-white focus:ring-opacity-75">
            <svg xmlns="http://www.w3.org/2000/svg" class="h-6 w-6" fill="none" viewBox="0 0 24 24" stroke="currentColor">
                <path stroke-linecap="round" stroke-linejoin="round" stroke-width="2" d="M9 5l7 7-7 7" />
            </svg>
        </button>

        <!-- Dots pagination -->
        <div class="dots-container absolute bottom-4 left-1/2 transform -translate-x-1/2 flex space-x-2">
            <!-- Dots will be populated by JavaScript -->
        </div>
    </div>

    <script>
        document.addEventListener('DOMContentLoaded', () => {
            const slidesContainer = document.getElementById('slides-container');
            const prevBtn = document.getElementById('prevBtn');
            const nextBtn = document.getElementById('nextBtn');
            const dotsContainer = document.querySelector('.dots-container');
            const slides = document.querySelectorAll('.slide-image');
            let currentIndex = 0;

            // Function to update the slider position and dot indicators
            const updateSlider = () => {
                const offset = -currentIndex * slides[0].clientWidth;
                slidesContainer.style.transform = `translateX(${offset}px)`;
                updateDots();
            };

            // Function to create dots and attach event listeners
            const createDots = () => {
                dotsContainer.innerHTML = ''; // Clear existing dots
                slides.forEach((_, index) => {
                    const dot = document.createElement('span');
                    dot.classList.add('w-3', 'h-3', 'bg-gray-300', 'rounded-full', 'cursor-pointer', 'transition-colors', 'duration-300', 'hover:bg-gray-500');
                    dot.addEventListener('click', () => {
                        currentIndex = index;
                        updateSlider();
                    });
                    dotsContainer.appendChild(dot);
                });
                updateDots();
            };

            // Function to update active dot class
            const updateDots = () => {
                const dots = document.querySelectorAll('.dots-container span');
                dots.forEach((dot, index) => {
                    dot.classList.remove('bg-gray-700');
                    if (index === currentIndex) {
                        dot.classList.add('bg-gray-700');
                    }
                });
            };

            // Event listener for the "Next" button
            nextBtn.addEventListener('click', () => {
                currentIndex = (currentIndex + 1) % slides.length;
                updateSlider();
            });

            // Event listener for the "Previous" button
            prevBtn.addEventListener('click', () => {
                currentIndex = (currentIndex - 1 + slides.length) % slides.length;
                updateSlider();
            });

            // Initial setup
            createDots();
            updateSlider();
        });
    </script>
</body>
</html>
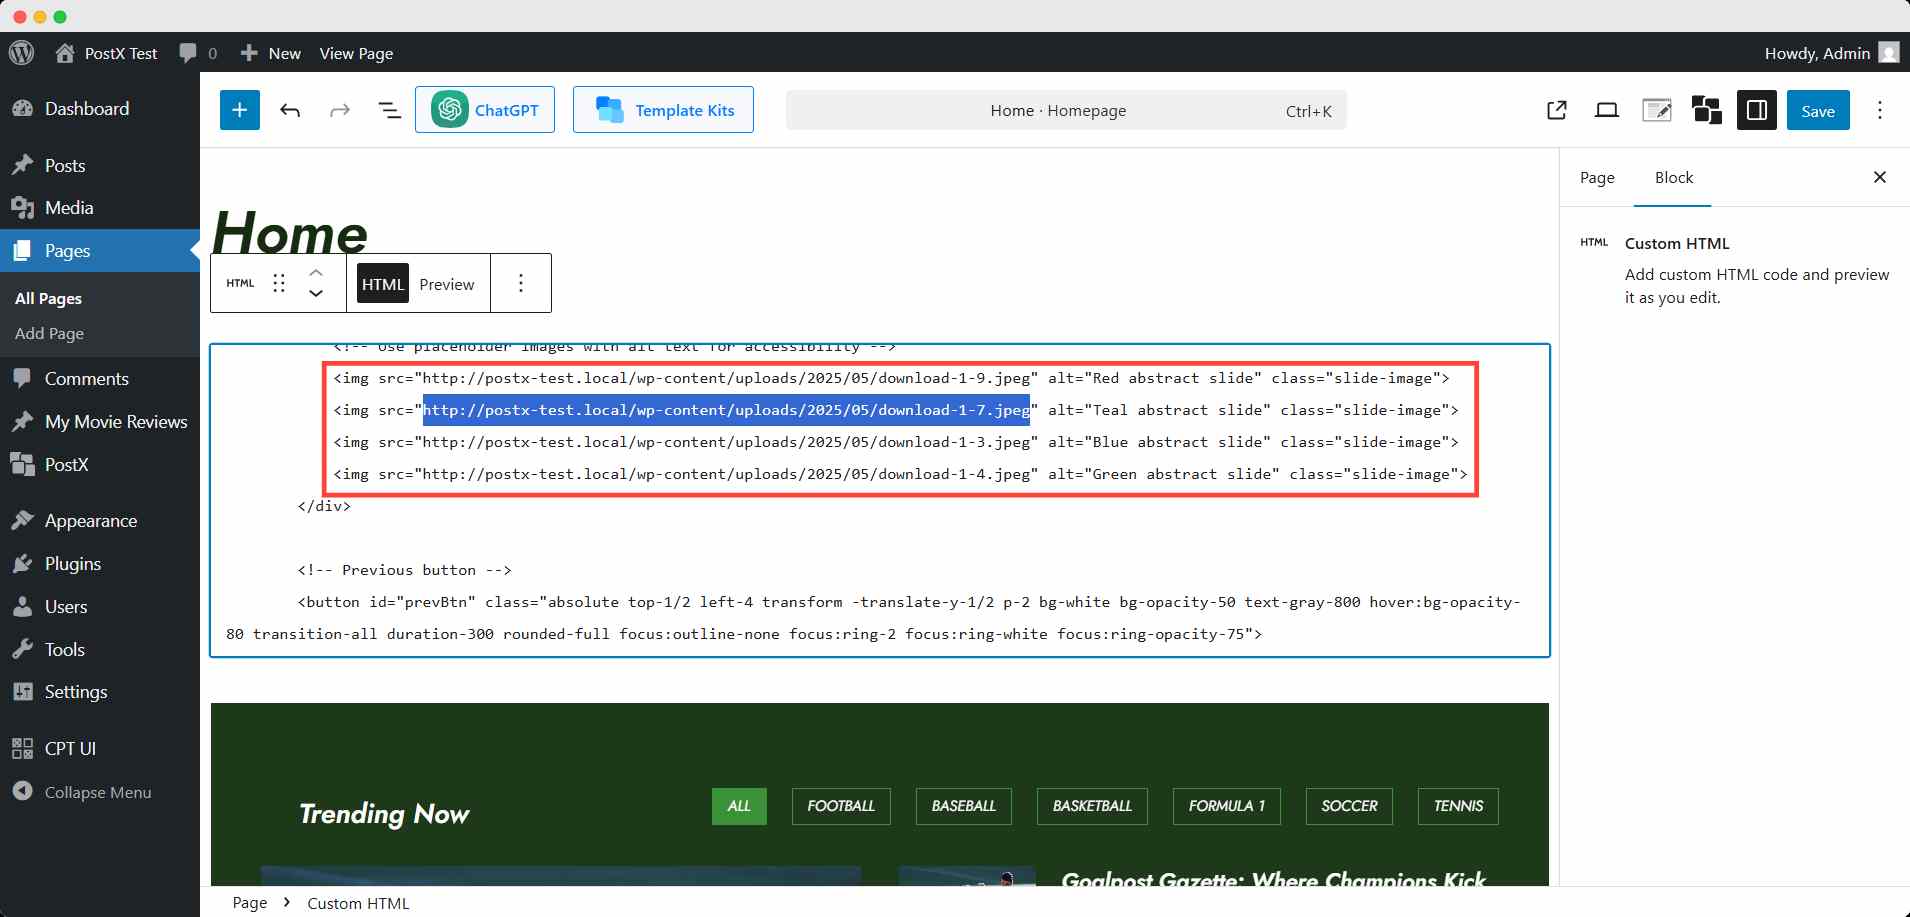
Step 3: Change the placeholder image link
Now, use those selected image URLs in place of the placeholder links. You can change the alt text too from the code.
Step 4: Change the styling
To customize the styling, you can add or tweak the CSS of this code.
Finally, click the save button and check the frontend of your homepage to check if it’s working as expectedly.
Best Practices for Homepage Sliders
Adding a slider to your homepage is only half the work; making it effective and user-friendly is what really matters. Here are some best practices to follow:
- Keep It Simple and Focused
Avoid overwhelming visitors with too many slides. Stick to 3–5 slides showcasing your most important content. Each slide should have a clear purpose, whether it’s highlighting a product, a promotion, or a key message.
- Prioritize Speed and Performance
Sliders can easily slow down your site if images aren’t optimized. Use compressed images, enable lazy loading, and limit animations to ensure fast loading times across devices.
- Optimize for SEO
Add descriptive alt text for each image and use relevant headings or captions where possible. This helps search engines understand your slider content and can improve your site’s visibility.
- Make It Mobile-Friendly
Most of your visitors will browse on mobile. Choose a slider that’s fully responsive, and always preview how it looks on different screen sizes before going live.
- Ensure Accessibility
Not all users interact with websites the same way. Provide visible navigation arrows or dots, allow keyboard navigation, and make sure text contrasts well against background images for readability.
- Balance Automation with User Control
Auto-rotating sliders can grab attention, but they shouldn’t frustrate users. Set reasonable transition times (3–5 seconds) and always give visitors control with pause, next, and previous options.
- Test and Track Engagement
Use analytics tools to see how users interact with your slider. If a particular slide has high click-through rates, feature it more prominently. If sliders aren’t driving results, consider switching to a static banner or hero section.
SEO-Friendly Homepage Sliders
Sliders can look great, but if they’re not optimized, they might hurt your site’s SEO instead of helping. Here are a few ways to make your homepage slider search-engine friendly:
✅ Optimize Images
Use compressed images without sacrificing quality. Tools like TinyPNG or WebP formats reduce file size, helping your slider load faster, something Google considers in rankings.
✅ Use Descriptive Alt Text
Every image in your slider should have unique alt text that describes what’s in the image. This not only improves accessibility but also gives search engines context about your content.
✅ Add Relevant Captions and Headings
Captions and slide titles can include keywords naturally. If you’re showcasing blog posts or products, make sure the text is clear and relevant to what users are searching for.
✅ Implement Lazy Loading
Don’t load all slider images at once. Lazy loading ensures that only the visible slide loads first, improving performance scores and page speed.
✅ Schema Markup
If your slider highlights products, events, or articles, consider adding structured data (schema markup). This gives search engines more context and can increase your chances of appearing in rich snippets.
✅ Limit the Number of Slides
Too many slides can dilute SEO impact. Focus on 3–5 slides that highlight your most important content or keywords.
Troubleshooting Common Slider Issues
Even with the best setup, sliders can sometimes cause problems. Here’s a quick table of common issues, their causes, and how to fix them:
| Issue | Possible Cause | Solution |
|---|---|---|
| Slider not showing on homepage | Plugin not activated, shortcode missing, or block not placed correctly | Check plugin activation, reinsert the slider block/shortcode, and ensure it’s published on the correct page |
| Slow loading speed | Large, unoptimized images or too many slides | Compress images, reduce the number of slides, and enable lazy loading |
| The slider is not responsive on mobile | Slider settings are not optimized for smaller screens | Enable responsive mode in plugin settings or adjust CSS for custom sliders |
| Text is not readable in images | Low contrast between text and background | Add overlays, adjust text color, or use high-contrast fonts |
| Auto-rotation too fast or too slow | Default timing is not suitable | Adjust transition duration (ideal: 3–5 seconds) in slider settings or custom script |
| Navigation controls missing | Disabled by default or hidden in theme styling | Enable arrows/dots in plugin settings, or add custom navigation for HTML sliders |
| Conflicts with the theme or other plugins | JavaScript/CSS conflicts | Test in a default WordPress theme, disable conflicting plugins, or check the browser console for errors |
FAQs
Do sliders slow down WordPress websites?
They can if not optimized. Large images, heavy animations, or too many slides may reduce loading speed. To avoid this, compress images, enable lazy loading, and keep the slider simple.
Which is better: using a plugin or custom code for sliders?
Plugins are easier and offer more features (ideal for beginners). Custom code is lighter, faster, and avoids plugin bloat, but it requires some coding knowledge.
How many slides should I use on my homepage?
For the best user experience, stick to 3–5 slides. Too many slides can overwhelm visitors and slow down your site.
Can sliders affect SEO?
Yes, positively if done right, negatively if done poorly. Optimized images, alt text, captions, and structured data can improve SEO. Unoptimized sliders with large files can hurt performance and rankings.
Are sliders mobile-friendly?
Most modern slider plugins are responsive, but it’s important to test on different devices. If coding manually, make sure your CSS supports flexible layouts for smaller screens.
What are some good alternatives to sliders?
Static hero images, full-width banners, and grid layouts are all lighter, faster-loading alternatives that still deliver strong visual impact.
Conclusion
Adding a slider to your WordPress homepage is one of the most effective ways to make your site dynamic, engaging, and visually appealing. Whether you want to showcase featured posts, highlight promotions, or create a more interactive user experience, sliders give you the flexibility to do it all.
If you prefer a quick and user-friendly setup, plugins are the best route. Among them, PostX stands out as the most practical choice. Unlike other slider plugins that focus mainly on visuals, PostX combines ease of use with powerful functionality.
Its Post Slider blocks are ready to go within minutes, and the Query Loop builder gives you unmatched control over what content appears. This means you can display recent posts, featured articles, custom post types, or even hand-picked selections, something most plugins don’t handle as seamlessly.
While manual coding without a plugin is lightweight, it requires technical knowledge and ongoing adjustments. For site owners who want a reliable, customizable, and professional-looking slider without coding headaches, PostX is the smarter solution.
For more helpful tips, stay connected with our LinkedIn Newsletter.