Online sales for both B2C and B2B eCommerce stores are growing rapidly. According to reports in 2023, the eCommerce space saw around 6.3 trillion dollars in sales. This number is predicted to grow in the coming days.
Since 2019, B2B sales have risen from 13% to 19% – and it is slated to grow more in the coming years. Also, the B2C online industry will grow to become an $8.3 trillion market by 2026.
This goes to show one thing:
Creating a proper B2B eCommerce store with B2C is super important for vendors. Small Businesses should think about creating B2C+B2B hybrid eCommerce websites to get the best of both worlds.
Today’s discussion is all about that.
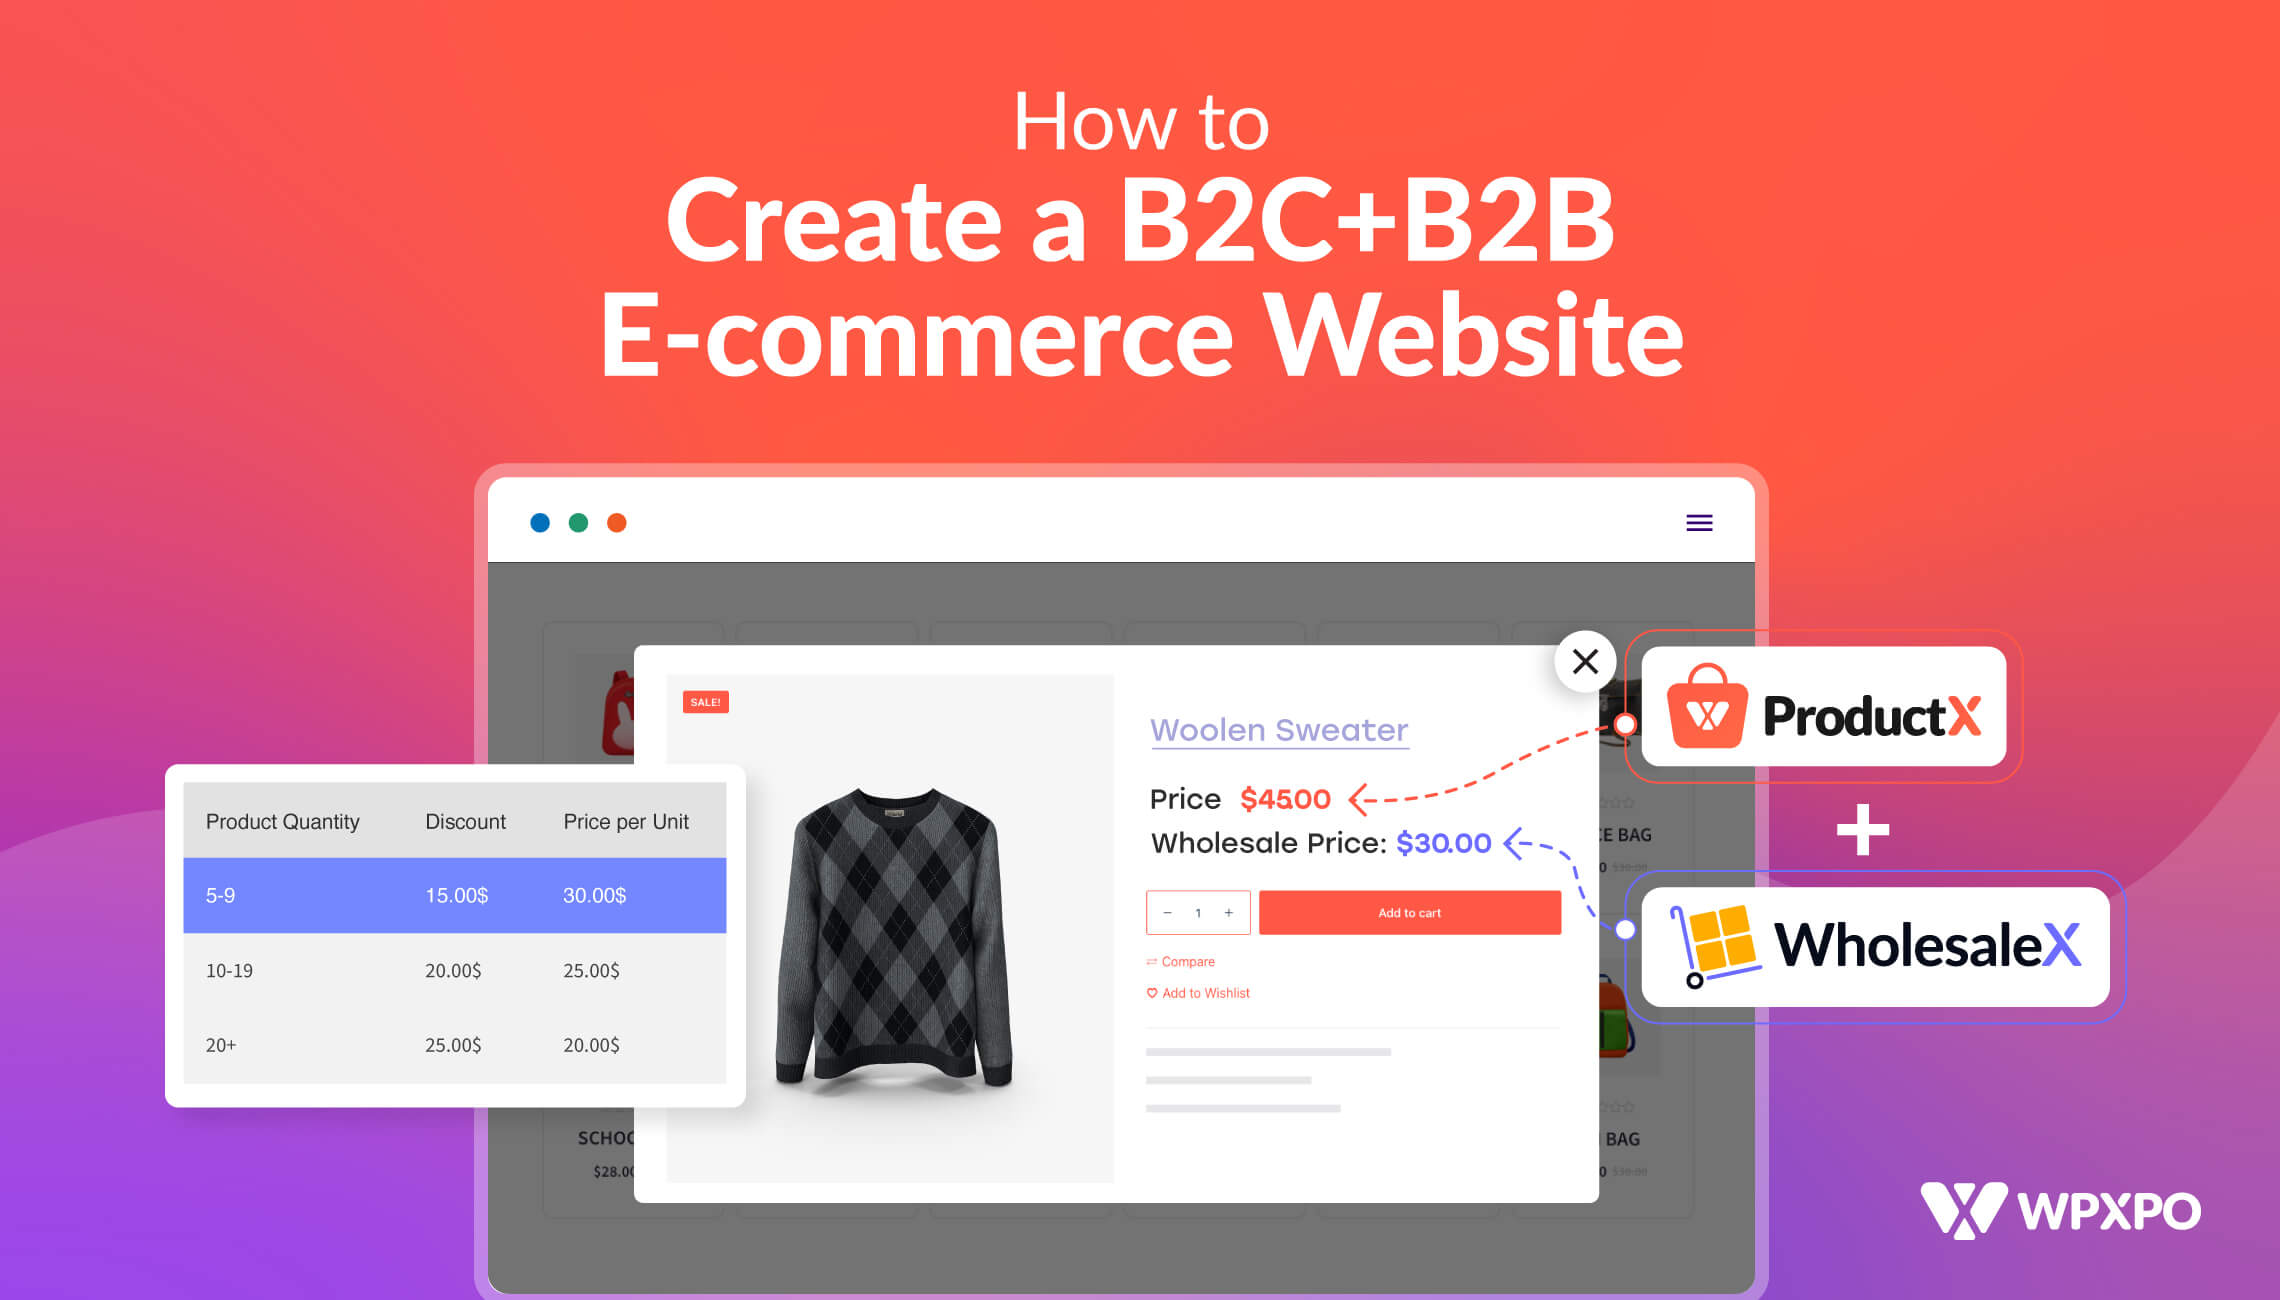
We will show you how to create a proper B2C+B2B eCommerce website using the ProductX and the WholesaleX plugins.
But before that, let’s explore why the WordPress CMS is an excellent starting point for wholesale and retail businesses.
Why Use WooCommerce for Your Online Store?
WooCommerce comes as an “extended” version of WordPress – adding eCommerce capabilities to WordPress. In contrast, other popular options like Shopify, Magento, Wix, etc. WooCommerce has a couple of distinct advantages:
- WooCommerce is free to use. Unlike platforms like Shopify which require a monthly fee, you do not have to pay anything to use WooCommerce with WordPress.
- One of the great things about WooCommerce is the fact that it’s very scalable. If you want to bring any new feature to your B2B+B2C store, you can do it with free plugins. However, some plugins will cost you.
- WooCommerce has a wide community of users. If you’re looking for a solution to a problem the possibility of finding a proper solution is very high.
- You can integrate more than 100 payment gateways with WooCommerce – making it a proper platform for an online store.
- You can use WooCommerce with various plugins to enhance the usability of the platform. You can use various plugins to introduce features like conversations, registration forms, payment gateways, etc.
Low cost, better modularity, and good community support are some of the reasons why you should use WooCommerce for a growing business.
Now, let’s get to know the plugins we will use to create the B2C+B2B eCommerce website.
Why Choose WooCommerce Plugins Like ProductX and WholesaleX?
ProductX and WholesaleX are plugins that complement each other. On one hand, ProductX is a WooCommerce Gutenberg builder plugin that allows you to create page templates with just a couple of clicks. On the other hand, WholesaleX adds the B2B+B2C wholesale functionalities to the WooCommerce store.
ProductX is now WowStore! We’re very excited to bring you this experience, packed with unique features. Please note that the features, blocks, starter packs, etc. all work the same. If you have used ProductX, you’ll feel right at home with WowStore.
Among various notable features of the ProductX plugin, the WooCommerce builder ranks at the top. With the WooCommerce builder, you can create a custom shop page, single product page, archive page, 404 page, etc. You can use the custom blocks or the library of pre-made templates to create a tailored WooCommerce store.
Do explore other features of the ProductX plugin in the link below:
WholesaleX is a ‘feature-first’ plugin that allows users to add wholesale features to a WooCommerce store. Features like dynamic rules, form builder, user role management, etc. will help you create a wholesome B2B+B2C experience.
Before Getting Started
Before you start building your B2B eCommerce website with ProductX and WholesaleX, you need to have a couple of things ready:
- You need to have proper hosting with your WordPress site installed and activated.
- You need to install the WooCommerce plugin
- After that, install and activate the ProductX and WholesaleX plugins
Once you are done installing these things, you are ready to build your eCommerce website.
*** Now you may ask – Do I need a WordPress WooCommerce theme installed on my site? Well, ProductX is a standalone plugin and can create a product home page on its own. However, if you want to have some flexibility, you can install a WordPress theme (though it’s not a requirement).
Creating an eCommerce Website from Scratch with ProductX
Now that you have everything installed and activated, it’s time to start building an online store with ProductX.
We will be using the ProductX WooCommerce Builder to create our store. The WooCommerce store builder lets you build eCommerce website templates that represent the different pages of an online store.
Here’s a quick overview of the WordPress WooCommerce builder:
Also, you can create assets like the header and the footer of your store using the WooCommerce builder.
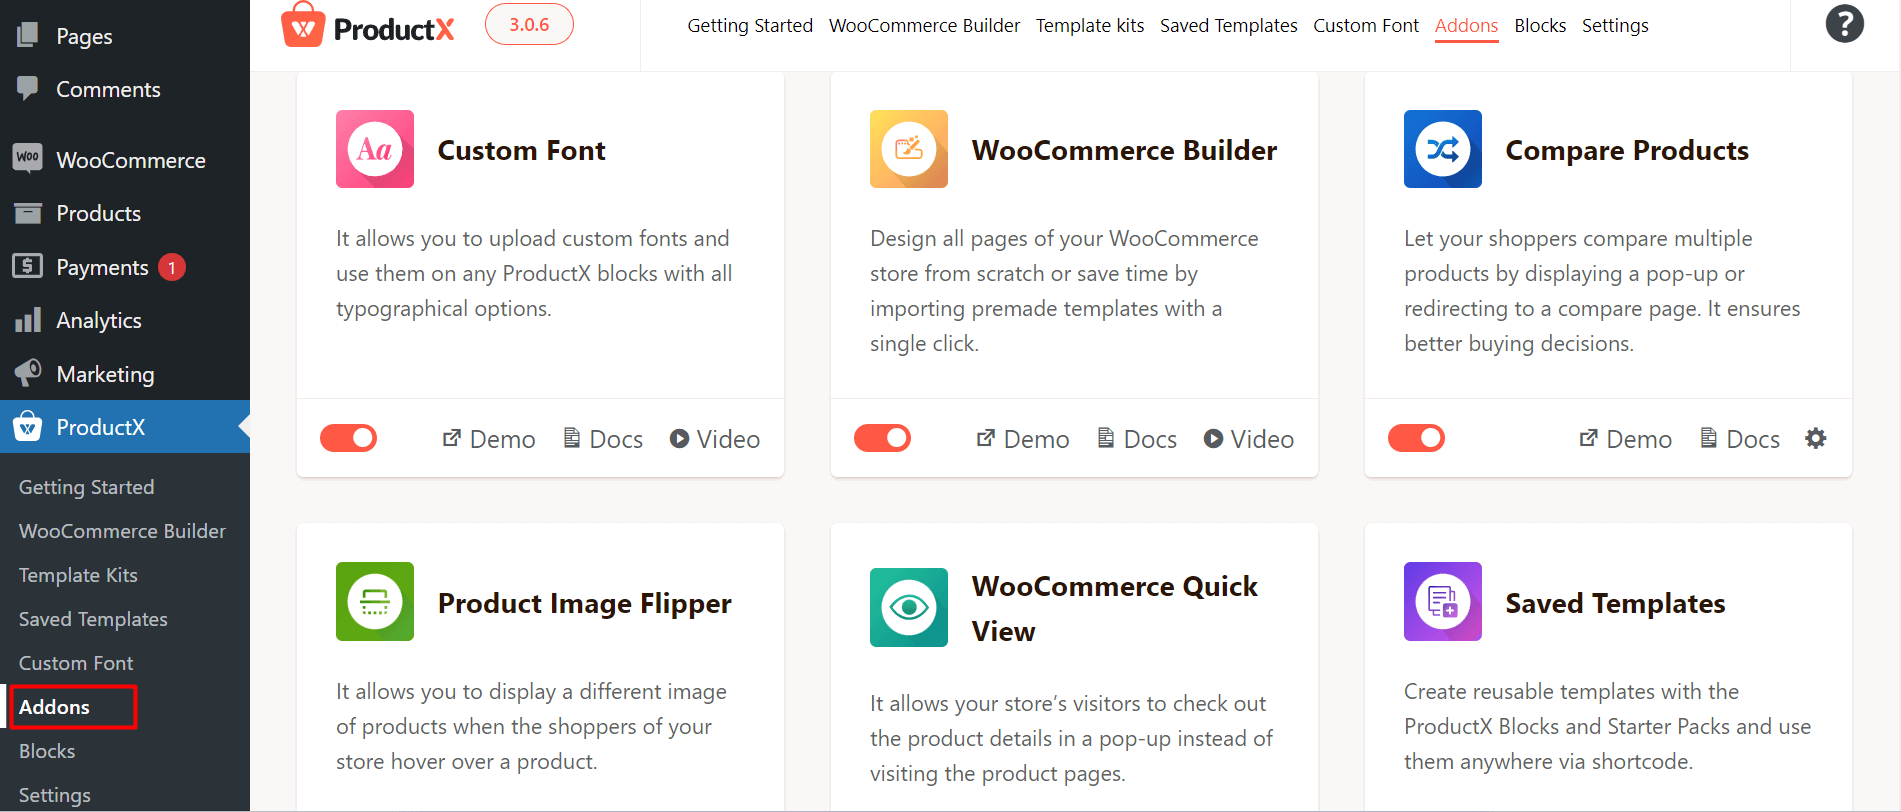
But before you start building, you need to enable the WooCommerce builder addon and other essential addons you may want to use with the ProductX plugins. What you need to do is:
- Go to ProductX > Addons from your WordPress Addons
- Enable the WooCommerce builder addon
- Enable any other addons you may want to use
Note that you have 2 types of addons – General Addons and Integration Addons. General addons are the ones you use with ProductX and the Integration addons let you use ProductX with various page builders.
Once you enabled all the addons, go to the WooCommerce builder of ProductX from your WordPress dashboard.
If you are using the builder for the first time, you will see the following interface:
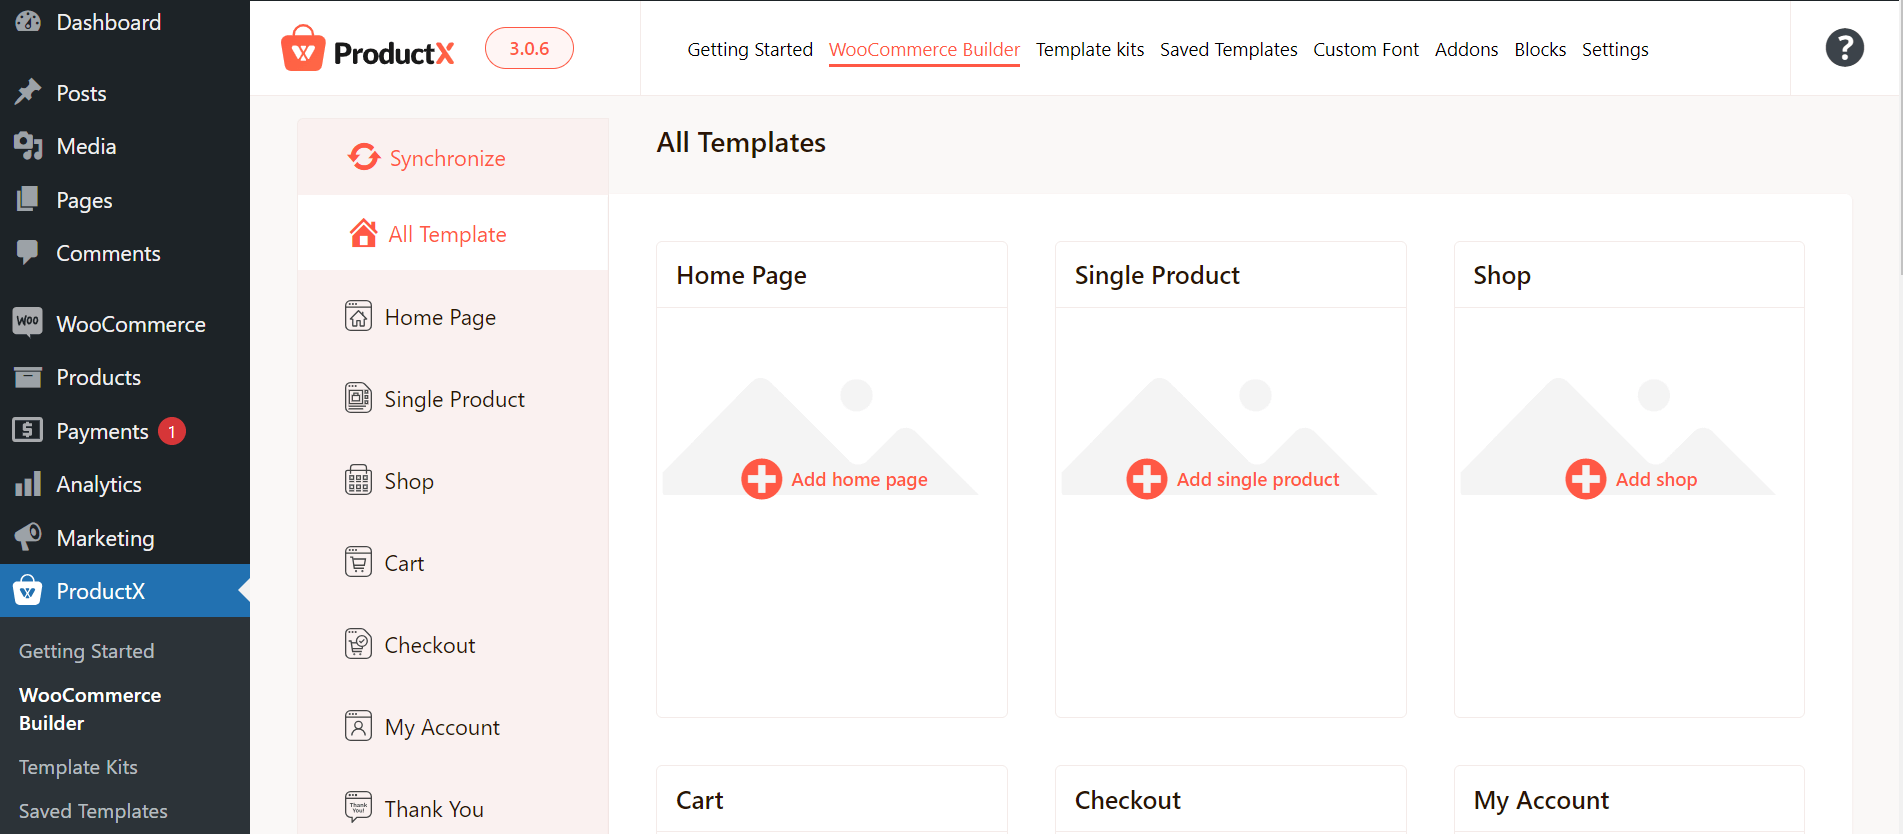
From here, you can start building your eCommerce website templates. There is a synchronize button that allows you to get access to the new design templates.
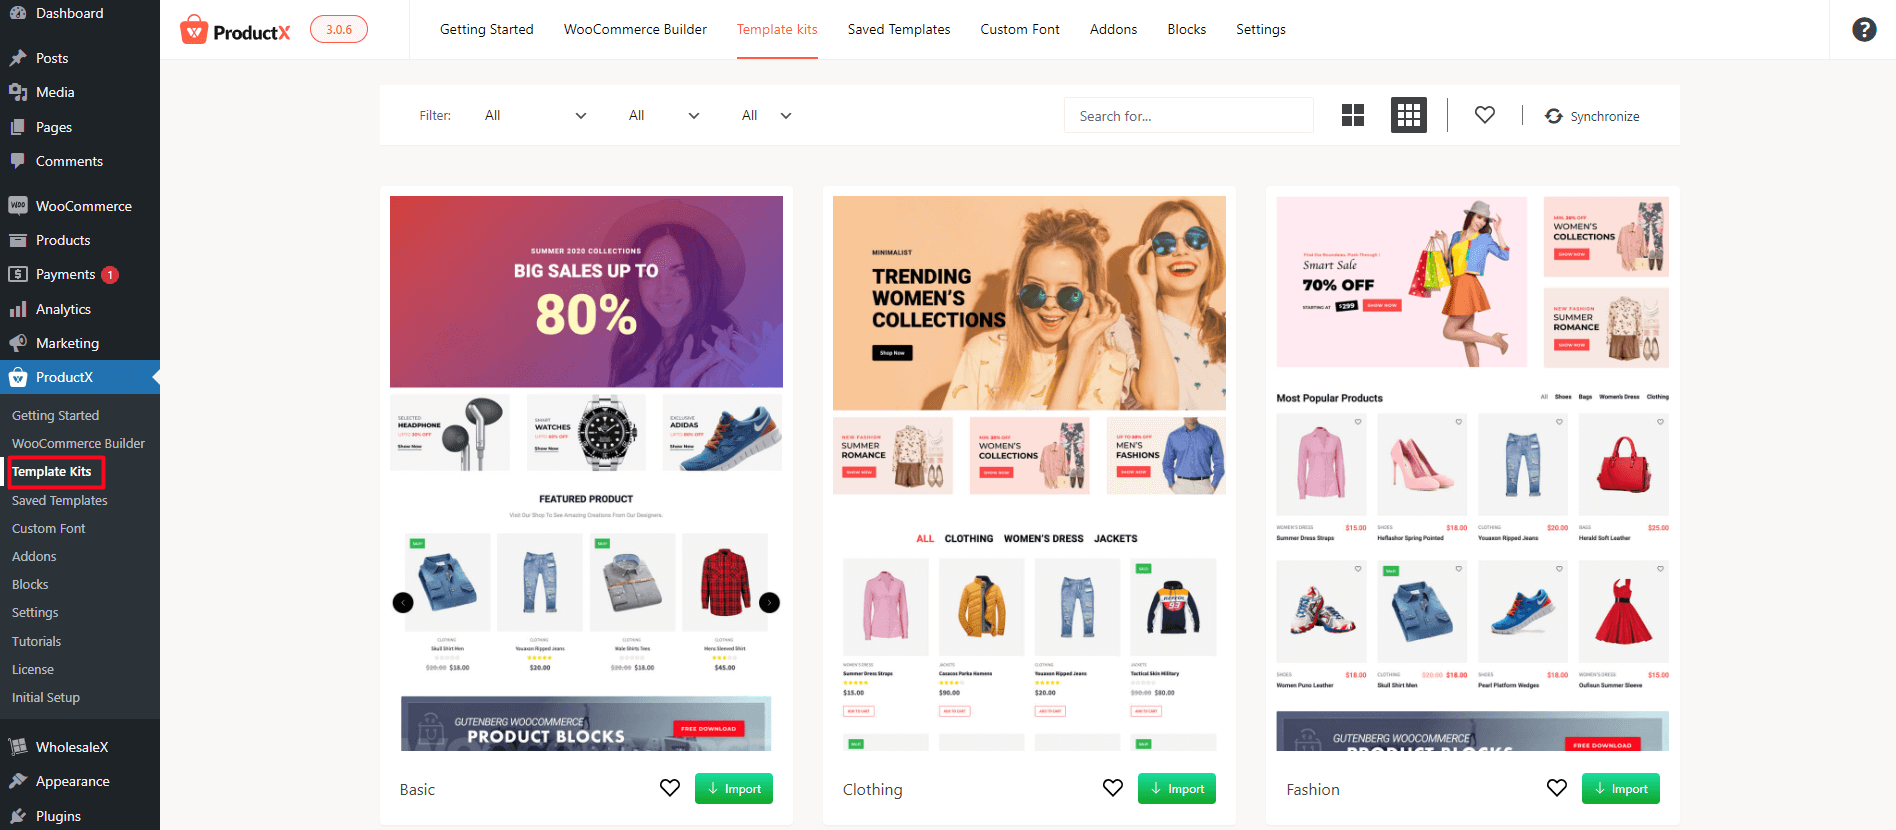
Also, there is a template kits tab under the ProductX setting that allows you to use some pre-made templates of ProductX. You can import any of these templates and use them as the home page of your website.
Now that we have the basics out of the way, let’s start building the eCommerce site.
Creating a Header and Footer for WooCommerce Store?
To create a header, you need to click on ProductX > WooCommerce Builder and click on the header from the left panel.
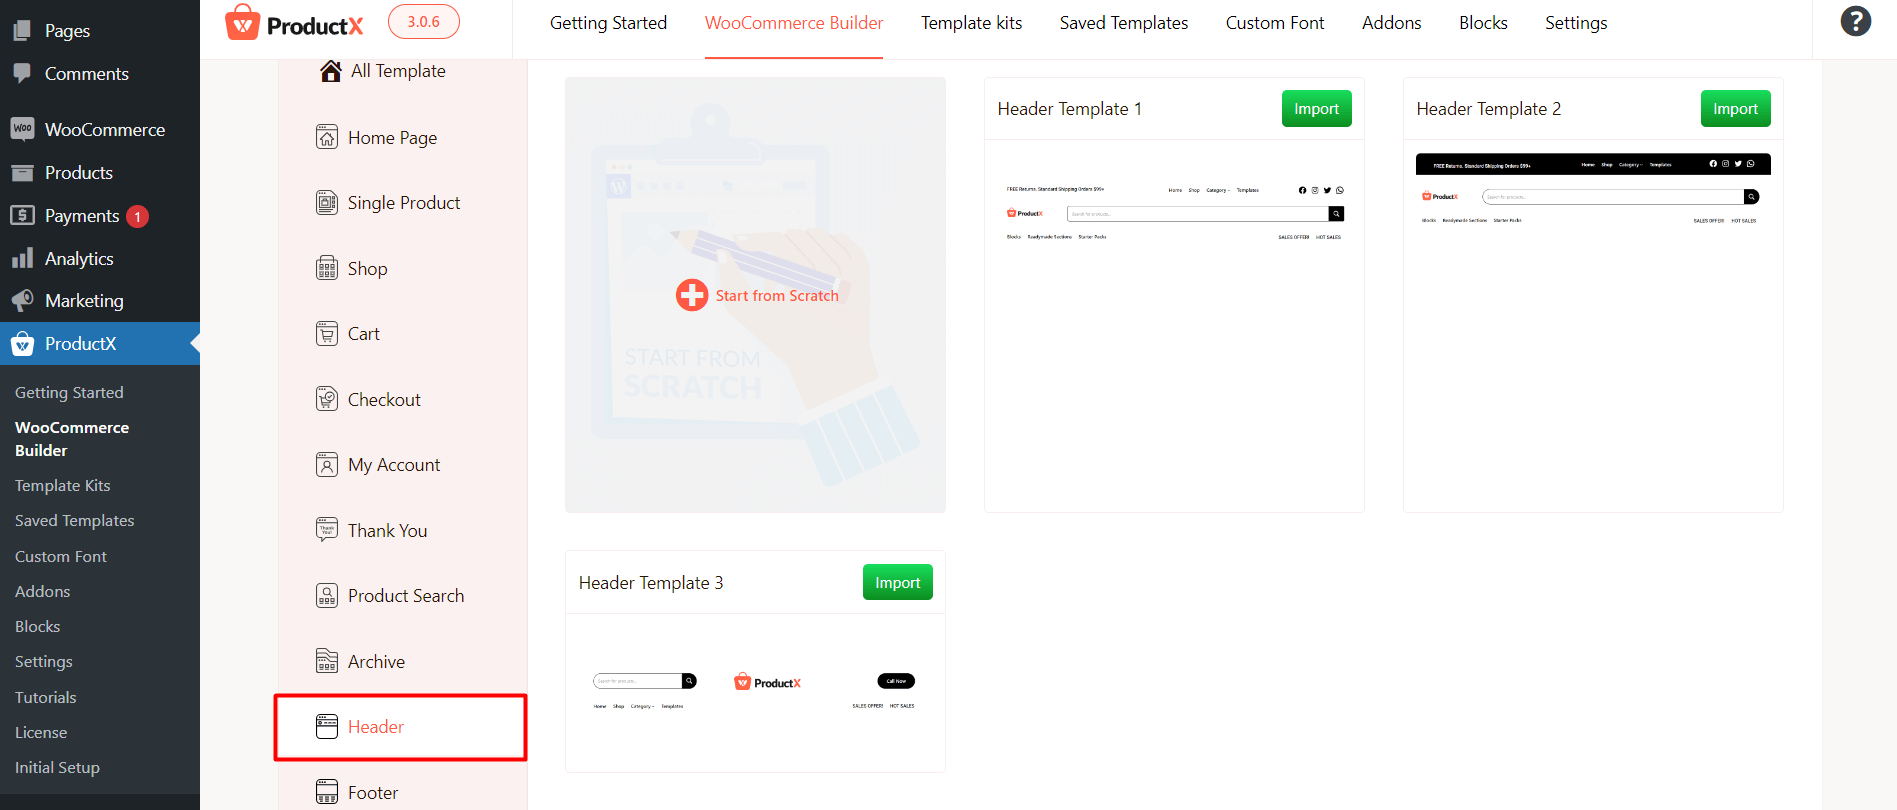
Here, you will have 2 options:
- You can choose to create the template from scratch
- Import a pre-made template and customize it
We will choose the second option. We will import a pre-made header template and customize it. To import a pre-made template, just click on import. The template will be imported and you will be taken to the editor page.
Once you are in the editor, you can make changes accordingly. Before that, you will be asked to add a condition for the header template.
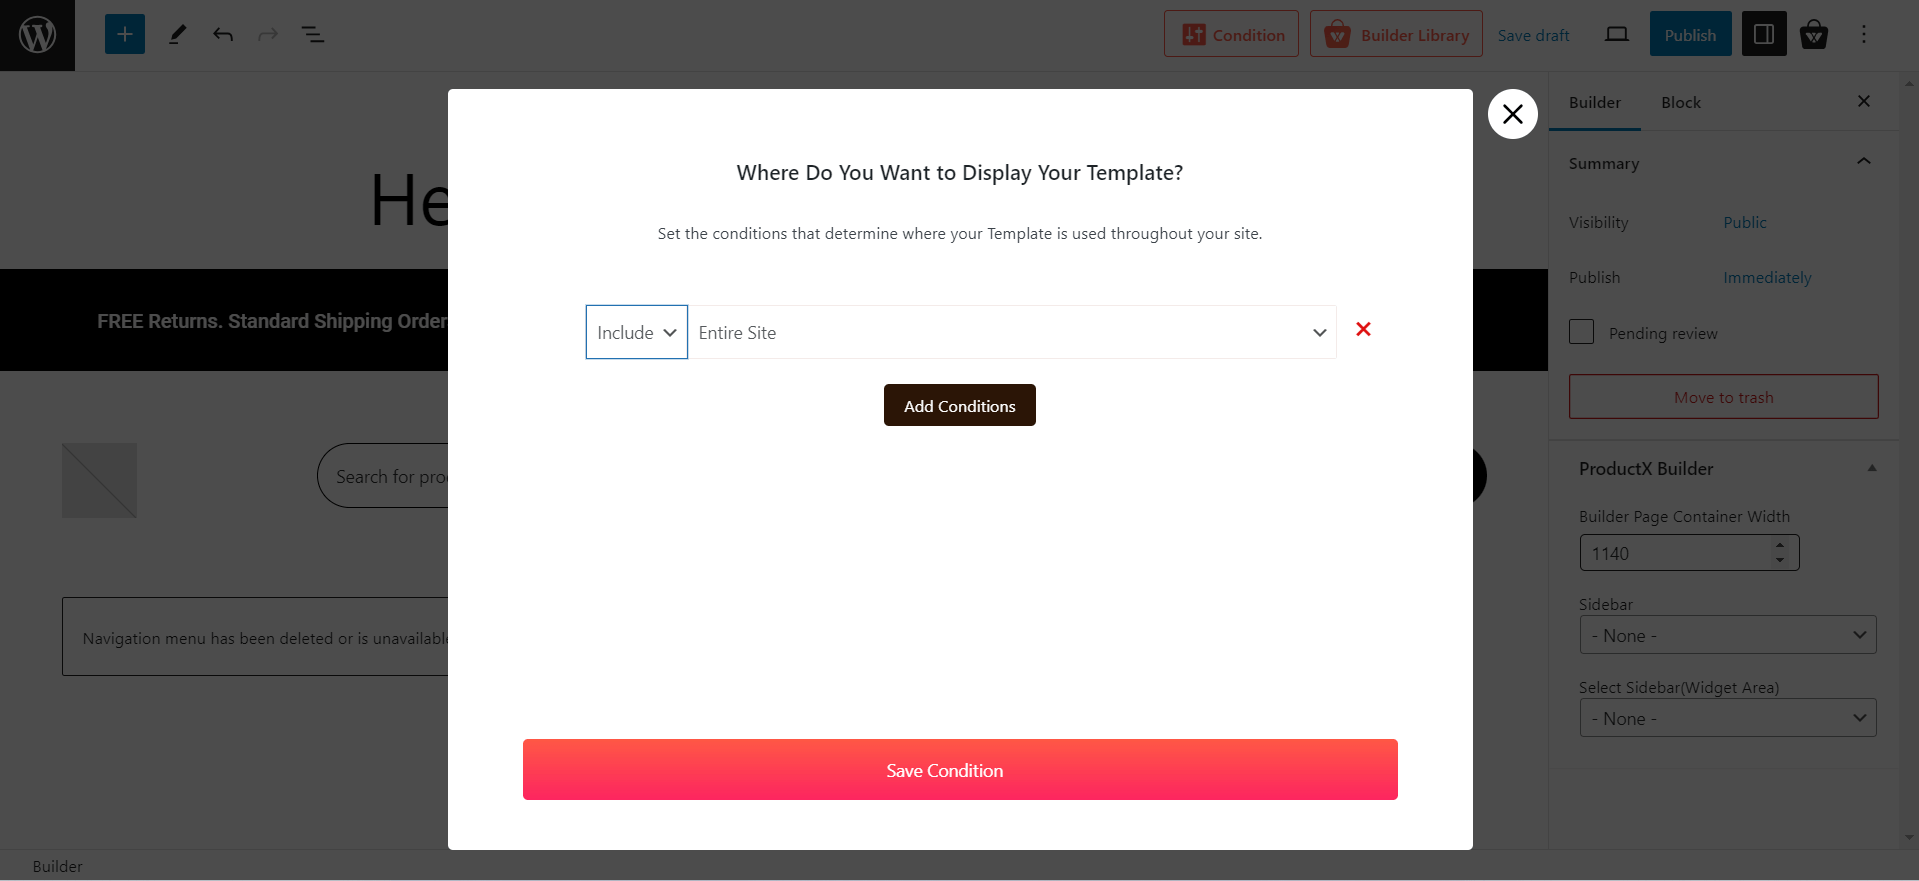
For example, if you want to show it on the entire site, include “entire site” and save the condition. Once you save it, you will be able to customize it.
Here’s what the final customized version looks like:

Creating the footer is a similar process. You can follow the documentation to learn more.
You may also like to read: How to create a header and footer design in WordPress WooCommerce Store?
Creating the eCommerce Home Page
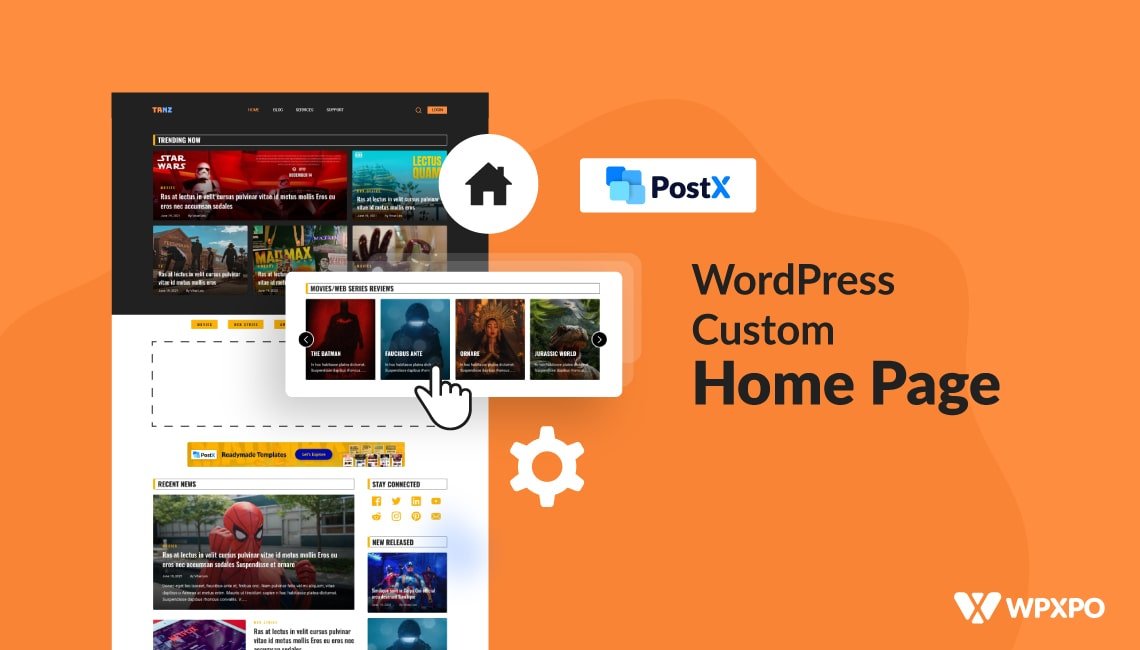
Again, ProductX comes with a number of pre-made templates for the home page. You can select one of them or create a custom page from scratch.
Here’s a home page we created:
The page features some of the necessary features for a proper product home page. We have the WooCommerce product slider along with the row block, product category block, grid block, and WooCommerce banner.
Another thing you can use (though it is better to use on the shop page) is the currency switcher. It helps you to show the product prices of the various regions. Here’s a quick video showing you how the currency switcher works:
To learn more,
You may also like to read:
Creating the Shop Page
You can create the shop page template by following the above-mentioned way. You can simply choose a shop page template and customize it. Or if you want you can create a template from scratch.
Here’s a quick guide to help you with the process:
Creating the Single Product Page
The Single Product Page is one of the more important pages of an eCommerce store. It is where most people tend to make their purchase decisions.
ProductX understands this. That’s why there are 15+ dedicated blocks to help you create a single product page.
Let’s show you how to create the page from scratch:
- Go to ProductX > WooCommerce Builder from your WordPress dashboard
- Click on Single Product in the WooCommerce builder dashboard
- Click on Start from Scratch. You will be taken to the editor.
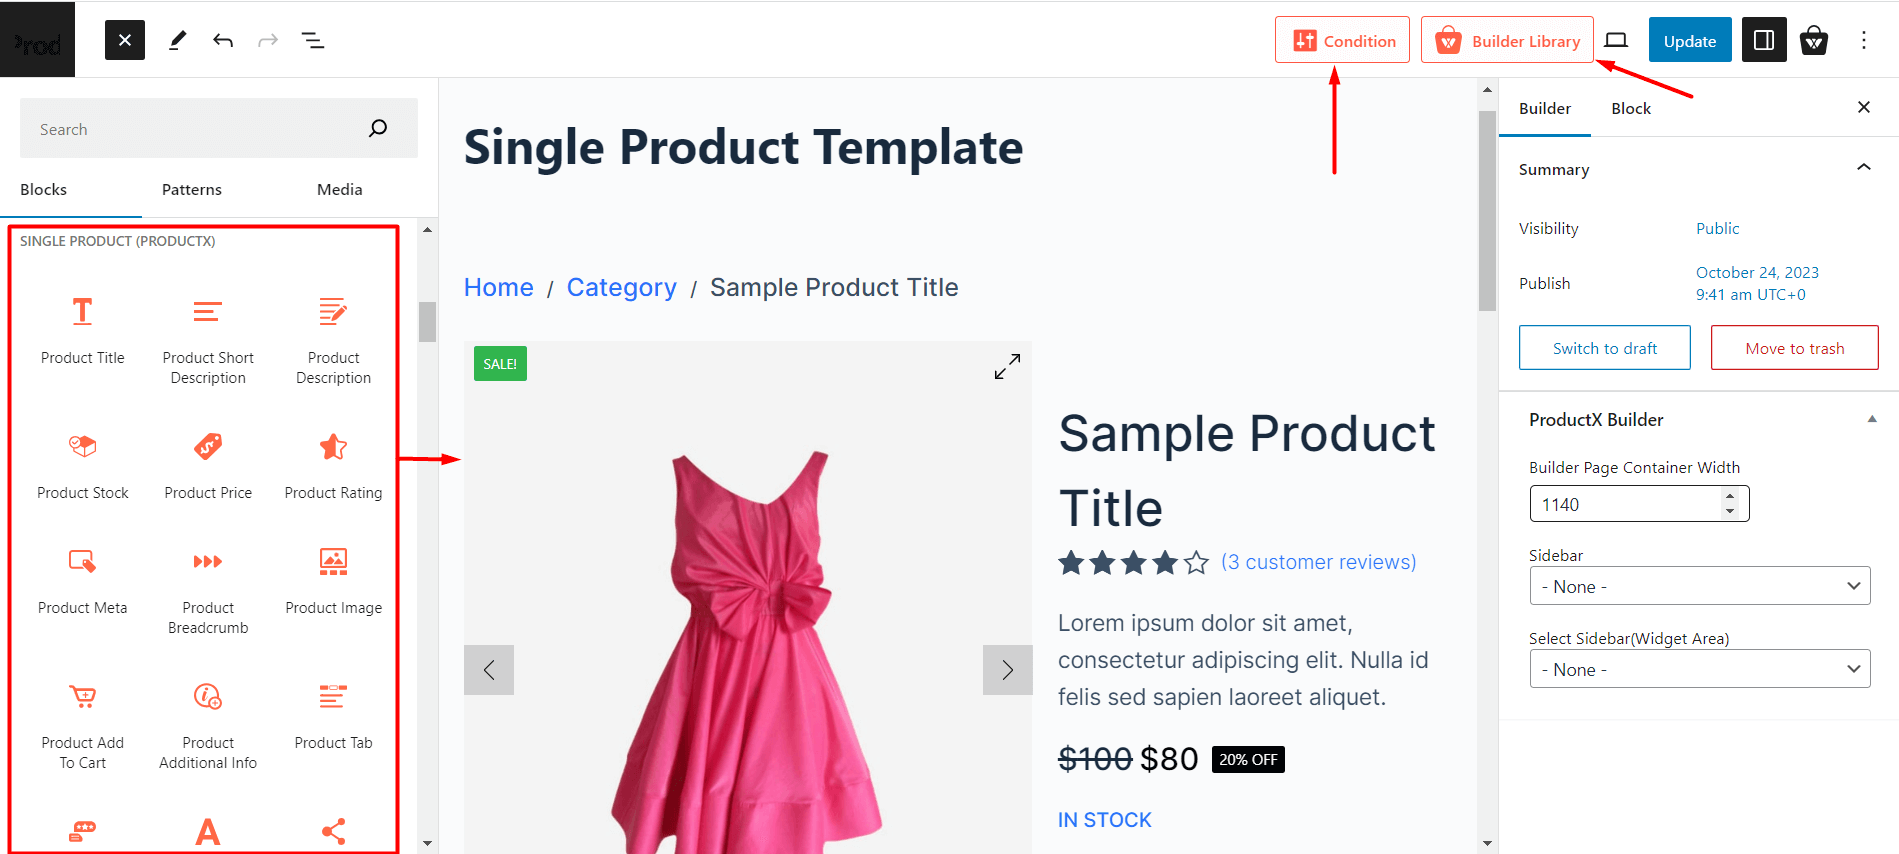
- Here, you will need to set the condition to show the template on all product pages.
- Now, you need to start building a single product page. Use the “+” icon to find the product page blocks. You will find them under the Single Product (ProductX).
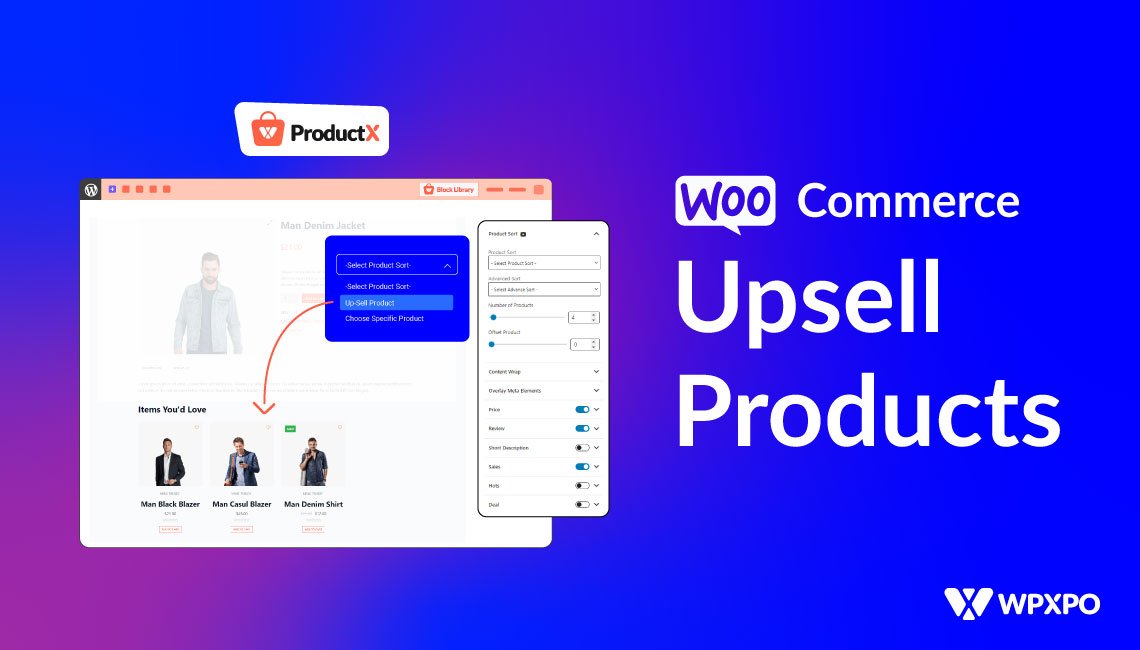
- Now all you have to do is bring the desired blocks to the single product page and create your template
In order to show upsell products, you need to use a product grid and set the product sort condition to upsell products. Once you do that, for each product, you will be able to show the upsell products.
If you don’t know the difference between upsell and cross-sell, you can check out the following post:
What is the difference between upsell and cross-sell in WooCommerce?
Here’s how the final single product page looks like:
This way, you can create a proper product archive page, thank you page, and more with the ProductX WooCommerce builder.
The best way is to use the pre-made templates and customize them to your needs. And yes, for various page templates, you have various ready-made blocks to use. So, you don’t have to worry about coding and creating anything new. You can pretty much do all you want with the eCommerce website templates of ProductX.
Now, let’s explore how to add wholesale functionality to your WooCommerce store using the WholesaleX B2B WooCommerce plugin.
You may also want to read about:
How to Enable Wholesale Features in an eCommerce Store?
WordPress has a wide library of plugins that can help turn your retail store into an online B2B powerhouse. However, not many plugins have the right features to do so.
But there is a plugin that can!
The WholesaleX B2B plugin has the features to turn your WooCommerce store into a B2C+B2B wholesale powerhouse.
Now we will not go into the complete details. However, we will take you through the process and share the necessary knowledge bases. So, you will have zero problems turning your regular e-store into a marketplace.
Let’s get started!
How to Setup reCAPTCHA with WholesaleX?
Google reCAPTCHA works as an added layer of security for your B2B eCommerce store.
You can easily set it up by following the steps below:
- Go to WholesaleX > Addons from your WordPress dashboard.
- Enable the reCAPTCHA addon
- Go to WholesaleX > Settings
- Enter the Site Key and the Secret Key
- Save the changes
How to Get the Google reCAPTCHA Keys?
To generate the Site Key and Secret Key, you can go to the Google reCAPTCHA link, add your domain, accept the terms and services, and submit the request.
Once that’s done, you will receive the keys. Then, you can enter these keys in the reCAPTCHA settings and save the changes for them to take effect. If you feel lost, you can take a look at the documentation to get a clearer idea about the process.
Or, you may want to look at a quick video to help you with this:
Creating a User Roles for Setting Tiered Wholesale Price
In order to create user roles for allotting bulk wholesale pricing, make sure to do the following:
- Go to Users > Add New from your WordPress dashboard.
- Add a new user by filling out the form with the necessary credentials.
- Save changes.
Now, you have to create a new user role from WholesaleX. To do this:
- Go to WholesaleX > User Roles from your WordPress dashboard.
- Click on Add New B2B role and set it up
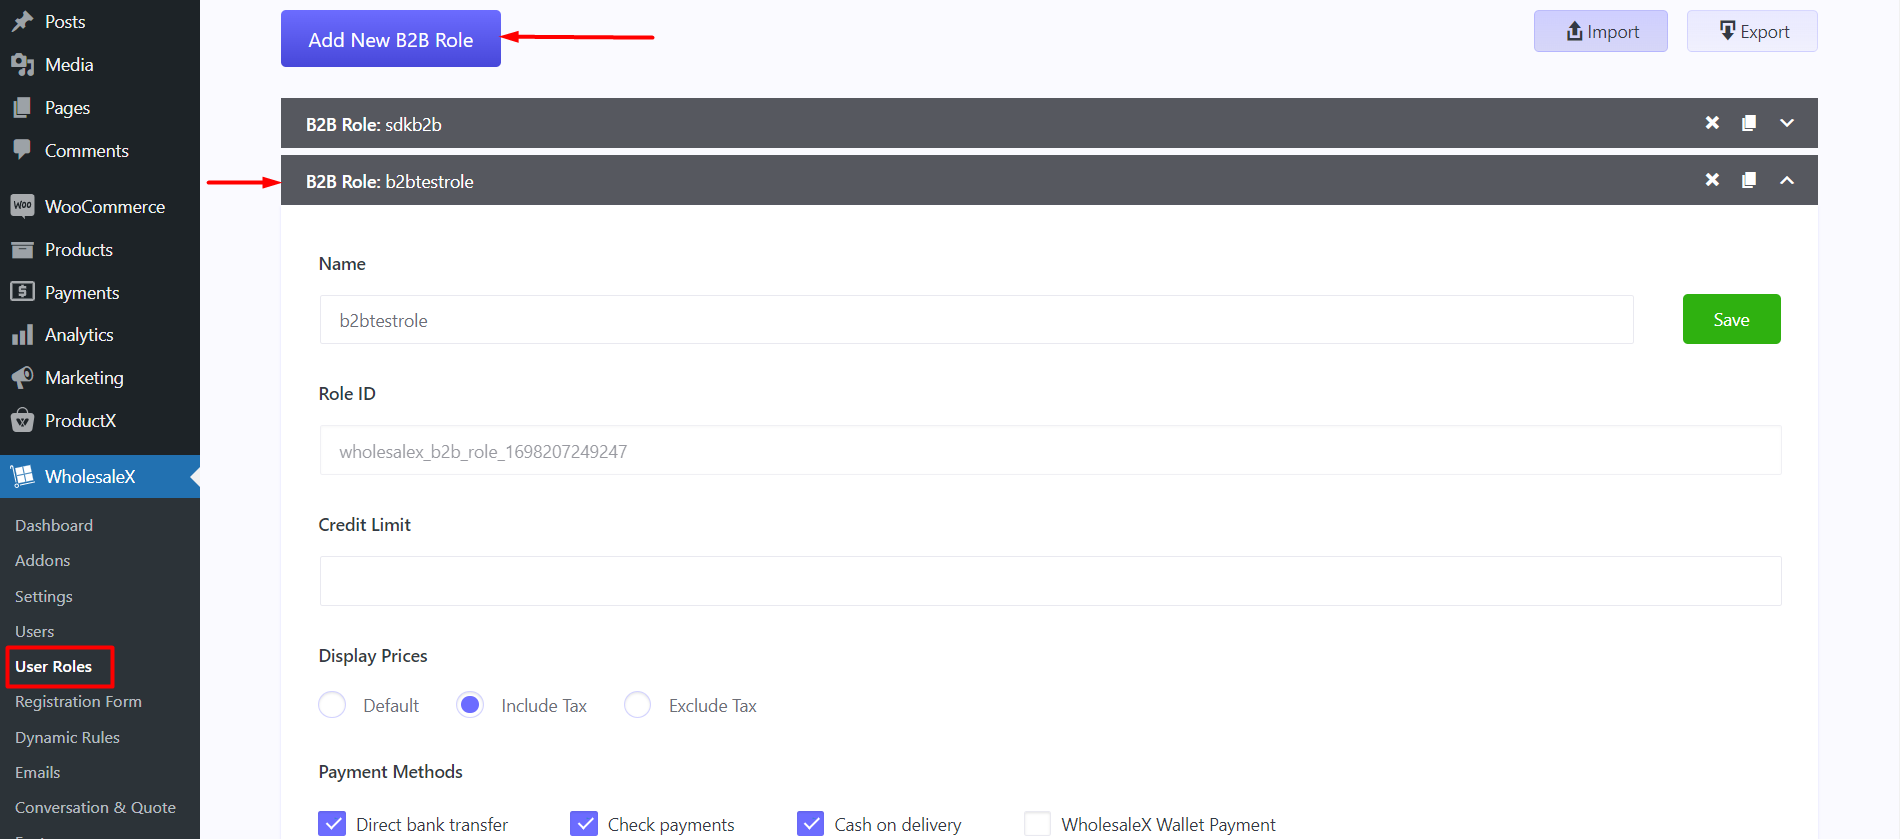
- Save the changes
Now the B2B user role is ready, you need to assign the role to a user. To do that:
- Go to Users > All Users
- Select the user you just created
- Go to the WholesaleX Profile Settings within the User Setting
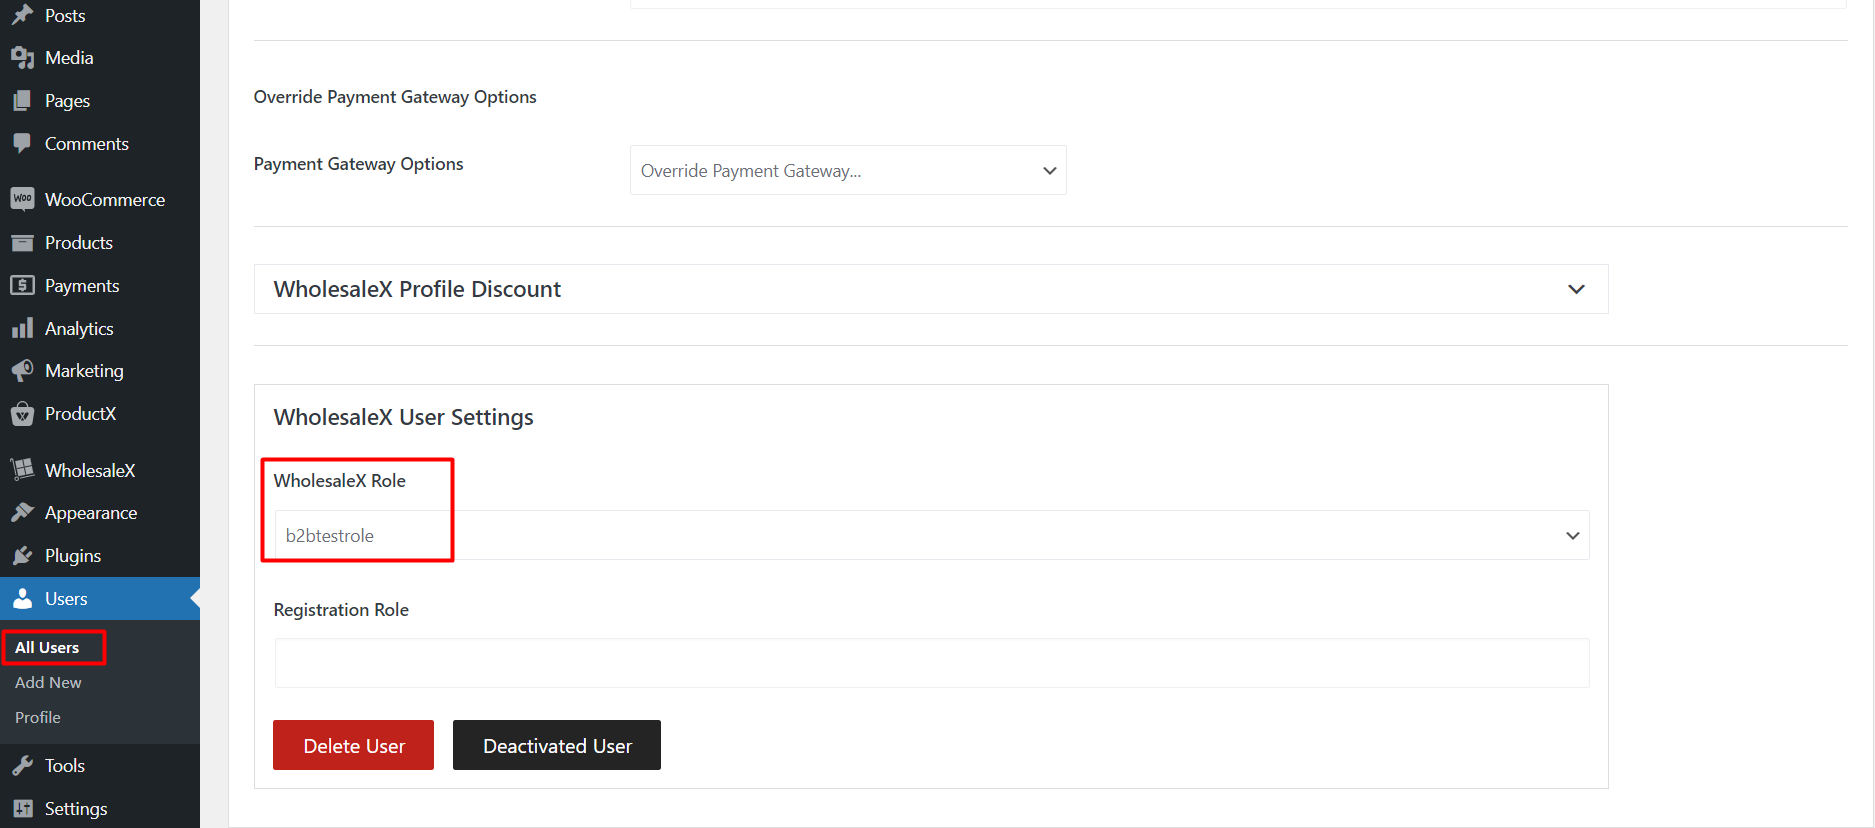
- Under the WholesaleX User Settings select the WholesaleX role
- Save the changes
You are now ready to assign tiered pricing for the particular user. Here’s how to set tiered wholesale pricing:
Set Tiered Pricing for Wholesale User
We are now going to set tiered pricing for a particular user role. Follow the steps below to set tiered pricing:
- Go Products > All Products from your WordPress dashboard
- Edit the product where you want to show tiered pricing
- Under the Product Data click on WholesaleX
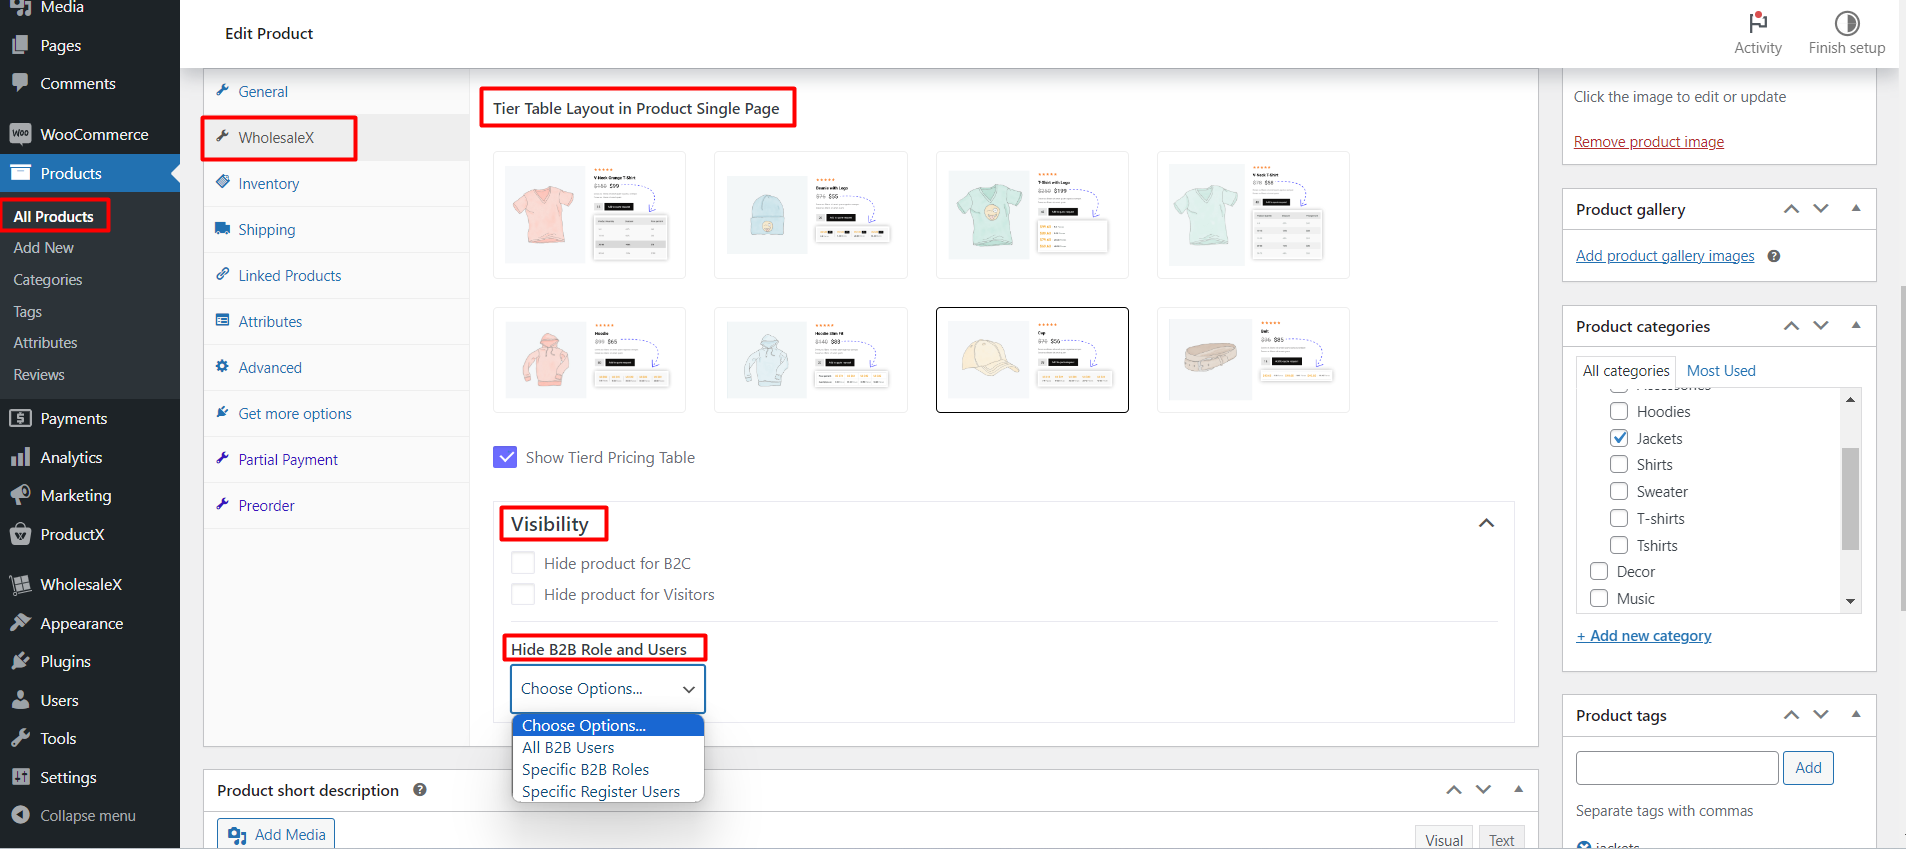
- Select a tired pricing table-style
- Now go back to the General Tab
- Under WholesaleX B2B Special, find the specific user role to show tiered pricing
- Set the Base Price and the Sale Price
- Set the tiered pricing with the discount types
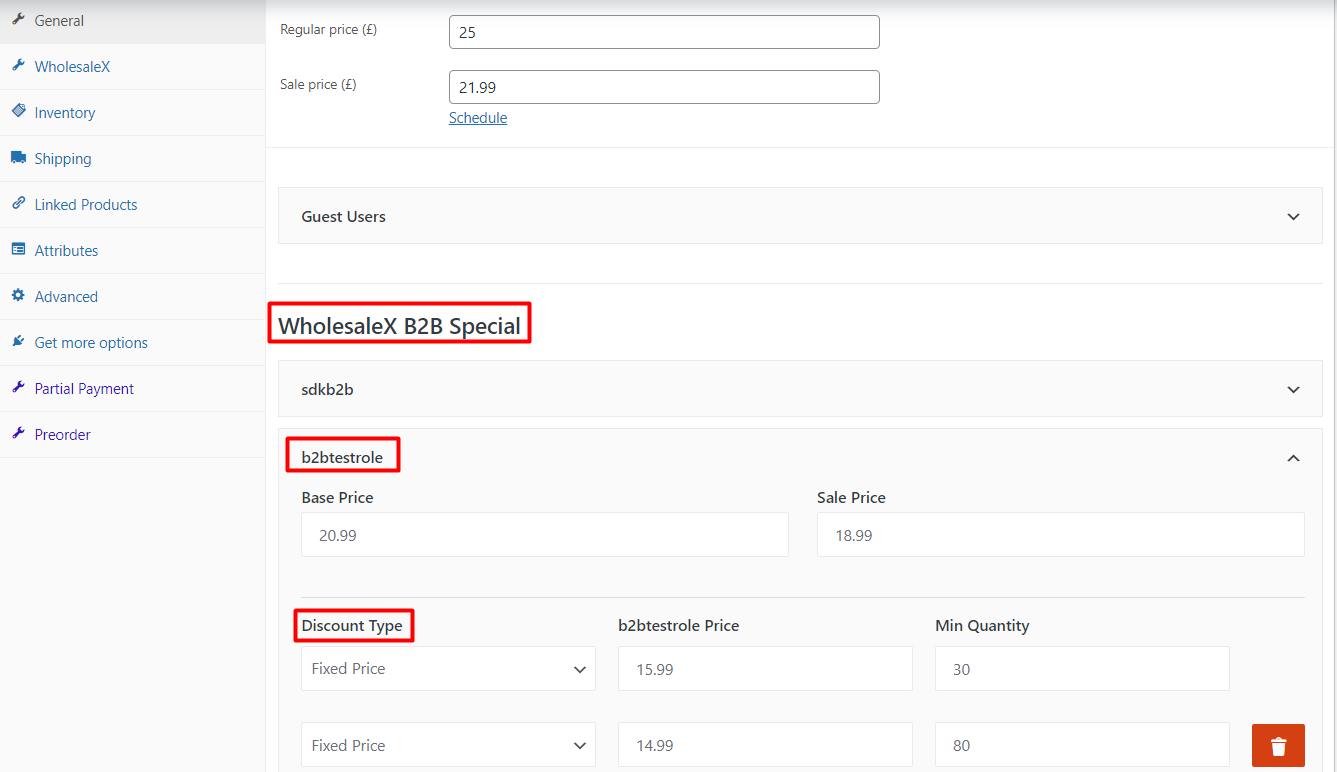
- Save changes to the product.
Now, if a registered user with the specific user role logs in to his account and goes to view the product, he will find the tiered pricing shown in the format you set earlier.
You can also set dynamic discounts for specific roles using the dynamic rules feature.
How to Set Dynamic Discount Rules for a Specific User Role
The WholesaleX dynamic rule is a feature that allows eCommerce website owners to create specific discounts based on specific criteria. We have detailed resources on how you can set dynamic discounts for specific user roles. But the gist of it is:
- Go to WholesaleX > Dynamic Rules from your WordPress dashboard
- Click on Create Dynamic Rule
- Choose the Rule Title and set the Rule Status to Active
- Set the Rule Type, Use Role, and the Product Filter for which the discount will be applied
- Choose additional discounts from the Optional Conditions tab
- Select the date and limit rule (if necessary)
- Save the changes
You can create various dynamic discounts. Also, you can set specific discounts for specific user roles. We have a detailed guide on the process.
You may also like to read:
How to Create WooCommerce BOGO Discounts with WooCommerce Dynamic Rules?
Set up Bulk Order Product Pricing
You can enable the bulk order addon from the WholesaleX Addon settings. Once you do it, registered users will be able to inquire about bulk order discount prices from the user dashboard.
Speaking of user dashboards, you can create custom dashboard account designs with the ProductX WooCommerce builder. But you already knew that right?
On a different note, this video might help you understand the bulk order feature in a better way:
Setting Up Conversations for Registered Users?
Registered users can have a conversation with the site admin using the WholesaleX Conversations addon. Here’s how to use it:
- Enable the Conversations addon from the WholesaleX dashboard
- Go to WholsaleX > Settings > Conversations and enable “Show Conversation”
- Save the changes
Now, registered buyers from their dashboards will be able to send queries from the conversations tab in their account dashboard. The eCommerce B2B platform admin will be able to check these conversations from the dashboard. Make sure to check out the documentation to have a better idea of the feature.
How to Turn your B2B site into a Multi-Vendor WooCommerce Store?
The WholesaleX B2B WooCommerce plugins allow you to turn your WooCommerce store into a multi-vendor site using:
The process for adding a multi-vendor taste to your WooCommerce store is simple:
- Install and activate WholesaleX and WholesaleX Pro
- Enable the either one of the two addons (WCFM or Dokan)
- Go to WholesaleX > Settings to customize specific options for the multivendor plugin.
- Add wholesale pricing and other features to the multi-vendor marketplace.
Here’s a quick overview of the WholesaleX for Dokan migration plugin:
Also, if you are a WCFM user, then you can check out the following video:
We would highly recommend you go through the following to turn your WooCommerce store into a B2B powerhouse:
- How to Use WholesaleX for Dokan Integration to Create a Multi-vendor Site?
- WholesaleX for WCFM: Creating a Multi-vendor Powerhouse!
FAQ
You may have a couple of questions about both plugins. We will try and answer them here:
Where do you show upsell and cross-sell products?
In general, you show the upsell products on the product page and cross-sell products on the cart page. ProductX gives you the option to do so.
What is a Product Archive Page?
A product archive page lets you systematically show groups or categories of products. For example, you can create a product archive page with ProductX and show a specific group of products.
Can I build custom banners using ProductX?
Yes, the ProductX banner block allows you to create custom banners of your choice. You can use the in-built settings to create customized banners for your product promotions. You can check the documentation for the banner maker to learn more about the functionalities.
What is the minimum allowed score for reCAPTCHA?
In the WholesaleX, reCAPTCHA settings, you will find a setting called the “Minimum Allowed Score” – here you can set the value between 0.1 to 1.0. The scale measures the interaction between an entity and your website. If the score is <= 0.3, the entity is likely to be a bot or malicious program. If the score is greater than or equal to 0.7, it is an indication that the interaction is good and the entity is likely a human looking to establish communication with your site.
How to change the store to be a B2C+B2B eCommerce website?
If you go to WholesaleX > Settings > General Settings, you will find the option to change your store from wholesale B2B to a B2C+B2B eCommerce website. All you have to do is select the option and save the changes.
Can I create wholesale pricing for guest users?
Yes, WholesaleX has the ability to set tiered wholesale pricing for guest users. All you have to do is go to Products > All Products from your WordPress dashboard. Select the product to create wholesale prices. Go to Product Data > General > Guest User and add the tiered prices. Make sure you choose “B2B+B2C” in the WholesaleX settings for this to work properly.
Can registered users create subaccounts?
Yes, with the WholesaleX Subaccounts addon, you can enable subaccount creation for desired users. Registered users will be able to create subaccounts from their dashboards.
Can users create custom email templates?
You can create custom email templates with the WholesaleX plugin. Even if you find it lacking in some areas, there is a WholesaleX Email Integration you can try out to get a proper experience.
Finally…
Hopefully, you found all the right answers on how to create a B2C+B2B eCommerce website. Both ProductX and WholesaleX have great potential to help you create a tailor-made wholesale website.
Is there a particular feature you are missing? Something we did not cover?
Sound off in the comments below. We would like to hear from you very much.
Have a great one!