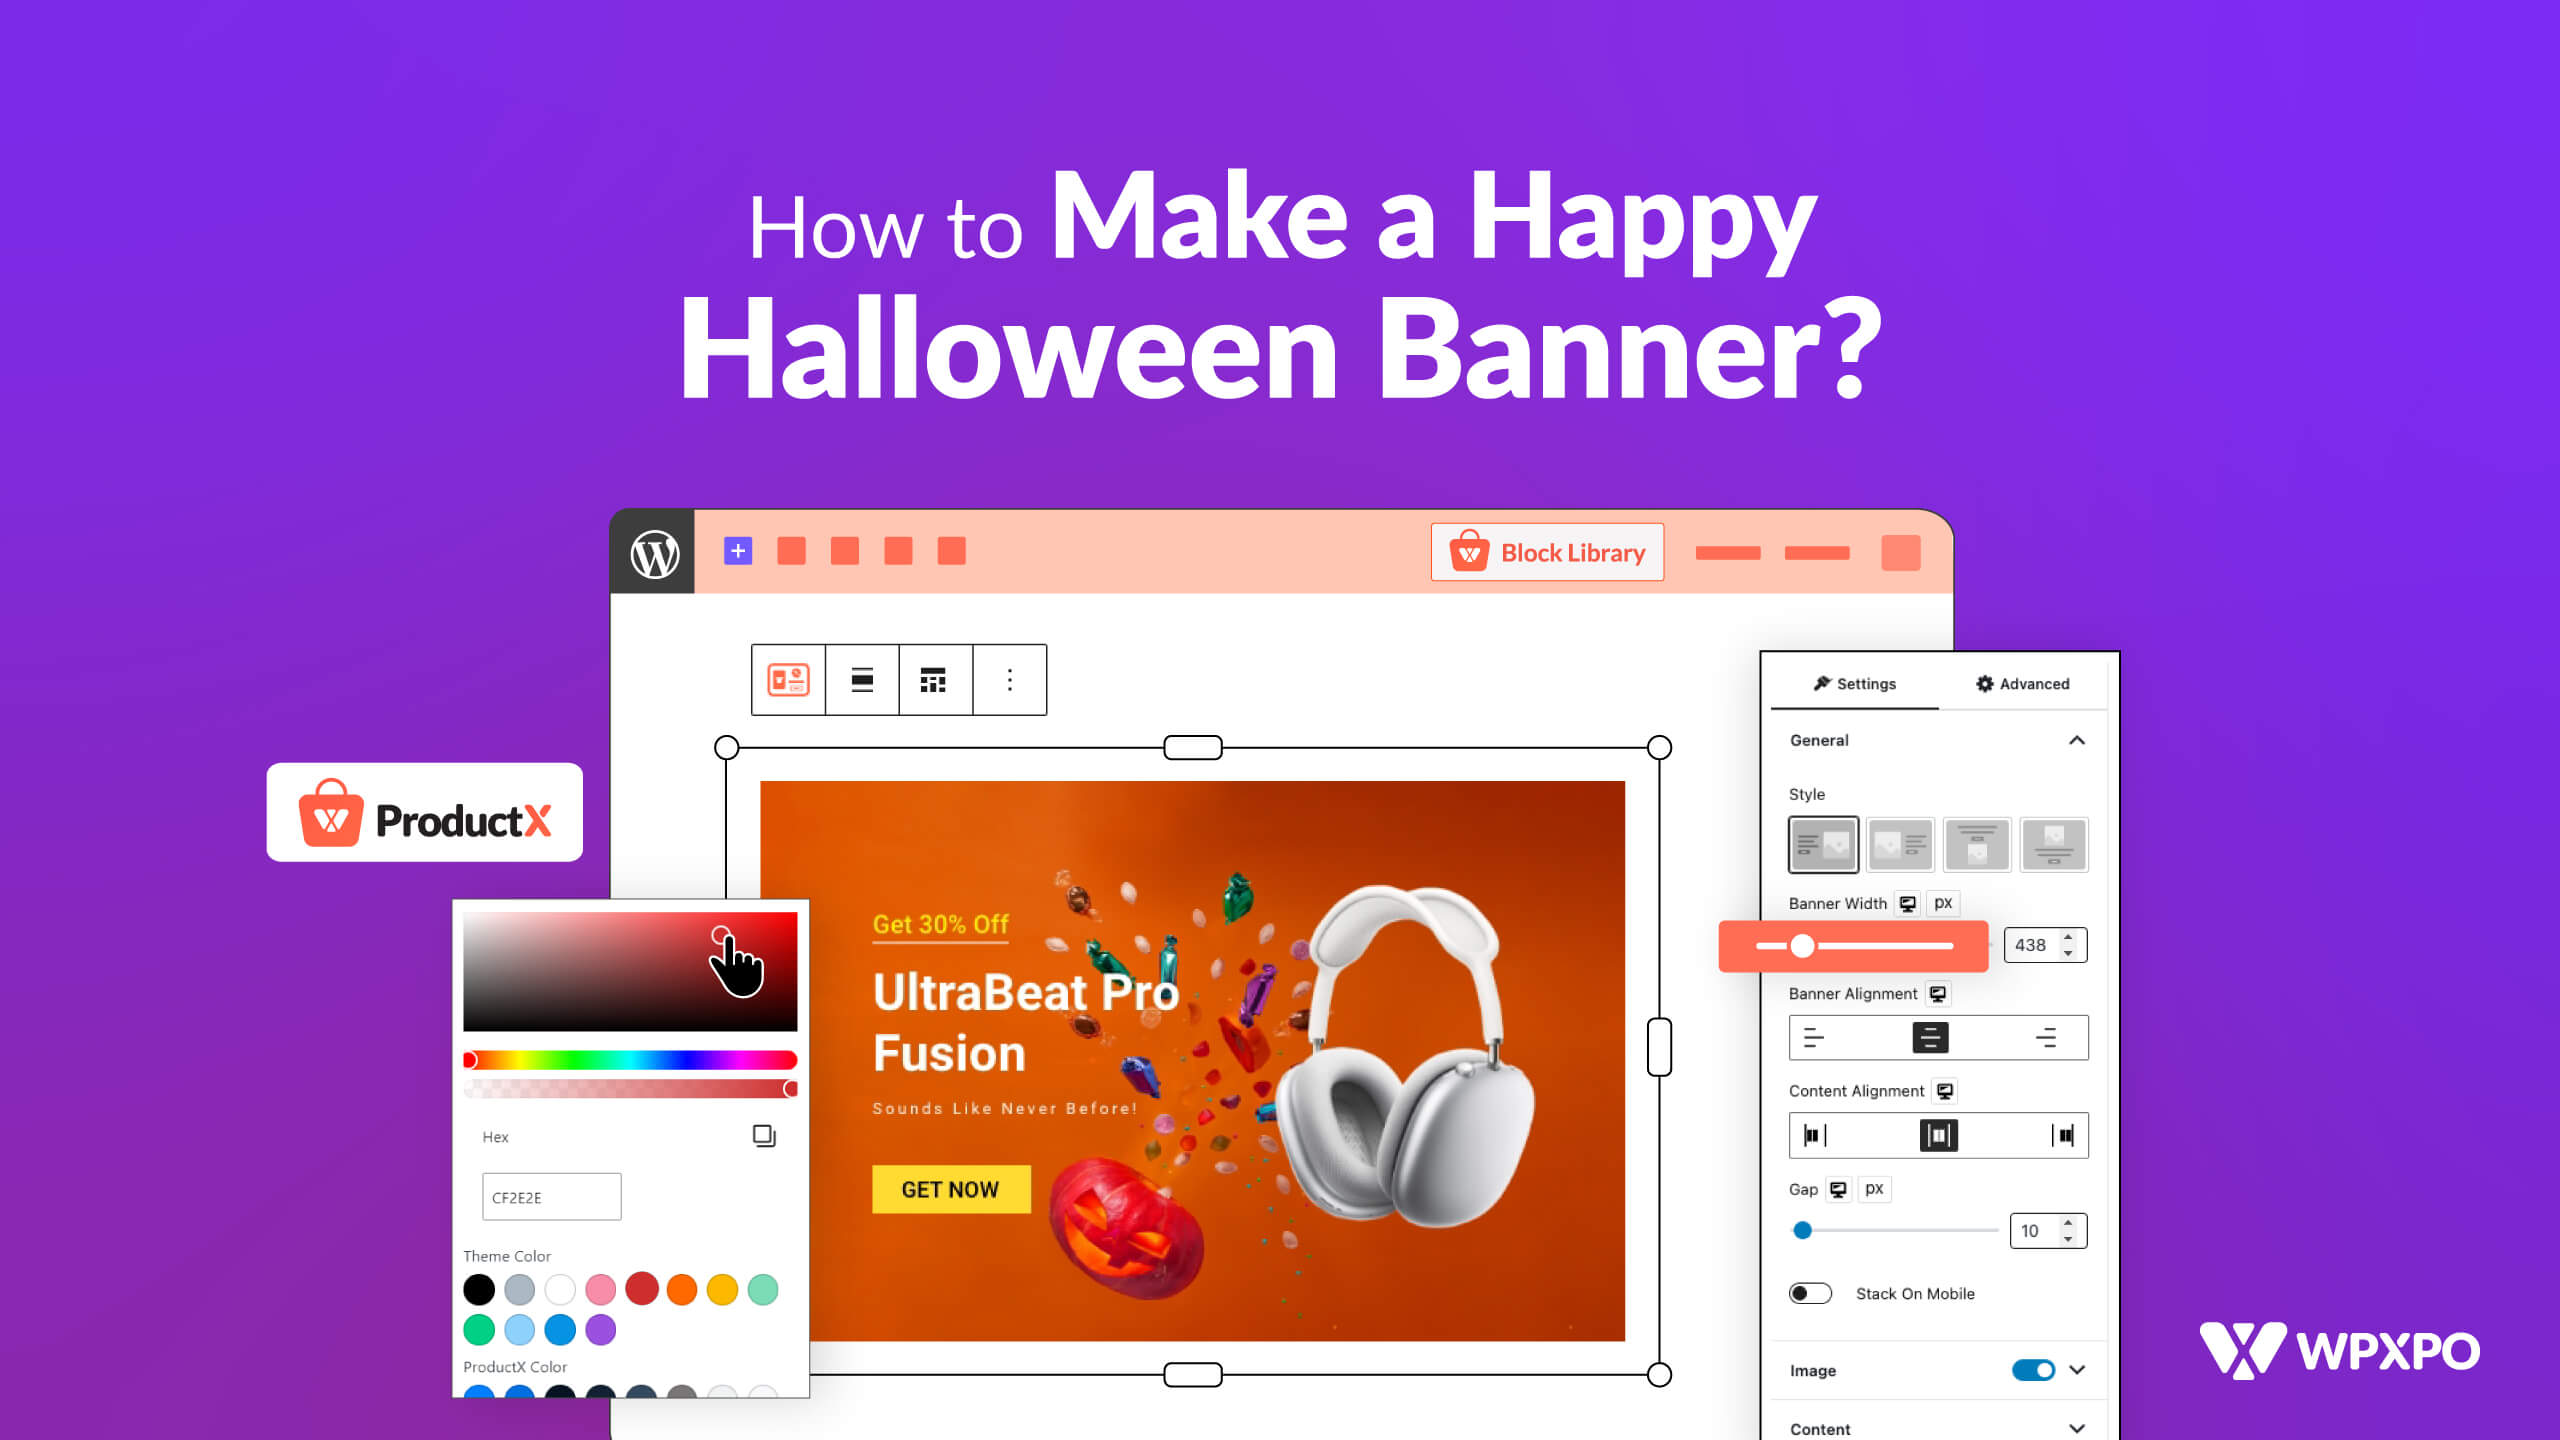
Halloween is right around the corner. It’s one of the reasons why we want to show you how to create a happy Halloween banner.
However, it may sound a bit far-fetched. But no, it is an effective strategy that will help boost your sales this Halloween.
Now the question is, how do you make one in WordPress?
If you are running a WooCommerce store, chances are you don’t have a way to make an E-commerce banner to showcase products on sale. But, ProductX, a WooCommerce builder plugin has the answer for you.
The ProductX banner maker block!
With it, you can easily create wonderful sales banners and promote your products.
Now, before we show you how to create a WooCommerce sale banner for your online Halloween business, there’s something we need to discuss.
Why Is a WooCommerce Sale Banner Necessary for Your Online Business?
There are a couple of things you need to know when you are creating a banner for product promotion:
- An E-commerce banner for targeted ads can increase your efforts by 2-3% on top of your regular marketing efforts.
- They represent your brand. A banner with your colors, logo, and other assets represents what you are trying to sell to the community.
- It helps you test your sales strategies. Creating and testing various sales strategies through your banners helps you find insights into your efforts.
In order to create a banner that works, you need ways to create banners quickly and efficiently.
That’s where the ProductX plugin comes in!
With the ProductX banner block, you will be able to create custom banners to promote your products online.
Want to know how to create a custom banner to boost sales? The following sections will give you an insight.
Create a Happy Halloween Banner with ProductX [in 4-steps]
There are various ways to create a custom happy Halloween banner. However, creating a manual Halloween banner may require coding – something you may not want to get involved with.
In this case, a WooCommerce plugin like ProductX will help you out a lot. The ProductX Banner Maker block is purpose-built for these sorts of situations. You are free to create wonderful E-commerce banner designs to sell seasonal products on your store.
ProductX is now WowStore! We’re very excited to bring you this experience, packed with unique features. Please note that the features, blocks, starter packs, etc. all work the same. If you have used ProductX, you’ll feel right at home with WowStore.
And we will show you how! But before that, here’s a quick overview:
The next 4-steps will discuss how to create a WooCommerce sale banner for Halloween. Once you go through the steps, you will be able to create wonderful promotional banners on your own.
Note: You will need to install and activate both the WooCommerce and ProductX plugins for this to work properly. Now the ProductX plugin isn’t just a banner maker for WooCommerce. It is a complete online store maker solution. So, you can check out the banner builder and other features to see whether or not it will help you boost sales.
Once you are done with the installations, you can start the process.
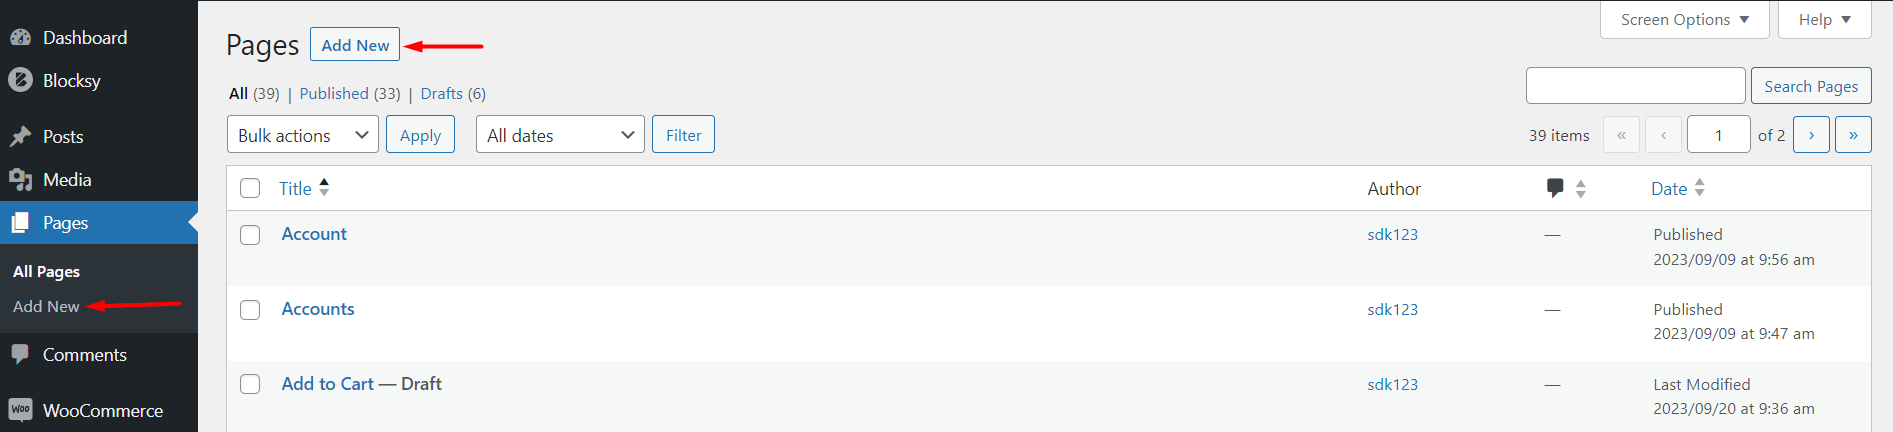
1. Add or Design a Page in WordPress
You can add a page to your WooCommerce store or Use the design of a custom page for promotional purposes.
The process is simple. You can simply go to your WordPress Dashboard > Pages > Add New to create a new page. Or if you have an existing page, then just click on Edit Page. You can add the banner there.
Or, you can do another thing…
How to Add a WooCommerce Sale Banner in a Custom Shop or Archive Page?
You can use the ProductX WooCommerce builder to create both custom shop page and archive page templates. You knew that right?
This is where the magic happens. You can simply do the following:
- Go to the WooCommerce Builder from the ProductX Setting
- Click on Shop to create a shop page template
- Choose one of the pre-made shop templates and click on import
- Once the template is imported, you will be taken to the editor
- Add the banner maker and customize the designs
- Publish the page and see the changes
Note: Please note that for some pages, you may need to select the specific conditions.
Now you may be thinking how do we use the WooCommerce banner block? Check out the next steps.
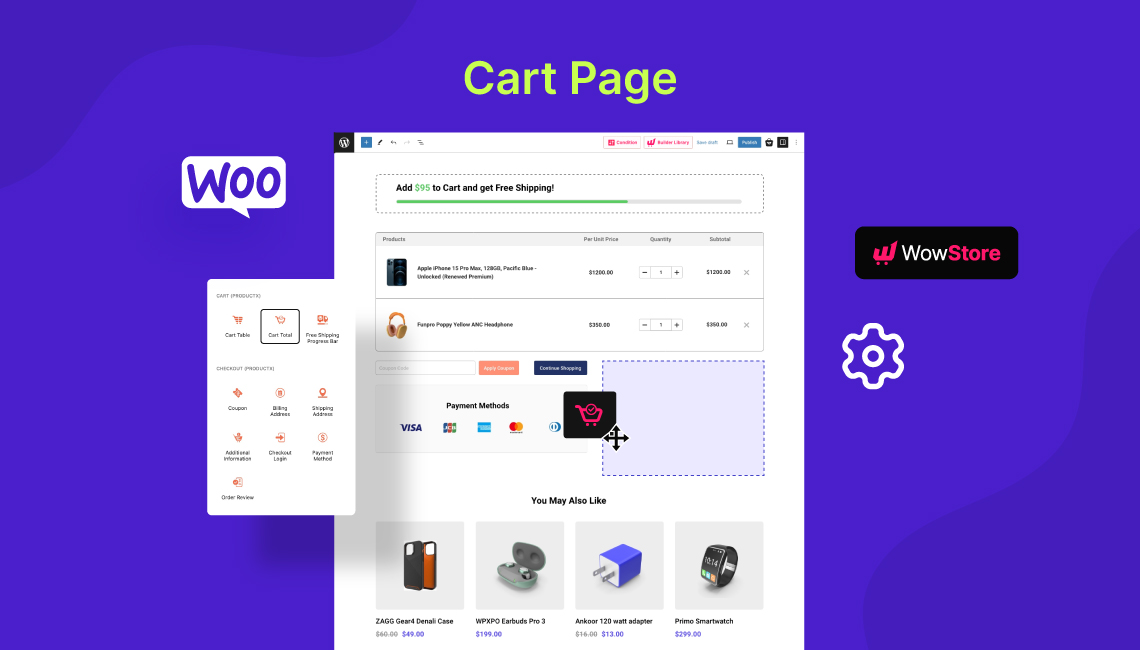
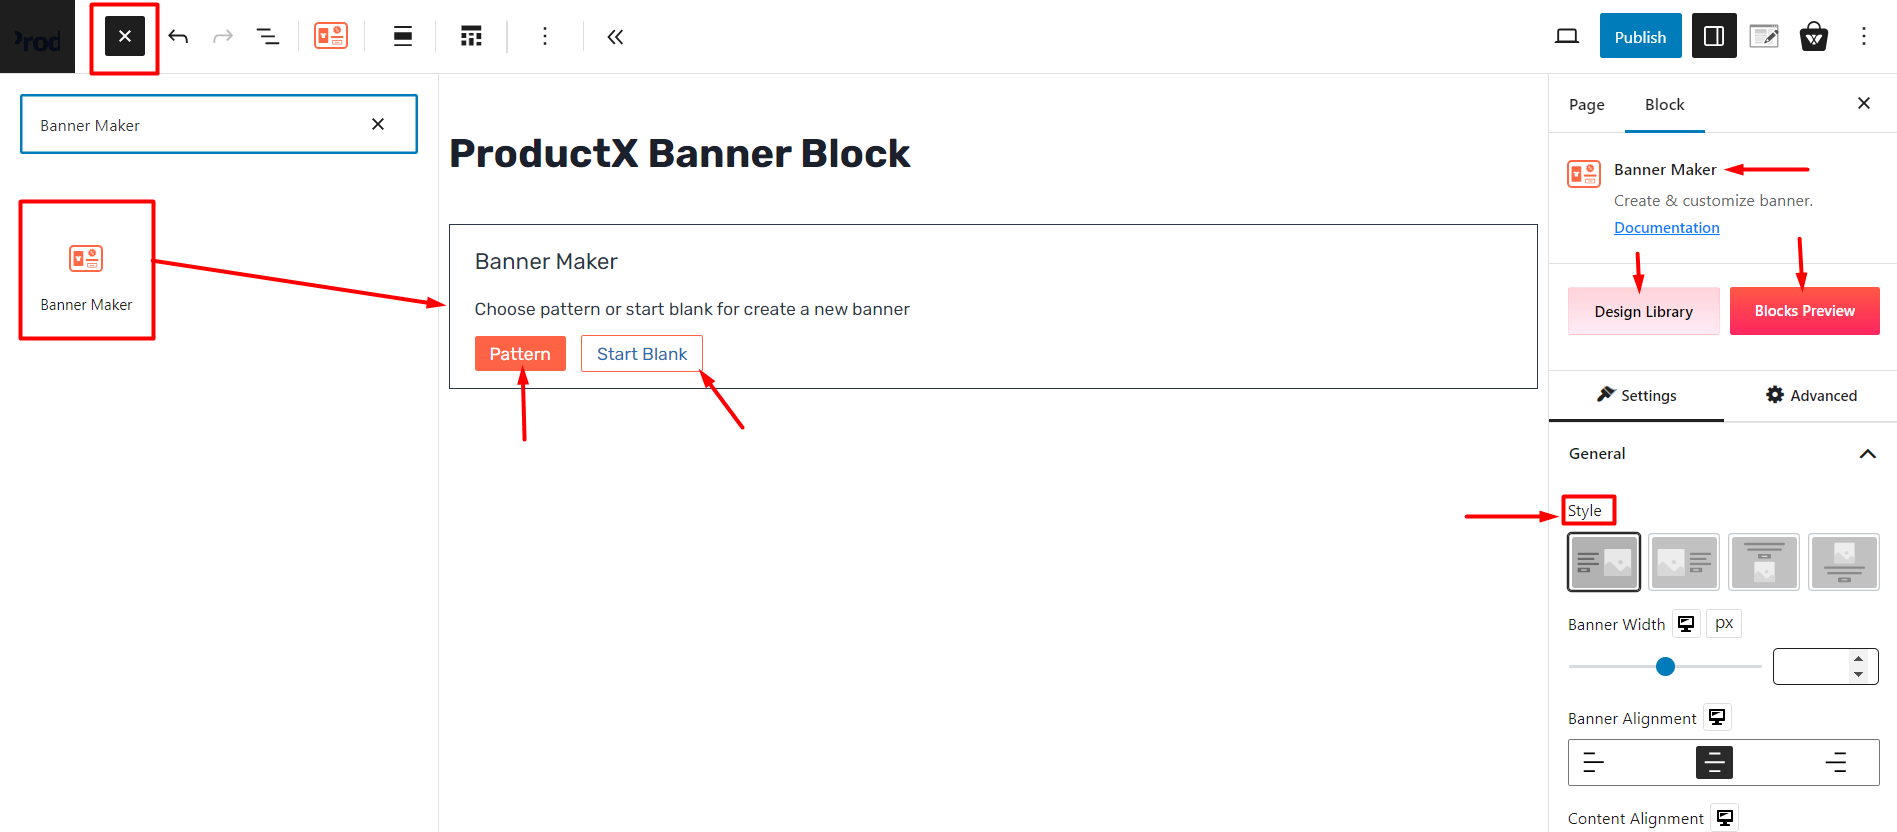
2. Bring the Banner Maker to the Page
You can bring the banner maker to the page in one of 2-ways:
- Click on the “+” icon on the page (located at the top left), search for the banner maker, and drag it to the page, or,
- Use the Forward Slash (“/”) and write “Banner Maker” and the block will appear
Again, you will not be able to use this feature if you don’t have the ProductX plugin installed and activated on your site.
Once you bring the banner maker on a page, you will be prompted to create a blank design or choose one of the pre-made patterns.
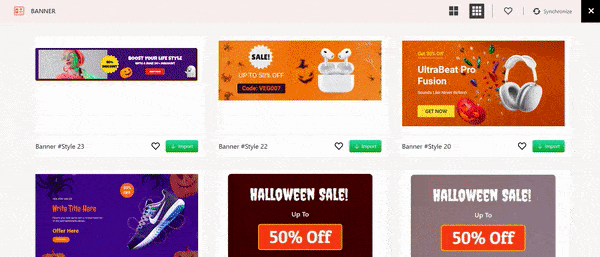
The Pre-made Patterns of ProductX Banner Maker
If you click on ‘Pattern’ you will be able to see the following window from where you can import the pre-made patterns. Also, you can check out the preview of the blocks.
Here’s a quick look at the pre-made patterns of the ProductX Banner Maker:
3. Customize the Banner
The Banner Maker comes with a good number of pre-made patterns. Also, you can create a custom design from scratch as well.
Customizing a Happy Halloween Banner from Scratch
If you choose to create a banner from scratch (“start blank”), you will be given a blank template with some ready options.
Global Styles
If you click on the banner (for both a blank design and pre-made banner designs), you will find the following:
- A global setting where you can choose between some pre-made layouts
- Change the banner width and alignment
- Gap settings between the image and the content
- Make the banner stackable on mobile
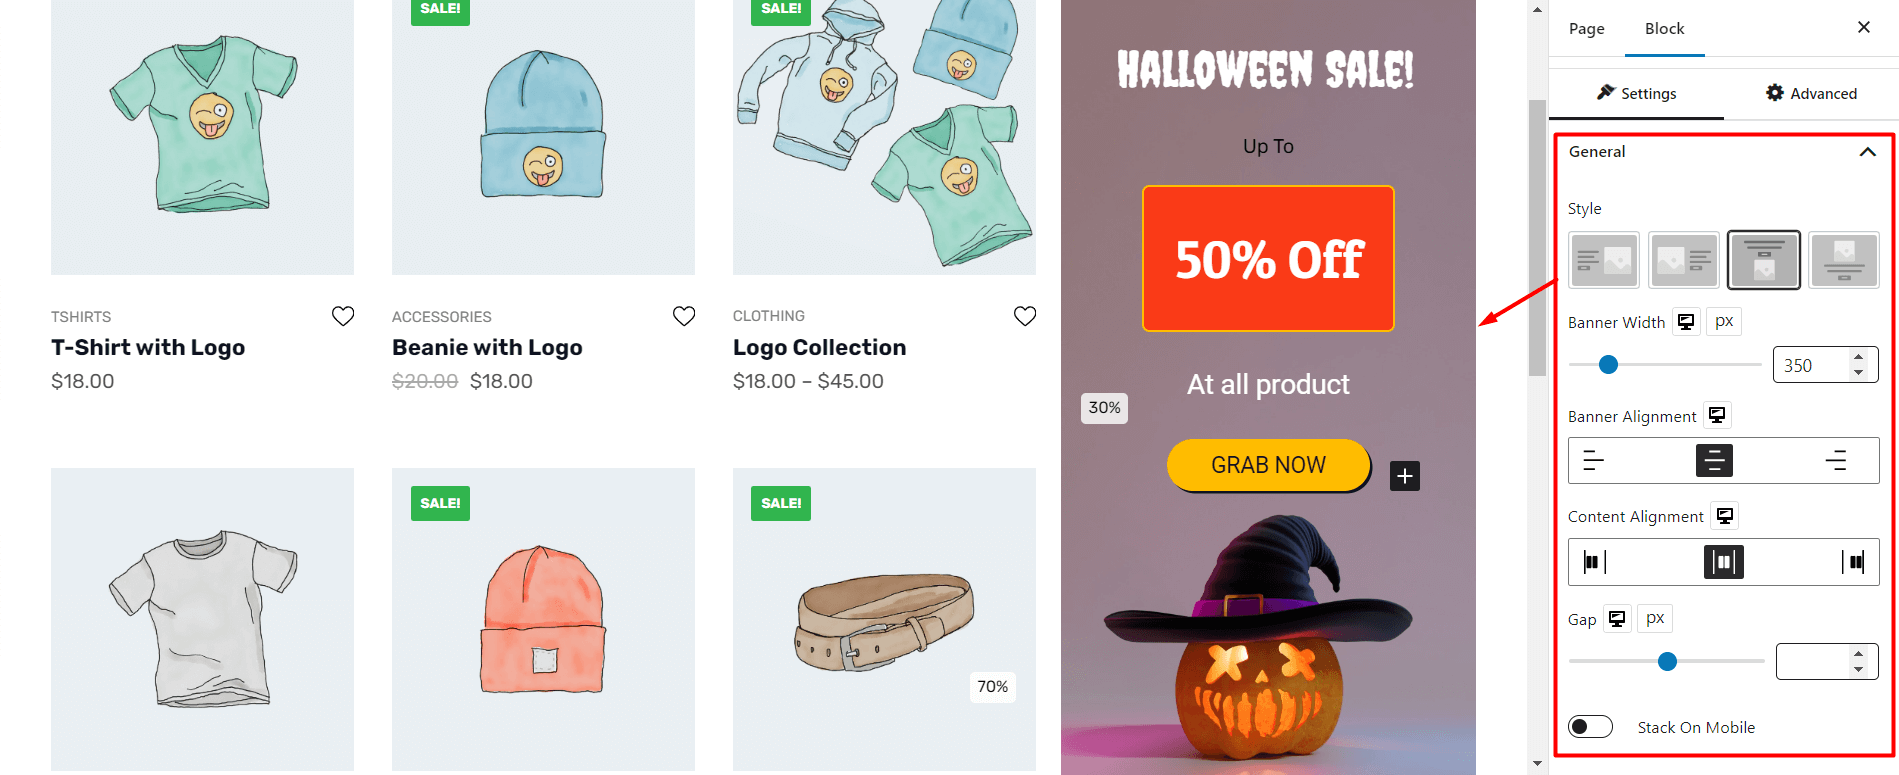
These are the general style options you will find for all banners. The rest of the settings – like the content for the promotion, background, and images are ones you can change.
If you click on content or click to include an image in the banner – the settings for that property will appear on the right.
Image and Offer Settings
The Image and the Offer Badge settings rely on each other (for some design patterns).
In the Halloween banner image settings, you are free to upload your desired image to the WooCommerce banner. You get the option to change the image scaling, width, and height. And you have the border and margin settings as well to make the image look better.
As for the Offer Badge Settings – it gives you the option to show the Product Discounts you are offering. There are certain badge styles from which you can choose from.
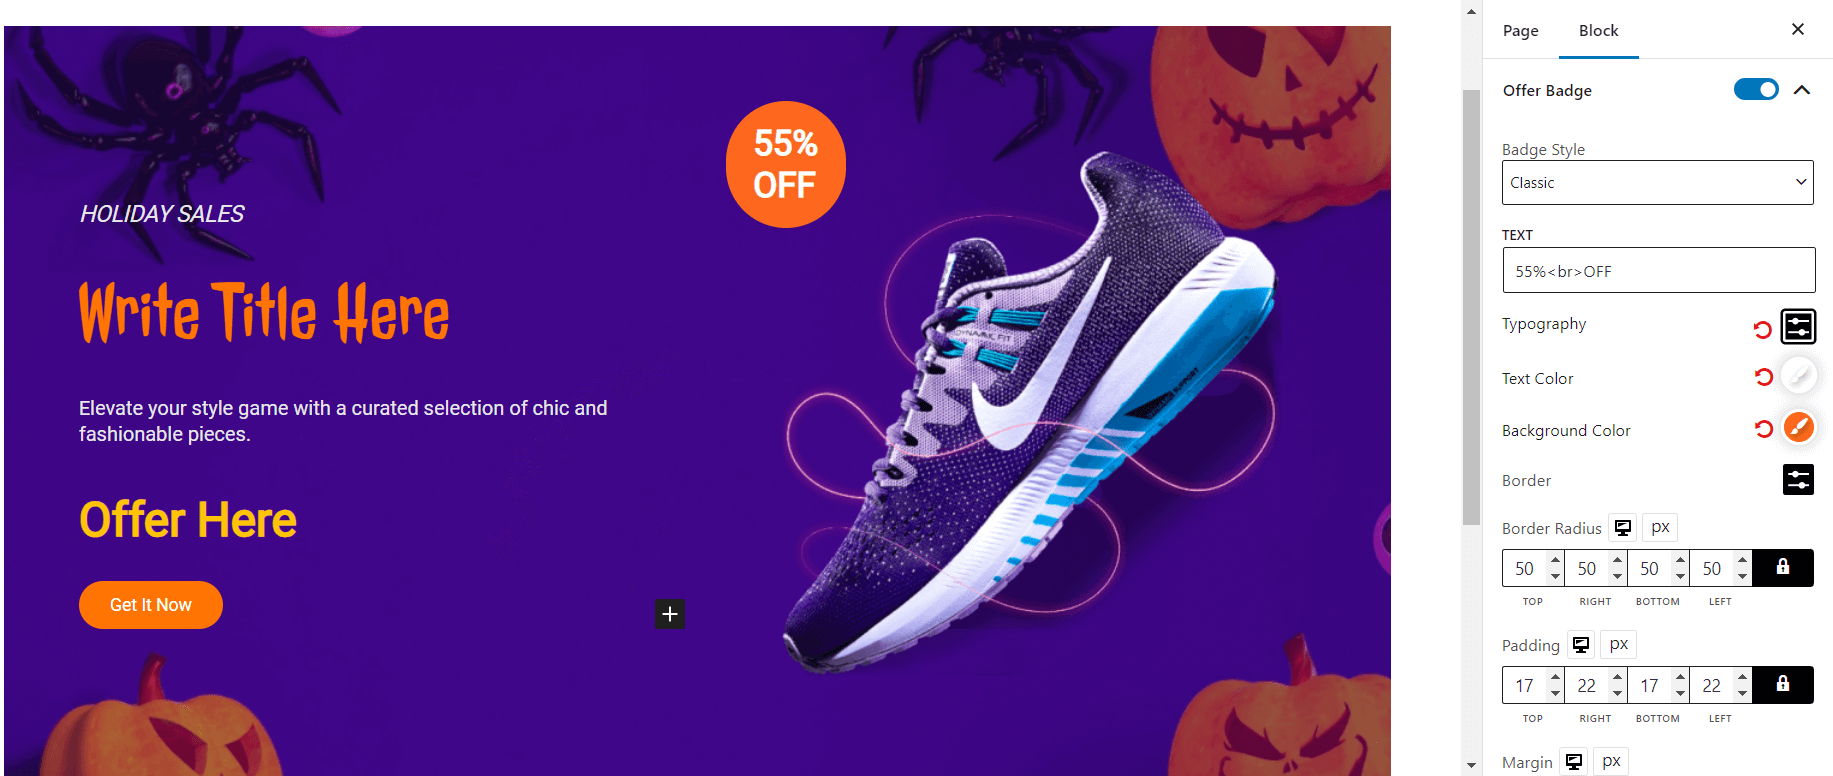
Also, you can choose where the banner will show using the Badge Position Setting. Furthermore, you have the Badge Position which helps you show the discount badge either with the image or in the entire banner.
Banner Background
The Halloween banner background is a crucial setting to showcase the banner in the right way.
The Background Fill is one of the important settings where you can change the background between a solid color, color gradient, or image.
Also, you can change settings like the Box Shadow, Banner Radius, and Padding. Furthermore, you can turn the banner into a clickable link by enabling the Banner link option.
Banner Button
The Banner Button is another important feature. You can simply make changes to the banner button settings by clicking on it (it works for other components on the banner as well).
The banner settings are very easy to control. It’s like the ProductX button group.
Content Settings
Finally, there’s the content setting. You can change the padding and margin settings from the Halloween Banner control.
However, if you are looking to change the text in the banner, simply click on the text you want to change.
You will be able to change the settings manually from the settings to the right. You have granular-level controls for the content.
These are the key settings you can access for the banner.
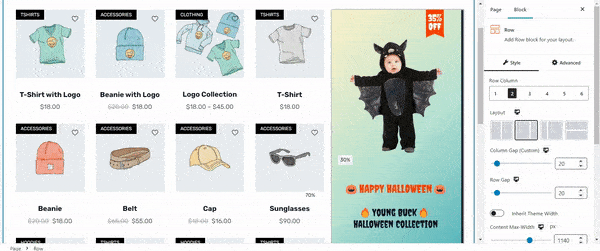
4. Publish the Banner Content
You are now ready to publish the banner. Once you publish the banner, you will be able to see the changes. Here’s a banner we created to showcase offers on kids Halloween costumes:
These are the steps to create a happy Halloween banner for ProductX promotion. But what if you wanted to use a pre-made banner?
How to Use a Pre-made ProductX E-commerce Banner for Halloween?
The process of using a Pre-made ProductX WooCommerce banner is super easy. Just follow the steps below:
- Create a new page or go to an existing shop page
- Bring the banner maker block to the page
- Click on Pattern
- Choose one of the pre-made banner templates
- Customize the template
- Publish the page
You can customize the banner using the controls and settings mentioned in the previous sections. You can choose from a wide variety of Halloween theme banner options. Here’s a quick demo:
Still feeling lost, we also have a blog post where we show you how to create a banner for a WooCommerce store. Read it to learn more about the banner maker of ProductX:
How to add a banner to WordPress Store?
FAQ
Here are answers to some important questions:
What types of banners can you design?
The ProductX WooCommerce plugin allows you to create vertical and horizontal style banners. You can adjust the width of the banners and the positioning to show it in the desired space. However, using it with the ProductX row block will yield better results.
What are the ideal banner sizes for promotion?
You can create various banner sizes for promoting your Products. However, 250×250, 468×60, and 728×90 pixel banner sizes have yielded good results for marketers.
Why should I use ProductX for creating digital banners?
If you are on the WordPress WooCommerce platform, then ProductX is your best choice because of the following reasons:
- The number of easy-to-use banner maker options is very small in the WordPress space.
- ProductX gives you a block-based banner maker that’s super easy to learn and use – giving you more opportunity for A/B testing.
- You have the flexibility to create a banner and place it anywhere on a page.
- The banner maker comes bundled with a full WooCommerce builder. So, ProductX doesn’t just allow you to build banners. It offers you the ability to create a full E-commerce store.
The pro-version of the ProductX plugin has a lot to offer. Also, there is a money-back guarantee. Why not take it for a spin and see whether or not it meets your needs:
Can Digital WooCommerce Sale Banners help improve sales?
Display add banners have proven to be effective when combined with social media marketing, guerrilla marketing, and other forms of marketing campaigns. So, display banner ads should be accompanied by other potential efforts to boost sales online.
Final Thoughts
Now that you know how to create a Halloween banner properly – how do you think it will help? We’ve shown you how to make a happy Halloween banner – do you think it will have an impact?
We urge you to try it out. Also, do share what impact it had on your business.
Cheers!