
Don’t want to read the full post?
Let your favorite AI assistant summarize it for you 👇
You’ve got a sale running. Or maybe you just dropped a new collection. But somehow, visitors scroll right past – no clicks, no conversions, nothing.
Sounds familiar?
The truth is, WooCommerce doesn’t make it easy to visually highlight what matters most. Popups can feel intrusive. Sliders are easy to ignore. And manually editing layouts every time? That’s just not scalable.
That’s where banners come in.
To add such a sales banner, you need to:
- Go to the page editor
- Add the Banner block
- Write your message and upload the image
- Customize the design (text, colors, layout)
- Save and publish
In this guide, you won’t just learn how to add a banner to your WooCommerce store. You’ll discover the right sizes, placements, and design principles that make banners actually work.
Let’s get started 💪
Why Add a Banner to Your WooCommerce Store?
A banner in WooCommerce is a visual element placed on your website to highlight important messages, such as promotions, announcements, or featured products.
Unlike popups or sliders, banners are embedded directly into the layout of your site. They blend with the design but still stand out enough to guide your customers’ attention where you want it most.
So, why does your store need banners?
Because your customers won’t always scroll or click deep enough to find what matters. They may miss your latest sale, seasonal offer, or even a new product launch. Unless it’s right in front of them.
That’s where banners shine.
Here’s what banners can do for your store:
- Promote time-sensitive offers like flash sales, coupon codes, or festive discounts.
- Drive traffic to high-margin or underperforming categories with targeted messaging.
- Showcase new arrivals or product collections without redesigning the homepage.
- Increase engagement by visually nudging customers toward your goals – signups, sales, or special campaigns.
- Keep the experience smooth without intrusive popups or attention-hogging animations.
Think of banners as your store’s built-in marketing assistant, always on, always visible, and always working to convert.
What is the Best Banner Size in WooCommerce?
Choosing the right banner size is crucial for making sure your message looks great and grabs attention, without slowing down your site or getting cut off on different devices.
There’s no one-size-fits-all, but certain standard dimensions work best across most WooCommerce stores and WordPress themes.
Common Banner Sizes for WooCommerce Stores
| Banner Placement | Recommended Size (pixels) | Notes |
|---|---|---|
| Homepage Hero Banner | 1920 × 600 | Full-width banners that stretch across the screen, great for big announcements and sales. |
| Sidebar Banner | 300 × 600 | Tall, vertical banners are ideal for sidebars or widget areas. |
| Inline Banner (Above/Below Product Grid) | 728 × 90 or 468 × 60 | Horizontal banners that fit neatly between product rows. |
| Mobile Banner | 320 × 100 | Smaller banners optimized for mobile screens. |
Why Banner Size Matters
- Visual clarity: Too small banners can make text unreadable, while oversized banners might push important content too far down.
- Performance: Large images can slow page loading, hurting user experience and SEO.
- Responsive design: Using recommended sizes helps ensure your banners display properly on desktops, tablets, and phones.
How to Add a Banner in WooCommerce (Step-by-Step)
As you know, WooCommerce doesn’t offer any built-in blocks for a sale banner or a simple banner. You need to use another Gutenberg block-based plugin that is compatible with WooCommerce.
There are several plugins that offer banner templates for WooCommerce store owners. However, considering all the factors, I have decided to go with WowStore.
WowStore is a WooCommerce store builder with the Gutenberg block, which is fully compatible with WooCommerce’s environment.
I will demonstrate the step-by-step guide to add a banner to your WooCommerce store. But before that, ensure you have installed and activated the plugin. Follow the official documentation on the installation process if you need.
Step 1: Go to the editorial interface of the page
First, you need to decide where to display the banner. Go to the editorial interface of that page and find a suitable place.
I chose to add the Home page here and decided to show the banner at the top of the page.
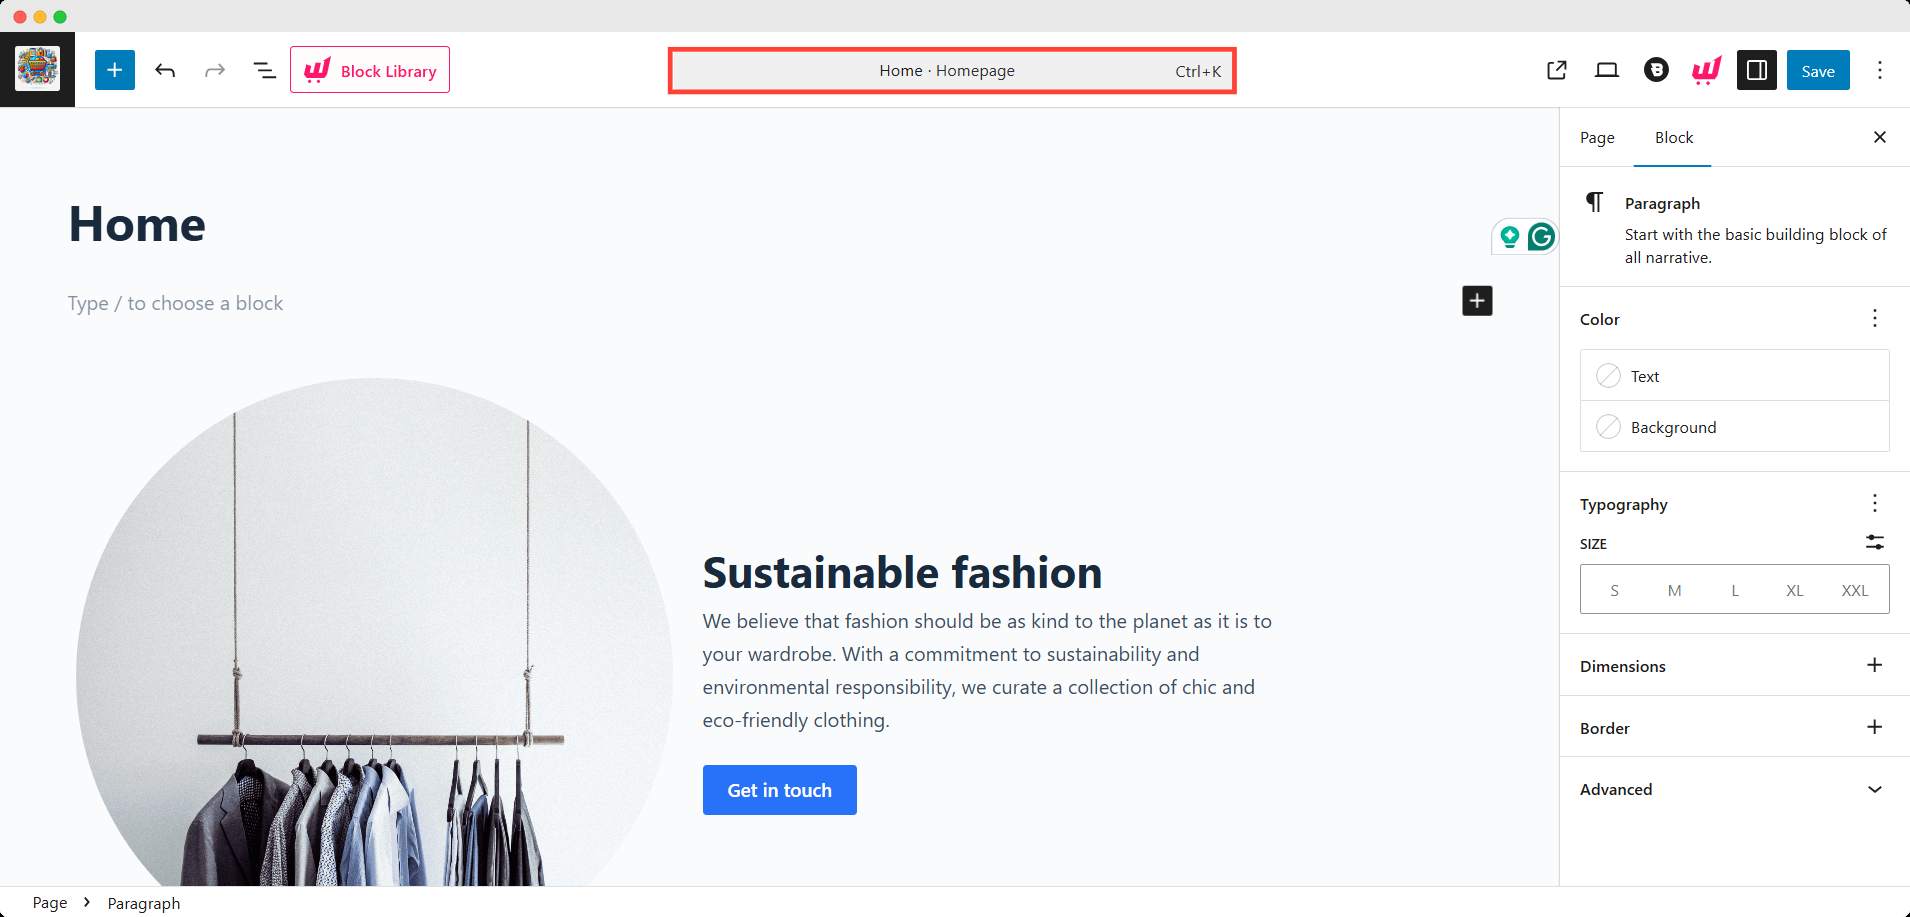
Step 2: Add Banner block
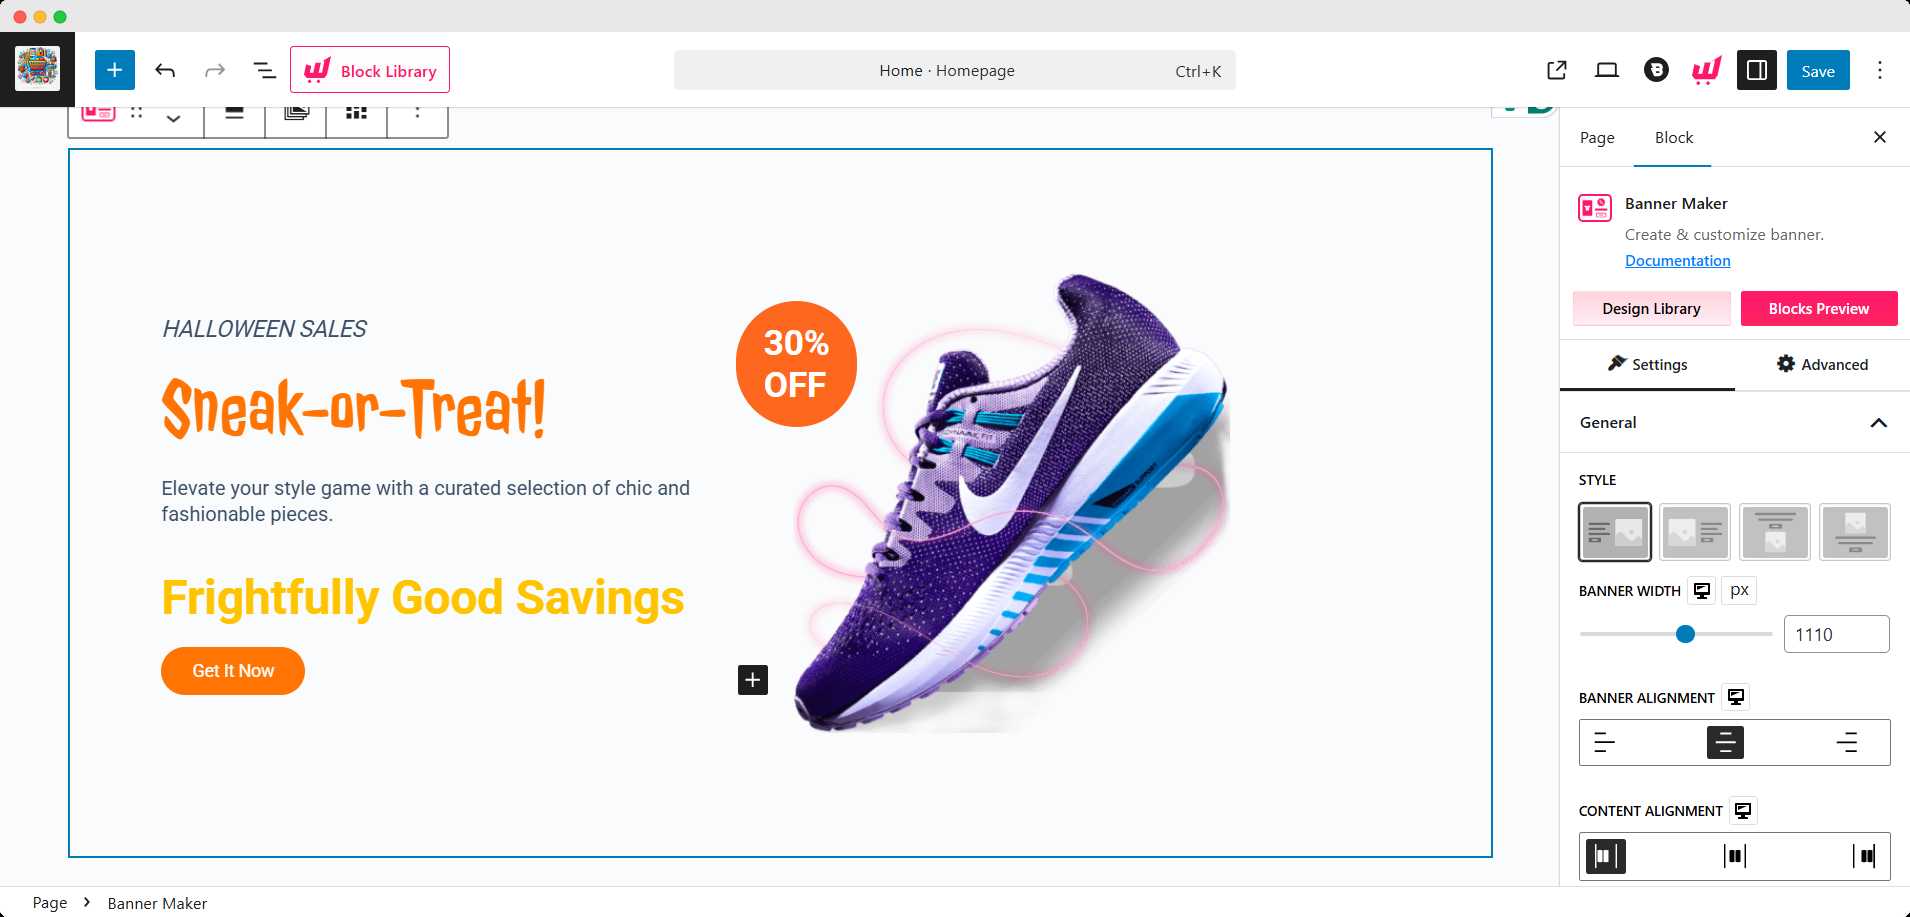
Now, I clicked the +(plus) icon to add a block. Searched for the Banner block and clicked on it.

It added to my preferred place on the homepage. This is a default template. I can choose any template. To do that, I clicked the design library on the right sidebar.
Choose any of the premade templates you want.
Step 3: Craft a message and add the banner image
After selecting the template, I added my promotional message to inform the customers. Also added an attractive image to get their attention.
Then linked the button to my desired page where I want them to explore, what I want to show them.
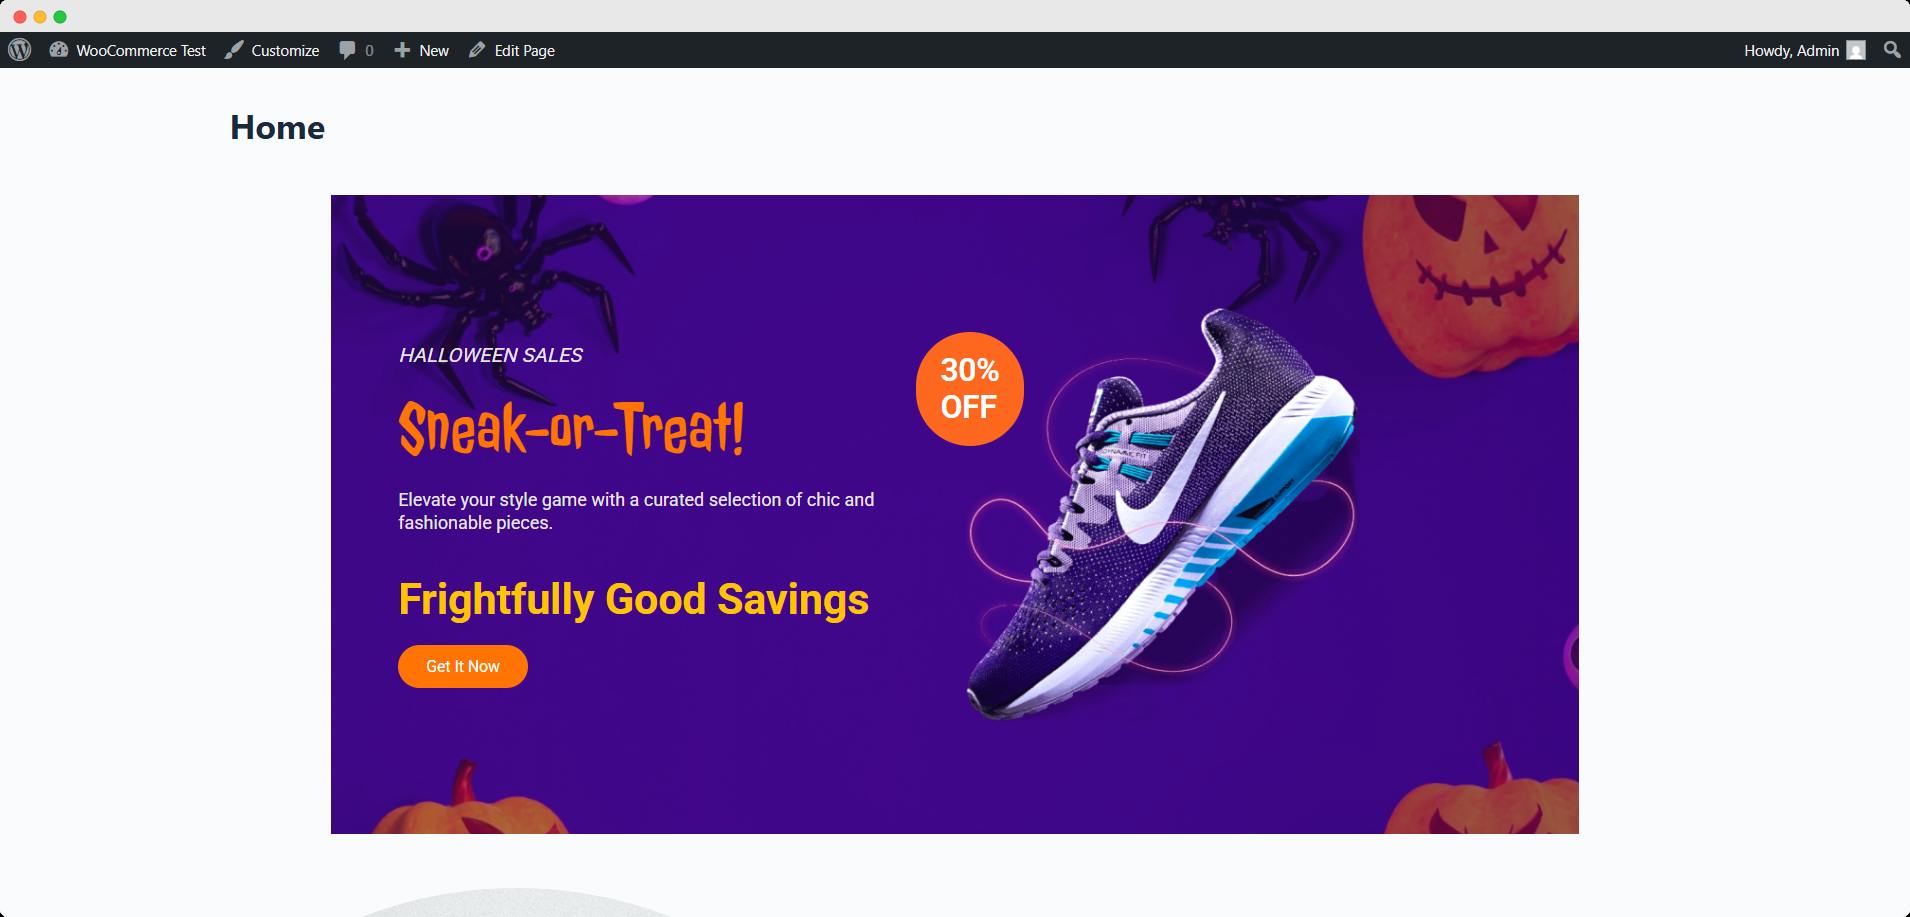
This is what I created.
Step 4: Design the banner
Next, you need to design the banner, make it eye-catching, and meaningful. It also represents your brand aesthetic, so design the banner carefully.
I changed the typography, color, and other appearances.
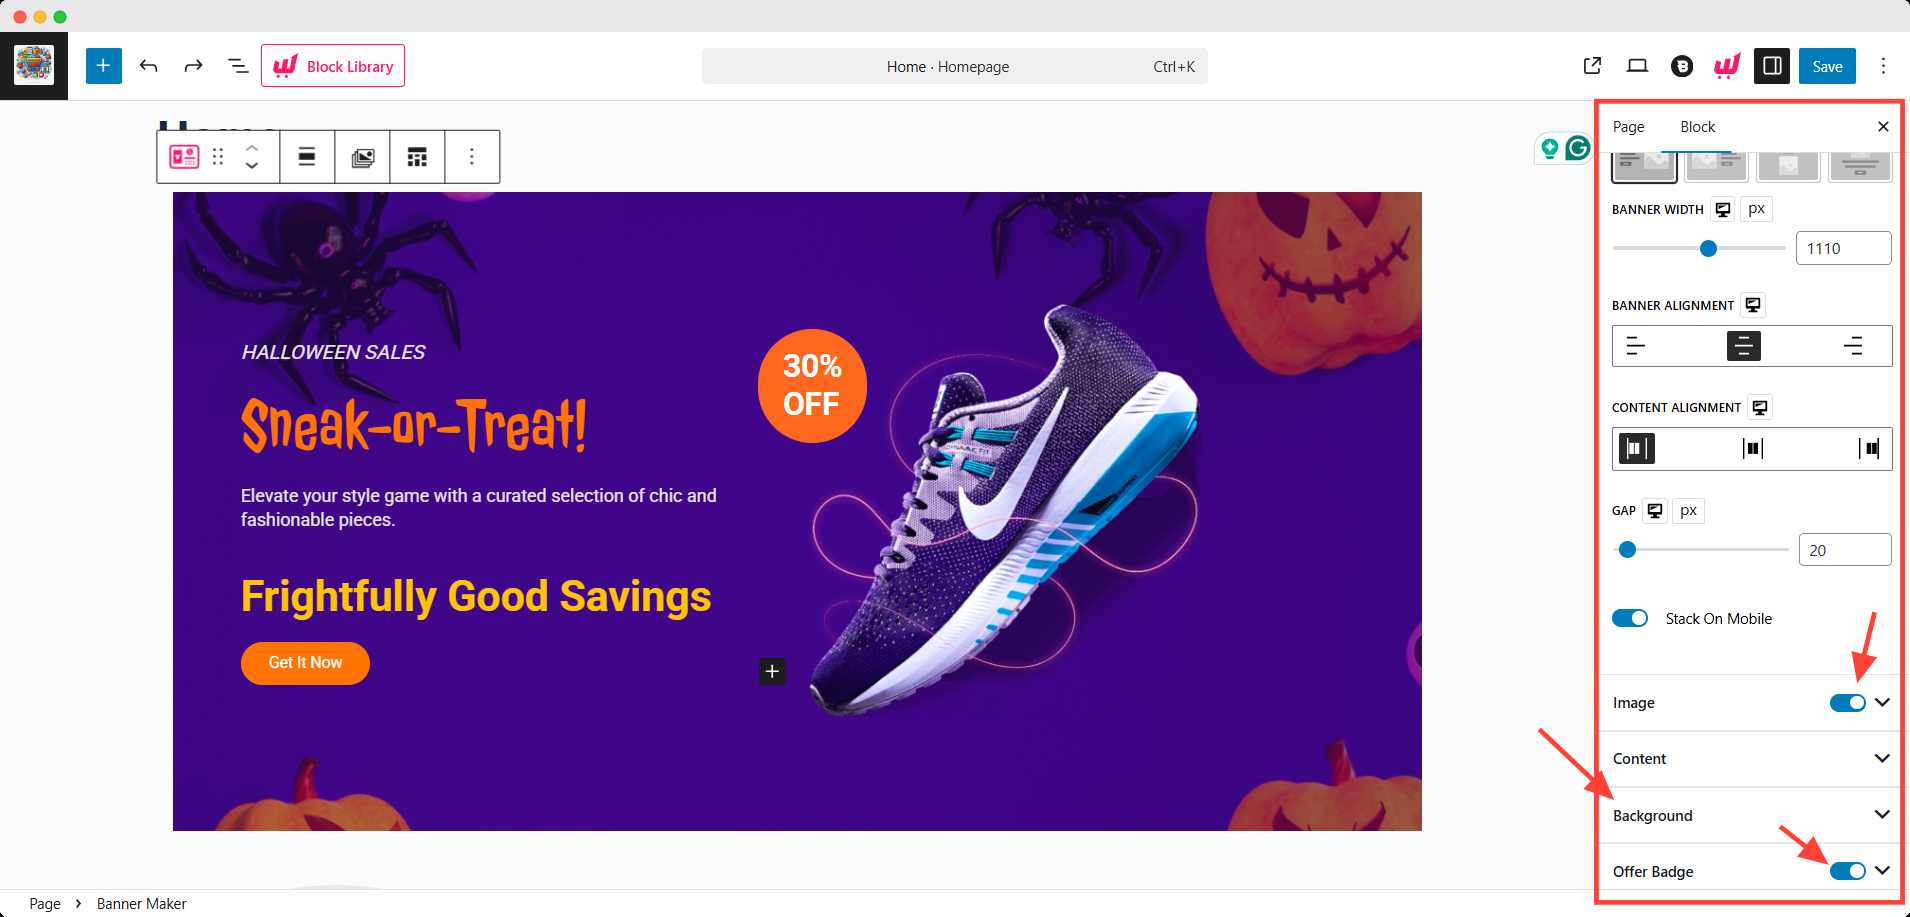
Step 5: Save and Publish
Finally, hit the save button to make the banner live on your page. Also, save any further changes you made to the banner.
This is the final outcome of the banner that appears on the homepage.
Note: This was created using the free version of WowStore.
Best Practices for WooCommerce Sales Banner Design
Designing a banner isn’t just about picking a pretty image; it’s about getting attention and driving action. A well-designed sales banner can increase clicks, reduce bounce rates, and guide users toward your key products or promotions.
Here’s how to make yours effective:
1. Keep the Message Clear and Short
Visitors should understand your offer in 3 seconds or less. Use concise, benefit-driven copy:
- Buy 2 Get 1 Free
- Up to 40% Off – This Weekend Only
- New Arrivals Just Dropped
Avoid vague or cluttered messaging that forces the user to guess.
2. Use High-Quality Images (But Keep Them Light)
Visuals matter, but performance matters too. Use:
- Compressed JPG or PNG files (under 500 KB if possible)
- Transparent PNGs or SVGs for clean icons or logos
- Consistent color tones that match your brand or sale theme
💡 Pro Tip
Use tools like TinyPNG or Squoosh for image compression without losing quality.
3. Maintain Good Contrast Between Text and Background
Your headline should pop, not blend in. Use dark text on light backgrounds or vice versa. Consider adding a semi-transparent overlay on images to improve text readability.
4. Make It Mobile-Responsive
Check how your banner looks on mobile devices, not just desktop.
- Use flexible-width containers or percentage-based layouts
- Avoid cramming too much text or buttons on small screens
- Always test with multiple screen sizes
5. Add One Clear Call-to-Action (CTA)
Don’t overwhelm with options. Stick to one CTA per banner, like:
- Shop Now
- Browse Collection
- Get the Deal
Make the button large, noticeable, and tappable on mobile.
6. Align the Banner With Your Store’s Goal
Design each banner with intention:
- Want more newsletter signups? Highlight that.
- Want to clear out last season’s stock? Say it.
- Launching a new product line? Make it the hero.
Every banner should answer: What do I want the user to do next?
Banner Placement Ideas to Maximize Visibility
Placing your banner in the right spot is just as important as designing it well. Even the most attractive banner won’t help if users never see it or scroll past it too quickly.
Here are the best-performing banner placements in a WooCommerce store:
1. Homepage Hero Section (Top of the Page)
This is the most valuable real estate in your store.
Placing a full-width banner at the very top of your homepage grabs instant attention. It’s ideal for:
- Store-wide sales
- New product launches
- Seasonal campaigns
💡 Pro Tip
Use a 1920×600 banner with a bold headline and clear CTA.
2. Above or Below Product Grids (Shop or Category Pages)
Placing a banner just above the product listings helps guide buyers before they start browsing. Use it to:
- Highlight limited-time deals for specific categories
- Promote bundles or upsells
- Announce flash discounts on related items
You can also add a banner below the grid as a secondary reminder.
3. Inside Product Pages (Under Description or Above Add to Cart)
Use this space for product-specific promotions, like:
- Buy 2, Get 1 Free on This Item
- Free Shipping Over $50
- Limited Stock – Order Soon
These banners can drive urgency and increase order value.
4. Sticky Top Banners or Notification Bars
Sticky banners remain visible while users scroll, perfect for:
- Free shipping alerts
- Countdown timers
- Coupon codes
💡 Pro Tip:
Make sure it doesn’t block content on mobile. Tools like WowStore or banner bar plugins can help you implement this easily.
5. Cart and Checkout Pages
This is often overlooked but highly effective. You can:
- Promote upsells (Add this product to qualify for 10% off)
- Offer last-minute deals
- Remind about free shipping thresholds
These banners can directly impact average order value (AOV).
Troubleshooting: Common Banner Issues
Here’s a quick-reference table of common banner problems in WordPress/WooCommerce stores, their causes, and solutions:
| Issue | Possible Causes | Fix / Solution |
|---|---|---|
| Banner Not Showing | – Visibility not set – Theme or plugin conflict – Cached content | – Check display rules in banner settings – Clear cache – Test with default theme |
| Blurry or Cropped Image | – Low-res image – Wrong aspect ratio – Theme auto-resizing | – Use recommended sizes (e.g., 1920×600) – Apply cover or contain setting – Avoid upscaling small images |
| Breaks on Mobile | – Fixed widths – No mobile responsiveness – Overlapping content | – Use percentage-based sizing – Adjust the layout in mobile view – Add padding/margins as needed |
| Old Banner Still Displays | – Browser or CDN cache – Image not updated | – Clear all caches – Rename or replace the image with a new file |
| Layout Broken or Overlapping | – CSS conflict – Incorrect z-index – Using margins instead of padding | – Inspect with browser dev tools – Use padding for spacing – Adjust z-index if sticky/fixed |
💡 Pro Tip
If you’re using a visual builder like WowStore, most of these issues can be fixed directly within the block settings, no custom code needed.
Frequently Asked Questions on Sales Banner in WooCommerce
Can I show different banners on different pages?
Yes! If you’re using a plugin like WowStore, you can apply conditional display rules to show different banners on specific product pages, categories, or user roles.
How do I make my banner mobile-responsive?
Use percentage-based widths, avoid fixed pixel dimensions, and test using your theme’s mobile preview or browser dev tools. Most modern banner blocks include mobile layout controls for padding, alignment, and text scaling.
What type of content should I use in a sales banner?
Focus on clear, actionable content like:
- Limited-time discounts
- New arrivals or featured collections
- Free shipping or bundle deals
- Call-to-actions like Shop Now or Claim Offer
Visual consistency and clarity are key.
Conclusion: Add a Banner That Converts
A well-placed, well-designed banner isn’t just a visual upgrade; it’s a silent salesperson.
From homepage hero sections to product page promos, banners help guide visitors, promote key offers, and boost your WooCommerce store’s performance without disrupting the shopping experience.
By following best practices for banner size, placement, and messaging and using the right tools, you can turn every banner into a conversion opportunity.
Whether you’re launching a new collection, running a weekend sale, or just trying to improve user flow, a smartly placed banner can make all the difference.
And the best part? You don’t need custom code or a designer. With tools like WowStore, you can create and display responsive, high-converting banners in minutes.
Ready to design a banner that actually works?
→ Start with your homepage. Make it count.
For more helpful tips, stay connected with our LinkedIn Newsletter.

