Currency Switcher for WooCommerce
Expand your E-Commerce store globally with the WowStore Currency Switcher for WooCommerce! Automatically convert prices to customers’ local currencies dynamically.

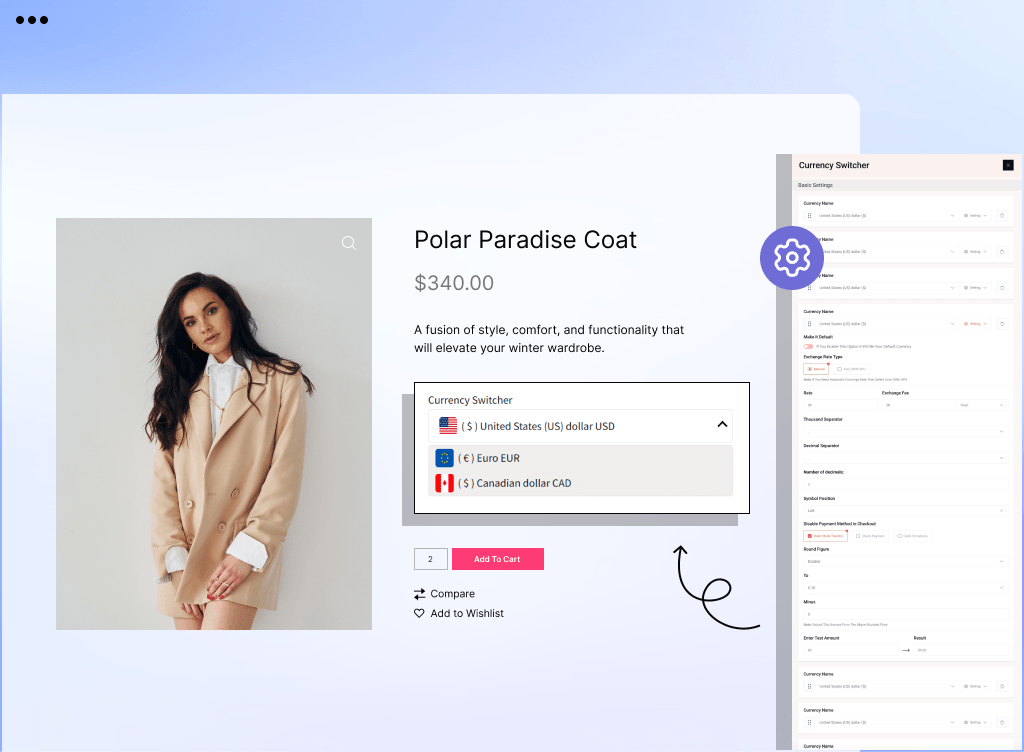
Select and Configure Currencies
Choose multiple currencies with this WooCommerce currency switcher addon. Set rate conversions manually – let users enjoy local rates on your store.
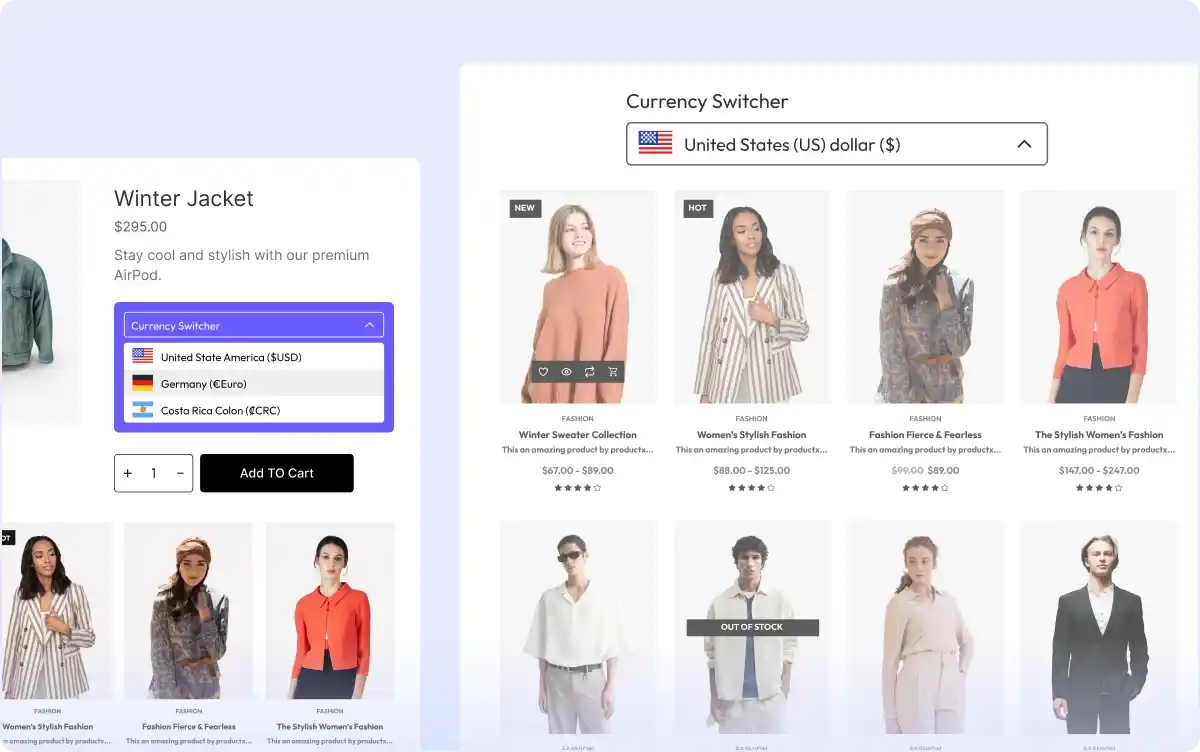
Display on Product Listing and Single Product Pages
Place the multi-currency switcher block on shop listings, single products, carts, and checkout pages, enabling real-time price views in preferred local currencies.
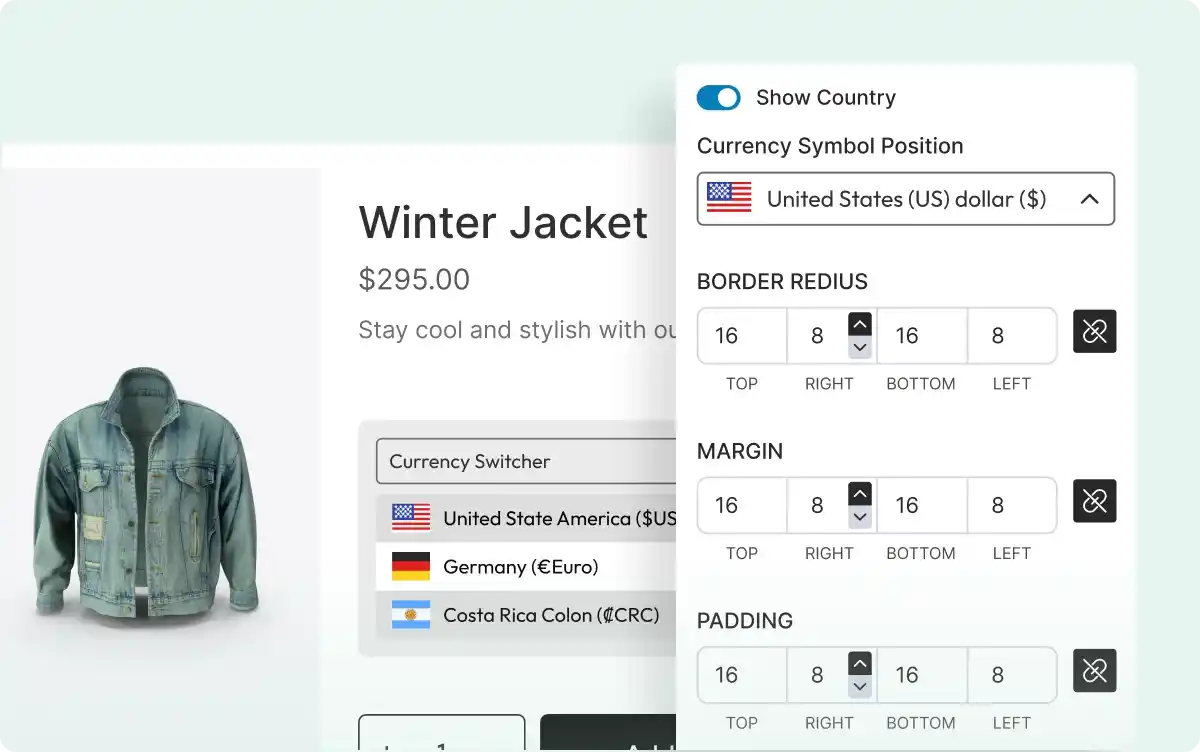
Customize Currency Switcher Appearance
Modify text colors, hover effects, backgrounds, borders, etc, in the currency block to align with your WooCommerce store’s branding – share a personalize experience online.
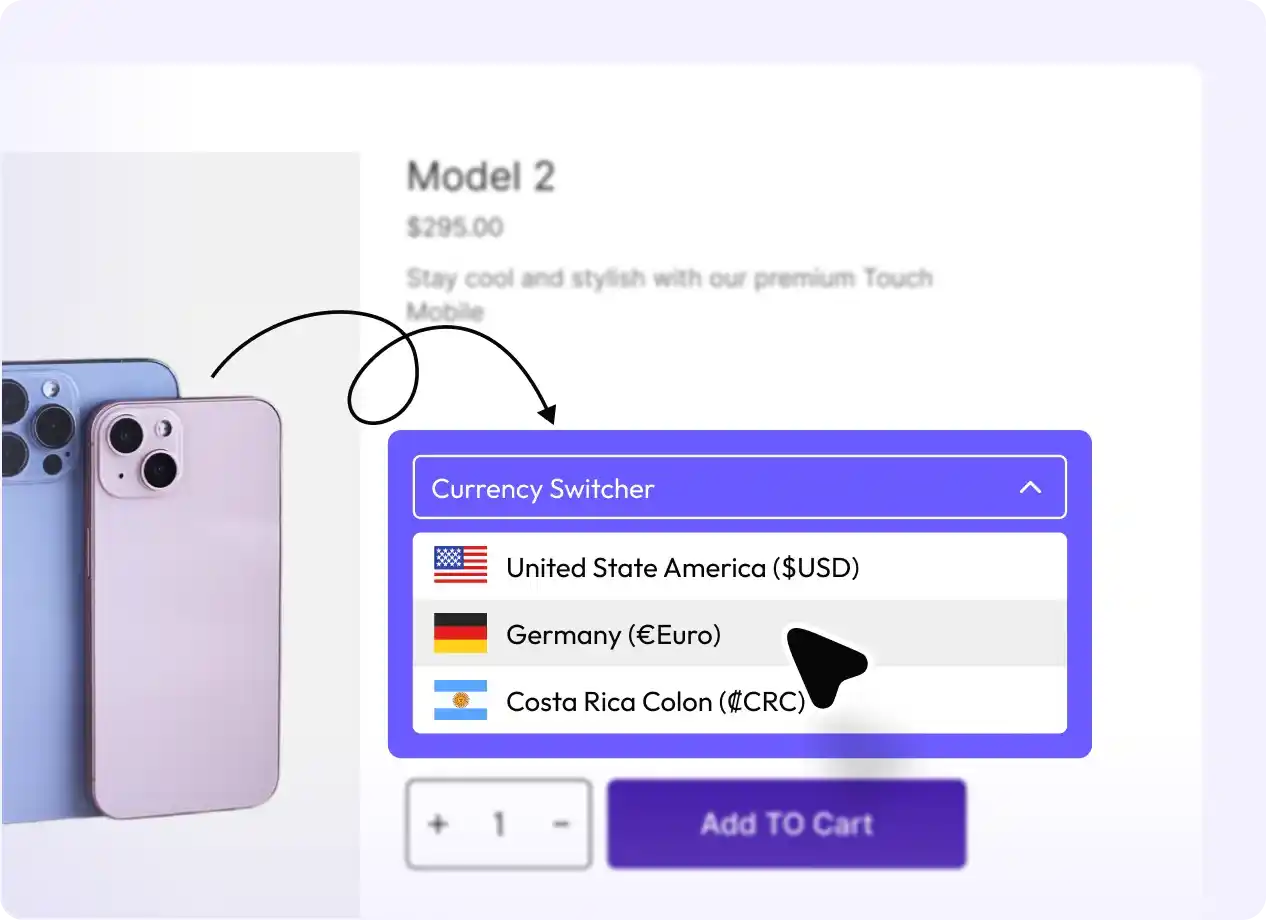
Dropdown Selection for Multi-Currency
Use the dropdown for switching to local currencies – super helpful for intuitive, region-specific purchases. Helps build user engagement with your store.
All-In-One WooCommerce Page Builder for Gutenberg to Scale Your Business
Get started with the most feature-packed WooCommerce Page builder to create, manage, and increase sales of your online store.
Frequently Asked Questions
Explore these frequently asked questions about the Currency Switcher that you might be curious about. So, you can make a quick decision about whether you want to buy it.
Feel free to contact our support team in case you have more questions.
Build & Manage Your Stores with Our WooCommerce Builder