WordPress columns are amazing and flexible blocks that help you escape the usual website layouts. With them, you can make your pages look attractive like a magazine, and your visitors will remember your site for a long time. But how to add columns in WordPress?
- If you’re using the default editor, then just go to a page and search for the column block.
- But if you’re using PostX, then add the Row block and then from the layouts, choose any column style and customize it with tons of options.
Are you still getting it confusing? Don’t worry; it doesn’t matter if you’re new to WordPress or have experience with it; we invite you to discover the wonders of using columns. So let’s read on till the end.
What are WordPress Columns?
In WordPress, the term “columns” refers to a block that enables you to showcase content in a side-by-side layout, enhancing visual appeal and readability. In easy words, columns are a practical and efficient way to arrange content or present complex information on WordPress websites’ posts and pages. Fortunately, there are multiple methods to add columns to your WordPress site, and the process is straightforward.
The default Gutenberg editor comes with a column block. But if you want some advanced customization options, you can go with a plugin like PostX that offers additional blocks.
Method 1: How to Add Columns in WordPress Using Default Editor
Let’s start with the easy method – the default WordPress column block.
Step 1: Login and Create a Post/Page
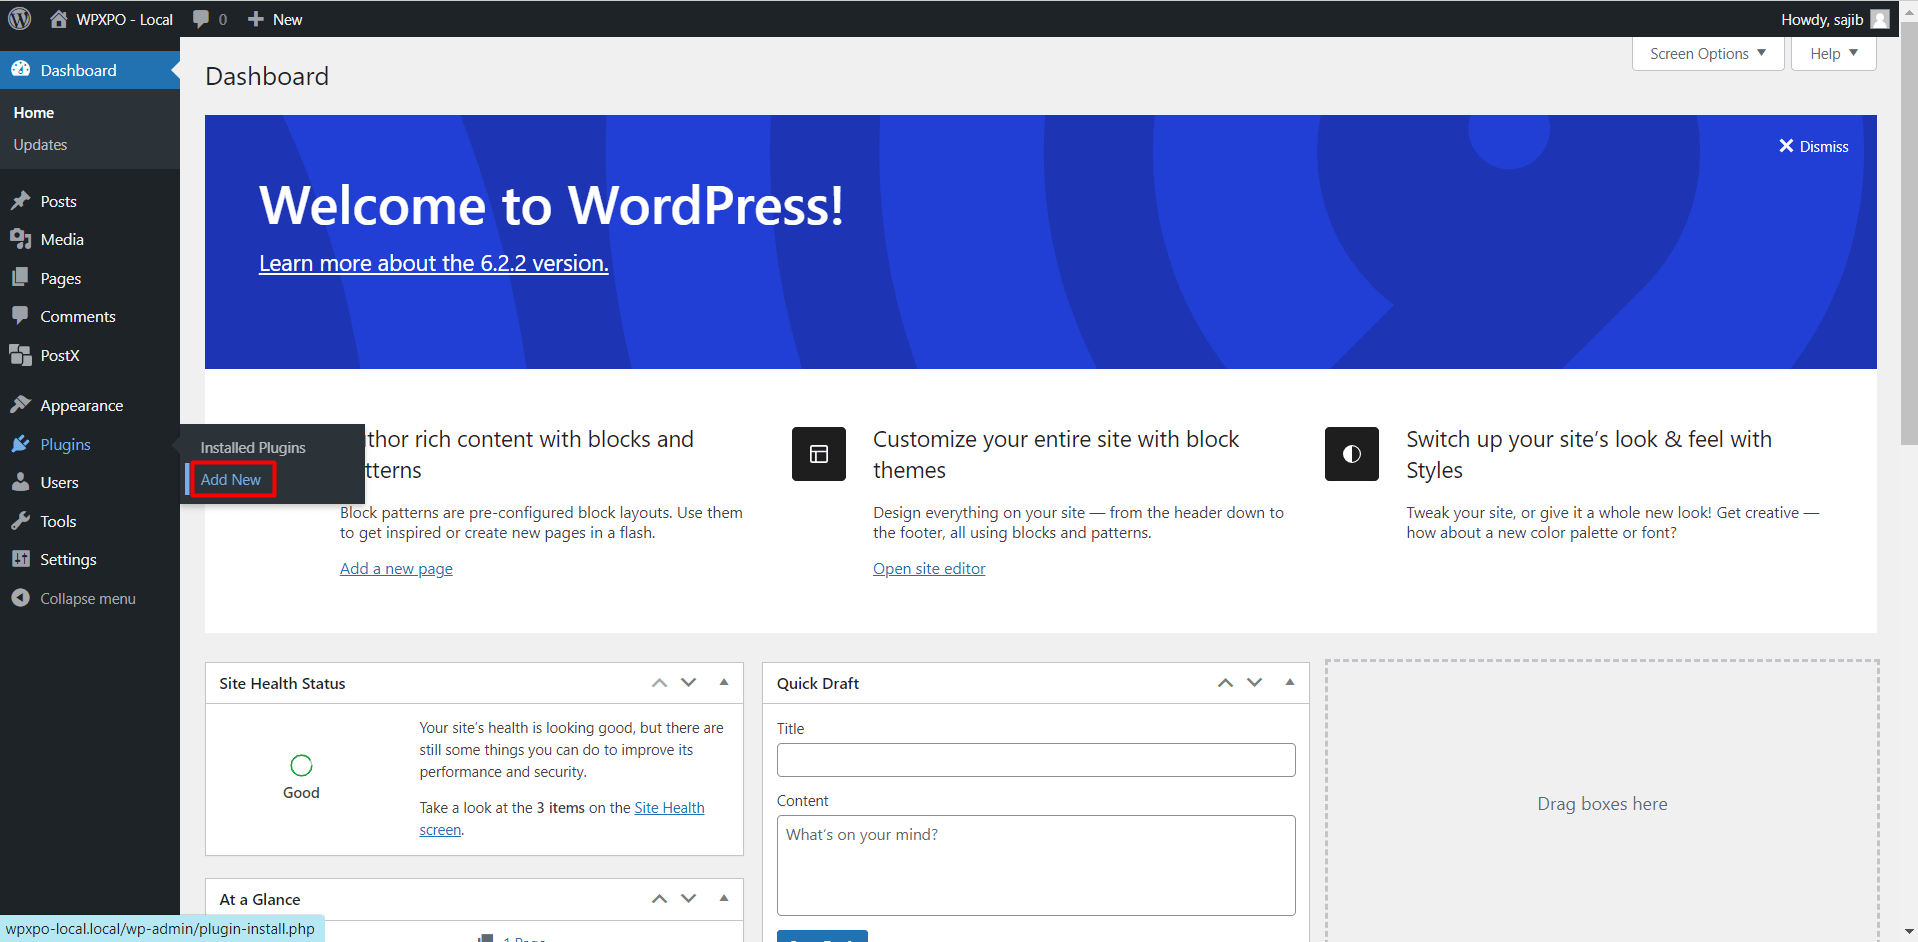
In the first step, log in to your WordPress dashboard and find the “+ New” button at the top. Now move the cursor to your desired location and, based on your preference, add either a Post or a Page.
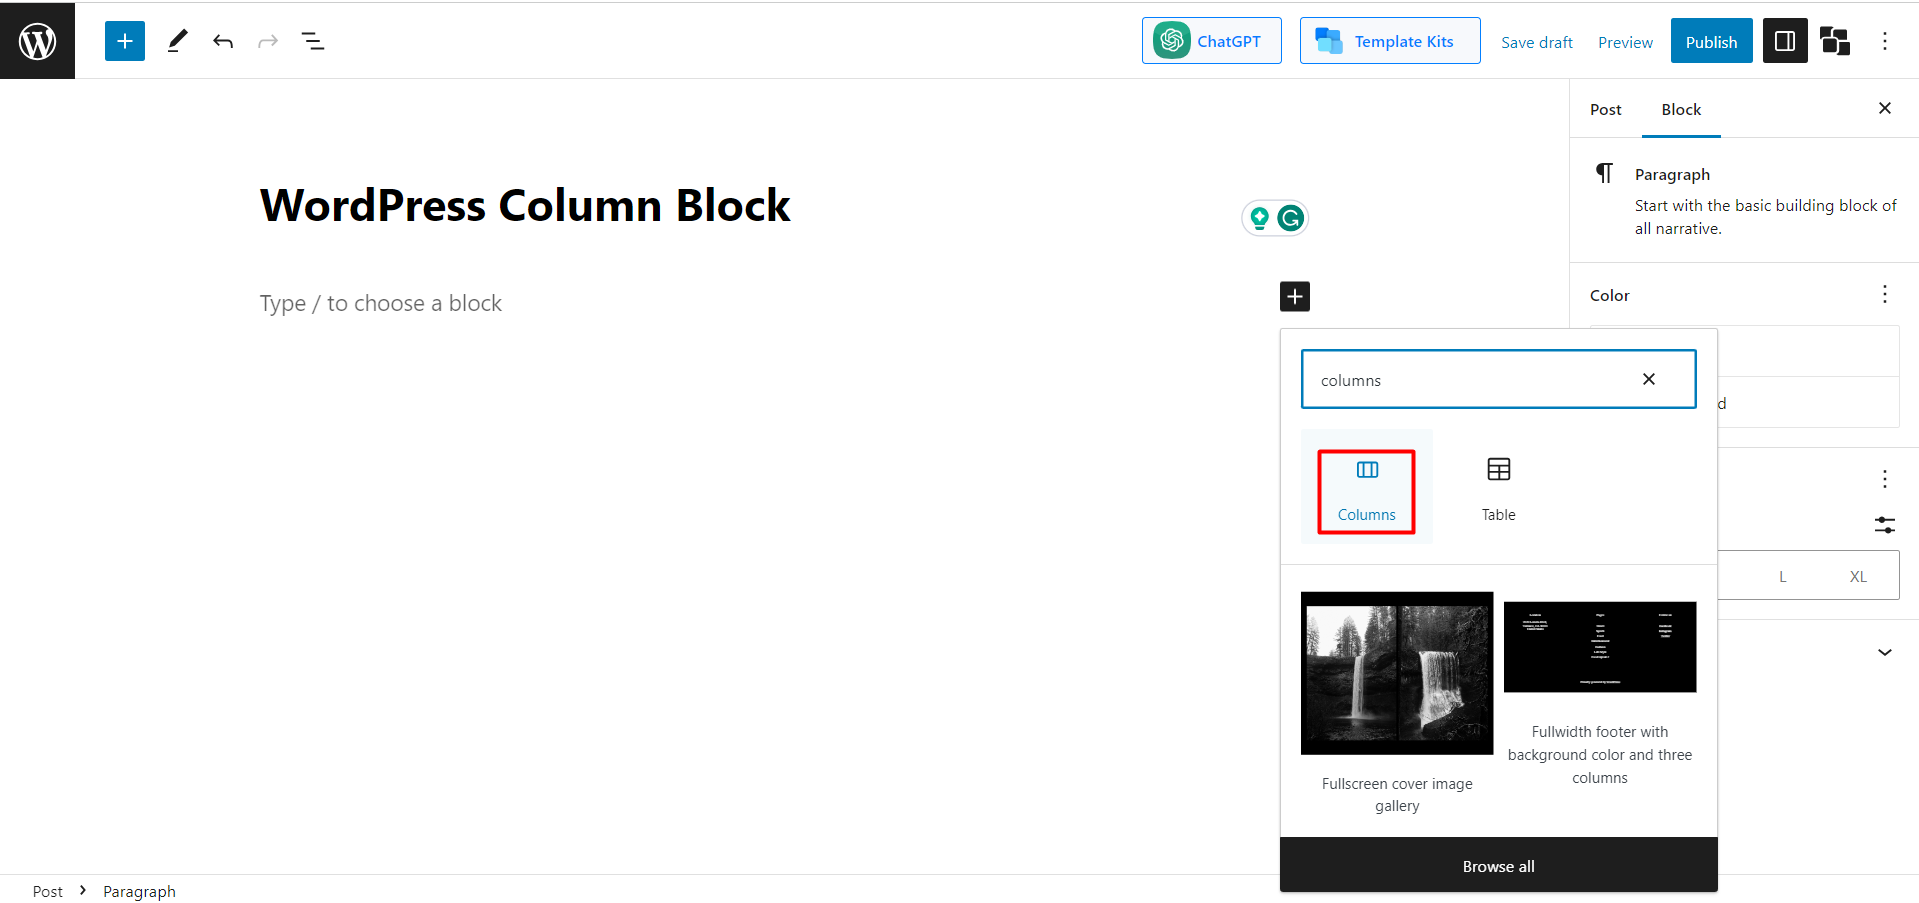
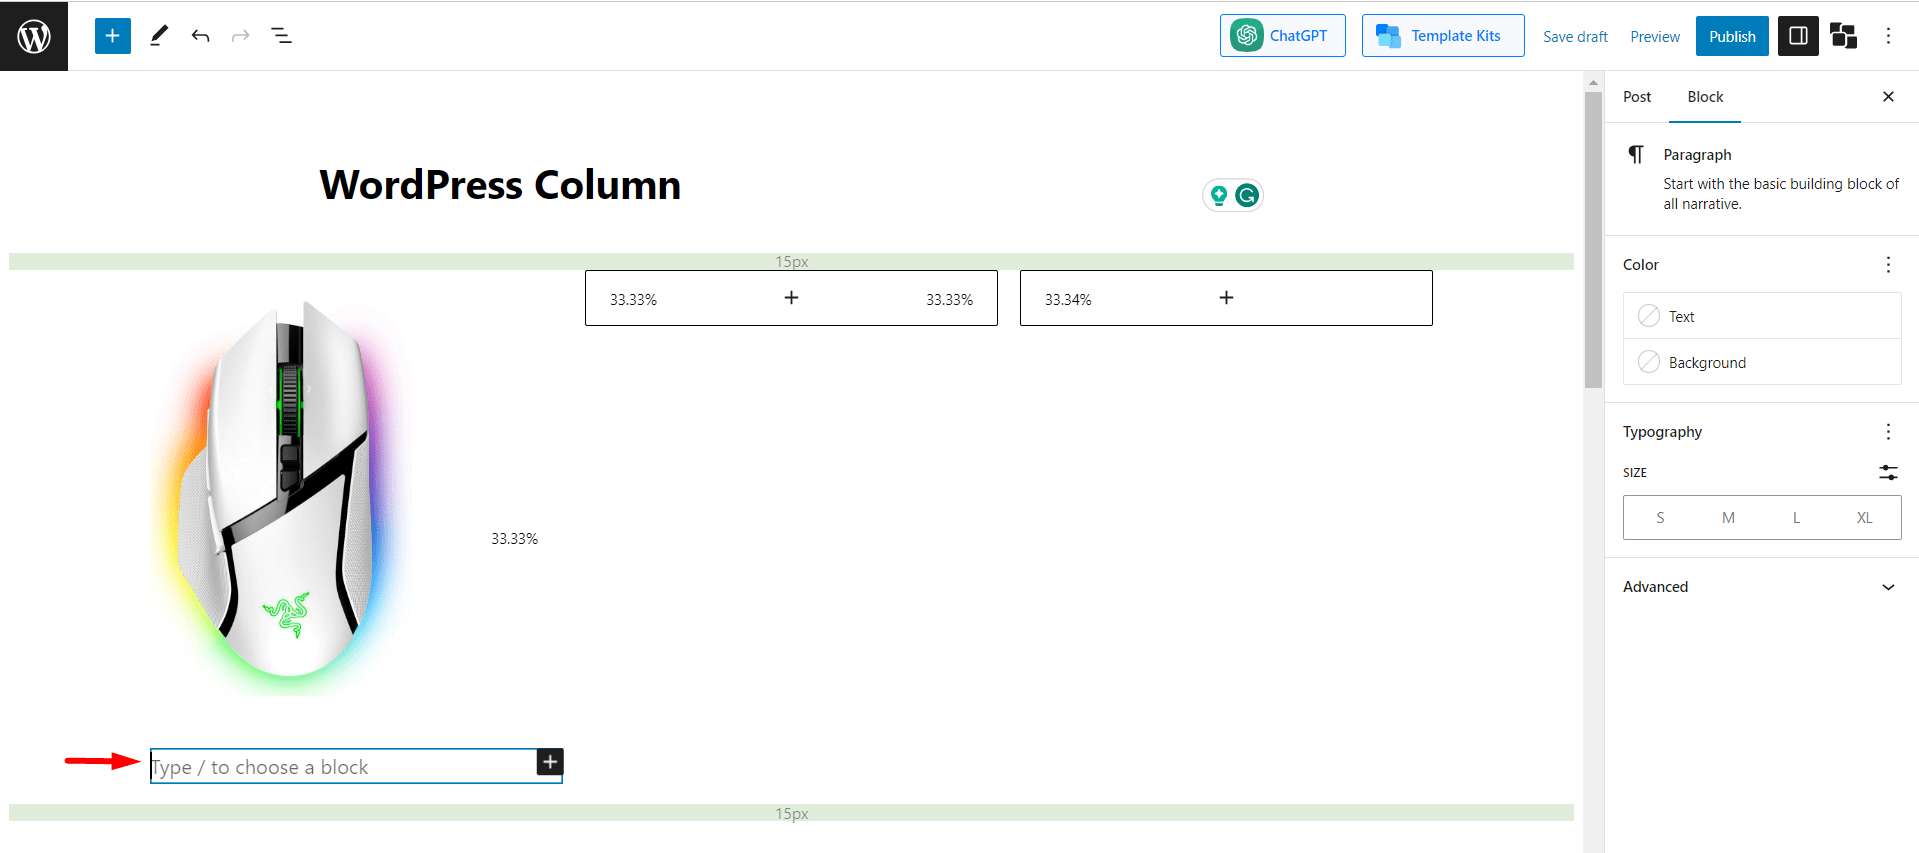
Step 2: Add the Column Block
Now click the Add block option or “+” button, and you’ll notice a search box. Then in the search box, type “Columns,” and you’ll find the column block icon.
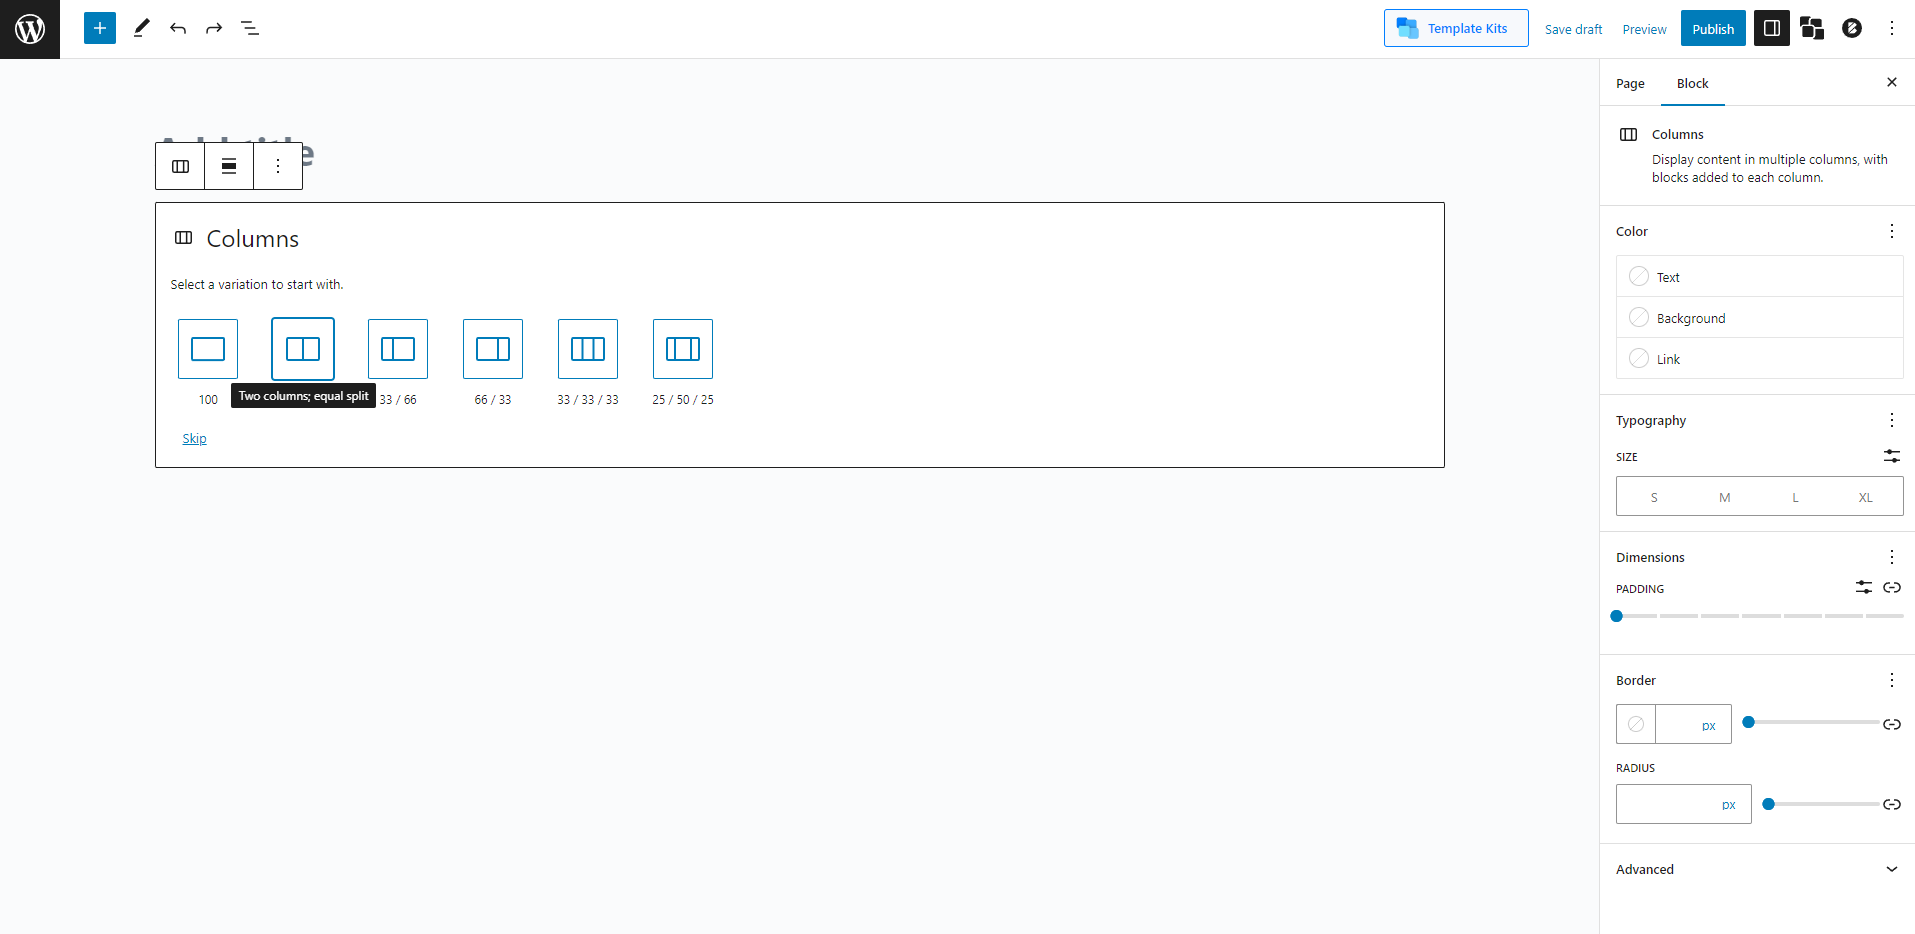
Step 3: Choose the Number of Columns
After adding the columns block, you’ll be asked to choose a variation. There are 6 variations, for example, 100, 50/55/, 33/33/33, etc. Let’s move on with the 50/50 Columns.
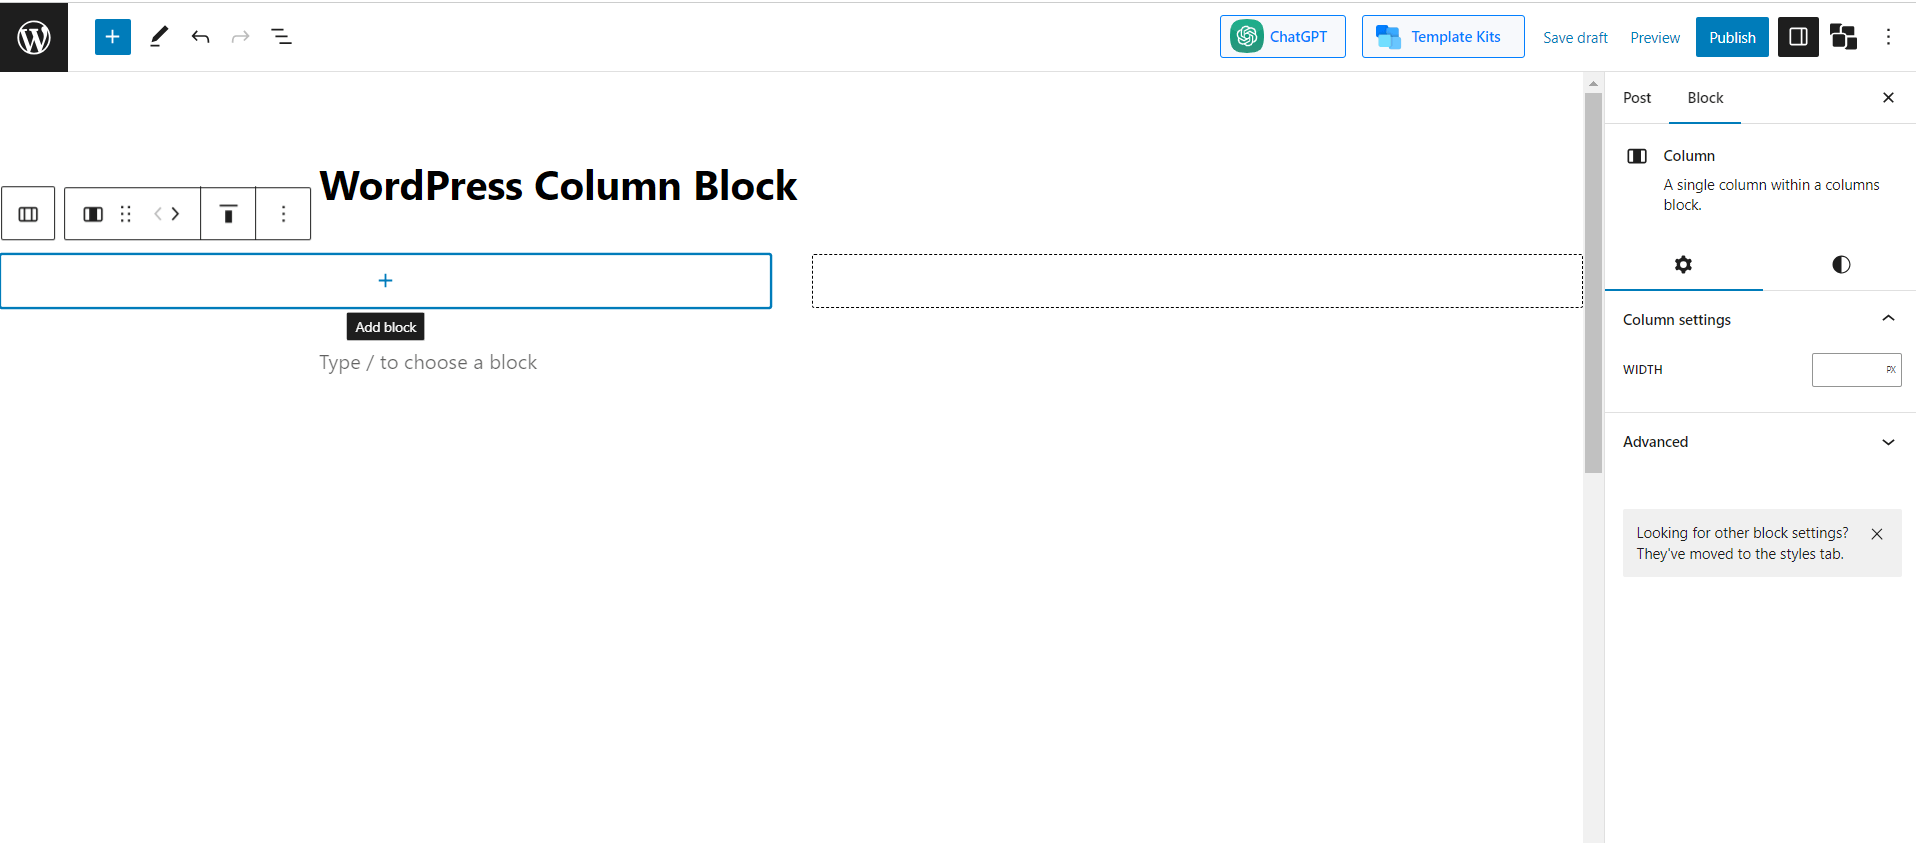
Step 4: Add items to the Columns
Our actual task of adding WordPress columns is done. Now it’s time for you to customize it based on your needs.
Let’s consider that we need to add 2 columns for the Lunch and Dinner menus. So let’s add them.
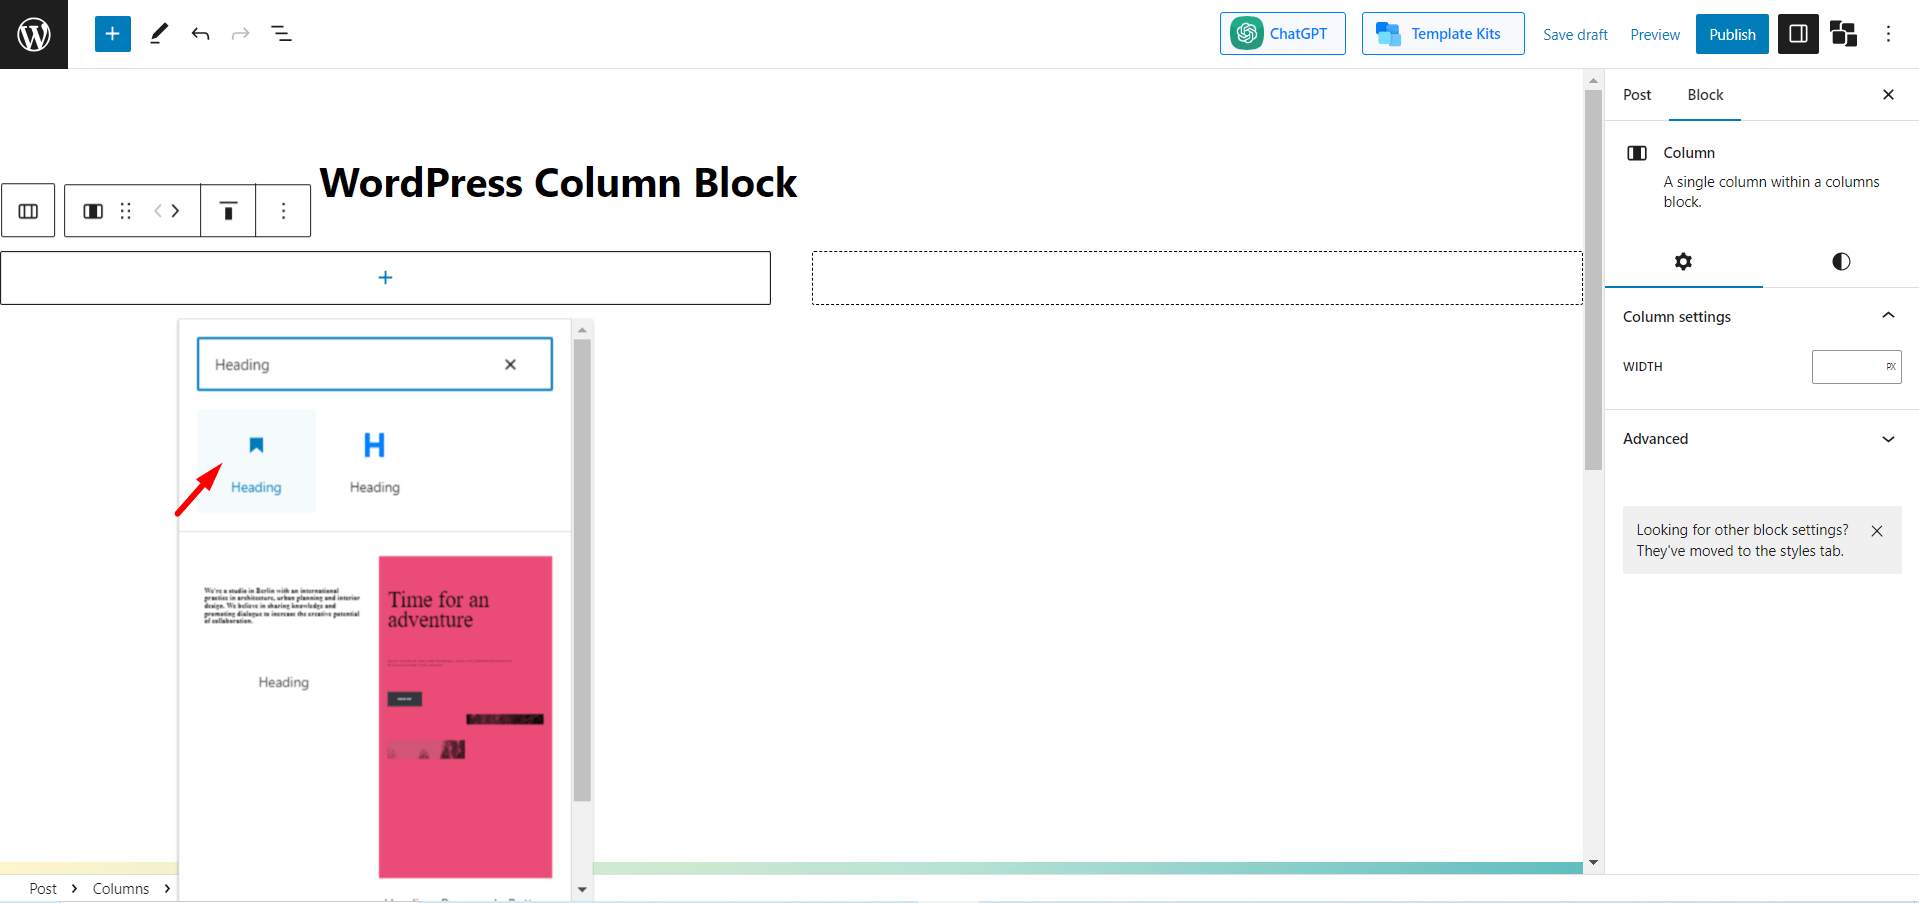
- Add Headings and Paragraphs to the First Column
First, go to the first column, and you’ll notice a “+” button. Hover the cursor there, and you’ll see a text appear “Add block.”
Click here and search for the “Heading” block.
Now, type whatever you need to type for the headings. After that, just press “Enter,” and a new block will be created. Add what you want to write under the heading.
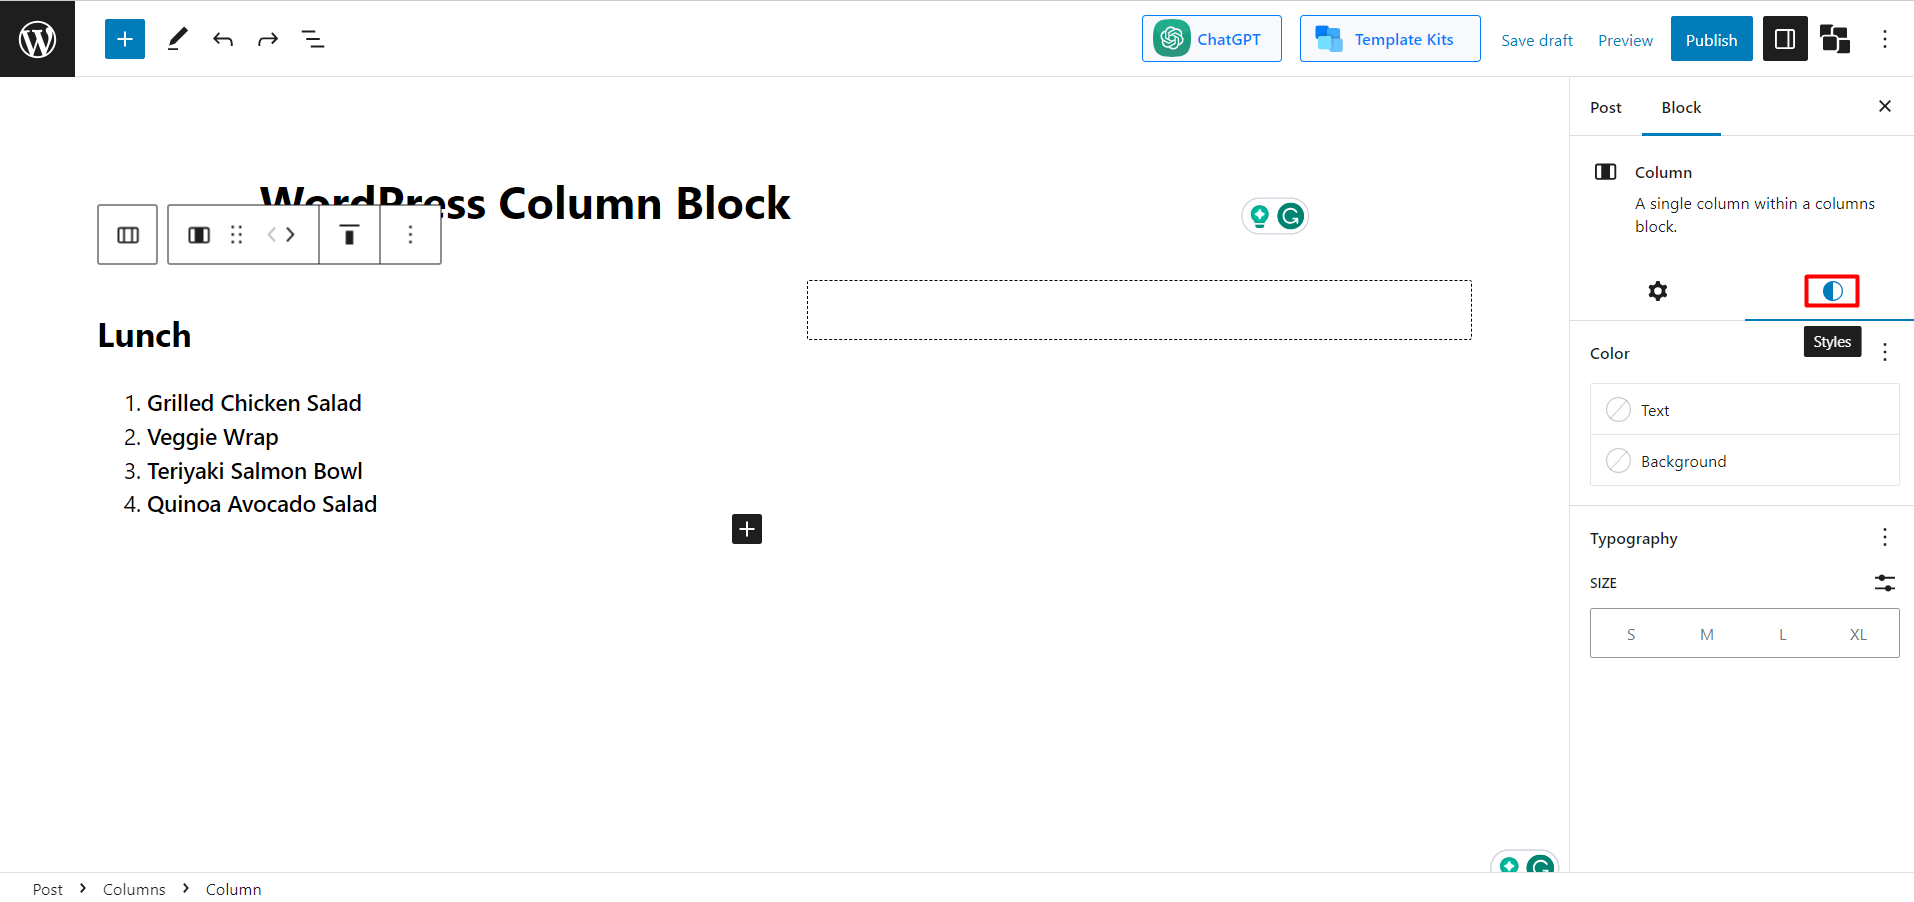
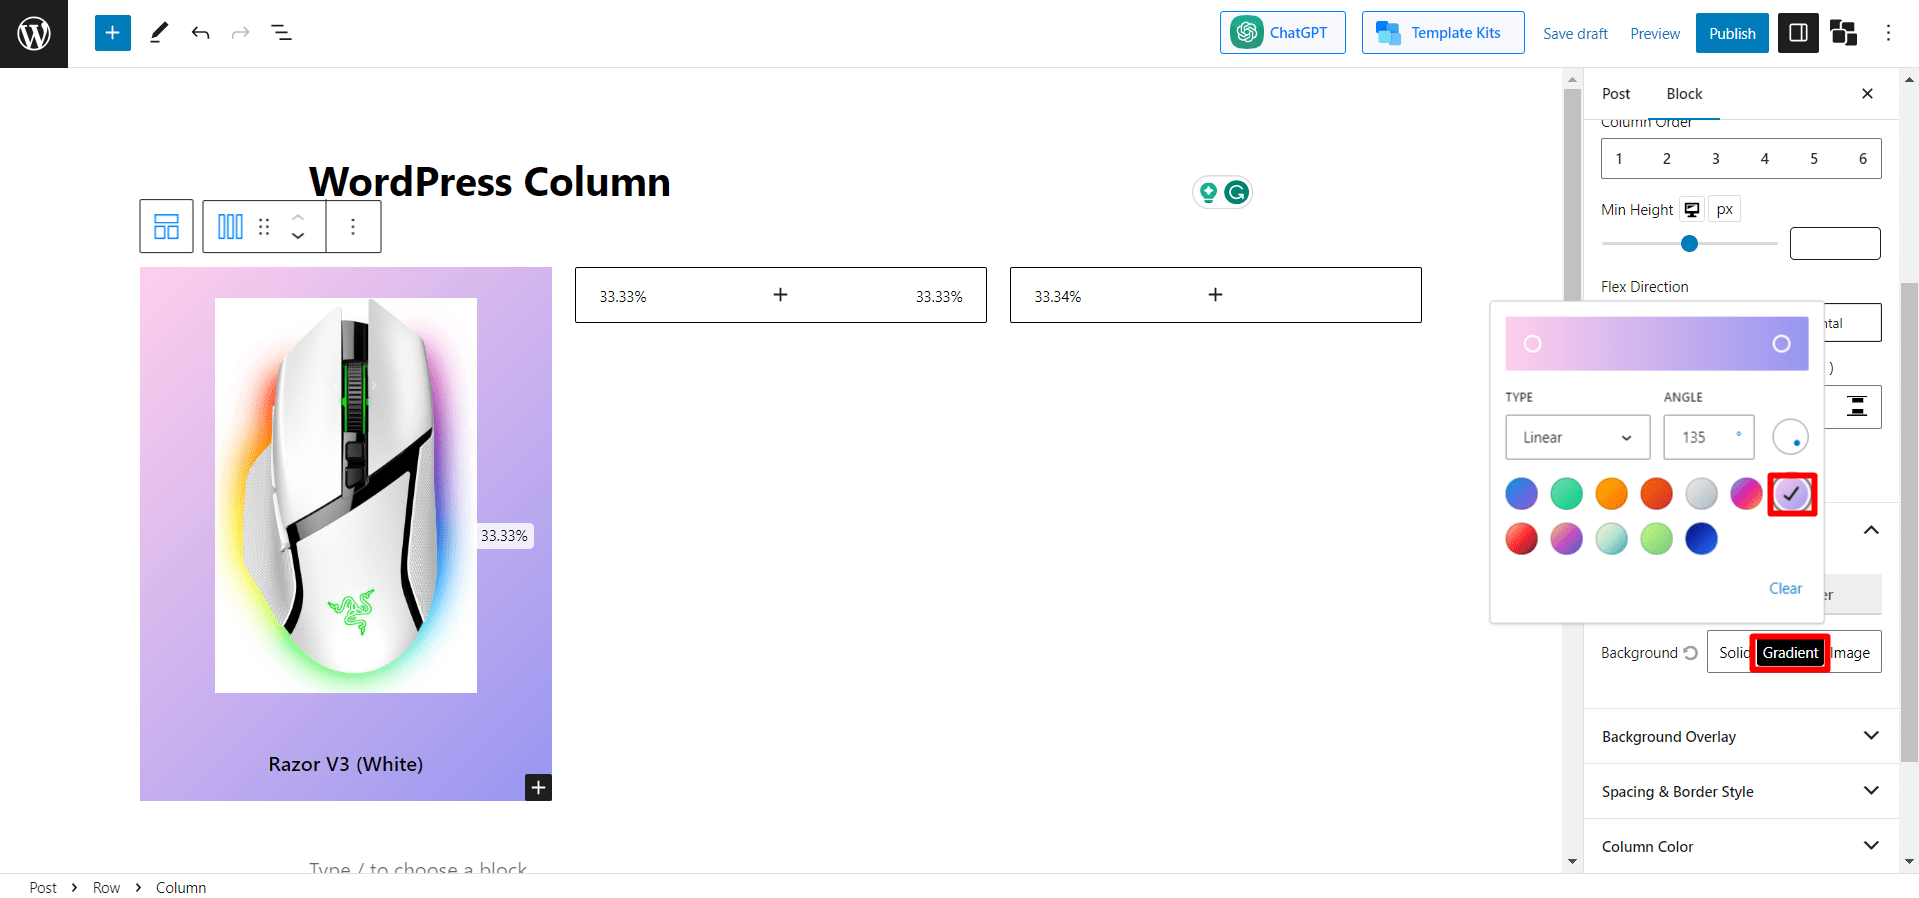
- Add Style to the Heading
Now you can customize it to make it look catchy. For example, there are different options, such as you can change the WordPress column width, text color, and background color. For now, we’ll be adding a background color. For that, let’s click on the Style icon.
Now from the block setting, click “background” and then you’ll see color options. There are both solid and gradient colors. We’re choosing the gradient and selecting the electric grass color.
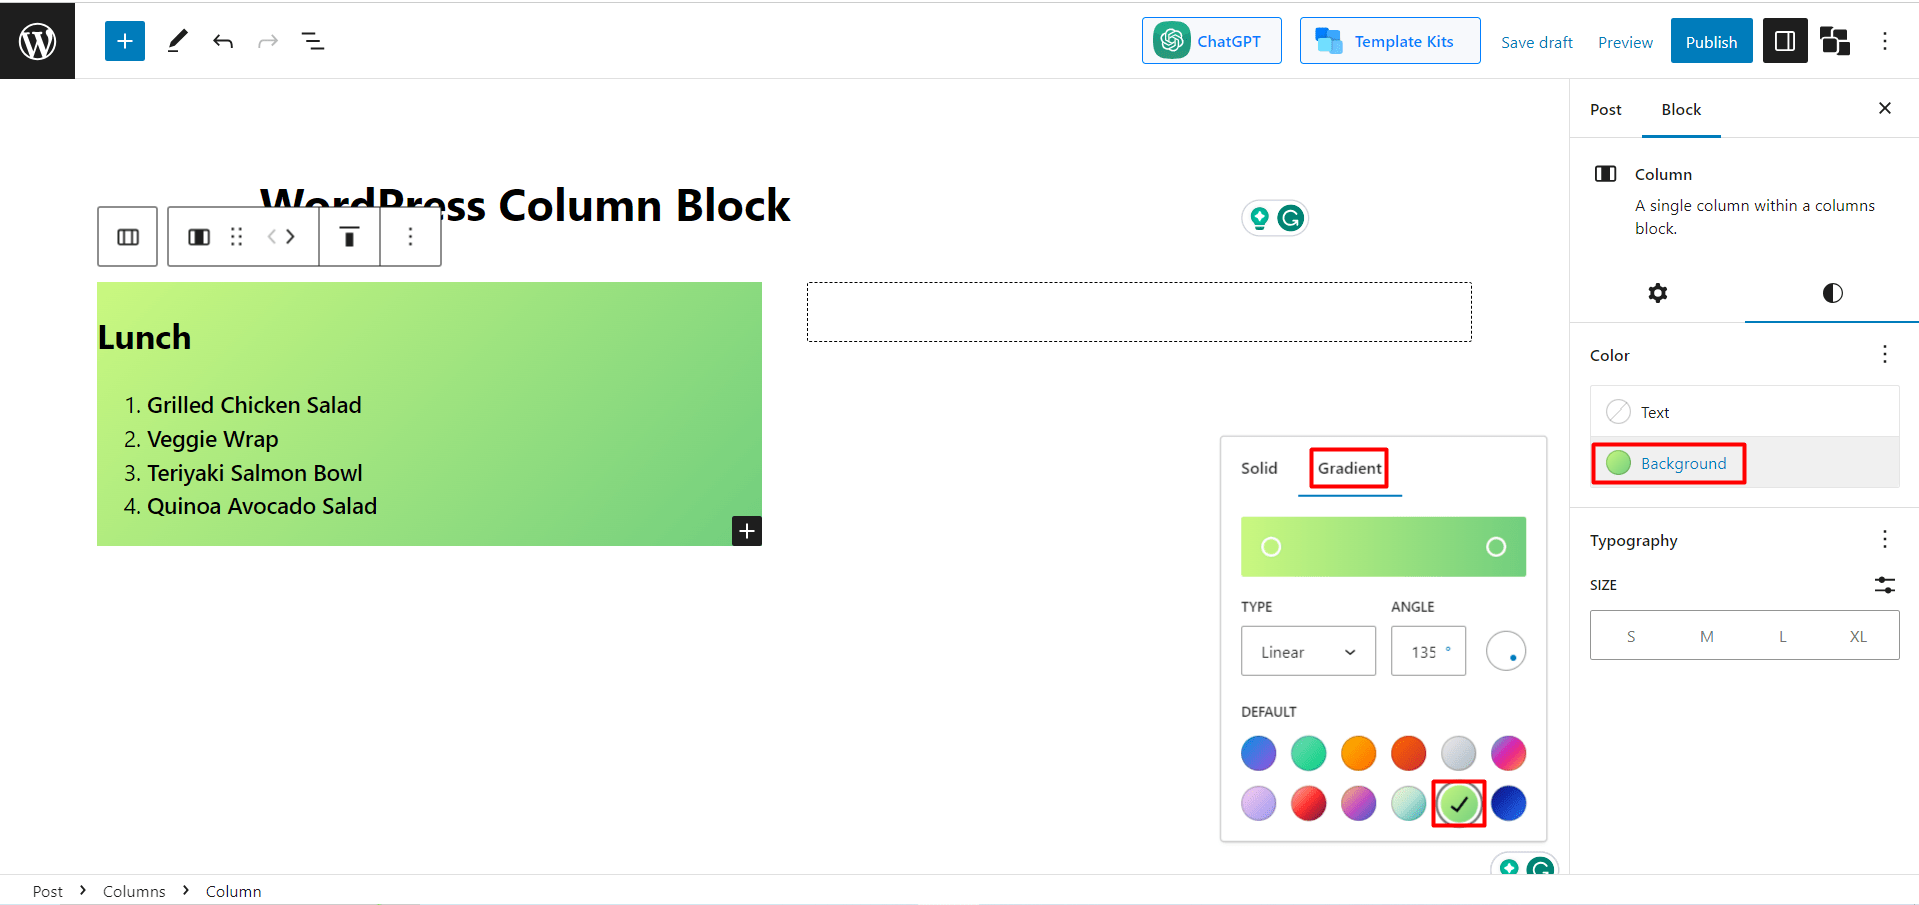
Now let’s do the same for the second column to add dinner items.
- Add Overall Background Color
Our task is almost done. For a final touch, we’ll add another background color for the whole column. For that, we need to select both of the columns. Now go to style, then the background, and select color.
We’ve chosen the pale ocean color. Now let’s see the final output.

Also Read: WordPress Background Video: Add It in 2 Different Methods
Methods 2: How to Add Columns in WordPress Using PostX
The above process of including columns in WordPress is quite easy, but the final output might not be so satisfying. It’s because there are very limited options in the default editor to customize the columns.
Don’t worry; in that case, PostX can be your savior. PostX also offers highly-customizable columns for WordPress. In the below segment, we’ll learn how to do it, as well as a customization guide.
But before we start, if you aren’t using PostX, then check the linked guide and install and activate the PostX plugin.
👉 Get PostX Pro to unlock all exciting features and make amazing Websites
Step 1: Login and Create a Page/Post
Just like the previous step, log in to your WordPress and then look for the “+ New” button at the top. Get your mouse on there and create a new page/post. Or, if you want, you can edit any previous post. It depends on your preference.
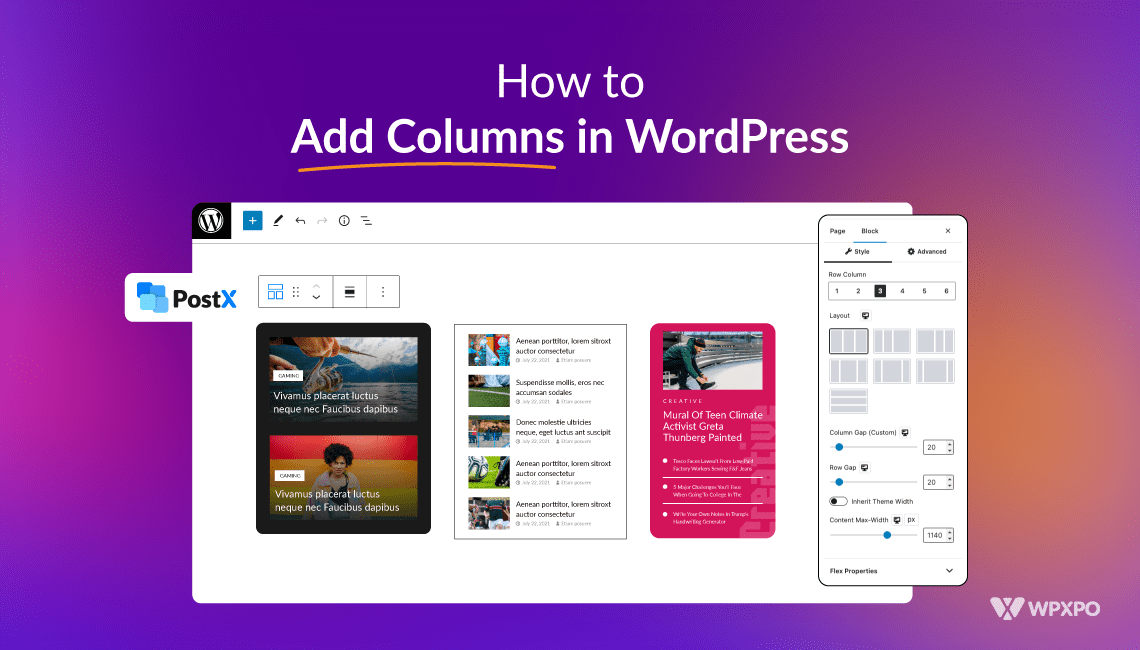
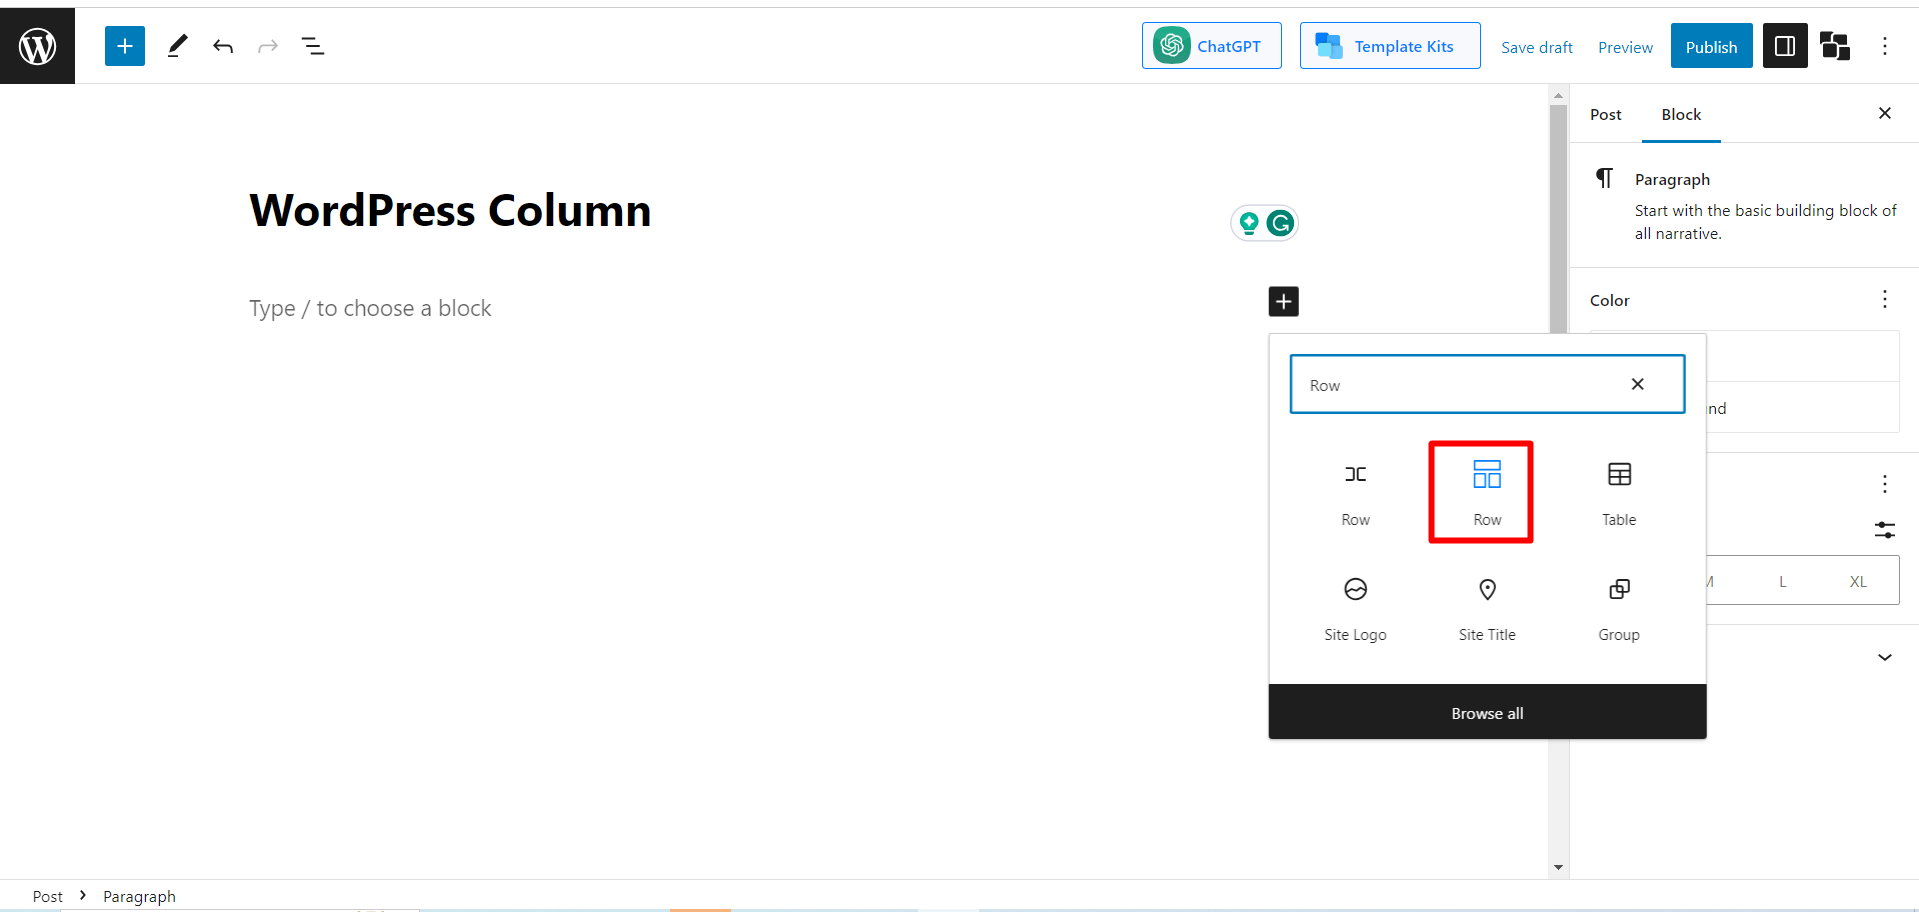
Step 2: Add the Row Block
At this step, click the “+” button, and you’ll see a search box. Now, in the search box, type “Row,” and you’ll see the row block icon. The name of the block is Row, but it’s a combination of Row and Column blocks.
Step 3: Choose a Layout
There you’ll find 10 pre-set layouts. Here, you’ll be asked to choose the number of columns. Choose any of them as your preference.
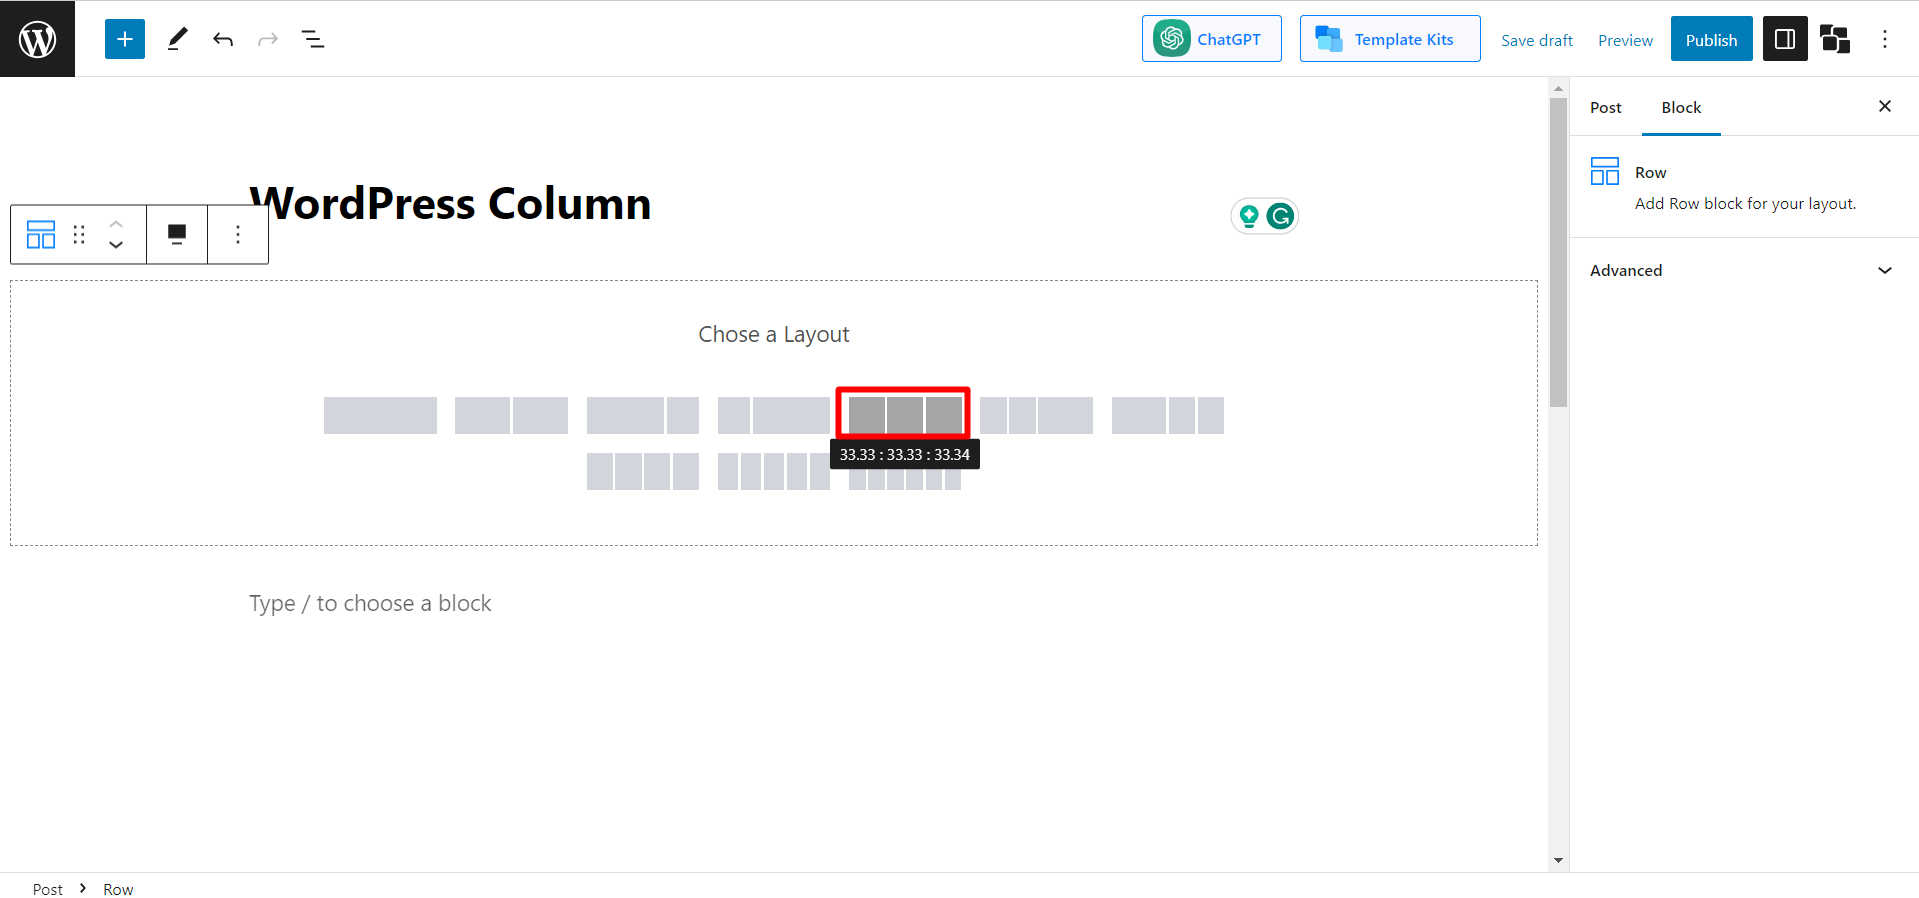
Now if you want, you can change the column number and customize the layout. There are 7 different layouts. You can choose any of them as per your requirements.
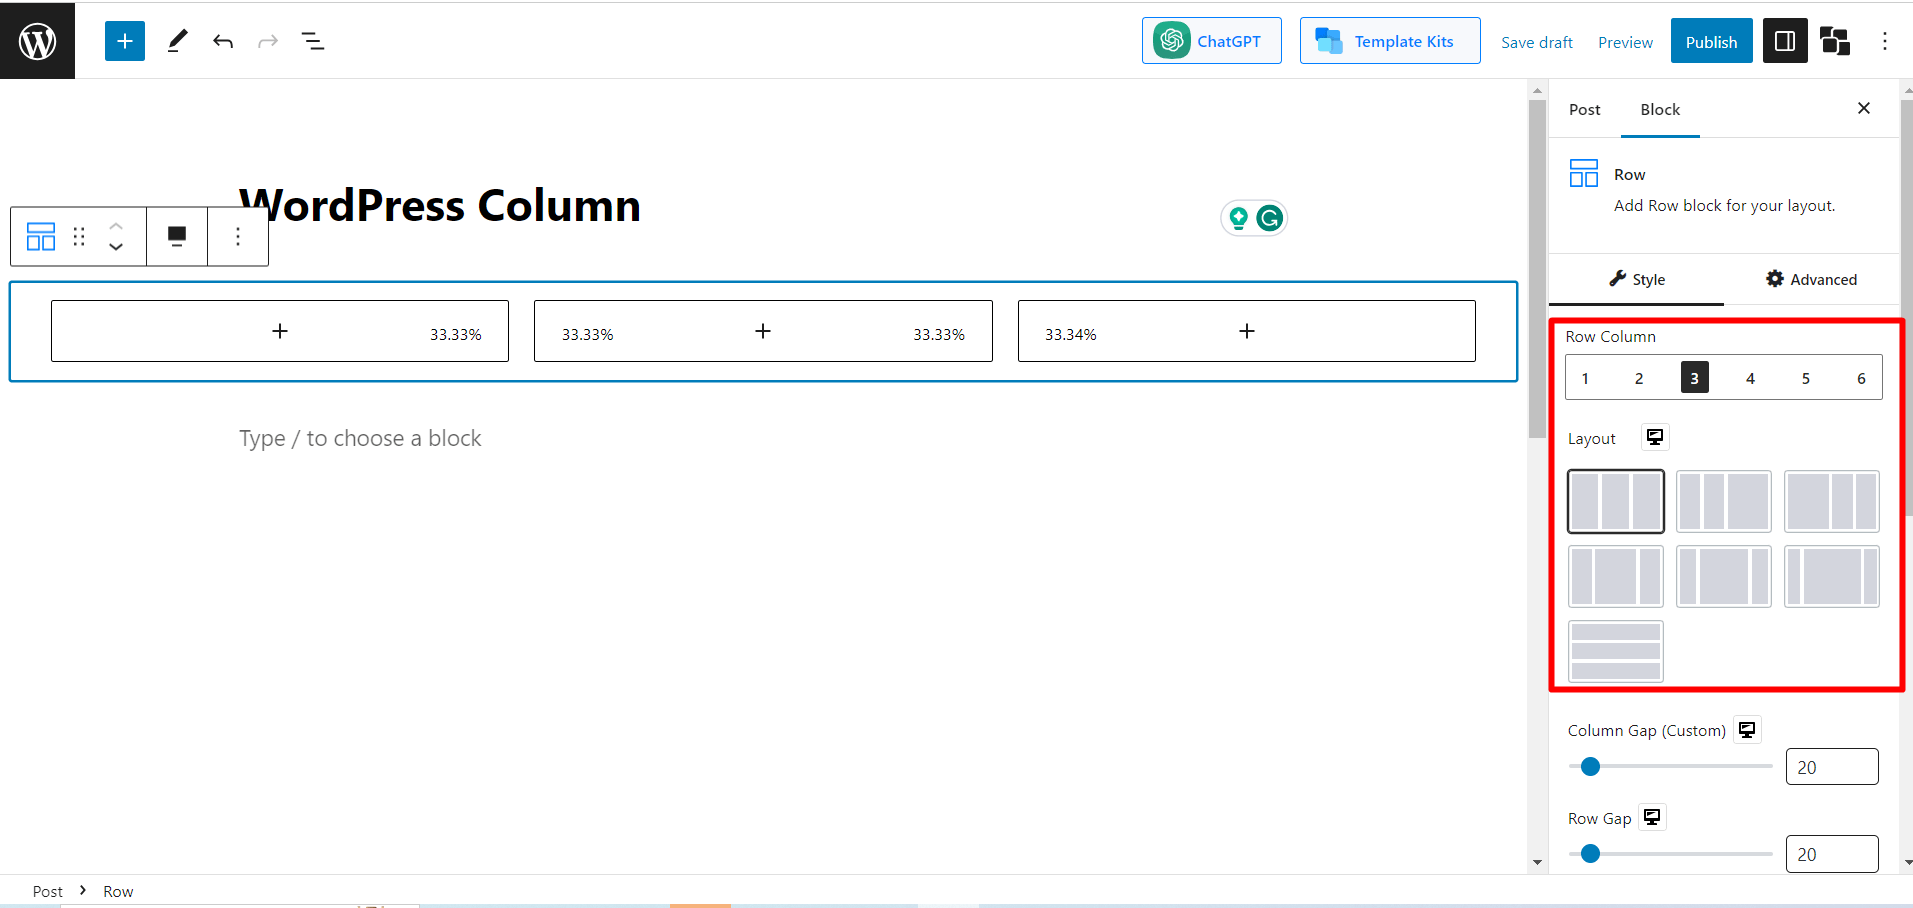
For now, we are staying with the default layout. Let’s move on to the next step.
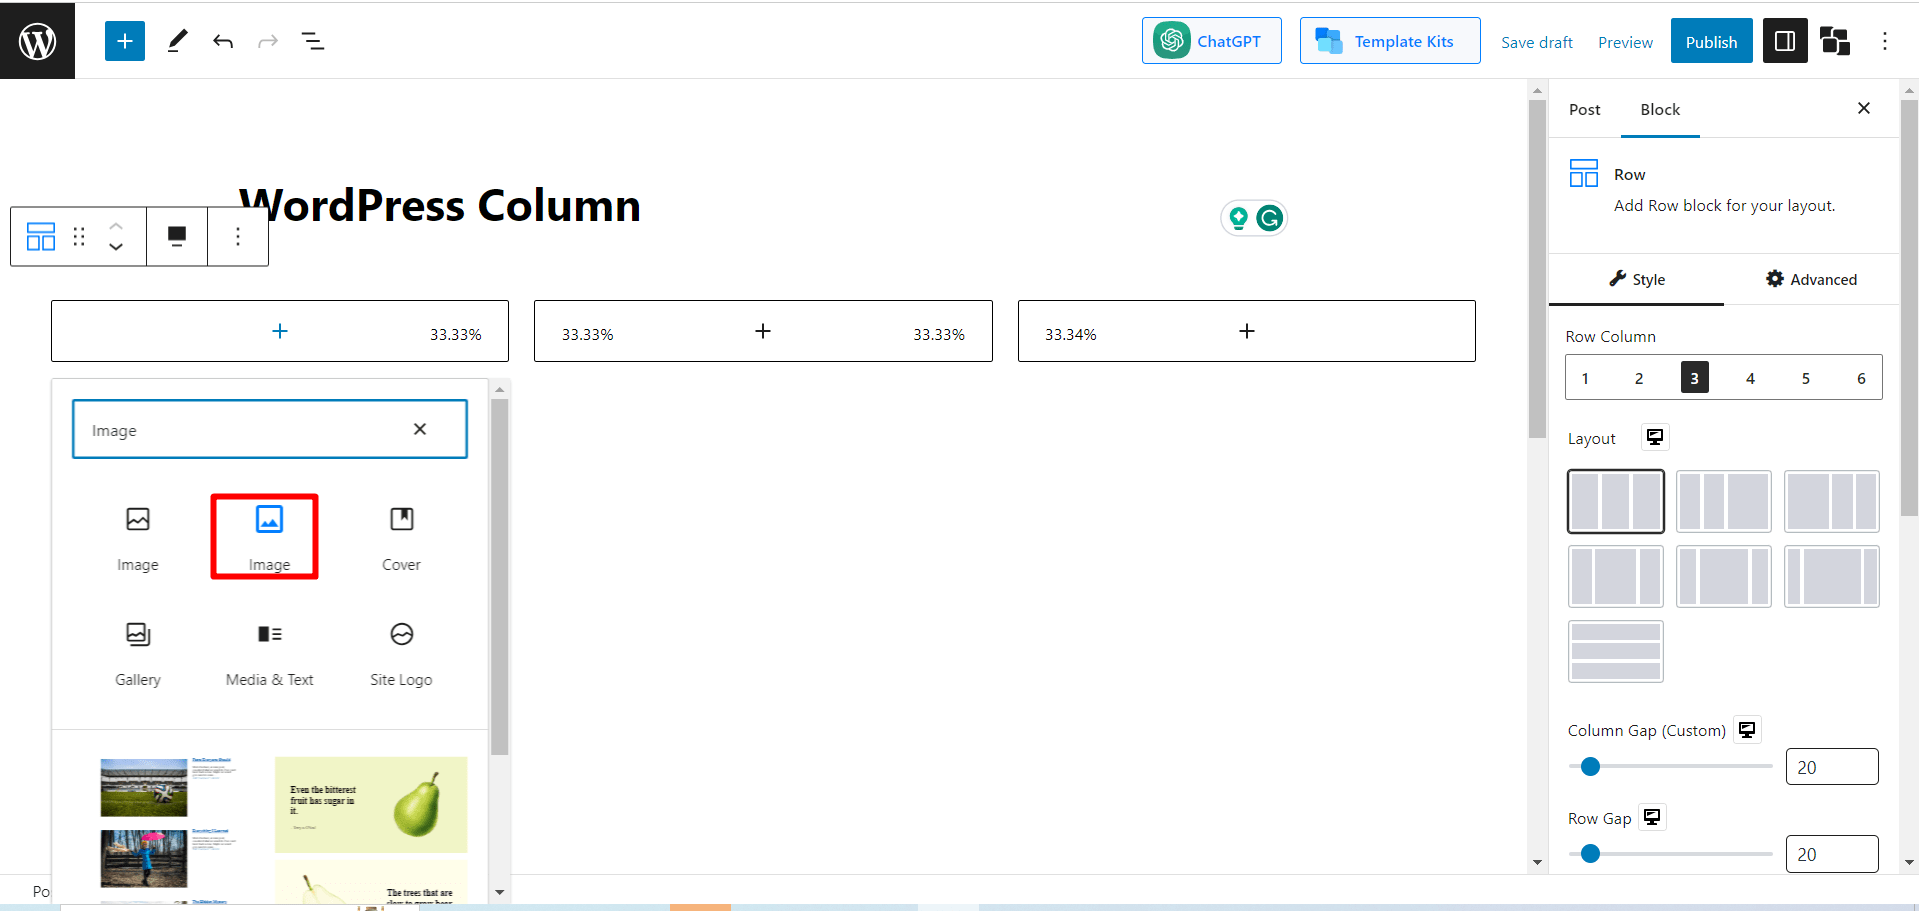
Step 4: Customize the Column
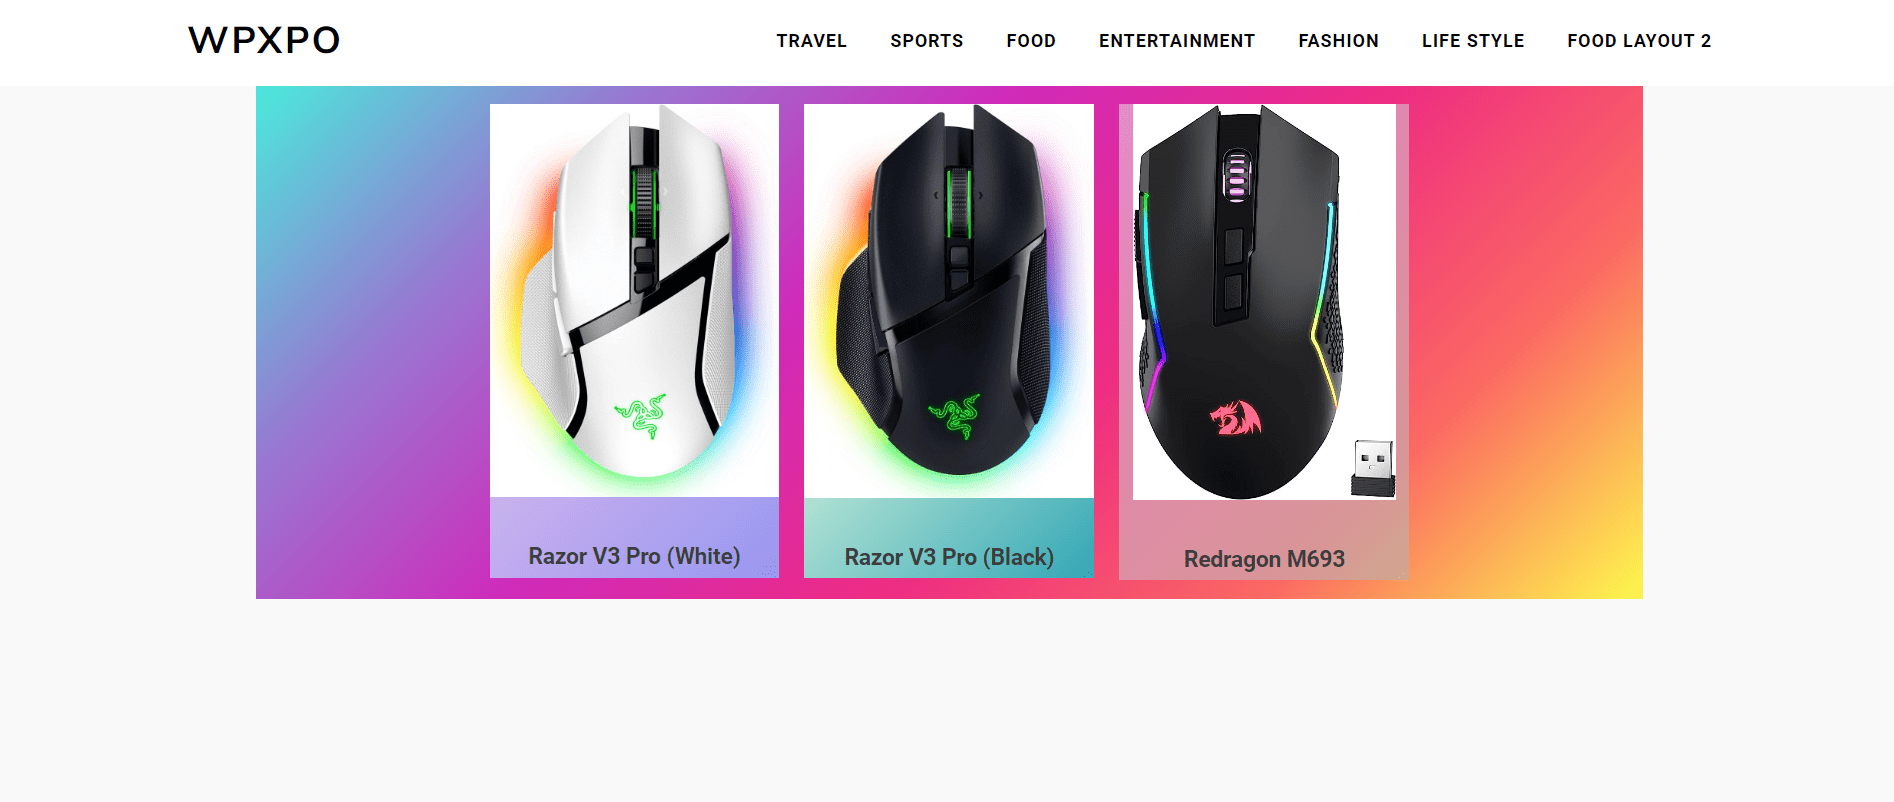
Our Columns are already added. Now we’ll have to customize it. Suppose we’re going to show 3 gaming mouses in 3 columns. Let’s see how we do it.
- Add the Image
First, click the “+” icon on the first column, and on the search box search for “Image”
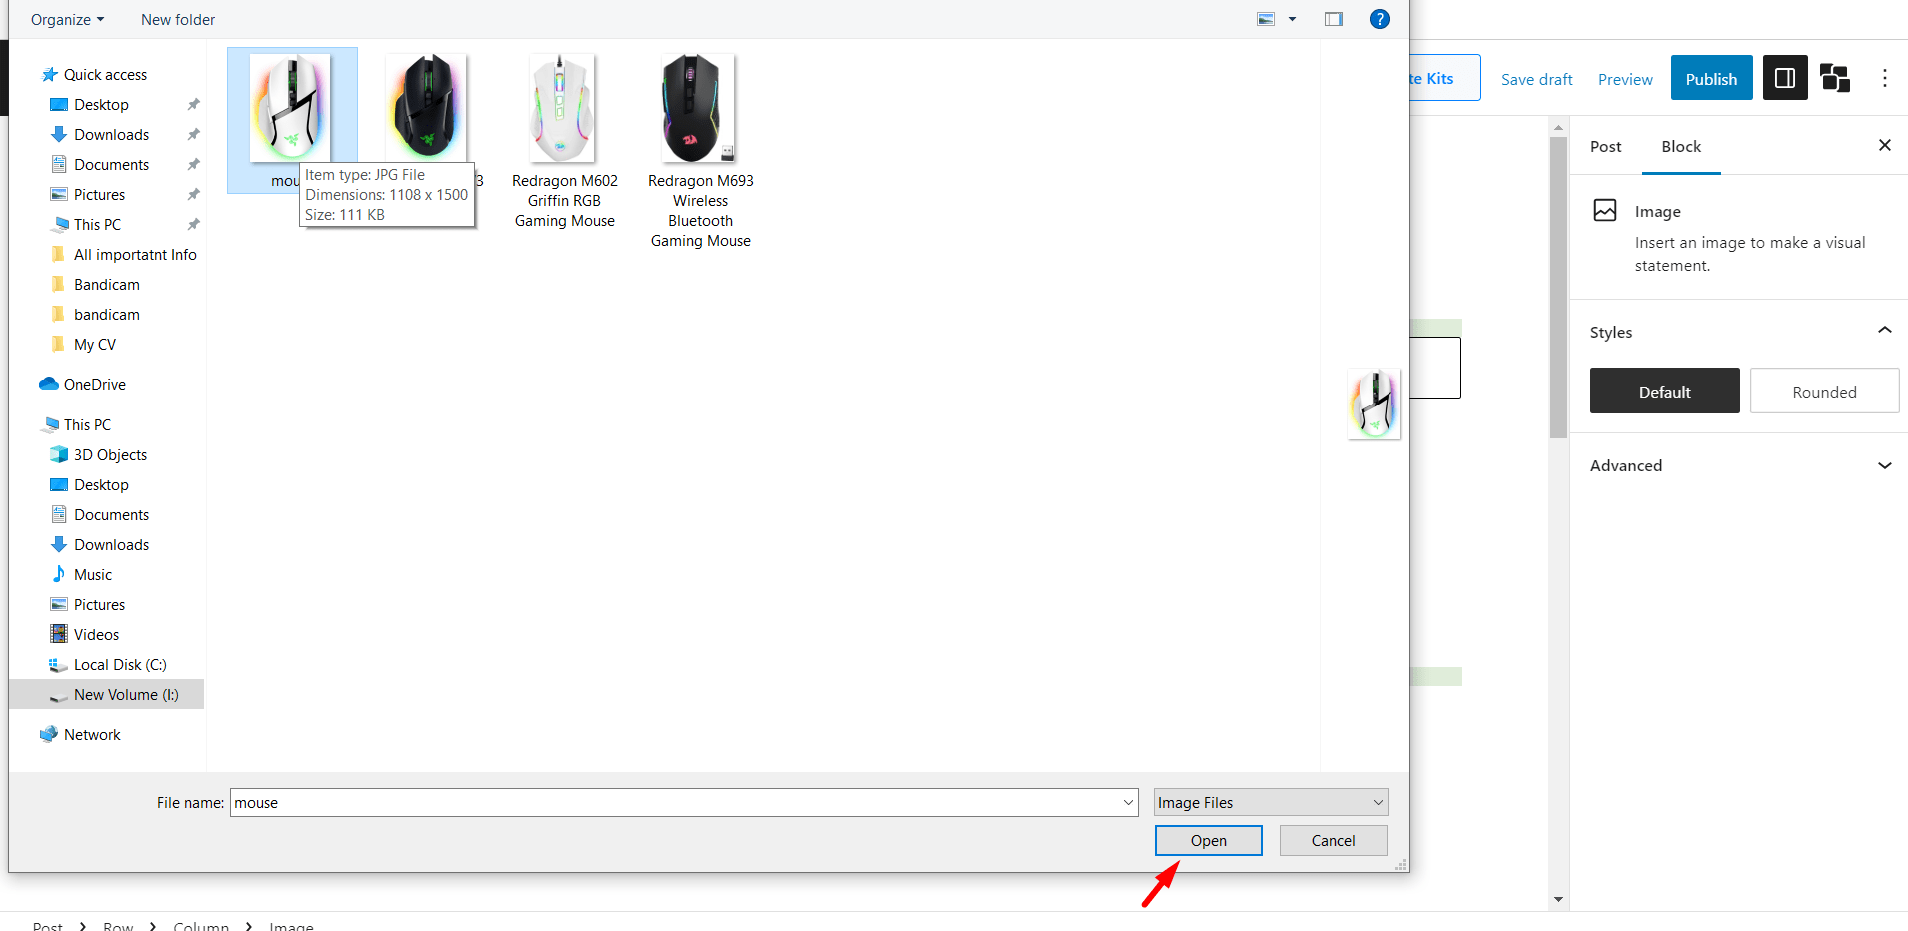
Now click on the Image and then click on the Upload button. (If the Image is already added to the Media library, you can click on the media library to add that to the column.). Now choose the particular Image and click “Open.”
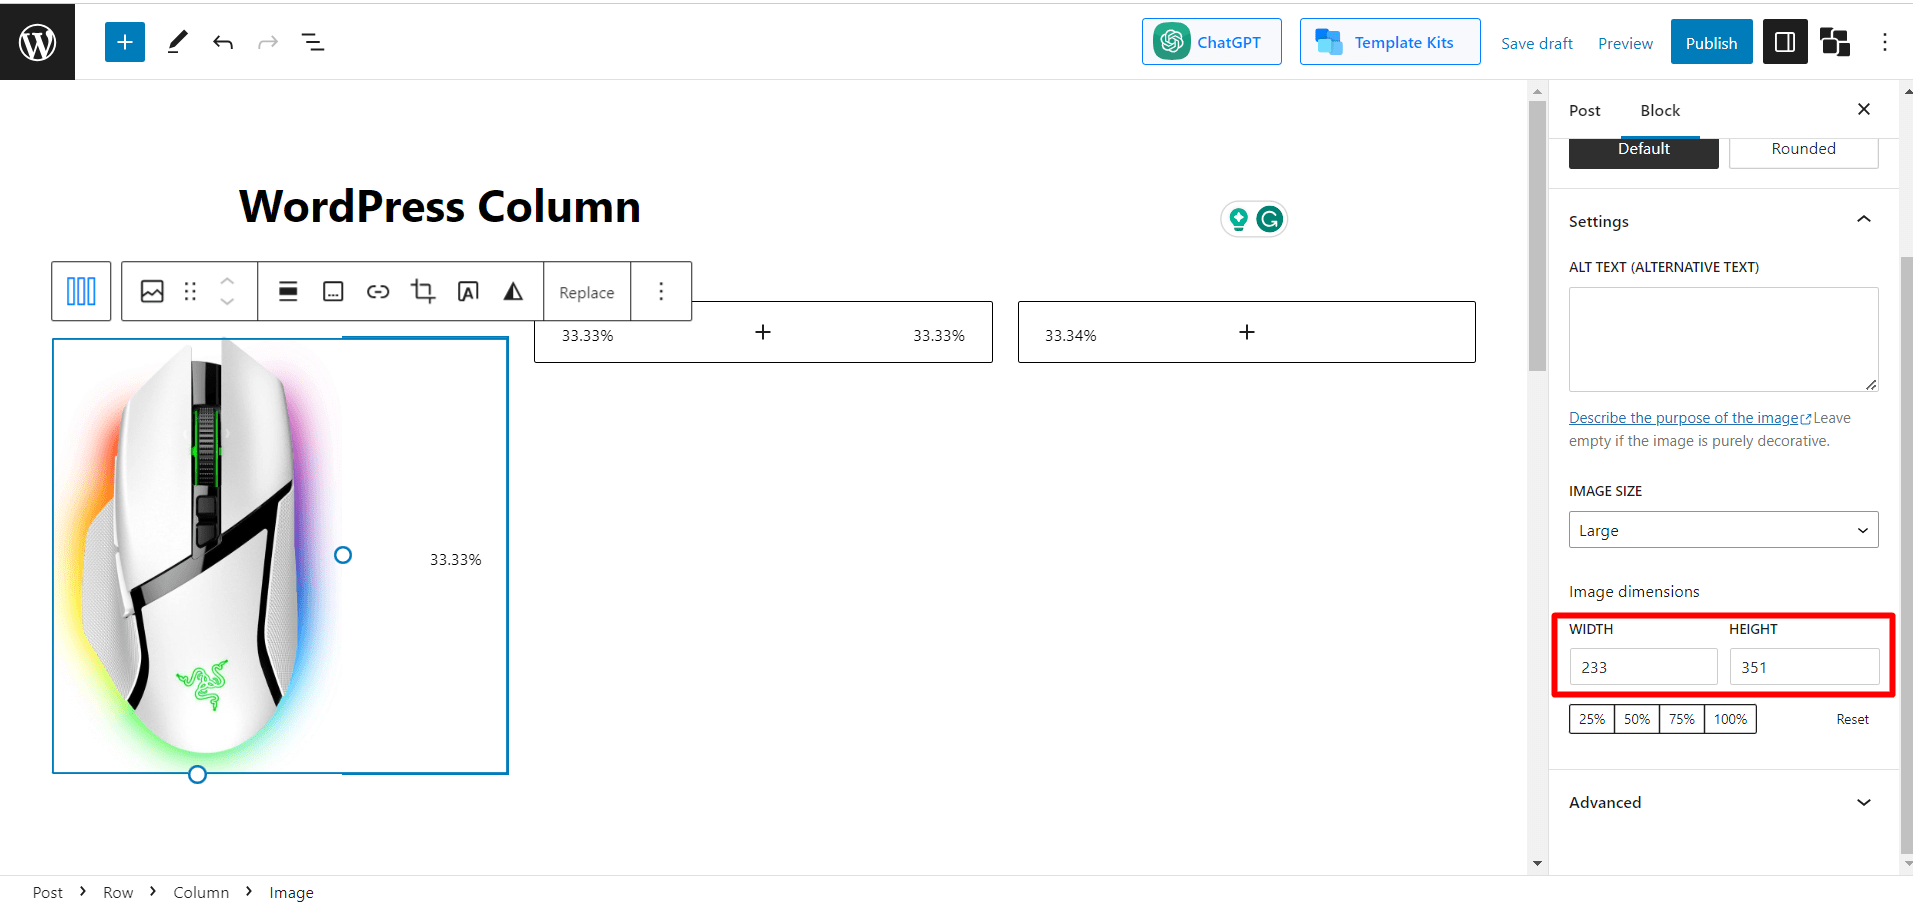
- Set the Image Dimension
The uploaded Image might not be on the proper dimension for WordPress. In that case, find the option “image dimension” and fill the Width and Height box with the proper image dimension.
- Add Image Title
Now you’ll have to name the Image. To do it, you’ll have to create another block. Click on the image block and then click enter. A new block will appear then.
Now type the name of the Image. Our first Image is a Razor V3 Mouse.
- Add Background Color for the First Column
To make it more catchy, click the first column and search for the option “Background and Wrapper.”

Now add solid/gradient color according to your preference.
- Customize the 2nd and 3rd Row
Follow the exact same process and customize the 2nd and 3rd rows with particular images and titles.
- Set the Content Max-Width
Now, the position of the images might not be appropriately aligned with respect to the background. In that case, you’ll find an option “Content Max-Width” and change it accordingly. We’re keeping it 766 to get a good alignment.
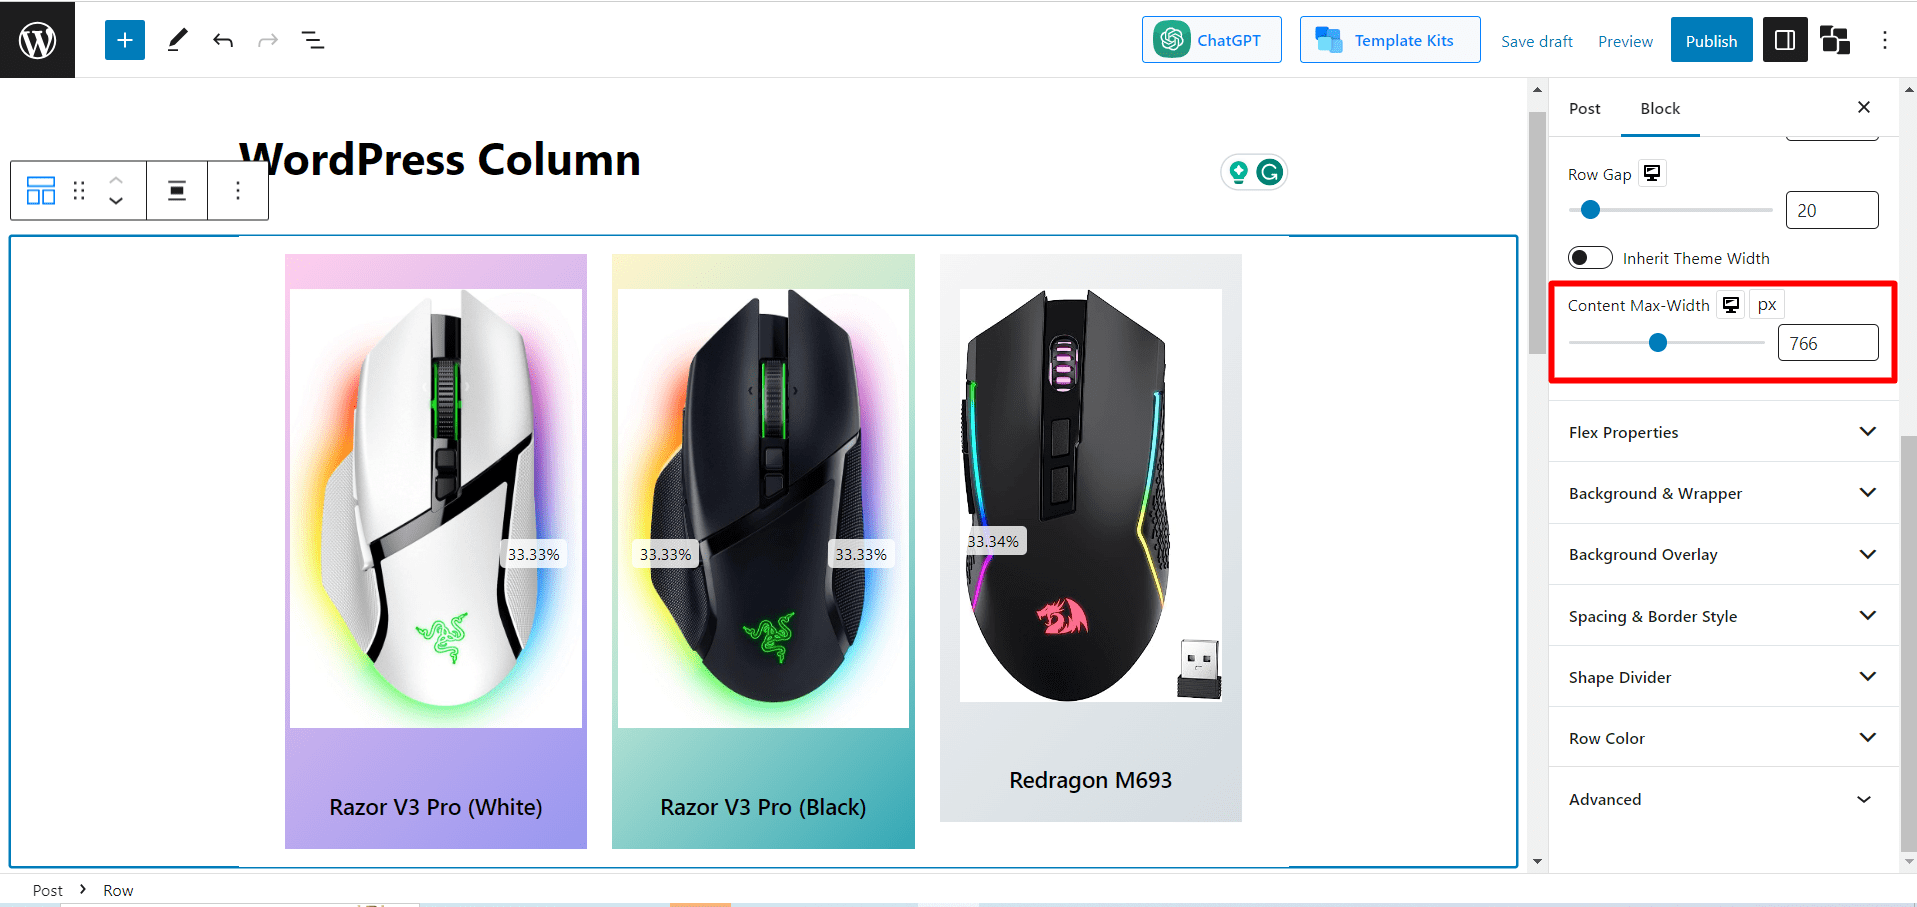
- Add Background for the Primary Row Block
Here’s the final step. To give it a final look, we’ll add a background for the row column; for that, select the Row column and search for “Background and Wrapper.” Click it and choose any solid/gradient color.
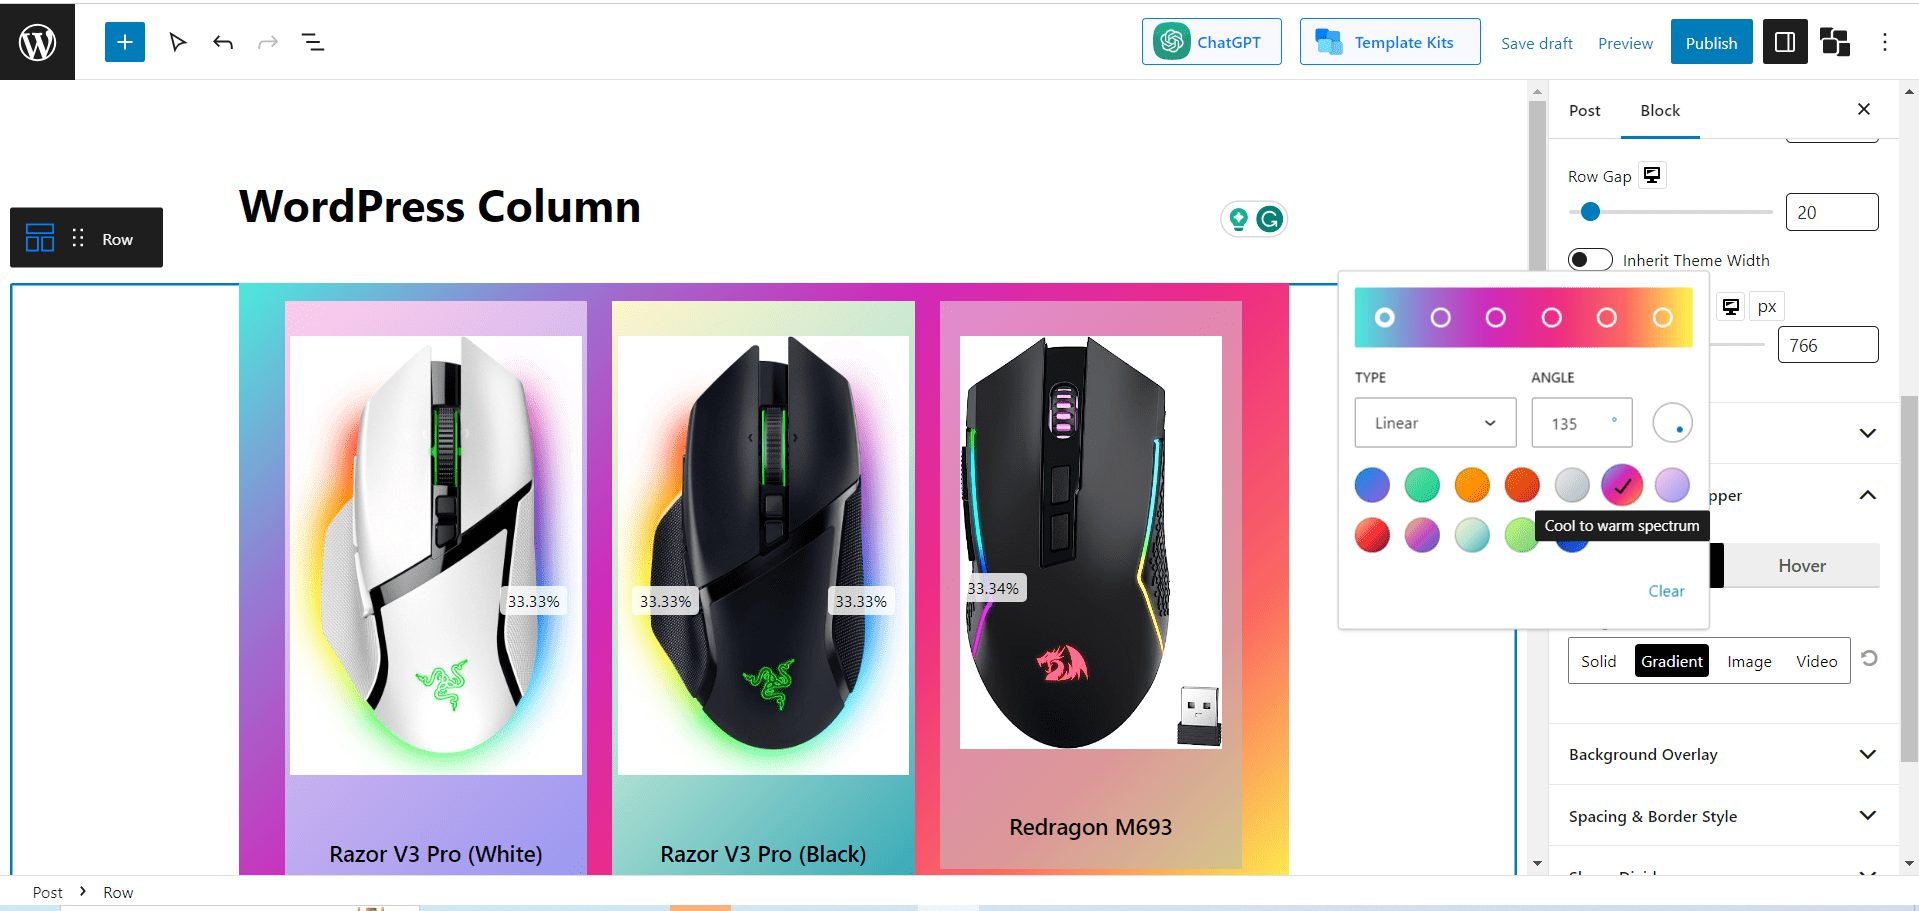
Finally, it’s done. Now let’s check the final output.
Also Read: WordPress Shape Divider: Master the Art of Separating Sections
Final Words
Hopefully, now you’ve no more confusion about WordPress columns. We’ve already guided you on how to add column blocks and customize them both in the default WordPress column block and PostX row block. It’s time for you to practice.
So now, don’t hesitate to experiment with columns and unleash your creativity. Transform your website into a masterpiece that not only captivates but also inspires your audience.
👉 Get PostX Pro to unlock all exciting features and make amazing Websites


![How to Create Custom WooCommerce Thank You Pages [Ultimate Guide]](https://www.wpxpo.com/wp-content/uploads/2022/10/Thank-you-page-customizer.jpg)