Are you looking to make your WordPress website more exciting and captivating? One great way to do that is by adding a background video. It’s a cool feature that instantly grabs people’s attention and makes your site more engaging. But how to add a video background in WordPress?
If you ask for the straightforward steps for adding a WordPress background video, then-
- Create a post/edit any existing post
- Add cover block
- Now add the video by uploading it or from the media library
- Finally, customize it
It looks straightforward, but there is some extra work. Don’t worry; in this article, we’ve explained everything properly. Well, it’s not only the way; we’ve added another way to add video as a website background using PostX.
So, let’s explore how to add a video background in WordPress.
WordPress Background Video: How to Add with Default Block Editor
So, here we’re into the main segment. You may not like extra hassle such as adding a plugin for inserting video as a WordPress background. So, let’s start with the default Gutenberg or Block editor. Below, we’re adding a step-by-step guide on how to do it.
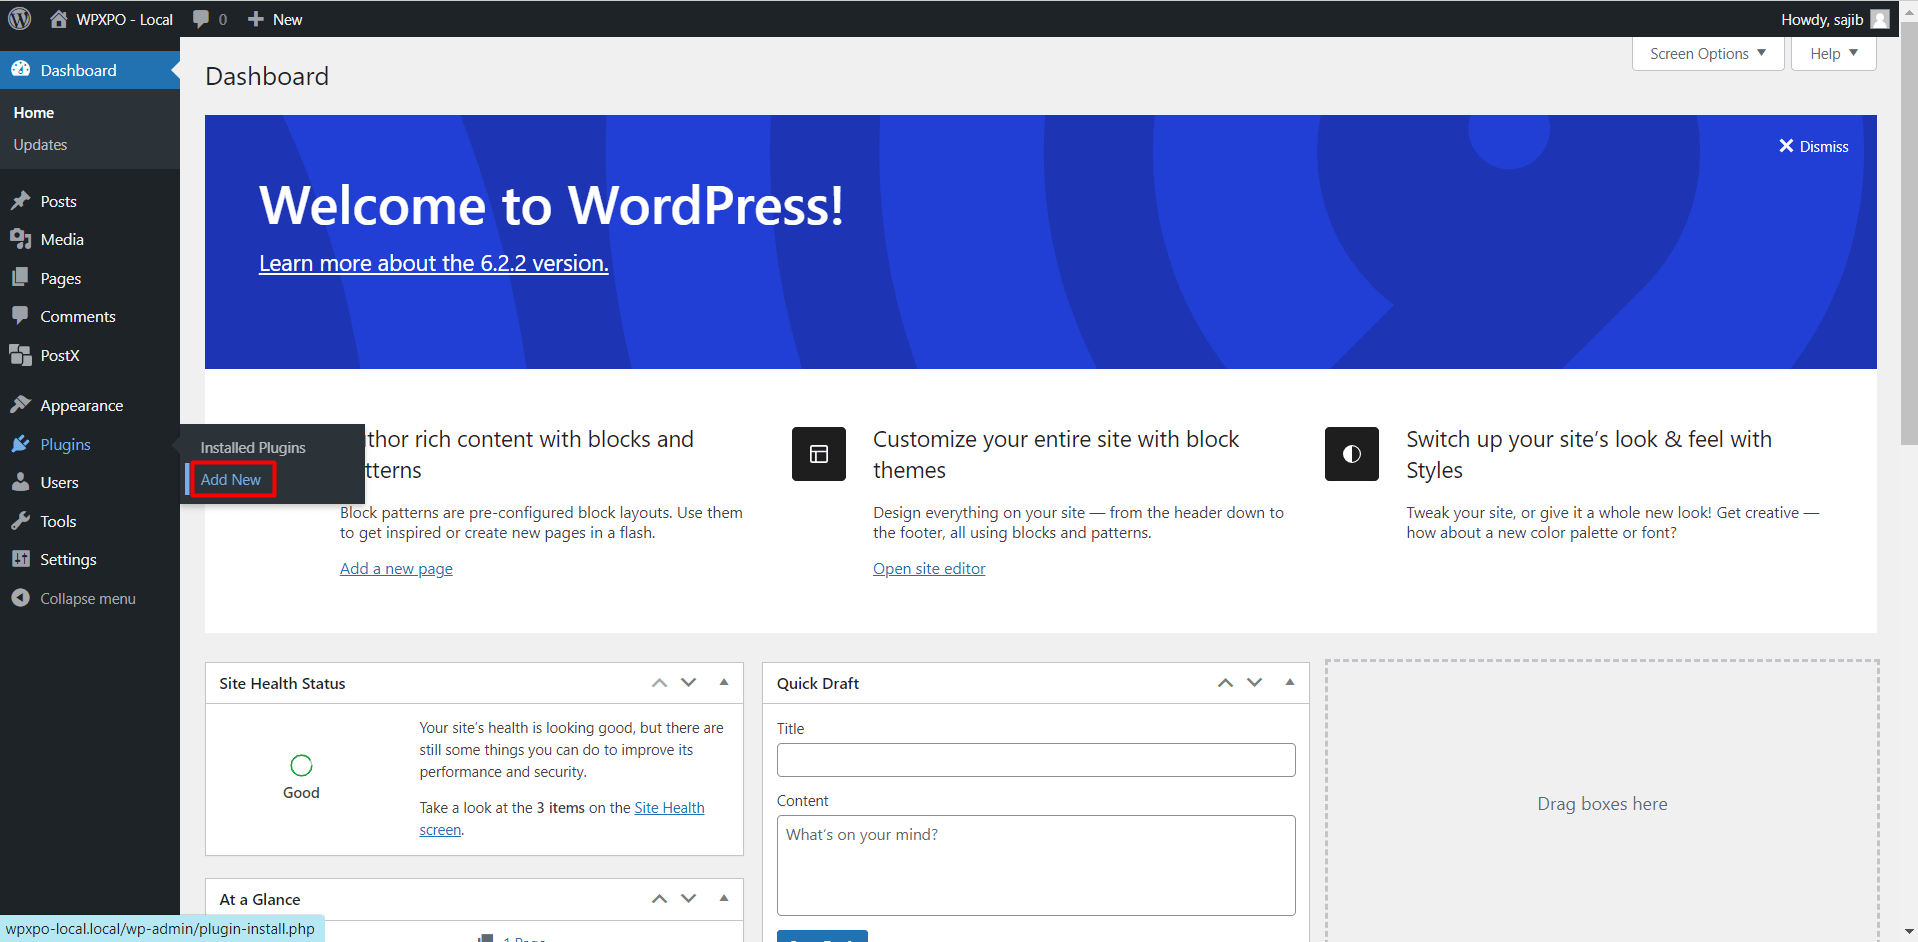
Step 1: Login and Create a Post/Page
Here the very first step is so basic. Log in to your WordPress dashboard and then hover the cursor to the “+ New” button. Then according to your preference, add a Post or Page.
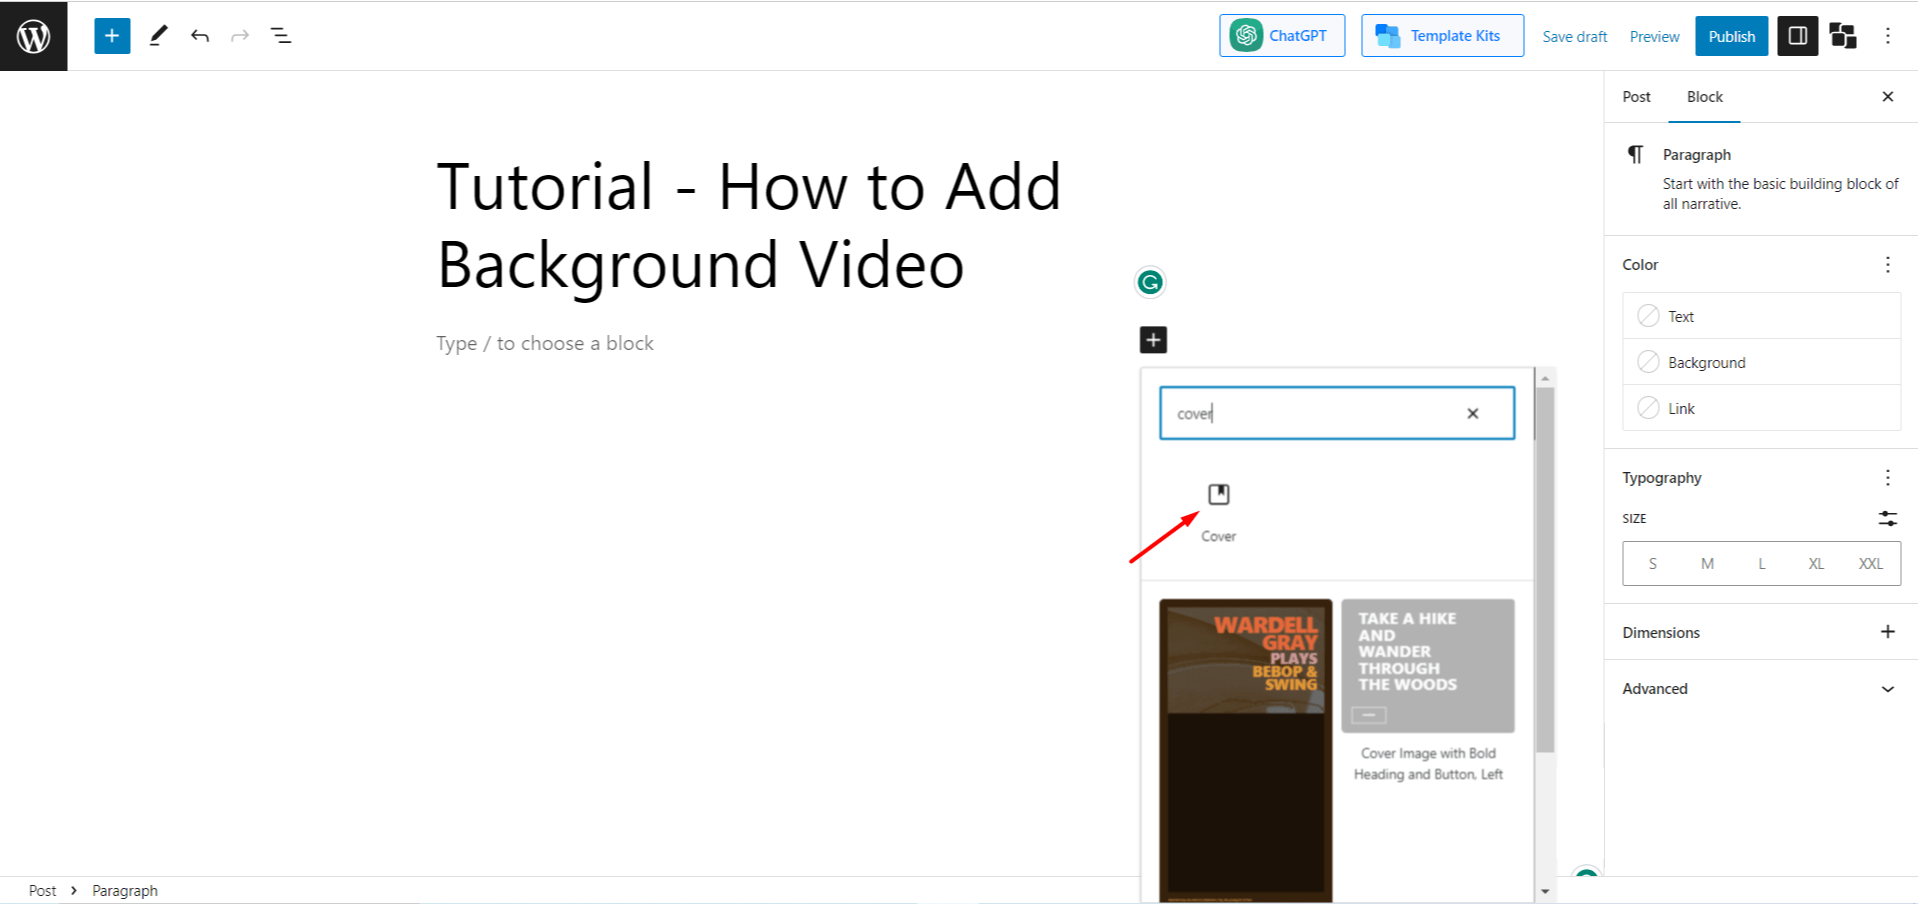
Step 2: Add the Cover Block
Now click the “+” button to add a new block. Then in the search box, type “cover,” and you’ll see the cover block icon. It’ll look like the following image.
Step 3: Add the Video
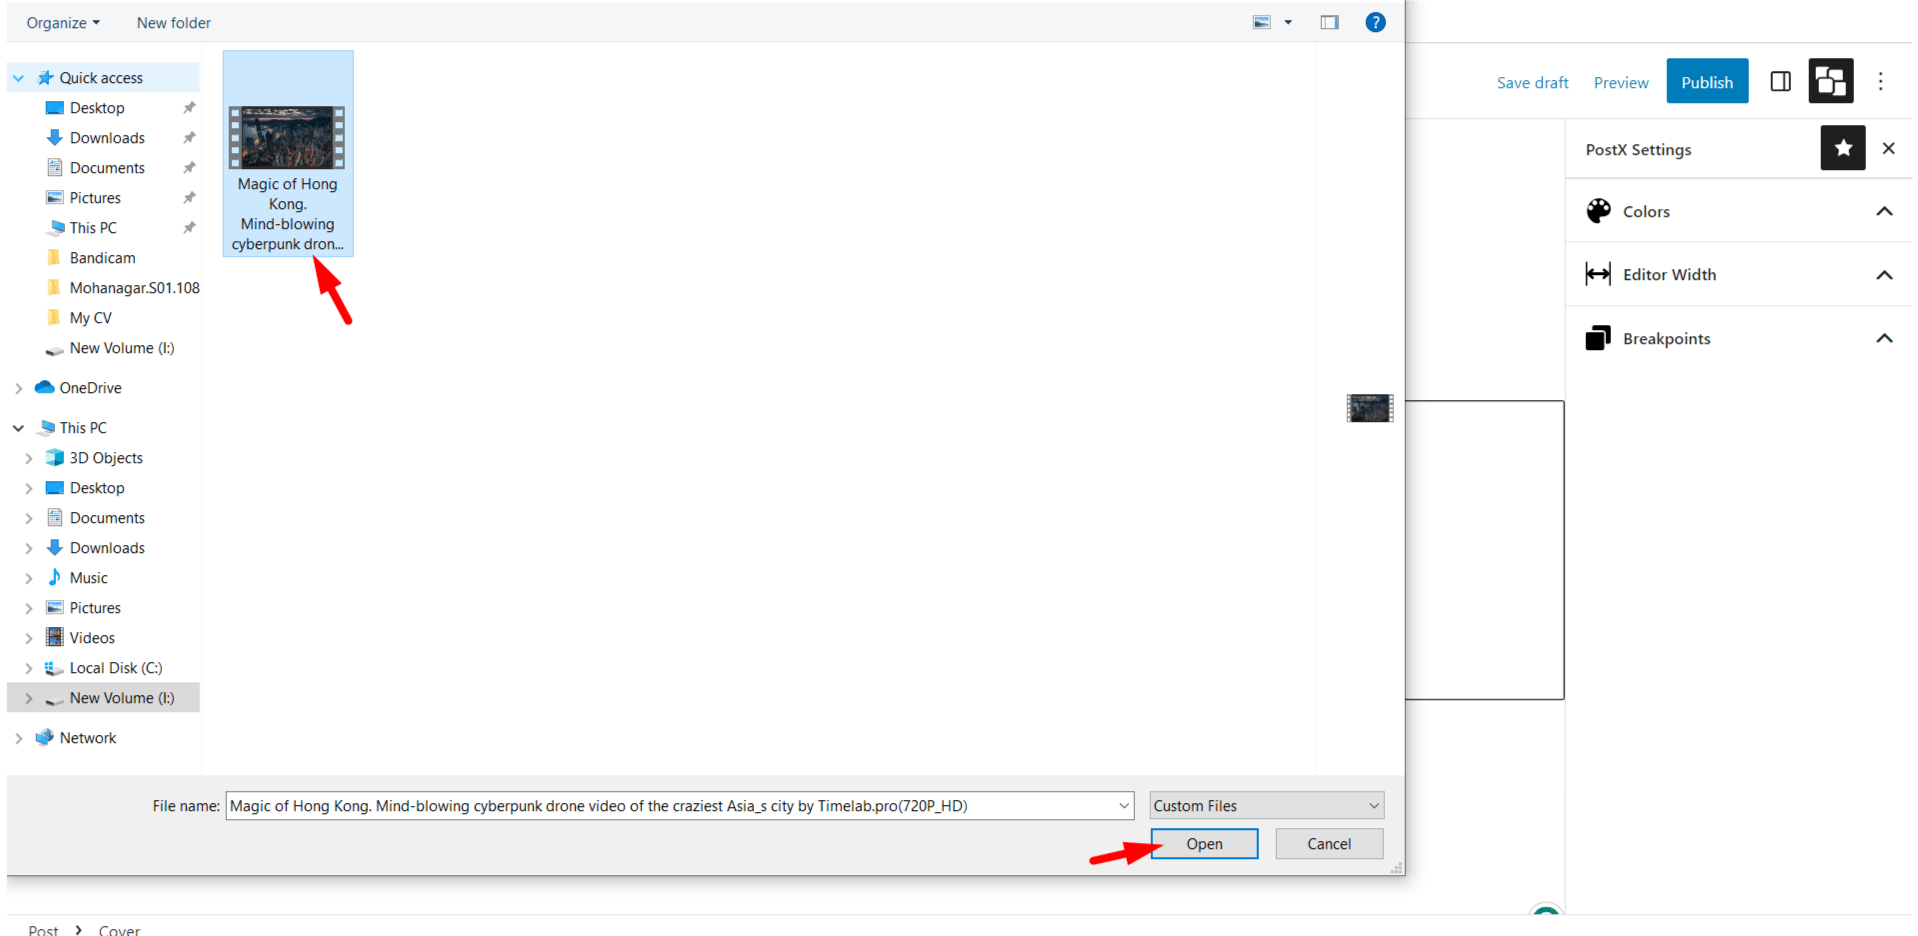
After you click the cover button, the block will appear with a few options. There you’ll have two options to add a background video. You can either upload a video from your computer by clicking on the “Upload” button or select a video from your “Media Library.”
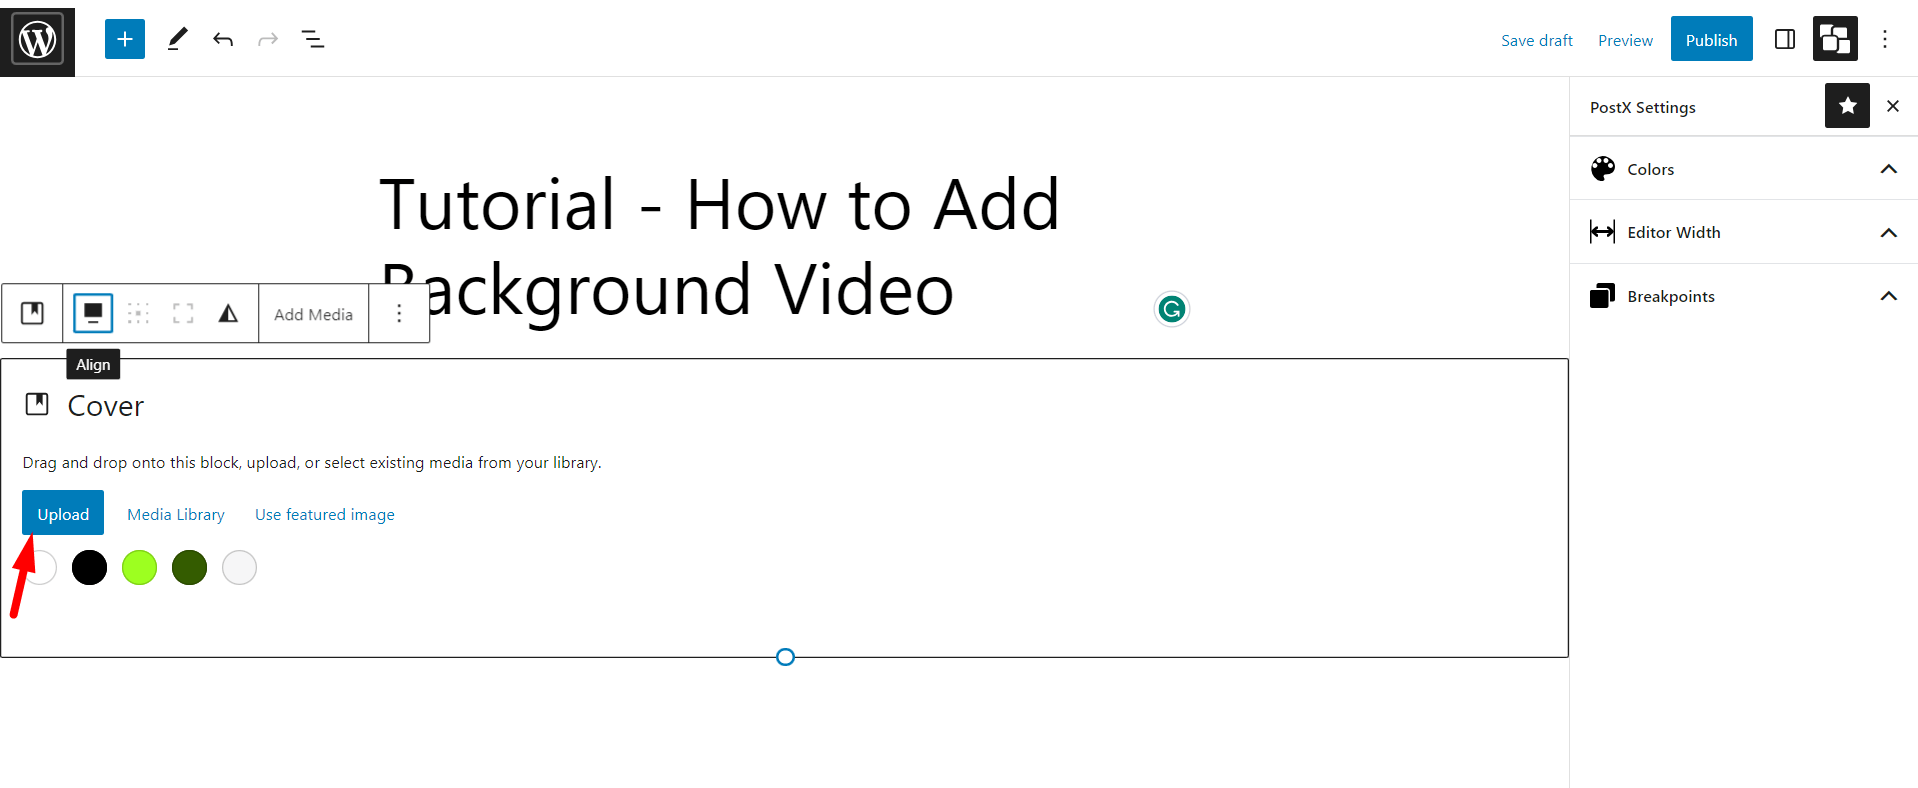
So now click any of them and choose the video you want to use as a WordPress background video.
Step 4: Customize Everything
The task you’re looking for – adding a WordPress video background is now done. But now it’s time to customize everything. There are plenty of options to customize. Below we’ll be discussing some common customizations.
Add Caption for the Block
What most people do is add a caption over the video. Here you’ll have to do nothing special. It’s because, by default, you’ll notice “Write Title…” Just click here, and you’ll see the write cursor.
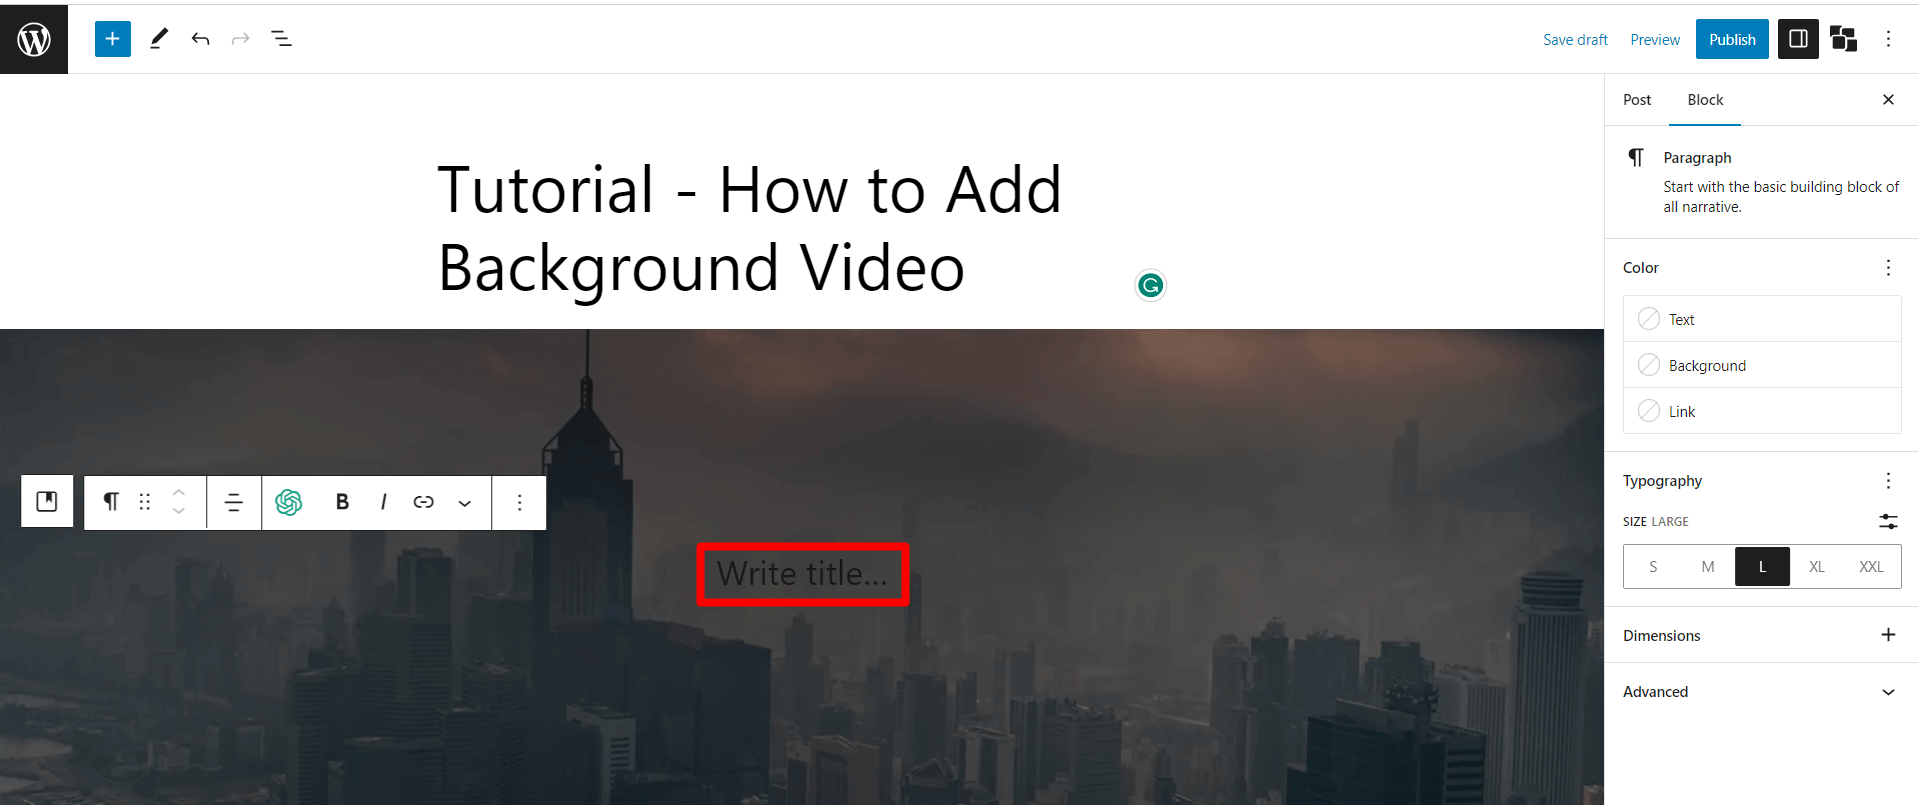
Now you can easily add any title/quote or whatever you want to show over the background video. Even you’ll find a few more customization options, such as:
- Paragraph/Heading
- Text Color
- Text Size
- Focal point picker
That’s it. You’re done integrating a background video on WordPress.
Add Style to the Video
Well, only a caption isn’t everything. You can also change the style of the background video. For that, click the style button (The button looks like a half-black-and-white circle), and you’ll find more options to customize the video. The options include
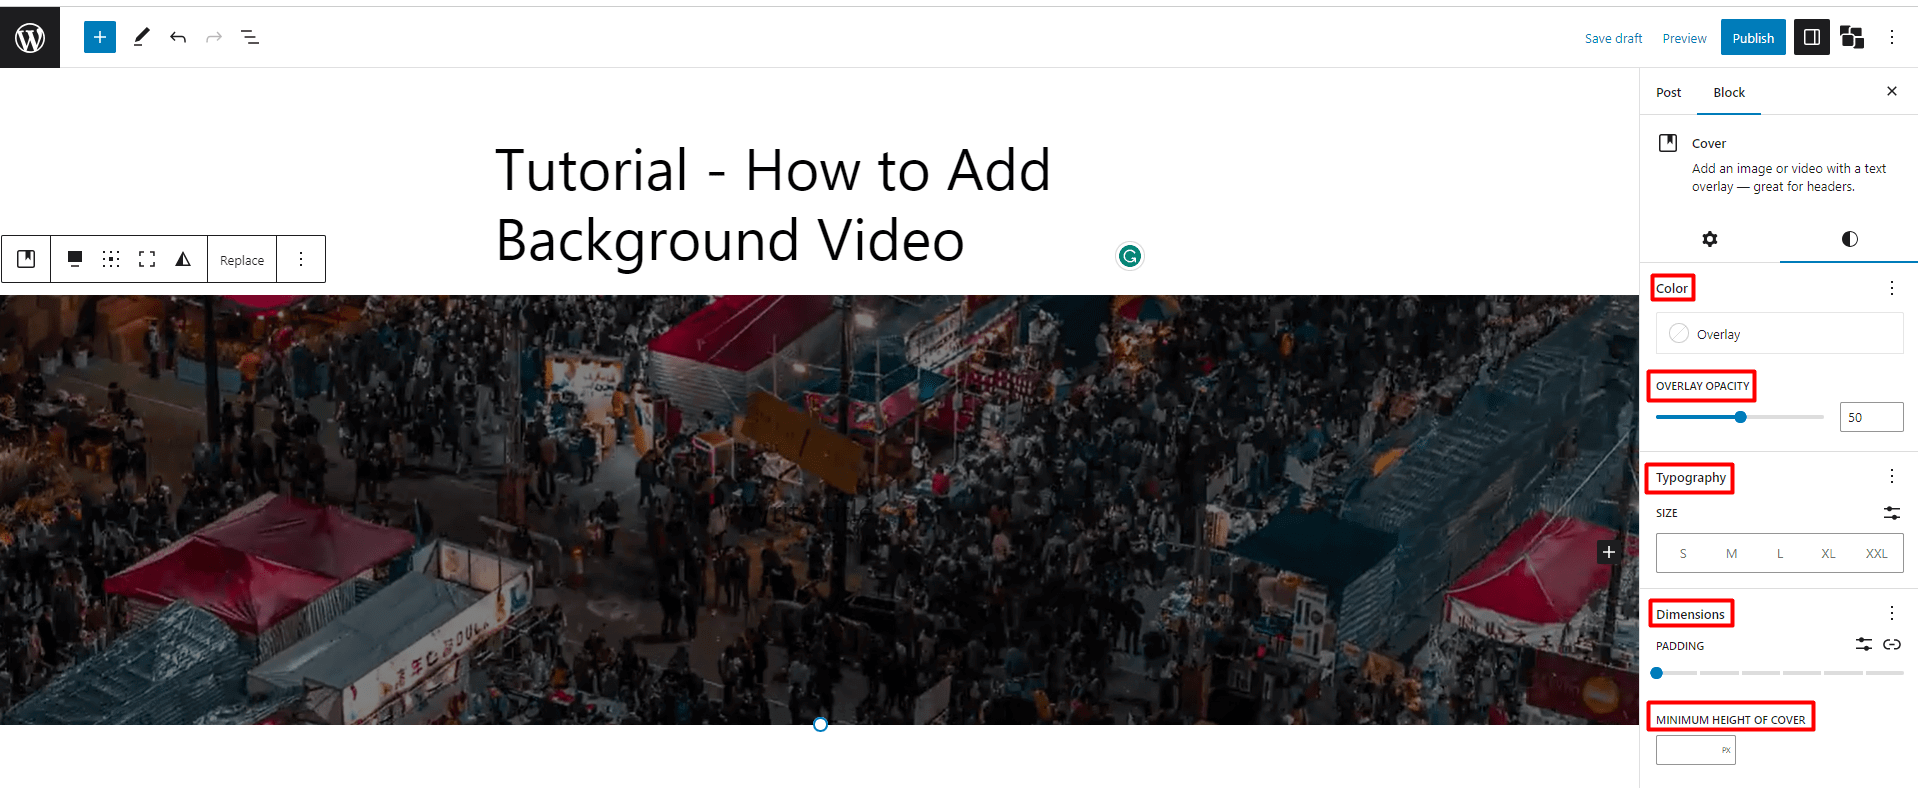
- Color (Solid and Gradient)
- Overlay Opacity
- Typography
- Minimum Height of Cover
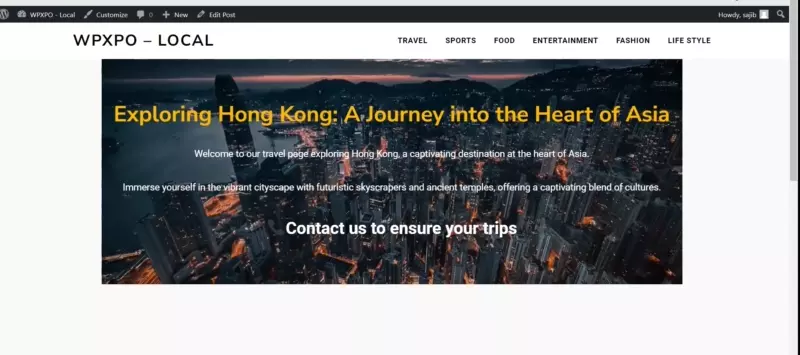
Now incorporate the style according to personal preferences. We’ve just added texts with different sizes and colors and aligned them accordingly. Here’s the final output of the WordPress Background Video by Gutenberg.
WordPress Background Video: How to Add with PostX
The above one was the default method. However, if you love to customize it more and want a more professional look, then we suggest using our plugin PostX. PostX offers more control over your WordPress background videos and allows you to add them easily with various customization options. With PostX you can also display videos as featured images. Here’s how you can use PostX to add a background video to your WordPress website:
Step 1: Install and Activate Post
First, you need to install and activate the PostX plugin on your WordPress website. To do it, click the cursor on the “Plugins” section in your WordPress dashboard, and then click on “Add New.”
After that, search for “PostX.” Once you find the plugin, click on “Install Now” and then “Activate.”
? Get PostX Pro to unlock all exciting features and make amazing Websites
Step 2: Create a New Post or Edit an Existing One
After activating PostX, you can create a new post or edit an existing one where you want to add the background video. You can also use the plugin on pages or any other custom post types. So, now create a new post like the way I explained before.
Step 3: Add the Row/Column Block
Now just like the previous one, click on the “+” button to add a new block. Then in the search box, type “Row,” and you’ll find the PostX Row/Column block icon.
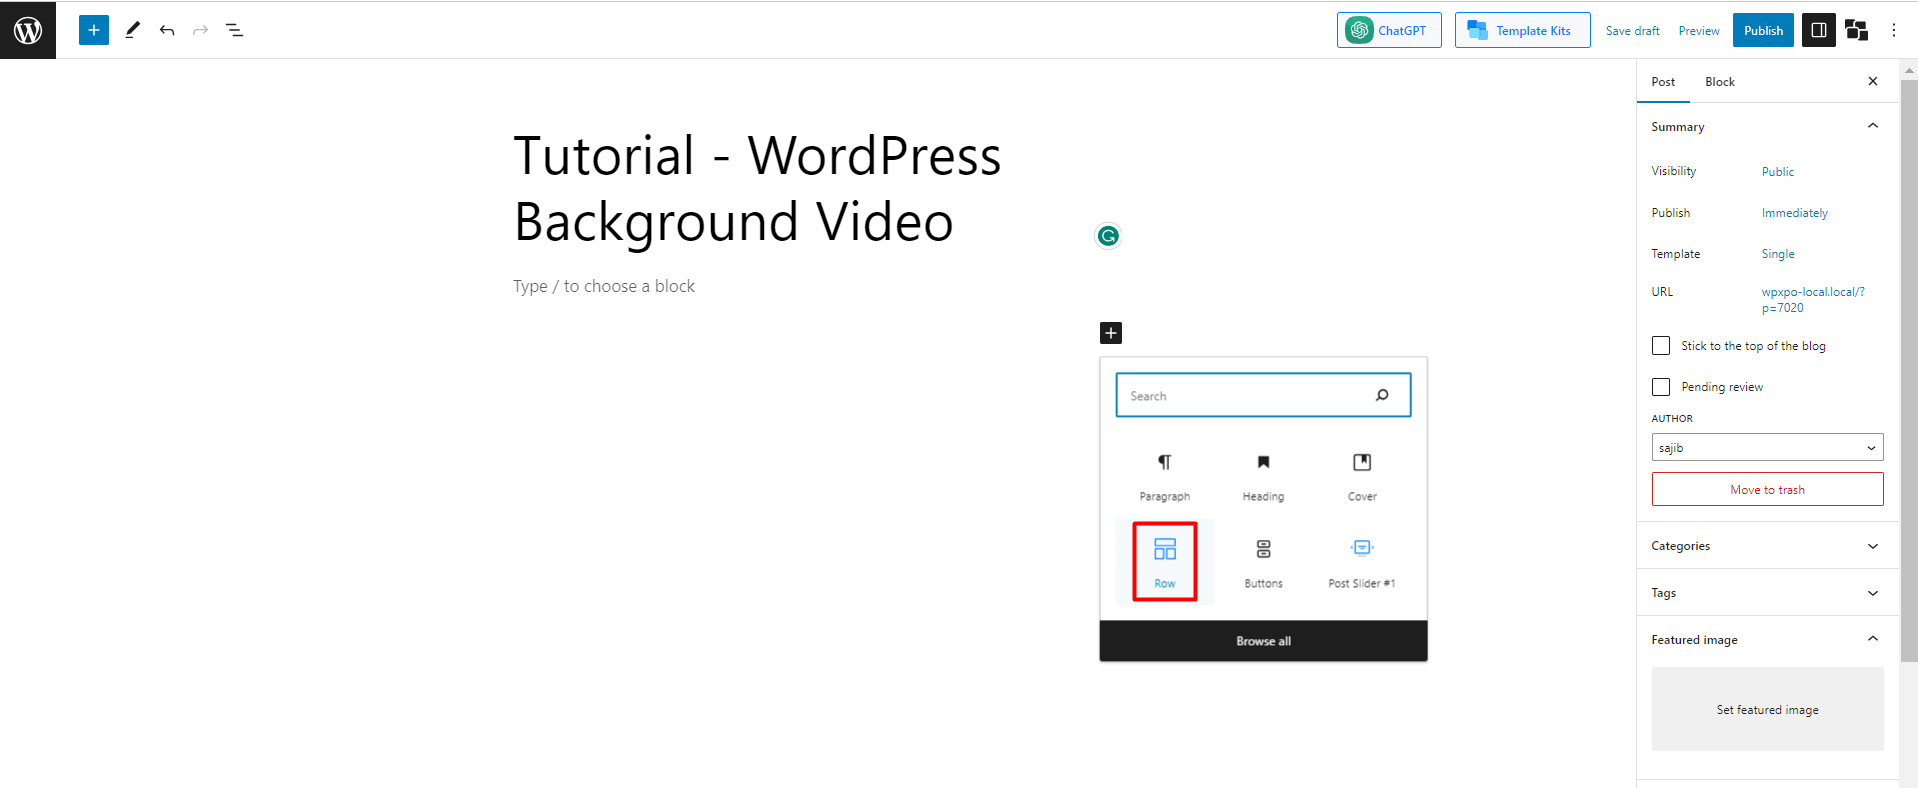
NB: You might see 2 different blocks named Row. Don’t get confused; one is from the default editor, and another one is from PostX. Just follow the image above and select the suggested Row/Column block.
Step 4: Choose the Layout
After clicking the row block, you’ll see ten different layouts such as “100,” “50:50,” “50:25:25,” etc. Choose any of them according to your needs.
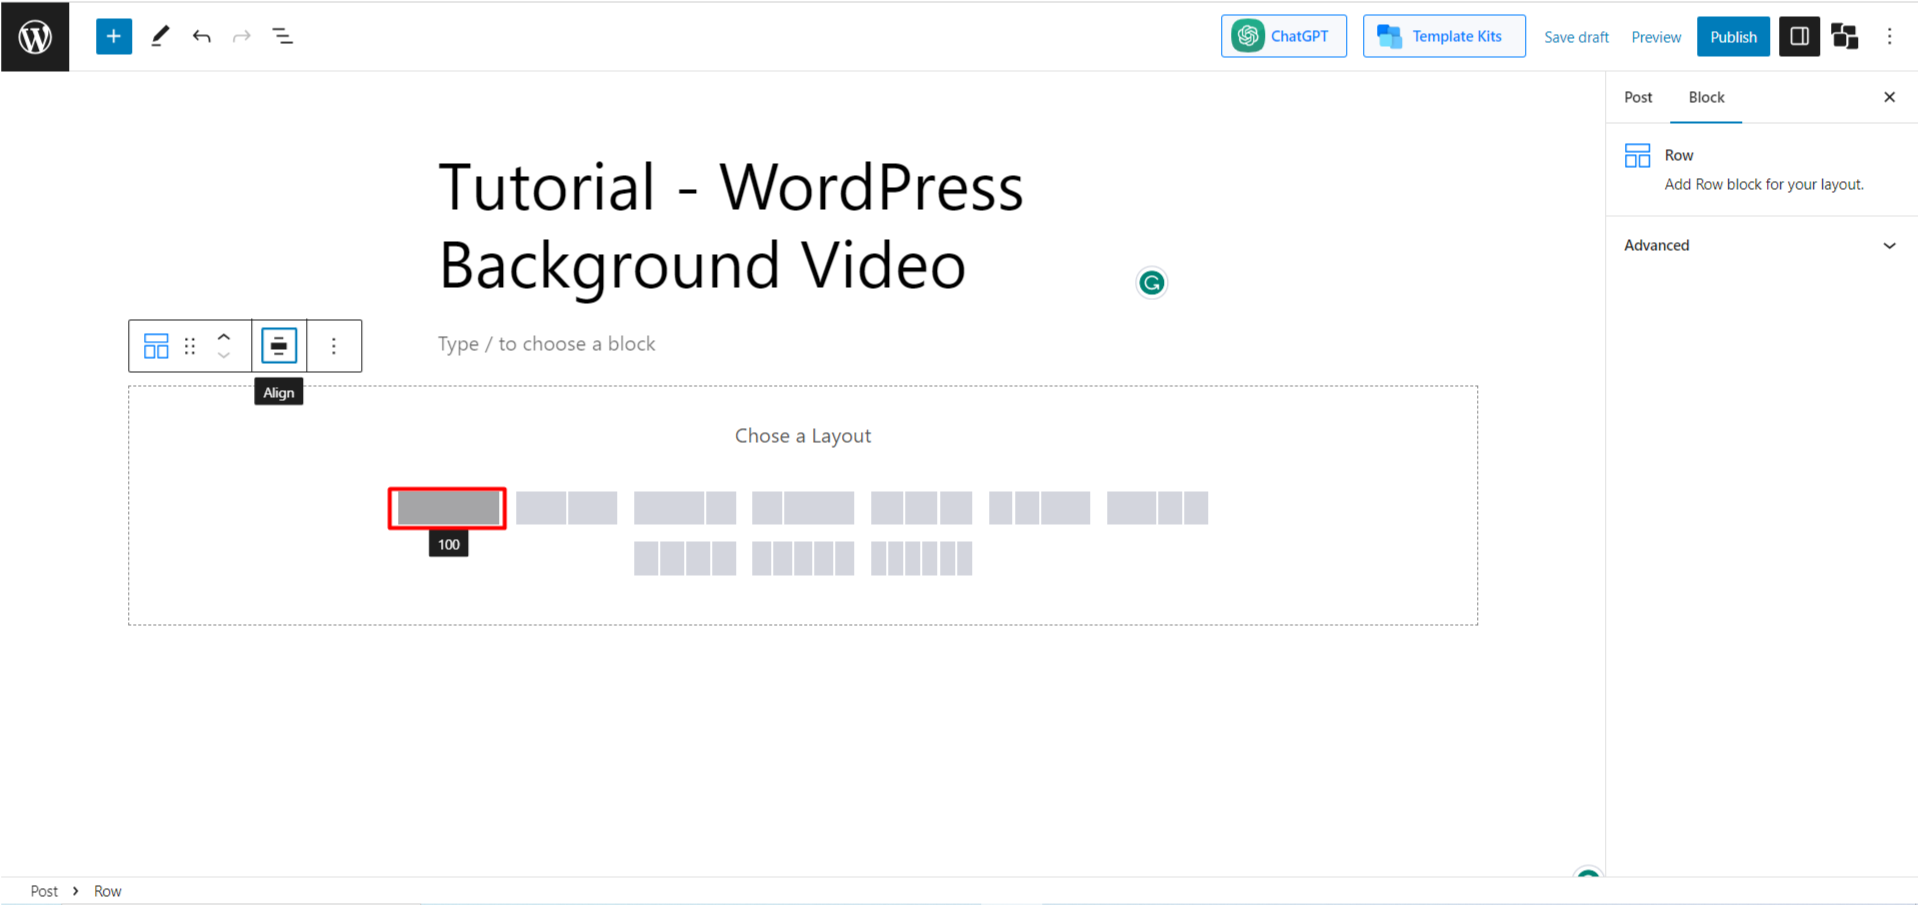
Let’s go with the 100:00 layout: click on it.
Step 5: Click on Background and Wrapper
After you opt for the layout, you’ll notice the row block is created with a single block inside it.
You don’t have any work now with the included block. Instead, your main task is now with the Row block. Now click on the “Block” button (You’ll find it just below the publish button.)
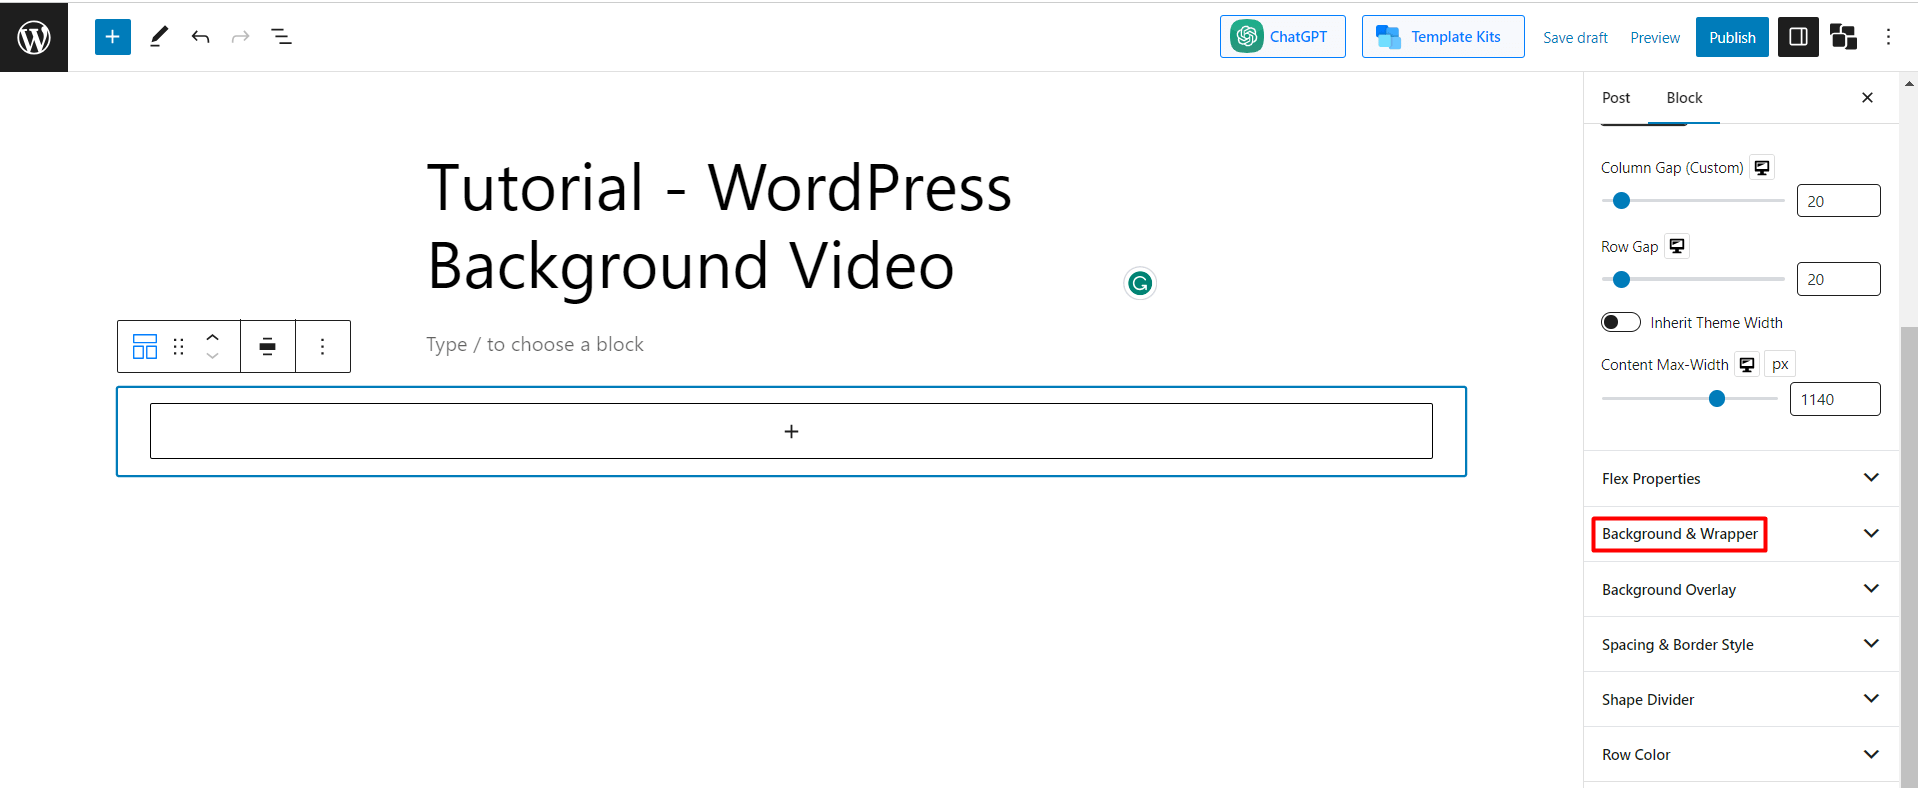
Then you’ll see lots of options to customize the Row. However, our main task is to add a WordPress background video. So find the option “Background and Wrapper” inside the “Block Button” and then click on it. If you can’t find it, just check the image below.
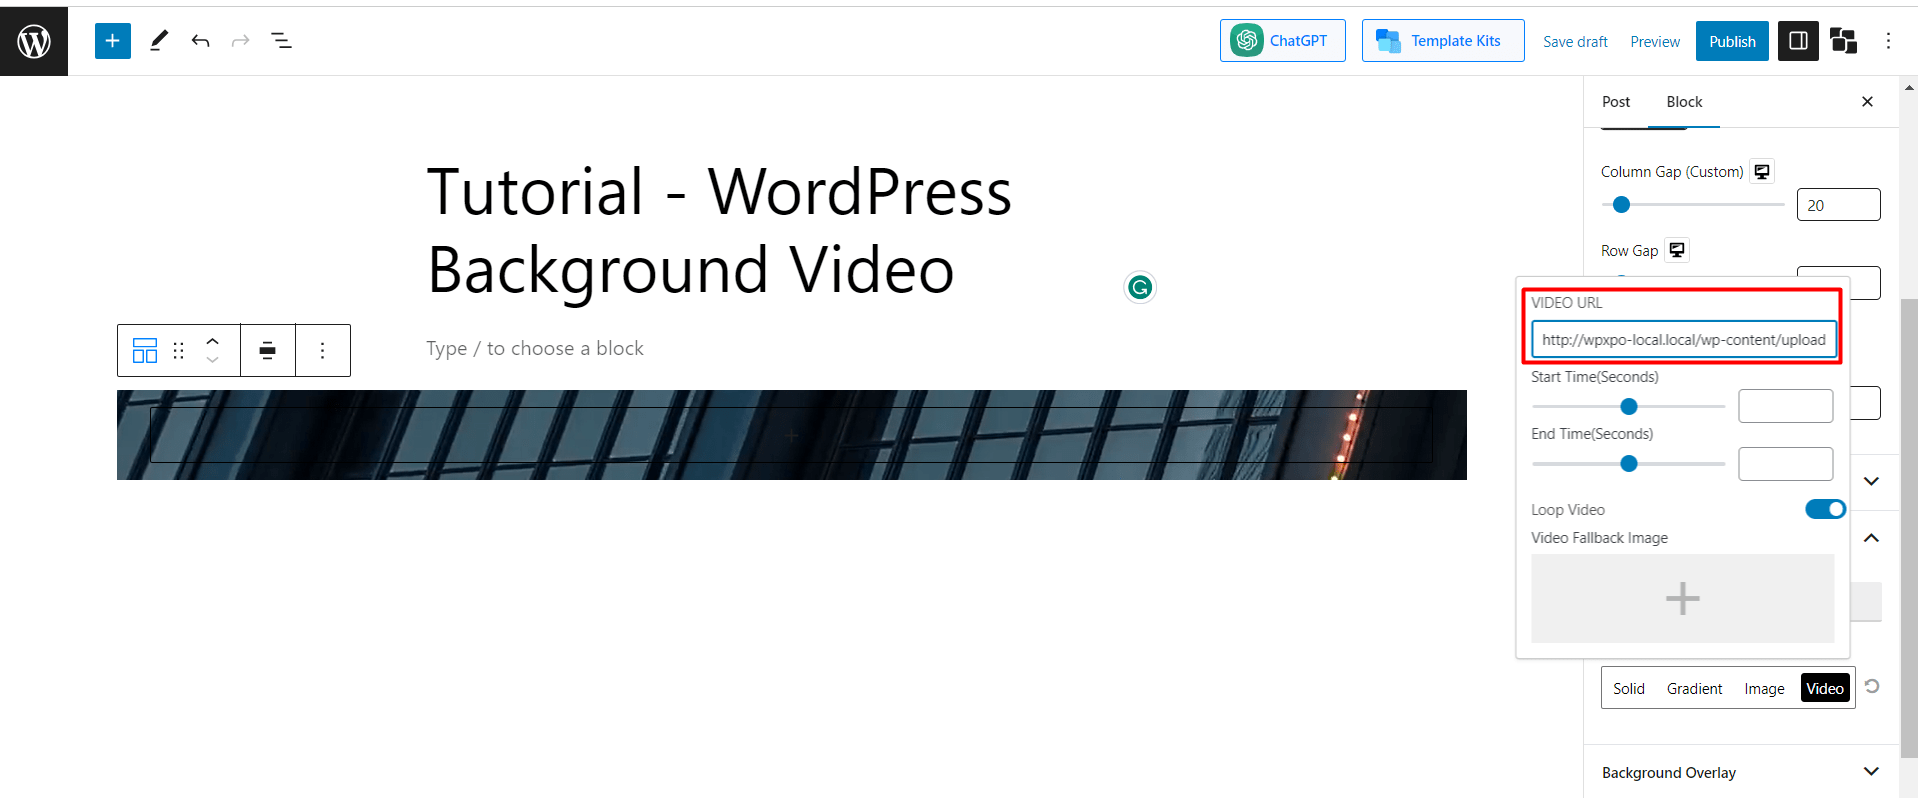
Step 6: Upload the Video URL
Now click on the button, and you’ll find 4 options under the background option – Solid, Gradient, Image, and Video. There, select “Video.”
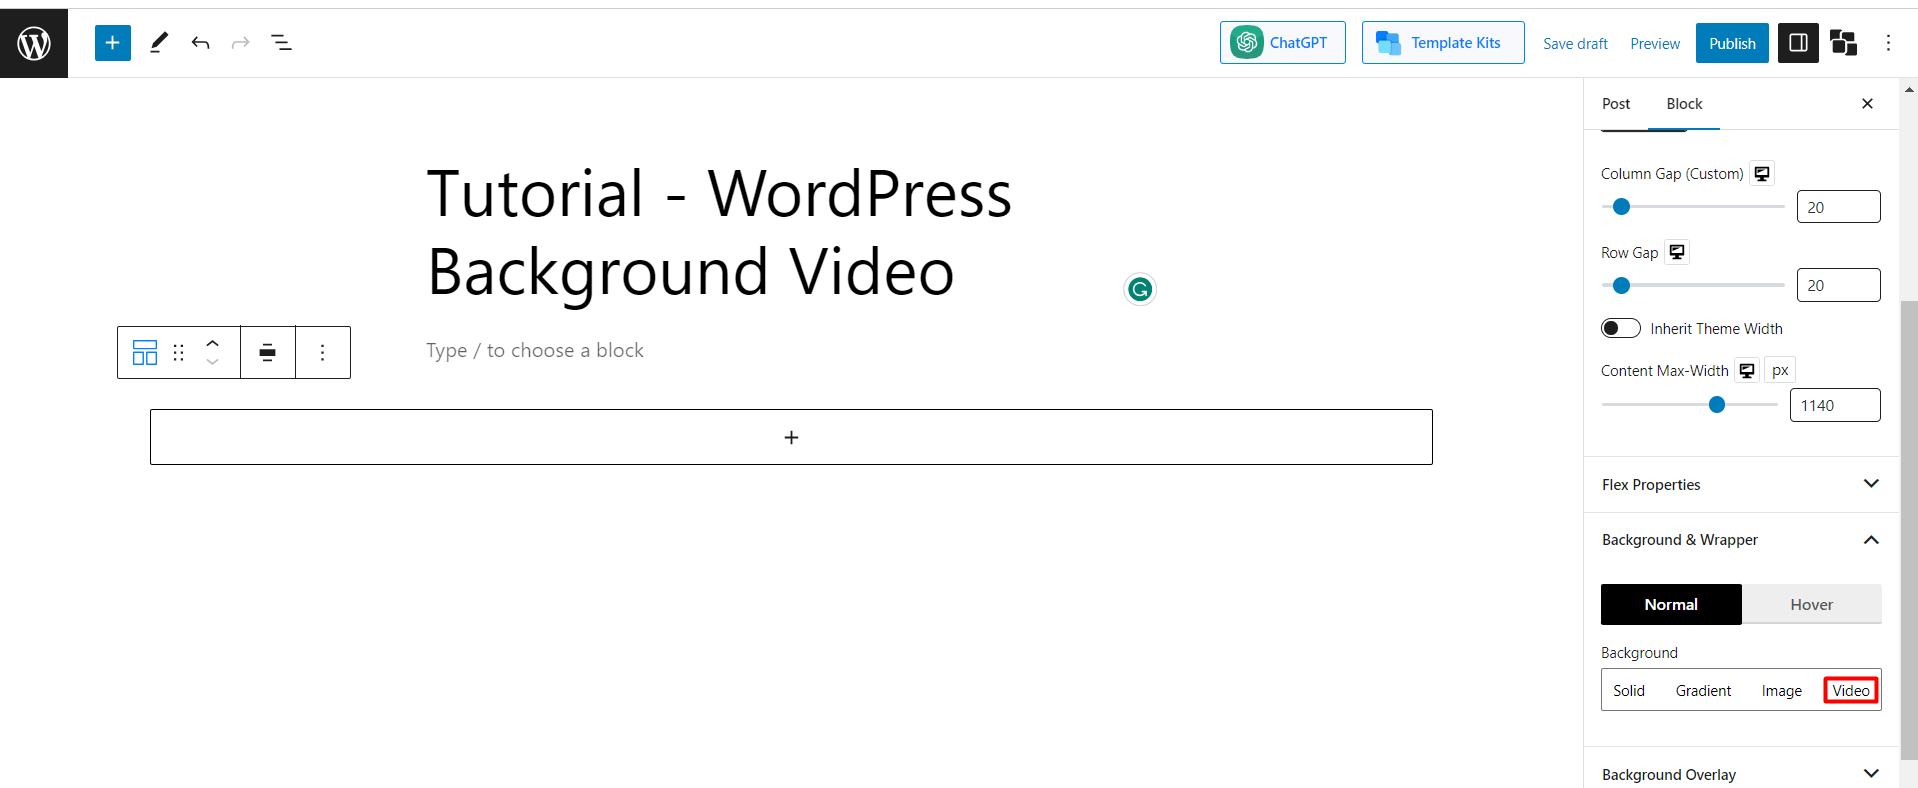
Note: When you’re using PostX, you can’t directly upload a video. You’ll have to share the video URL. In most cases, it is more advantageous.
For example, if you want to add any YouTube video, then just copy the video URL and paste it into the box “VIDEO URL.”
But in the case of any saved video, it’s a bit time-consuming. As there is no option to upload direct video, you’ll have to share a Self Hosted URL. You can upload videos to your WordPress site and add them by using the uploaded video link.
Now just like you inserted the YouTube video link, insert the self-hosted video link to the default Video URL Box.
[Note: Make sure the hosted video URL is available to the public, otherwise nobody would be able to see the video.]
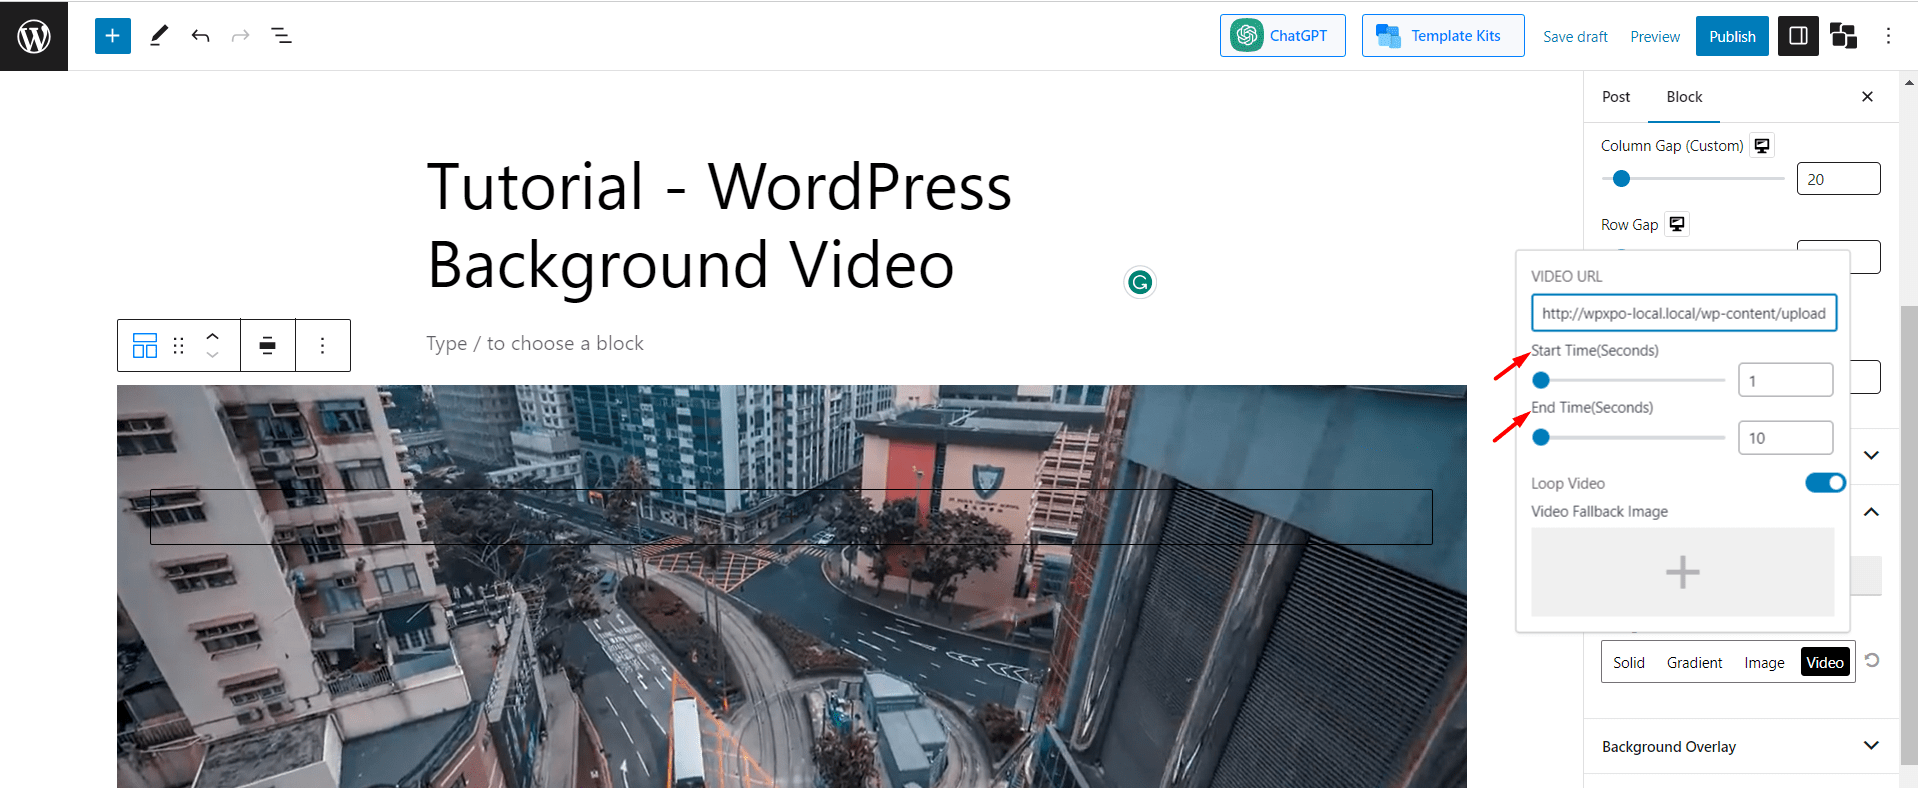
Step 7: Customize the Video Settings
After you add the video, PostX offers some extra benefits. For example, you can adjust the video time. Just fill in the start time and end time box according to the time and position you want to run the video.
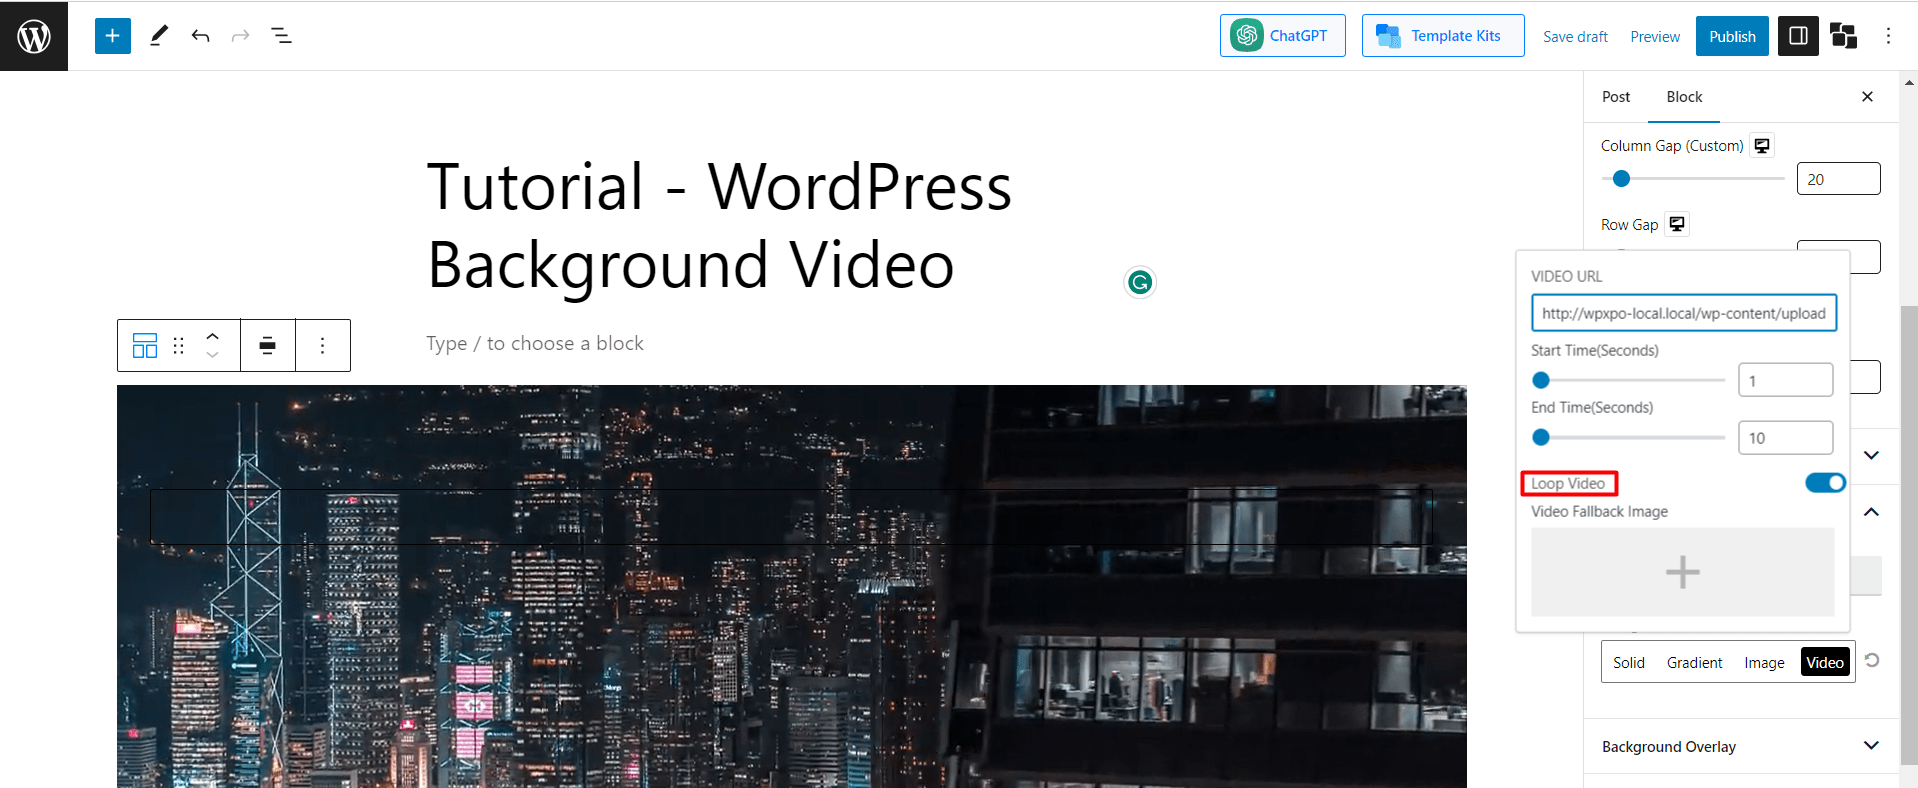
You also have the option to enable or disable “Video Loop” and set the “Video Fallback image.”
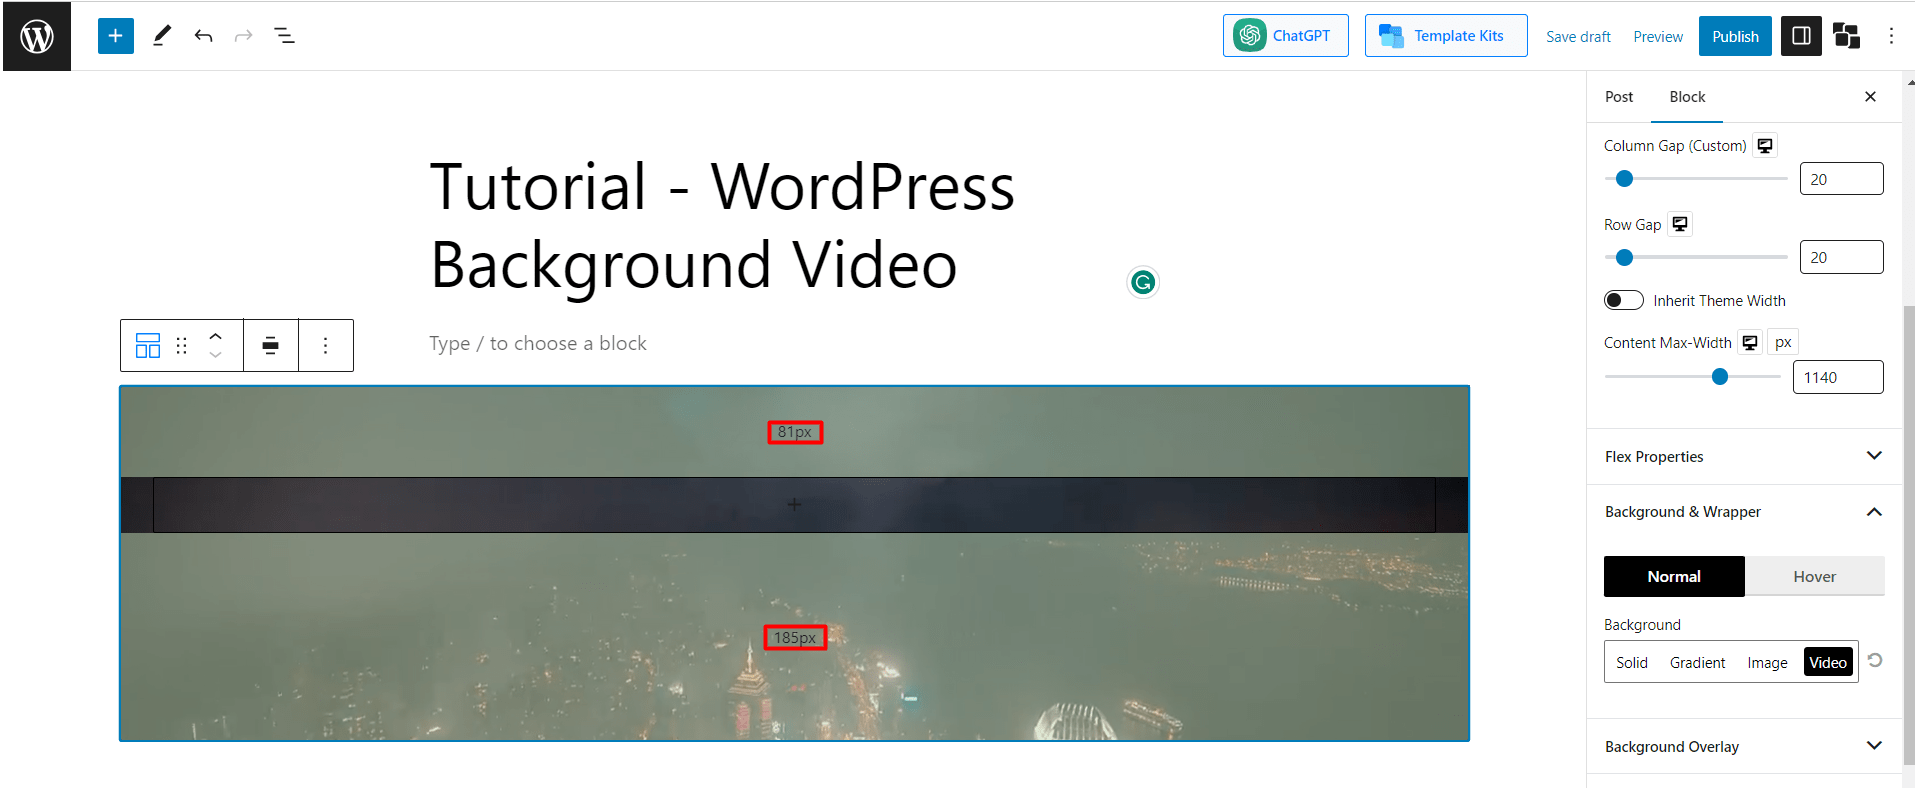
Step 8: Add Items to the Inside Block
You’ve already done adding the background video. It’s time to design it. As we’ve selected a 100:00 layout, you can add a single item to the layout. However, we can add multiple blocks under this.
You can also set the pixel of the background video. To do it, just hover the cursor on the middle top or bottom corner of the “Row” block. As soon as you reach the position, you’ll see a pixel shown inside the Row. You can then click and drag it upper or lower to adjust the Background video size.
Now finally, customize it according to your preference. We’re going to prepare one quick customized background video now. Let’s check it step-by-step.
Practical Guide on WordPress Video Background Customization
Now we’ll create a simple background video showcasing a tourism service.
Step 1: Follow the Previous Steps and Add the Video
We’ve already learned the basics. Just follow the below steps and add a WordPress background video using the Row/Column block by PostX.
Step 2: Add Heading to the Existing Block
Now we selected a 100:00 layout. There you can add a single item. We are adding the “Heading” block.
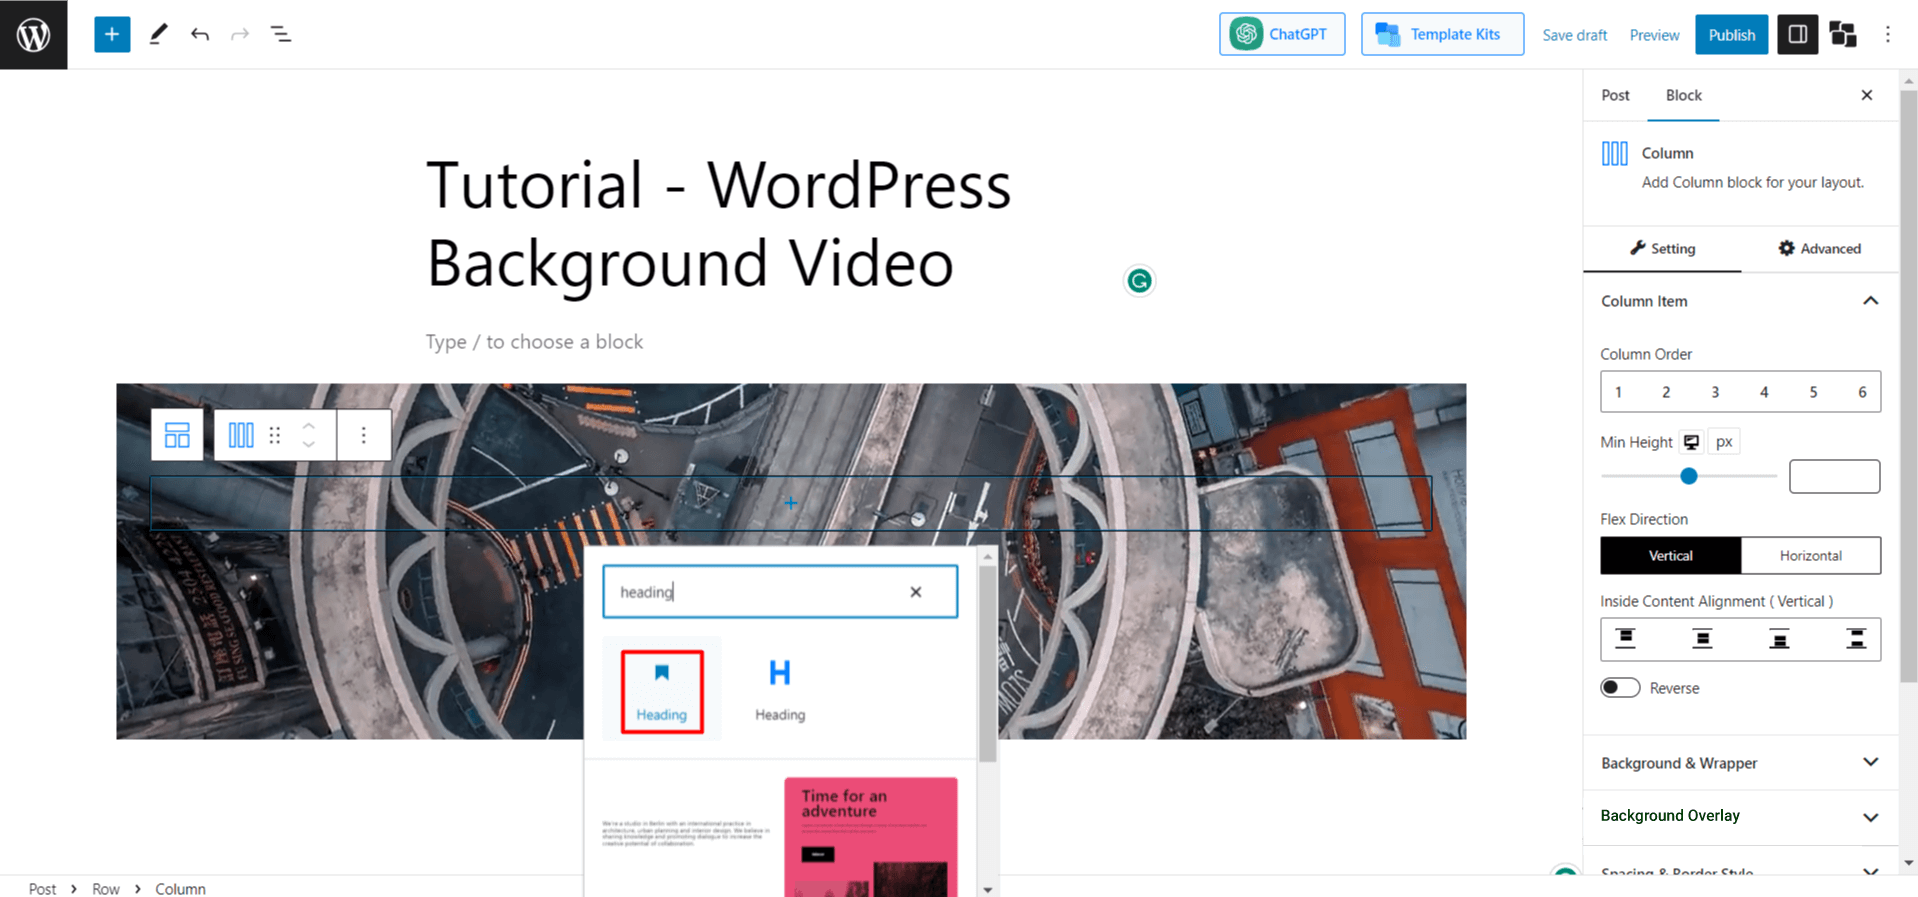
After adding the heading block, Add the Tagline/Service you want to show on the heading.
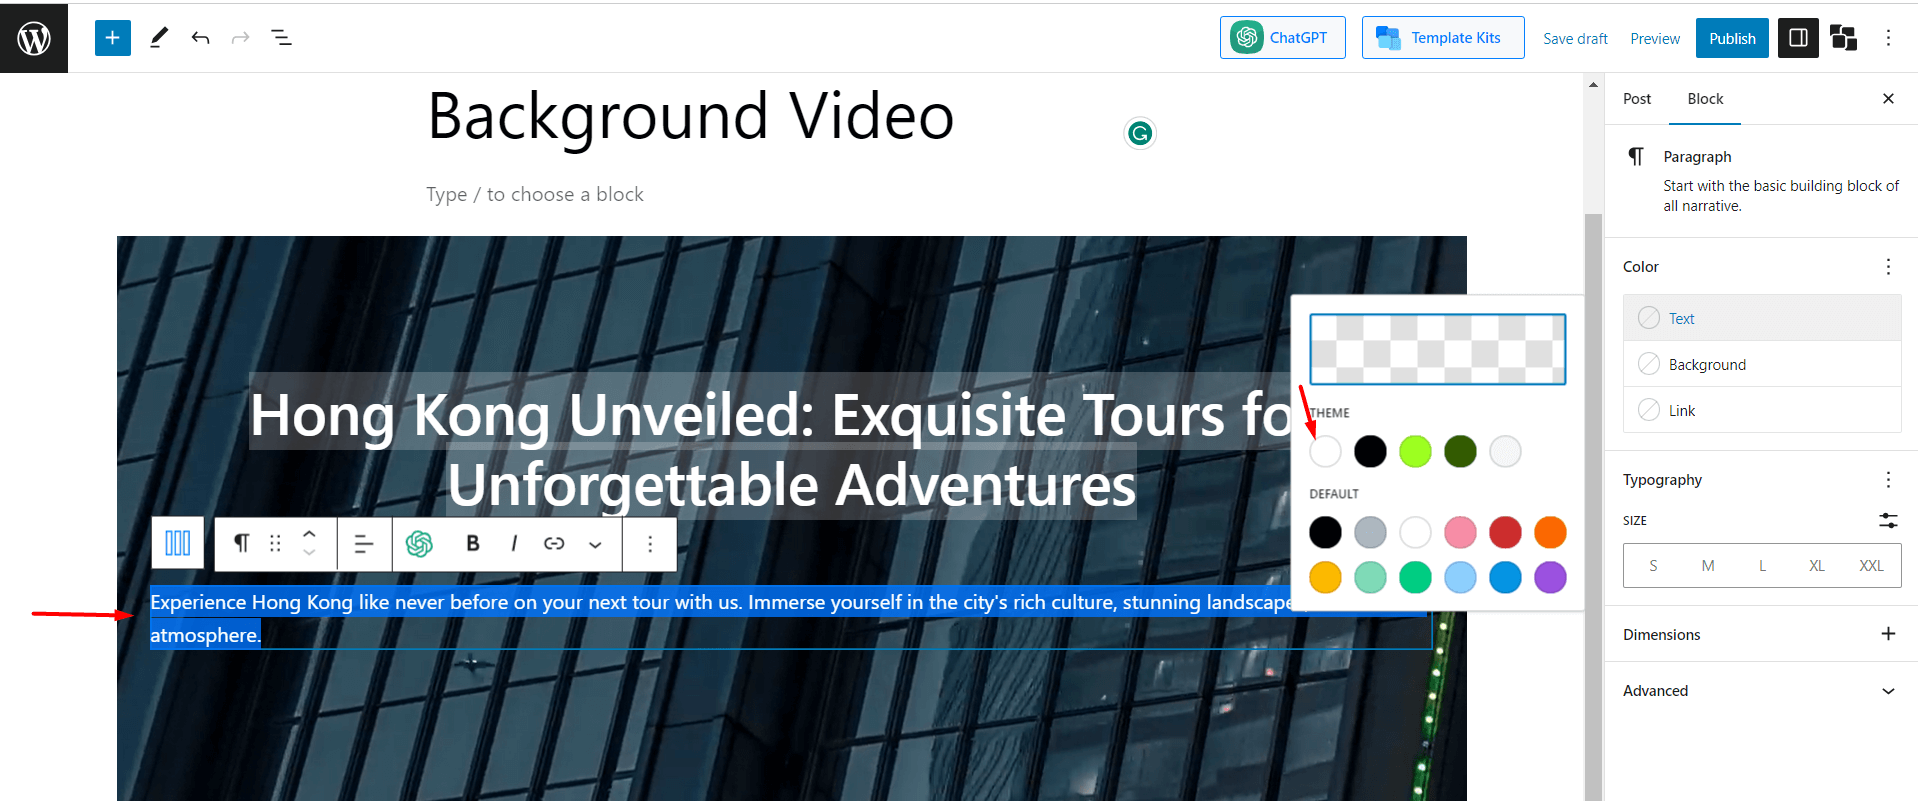
Step 3: Add a Paragraph Block Under the Heading
Now just click enter or click the “+” button, and you’ll see another block under the heading. It’s, by default, a paragraph block. Now write what you want to offer in the paragraph block. For better visibility, we’re keeping the text color “White.”
Step 4: Add CTA Buttons
Now following the same way, after completing the paragraph block, press the enter button, and a new block will appear. Now add the “Button Group” by PostX.
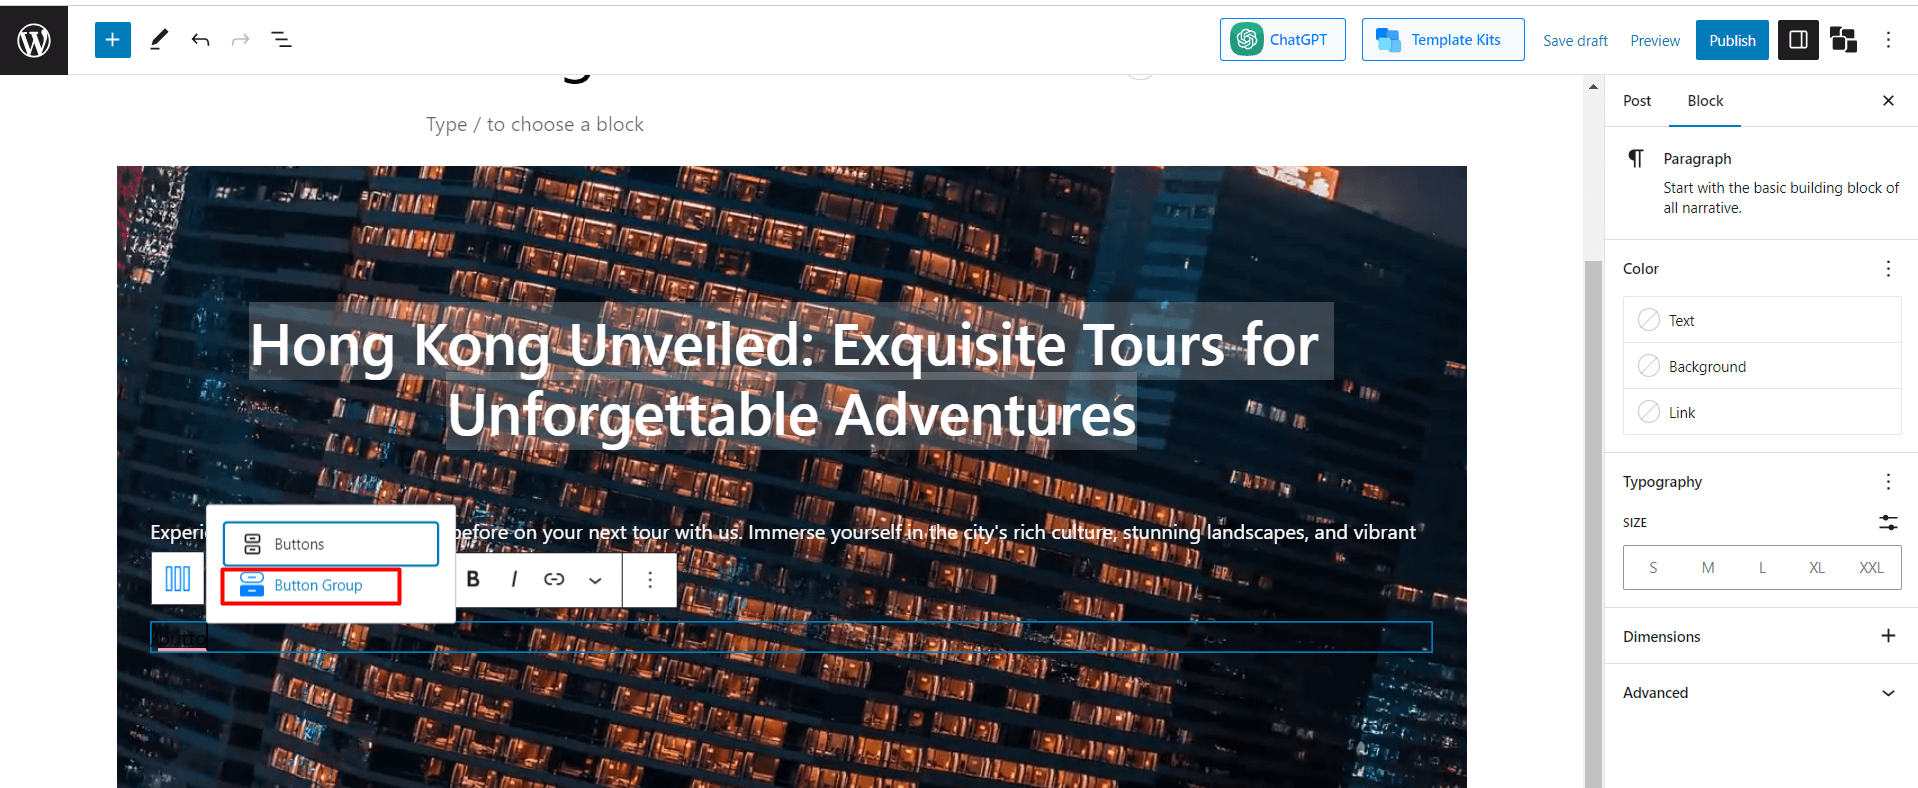
We are adding 2 CTA (Call to action) buttons to attract customers with different purposes. To customize the buttons in a better way, check out this video.
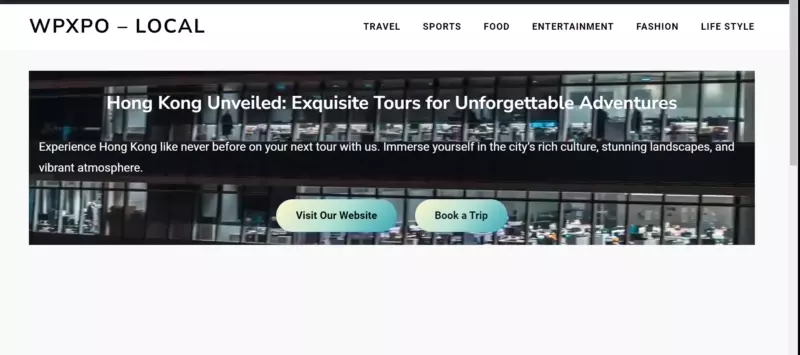
Creating the background video is now complete. Let’s see the final output.
Guidelines for Adding Video Background in WordPress
Here are some recommended guidelines for adding a video background to your WordPress website:
Optimize file sizes without sacrificing resolution
Large videos and images can slow down your site’s performance, so it’s important to find a
balance between file size and resolution when compressing your videos.
Use videos sparingly
Avoid overcrowding your website with too many videos. Instead, use them strategically to highlight important points or showcase relevant content.
Include a call to action
When using a video background, make sure to provide additional information or a clear call to action button. Don’t leave viewers wanting more without offering a link or direction to learn more.
Avoid autoplay with audio
Having audio play automatically when someone visits your website can be jarring and disruptive. It’s best to avoid auto-playing audio altogether.
Provide an option for audio playback
If your video requires audio, give users the ability to control the audio playback. This allows them to choose whether or not they want to listen to the audio.
Consider closed captions
Include closed captions for videos that have audio. This helps make your content accessible to all users, including those who are in a location where they can’t play audio or have hearing impairments.
Host videos externally
To ensure optimal performance, consider using external video hosting platforms like Vimeo or YouTube. These platforms are specifically designed for video hosting and streaming.
Stick to recommended formats and resolutions
When uploading videos, use MP4 format with a minimum resolution of 720p. Also, make sure the videos are encoded using the h264 codec, as it provides good quality and compatibility.
Final Words
Hopefully, now you’ve properly understood how to add WordPress background videos. We’ve added 2 methods, and both methods have pros and cons.
In summary, I would say if you want to add video as background, or a video link, PostX is the best option. But if you want to upload a video, then the default block is the easier option for you.
? Get PostX Pro to unlock all exciting features and make amazing Websites


