So you want to create a separate page for blog posts. It means that you have already crafted a home page. Now, you need another page that displays the blog posts. It is a common scenario for most bloggers or website owners who want to stand out from their competitors and wow their audience. But the question is, how to create a separate page for blog posts in WordPress?
You can easily separate pages for blog posts by following the below steps:
- Step-1: Install PostX
- Step-2: Turn on Dynamic Site Builder Addon
- Step-3: Create a Blog Page
- Step-4: Add Content to Blog Page
- Step-5:Add Filtering Options to Blog Page
- Step-6: Add Pagination to Blog Page
- Step-7: Add Blog Page to Menu
What is a Posts Page in WordPress?
A Posts Page or Blog Page of WordPress refers to a page where blog posts of the site are displayed. Normally the default home page of WordPress sites displays posts in reverse chronological order. But most of the site owners make customized home pages that may contain products, services, and categories along with these posts. In this type of scenario, the posts page comes very handy.
Why Create a Separate Page for Blog Posts?
Usually, it is not mandatory to create a separate page to display blog posts. However, if you are doing some kind of product or service-based business where posts are not the only ones you want showcased on the home page. Instead, you are more likely to showcase the products and services on the home page. But, blog posts are also important to drive visitors and potential customers to the site. That’s where a separate page for blog posts comes into play.
“For many of the business websites we build, we often set up a blog page to serve as a convenient location to check out blog posts and resources,” according to Donald Chan, founder of IMPACT, a leading content marketing agency based in Singapore.
How to Create a Separate Page for Blog Posts in WordPress
PostX offers amazing post blocks to display posts in an organized way. But where you will be displaying the posts? As you want to create a separate page where you will display posts, the posts grids and posts lists of PostX will be effective.
But, what about creating the blog page? Don’t worry PostX got your back. It has an amazing Gutenberg-based Dynamic Site Builder that takes care of creating all essential pages of sites, especially for News Magazine and blogging sites. How?
Just follow the below steps and your blog page will be ready in no time.
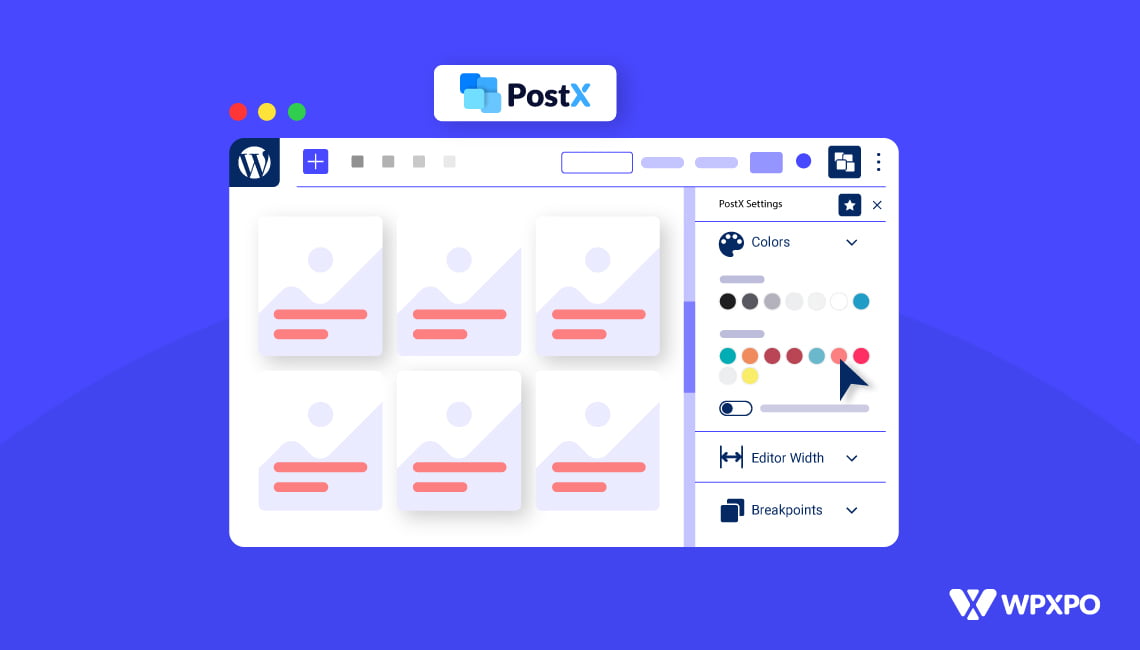
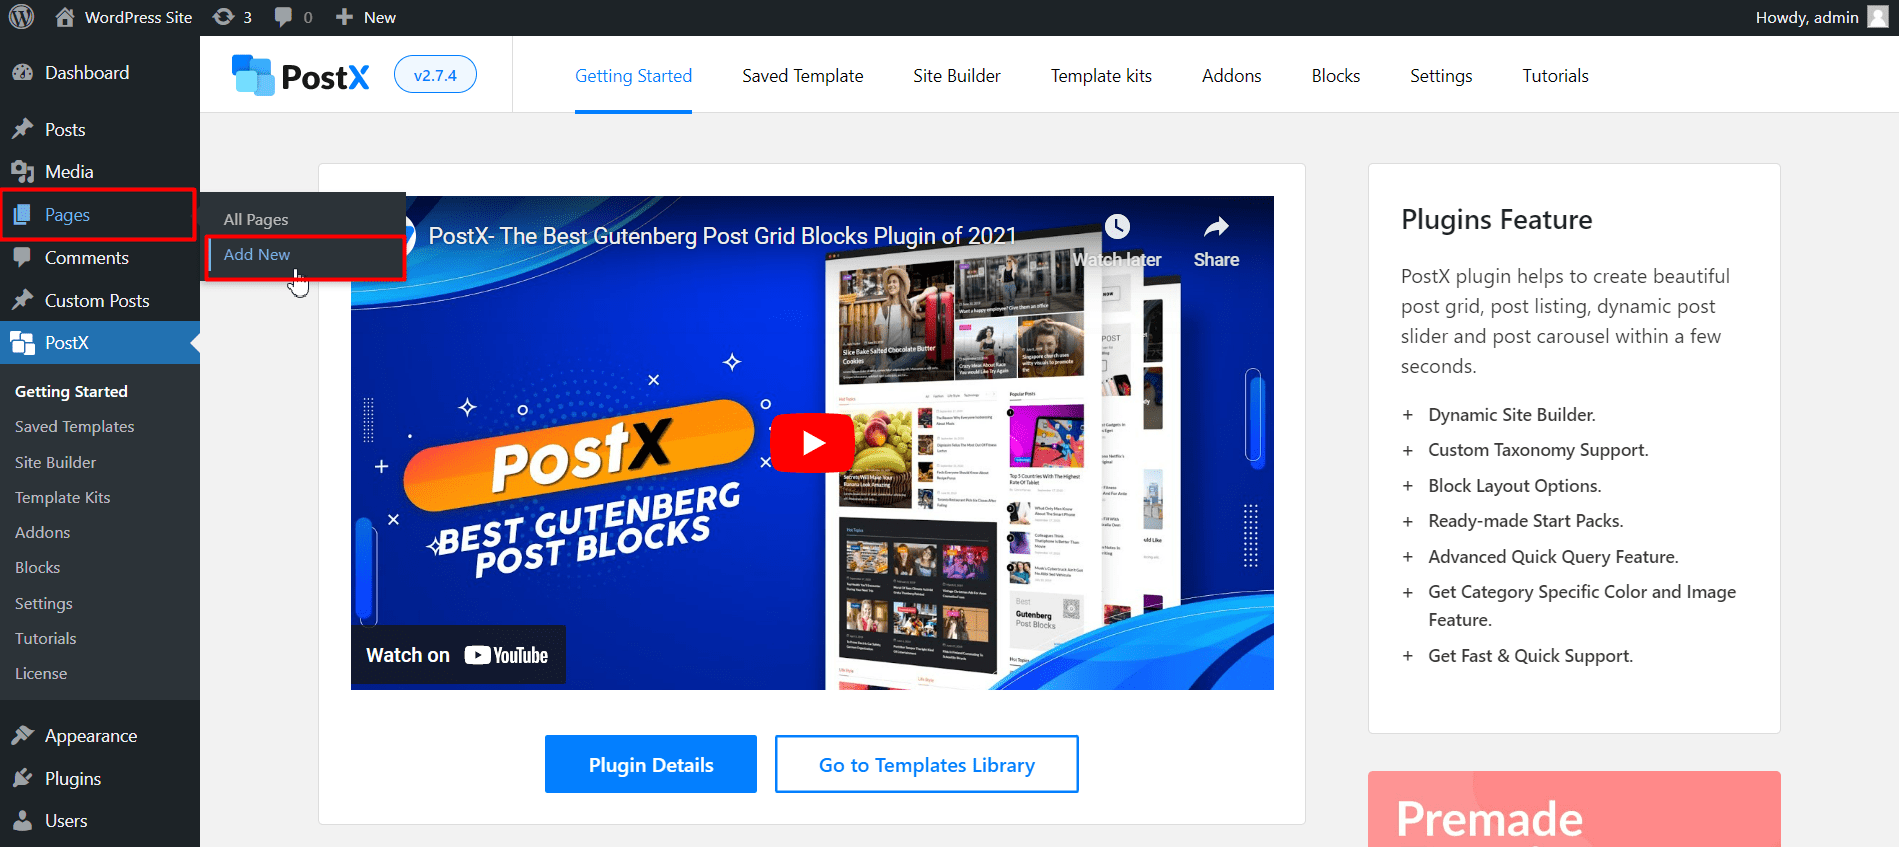
Step-1: Install PostX
First of all, you have to Install the PostX plugin. Because we are going to use this for creating the blog page. You will get the free version from the WordPress plugin directory. Here is how you can install it:

- From your WordPress dashboard click on the “Add New” button from the plugin section.
- Now type “PostX” in the search bar
- Then click the install button to install the PostX plugin
- After installation, click on the active button to activate it
Step-2: Turn on Dynamic Site Builder Addon
As I have already said that we will use the dynamic site builder of PostX. It is an add-on of PostX that makes it more powerful. There are more effective add-ons available for PostX, you can explore them all by clicking here.
Let’s get back to the main topic. So to use the site builder addon, we need to turn it on. Here’s how:

- Click on the “Addons” option from the PostX section
- From all addons section, turn on the site builder addon
That’s all, the addon is turned on and ready for use. Now you will see a new section of site builder added along with all other options of PostX. Keep it there, we will start using it soon.
Step-2: Create a New Page
So, you want to create a separate page for blog posts, right? For that, you have created a new page if not already created. For that, just go to the page section of WordPress and click on the “Add New” button to create a new page. Give a name to the page, for example, a Blog Page, and publish it. Don’t worry as the page is empty because we are going to add content to it in the next step.
Step-3: Add Content to Blog Page
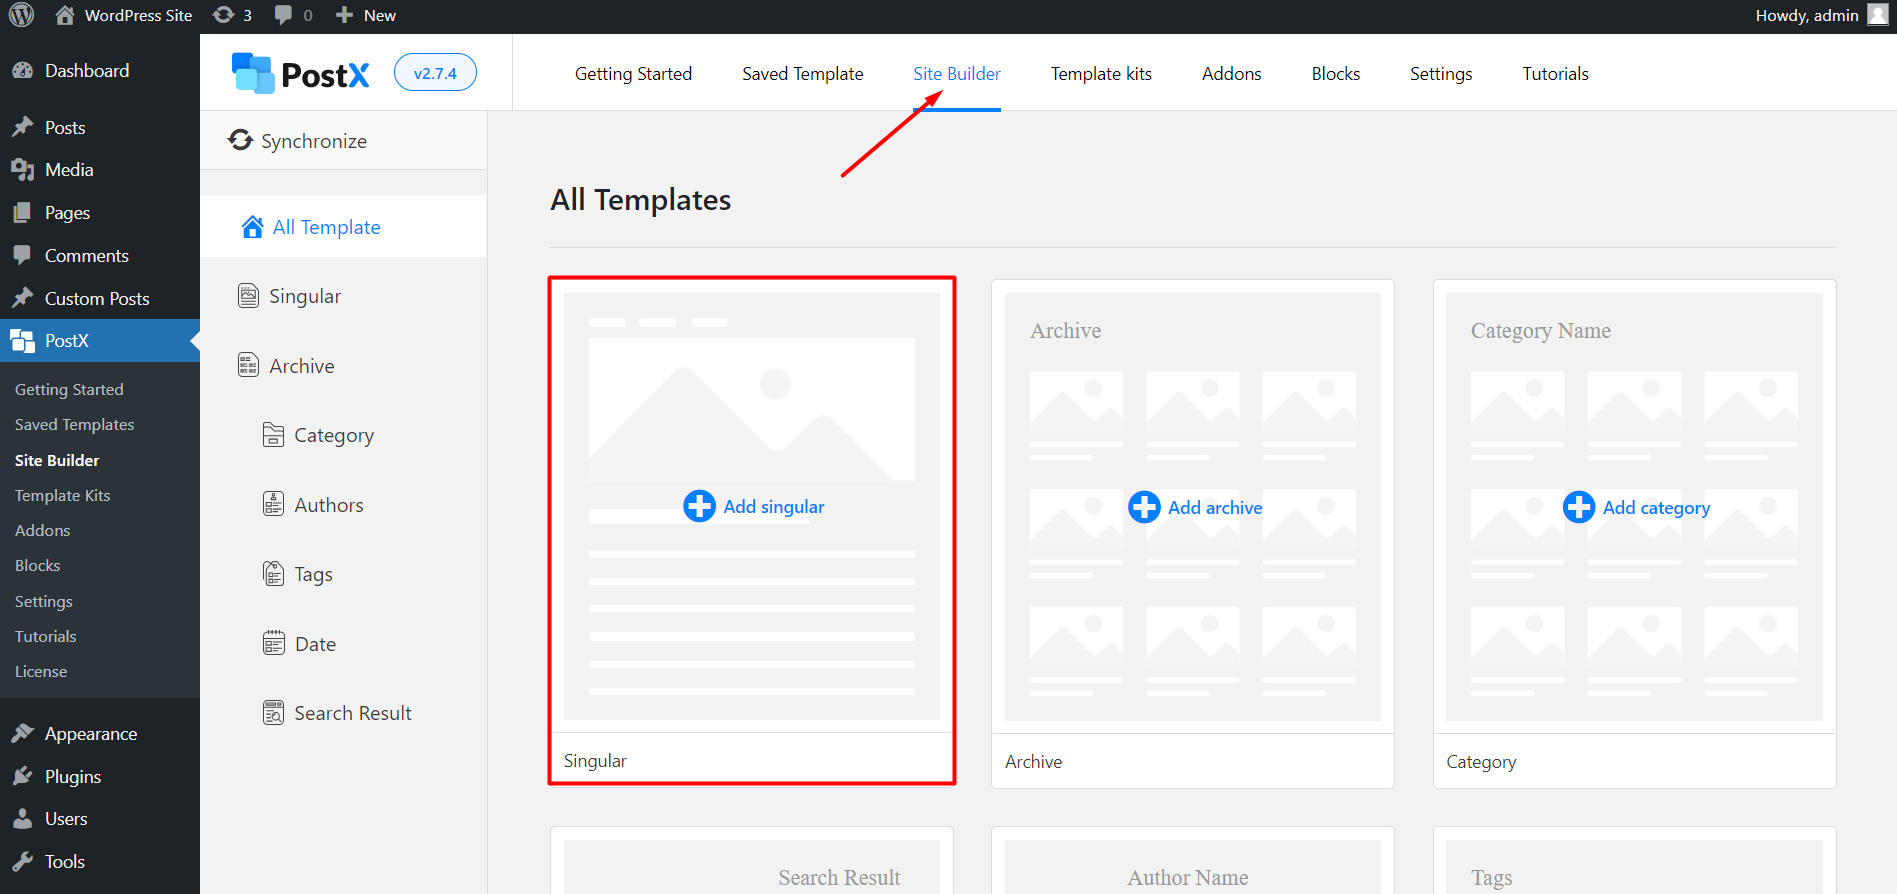
Now comes the fun part which is adding content to the blog page. For that, you need to use the site builder addon. Just go to the site builder section of PostX.
Here you will get options to create templates for all essential pages of your site. For now, click on the “Singular” that lets you create custom pages and post templates dynamically.
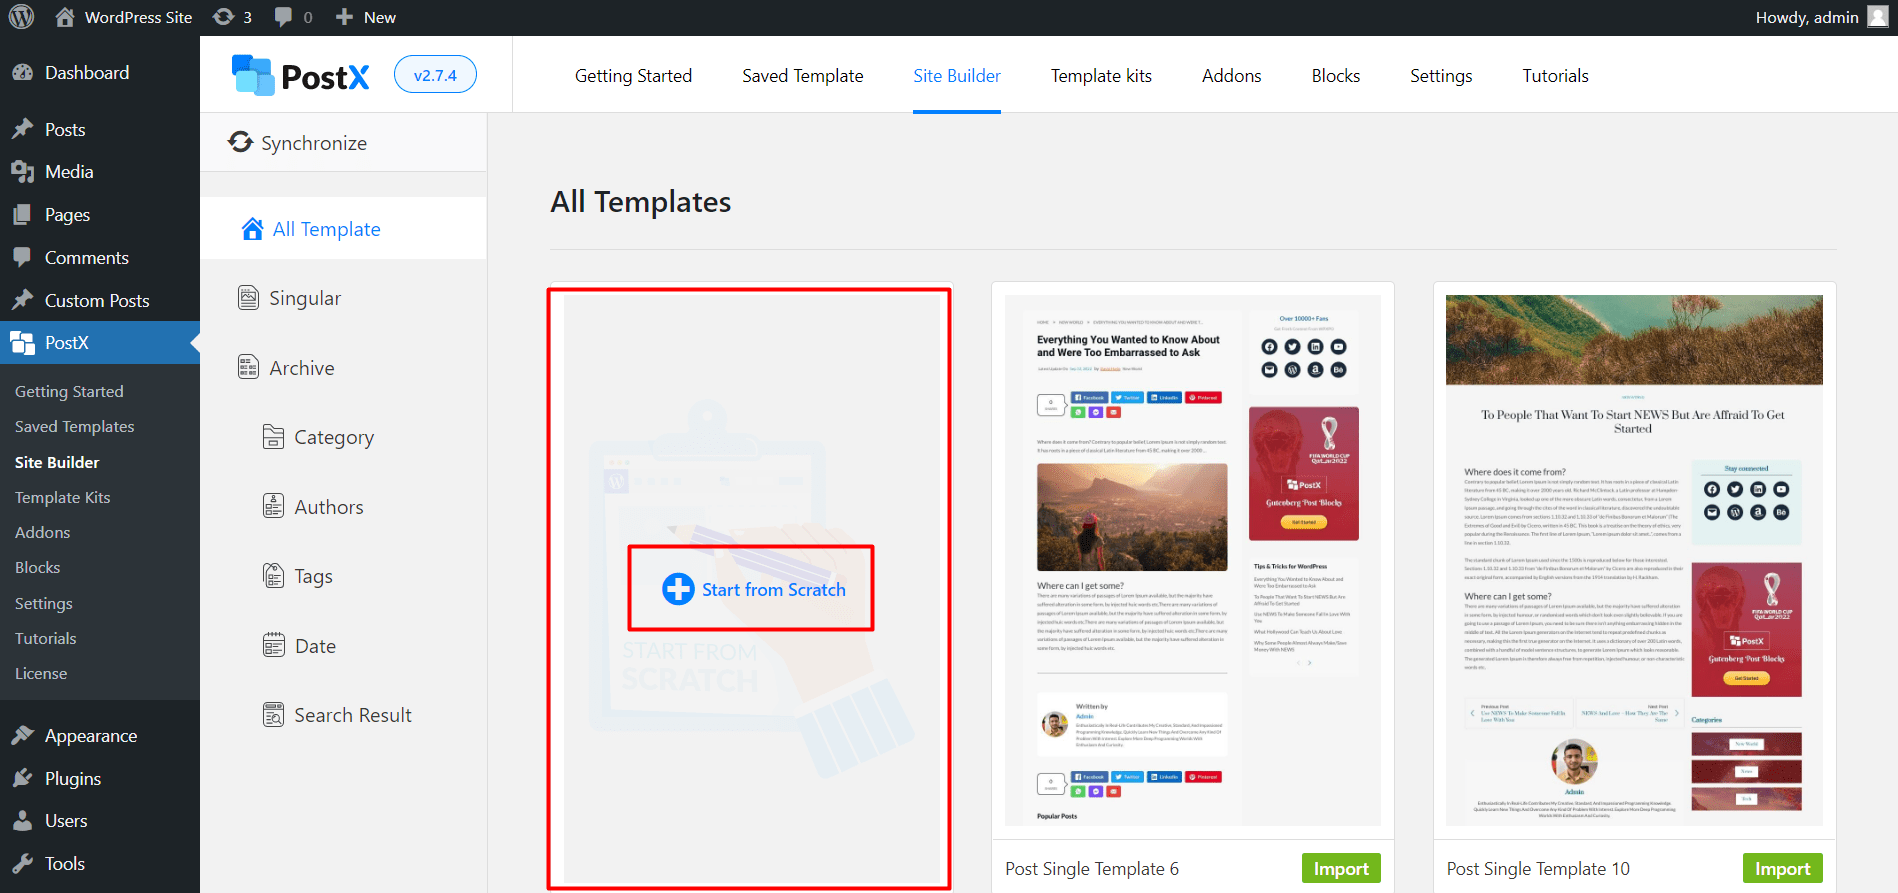
After clicking on the singular options, you will see multiple premade templates finely crafted for single posts. However, we will not use it for now. Because we want to create a custom page. You can create any of these templates for creating WordPress post templates. For now, just click on the “Start from Scratch” option.
Now you will see a block page. As we want to display posts on the blog page, we have to start editing the blog page. For that, click on the above condition selection option.
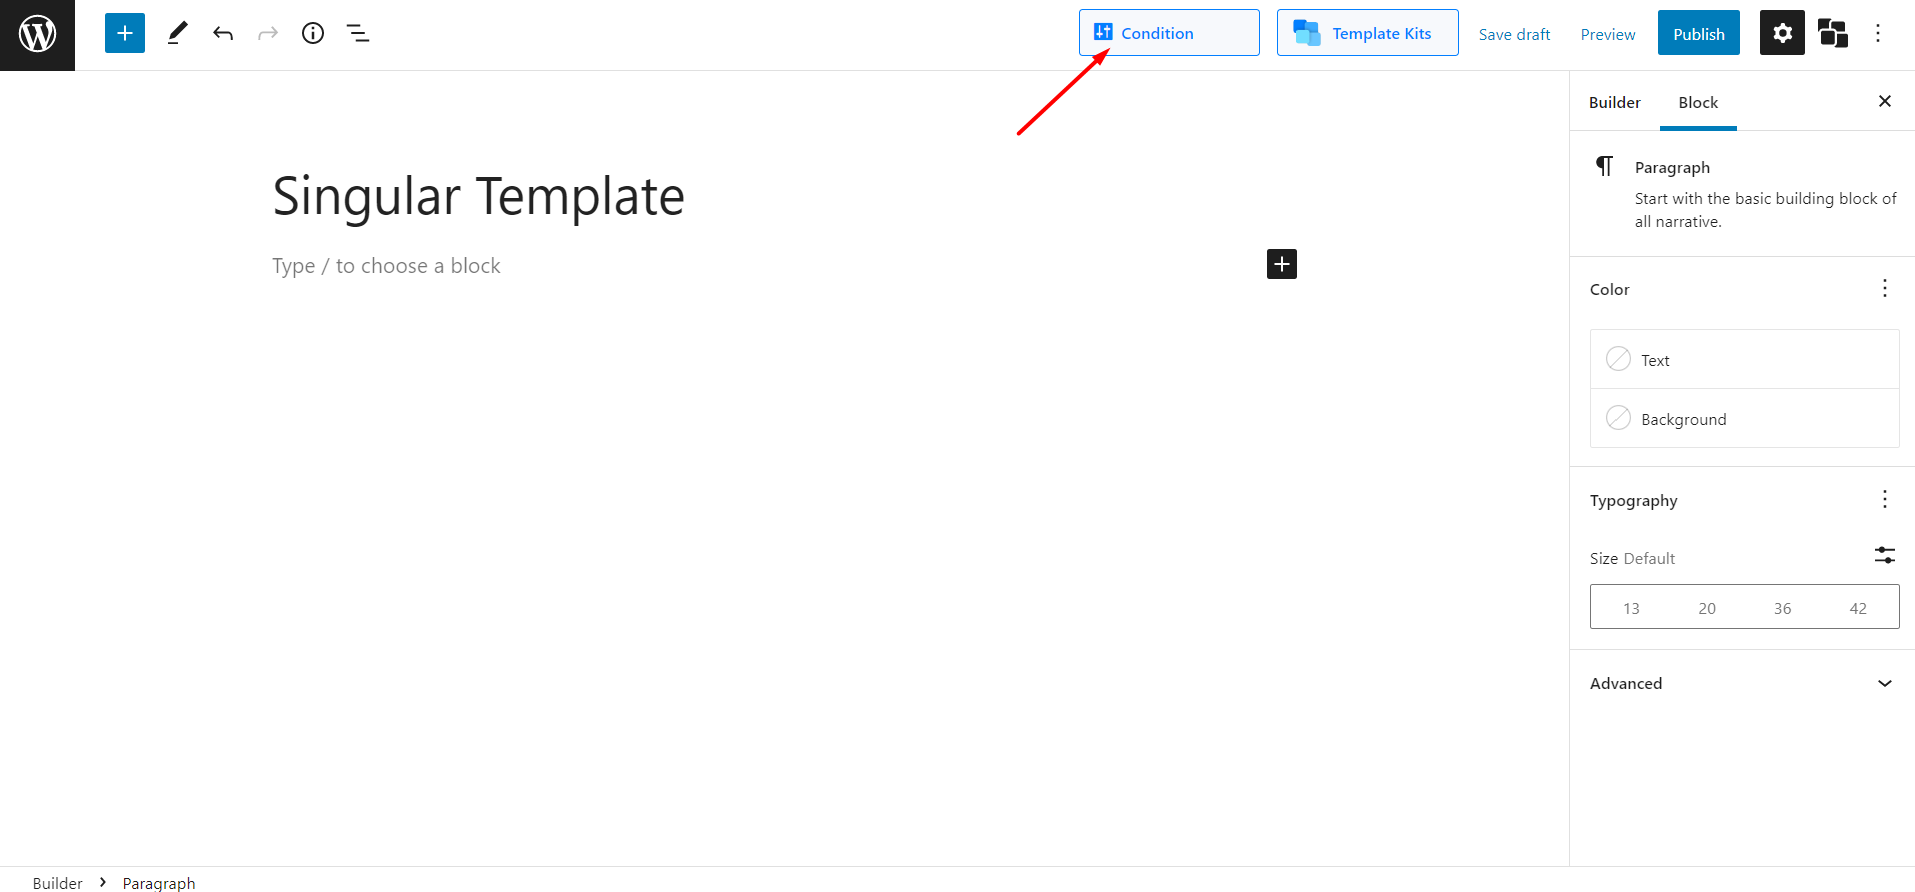
Change the conditions options from posts to pages. Then you will also need to choose your desired blog page that you have created in the previous steps. As I named the new page the “Blog page“, I am selecting it here.
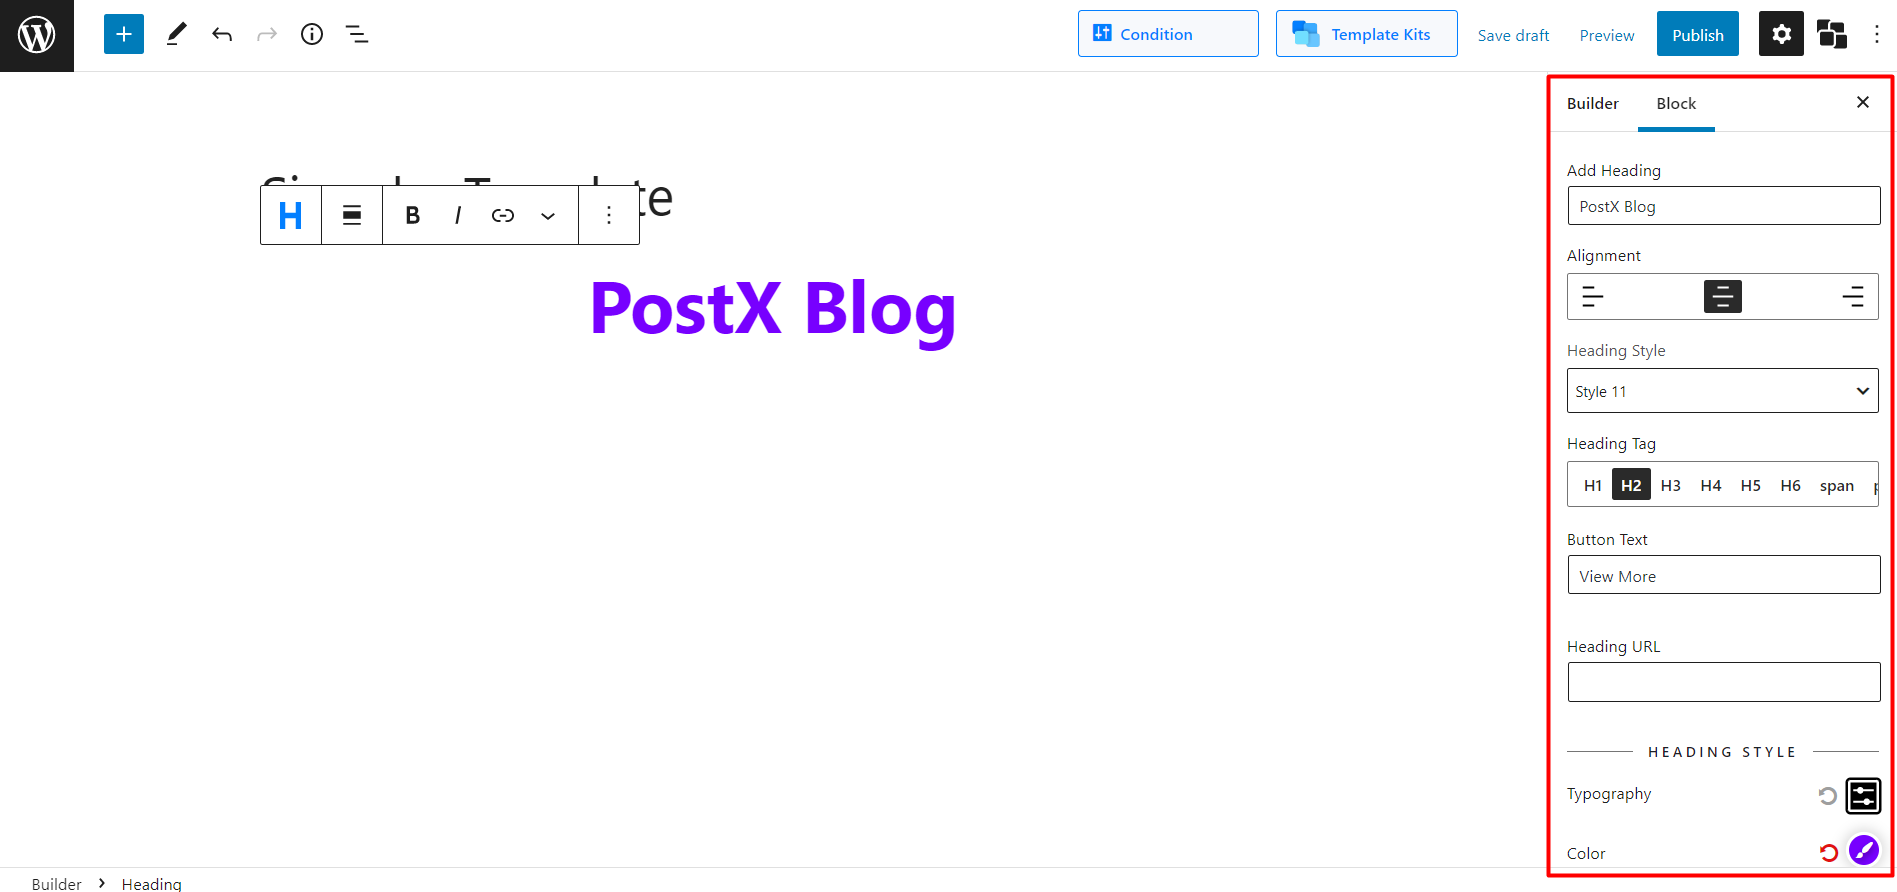
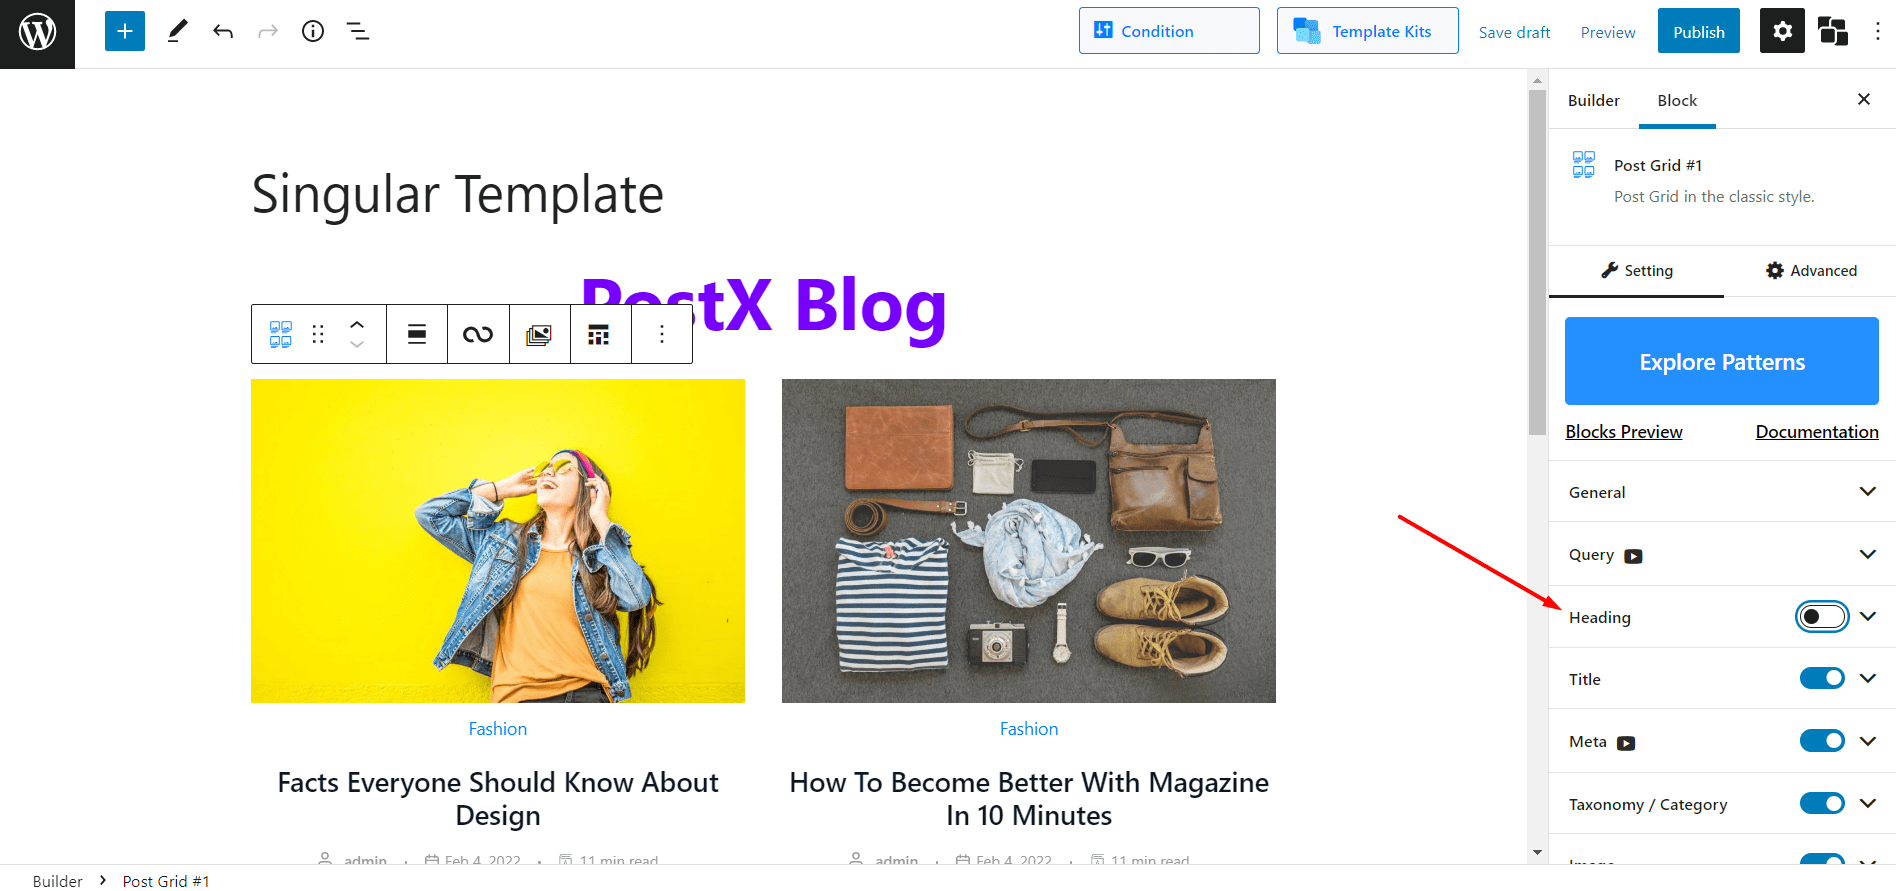
Now, to display content to it you can use the amazing post blocks of PostX. First of all, if you want to add any title, add the Heading blocks to the page you are editing. After adding the block, you can customize it according to your need. The most obvious thing you need to do is the change default text to your desired text. For now, I am changing it to PostX Blog.
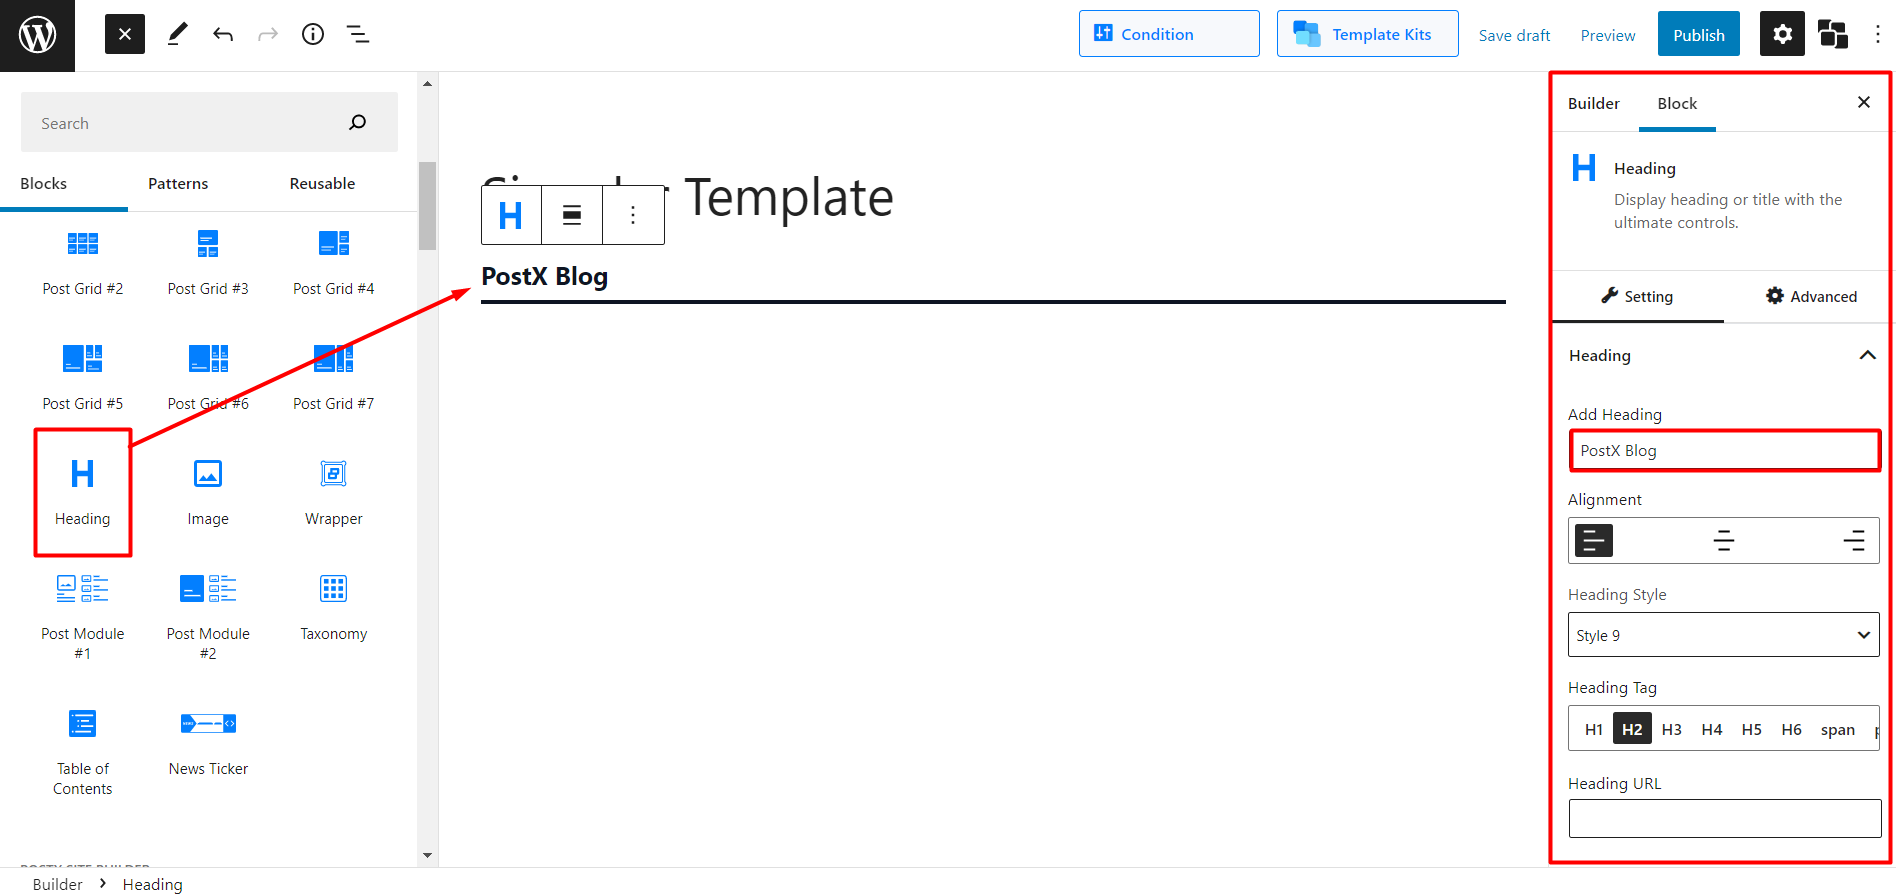
Then can change the heading style by choosing from 20+ heading styles. However, you can customize the heading by yourself by using the vast customization options.
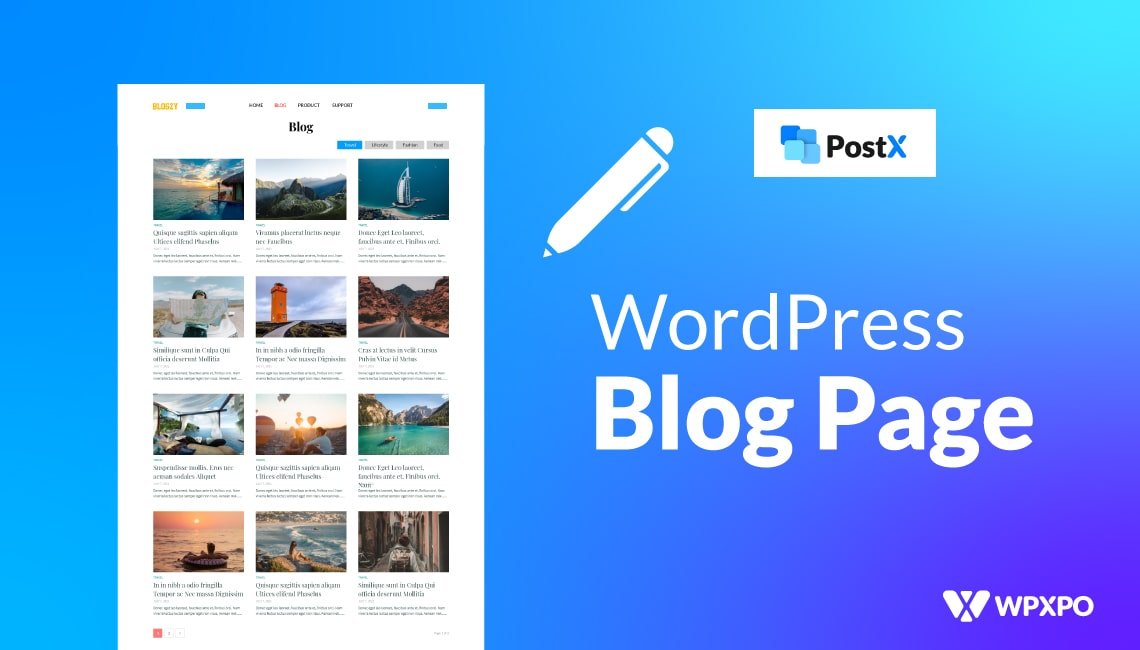
For displaying posts, multiple blocks are available such as post grid, posts list, post slider, and much more. For now, I am adding the post grid 1 block as I want to display posts in a grid layout.
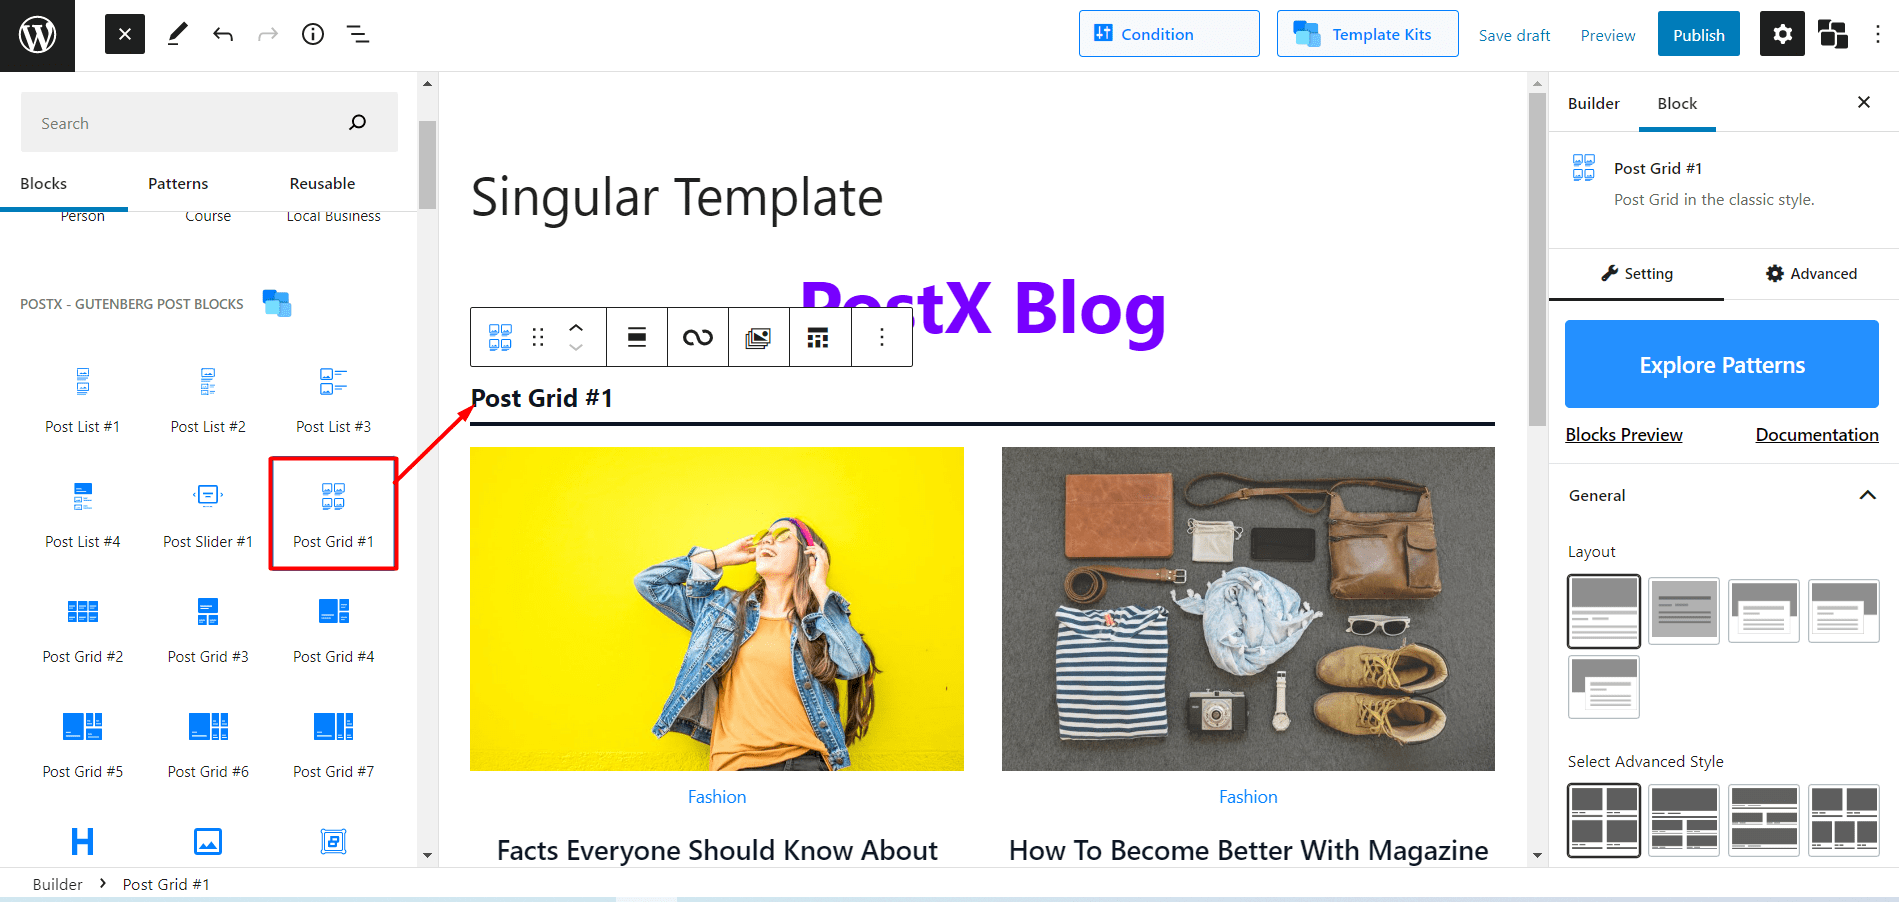
First of all, you may want to hide the heading of the block as you have already added a heading block to display the post’s page title. Not only the heading you can show or hide anything according to your need by using the setting option on the right side.
Now you can change the layout and increase the number of columns from the general setting options. And, there are more customization options that you can explore.
After adding the block, the recent posts of your site will be displayed on the page. However, you can sort them according to your need using the advanced query builder feature that contains all possible post-sorting options that you can think of.
All post blocks of PostX have a large number of customization options. However, the options vary a bit from block to block. If you want to know the customization options for any particle blocks do check out the documentation page.
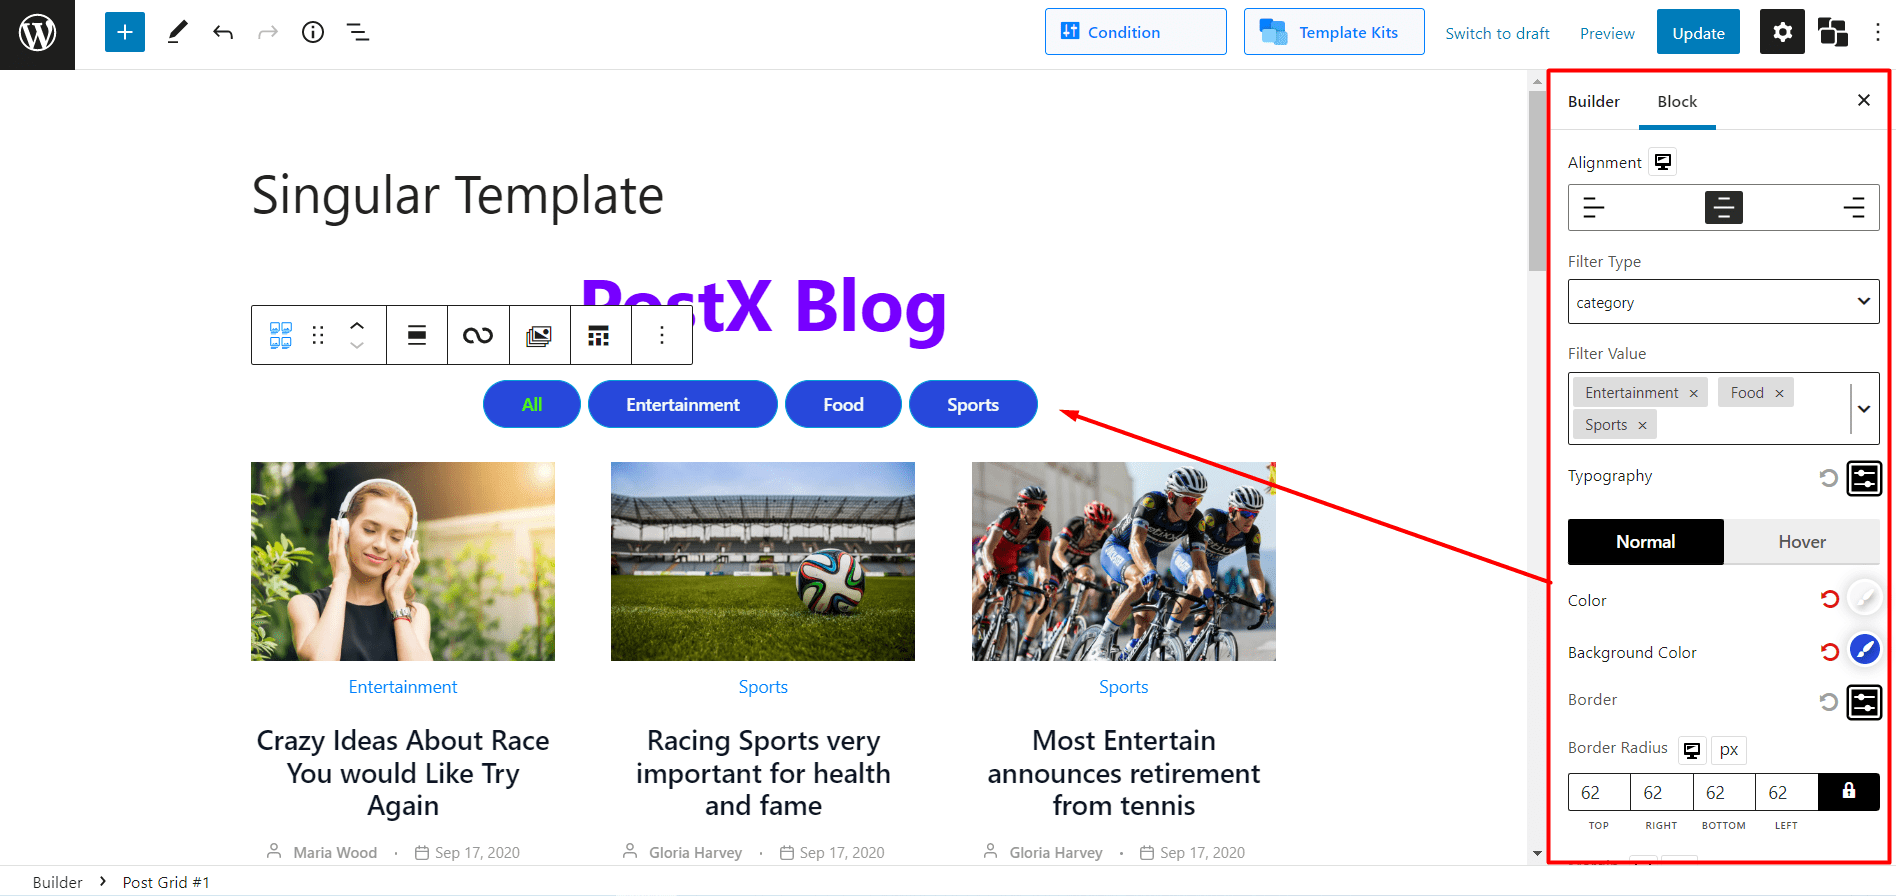
Step-5: Add Filtering Options to Blog Page
Now it’s to make your blog page stand out from competitors. Letting readers filter posts is an effective way to increase engagement and the rate of view per session. PostX offers Ajax-powered filtering that you can also use as a blog filter as well. So that, the audience of your blog page can easily find the posts that they are looking for.
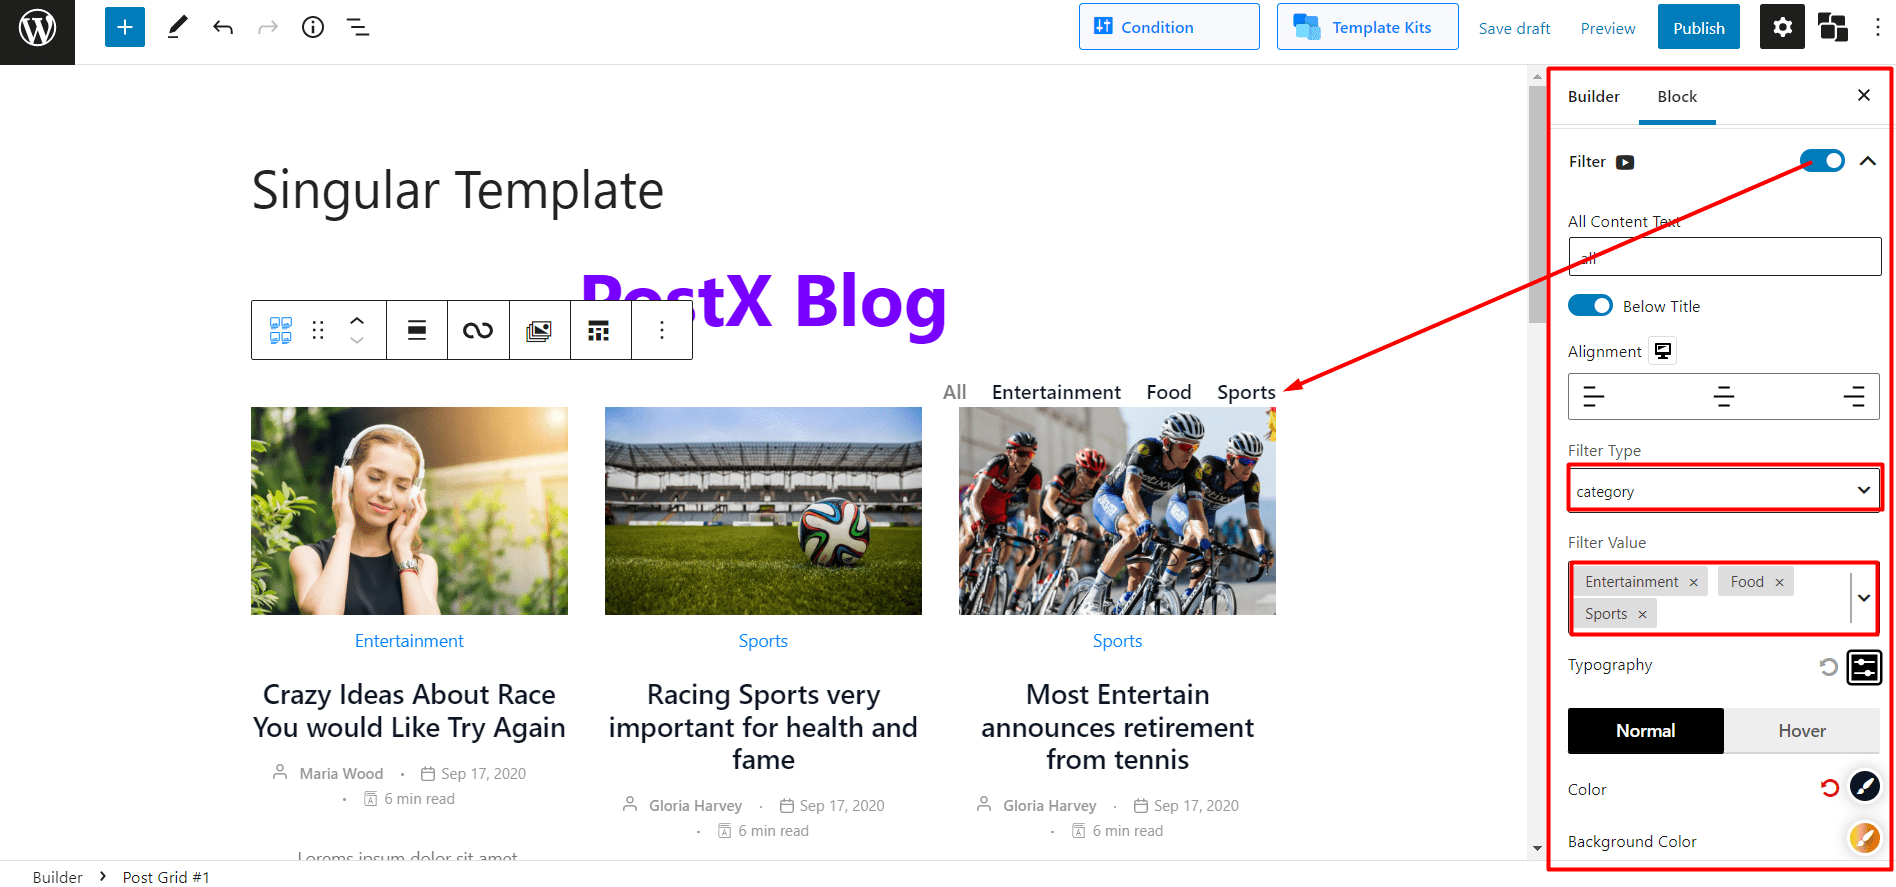
To enable the filtering option, navigate to the setting section and turn on the filter option. After turning it on, you can click on the drop-down button to explore the customization options. From where you can do the following things:
- Choose Filter Type Between Category and Tag
- Add Filtering Options Based on the Selected Type
- Change Typography of The Filter Options
- Change Text, Background, and Hover Colors
- Change Positions of The Filtering Options
- Adjust Boarder, Margin, and Padding
Here’s what I did by using the options mentioned above. You can also do the same or even better, only the sky is the limit.
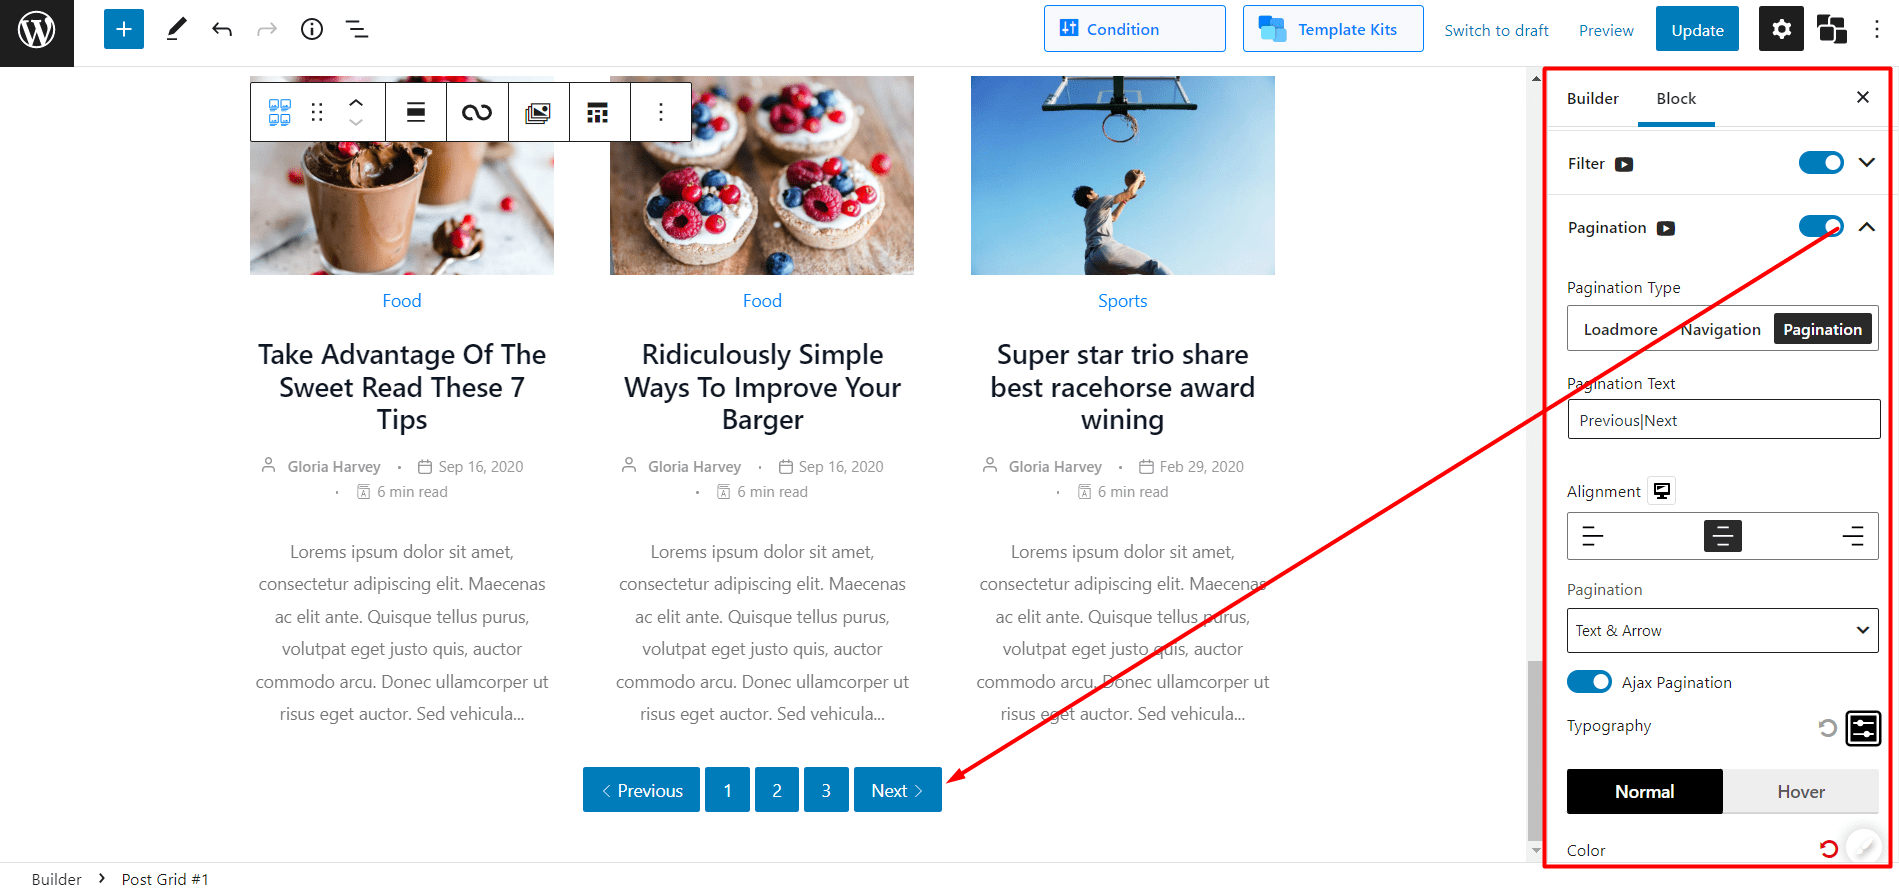
Step-6: Add Pagination to Blog Page
Like Filter, PostX also offers Ajax-powered WordPress pagination that you can add to the blog page you are creating. For that, navigate to the setting section and enable the pagination option.
Then click on the dropdown to explore all available customization options of the pagination. Here’s what you can:
- Choose between three types, Load More, Navigation, and Numeric
- Change the position of the Pagination
- Enjoy full Typography Control
- Change Pagination Colors for text and Background
- Adjust Margin, Padding, and border radius of Pagination
After completing all required customization click on the publish button. Once you hit the publishing button, the condition selection option will pop up again. However, if you have done this step before no need to do it again. It is just a reminder so that you check and make any changes if required.
Step-7: Add Blog Page to Menu
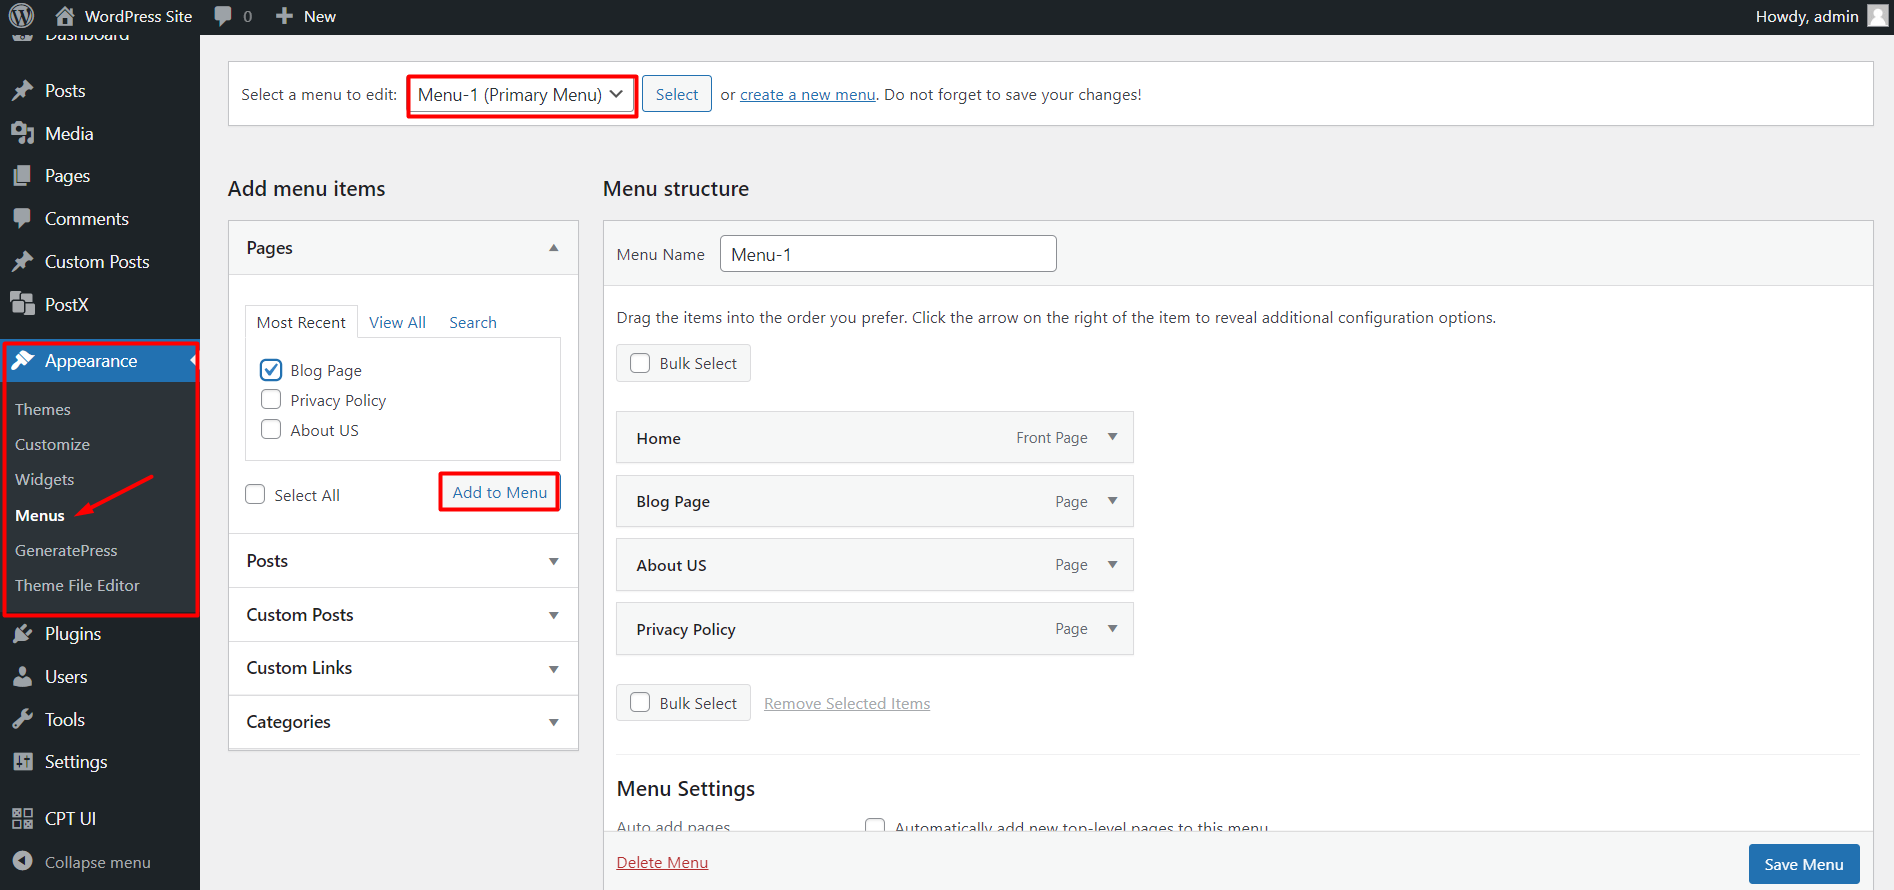
It is the last step, where you have to add the blog page to the menu of your site if you didn’t do it earlier. Every WordPress sites have a menu that is editable too. So in order to add a new page to the menu section just follow the below steps:
- Go to Appearance >> Menus
- Select the Current Menue of Your Site
- Add Blog Page to Menu
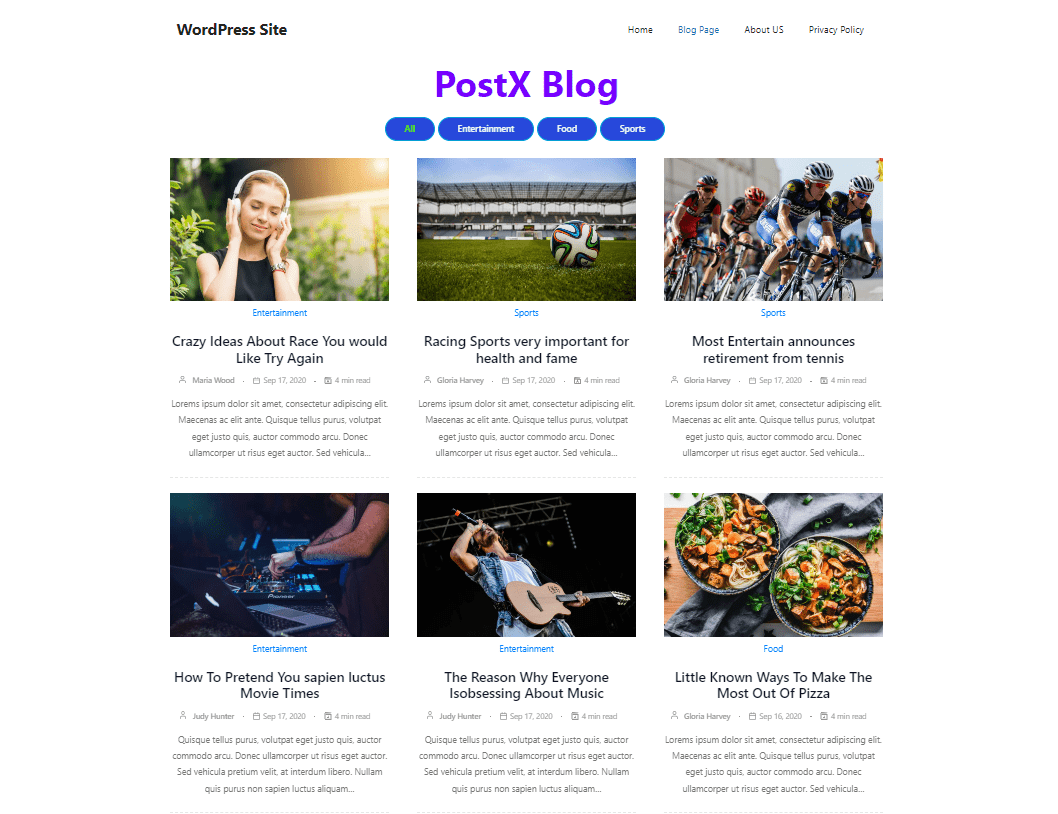
That’s all, your separate page for blog posts is ready now. Here is the final output. You can also do the same or even better. Remember only the sky is the limit with PostX.
Conclusion
That’s about creating a custom WordPress blog page. I hope you have understood how to make the best use of PostX to create a separate page for blog posts in WordPress that you have always dreamed about. Feel free to comment below if you have any further questions.
You can check out WordPress video tutorials on our YouTube Channel. Also, find us on Facebook and Twitter for regular updates!