By default, WordPress comes with a home page that displays recent posts in a reverse chronological order (latest posts at the top). However, if you are a smart professional blogger, you should have a custom home page and a separate posts page. If you don’t, you can do it effortlessly by tweaking the WordPress settings.
But is a blog page enough to satisfy the readers? We would say no. To impress the readers, you must have a good layout and a posts filtering option to help the readers explore posts with ease.
Don’t worry, we have got your back. After completing the blog post, you will be able to add a post filter to the blog page using a theme and a plugin. So you can choose whatever method you want.
Why Add Post Filters to Your Blog Page?
Before going into the tutorial, let’s explore the reason behind adding a posts filter to the blog page. Explore the reasons below if you are unsure whether it is required for you. However, feel free to skip this section if you already have a reason.
Enhanced User Experience: The first and most obvious reason for adding a posts filter is to improve the experience by helping readers find the posts they are interested in effortlessly.
Better Content Organization: Post filters also help us to categorize and display the blog posts efficiently in an organized way.
SEO Benefits: Encouraging readers to explore more posts not only makes them happy but also decreases the bounce rate. So, chances are your blog posts will rank higher on search engines.
Ideal Use Cases: Having a posts filtering system is a must-have feature, especially for multi-category blogs such as news sites, recipe blogs, portfolios, and more.
Method 1: Add Post Filters to WordPress Blog Page Using a Theme
Now, let’s start adding a posts filter to our website. We have explored all the popular themes that offer the filtering feature. Unfortunately, none of them offer the feature for free. That’s why we had to use the Pro version of the Astra theme. So, make sure to install the theme before starting to follow the steps below.
Step 1: Enable Blog Pro Module
As the Astra theme does not offer the post filter feature on the free version, we have to enable one of its pro modules. Here’s how:
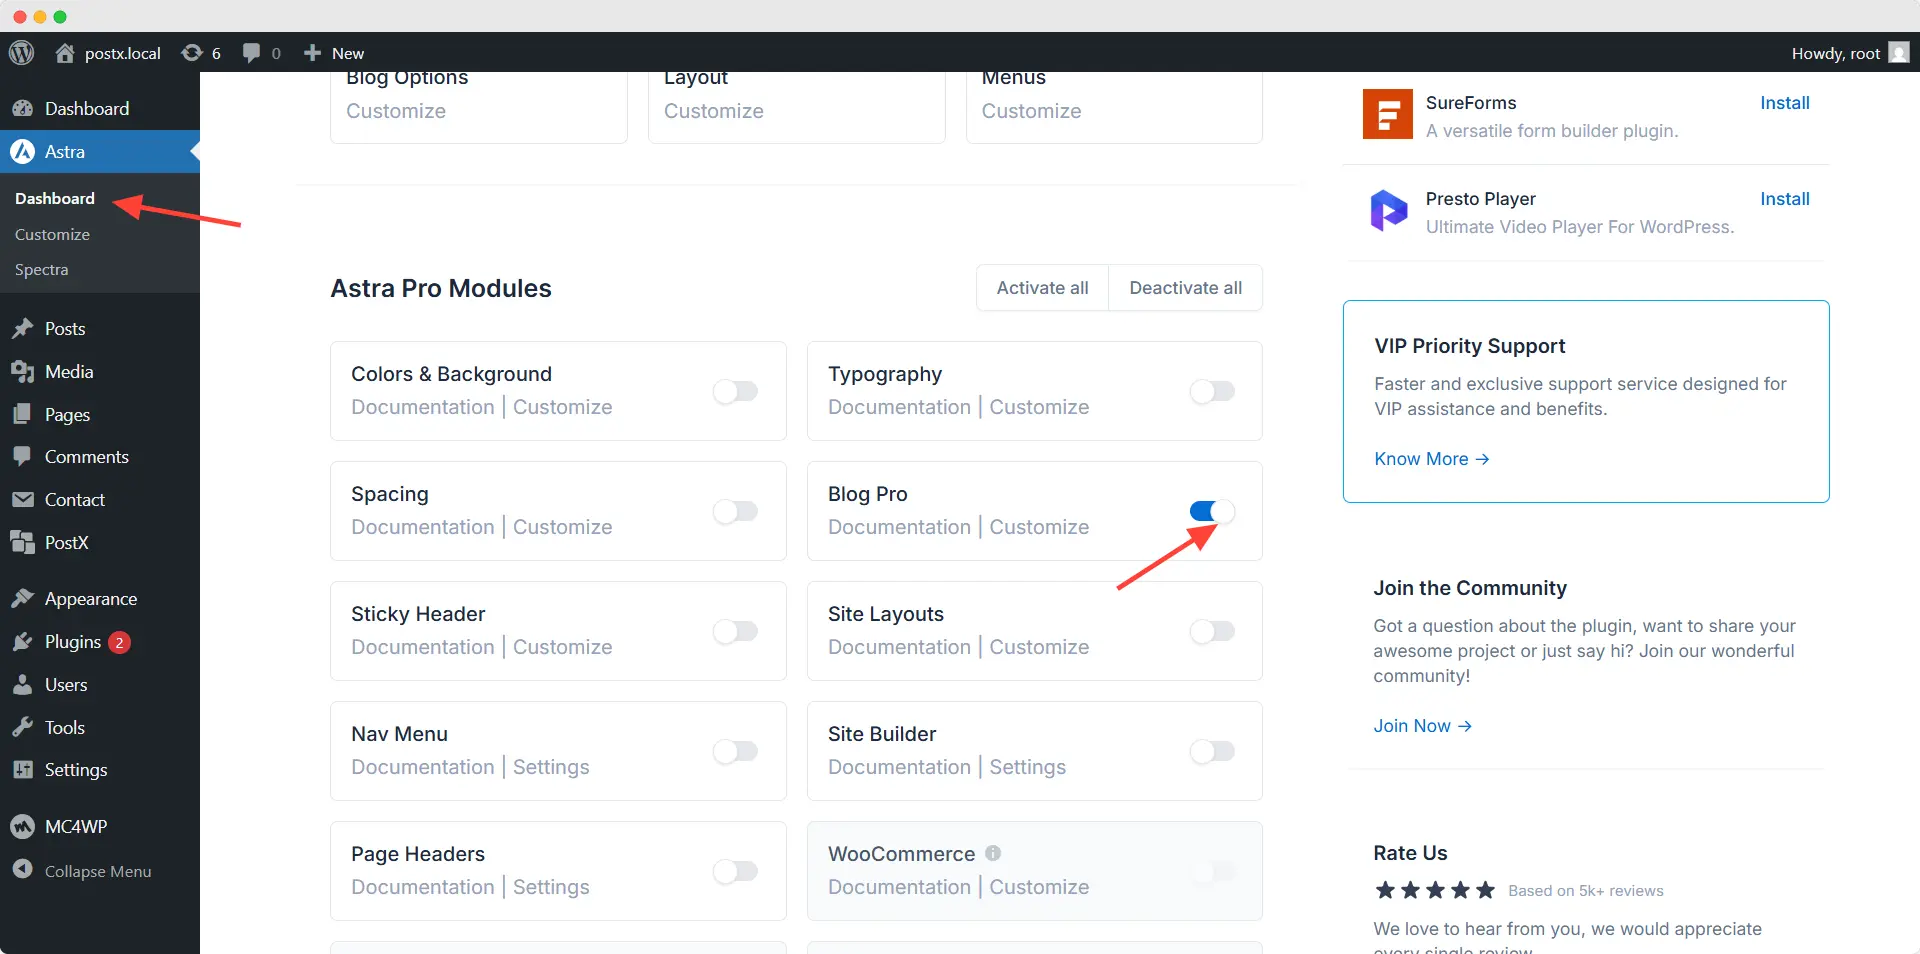
- Go to Astra >> Dashboard
- Scroll Down to the Pro Modules Section
- Enable the Blog Pro Module
Step 2: Enable Posts Filter for Blog Page
We are assuming you already have a blog page. If not, you can learn how to create a separate page for blog posts from our detailed guide.
To enable the posts filter feature, we need to open the theme customizer settings while we are on the frontend of the blog page.
Then we need to go to the Post Types >> Blog/Archive. Here we can see all available customization options for the blog page. From this section, we need to scroll and enable the post filter feature.
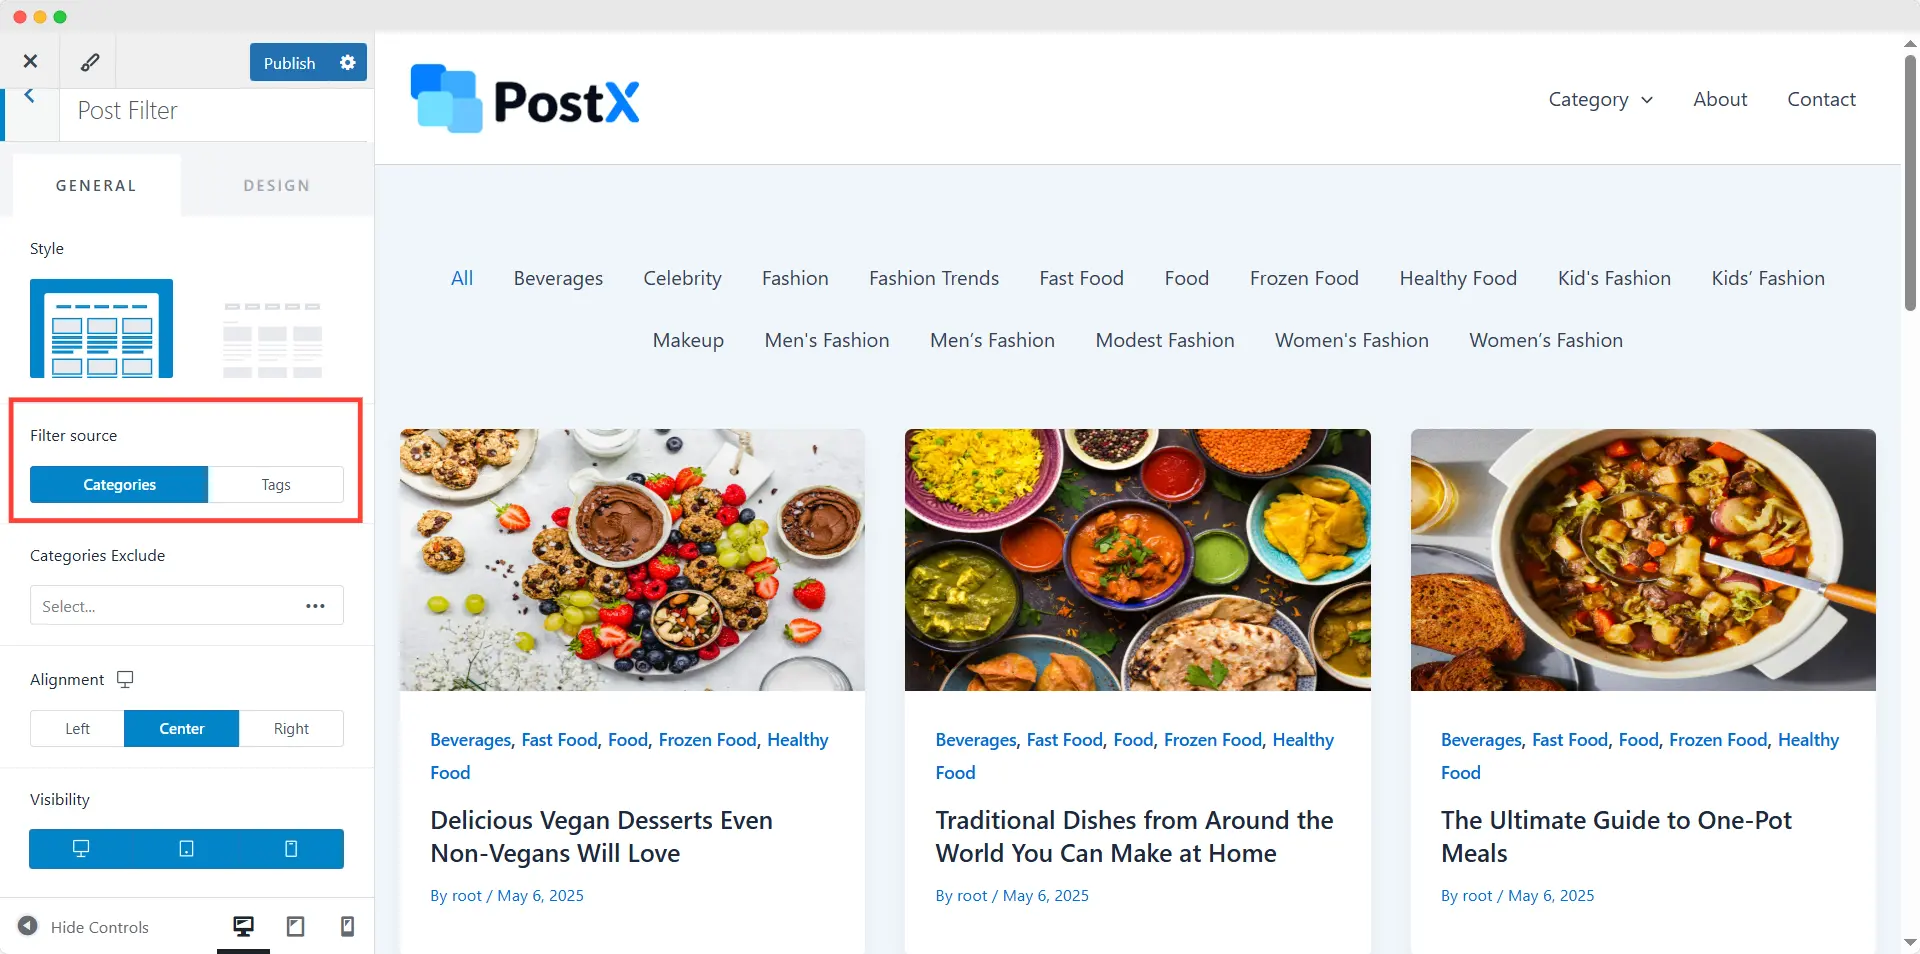
Step 3: Choose Between Category and Tags
Here you can see that all the categories are placed on top of the blog posts. However, we can also add tags instead of categories as a post filtering option. For now, let’s keep it as it is.
Step 4: Customize the Appearance
Now, let’s explore the appearance customization options. At first, we can choose from two available styles. Then we can also change the alignments. Moreover, we can customize the appearance of the design section further.

From here, we can change the text and background colors to align with our branding. Then we can adjust the margin, spacing, and border radius as per our requirements. Not only that, but we can also adjust everything differently for multiple devices. So we don’t need to worry about responsiveness issues.
Step 5: Exclude Taxonomies (Optional)
Astra displays all taxonomies (categories or tags) upon enabling the “Post Filter” feature. Fortunately, they have added an exclusion option. So you can exclude our desired categories if you do not want to show them as filtering options.

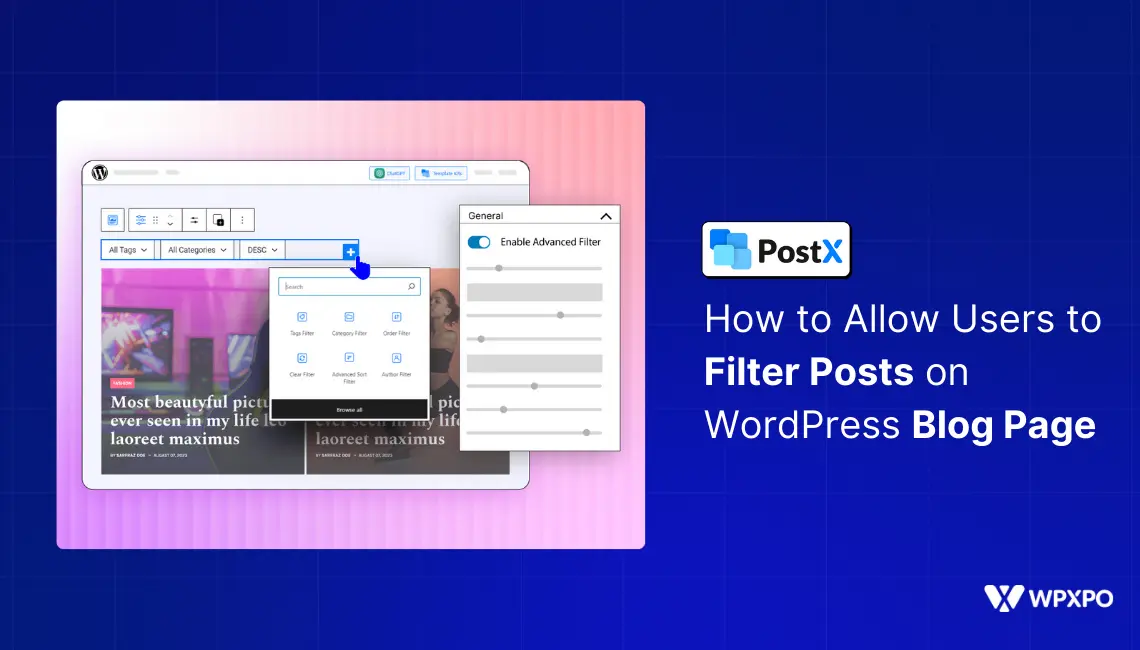
Method 2: Add Post Filters to WordPress Blog Page Using a Plugin
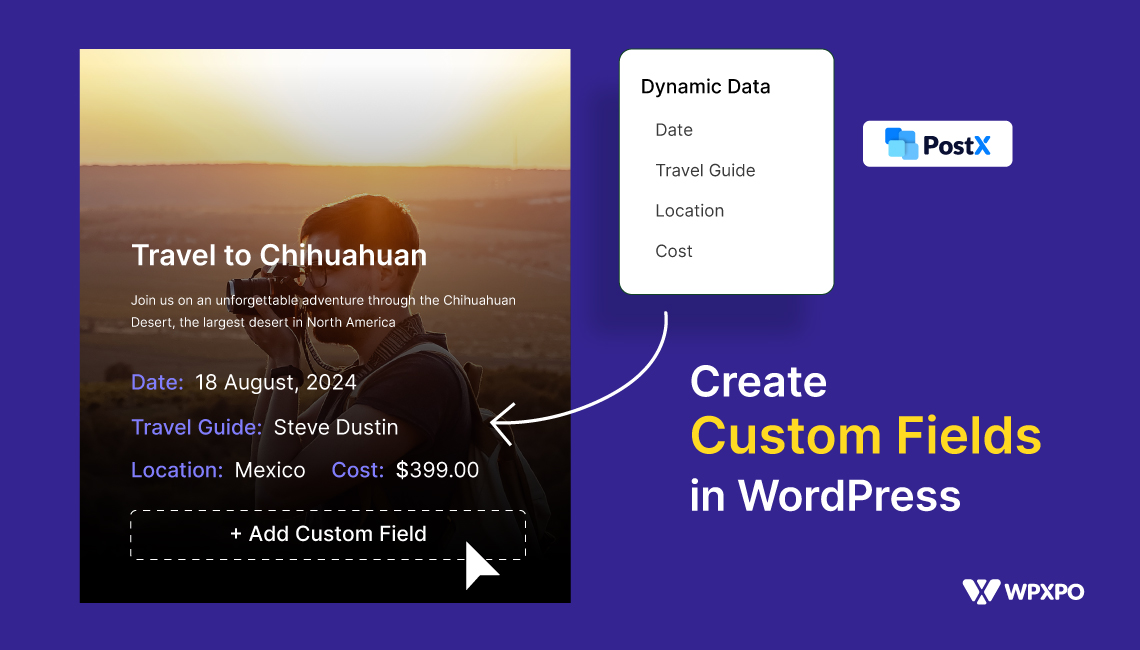
If you want to add post filtering options using a plugin, PostX will be a great choice. It offers all essential filtering options, and most of them are available for free. However, it also has a downside. We must create a custom blog page using its Dynamic Site builder to be able to add a posts filter. But we can assure you that you will surely like the design variations of PostX. Let’s explore:
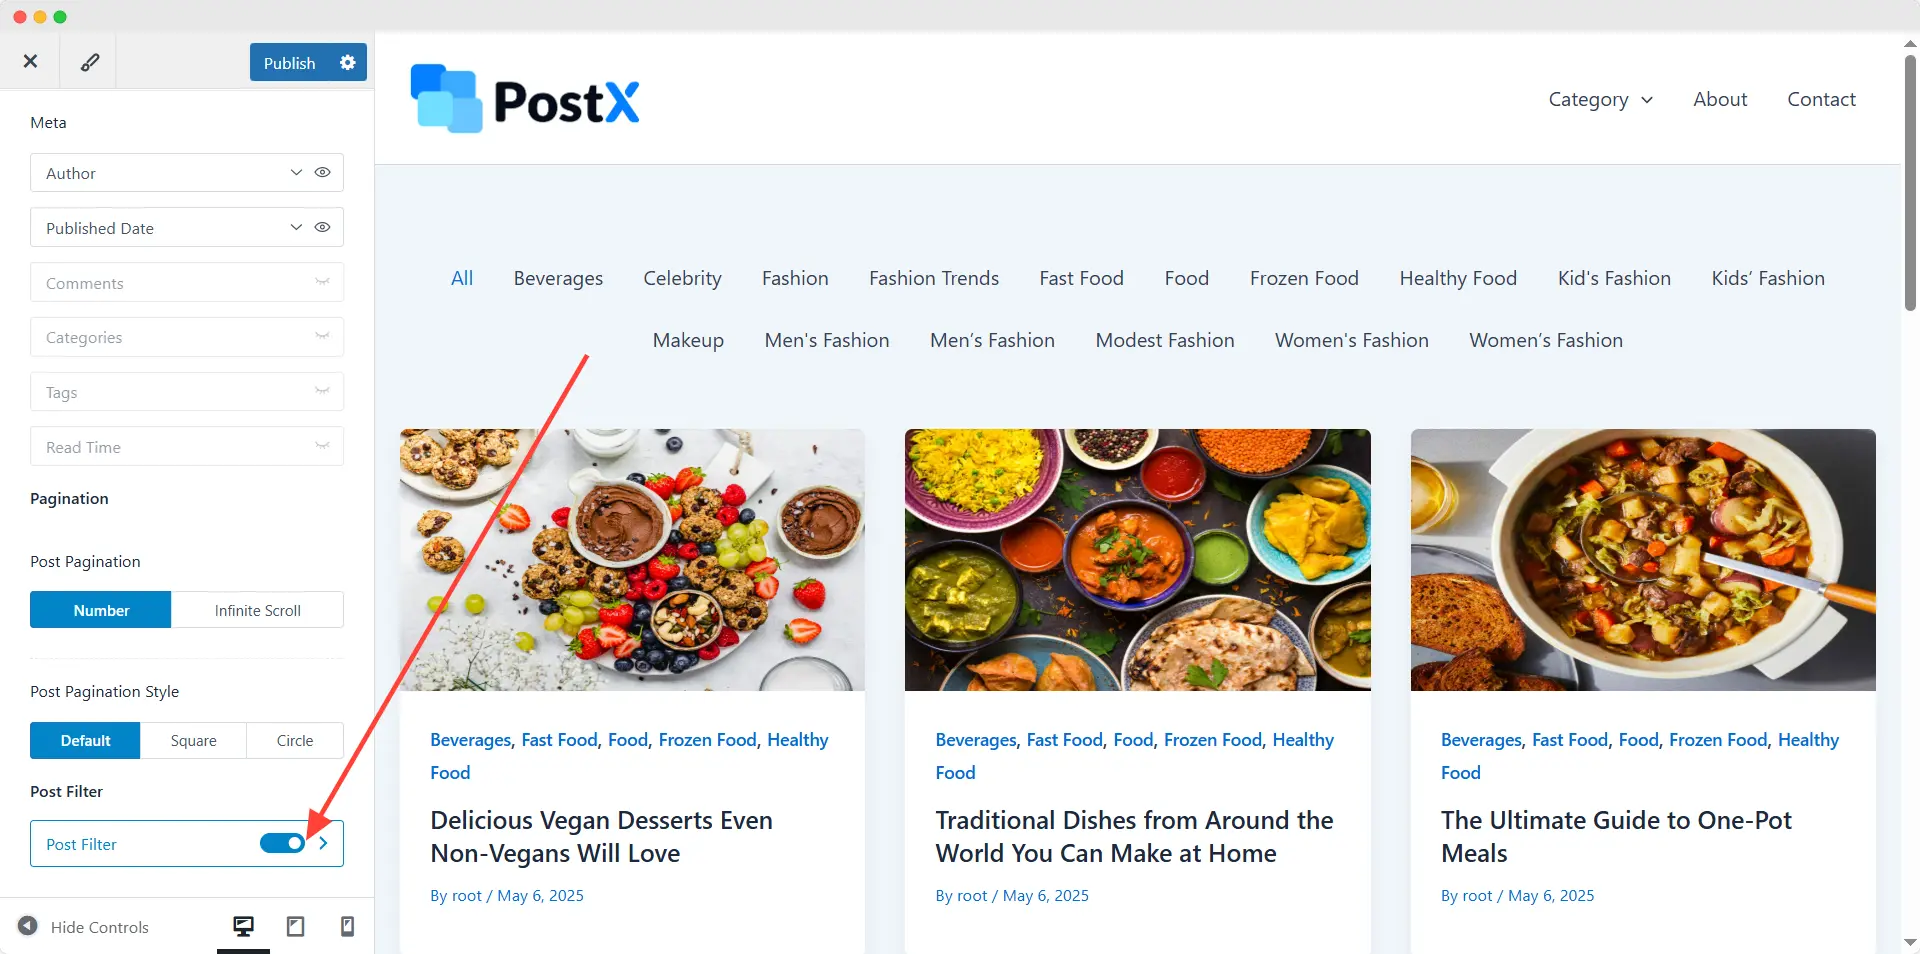
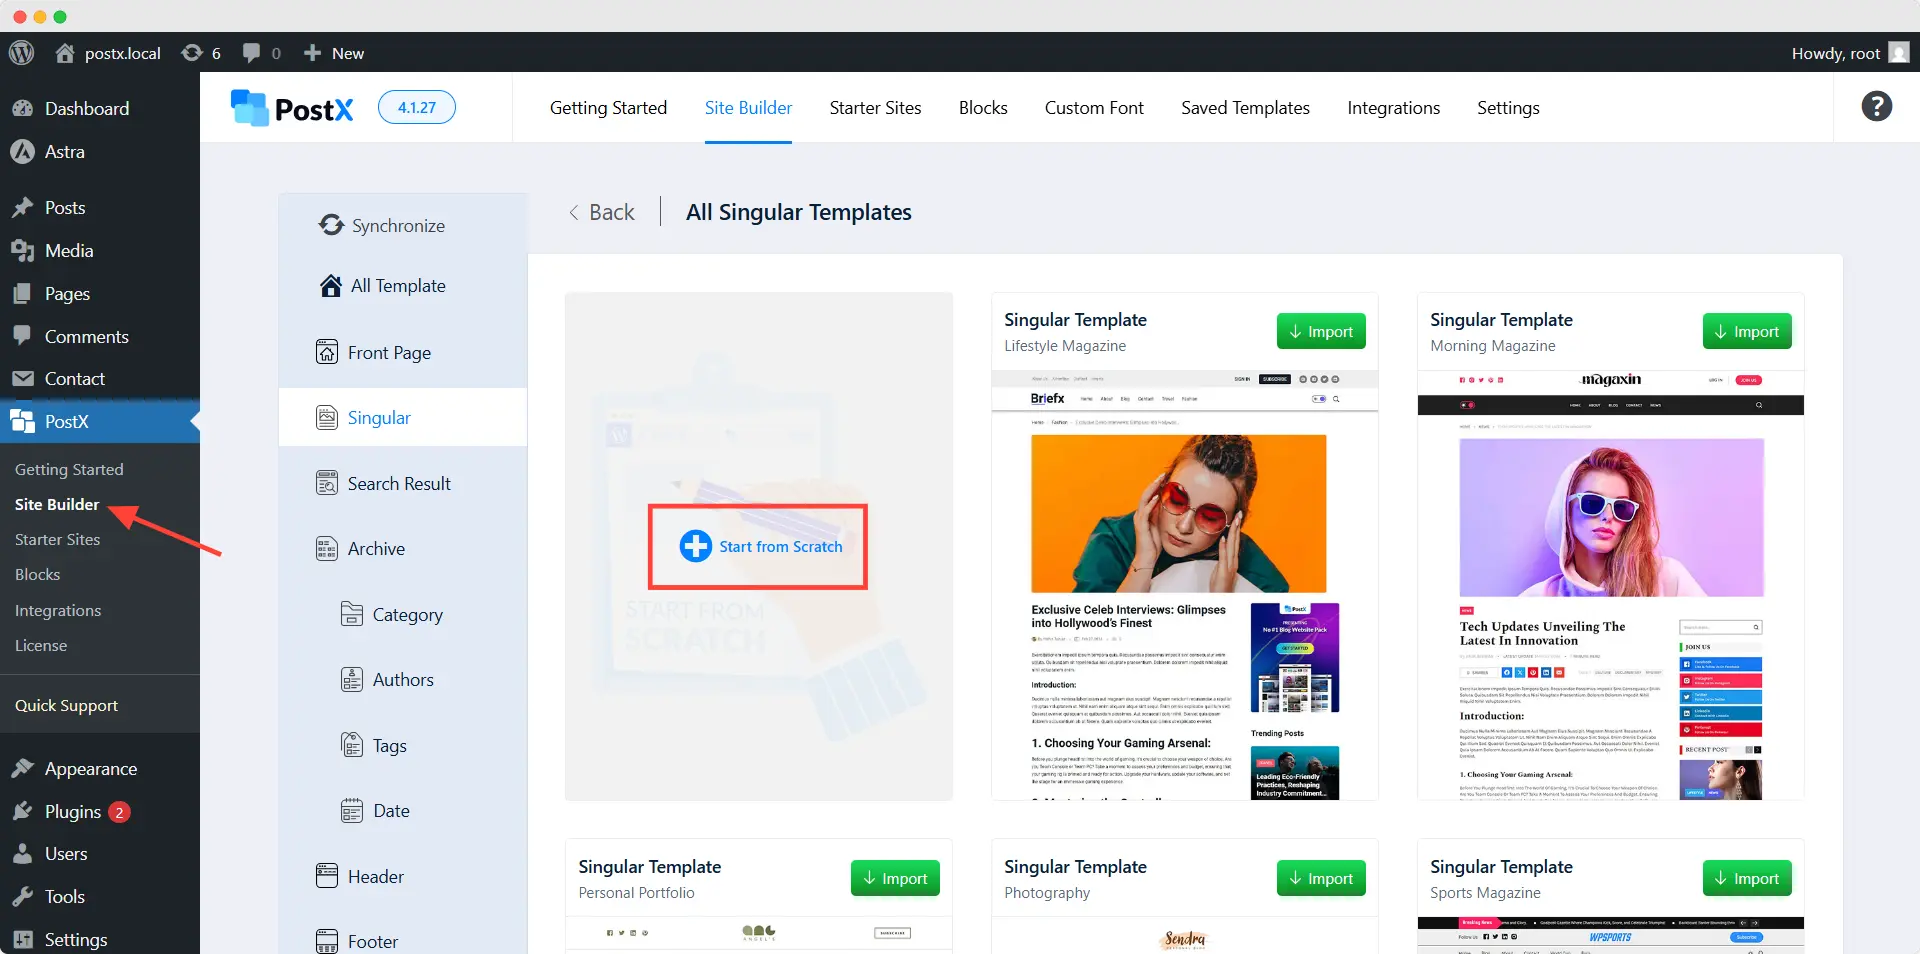
Step 1: Start Editing the Blog Page
Now we need to go to the Dynamic Site builder of PostX. Then click on the singular option, which allows us to create custom templates for blog posts and pages. Here we can see multiple premade templates for blog posts. But as we want to create a custom page, let’s click on the “Start from Scratch” option.
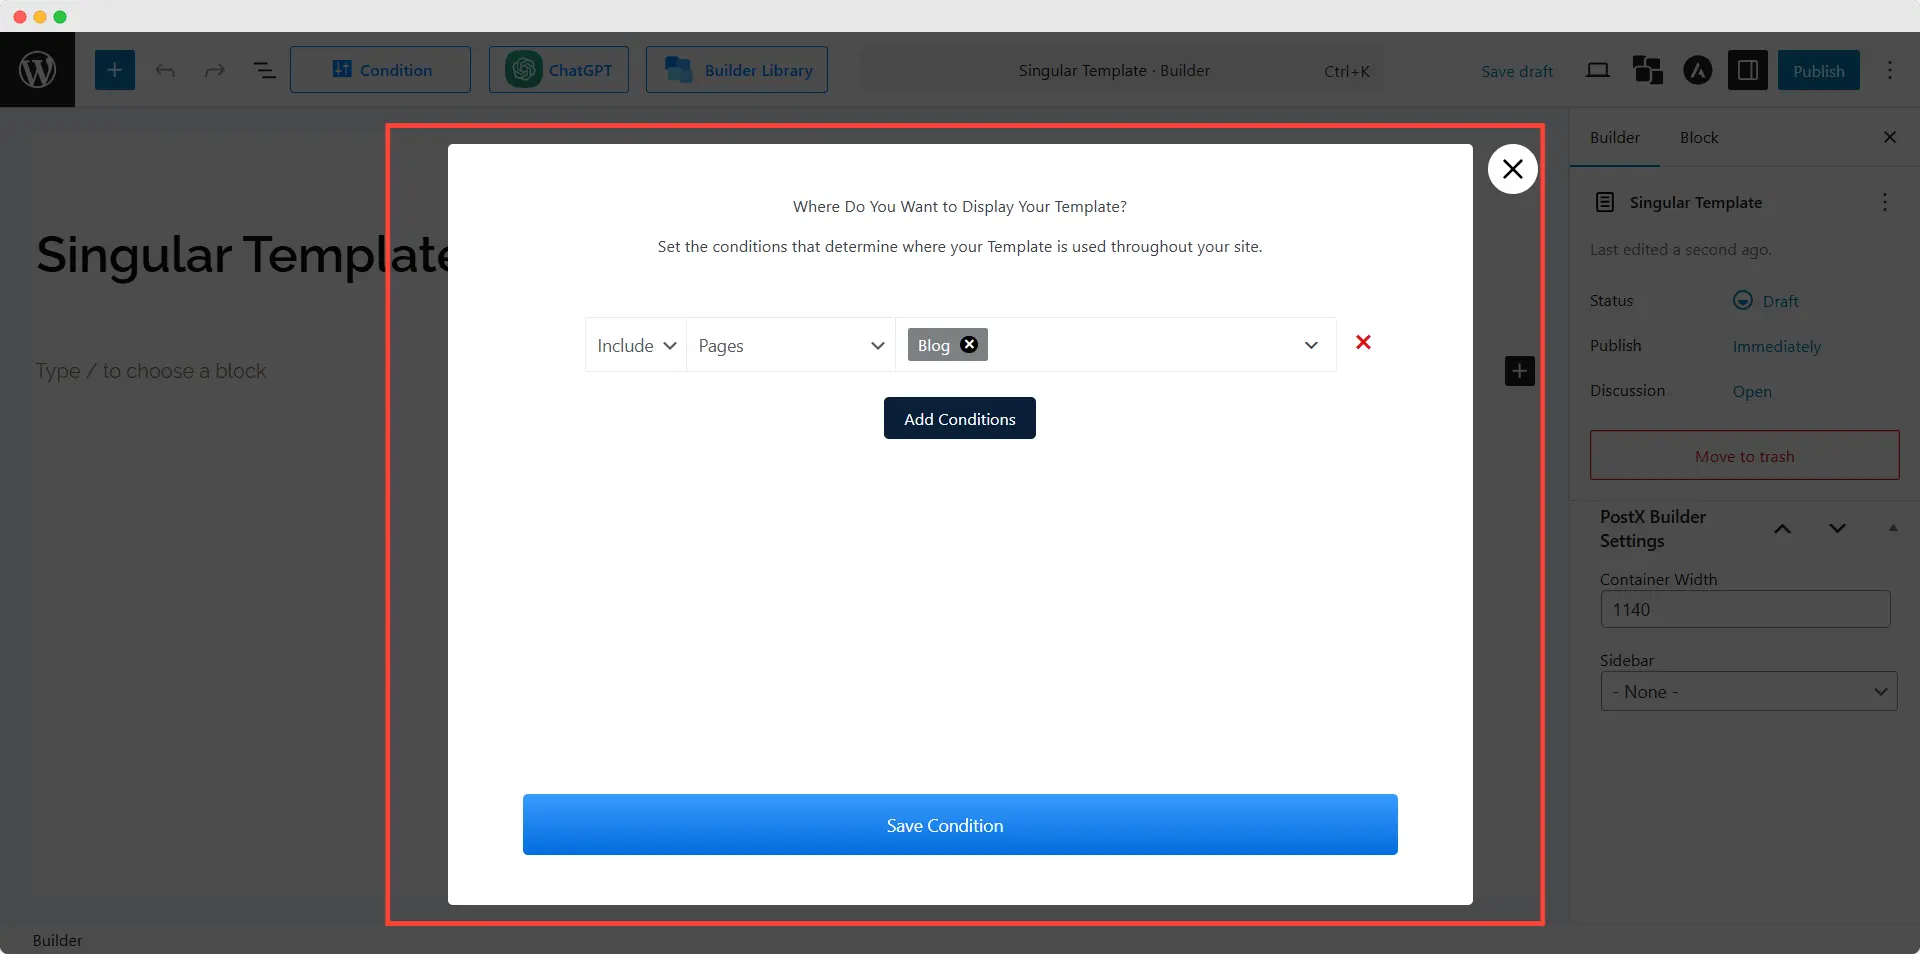
Step 2: Select Blog Page
Here you can see a condition selection option. From this section, we must select the blog page as we want to add a custom design to it.
Step 3: Add a Post Block
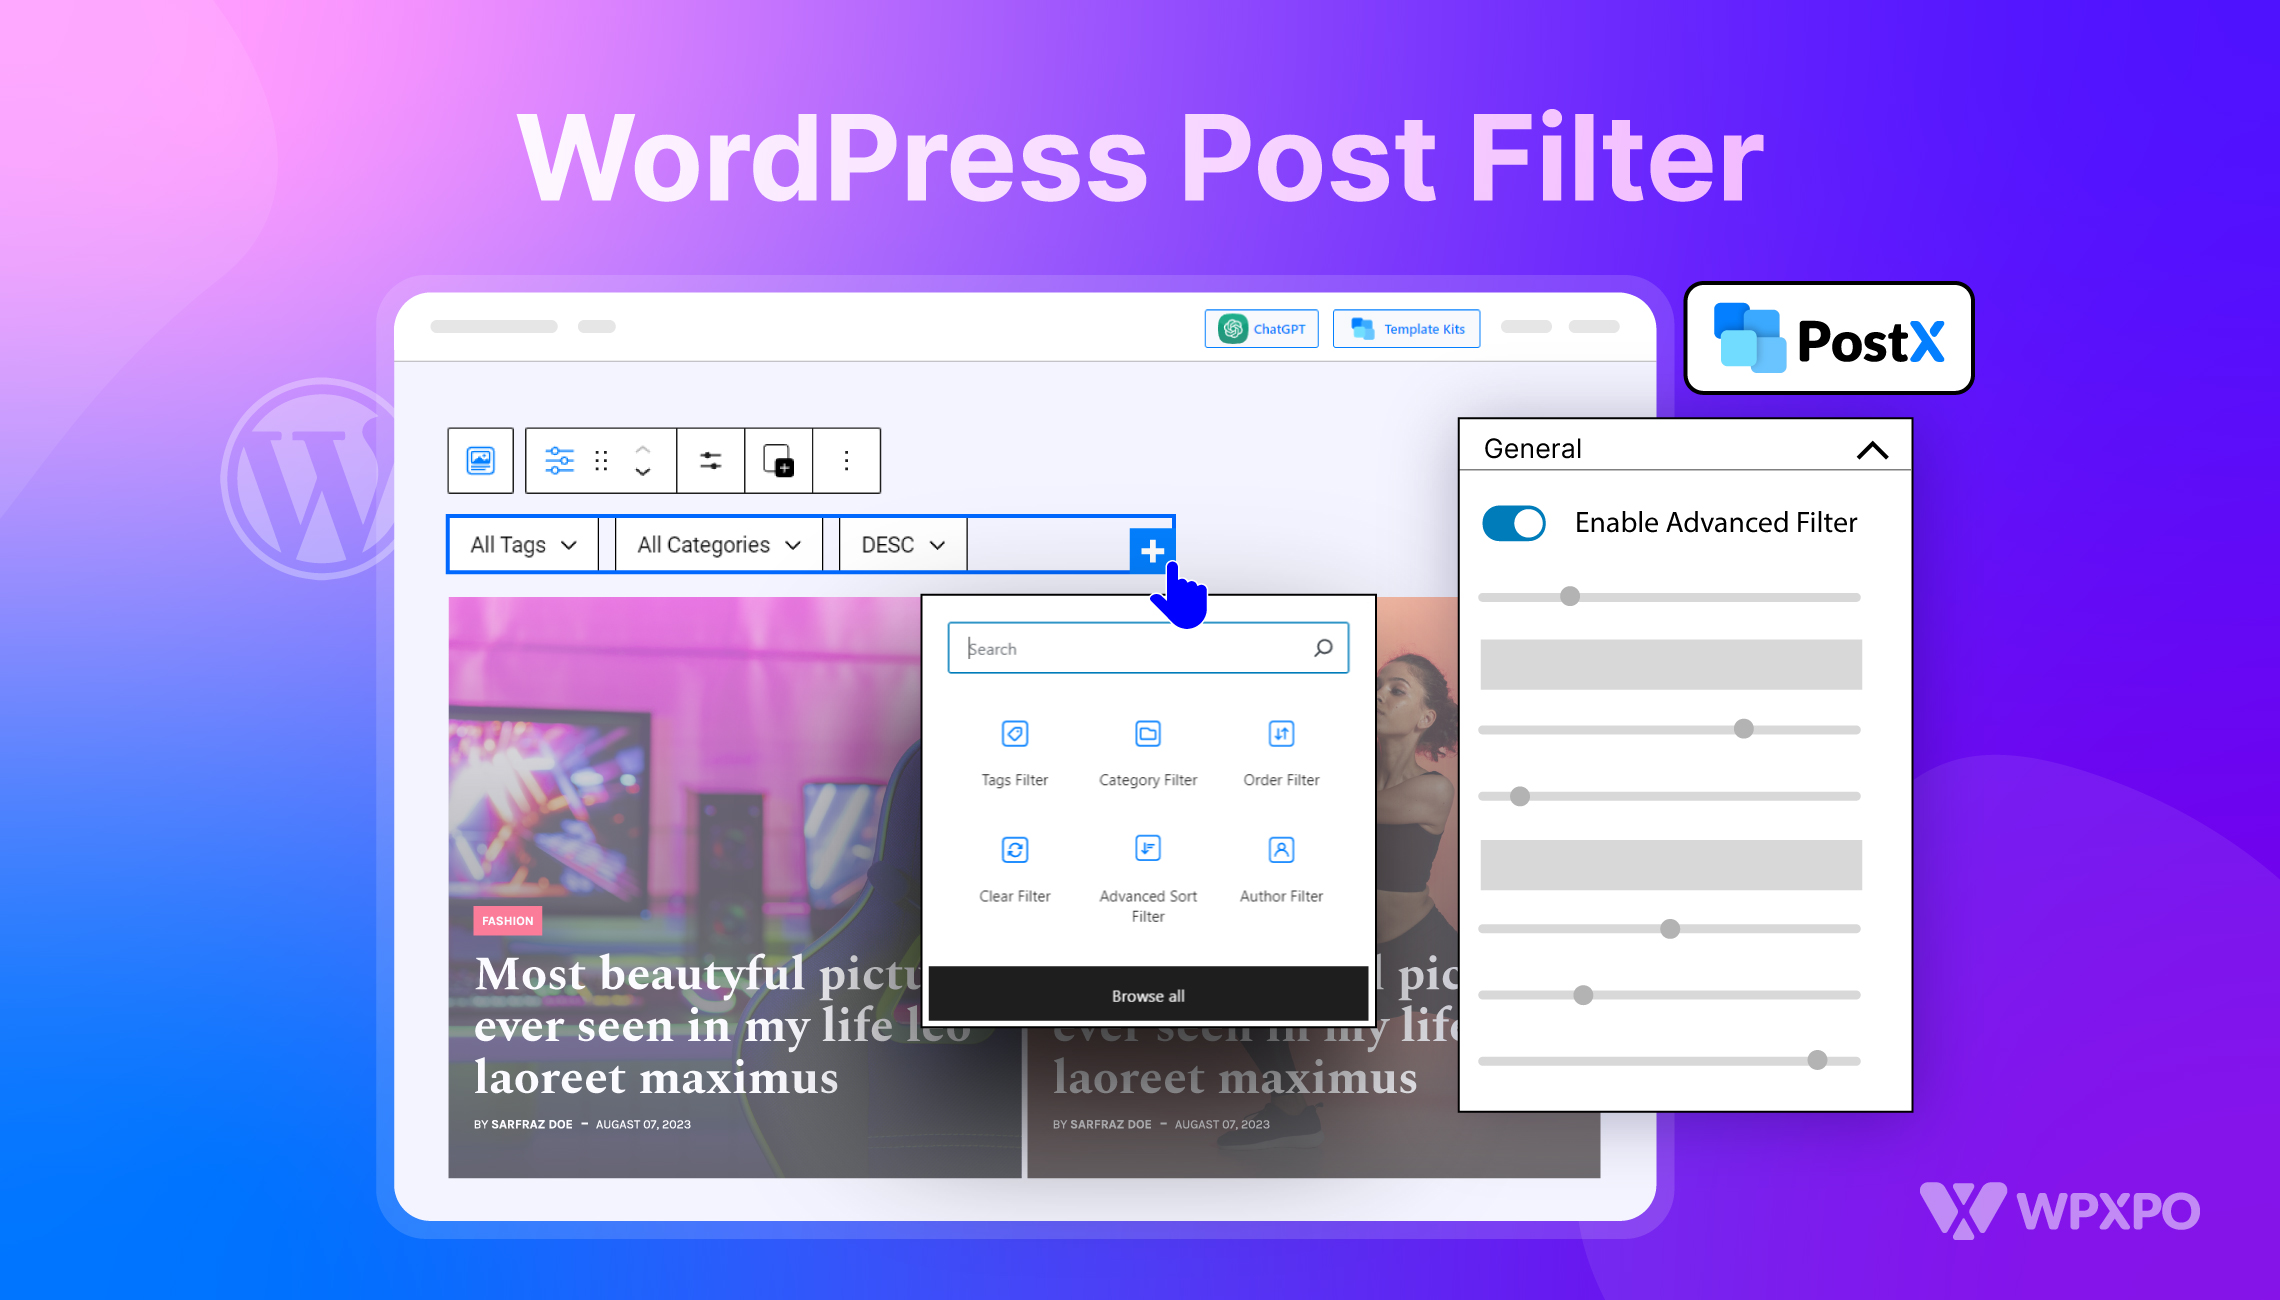
Then we need to fill up the blank page. Whatever we add here will be visible on the blog page. But as we want to display blog posts, we need to add a posts block. PostX comes with multiple variations, we can display the posts in grid, list, or slider layout. For now, let’s add a post grid block.
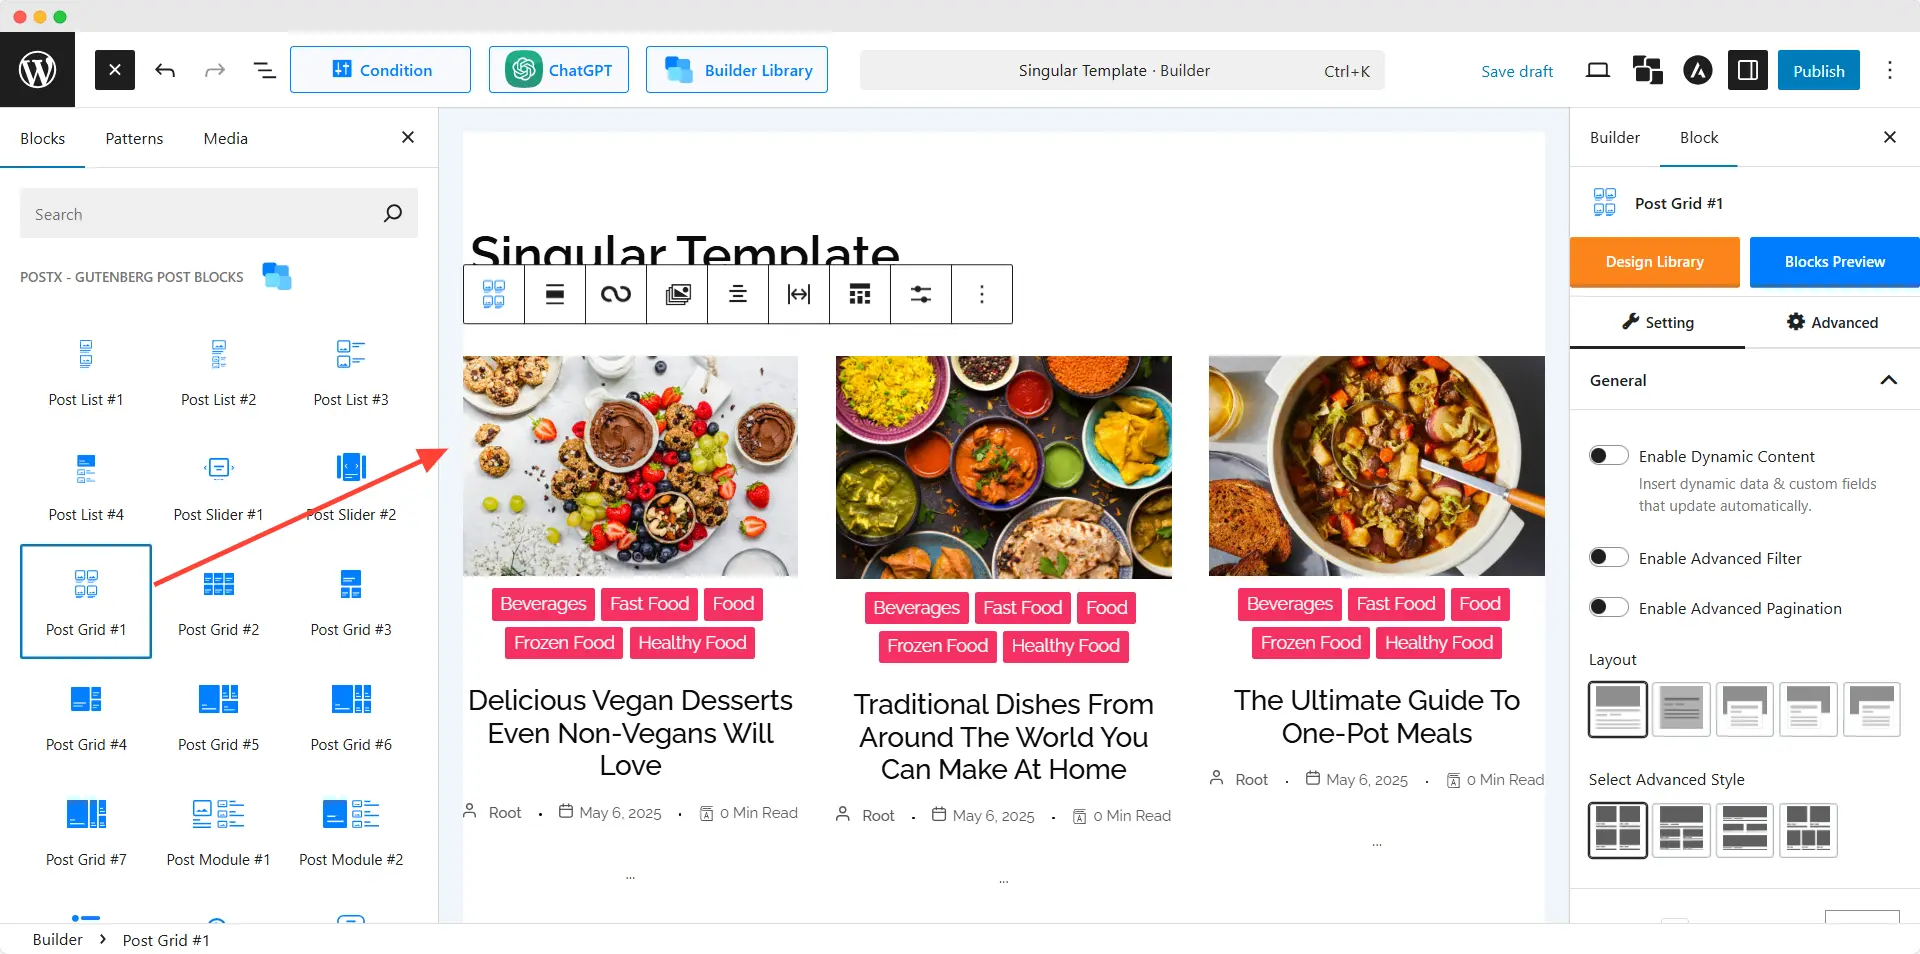
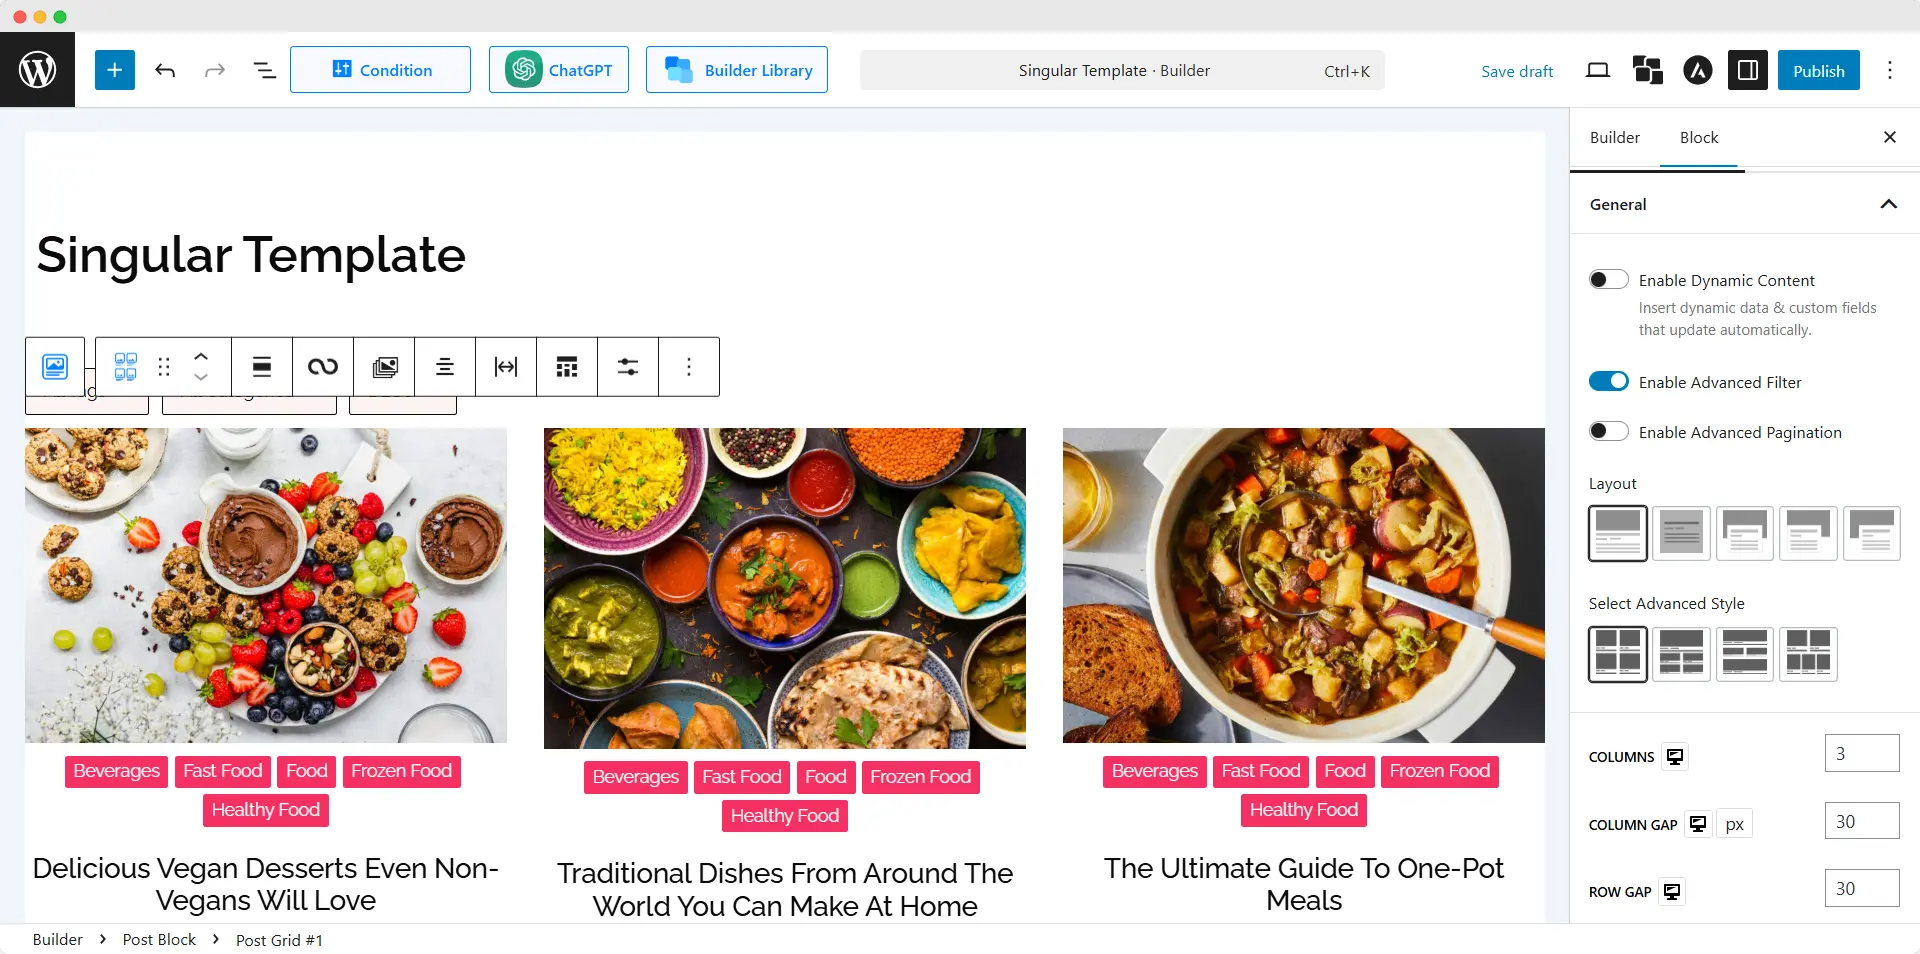
Step 4: Enable PostX’s Advanced Filter
Now we need to click on the post grid. Then we can enable the Advanced Filter feature from its settings section located on the right side. PostX supports enabling a filter for all of its post grid and post list blocks.
Step 5: Add or Remove Filtering Options
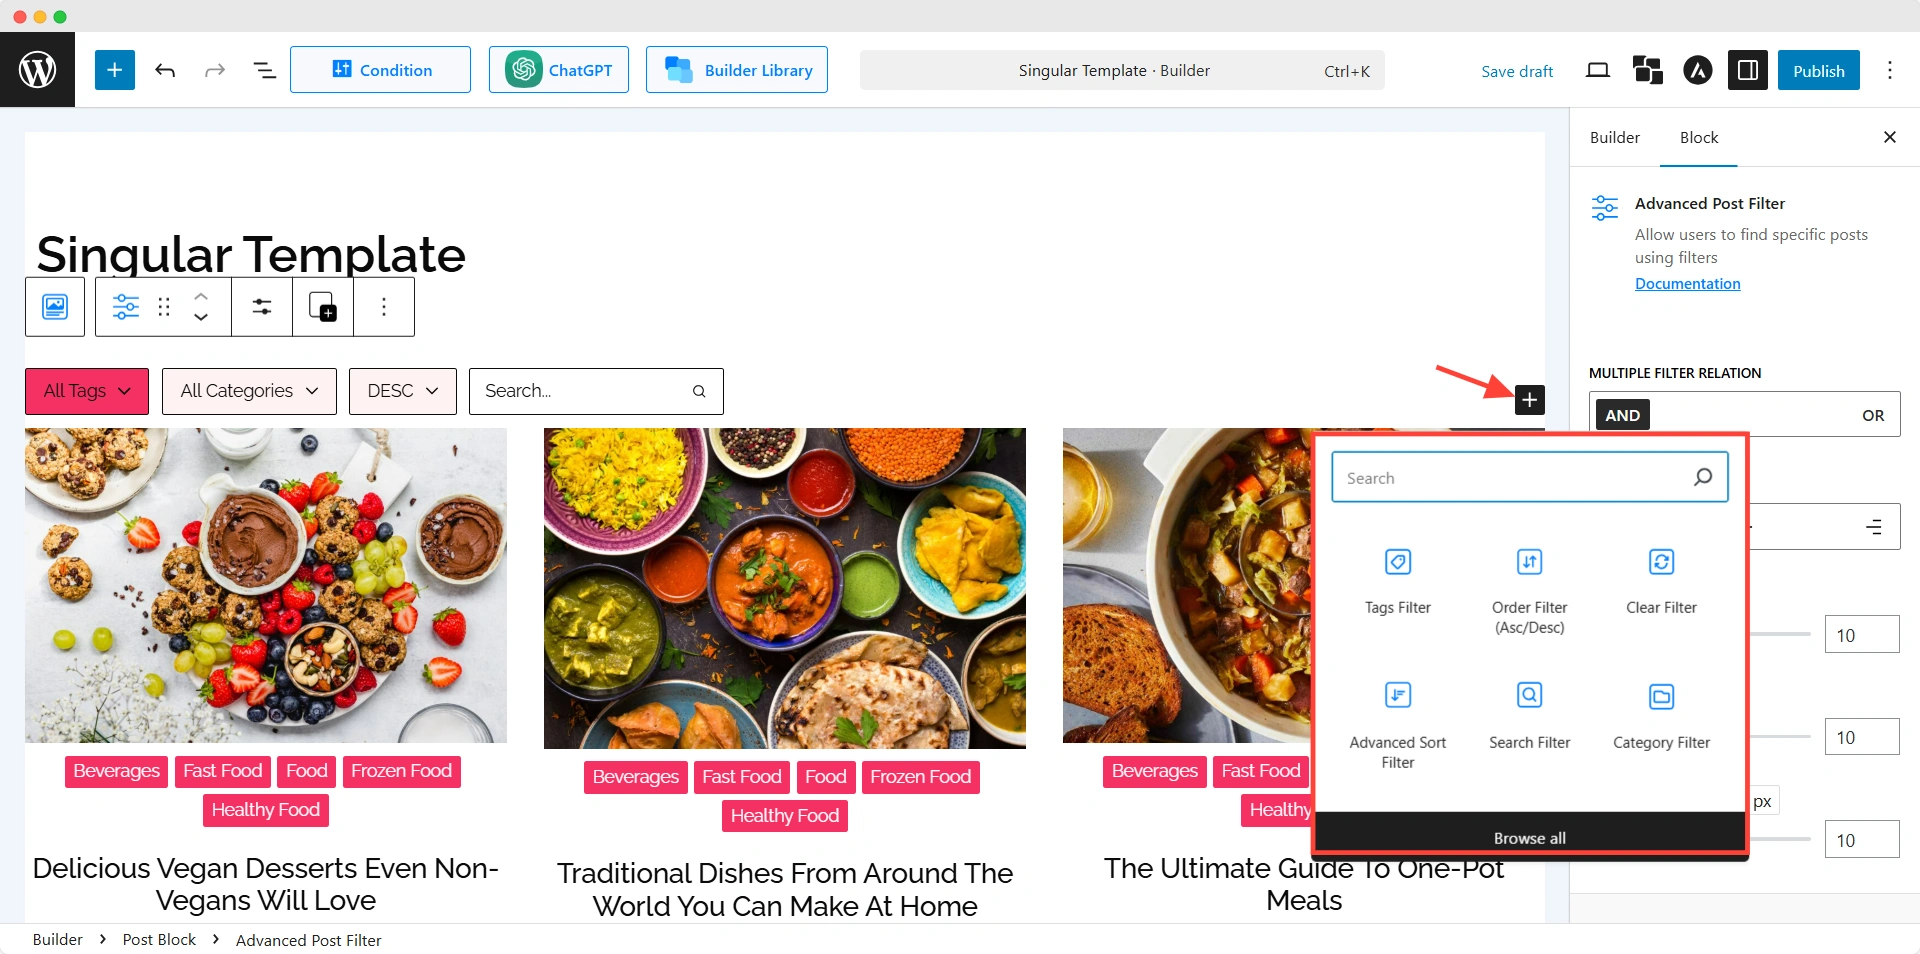
By default, PostX adds three filtering options. However, we can add or remove any filtering options as per our requirements. You can find all essential options by clicking on the plus icon. And guess what! Most of the filtering options are available for free.
Step 6: Customize Appearance
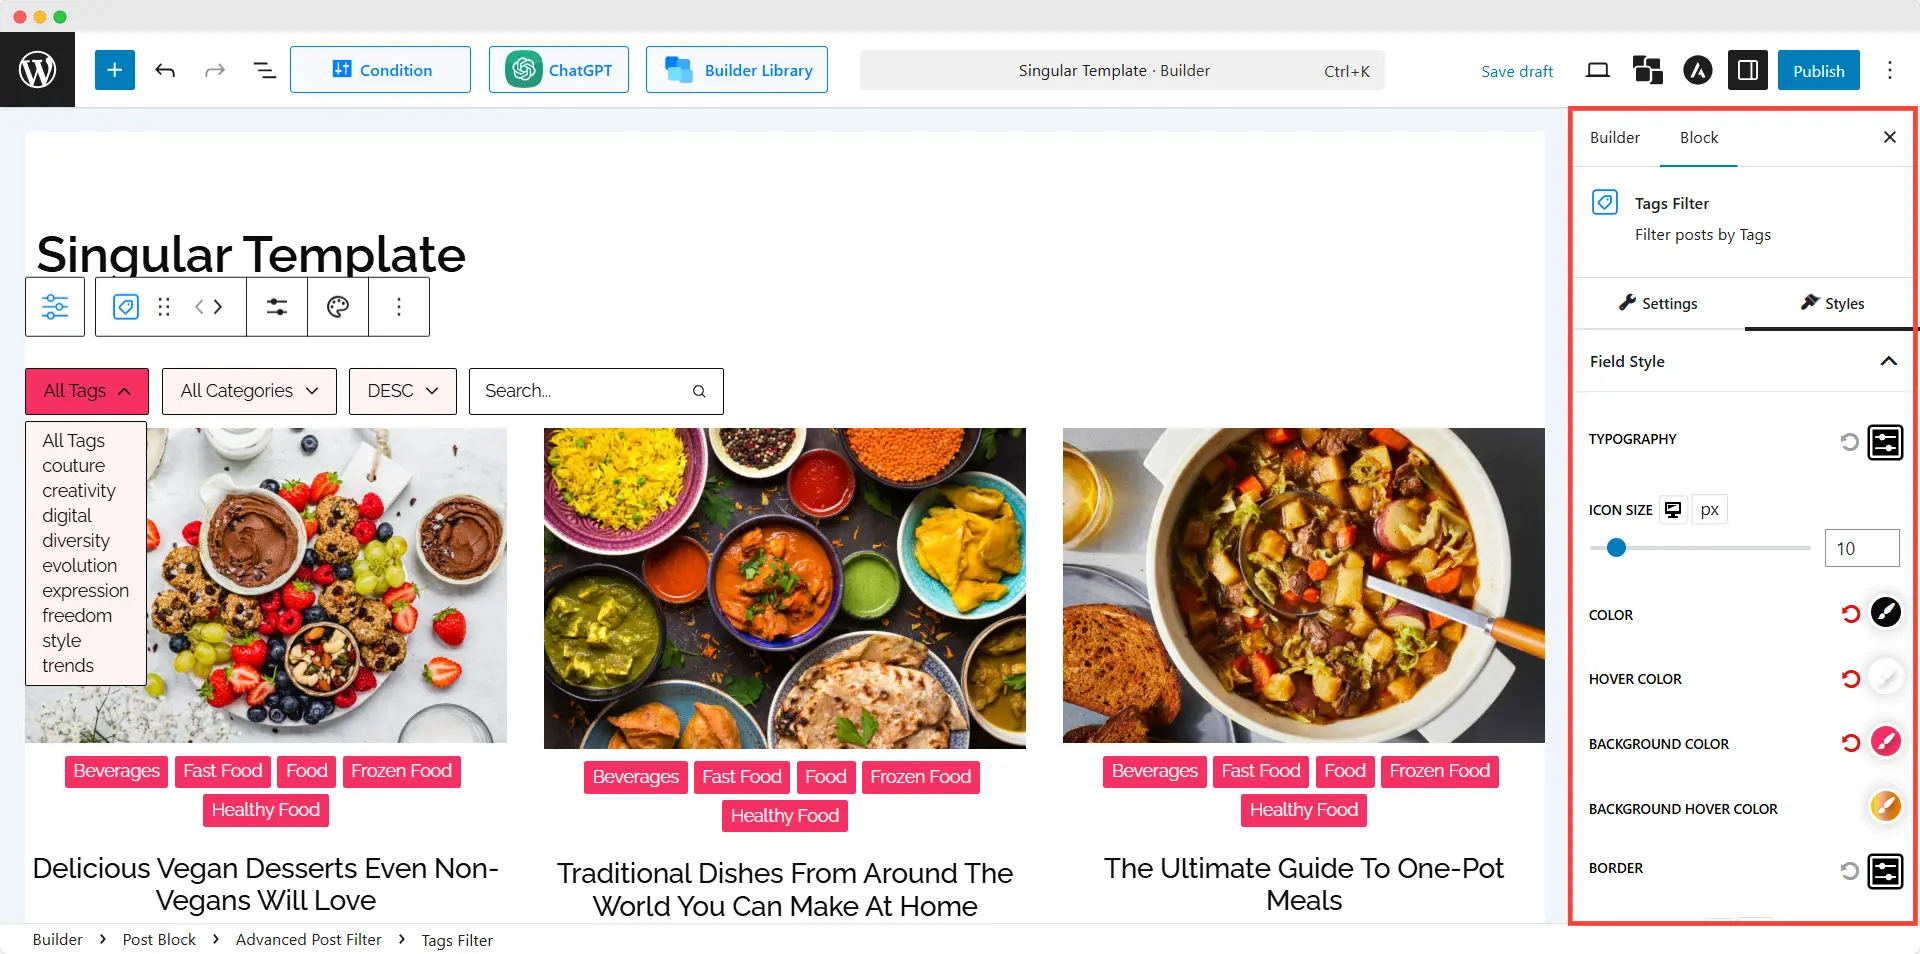
Then we can customize the appearance. We can also make it responsive by customizing it for multiple devices. Not only the filtering options, but PostX also offers full customization freedom for its blocks. So we can customize each of the elements and align them with our brand. Once satisfied, we need to click on the publish button and see how it looks at the front end.
Best Practices for Adding Post Filters
Now that we have discussed adding post filters, let’s explore the best practices while adding them to the blog page of your WordPress website.
Keep it Simple
Having the capability of adding multiple filtering options is good. But that doesn’t mean you have to add all of them. Instead of overloading your blog page, add the options that are truly required for your visitors.
Be User-Centric
As you are the website owner, you would know better about how your content is structured and how your visitors can find it. Add and organize the filtering options accordingly. So that the visitors can find them effortlessly without being confused by too many options.
Performance Considerations
Comprising website loading time while adding filtering is not considerable at all. So, make sure to keep your website speed according to the Google Core Web Vitals standard. Otherwise, you might end up losing visitors instead of satisfying them.
Responsive Design
Multi-device responsiveness is a must for this generation, as most of the readers come from mobile devices. So make sure the filtering options are responsive, no matter whether you use a theme or a plugin.
You may also like to read:
- Let Users Filter Posts by Category and Tags in WordPress
- How to Add Filter to Post List in WordPress
- How to Filter Posts by Author in WordPress
Conclusion
That’s all about adding a posts filter on the blog page. Now it’s your time to select a suitable method and add the feature to your website. Let us help you if you are not sure which method you should choose. If you need a basic taxonomy (category or tag) filtering option, check if your current theme has the feature or not. And if you need multiple filtering options with customization freedom, and your theme doesn’t have the feature, you should definitely consider choosing PostX.