If you have a WordPress site, it is essential to customize the overall design and look so that users get a positive experience from visiting your site. However, changing the settings for each webpage can become tedious and time-consuming.
That’s where a blog post template comes to the rescue. Using these templates, you can change settings across a number of blog posts simultaneously. But how do you create a blog template in WordPress?
Here are two simple ways to create a custom single post template:
- Use a WordPress block theme: Easily customize the appearance settings from the theme editor page.
- Use a plugin to save and reuse layouts: Use premade templates and custom conditions for a consistent blog layout with minimal effort.
In this blog post, I will explain both methods in more detail so that you can create customized post templates without a hassle!
What Is a Blog Post Template in WordPress?
A blog post template in WordPress is a reusable layout or structure that defines how single posts look. It controls how elements like the post title, featured image, content, author bio, and comments appear on the page.
Instead of structuring each post manually, you can use this template to maintain consistency.
These templates save you time, make your blog look more professional, and improve user experience. No matter, you have an established blog or just started recently, post templates are essential.
Let’s learn more about the benefits of using a blog post template.
Benefits of Using A Custom Blog Post Template in WordPress
A blog post template determines the overall layout of the blog posts on your site. So, If you want to build and manage your WordPress blog like a professional, you must utilize the power of custom blog post templates.
A custom post template lets you create beautiful web pages without delving into complex technical steps and spending hours.
Let’s learn more about why you should create a blog post template in WordPress.
i. Limitless Customization Options
Using a custom blog post template, you achieve true freedom in customizing each page of your WordPress site. For instance, you want to have different layouts for blog posts from different categories. You can achieve this with a blog post template.
Let’s say, you want to build a very unique page for a very special post on your site. You can accomplish that as well when you have a custom template in action.
ii. Save Development Time
The main joy in using blog post templates on WordPress is how much time it saves for the development process. You do not need to manually edit every single post on your site.
Simply create the template and see all your posts (or specific ones you desire) come alive with vibrant and engaging designs.
iii. Greater Control on Site Creation
Often, you may get overwhelmed managing different sections of your website. This is specifically true if you have a big website with lots of web pages. Manually managing all these pages can be tedious and you may notice bugs.
Creating a blog post template can make your life a lot easier in this regard. You have greater control over how each page is operating. You simply make changes from one place and those are applied simultaneously.
Method 1: Creating Blog Post Templates Using Theme Settings
Many WordPress themes offer customization settings for creating single blog post layouts. In this section, you will learn the detailed steps on how you can use a theme to create blog post templates.
Step 1: Choose a Suitable Theme with Layout Control
Install a theme that allows you to control the appearance of single blog posts. Some popular options include:
- Astra
- Kadence
- Blocksy
- GeneratePress
These themes include powerful customizer settings for single post layouts.
For instance, I am using the Astra theme. I will show you how you can easily create a post template using this theme. But no worries if you use other themes, the steps are quite similar.
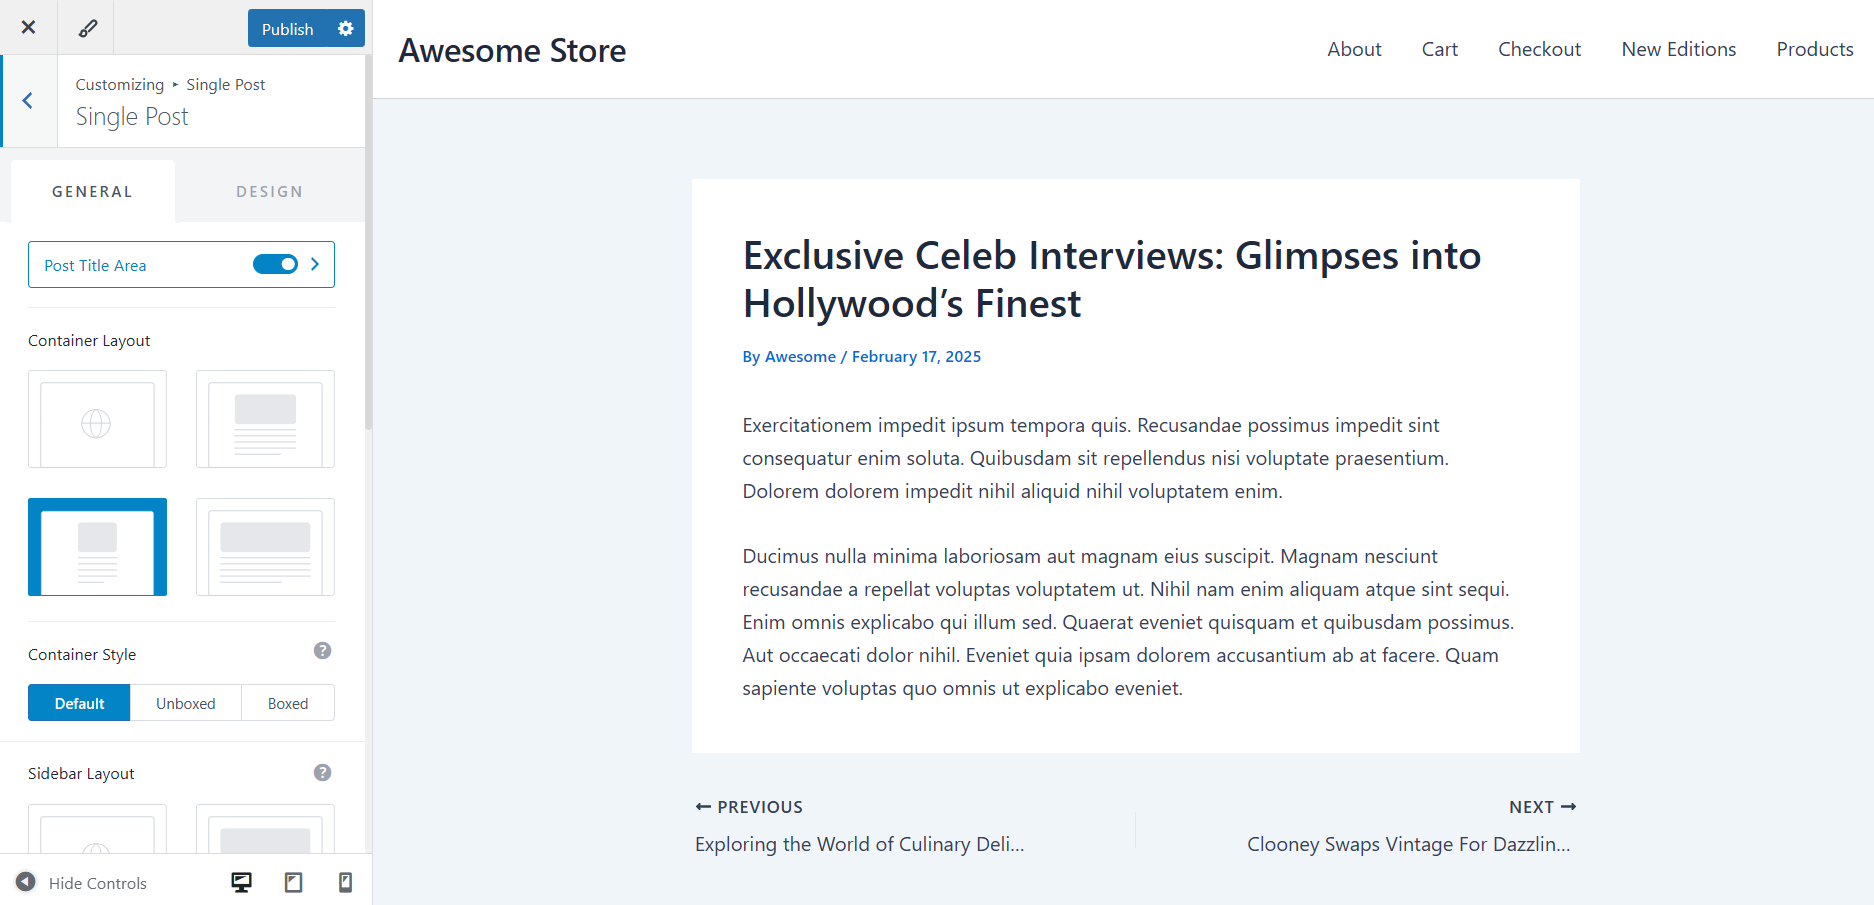
Step 2: Customize Your Post Template
On your admin dashboard, go to Appearance > Customize. You should see the theme editor page.
From here, navigate to Post Types > Single Posts
Here you can:
- Enable/disable featured image
- Adjust metadata (author, date, taxonomy)
- Choose the container and sidebar layout
- Customize Related Posts section
- Enable/disable comments
- And much more.
I suggest you tinker with these settings and make your ideal post template just the way you prefer.
Step 3: Save and Apply
Once you finalize your settings, don’t forget to hit the Publish button. Your changes will be applied to all blog posts instantly.
Method 2: Creating Single Post Templates Using a Plugin (PostX)
There are several ways to create blog post templates in WordPress. However, the easiest and most versatile option is to use the plugin PostX.
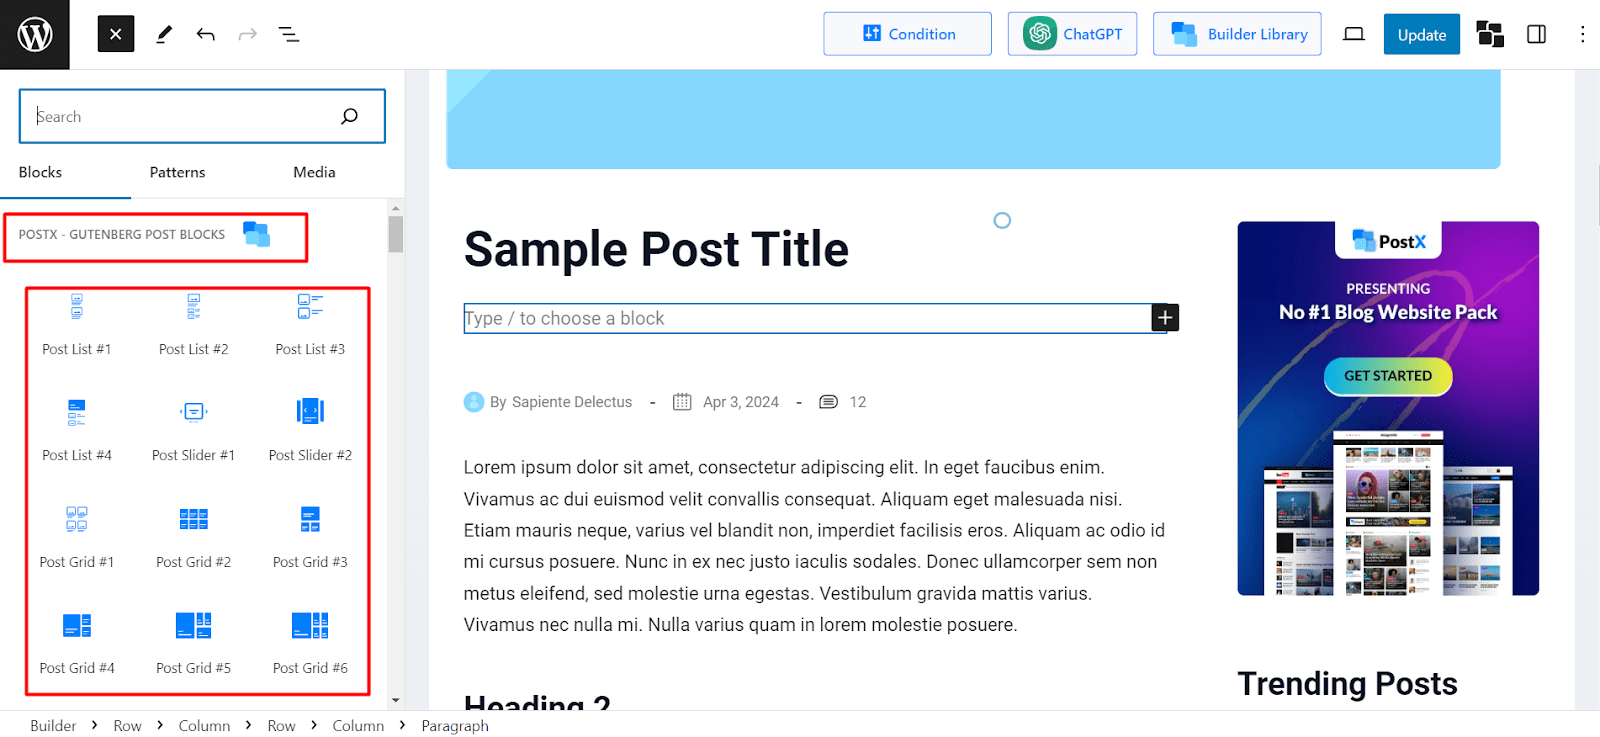
PostX is the leading WordPress post blocks plugin that simplifies your website creation process. You can easily launch your dream website in just a few clicks with its powerful features. Using its Site Builder, you can create beautiful, dynamic pages and amazing custom post templates in WordPress.
PostX isn’t just a page builder; it also gives you:
- A library of ready-made single-post templates
- Dynamic content blocks for title, meta, image, author, and comments
- Create custom templates for a specific post type, category, or tag
- SEO-optimized and fast-loading layouts
Here is the step-by-step process of creating a post template using PostX.
Step 1: Install and Activate PostX
Before using the plugin, you will need to install and activate it.
From your WordPress dashboard, go to Plugins > Add New.
Search for PostX, install, and activate it.
Step 2: Enable Dynamic Site Builder
Once PostX is active, go to PostX’s dashboard and make sure the Dynamic Site Builder feature is toggled on. This allows you to create and assign templates to different content types.
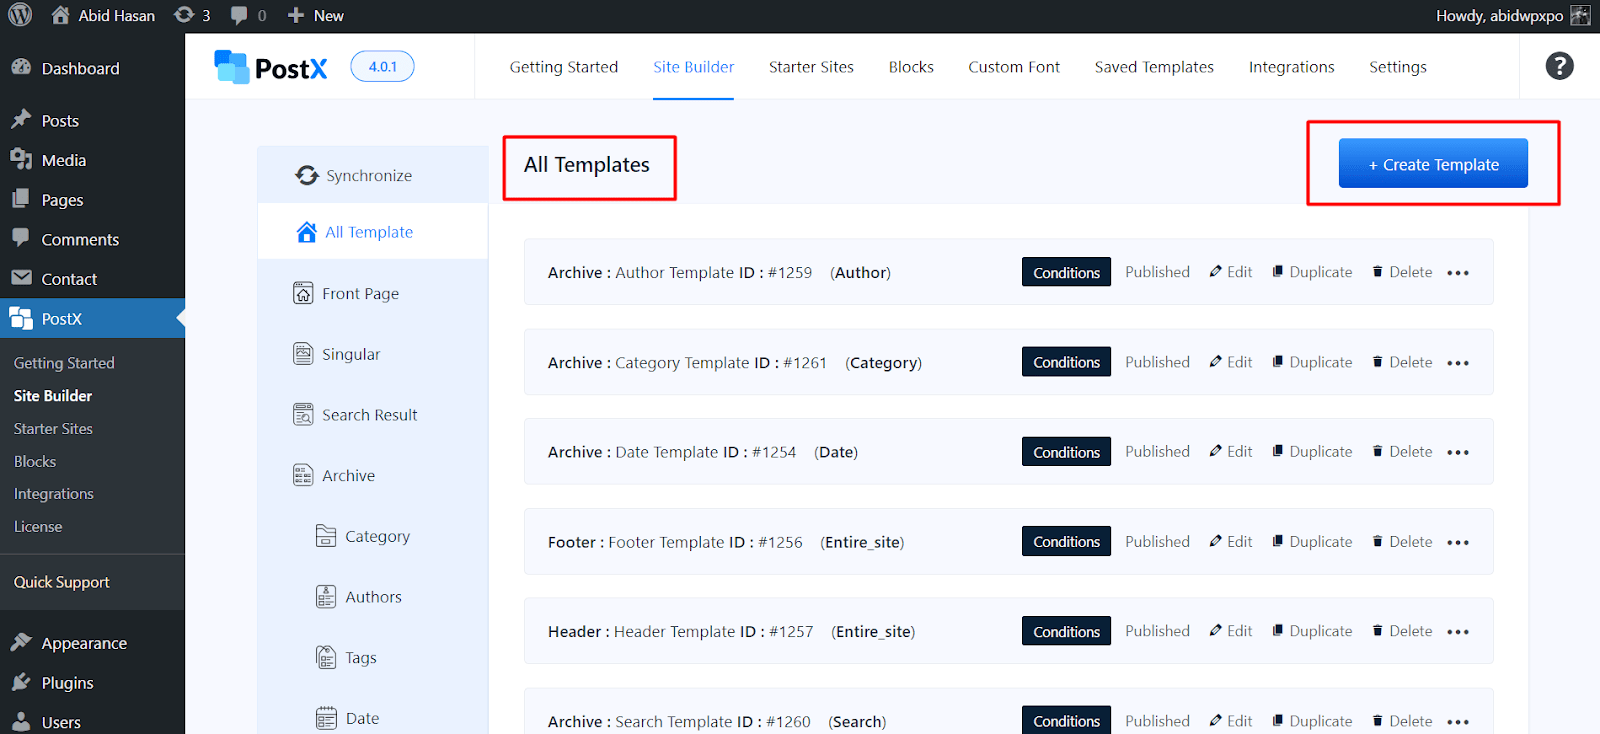
Now, move to the Site Builder tab from the PostX dashboard. Here, you should see a list of site templates you can use to customize the look of your website.
Step 3: Create a Single Post Template
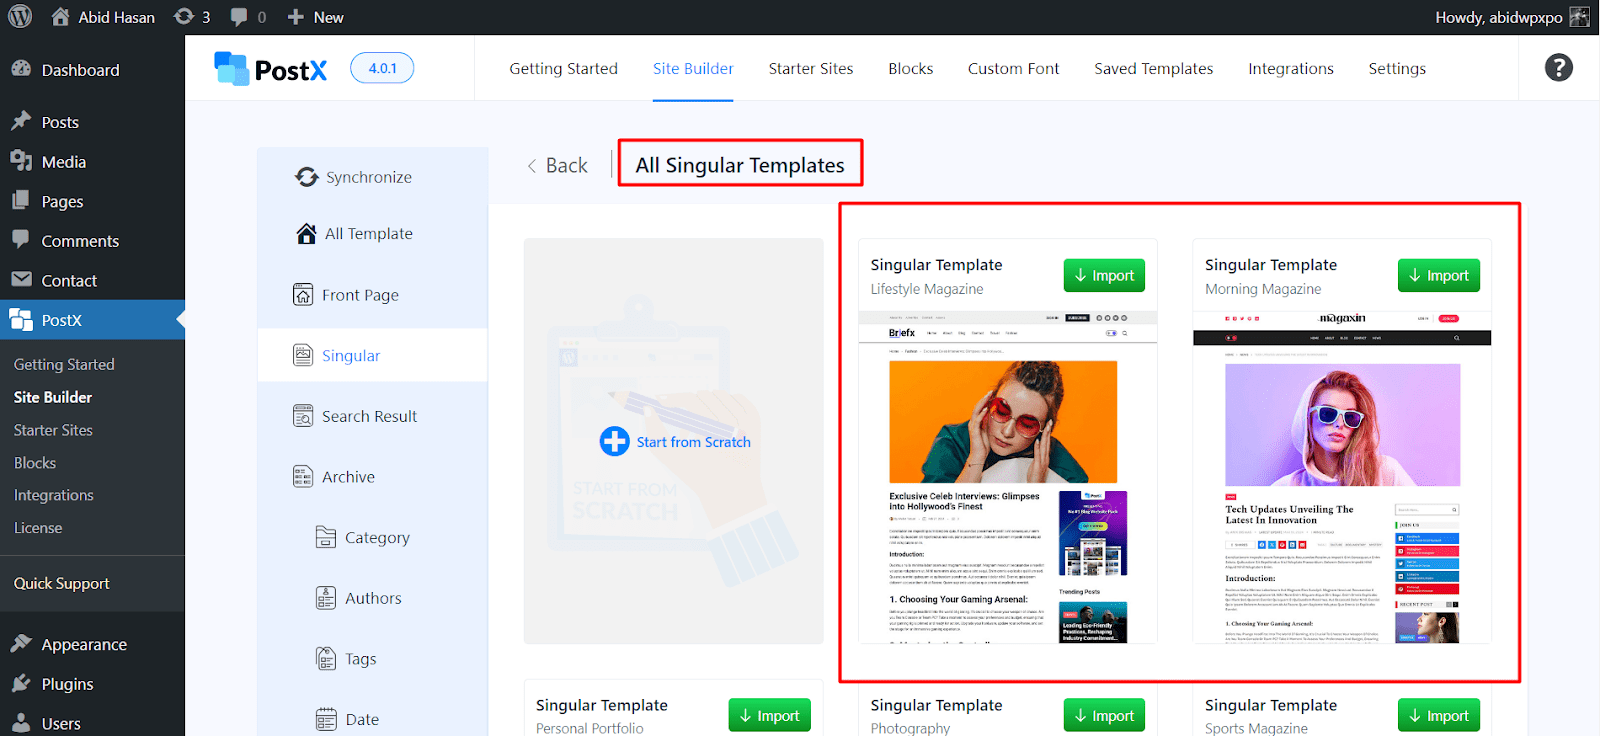
Now, click on Create Template > Singular. You will find a wide range of Single Post templates. You can choose an existing template and make necessary changes.
Alternatively, you can create one from scratch. I suggest you choose a premade single post template. It will save you time and effort by a lot.
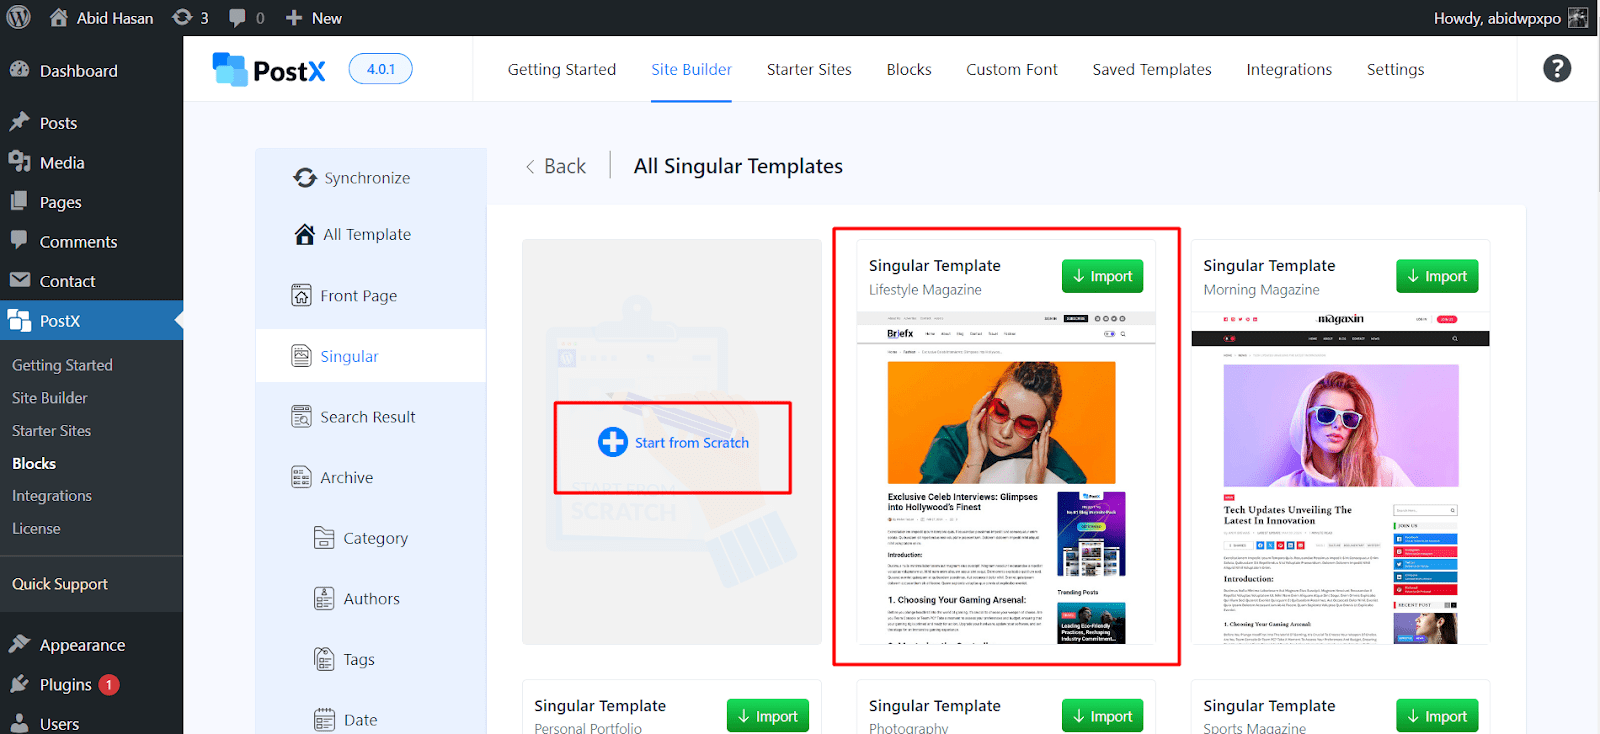
Click on the Import button on the template you like, and it will direct you to the template editor page.
You can add or remove post blocks and make changes to them. But before that, you will notice a Condition setting that pops up on the template editor page.
This option lets you choose which posts the template will be applied to – giving you more control.
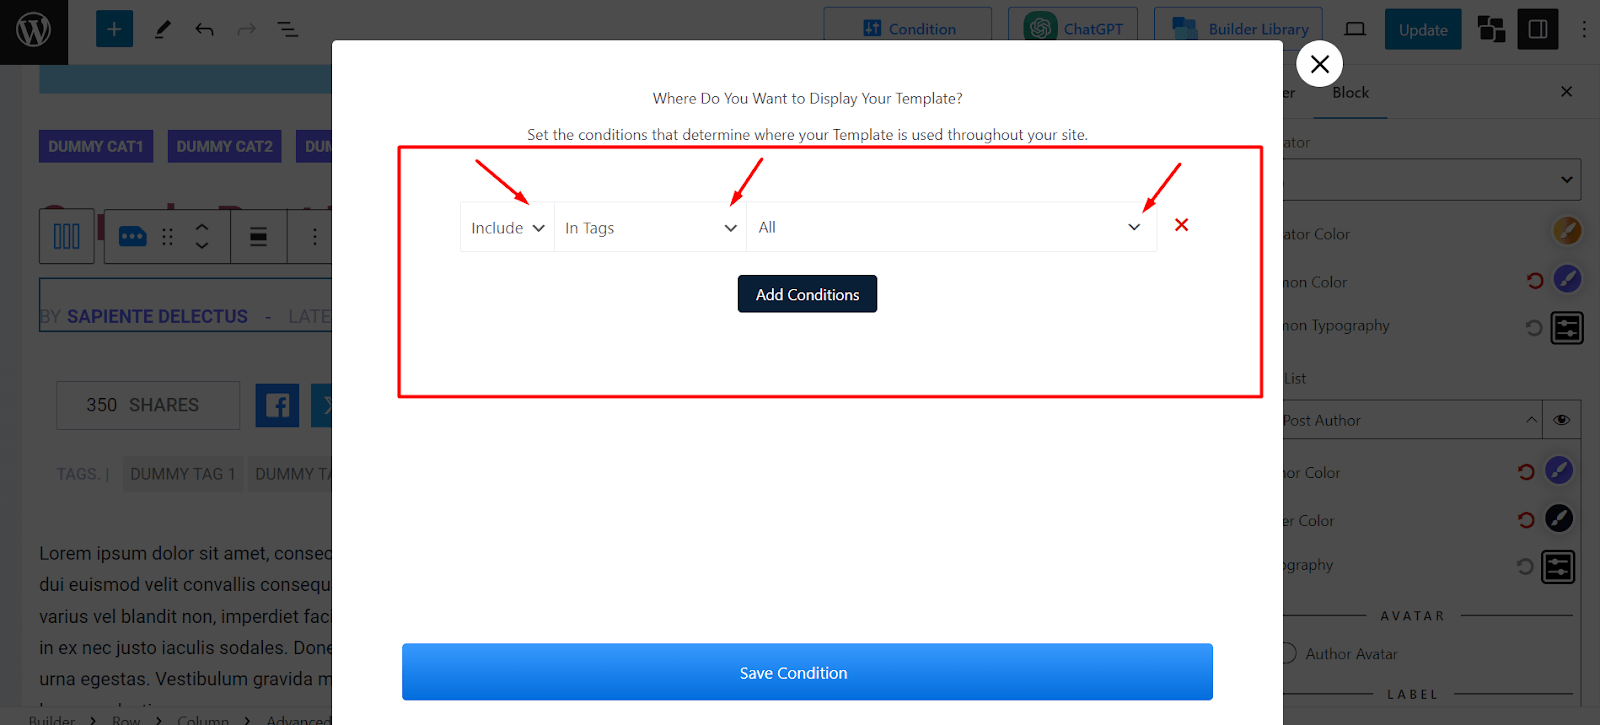
To set conditions, choose your desired options from the dropdowns.
- From the first dropdown, select whether you want to include or exclude a certain post, category, etc.
- In the next dropdown, select the type of Posts you want to create the template for. It can be for all blog posts, a specific post, specific category posts, and much more.
- Then, click on the right-most dropdown, and search for the desired posts, categories, tags, etc.
For instance, choosing the conditions Include, Posts, and All will show this template for all blog posts.
Step 4: Customize the Template
Now that you’ve created a blog post template, you can further customize it to give it a professional look.
PostX offers a wide range of dynamic blocks, that look premium and engaging. You can tinker with all of them and see how it looks on your website.
In general, here are the steps to customize the single post template:
- Click on a post block such as Post Title
- On the right side, you will see customization settings such as color, typography, spacing, and so much more.
Here are some of the most important blocks you should add and customize for your post template:
📝 Post Title: Make the Headline Stand Out
The Post Title is the first thing readers will see, so it should be something attention-grabbing. With the Post Title block from PostX, you can change the color, font style, alignment, and heading tag (like H1 or H2) to match your branding and SEO best practices.
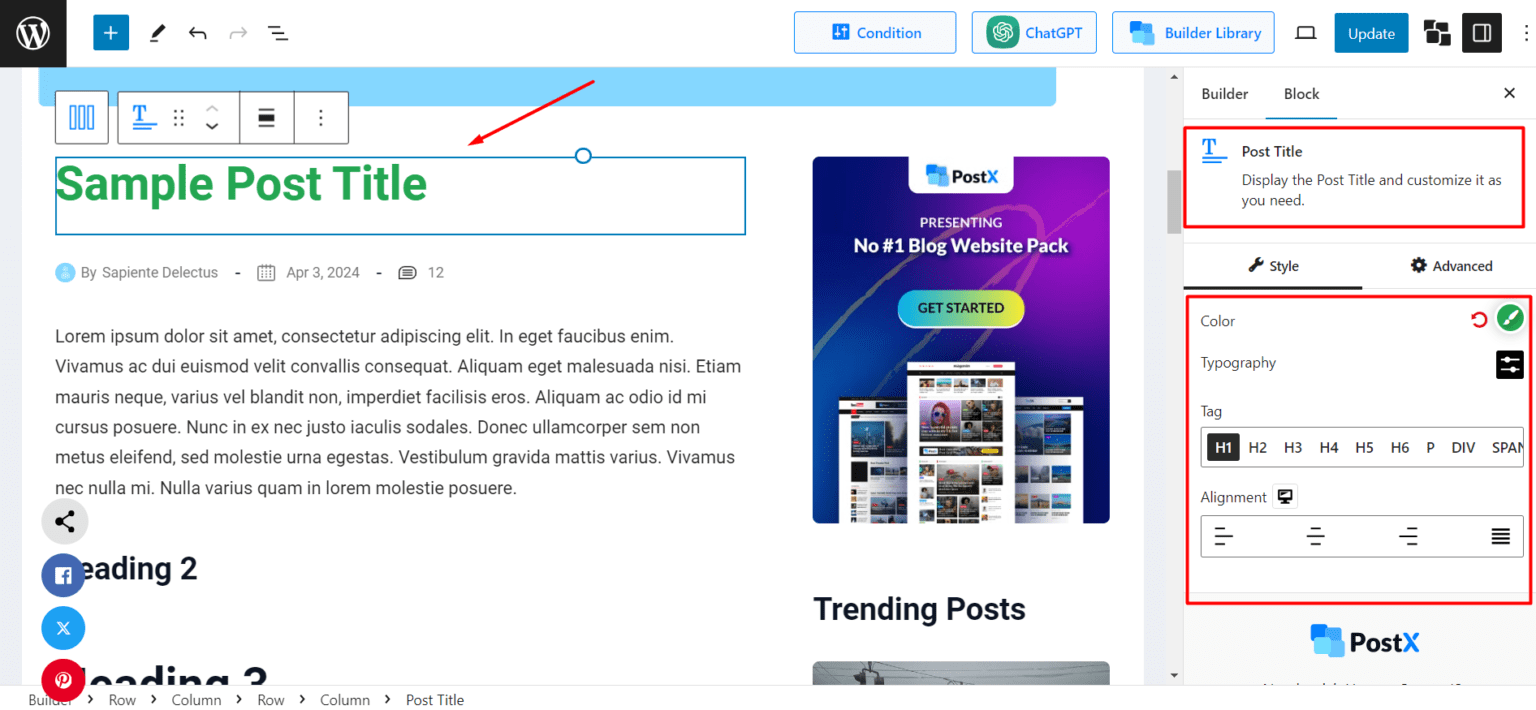
To add it, simply click the “+” icon on the page to bring up the blocks library. Here, search for “Post Title” and drag it into your template. After that, customize it using the block settings in the right-hand sidebar.
🧑💻 Post Author Box: Add a Personal Touch
Want to build trust and credibility? You must add author information to your posts. The Post Author Box block from PostX helps you showcase this easily.
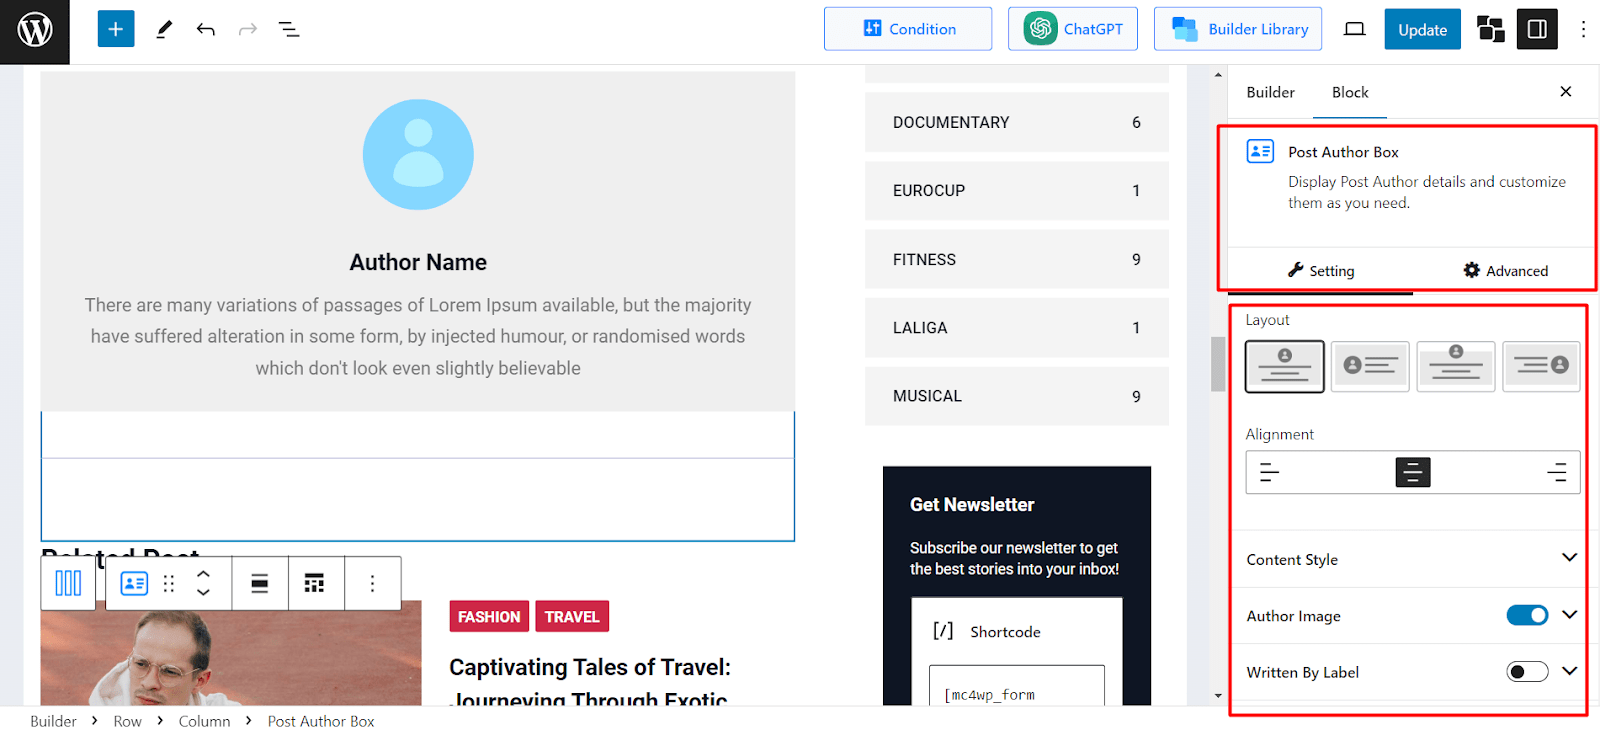
You can display the author’s name, bio, image, and more to add a human element to your posts. Also, there are customization options for each of these elements – which can be accessed from the right side’s block settings.
🗓️ Post Meta (Date, Author, and More)
Blog post metadata helps users and search engines understand the context of your post – like when it was published and who wrote it. The Advanced Post Meta block allows you to display this info with a wide range of flexibility.
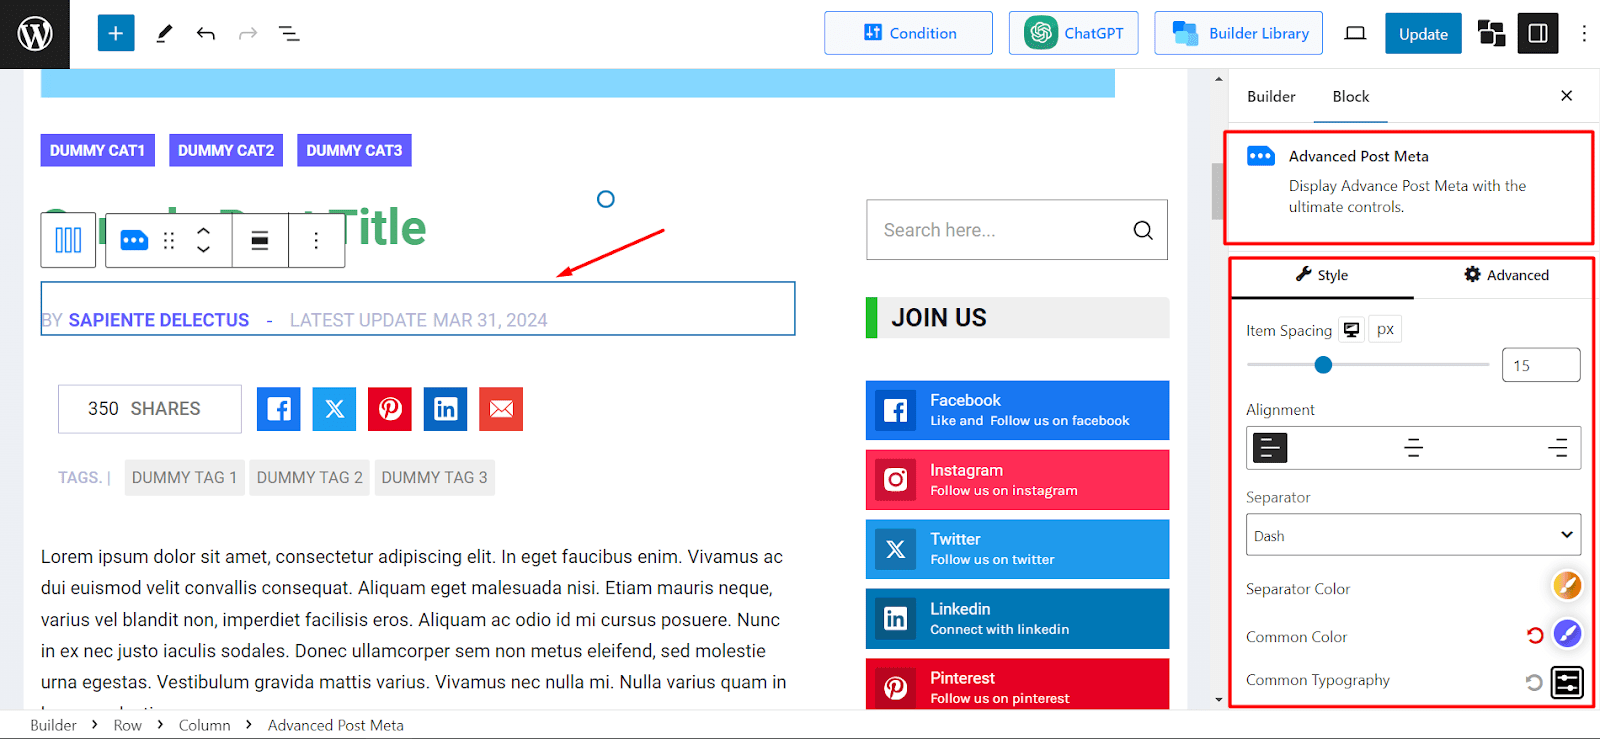
You can customize spacing, alignment, separator type, and even choose which elements (like author, date, reading time) to show or hide.
🖼️ Post Featured Image / Video: Create Visual Appeal
Every great blog post should have a visually appealing featured media. With the Post Featured Image/Video block, you can control how images or even videos appear at the top of your posts.
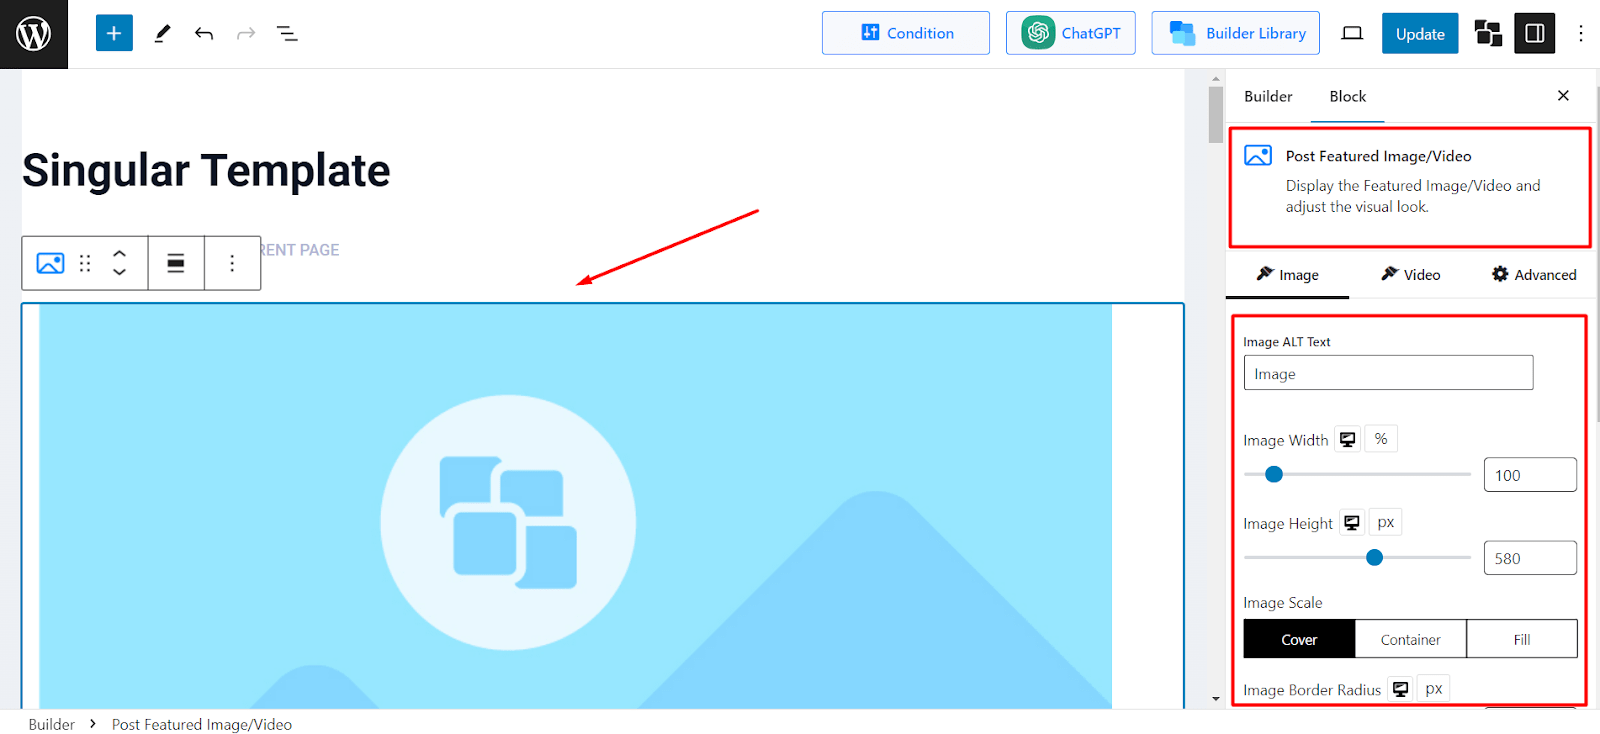
You can adjust the image size, scale, border radius, alignment, and so on.
In addition, you can showcase a video and customize its height, width, alignment, caption availability, etc. This is especially helpful if you have a tutorial blog or vlogs.
🔗 Post Breadcrumb: Improve Navigation and SEO
The Post Breadcrumb block adds a navigation trail to your blog posts.
It’s helpful for both readers (who want to navigate back) and search engines (which display breadcrumbs in search results).
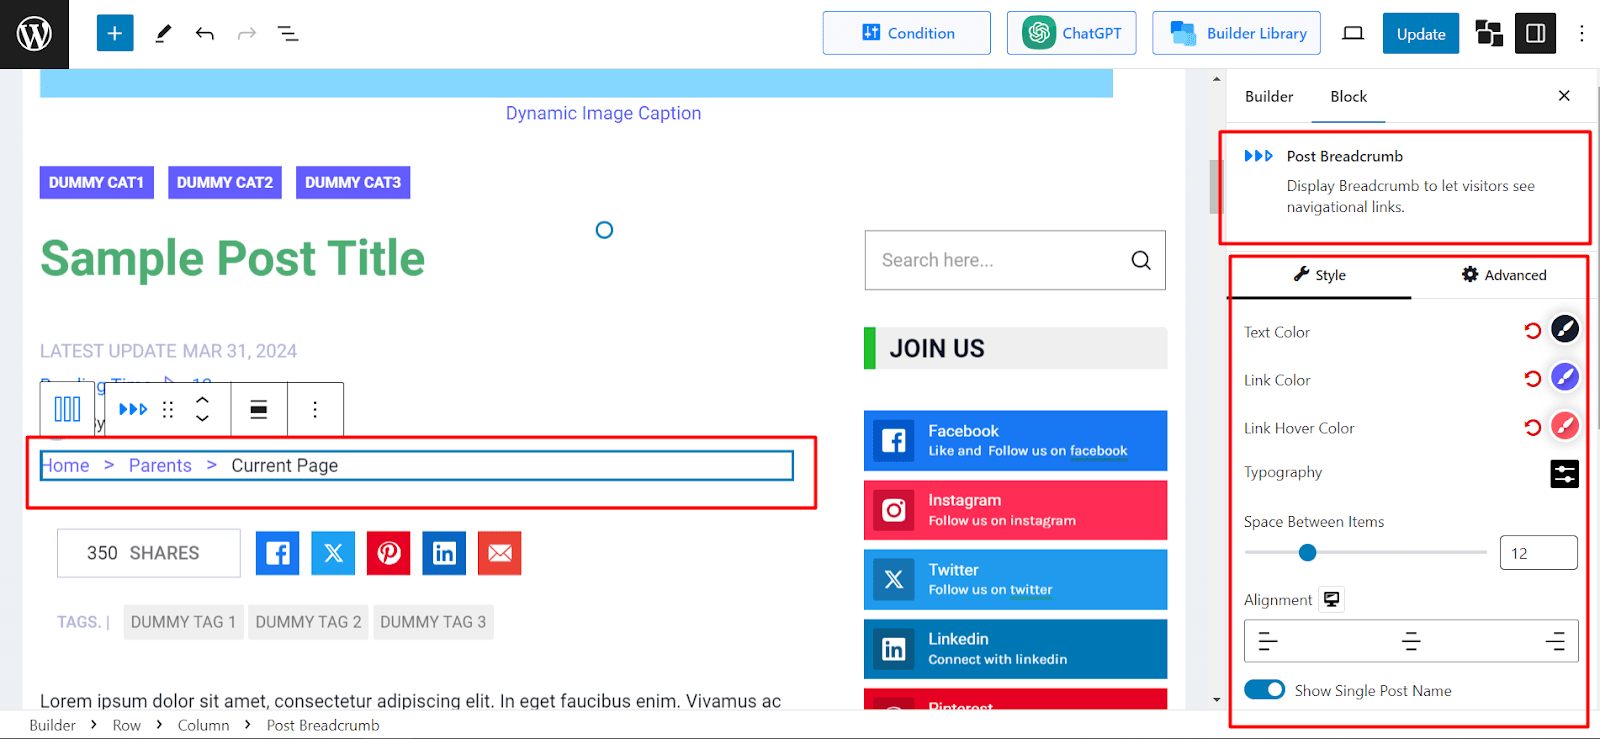
You can tweak the breadcrumbs’ color, spacing, alignment, and typography to match your site design. This block may seem forgettable, but it has a great impact on usability and SEO.
💬 Post Comments: Boost Engagement
Another great addition to a single post layout is the comments section.
And with the Post Comments block, you can have a customized comment area, such as modifying form heading, input fields, submit button, and more.
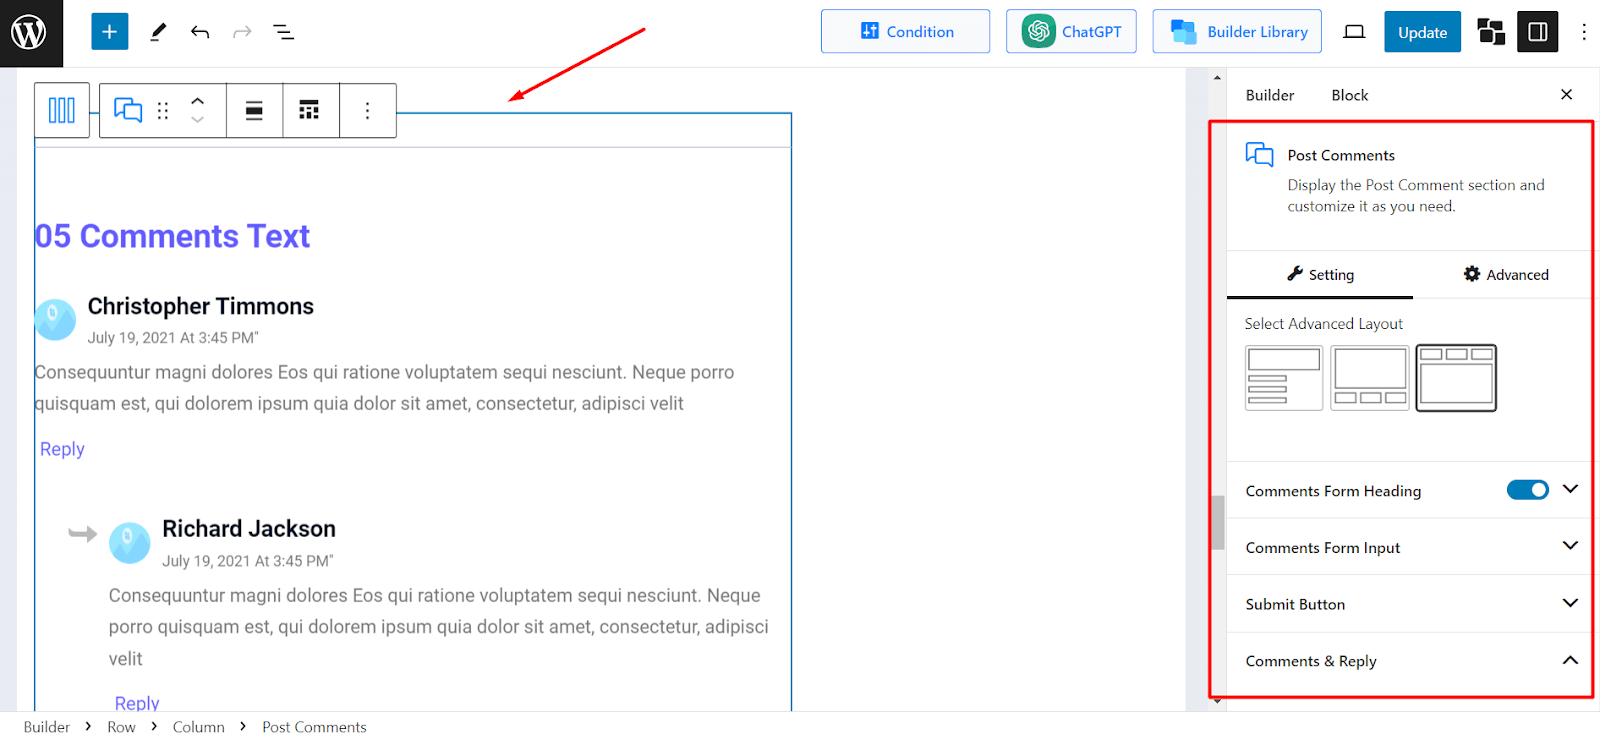
Note that a non-intrusive and well-designed comment section will encourage visitors to share their thoughts – leading to more engagement for your site.
4 Unique Ways to Create Custom Post Templates in WordPress (Without Code)
Want to customize how your blog posts look – based on categories, tags, authors, or even individual posts? With the PostX plugin, you can do it effortlessly.
With its 40+ Gutenberg blocks, you can create dynamic post templates – without any complicated steps. And you can apply these templates conditionally: by post type, category, or even a single blog post.
In this section, you will learn 4 practical and unique ways to create custom post templates using PostX.
Creating a Single Post Template for a Specific Post
Need a custom layout for a single blog post – maybe a sponsored article or a long-form guide? PostX lets you create a template just for that post.

Steps:
- Go to PostX > Site Builder > Create Template > Singular.
- On the Conditions section, set: Include > Posts > [Search and select your specific post].
- Click Save Condition.
- Customize the template with blocks and settings as you wish.
- Click Publish.
Now, only that selected blog post will use the new post layout.
You can also apply the same template to multiple individual posts by clicking “Add Conditions” and including more post titles.
Creating a Post Template for a Specific Category
You may want posts from a particular category – say “Cricket” if you have a Sports blog or “Tutorials” if you have a tech blog – to stand out with unique layouts or visuals.
PostX lets you do that in a few steps.
Steps:
- Create a singular template using premade design or from scratch
- Set conditions: Include > In Categories > [Type and select the desired category].
- Save the condition.
- Customize the template as needed and click Publish.
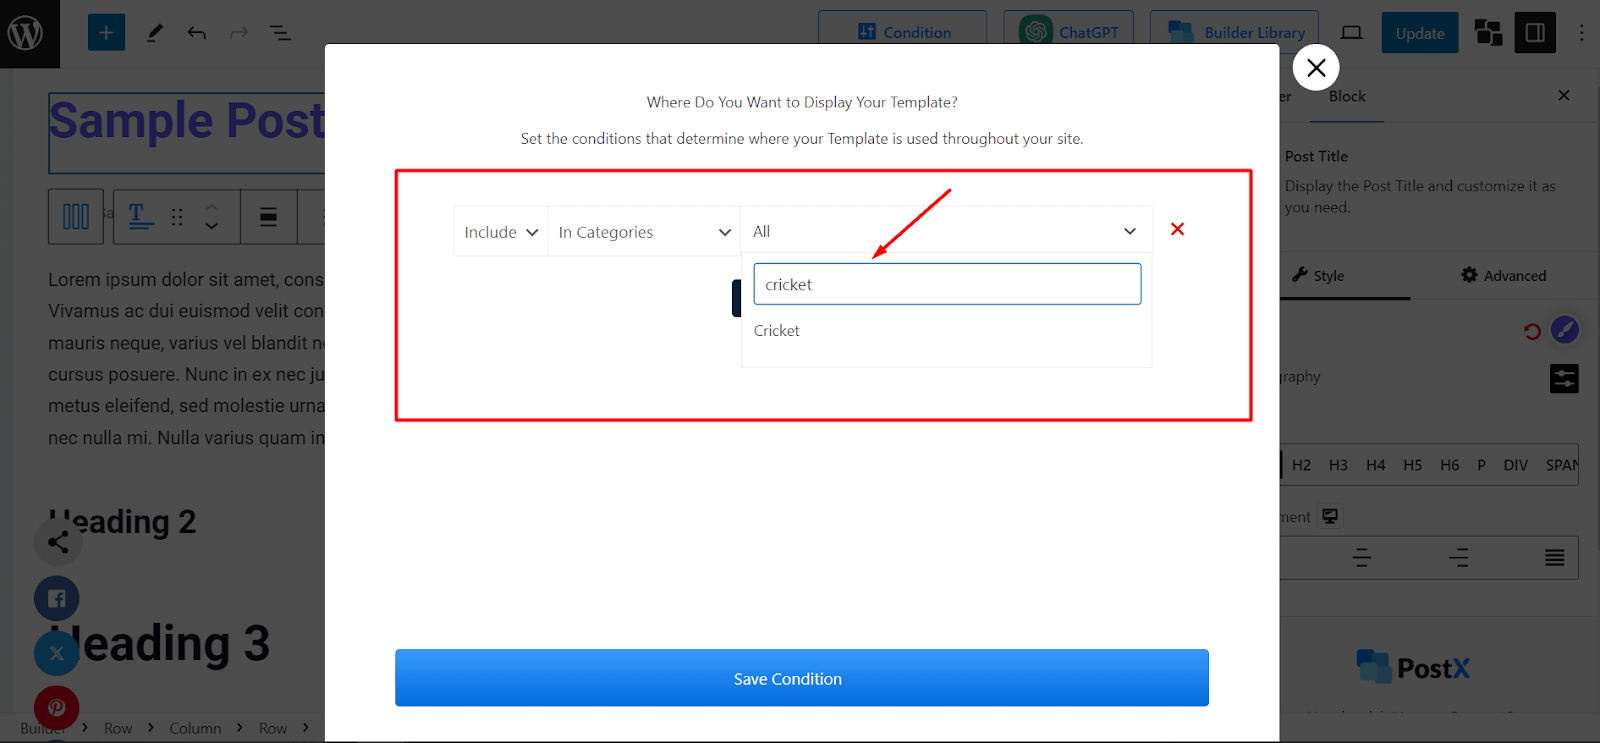
This template will only apply to posts under the selected category, giving you full control over how that section of your blog appears.
Creating a Blog Template for Posts with Specific Tags
Tags often group related content across different categories. For example, if you have a Sports blog, posts tagged with “premierleague” might deserve a different design to highlight relevant news for those football matches.
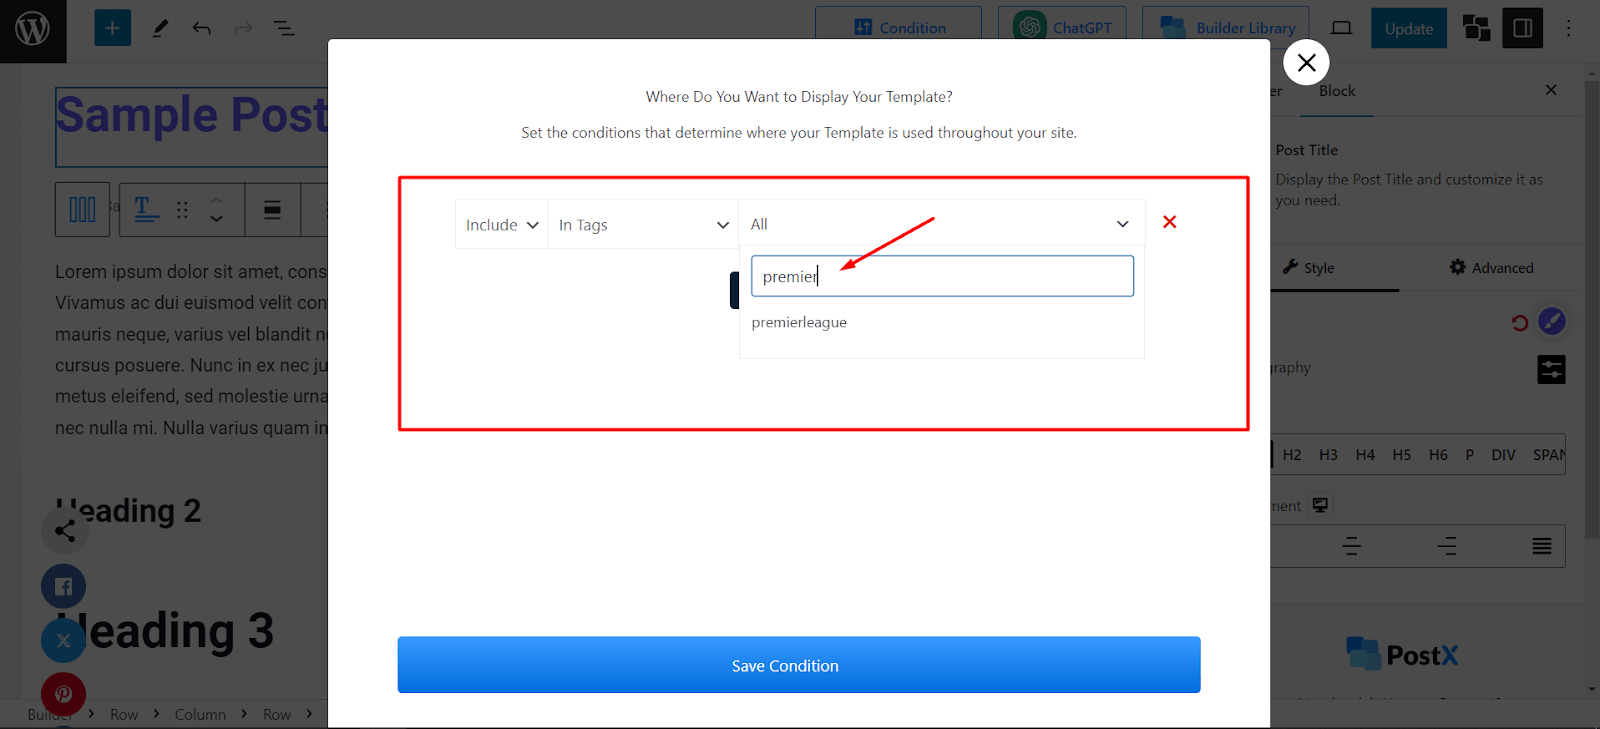
Steps:
- Create a single post template using the Site builder
- In the Condition section, choose: Include > In Tags > [Search and select the tag].
- Save the condition and edit the layout as needed.
- Click Publish.
Now, any post that has the selected tag will display using the new custom template.
Creating a Post Template Based on Author
If your blog has multiple writers, you might want to visually distinguish posts by different authors – especially for guest contributors or editorial staff.
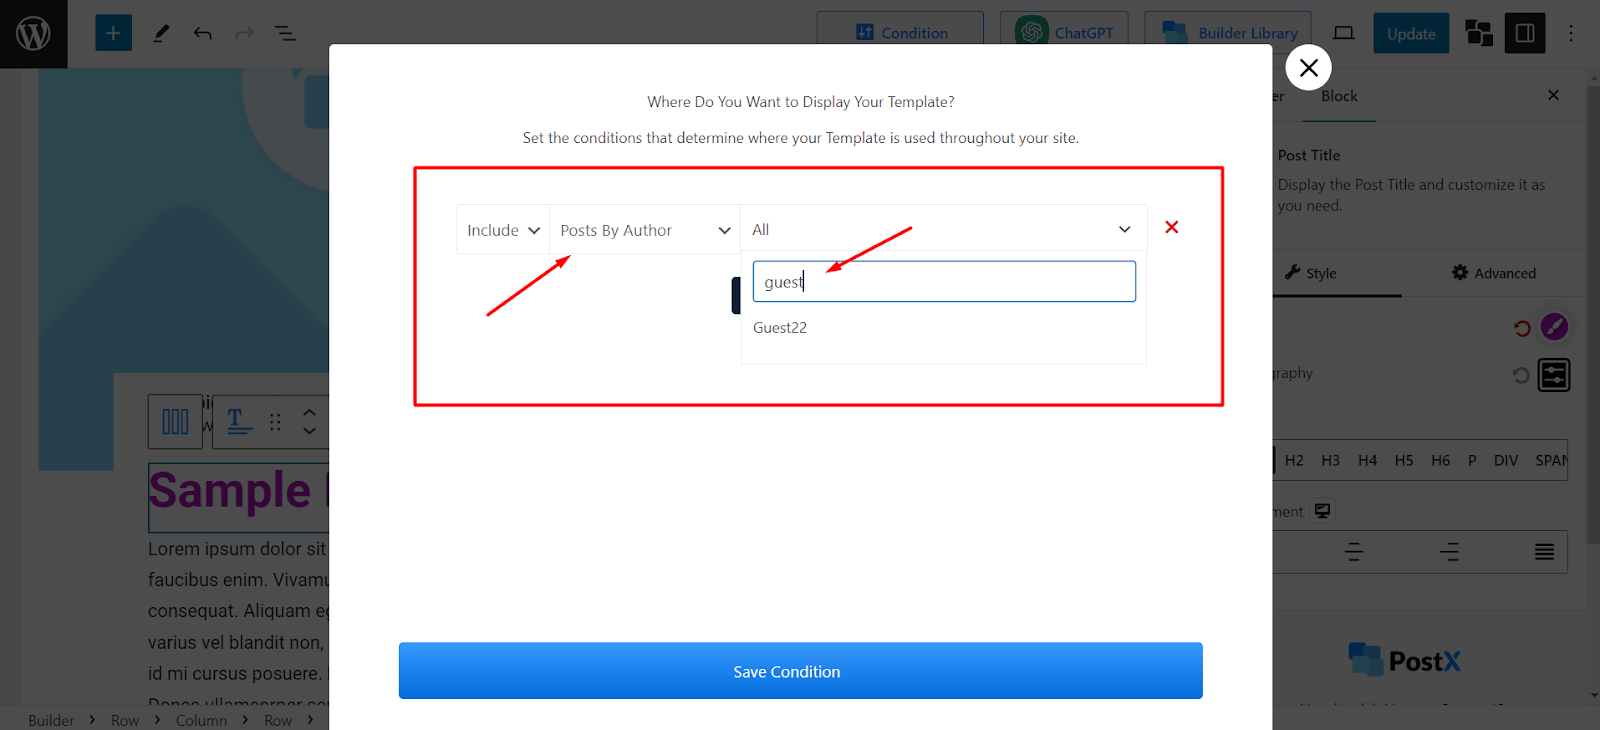
Steps:
- Simply go to PostX > Site Builder > Create Template > Singular.
- Under conditions, choose: Include > Posts By Author > [Search and select the author].
- Save the condition.
- Customize the layout for that author’s posts and click Publish.
This ensures that only the selected author’s posts use the unique layout, while others show different designs.
What Makes PostX the Best Plugin to Create A Blog Post Template?
PostX is the ideal plugin to create a blog post template in WordPress. But don’t just take our word for it. Let’s go through the benefits the plugin offers and what makes it the right choice for post templates.
User-Friendly Interface
PostX has a very intuitive and user-friendly interface that helps build a custom blog post template without getting confused.
Easily manage all the templates you have created so far from one place. Edit them to your preferences whenever you want.
Also, creating a template only takes a few clicks, allowing you to get started fast with beautiful designs for WordPress blog posts.
Ready-Made Templates
PostX offers 19 beautiful ready-made singular templates that you can use to build your custom blog post template. So, you don’t have to manually import blocks and edit settings to get started.
Simply choose the pre-made template that you like, import, and publish it. It’s easy like that!
Also, PostX recently launched Starter Sites feature that automatically creates beautiful single post templates alongside other templates for your site.
Very Useful Blocks
PostX offers 43 amazing blocks that you can utilize to build each part of a blog post template in WordPress.
So, it is very easy to make your dream design a reality by simply importing the necessary blocks and editing their settings to your liking.
Final Thoughts
Creating a blog post template is an essential step you must take to ensure a beautiful look for blog posts without spending hours.
Luckily, the job gets easier when you use PostX. With its site builder feature, you can create templates for all blog posts, a single post, posts from specific categories or tags, and much more.
As always, if you are in doubt, refer back to the detailed steps mentioned in this article. Good luck with your site creation journey!