
Introduction
Today we’ll be talking about implementing the WordPress Post List Gutenberg blocks. Before starting the discussion, there’s an important question:
Why would want to use a Gutenberg post list plugin in the first place?
First of all, it’s super easy to implement with Plugins [PostX is the choice we’re going with here]. Second, you can play with a lot of different built-in options to create a custom design for your audience.
These are the two compelling reasons to go through the content. If you’re someone looking to use PostX and its post list functionality, this post will help you out big time!
So, without further ado, let’s get started!
PostX WordPress Post List Variations
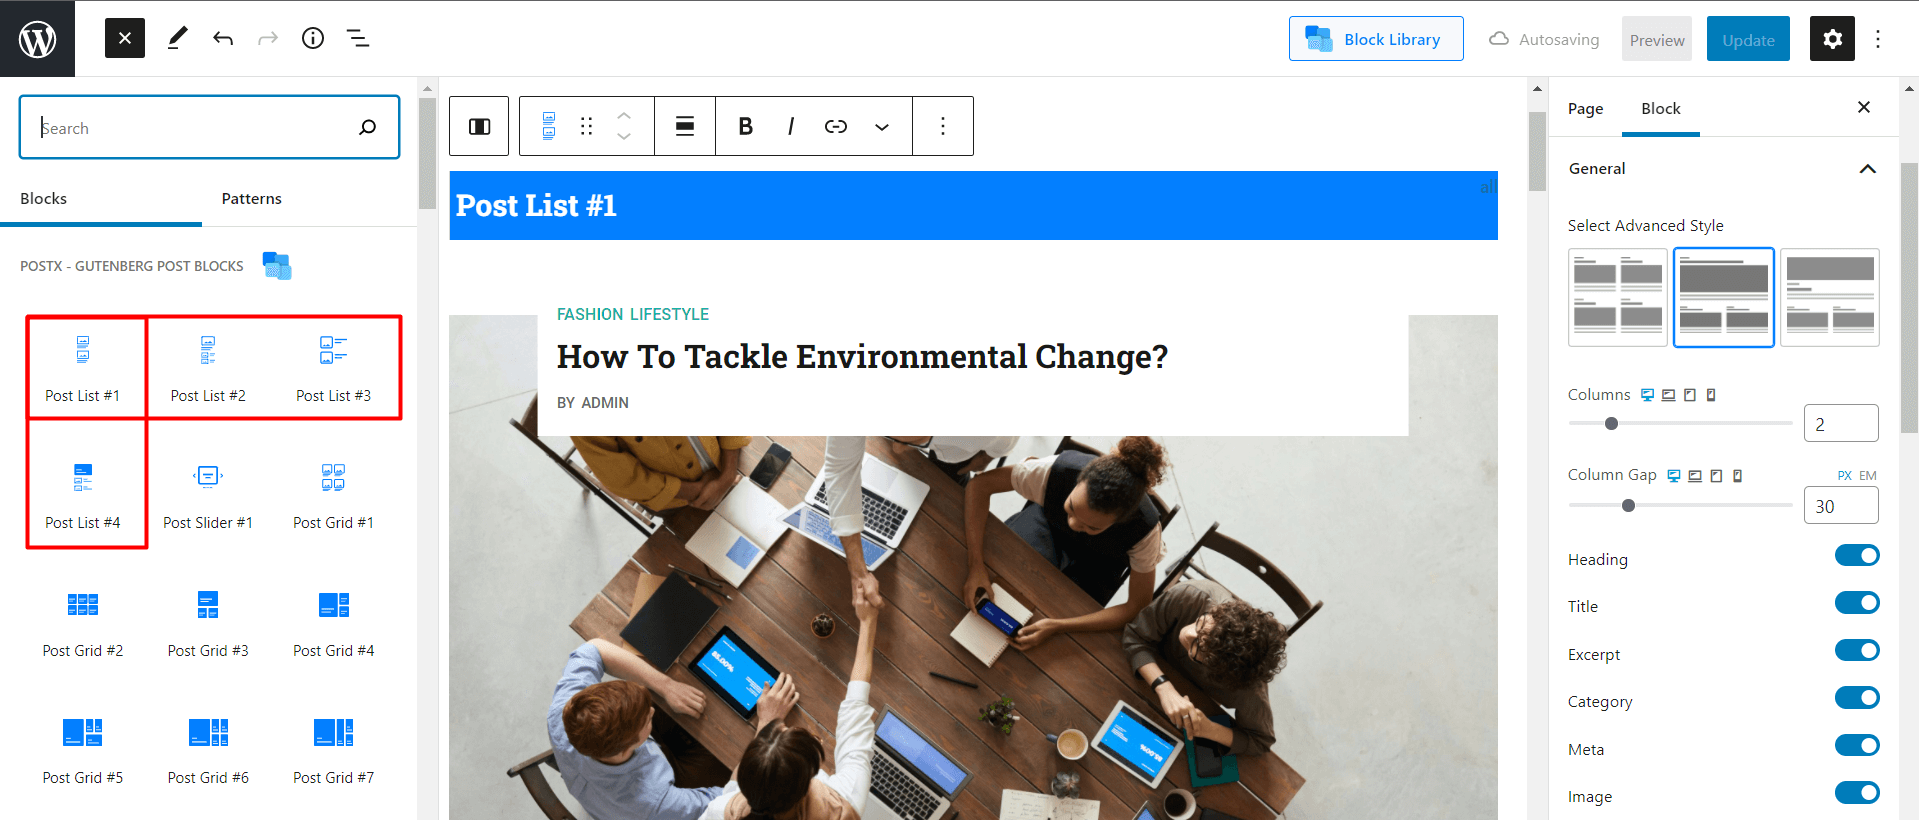
PostX already has a wide variety of readymade blocks. Among them, you’ll find 4-Post list variations. We’ll be talking about the WordPress Post List #1 primarily. There are other variations to explore as well.
WordPress Post List Variation demo [Post List #1]
The first post list variation allows for some advanced styling. We will now demonstrate how to use Post List #1 using the PostX built-in settings.
Of course, the very first thing you need is to install PostX. Installing PostX is the same as any other plugin. Still, you can check out the documentation to learn more.
Once you install it, you’re ready to import the ready-made design to your WordPress page. To do that, you can:
- Click the Block Library on the top-right.
- Go to Readymade designs.
- Navigate to the PostX list #1 style and click on Import.
- Wait for the design to load.
There’s another way you can do this as well. Of course, this will work better if you’re actively using Gutenberg:
- Click on the ‘Plus’ icon on the right of the page.
- Now click on ‘Browse All’.
- You will now see a window on the right with all the available Gutenberg Blocks. Just type ‘Post List’ in the search bar.
- Click on ‘Post List 1’. Your design will load automatically.
Once the design is loaded you can observe it. Now, let’s see what new settings are there.
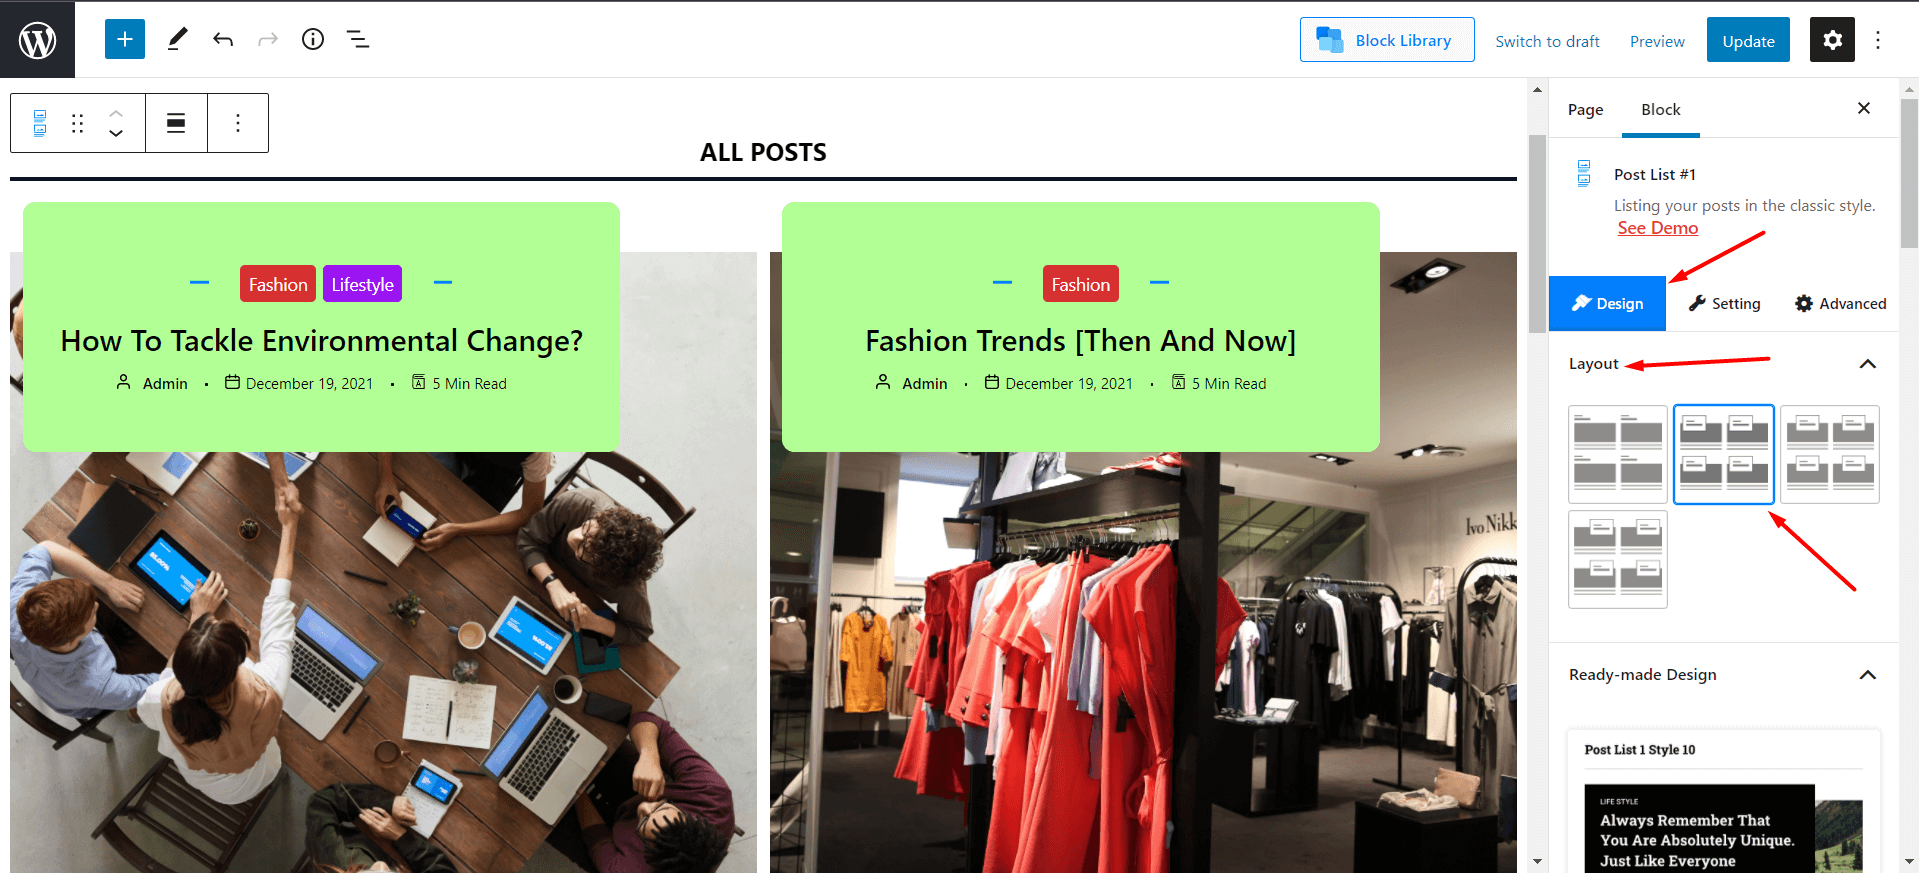
***Post list #1 features various premade layout designs that you can easily use with the click of a button. Also, design suggestions will show up right below the available layouts. Also, there are other Post Lists designs you can explore as well. Check out which one fits your site’s structure the most.
Let’s head to the ‘Setting’ tab to find out the feature sets and show you how to use them.
Exploring the PostX Post List #1 Settings
Under the ‘General’ tab in settings, you’ll find the option to Select Advanced Style. You can click on each style option to see what happens. For demonstration purposes, we will be:
- Choosing the 1st advanced layout setting.
- Keep the number of columns to 2.
- Keep the column gap to 30-pixels.
- Enable the ‘Links Open in New Tab’- toggle.
- Keep the post heading alignment to the center.
*** You get some advanced list post styles with the PostX plugin. You can choose from these advanced layouts and see how it fits your design needs.
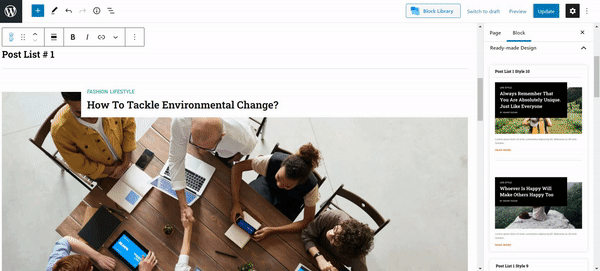
Design Variations
There are several design variations you can use for showing lists. All you have to do is import the design from the Design Pane and import it. Here’s a quick demonstration on working with the different design variations:
Explore Post Block Design Variations you can use with PostX in the following link:
***NOTE: You can enable/disable settings from the ‘General’ tab under Settings. Once you enable/disable a setting, you can change the design properties associated with that particular setting.
At this point, we want to change the layout of our post list. To do that:
- Go to the ‘Design Tab’.
- Under the design tab, we’ll choose the 2nd layout.
Now, we’ll go back to the Settings tab once more. Under the General Settings:
- Toggle all settings to enable except filtering.
- Choose the alignment to be in the ‘center’.
Now, let’s move on to the part where we can make the design better. Let’s start with the heading settings:
- We’ll name the heading ‘All Posts’.
- We want to align it to the center.
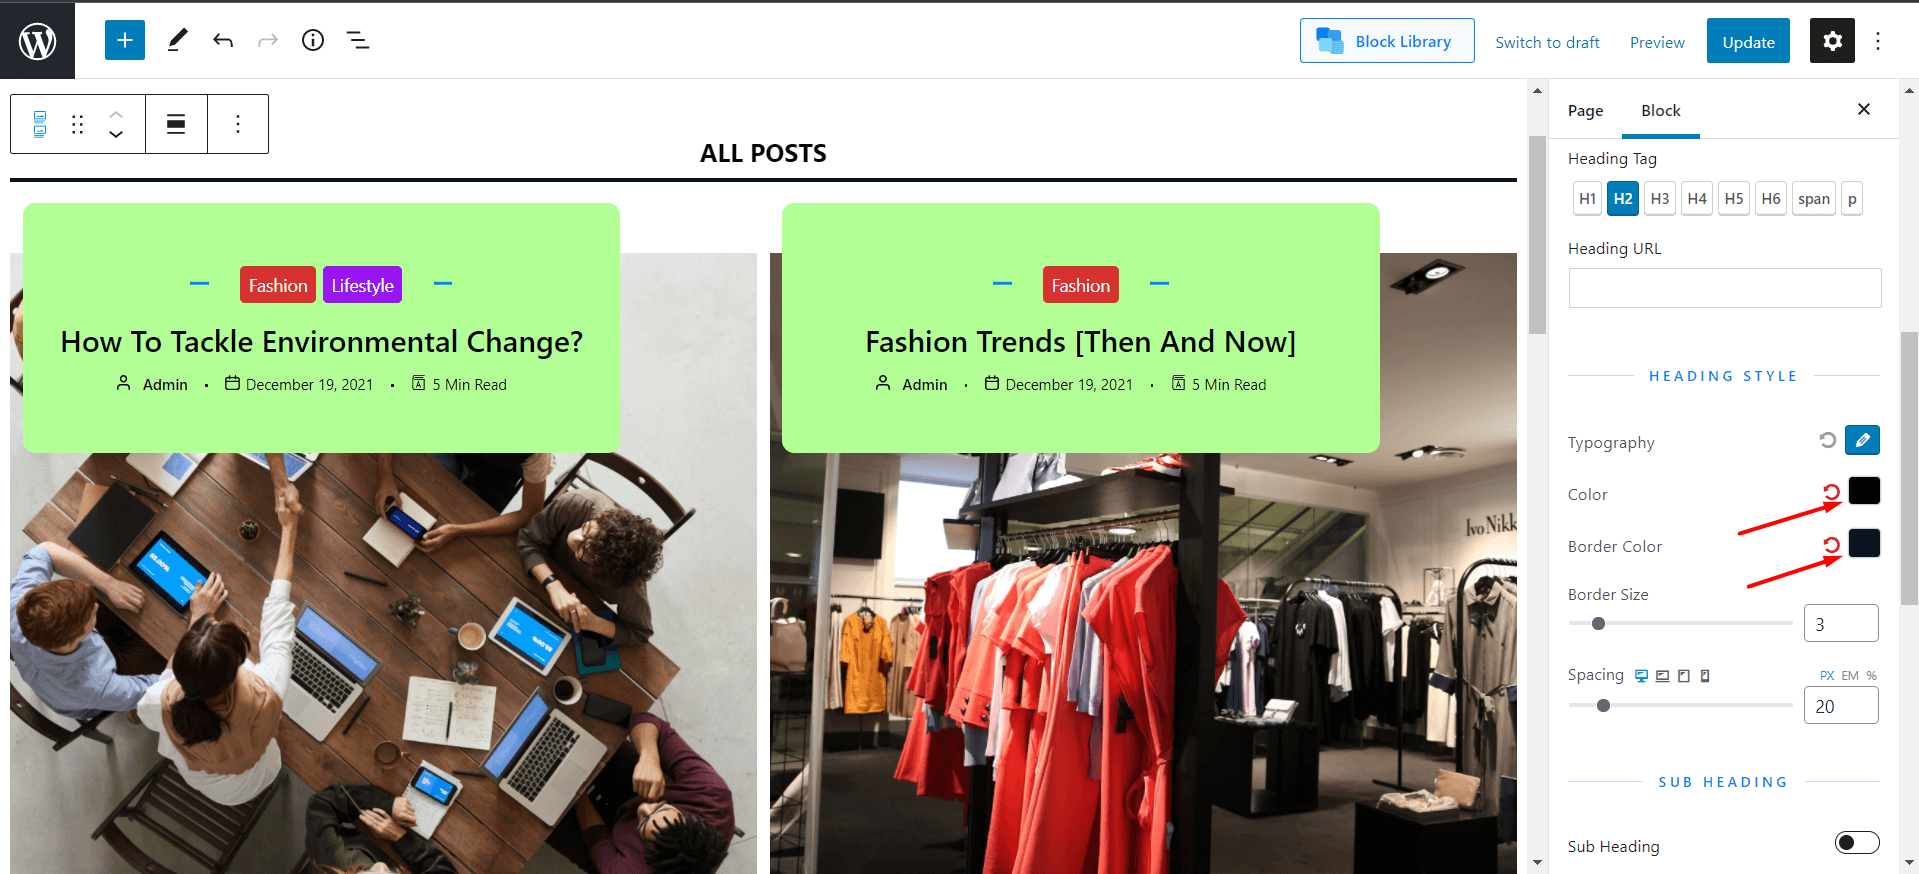
- You can choose different heading styles. For now, we’ll stick with the default heading style. Also, we won’t be adding any URL to the heading.
- Finally, we’ll keep the border size 3-px using and the spacing to 20-px from the PostX heading slider.
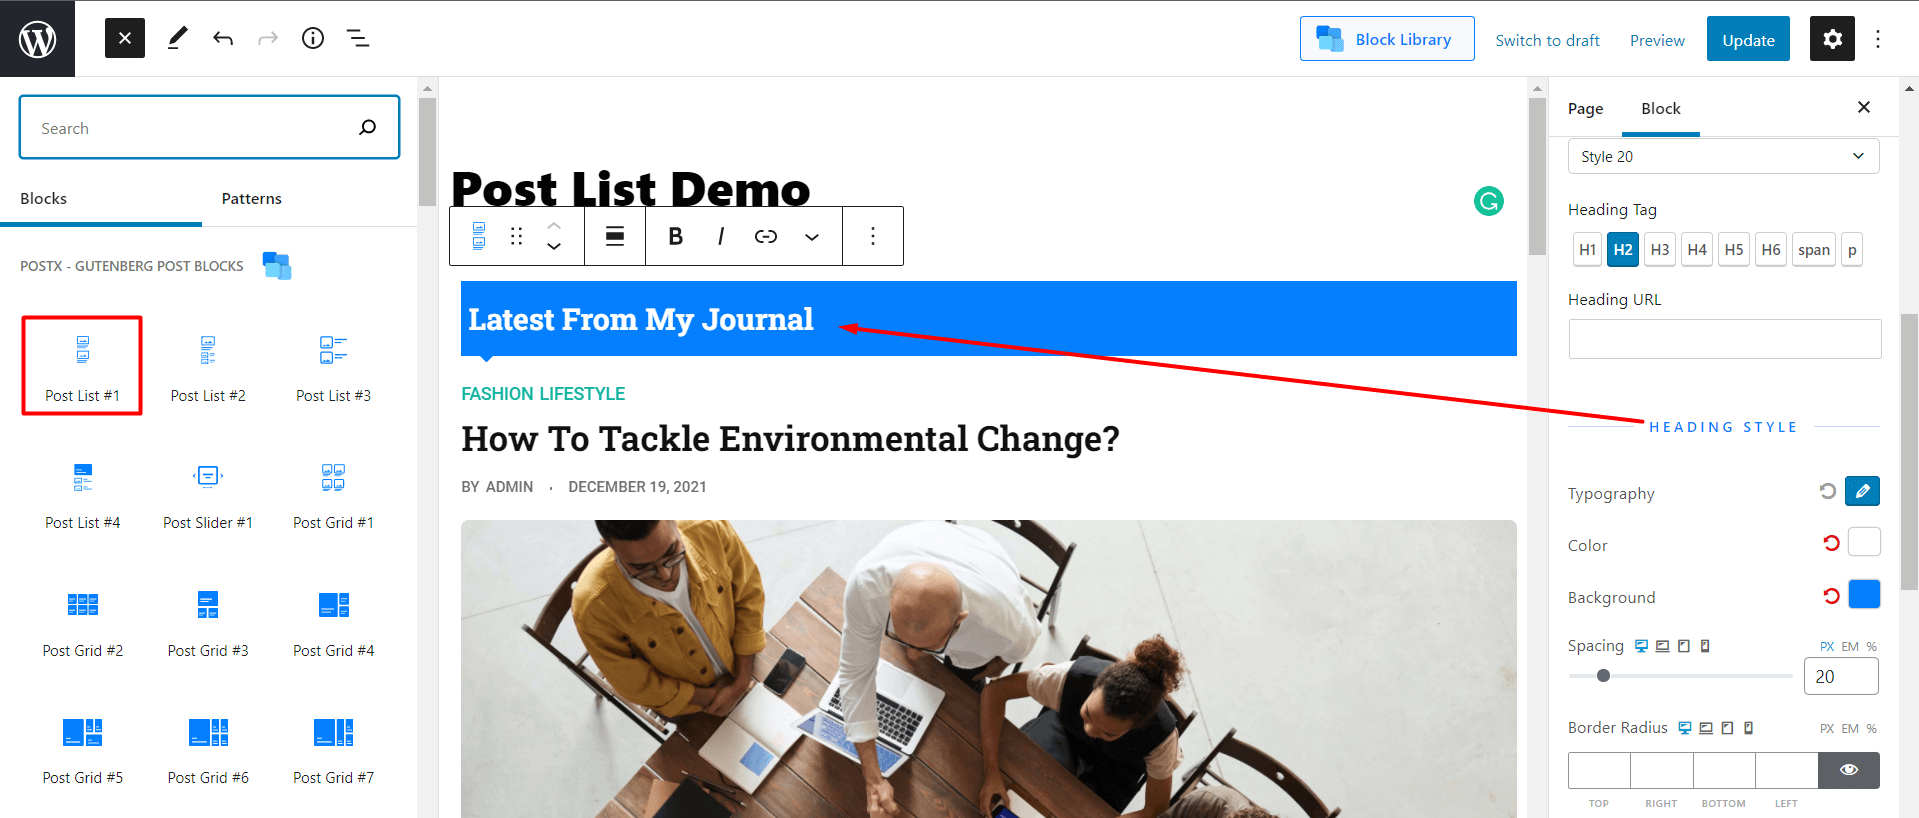
Heading Variations
A good thing to mention here is the number of heading styles you can explore with PostX. You can work with various different design choices to make your list style look more appealing. Take a look at the following example:
Next, we want to make our category look better for the WordPress post list design. For that, we’re going to:
- Choose the ‘Both Side Border’ category style.
- We’ll choose the position from the dropdown to be ‘Above Title’ to show the category over the post title.
- We want the ‘Line Width’ to be 20 and the ‘Line Spacing’ to be 40 [using the slider].

- We want to keep the ‘Line Color’ to the hexadecimal value of #037fff.
- We want the ‘Border Radius’ to be 4-px on all sides.
- We want to show the specific category color. So, we’ll enable the ‘Specific Color (Pro)’.
- Also, we want the Top and Bottom padding to be set to 5-px and Right and Left padding to 7-px.
We’ll now move on to the Entry Header. Here are the changes we want to make for completing the WordPress post list layout.
We want to:
- Add a ‘Border radius’ of 10-px on all sides [this is for the normal state].
- Set the ‘Normal Background Color’ to the hex code #b2ff95.
- Set the X-space to 10-px and Y-Space to 40-px.
- We also want to change the ‘Hover Background Color’ to the hex code #c8ffb4 so that we get a nice distinctive post list category effect.
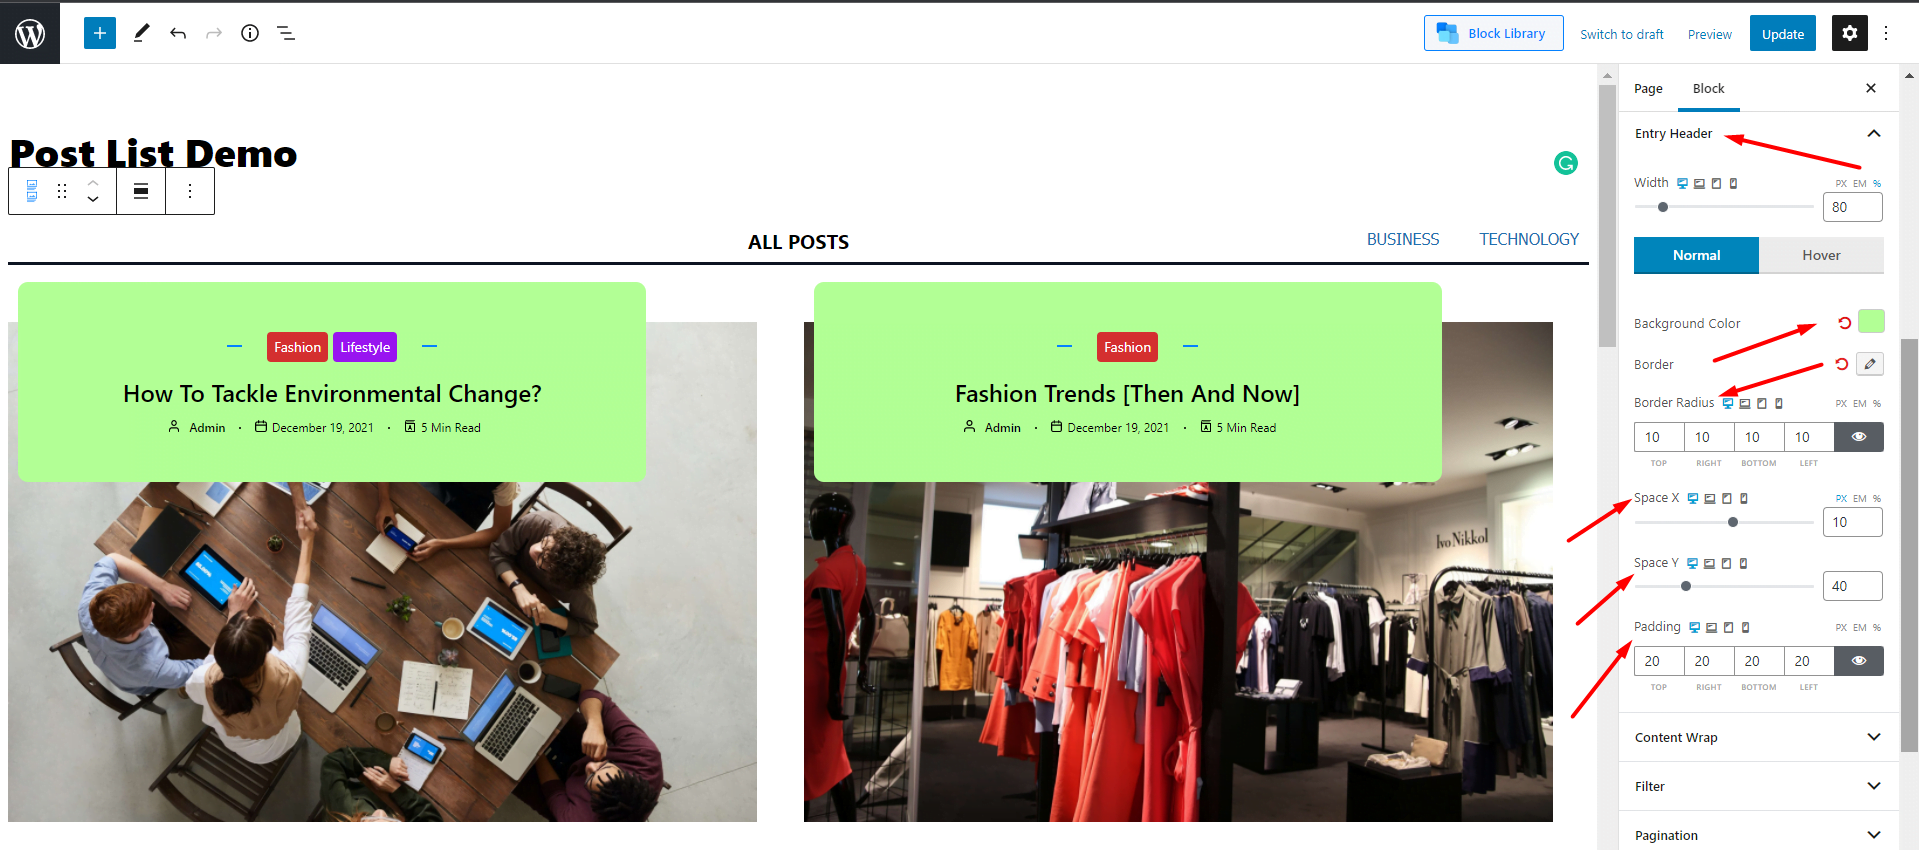
- Also, the ‘Hover radius’ will be 10-px as well.
- Finally, the Padding will be 20-px on all sides. Any other settings will remain as default.
Also, there’s one small thing that needs to change. And that’s going to be the Meta color. We want to set it to black (#000000) for better contrast.
We’ve also added an AJAX pagination property to our WordPress post list style. AJAX pagination is one of the more effective features to offer better functionality to the user. We’ve added a video in the later sections where you can explore the features of the pagination.
Here’s a quick example for creating quick pagination for your post list style [We used a similar design for the demo]:
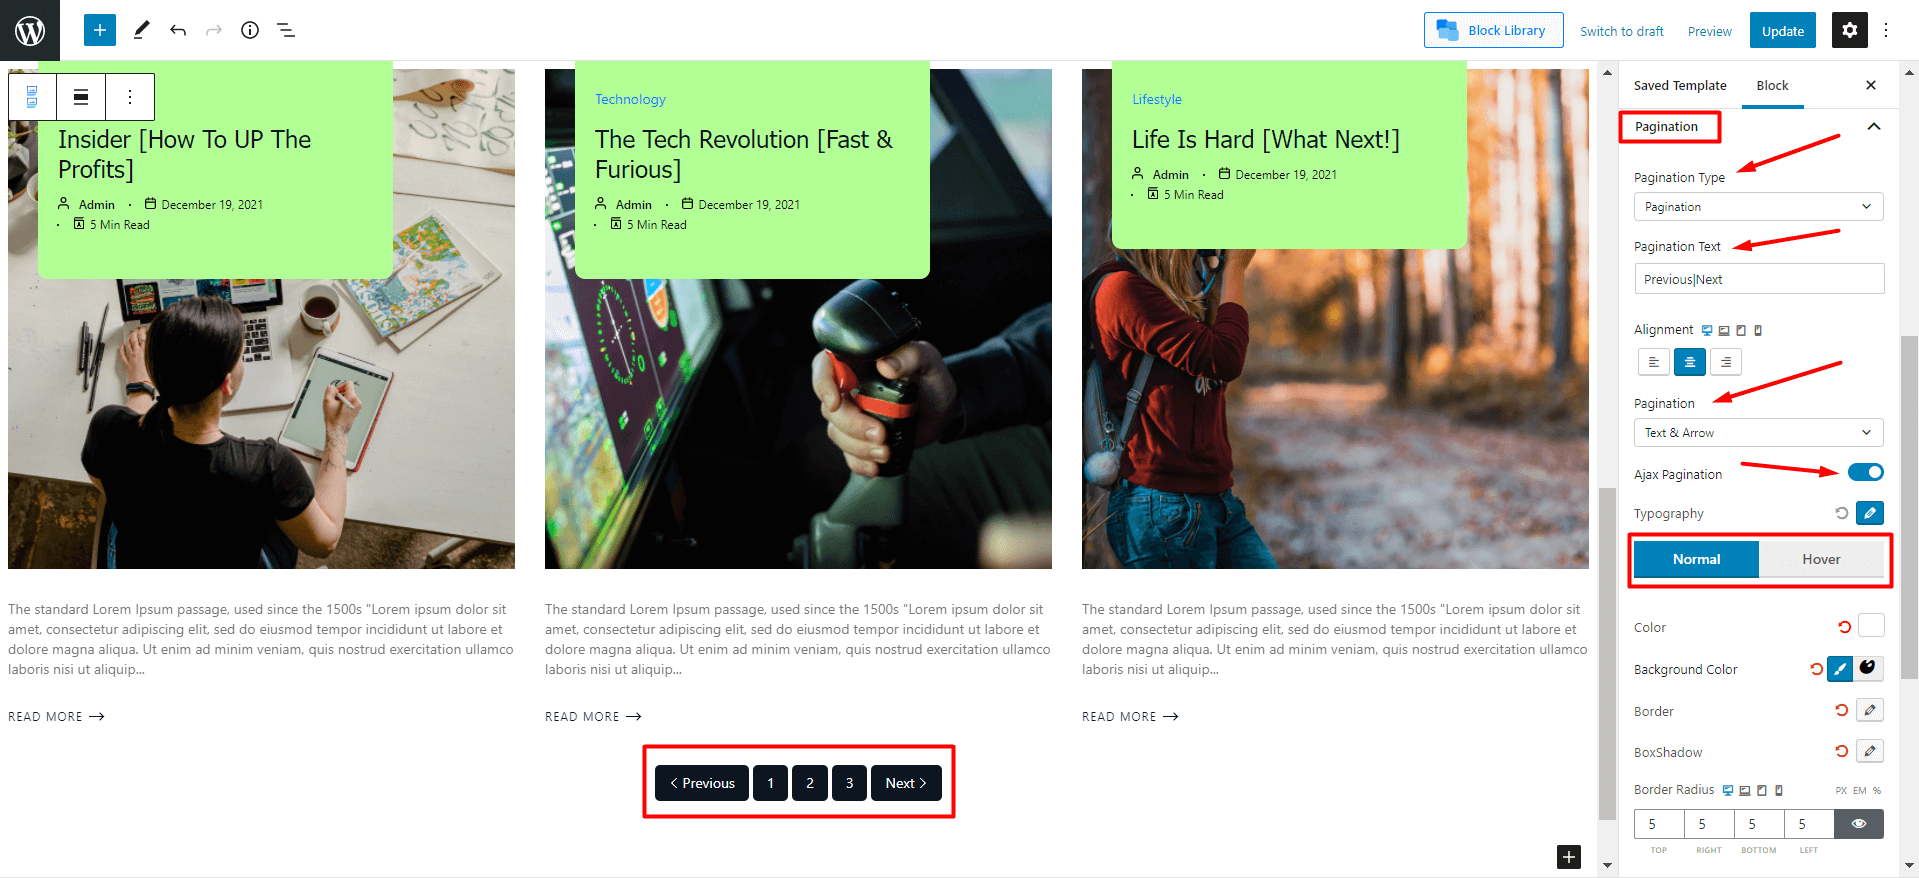
If you want to learn more about Pagination, make sure to check out the following video:
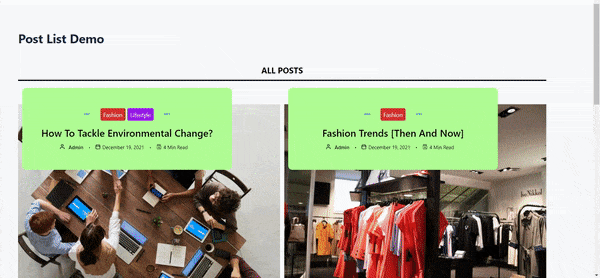
Final List Style Demo
Once you make changes as we discussed [make sure to explore all the design variations if you haven’t already], your WordPress post list page will look something like the following:
How to Use Shortcode to Show WordPress Post List Page?
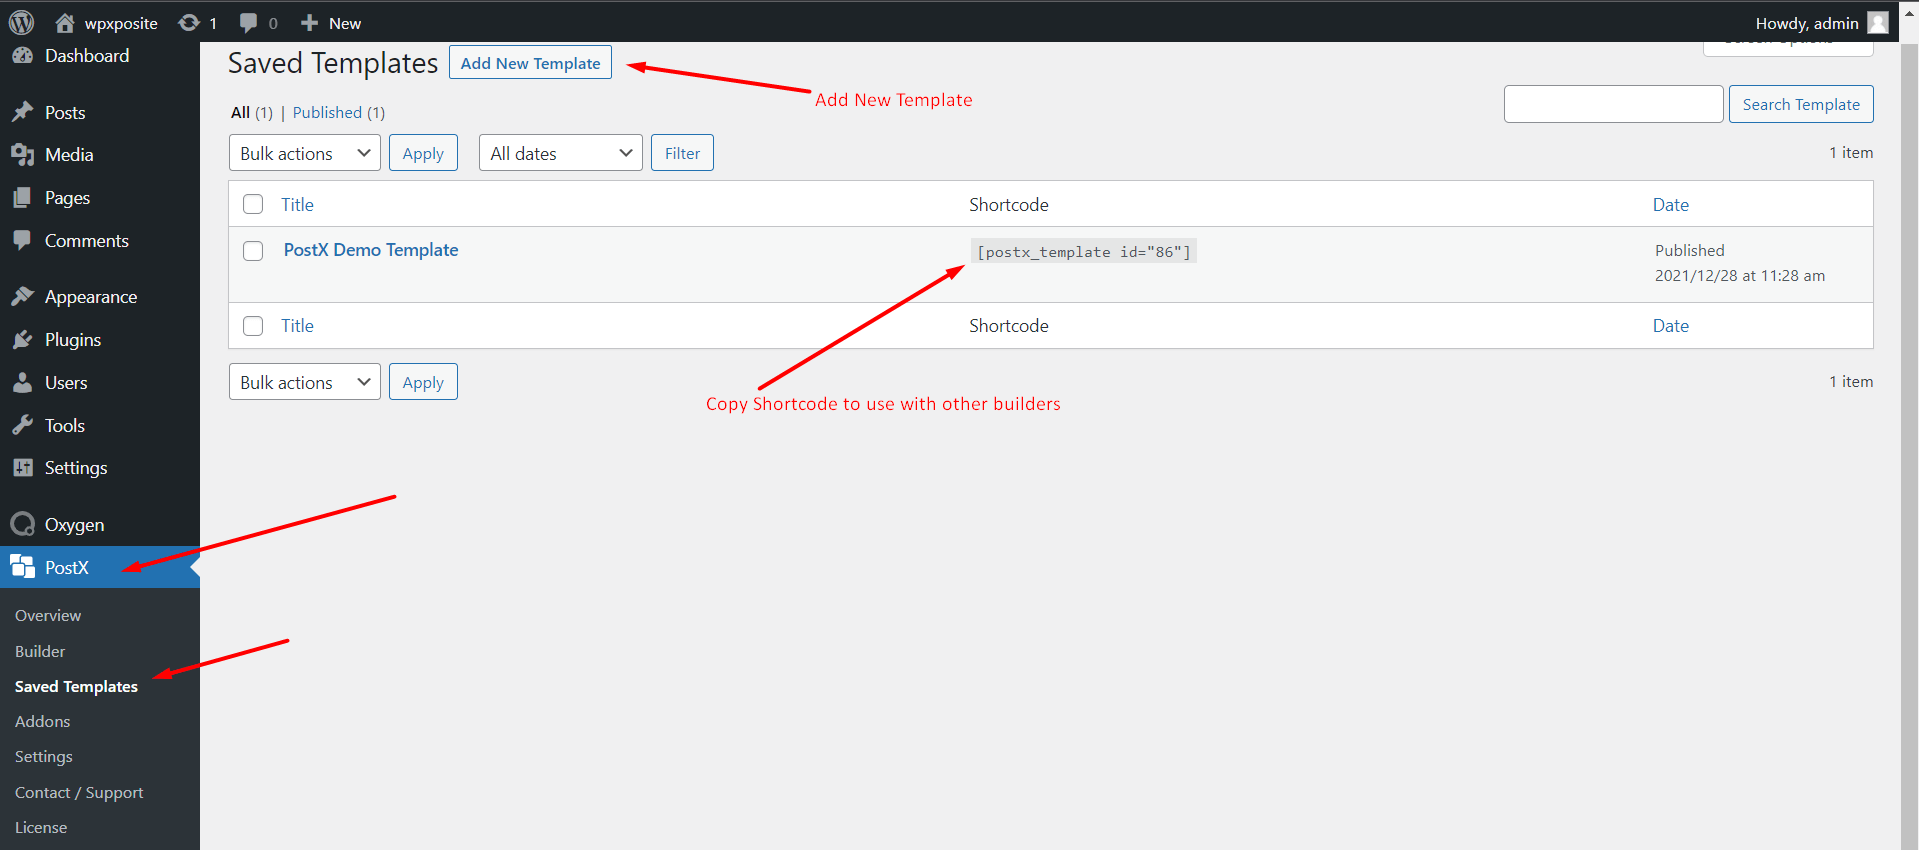
You can use shortcodes to show your post list WordPress page. In order to do that, you’ll need to use the ‘Saved Template’ functionality of PostX.
We’ve created a similar type of page to show you how to showcase it with shortcodes. We made a few small tweaks:
- Changed the Title Typography to Tahoma.
- Added the ‘On Hover Underline’ animation to the Title.
Then we published the page.
You will now be able to see the shortcode from in the shortcode section of the Saved Template window. You can now use this shortcode with popular page builders. As we just created the page, we will paste the shortcode to use the post list design with other WordPress page builders.
Now, let’s see how to use shortcodes to show different post list WordPress pages:
Using Shortcodes with Oxygen Builder
If you’re using Oxygen Builder, then you can use the builder’s shortcode element to show the WordPress post list. Here’s how to do it:
- Click on the page you want to edit.
- Then choose ‘Edit with Oxygen Builder’. It will take you to the oxygen builder interface.
- Now ‘+ Add’ in the top left of the Oxygen builder interface.
- In the search box, write ‘shortcode’ it should appear automatically.
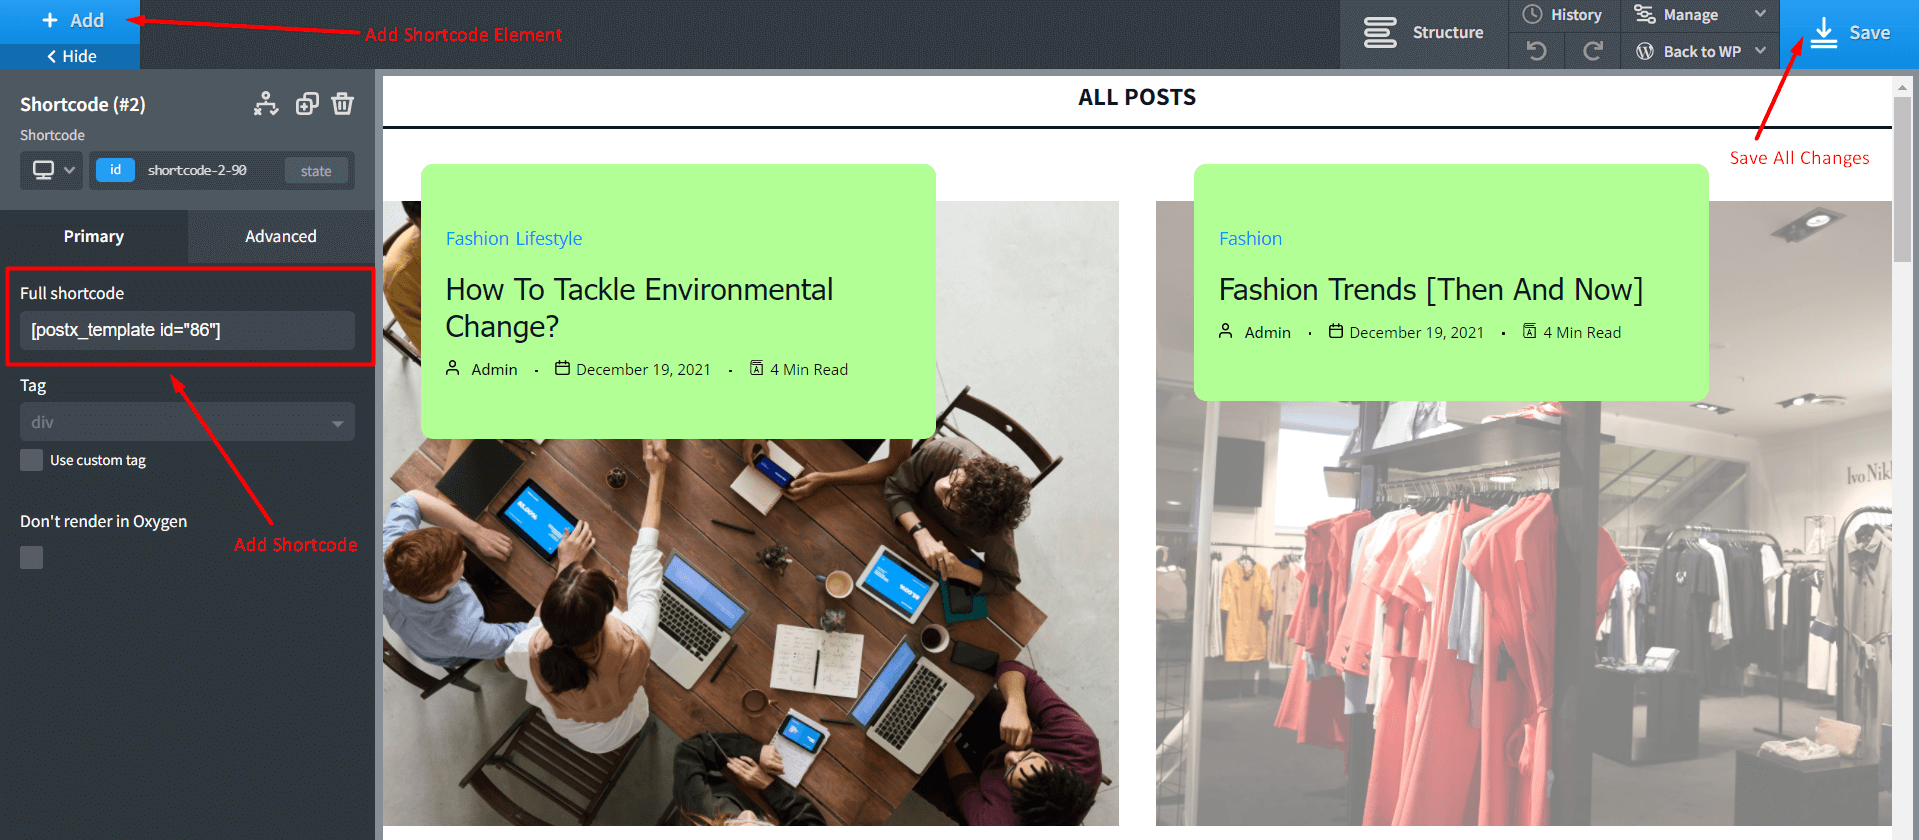
- Click on the shortcode element.
- Now we paste the shortcode we copied from the PostX Saved Templates option.
You can now see the preview of the design. If you’ve followed along, then you should see something like the following:
Using Shortcodes with Elementor and Beaver Builder
You can easily use shortcodes with both Elementor and the Beaver builder. You can read about it in the PostX documentation in detail:
WordPress Post List Advanced Editing: Creating Custom Post Lists
It’s only natural to want to make a more focused WordPress list style so that your viewers can get the best possible experience. In this demo, we’ll be using most of the above-mentioned settings. But we’ll show you how you can create proper post lists by using the features of the PostX Query Builder, Filtering, pagination, and more.
PostX WordPress Query Builder Plugin Functionality
The PostX Query Builder is a powerful tool for you to showcase particular post lists to your audience. You can easily create custom queries and show only the most relevant and most popular posts to your audience.
A quick demo of it can be to show the sticky posts in your blog that are related to fashion [as we will demonstrate right now]. In order to do that, you need to go to the settings tab and work with the query builder.
- Once in the query builder, select the Sticky post from the dropdown. You can also choose to show the popular posts, random posts, show posts in an alphabetial order, and more.
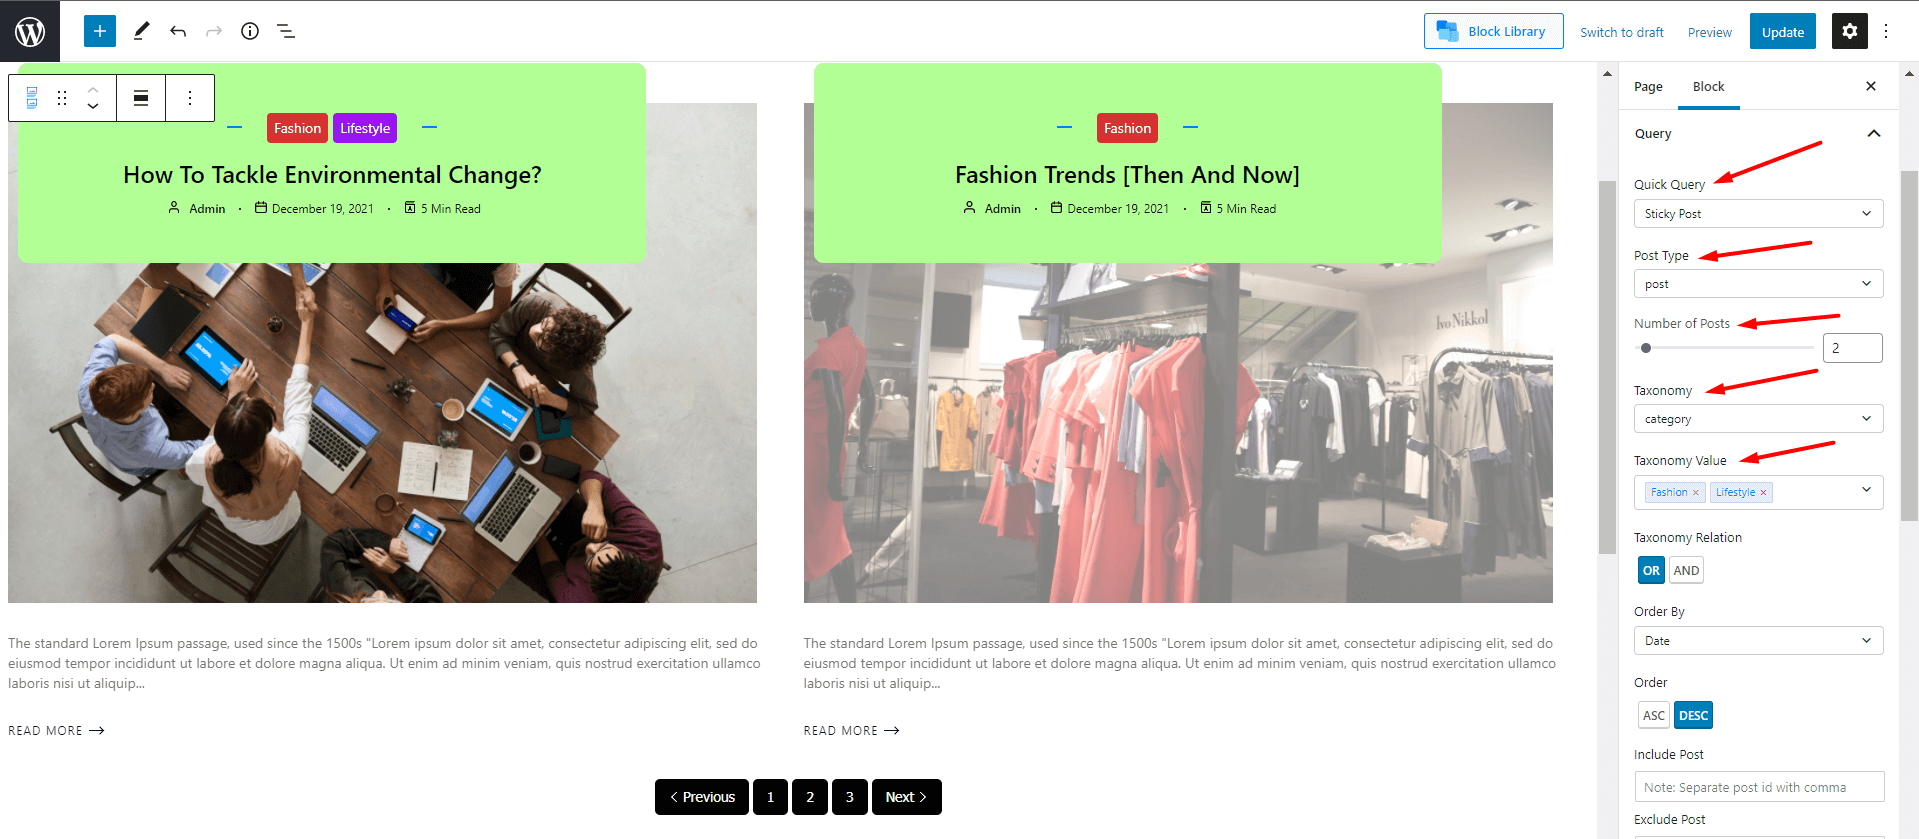
- We’ll select the ‘Post Type’ to be Post. There are other post types you can use to show the various WordPress post list types. For example, there’s option to show various pages, and templates.
- Also, we want to show only two posts at a time. We can show that from using the ‘Number of Posts’ slider. You can choose to show however many posts you want to show.
- You can also show lists using particular post taxonomies. There are two tabs: Taxonomy and Taxonomy Value. If you’re using post tags, you can choose the taxonomy to be post_tag. As we’re using categories, we’ll set the post taxonomy to be ‘category’. Once we’ve done that, we can use various taxonomy values. As we have a fashion category, we’ll choose that.
These are just some of the settings you can use to show WordPress post list categories. As a matter of fact, you have various options to play within the advanced query builder:
Working with the PostX WordPress Post Filter Plugin
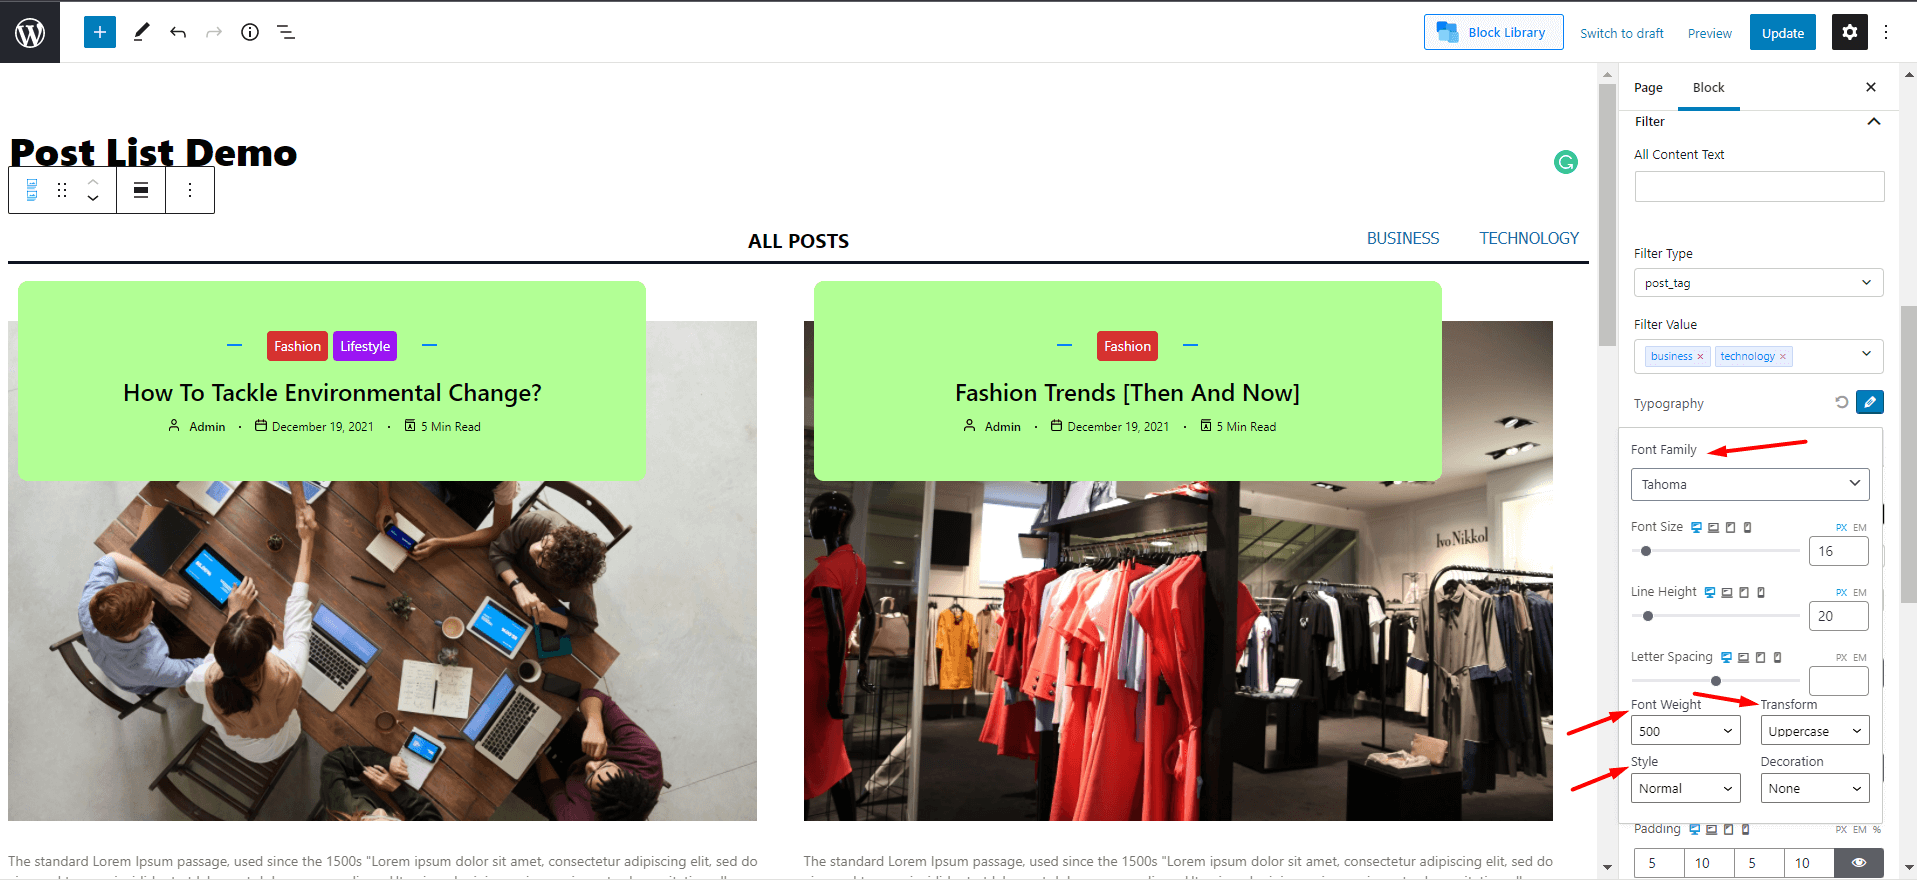
There’s another way to further customize your post list for your audience. And that’s to use the AJAX filtering capabilities of PostX. With this, you can easily filter posts for post lists. We’ll be demonstrating a short example as to how to use PostX to show WordPress filter posts by tag.
- You can add the ‘All Content Text’. But for our example, we’ll keep it blank.
- We’ll choose the Filter type to be ‘Post_tag’.
- We have tags with our posts, so we’ll add the ‘Filter value’ as the post tag.
- Once added, under the we want to change the typography to Tahoma, Text Transform to UPPERCASE, and the font weight to be 500. Also, we want the Line Height to be 20 [You can play around with the extensive settings to bring that extra level of flair to your website!].
- We want to add a hover effect. So, we go to the Hover settings-add a white (#ffffff) to the text and a Hover background color that is #174ab1.
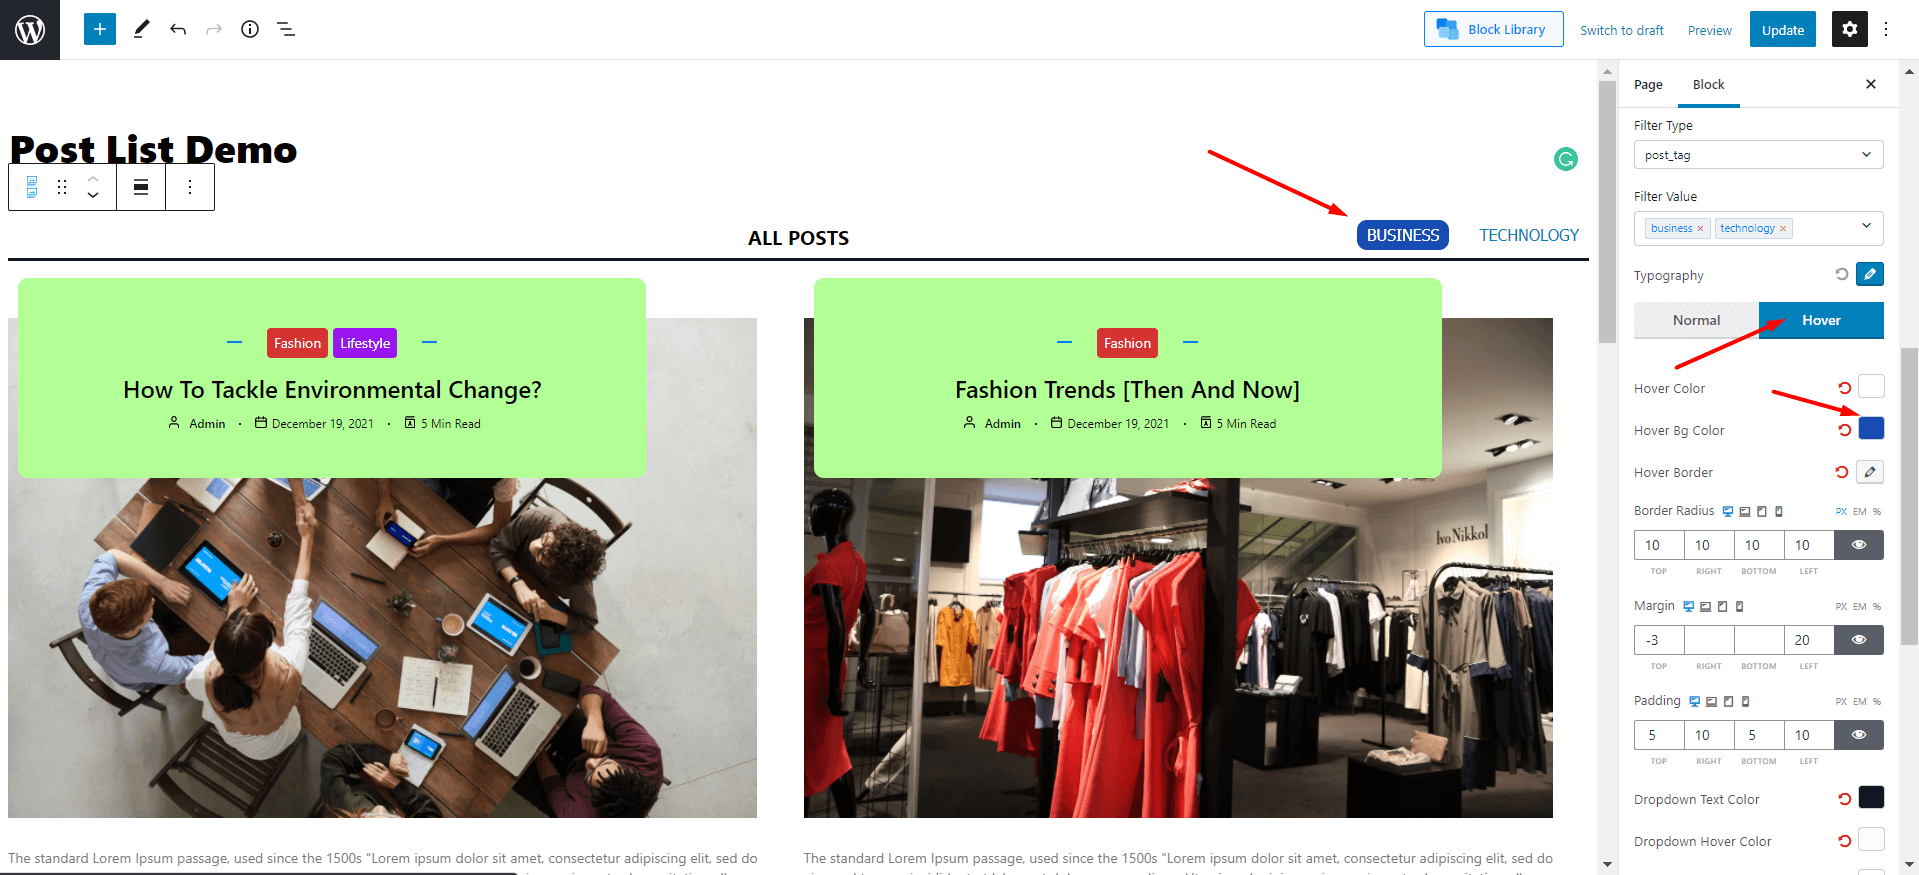
- Finally, we’ll add a border radius of 10-px on all sides and a padding of 5-px to the top and bottom alongside a padding of 10-px to the right and left.
It should be clear to you by now how extensive the PostX filter functionality is. Make sure to play around with the different settings and see how you can offer a super customized experience to your users.
FAQ
Here are answers to some frequently asked questions. As always, we will try to be as descriptive as possible when it comes to the WordPress post list variations.
Q: How do I make a Post List in WordPress?
Ans.: There are plenty of ways you can make a Post list in WordPress. And if you’re using Gutenberg, then the process is super easy with PostX. All you have to do is:
- Install PostX – the process is very easy to follow.
- You can simply create a new page/update an existing page.
- To add a post list using PostX, go to the Block Library [Access it from the top right].
- Select a readymade post list style.
- Finally, click on Import.
Once imported, you can change the layout and explore various design choices from the block settings window.
Q: How do I Show Lists in WordPress?
Ans.: As mentioned earlier, you can easily show lists with the PostX post list WordPress plugin. You can be very creative with all the different designs and layouts. Also, there’s the option to use shortcodes with different WordPress builders.
Just follow the steps shown in the previous sections and see whether it’s flexible enough for you [from what we’ve shown you so far, we believe it should be!].
Q: How do I Show My WordPress Posts in a List Layout?
Ans.: You can use PostX Post List #3 to show WordPress posts in a list layout. Here’s how you can do it:
- Go to the page you want your post lists to show. If it’s a list, then you can show it as a sidebar.
- In order to do that, you need to take a column block (preferably 70/30). You want to show your main content on the left of the column and the post list on the right.
- In order to do that, click on the ‘+’ icon on the right column and select Post List #3. You can use your main content on the left side.
- You can change between the different layouts and readymade designs as well. Choose whatever you like to see the preview.
That’s just one way to show WordPress Post Lists in a List Layout. PostX again, PostX has a lot of options for you to explore.
Q: How do I Show Post Categories in WordPress?
Ans.: In order to show Post Categories in WordPress, you need to import a PostX readymade block of your choice. From there, you can choose to change the category settings to your liking. We did bring some changes to our post in the previous sections. Make sure to check it out first.
It’s probably worth mentioning the ‘Specific Color (Pro)’ feature of PostX. With this, you can show how the category will show with its specific color in each post. A feature like this is certainly worth exploring.
Q: How to Create a Custom Post Type Template in WordPress?
Ans.: Custom post types are custom contents for WordPress where you can add your own custom fields. For instance, if you’re creating your own book review site, then there’s the possibility that you’d need to create a custom post type with your own custom fields.
For instance, for a custom post type, you’ll need to add the following bit of code to your WordPress functions.php file:
add_action( 'init', 'create_post_type' );
function create_post_type() {
    register_post_type( 'your_custom_name',
        array(
            'labels' => array(
                'name' => __( 'Custom_names' ),
                'singular_name' => __( 'Custom_names' )
            ),
        'public' => true,
        'has_archive' => true,
        )
    );
}
Here’s a quick link where you can find examples of custom post types.
Q: How many types of post formats are available in WordPress?
Ans.: By default, WordPress comes with 3-custom post types: a)post, b)page, c)attachment
You can explore more about the WordPress post types here.
Q: How to use a Post List with Elementor?
Ans.: You can easily show WordPress post list with Elementor using the PostX ‘Saved Templates’ functionality. There are two ways you can do this: But in both cases, you will need to paste the shortcode of the page you created. After that, here’s how it’s done:
- Go to Pages from your WordPress dashboard. You can either create a new page or edit an existing page.
- Click on ‘Edit with Elementor’ [we’re assuming you have the Elementor plugin installed and activated].
- Once you’re in the editor, create/edit a new section.
- Search for shortcodes in the left elements pane.
- Drag the shortcodes element to the section you just created.
- Now paste the shortcode you copied in the field ‘Enter your shortcode’.
- Finally, save the changes.
You can also show the post list WordPress template using the PostX Gutenberg Post Blocks Element for Elementor. The process for adding the element is the same. All you have to do is make sure the template is published from the PostX Saved Templates Editor. Then, once you’re in the Elementor Editor:
- Search for the PostX Gutenberg Post Blocks Element for Elementor.
- Add it to the section where you want to show your post category listing or something similar of your choice.
- Choose the template you want to show from the dropdown.
- Finally, save the changes.
These are the ways you can show a WordPress post list using the PostX Elementor element. But you can use shortcodes with other popular WordPress builders as well.
Final Thoughts
If you’ve followed along, then you know how flexible PostX is when creating WordPress post list styles. Also, you should now know how easy it is to manipulate different settings to create the news magazine, recipe, travel, fashion blogs, and more with this plugin.
We would love to hear your thoughts on what you think of the design flexibilities in PostX. Sound off in the comments below.
Also, new features are coming in hot! Stay tuned for incoming updates that are right around the corner.
Cheers!