WooCommerce Quick View is an amazing opportunity to help your buyers by sharing product details in the quickest way possible.
Suppose you are a store owner and interested in enabling this feature in your store. In that case, I am introducing you to the WooCommerce Quick View feature which is the easiest and best way to boost your online store and the shopping experience with a full customization option
Read this article to know full details about this exciting feature!
What is WooCommerce Product Quick View?
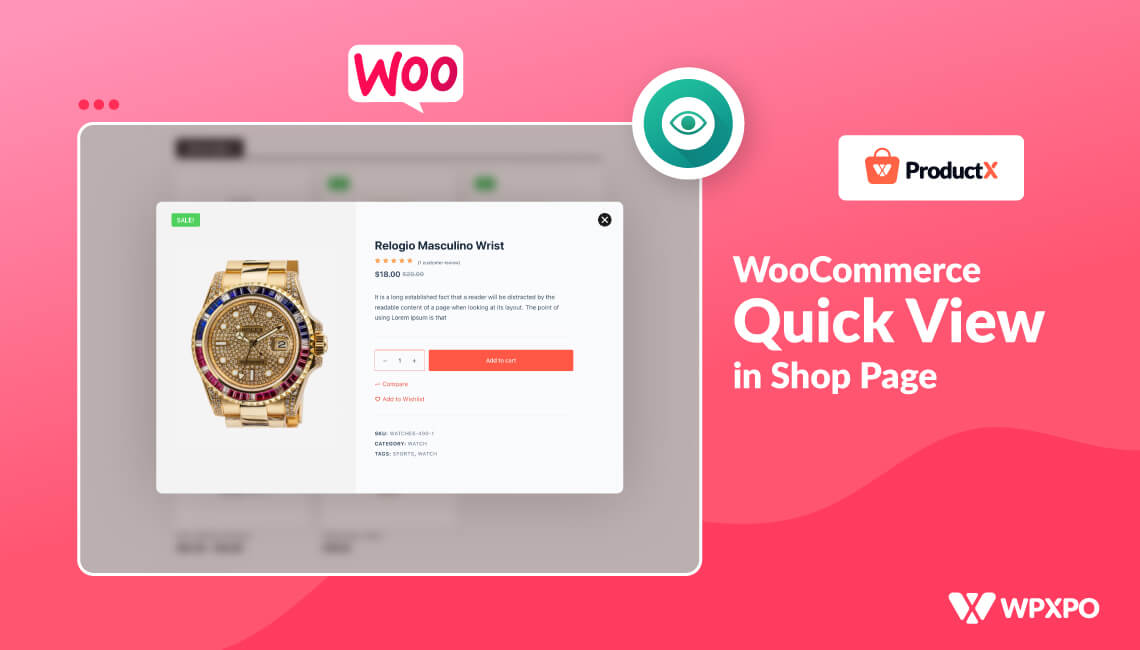
WooCommerce Quick View is a unique feature where customers can get the full details of a product by just clicking on the product, this feature opens a window that shows the full details of that product without any further loading.
Usually, when a buyer wants to see details of any product he/she needs to click on that product and it redirects to the specific product page from the shop/archive page. But, by showing the full details of the product from the shop/archive page, without entering the specific product page.
Why Should You Enable the Quick View for Products Feature in Your Store?
It is a time saver for buyers and a goldmine for store owners.
Adding this to your WooCommerce is not an optional matter to consider rather nowadays it’s an essential feature of any WooCommerce store. This feature impacts revenue-generating, as customers are introduced to more products in less time, it impacts buyers’ mentality to buy more products, and the conversion rate of the store increases.
Another big opportunity of this feature is, that shopping with this feature is less time-consuming in WooCommerce. How many customers want to explore all the products specifically one by one? Everyone wants to explore more products within a short amount of time and this feature is the best solution for this.
This unique feature also decreases server load. As we know the product/archive page already stores the data, so it does not redirect to another page and customers do not need to explore different pages, rather customer engagement and experience become smoother.
Additionally, applying this will give thought to your customer’s brain automatically that this shop is smarter than others, as they are getting modern attributes on their store.
How to Activate Quick View in Two Different Methods:
When adding this functionality, store owners can enable it in two ways. They are:
- WooCommerce Quick View Without Plugin
- WooCommerce Quick View With Plugin
Don’t worry! It is very easy.
In this article, I will share full details about the settings of both ways.
Method-1: How to Enable WooCommerce Quick View without Using a Plugin:
As we already know the default WooCommerce does not provide this feature, so if we want to set up this feature without a plugin we need to take the help of a theme named “Botiga”.
“Botiga”, one of the powerful themes, shows product quick view without any hassle, and most importantly without any additional plugins. It is free, easy, and effective.
To set up this feature you need to follow some steps. They are:
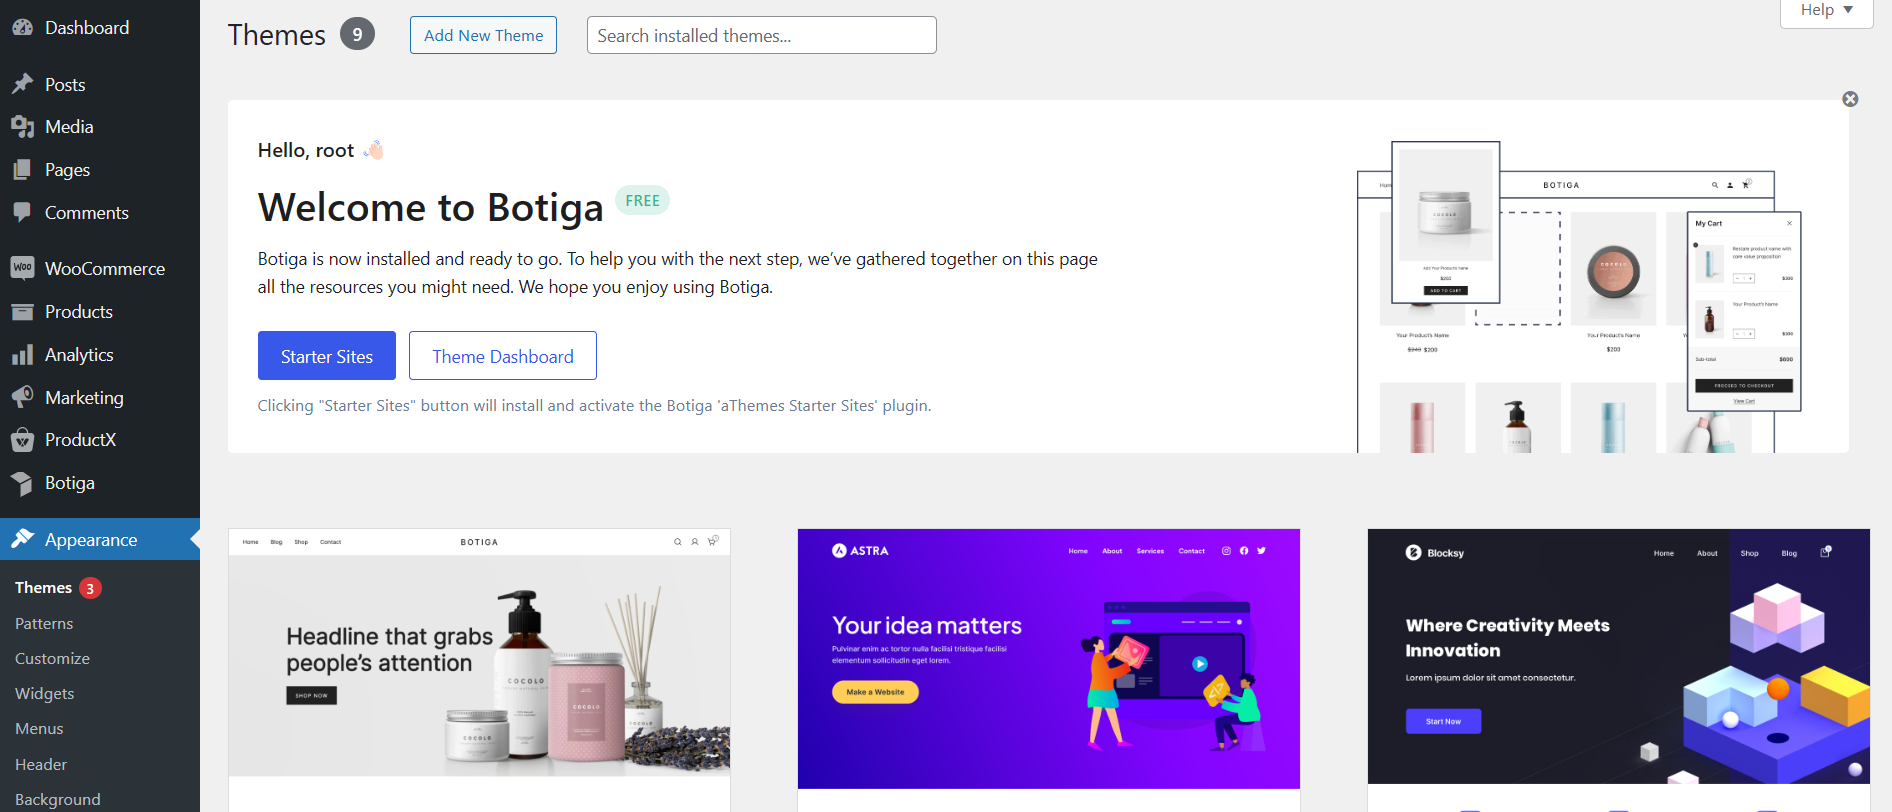
Step-1: Install the “Botiga” Theme
Go to your WooCommerce dashboard. From the dashboard, click on the “Appearance” option, it will show you some options.
Then, click on the first button which is “Themes”.
Now, click on the option “Add new theme”. After that, there are two ways by which you can add a new theme. One is through installation by uploading the theme and another is by searching the theme.
Type “Botiga” on the search bar and install the theme.
After the installation, do not forget to “Activate” the theme.
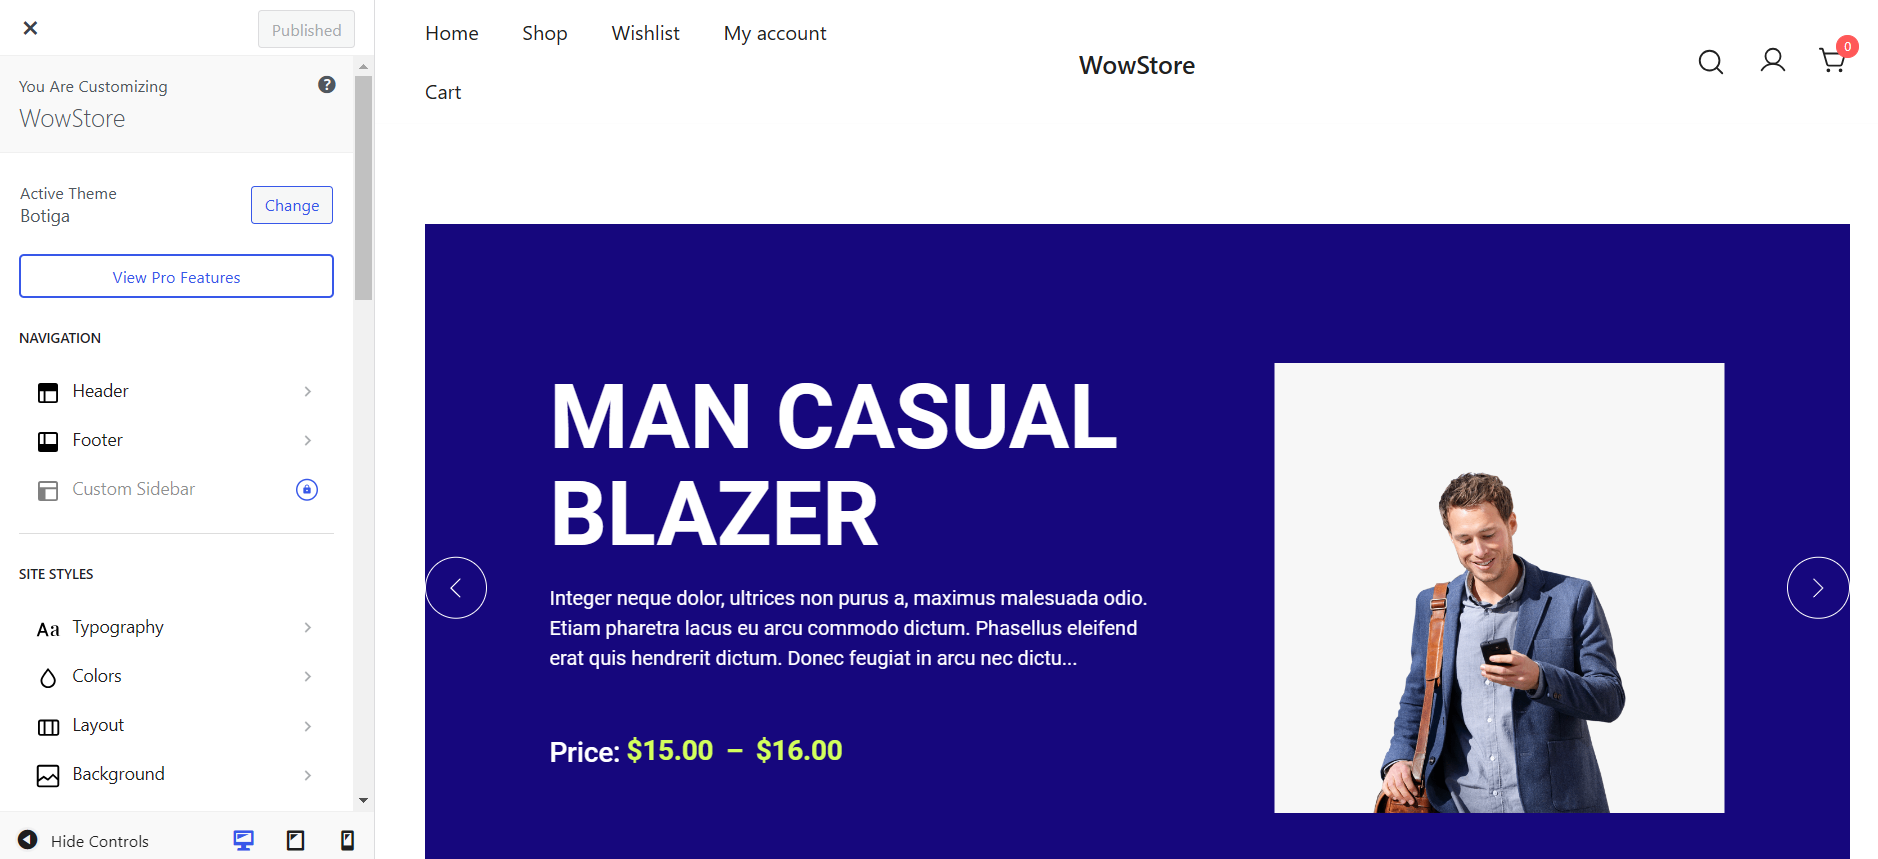
Step-2: Customize Botiga Theme
First, you need to go back to the “Dashboard” again and click on the “Appearance” option again. After clicking on this, you will find “Customize” in the second option. Click on the Customize button.
Step-3: Enable Quick View Feature
In the “Customize” options of the theme, you will find WooCommerce settings in the below part of the settings. In this section, you will find an option named “Product Catalog”, click on that.
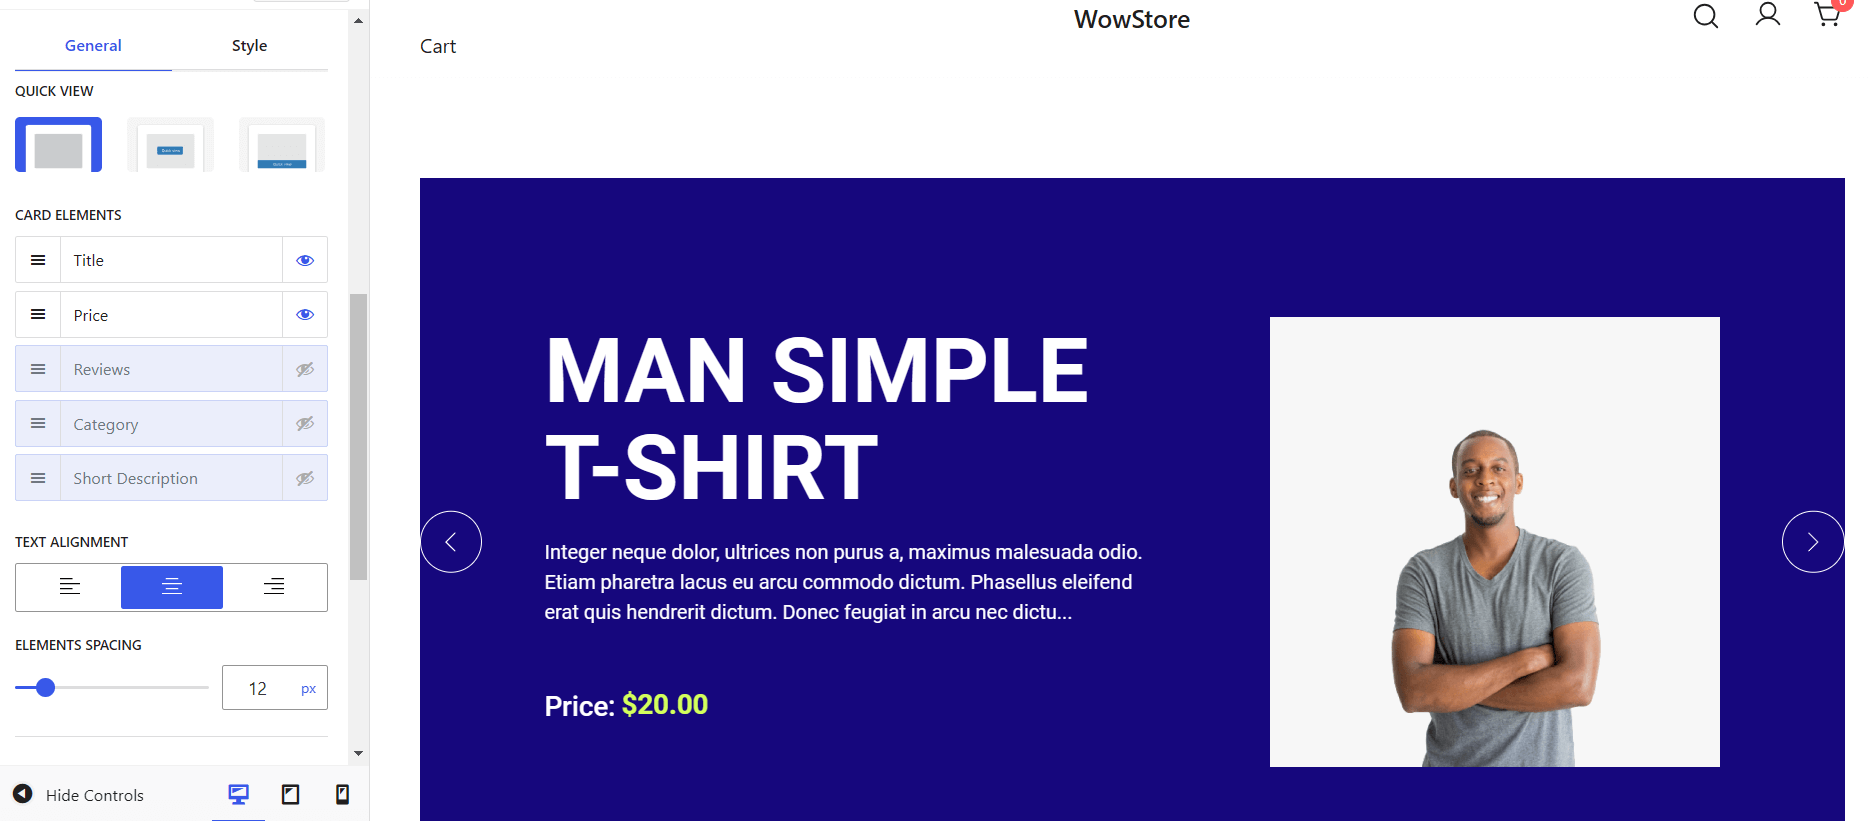
In the Product Catalog, you will find an option “Product Card” which has a quick view feature. Click on the product card option and scroll down where it says “Quick View”. You can select the layout for the quick view product card.
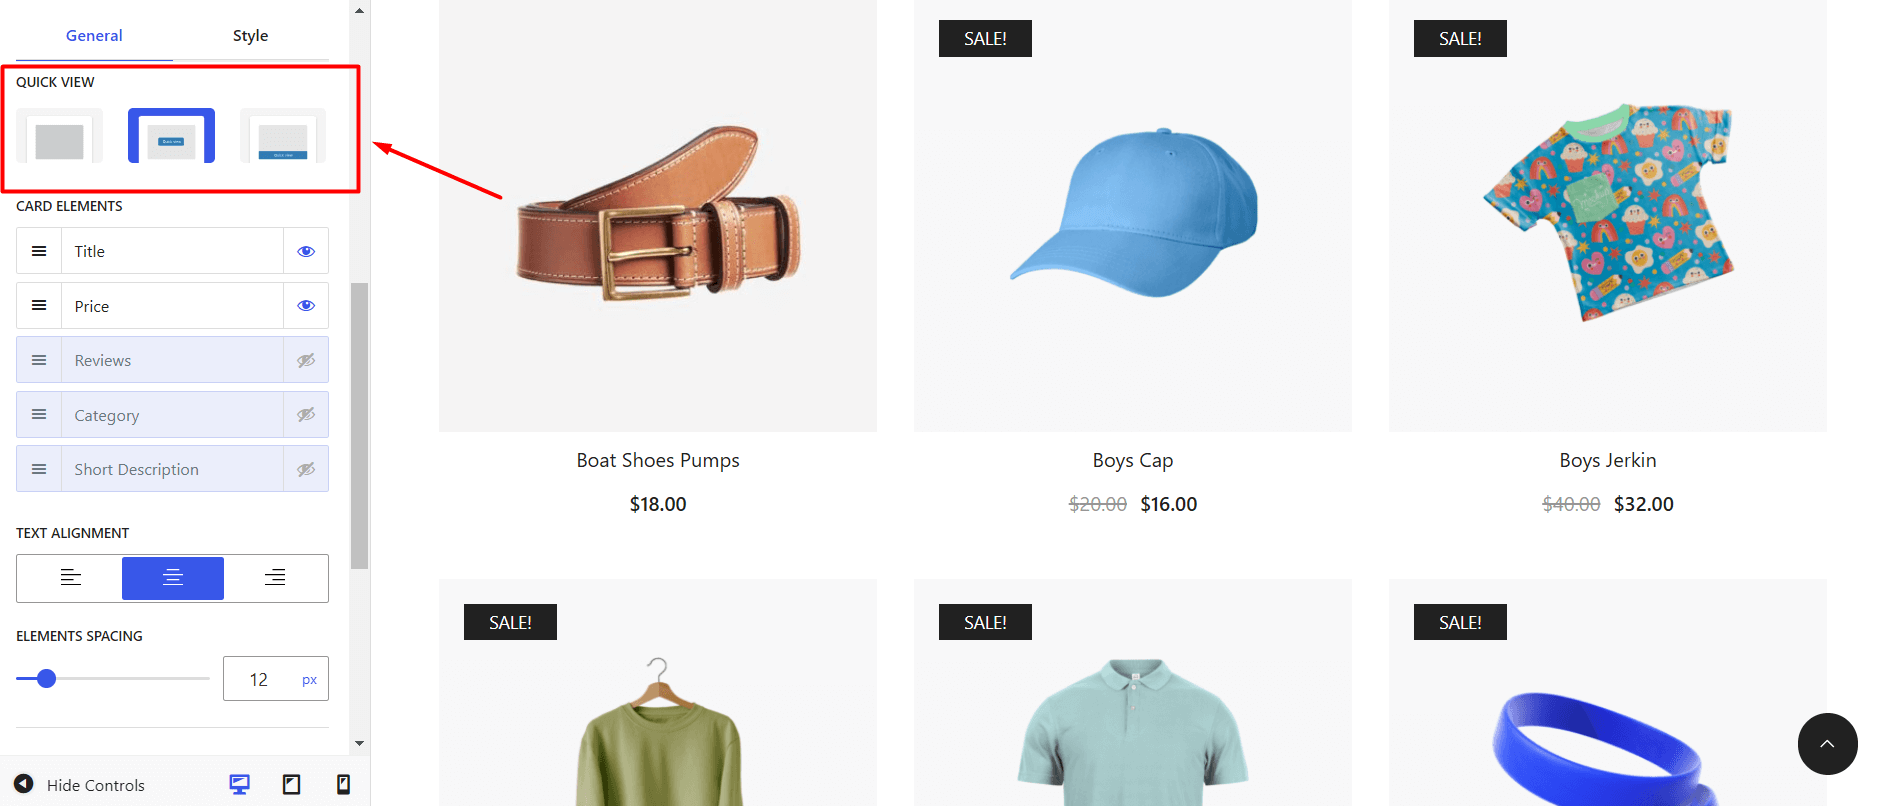
Step-4: Customize Quick View
From “Product Layout” to “Add to Cart Button” you can customize many things for the product card’s quick view. Additionally, you can add “Out of Stock’’ text, and “Select Equal Height” for all the products.
You can adjust “Text Alignment”, and “Elements Spacing’’ in this section.
Most importantly, card elements or quick-view modal box elements can be inserted, modified, or deleted from this section. You can insert or delete titles, prices, reviews, categories, and short descriptions.
You can also drag and drop to reorder fields according to your desire.
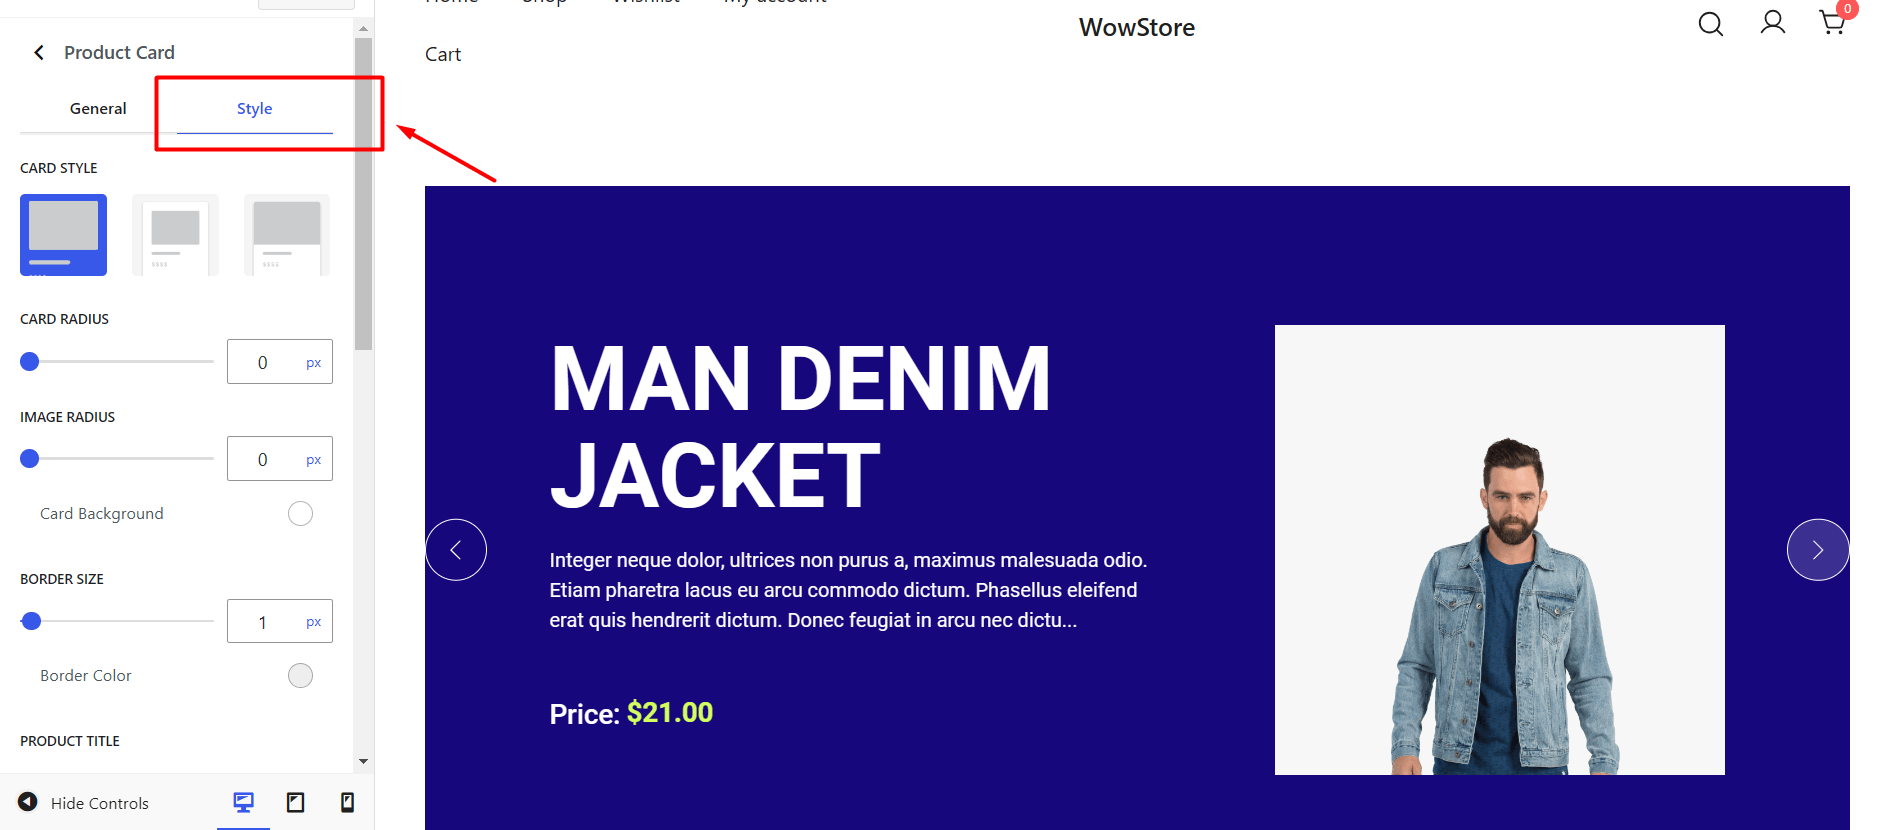
Step-5: Style Settings for Product Quick View/Product Card
In the style setting, you can change card styles from three different styles.
“Font size”, “Font Style”, and “Decorations” all this setting is available on this option.
You can also set “Card Radius”, “Image Radius”, and “Border Radius” from this setting.
Step-6: Front End Appearance
After all the customization based on your need do not forget to press the “Publish” blue leveled button on the left top.
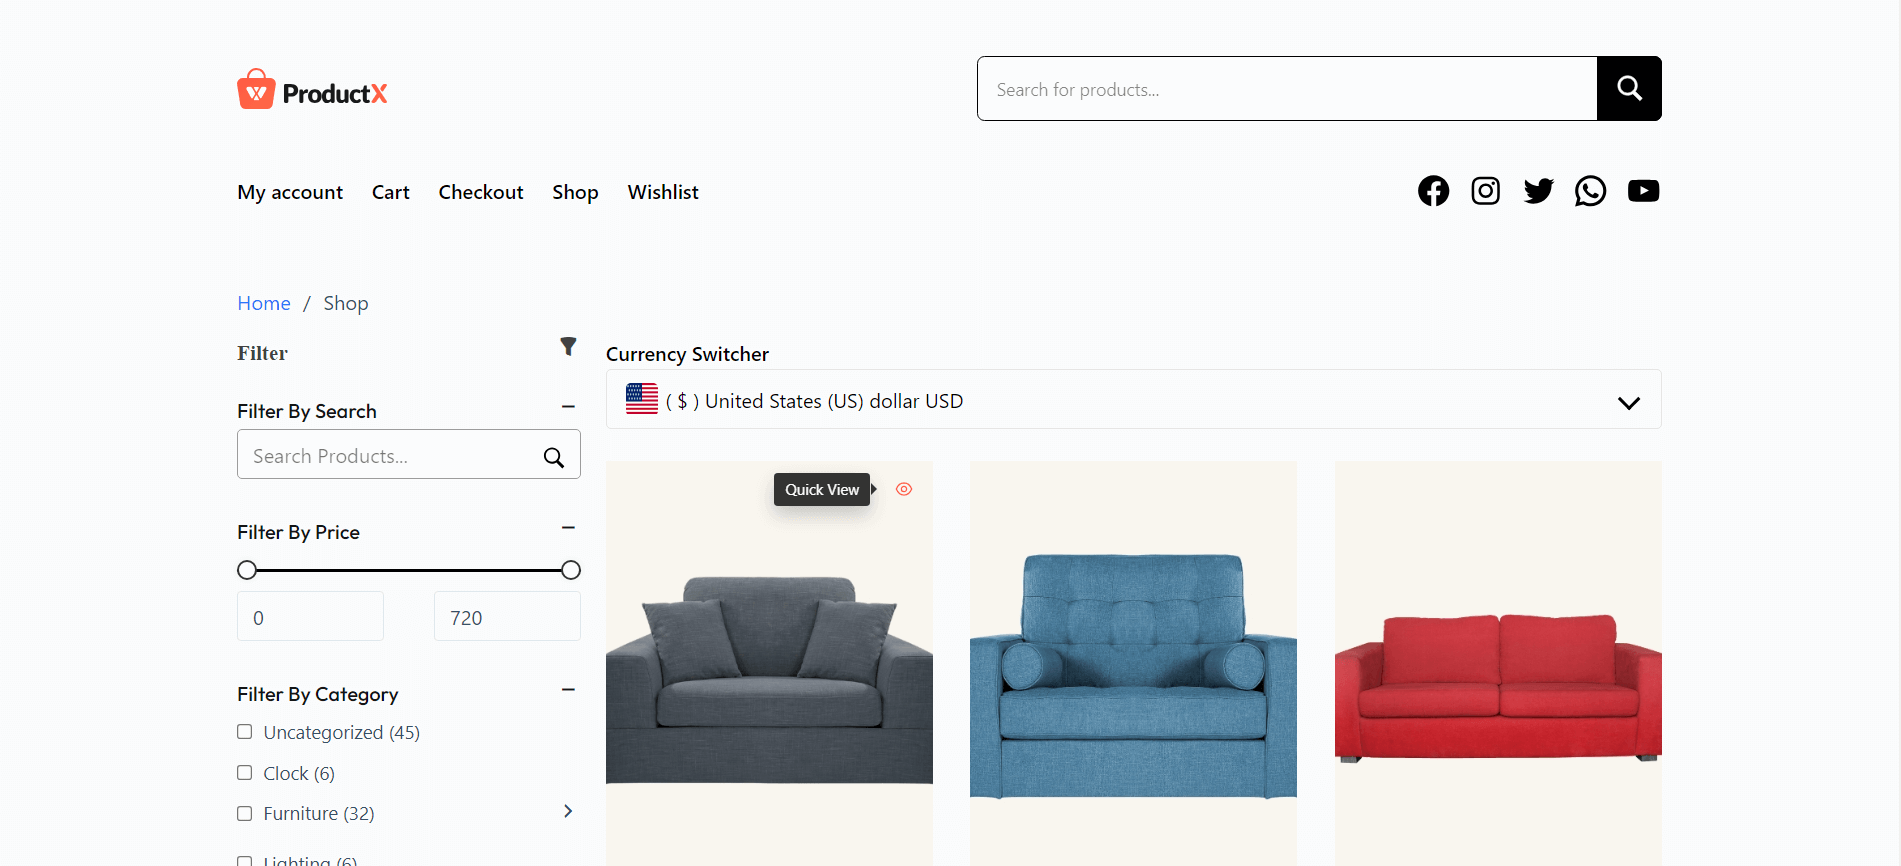
If a customer hovers over a particular product in the store, they will see a quick view button on the product image.
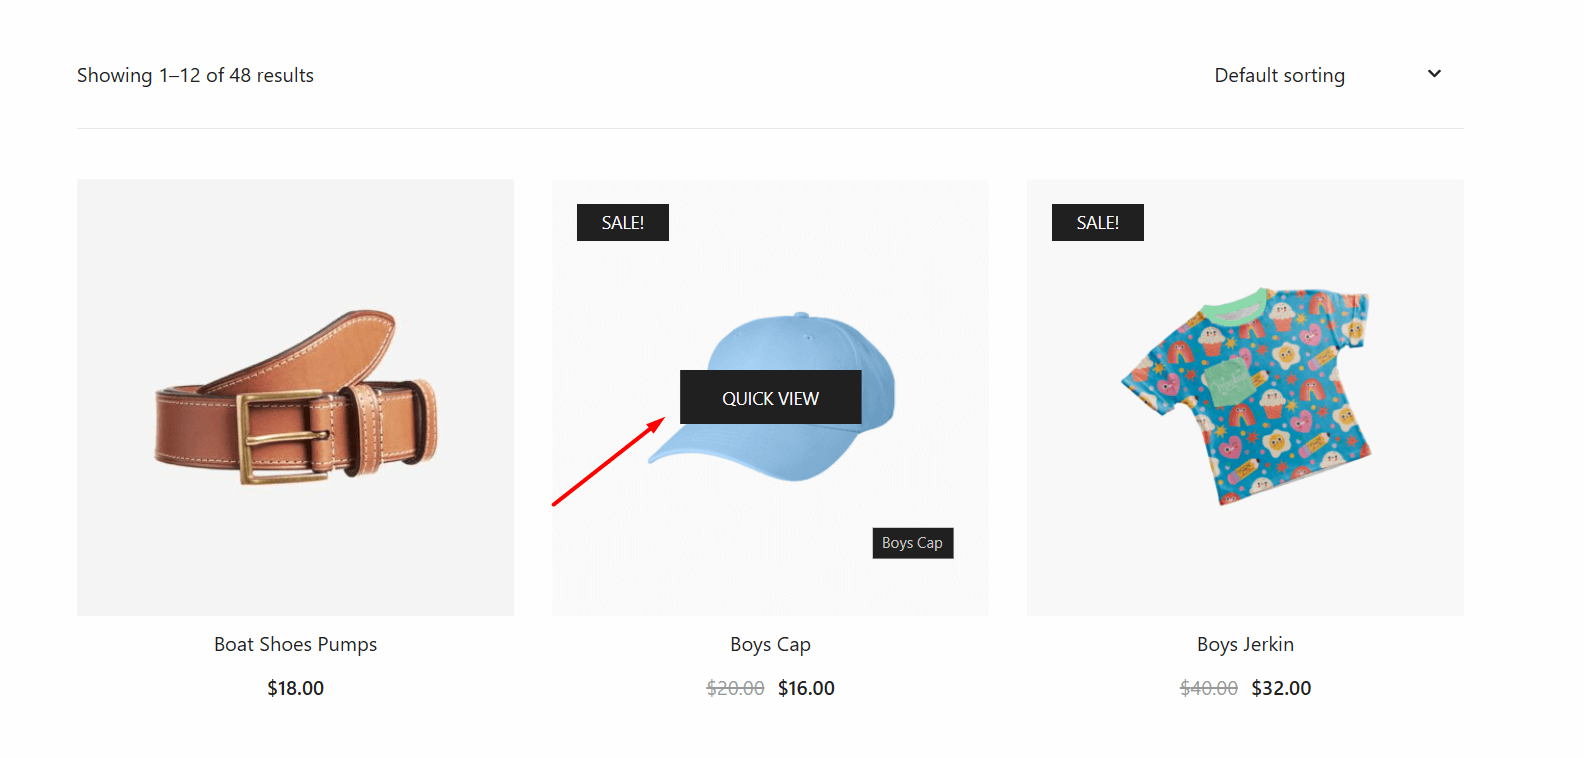
You can try out how this feature works on your products by checking out the quick view option for each product.
Method-2: How to Enable WooCommerce Quick View by Using a Plugin:
Enabling this feature on your WooCommerce store, you do not need any coding knowledge anymore.
ProductX’s new features let you add the quick view option to the shop page or category page easily.
ProductX is now WowStore! We’re very excited to bring you this experience, packed with unique features. Please note that the features, blocks, starter packs, etc. all work the same. If you have used ProductX, you’ll feel right at home with WowStore.
You just have to install and activate ProductX and use the following steps to activate the feature successfully. You can also check out the quick video tutorial:
How To Add Quick View in WooCommerce Stores
Step-1: Enable the Addon to Unlock the Quick View Option
First, you need to enable the “Quick View” addon from the addon page. It’s simple because you can turn it on with a toggle bar. You can also disable this feature anytime by turning it off.
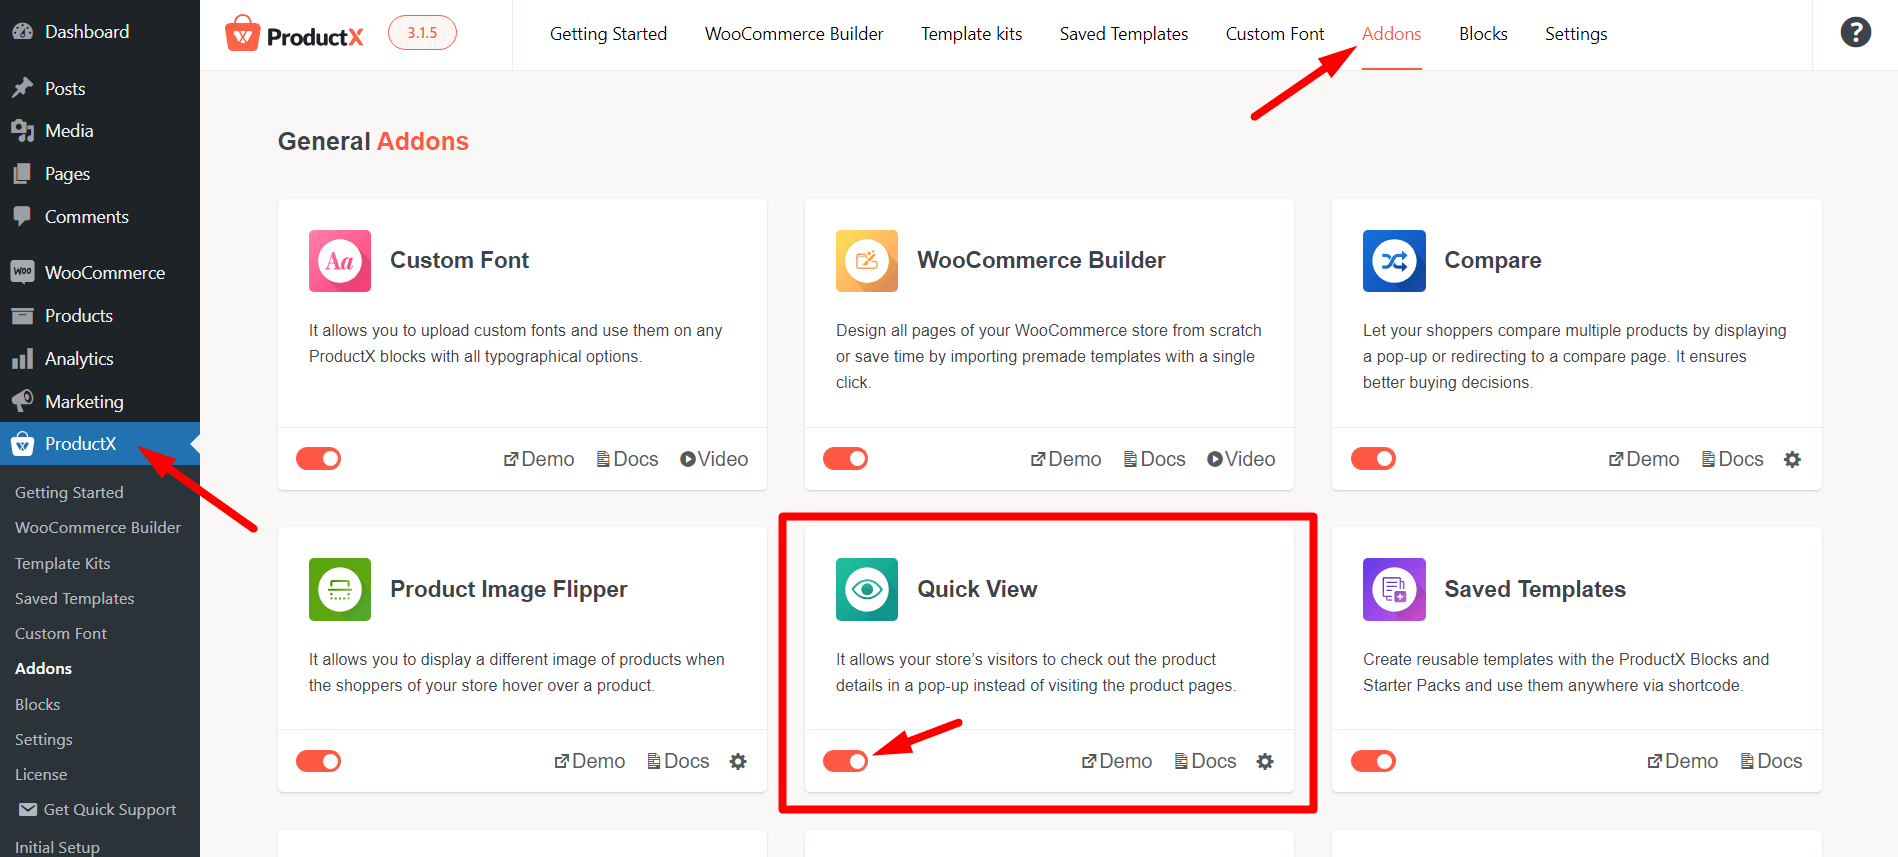
Once enabled, it is available for the users. So, it’s just a matter of a click to enable. Very simple, as I’ve told you earlier.
Looking for a step-by-step guide to enable and customize? You can check the detailed documentation by clicking the button below.
And, apart from that you can make your own WooCommerce Store at low cost with ProductX!
Step-2: Customization of Product Quick View
This new enhanced feature of WooCommerce gives you the ultimate freedom to customize and improve the product viewing options in your store.
Now, let me give you a quick look at the settings of the “ProductX” quick view addon.
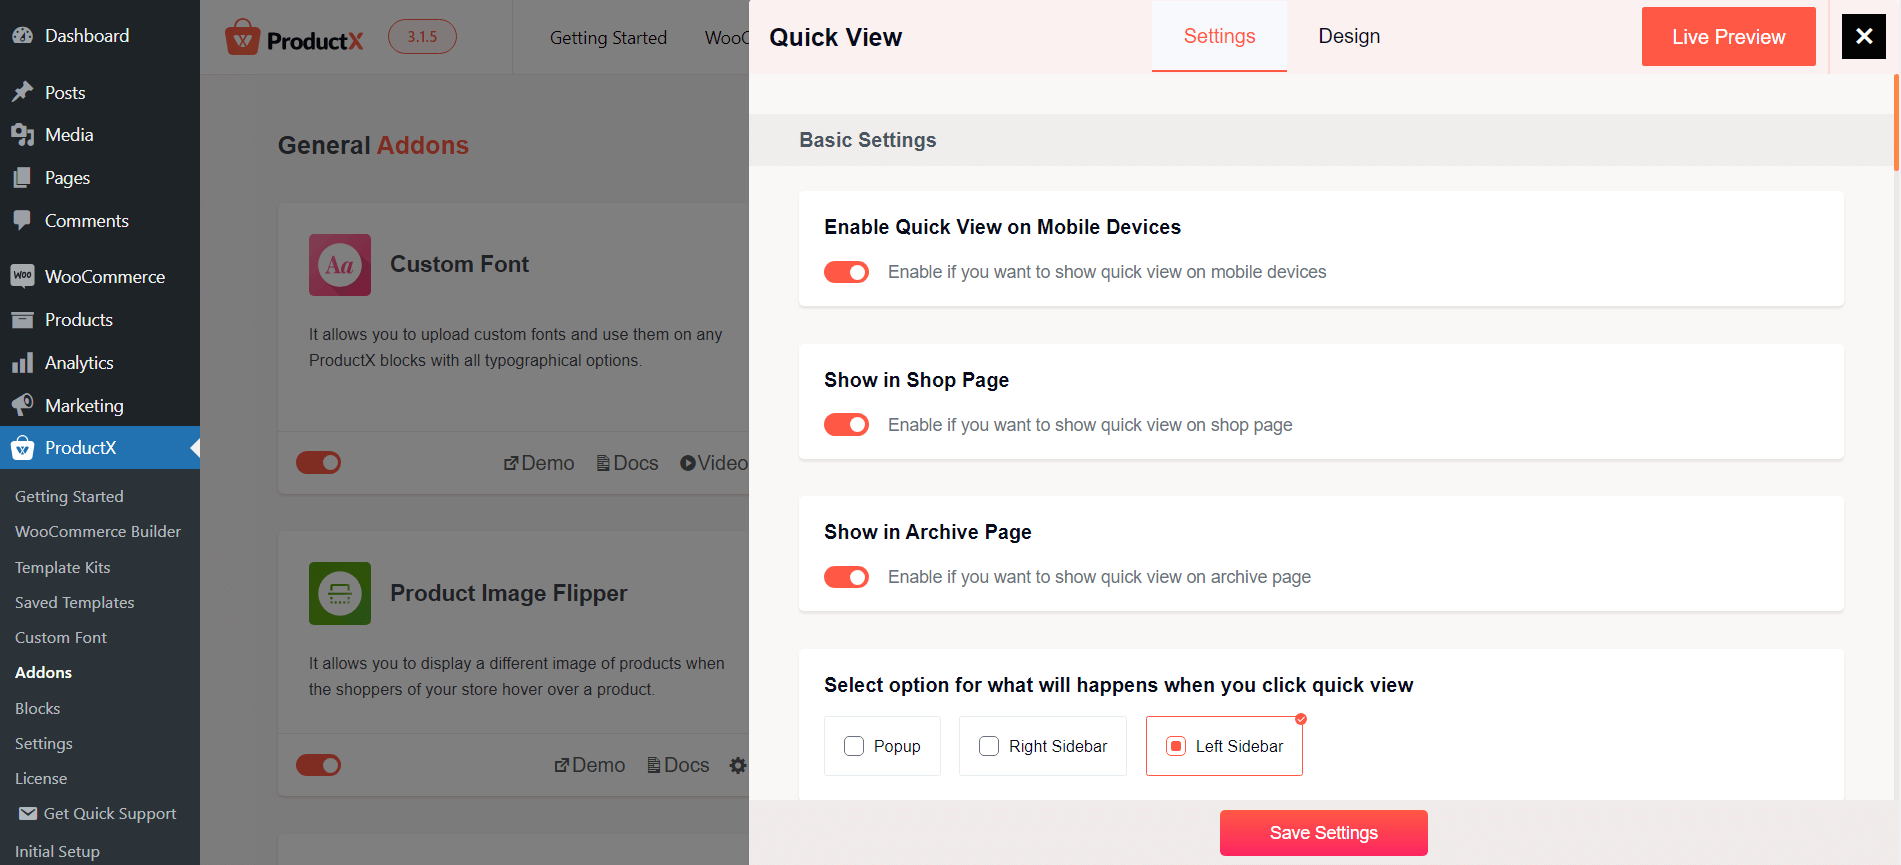
Quick View Basic Settings:
By clicking on the Product Quick View setting, you can see that the basic settings of the add-ons appear.
→ Enable Quick View on Mobile Devices:
Unlike other plugins and themes, you don’t have to worry about having a broken view on mobile devices.
You can turn on this setting if you want to show a fast view of products on mobile devices. If you do not want to show this feature for mobile users just keep the setting as it was.
→ Enable/Disable Shop Page and Archive Pages
This feature is commonly used in shop pages. But a lot of people wanted to use it on archive pages.
Do not panic! As ProductX is offering both of the options.
Just enable the setting, “Show in Shop Page” to display a quick view of the products on your shop page.
ProductX does an excellent job by giving you a one-click toggle bar to enable this on archive pages as well.
Just enable the “Show in Archive Page” setting if you want to show a quick view of the archive page. And whenever you want to stop, it’s just as simple to disable the setting with a toggle.
→ Types of Quick View Appearance
How users want to display the view was boring in the past, but not anymore.
Three ways can change the product’s quick view appearance on your site, and you can make your store more appealing to the customers. They are:
- Popup
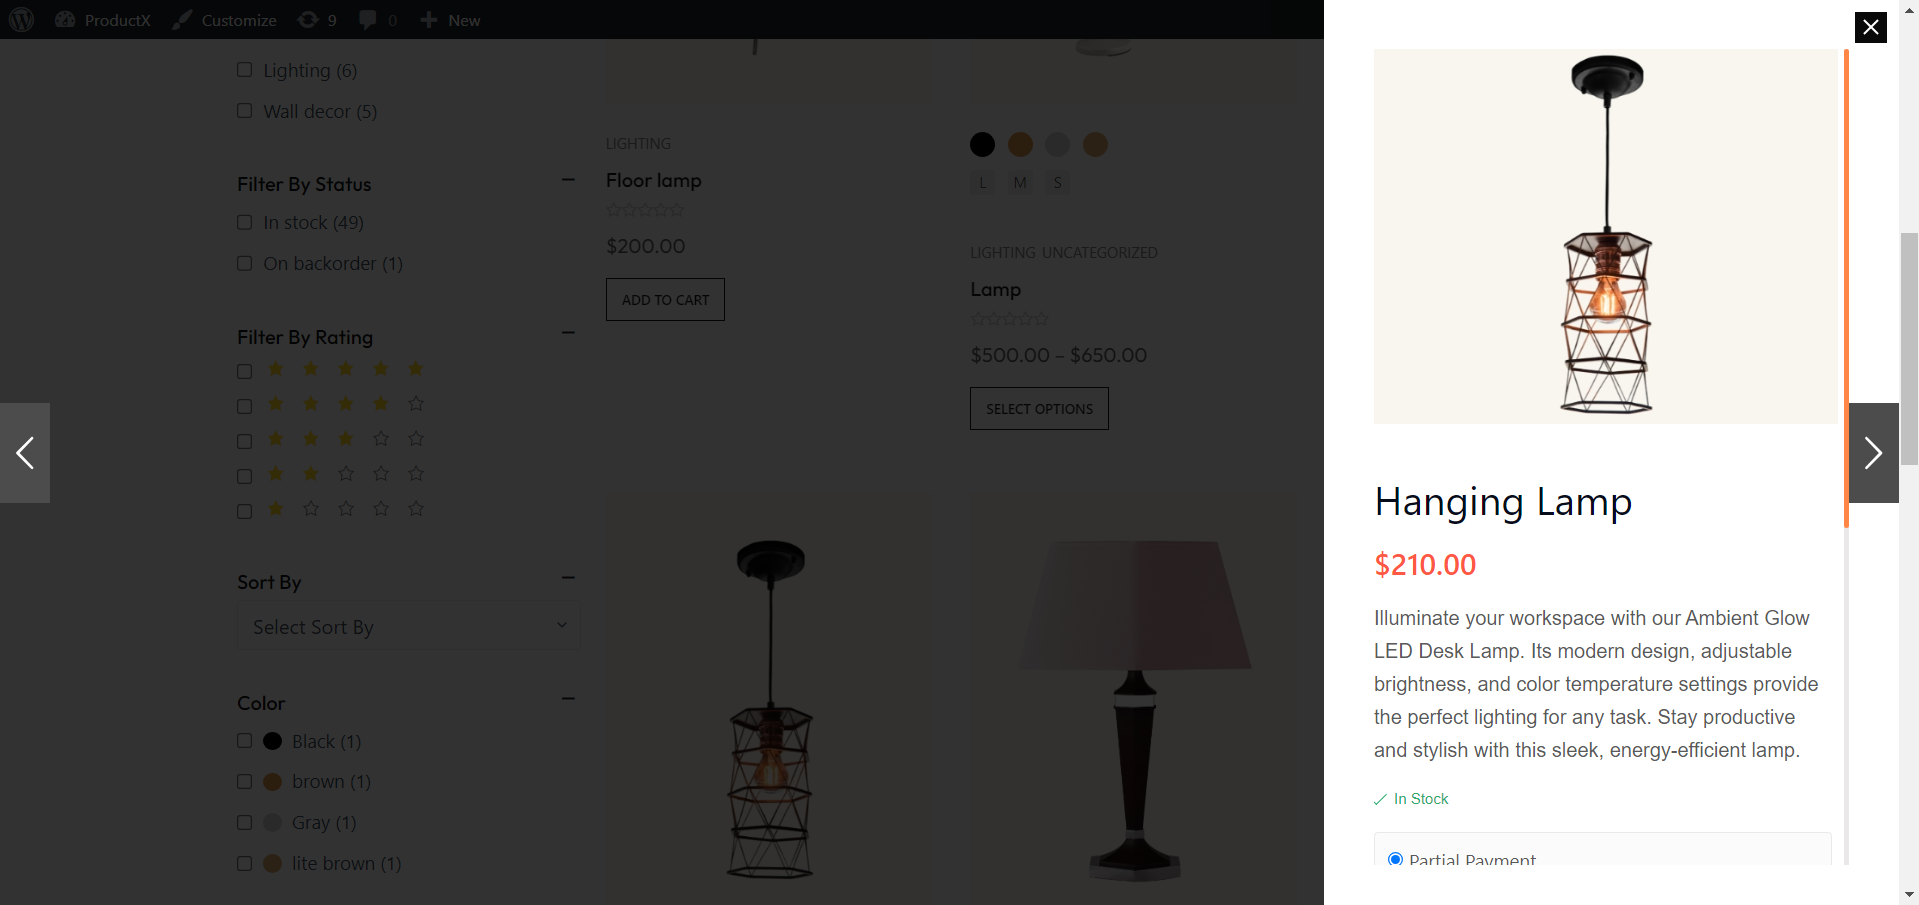
Now, instead of a basic pop-up, you can also showcase the product’s quick details in the left or right sidebar.
- Right Sidebar
- Left Sidebar
You can even customize the loading icon before opening this feature of a product. There are seven different icons that you can use in your store as a loading icon.
ProductX just doesn’t stop with simple appearances. You can even select animations while opening and closing the quick view box.
From zooming in/out to flipping, sliding, and unfolding, you’ll have lots of options to select from. This means you can change the animations from time to time.
Quick View Button Settings
Icons play a crucial role in this feature of WooCommerce for several reasons. It contributes to a more user-friendly and visually intuitive shopping experience.
ProductX quick view provides you with a set of icons to choose from with placement options. And the same goes for buttons if you’re using a text-based button instead of an icon.
→ Button Type
There are two ways, one is a “button”, and another is a “link”. So, if you want to show a button for the preview then select it, you can also select a link instead of a button by enabling this.
→ Button Text
When you are showing a button for a quick view of the product you can also add preferable text to show on the button.
→ Button Icon
You can show or hide the button by just simply enabling/disabling the option.
→ You can use only the icon to show the product view instead of any other additional texts by just enabling this option, “use only icon”.
There are six different stylish icons. You can change the look of the product viewing button by simply selecting any of the icons.
→ Button Position
ProductX is a complete solution, you can even change the position of the button according to your preference, you can add it “before add to the cart”, “after add to cart”, “above image” or other places from the options.
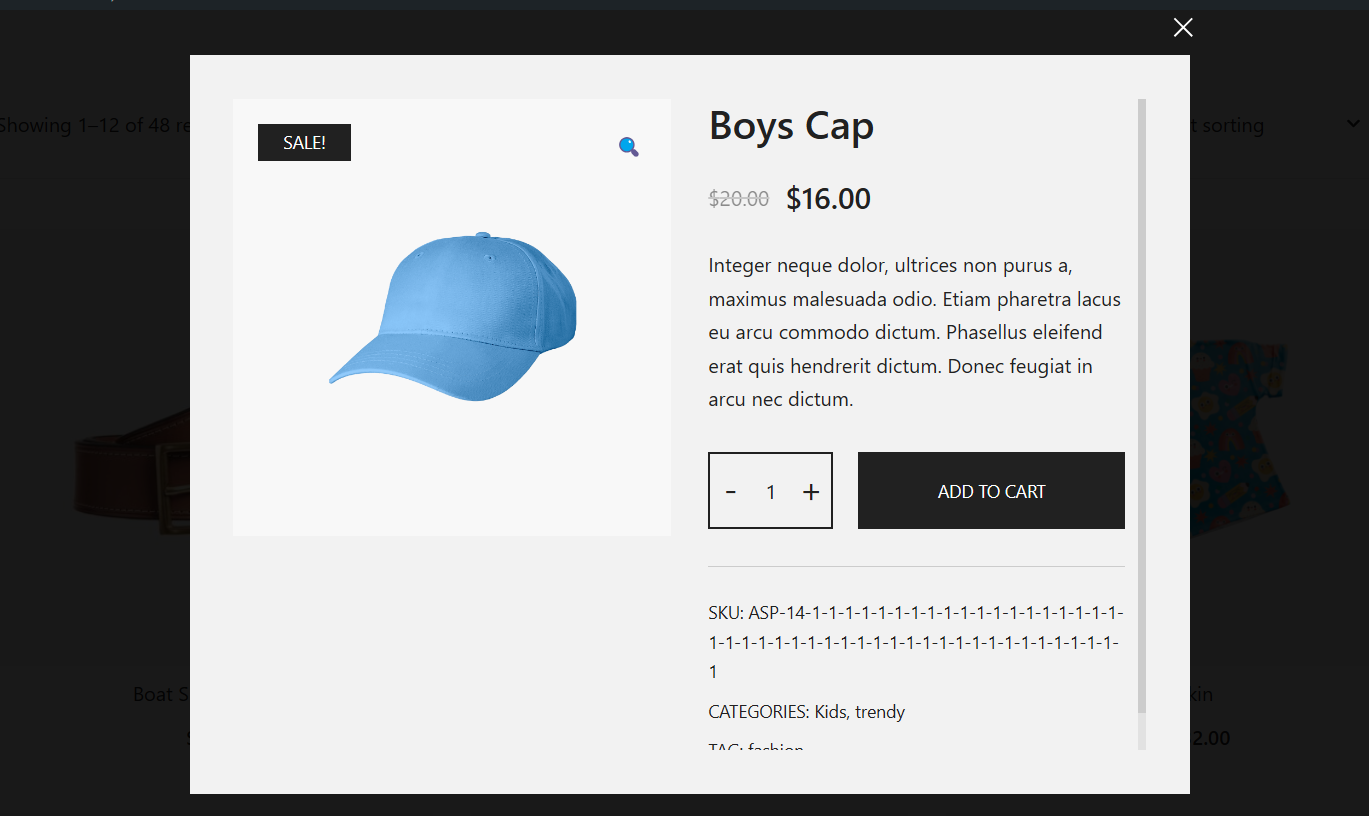
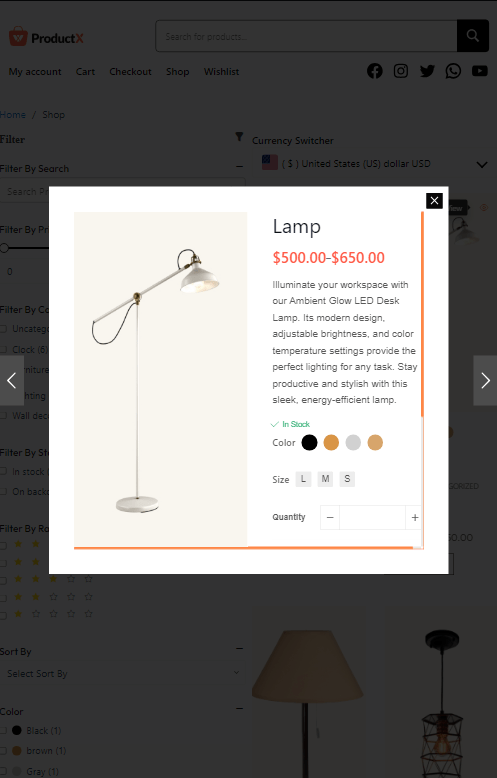
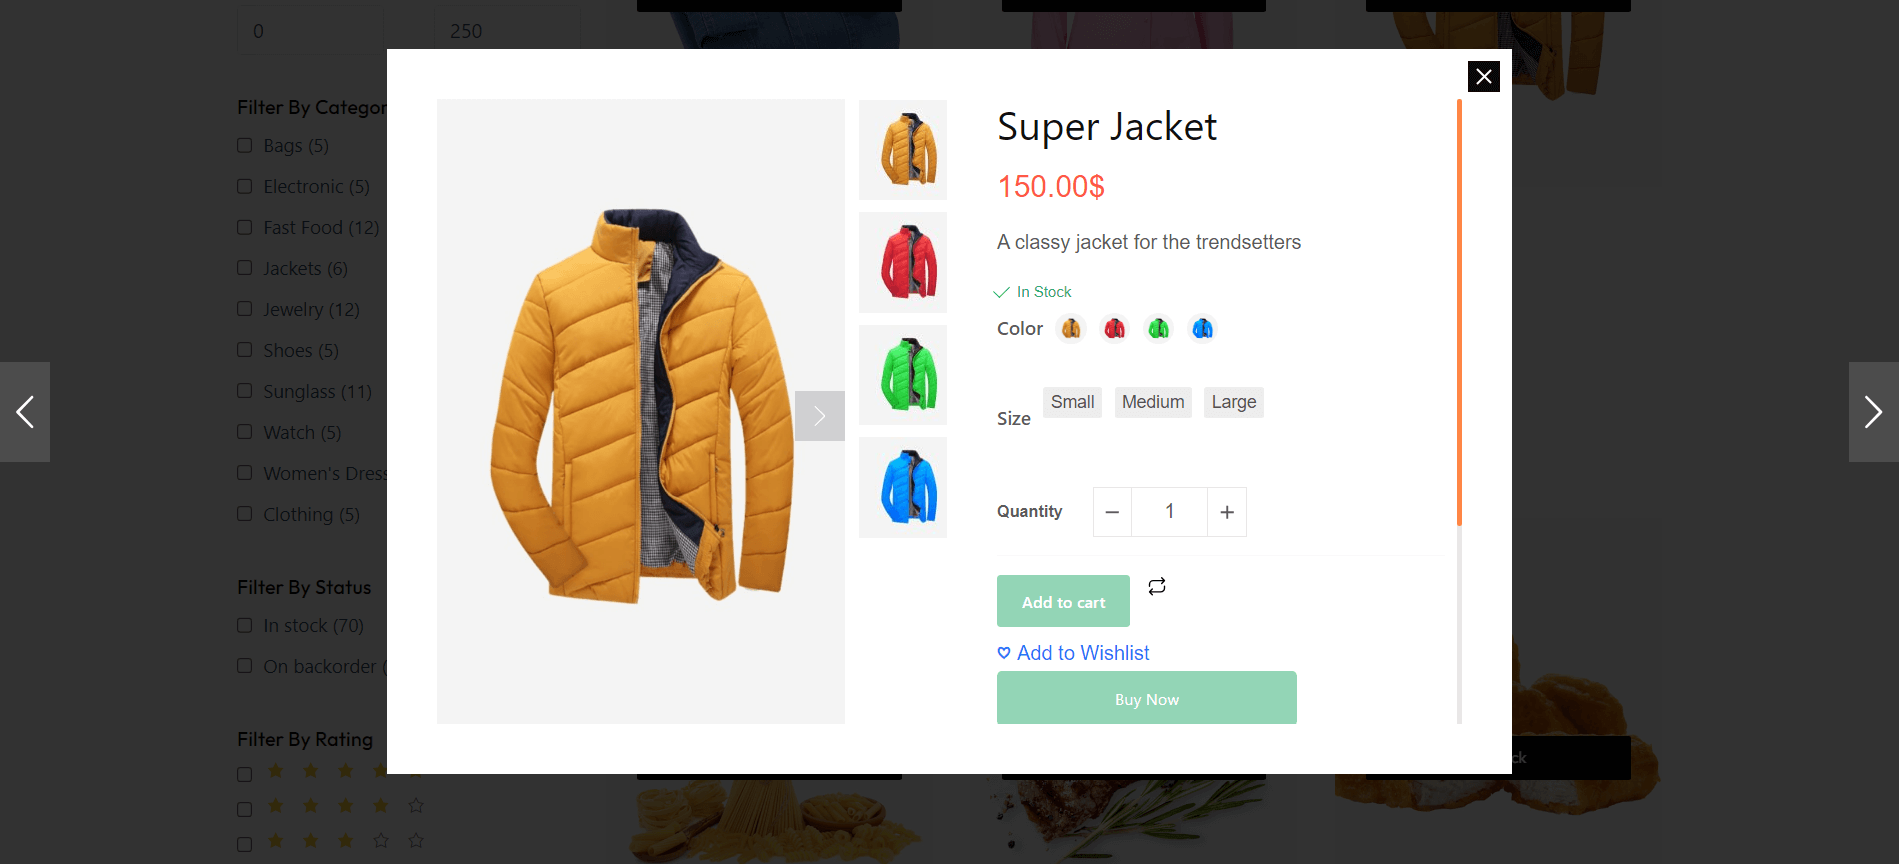
Quick View Modal Box Setting
The modal box is the box which visible after clicking on the quick view button or link for a product.
From the box, buyers get all the pieces of information about the product they have clicked to know about.
Let me share all the setting options available here:
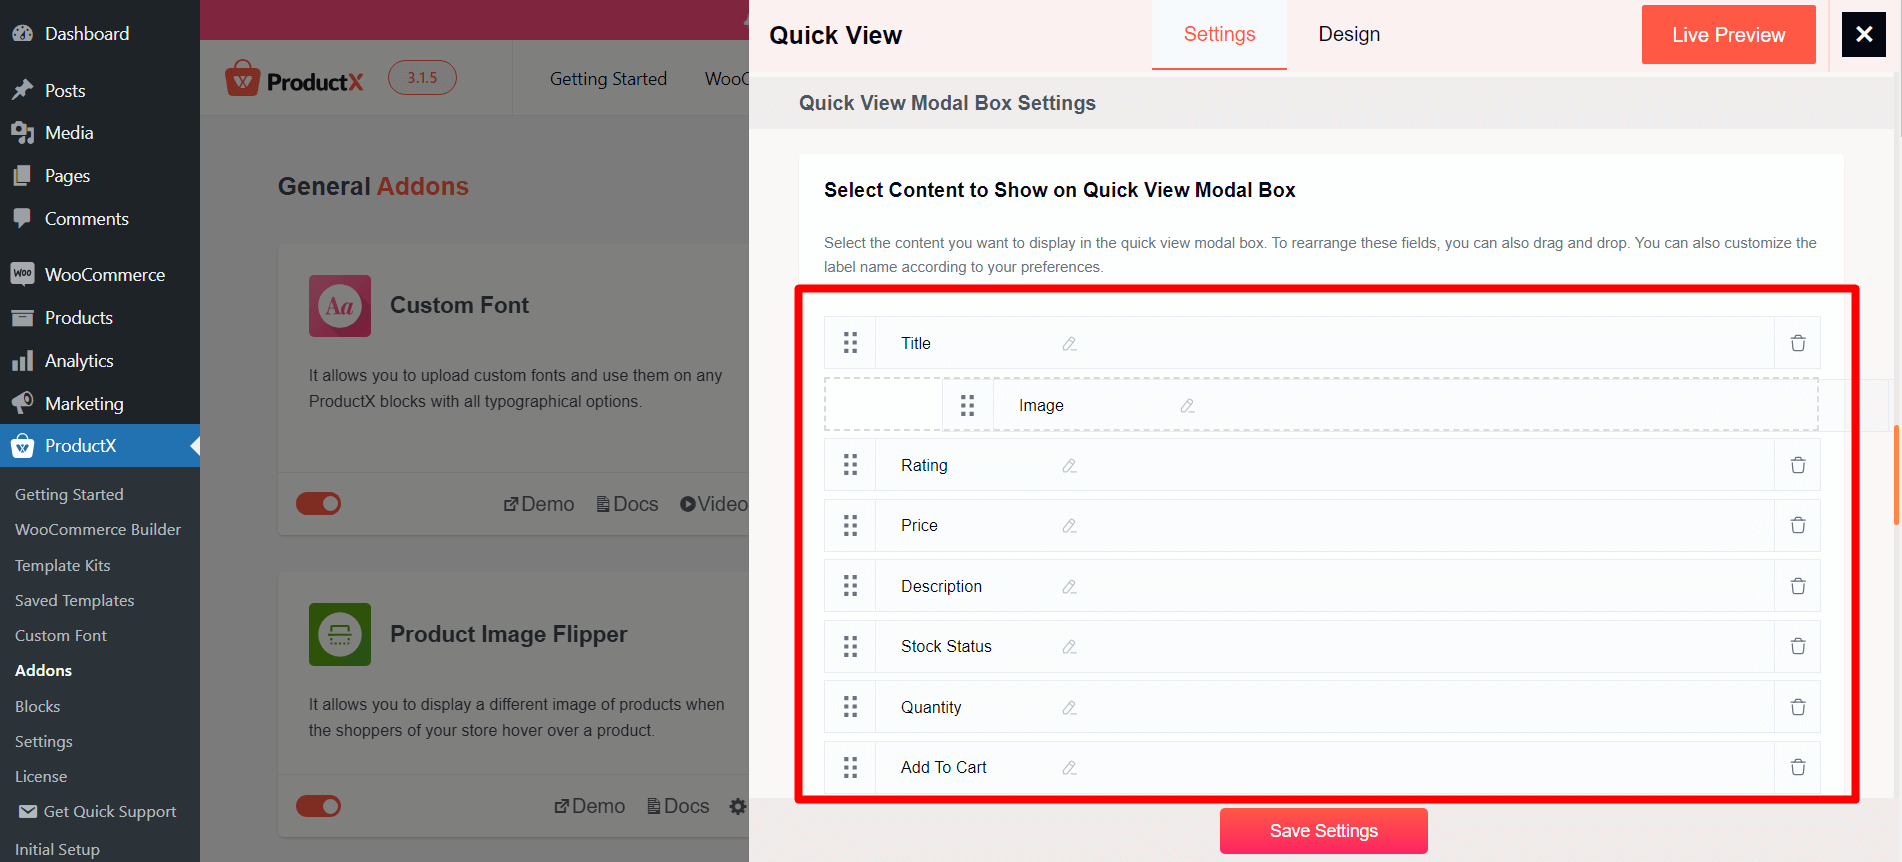
→ Select Content to Show on Quick View Modal Box
The first thing in the setting is all about modal box contents. So, from here you can select the contents that you want to show as details of your products on the modal box.
You can display images, titles, ratings, price, description, stock status, add to cart, meta, social share, and all available things. If you do not want to show anything just simply click on that and press on the delete icon.
Customizing the content name according to your preferences is also possible in this setting. You can also drag and drop to rearrange fields.
→ Product Thumbnail
Now, you can display your quick-view product images (or thumbnails) the way you want. By default, this feature displays product and gallery images.
But ProductX gives you the option to showcase only ‘‘product images” or “gallery images” in addition to the default one.
→ The thumbnails can be stylized with 3 different patterns so you can align the elements based on your store design. Also, it comes with a hover effect, so it is more attractive to users.
In most other plugins, you can only select the elements you want to show in the modal box. But with ProductX, you have complete control over all the elements. Now, you can choose what elements to show and adjust their placements.
→ Some other modal-related options you’ll get are the following:
- Enable a buy now button
- Freeze the product thumbnail
- Enable product navigation without closing the modal box
- Option to close the modal when clicked outside the box
- Close the modal box after adding it to the cart
- And more!
Remember, all these options can be enabled and disabled as required on the quick view modal box settings. So you’re not stuck with the default settings.
Quick View Design Settings to Control Layout, Color, Typographies and More
The ProductX quick view gives you the ultimate freedom to add and customize this feature for your WooCommerce store.
ProductX developers kept them in mind and added a complete design control. You get 5 different quick view modal box layouts to choose from with color presets. This kind of works as a premade template, but you can still customize the aspects whenever you want.
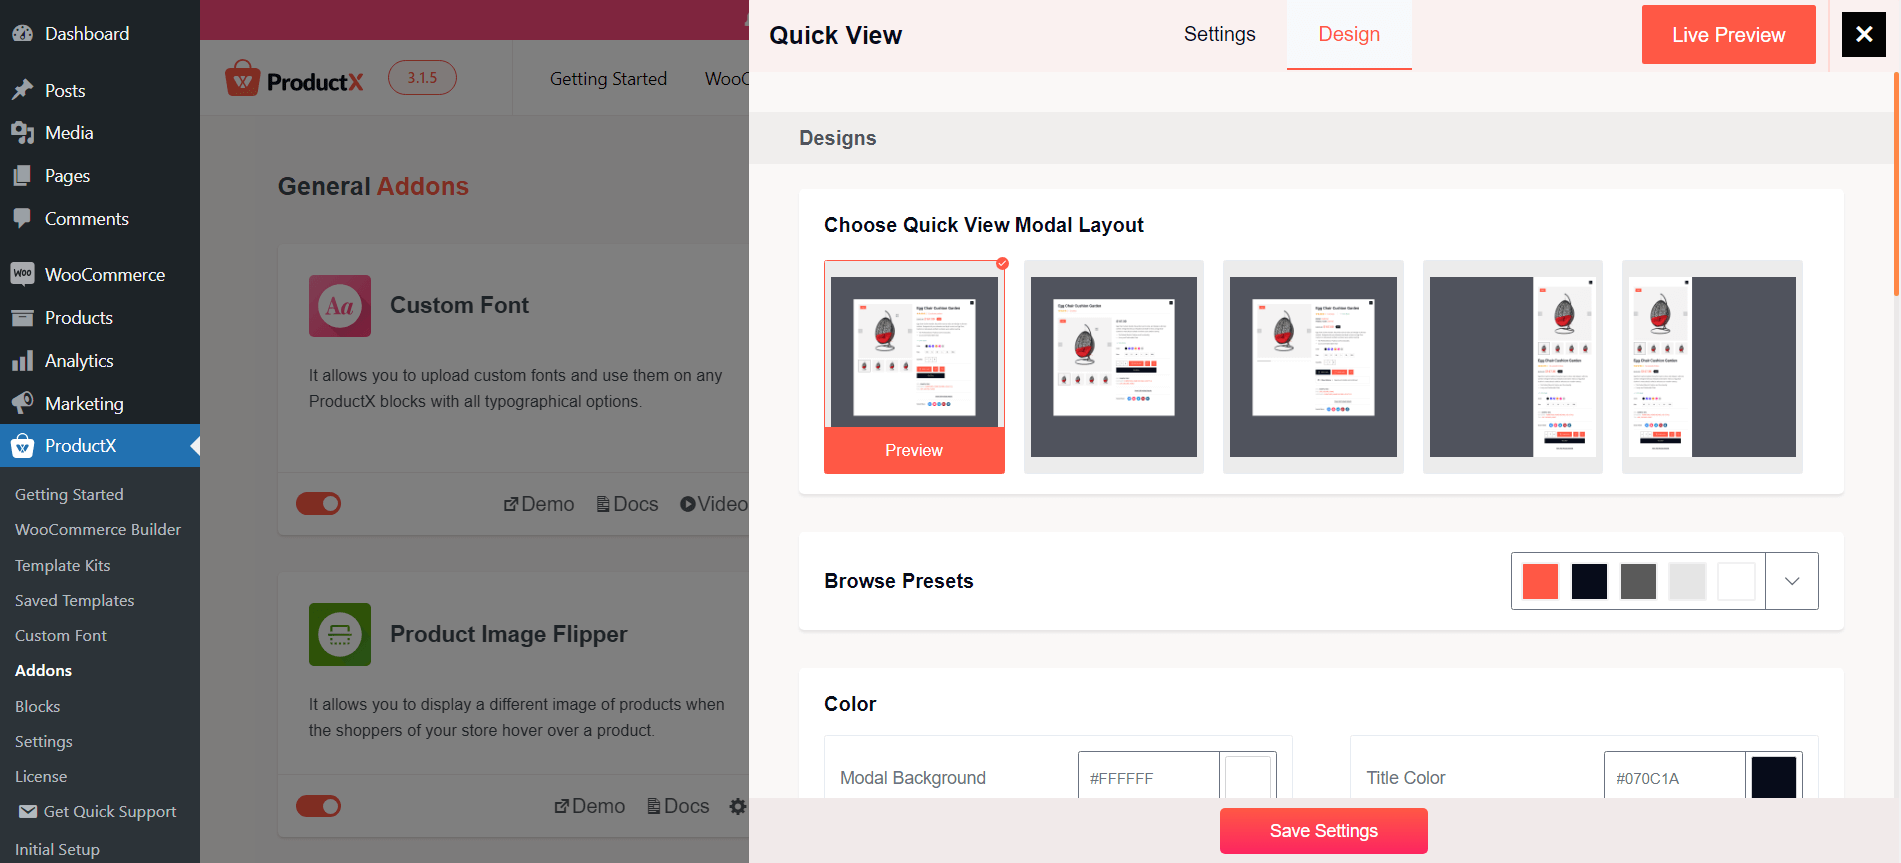
The typographical settings, colors, and button-related settings make ProductX the best quick-view plugin in the market right now.
You can change the modal box, background, text, and button color to your liking.
Additionally, you can bring major changes to the typography section, you can change the font size, weight, case, and other things on your preference.
Step-3: Front End Appearance
After all the customization based on your need do not forget to press the “Save Settings” orange leveled button on the lower part of the setting.
Now, you can see how it works on your products:
Conclusion
ProductX WooCommerce Quick View is a great choice for online shop owners who want to make their customers’ shopping experience better.
It tackles common issues like compatibility and security, offering a hassle-free and customizable solution.
This feature ensures user satisfaction and boosts revenue, setting a new standard among WooCommerce Quick View plugins.