
Are you looking to enhance your website’s navigation by adding convenient links to the next and previous posts? But unsure of the process because you don’t know how to do it? Fear not, I’m here to guide you through the simple steps to achieve just that.
By the end of this article, you’ll have the perfect next/previous post option on your website giving your readers an amazing experience. So, without further delay, let’s start!
What Are Next Previous Posts in WordPress?
Next/Previous post links serve as dynamic navigational elements, allowing visitors to move between subsequent and preceding posts quickly.
WordPress blog articles are presented chronologically by default (newer posts first). This means that the next post is published after the current post the user sees, while the previous post is published before the current post.
The Next/Previous post links enable visitors to navigate through articles and blog archive pages effortlessly, contributing to increased page views on your blog.
Most WordPress themes automatically display the next and previous post links at the end of each post. However, PostX gives you the complete freedom to customize it based on your preferences. PostX lets you achieve your dream website with style.
That being said, let’s explore how to display Next/Previous posts in WordPress effortlessly.
How to Show the Next Previous Post in WordPress?
Now that we know about the Next Previous post, let’s find out how to show it in WordPress.
Step 1: Install PostX
If you want to use the next previous post in WordPress without coding, you need a plugin. PostX gives a unique next/previous post block with a ton of customizations. So, the first thing you need to do is to install the PostX plugin.
PostX gives you the dynamic Site builder which open a huge quantity of options to create and improve your website.
Step 2: Create A Custom Post Template
After installing PostX, you need to create a custom post template to utilize the power of the Next Previous post block.
Simply follow these steps to create a template:
- Go to PostX > Site Builder > Singular > Create Singular Template
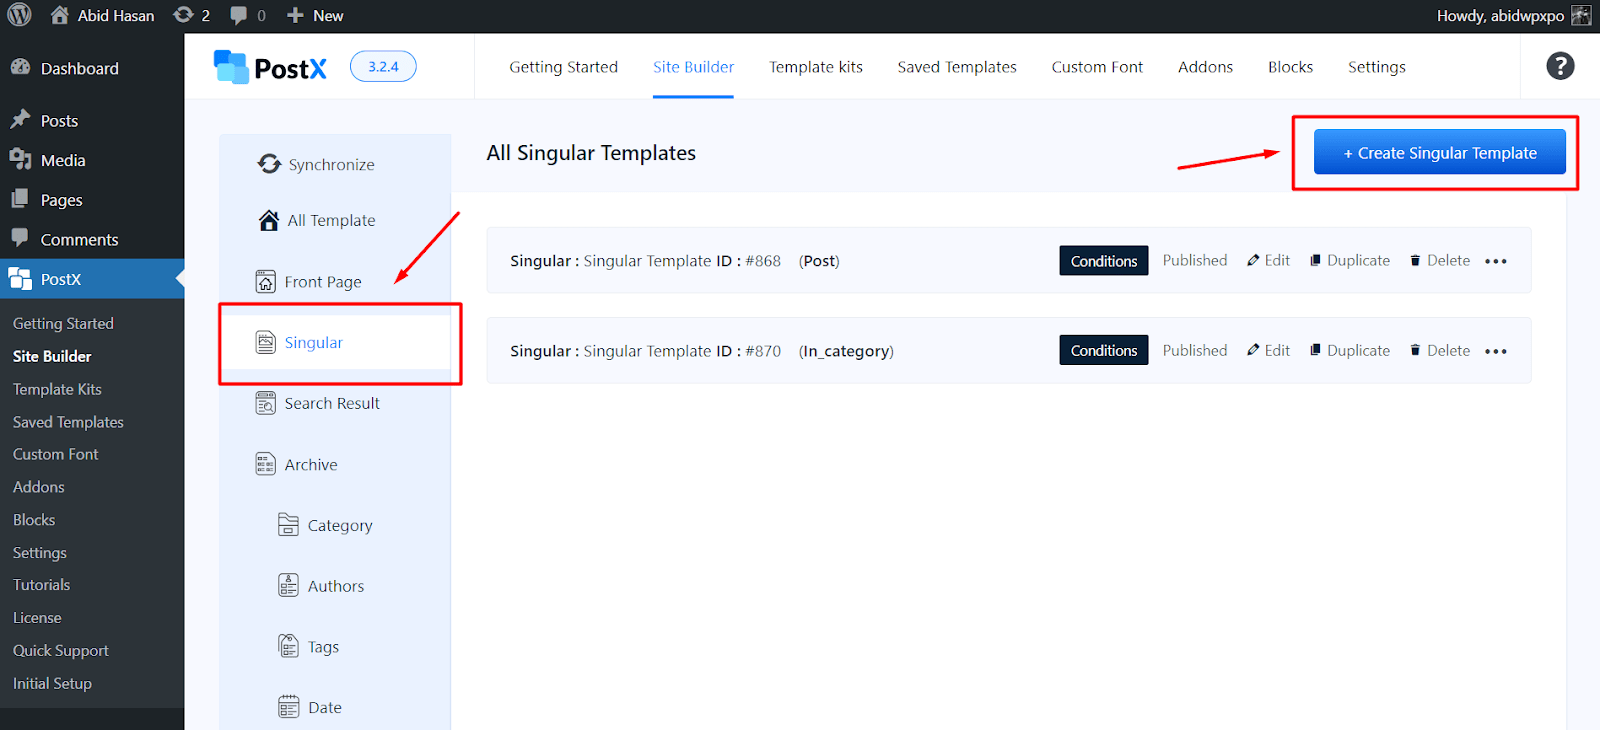
- You can create a new template from scratch or choose from the existing templates
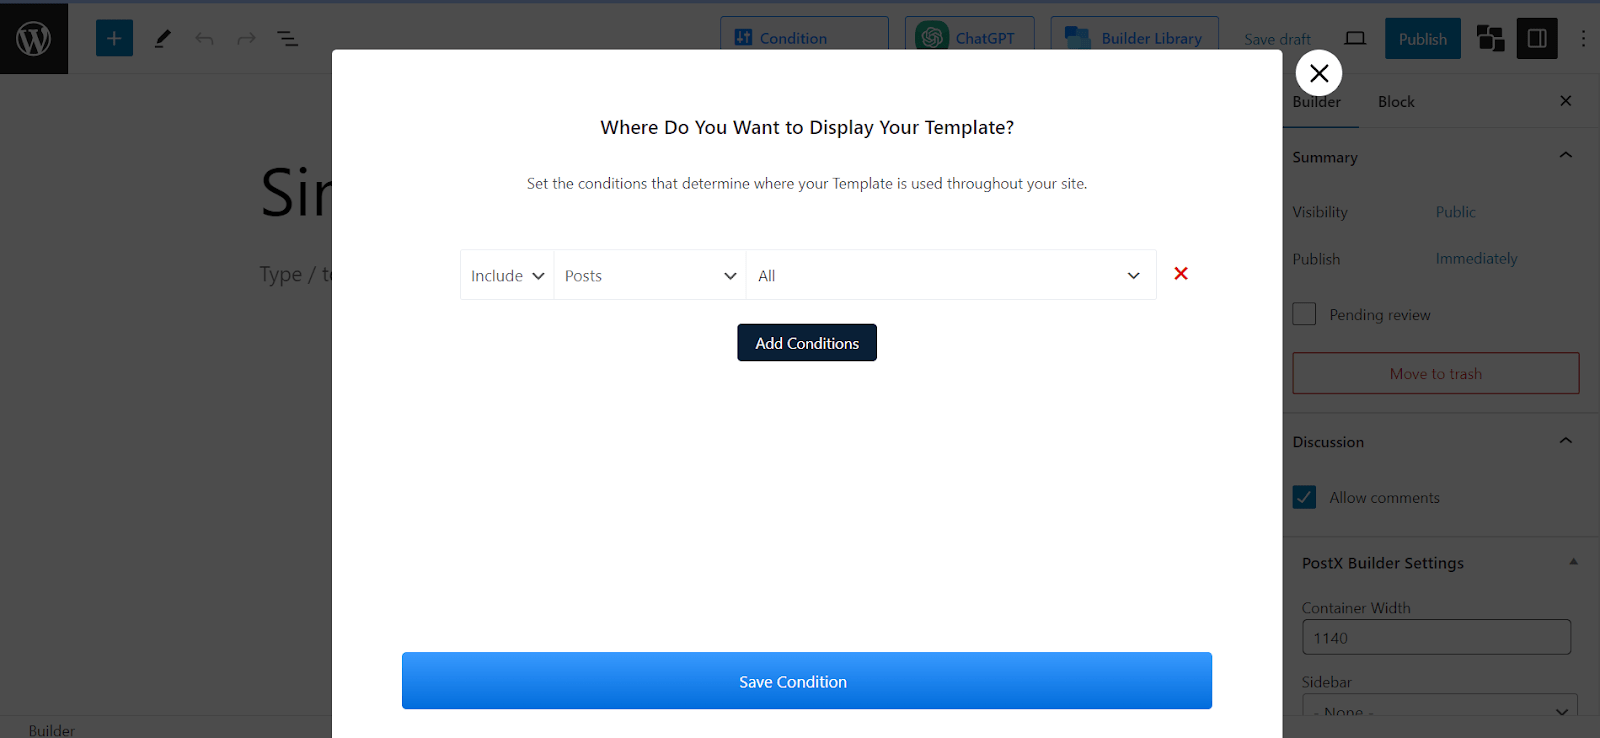
- This will open the Conditions section.
- Click on Save Condition to create the template
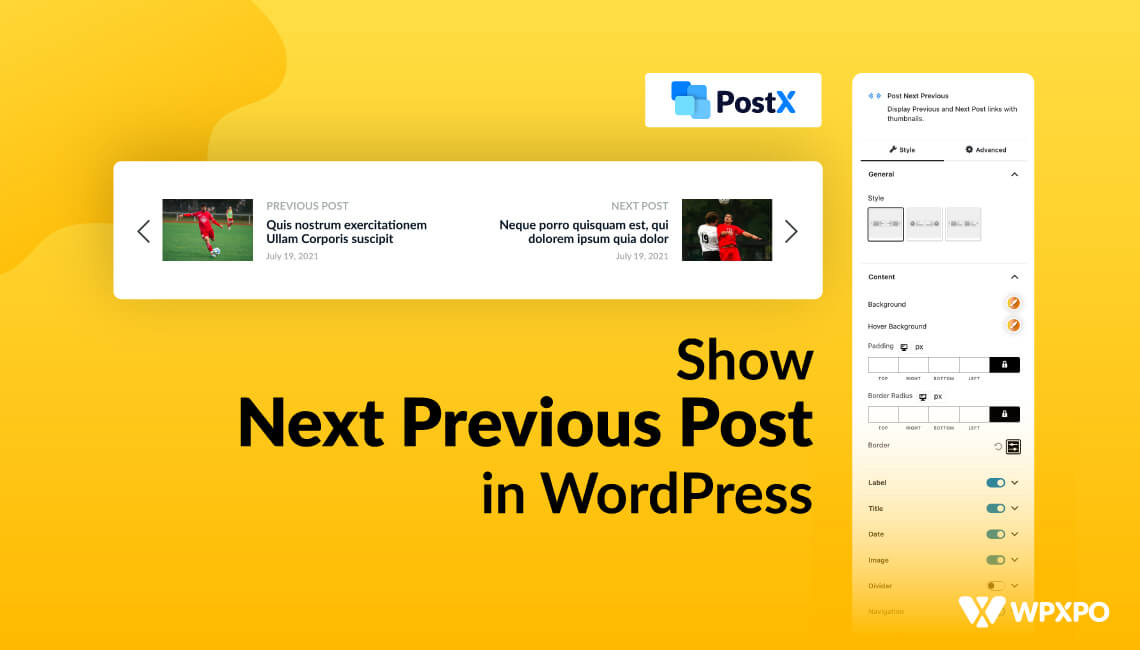
Step 3: Add Next Previous Post Block
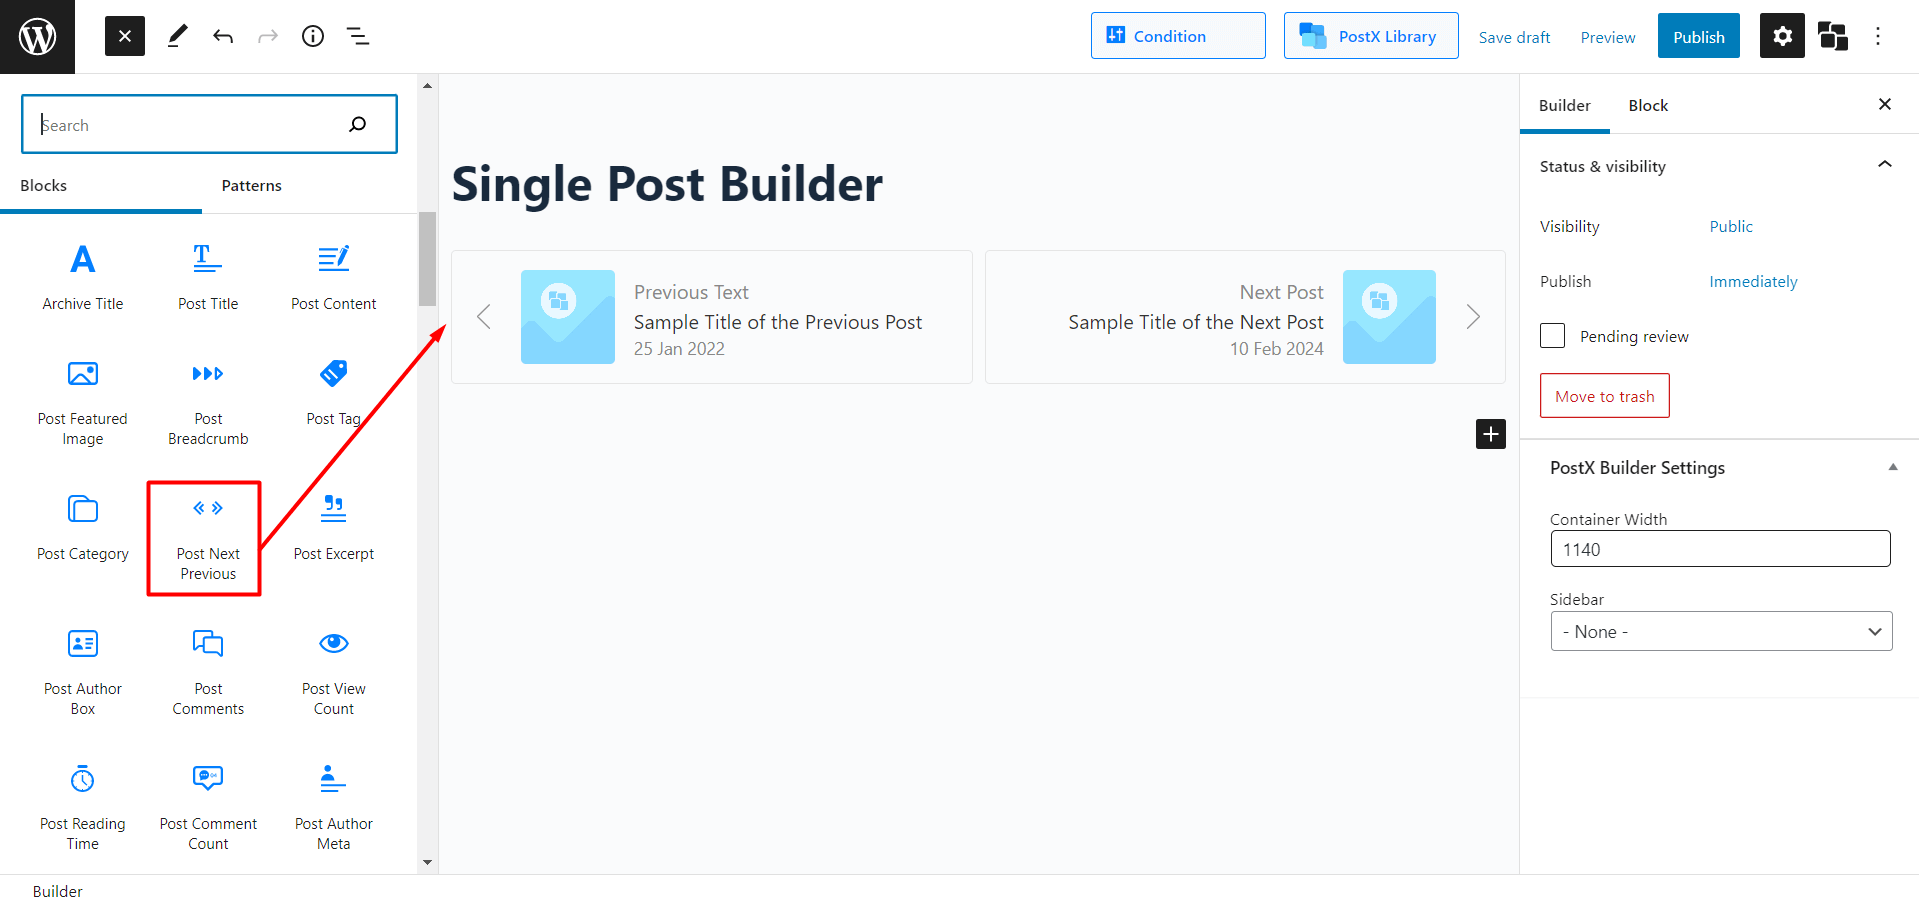
After creating a post template, go to its edit view and click on the add block (the + sign on the left) button.
Now type “/” followed by “Post Next Previous” to find the block and add it.
Now that we’ve properly implemented the Next Previous post, the next thing we’ll explore is how to modify its settings.
However, apart from this block, there are several other blocks that you can use to create amazing page templates.
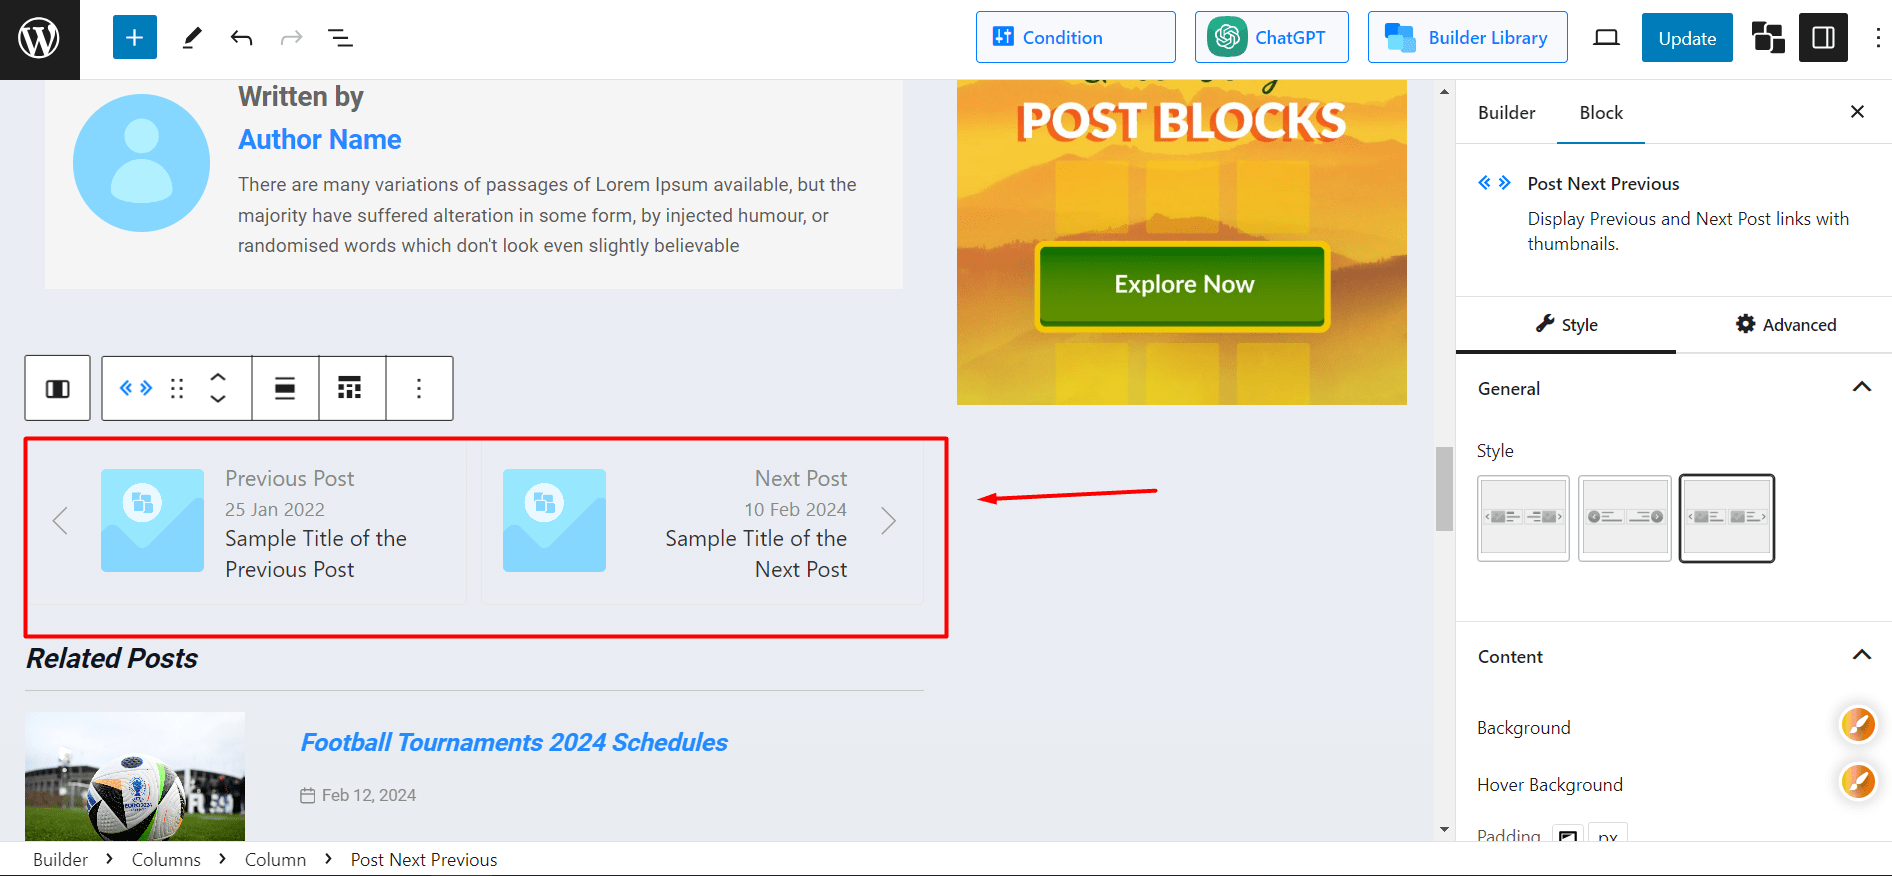
Step 4: Customize The Next Previous Post Block
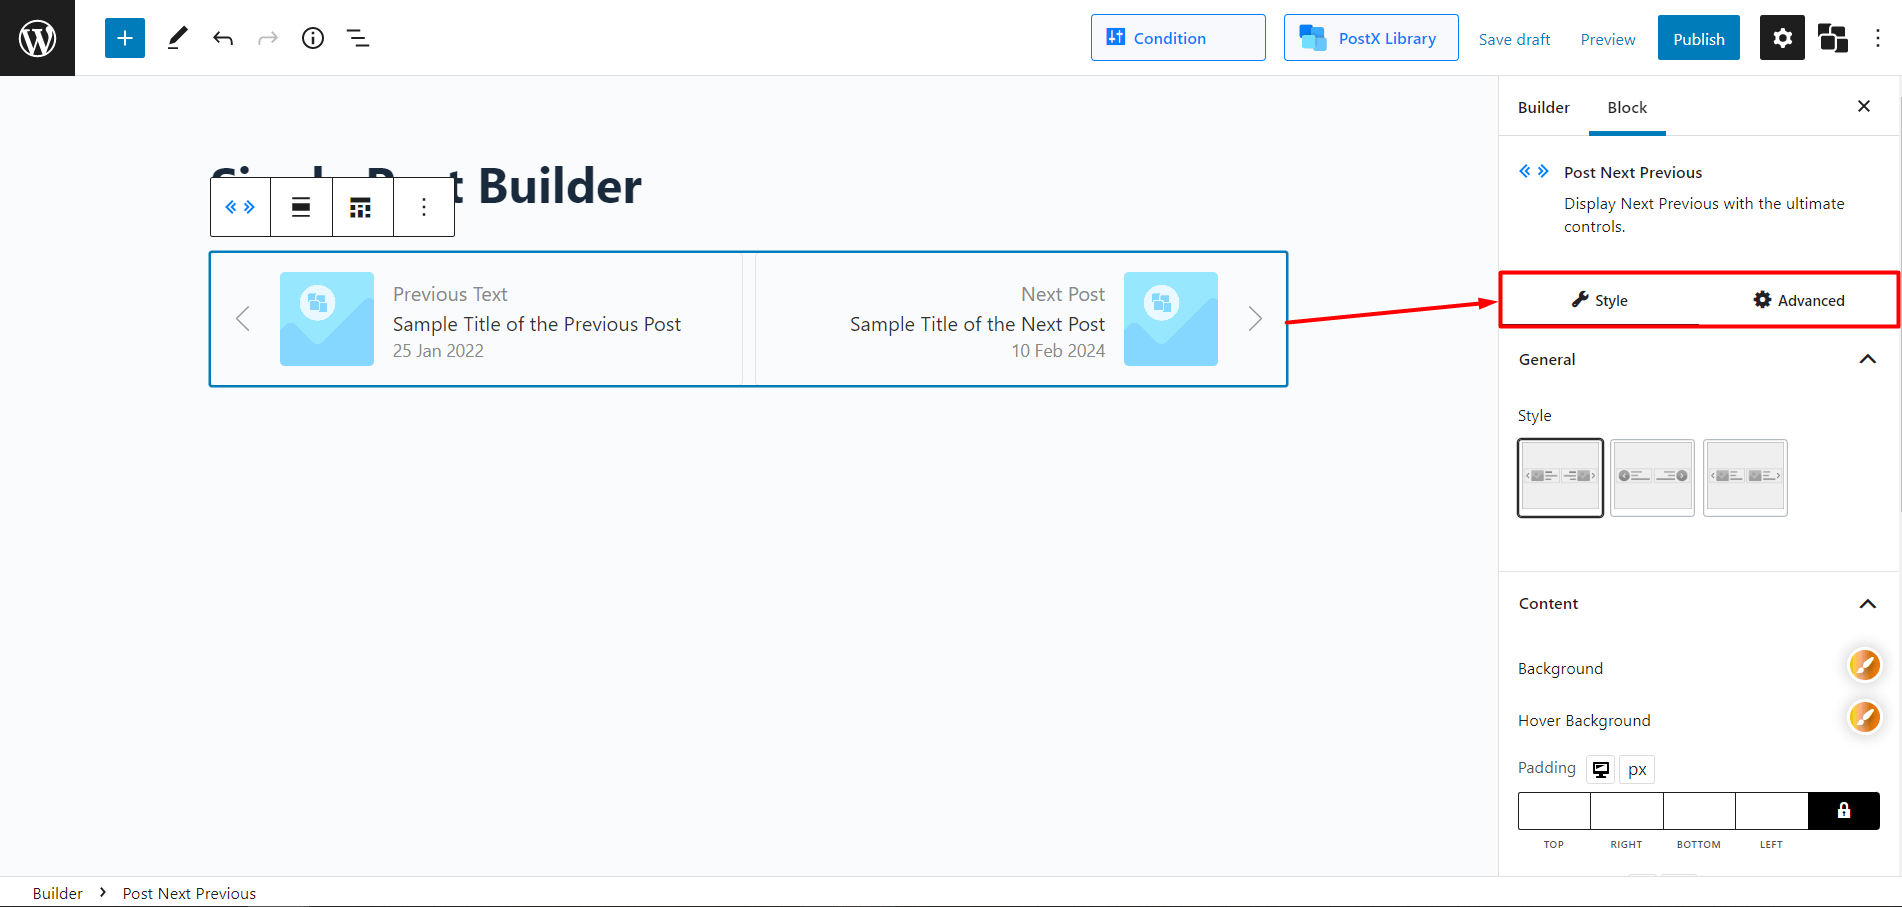
Now let’s look at what PostX offers in our Next Previous post blocks.
With three predetermined styles to pick from, you might think that’s all you get.
However, PostX allows you to modify settings such as background color, hover color, padding, border radius, and border.
In addition, you can modify settings such as label, title, date, image, divider, and navigation to give the next previous block a truly unique look.
How to Add Next Previous Post With Thumbnail
With PostX, you can easily show thumbnails for the next previous post blocks.
To add the next previous post with a thumbnail:
- Install the PostX plugin and create a custom post template
- Add the Post Next Previous block to the template
- Now you automatically have next previous post with a thumbnail
- Edit its settings to choose the thumbnail look
Next/Previous Post Advantages to Grow Your Website
Implementing Next/Previous post links in WordPress offers several benefits for website owners and visitors. While there might be additional advantages, I’ve tried to keep it short.
Enhanced Navigation: Users can easily navigate related posts, providing a user-friendly experience that increases user engagement.
Increased Pageviews: Next/Previous post links encourage visitors to explore more content on your site. And it certainly leads to higher pageviews as users click through to the next post in the sequence.
Reduced Bounce Rate: This links provides links to related content, which means these links can help reduce bounce rates. Visitors are more likely to continue exploring your site rather than leaving after viewing a single page.
Improved User Experience: Readers can follow a logical progression through your content, either chronologically or thematically, improving your site’s overall readability.
SEO Benefits: Search engines can use the structure provided by Next/Previous post links to better understand the relationships between your content, potentially improving your site’s search engine optimization (SEO).
Content Discoverability: Next/Previous post links expose users to a broader range of your content, increasing the likelihood of them discovering and reading articles they might have otherwise missed.
Customization Options: With customizable Next/Previous post links, you can ensure they align with your site’s design and user interface preferences.
Visitor Retention: By guiding visitors to explore additional content, Next/Previous post links can contribute to longer average session durations, helping to retain users on your site. Also, it generates a better CTR (Click-through rate), which helps increase your site’s organic visibility.
Using the Next/Previous post links in WordPress is a valuable strategy to improve navigation, increase engagement, optimize the overall user experience and get higher conversation rates on your website.
So, what are you waiting for?
Conclusion
Now that you know how to add the Next Previous posts in WordPress and how simple it is to customize them, you can start quickly. What are you waiting for, then? PostX gives you the ability to alter everything and anything.
So, unleash your inner Picasso and create magnificent websites and blog pages using WordPress. Best of Luck!