Did you know that there are over 2 billion online shoppers worldwide right now? Did you also know that by the end of 2025, global retail sales are expected to hit 7.4 trillion dollars?
Fascinating, isn’t it? But if you ask me, it’s pretty legitimate.
Shopping online is the first choice for almost all shoppers today. The craze of online shopping became even more significant after the pandemic hit all of us. So naturally, if you want to start a business or already have a brick-and-mortar store, you must also opt for an online one.
Otherwise, you will be failing to target, let’s say, a MASSIVE portion of potential buyers!
Now, there are many platforms to start an online store, and WooCommerce is one of the immensely popular ones.
Today’s blog will guide you through different steps to start an online store using WooCommerce. But, you might be wondering why we are emphasizing on WooCommerce instead of the other platforms that are popular as well.
That is why we will first get into the “whys” of choosing WooCommerce as your eCommerce platform.
Let’s get into the blog now without further ado, shall we?
Why Should You Choose WooCommerce To Start Your Business?
The popularity of WooCommerce as an eCommerce platform is sky-high today, and for good reasons. Let’s glance at some of the amazing perks you will enjoy if you start your online store using WooCommerce.
It is Free
First of all, WooCommerce is a free WordPress plugin and is open-source. You do not need to spend a dime on starting up your business if you choose the platform to be WooCommerce. WordPress is the most popular CMS to date, making it even easier for you to handle business activities as you will get development support from WordPress.
It is Easily Customizable
WooCommerce stores can be easily customized as per your need. It is not the same for many other platforms. Those platforms do not allow you to customize any changes once you are online. But not with WooCommerce. You can easily bring any customization to your online store if you use WooCommerce.
It is Secure
With WooCommerce, you will not have to worry about your online store’s safety and security. Working closely with renowned security providers like sucuri.net and WooCommerce allows you to be completely tension-free about your store’s security.
It Helps in Search Engine Optimization
Your online store needs to be SEO optimized, and WooCommerce can be a great help in that as well. This is because WooCommerce is already adapted to all the SEO guidelines given by Google, making it easy for you to make the content of your store SEO-friendly.
It has Amazing Features
If you opt for WooCommerce as your eCommerce platform, you will automatically receive a lot of amazing features to decorate your online store in the most effective manner. Some of the unique features that WooCommerce will give you are—
- Filtering and sorting of products
- Product reviews and ratings
- Customization of currency, location, etc.
- Management of product categories and so on.
It Gives You Entire Control of Your Store
When you use a third-party eCommerce platform, you are always at some risk of losing crucial data and information. For this reason, it is essential to have a backup for all your information, like customers’ information, product details, and so on. WooCommerce allows you to do that, unlike many other platforms.
Now that you know why WooCommerce will be an excellent pick to start an online store, let’s delve deeper and learn how to start an online store using WooCommerce.
How to Start an Online Store Using WooCommerce (Step-by-step)
We will now take you through 8 very simple steps to get your online store up and running.
Before you get started, choose your business name. You might try using an AI business name generator for ideas for your business name or website name. Choosing a powerful business name is where you start your business adventure.
Then you get started with the 8-step journey:
Step 1: Getting a Domain Name and a Hosting
The first thing you will have to do to open up your online store is get a domain name. Wondering what that is?
It is quite simple. A domain name is the store’s virtual address in the online world. This is what your customers will have to put on the search bar to visit your website.
For example, if you have an online book store, your domain name could be bookends.com, or you can choose any other relevant name. Use your imagination and creative skills while choosing a domain name. Make it classy and unique, but keep it simple so people can easily remember it.
On the other hand, you will also need web hosting. Web hosting is the place where your website will reside. You can get your web hosting from any of the recommended providers.
However, Bluehost is the one that WooCommerce highly recommends. This web hosting provider comes with a number of packages that you can choose from depending on your preference.
Step 2: Installing WordPress
The next step is quite easy. You have to install WordPress as WooCommerce is basically a plugin of WordPress. If your web hosting provider is Bluehost, the process will be even simpler for you as Bluehost allows automatic WordPress installation. However, if it is not, you must install WordPress manually.
Step 3: Installing the Plugin WooCommerce
By now, you have already installed WordPress. You will see a Dashboard when you log in to your WordPress account. To find the plugin WooCommerce, you will have to click on the following options in the following order:
WP Dashboard→Plugin→Add New
After that, you will see a range of plugins in front of you. There will be a search bar too. Search for WooCommerce there. Once you find it, click on Install. It will take a few seconds to install. Then you will see Activate button like the image below:

Click on it, and finally, you have successfully installed and activated WooCommerce on your WordPress account.
Step 4: Filling All the Necessary Details
After you have installed WooCommerce, you will be taken to a page like this:
This is the WooCommerce Wizard Setup. And this is where you will fill up all the necessary details about your store. Put in all the information one by one. At first, you will be asked to provide the basic information related to your online store, like the country you are operating from, your store address, etc. After you put all this information, you will need to go further and select the industry to which your online store belongs to.
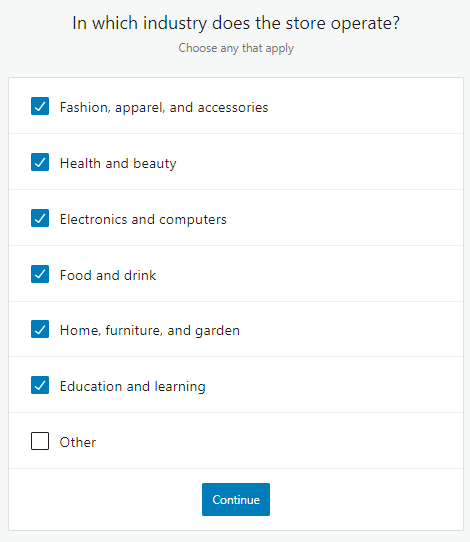
As you can see, you can select more than one industry for your online store. Select the ones that are relevant to your business. When you hit Continue, you will be taken to the next step.

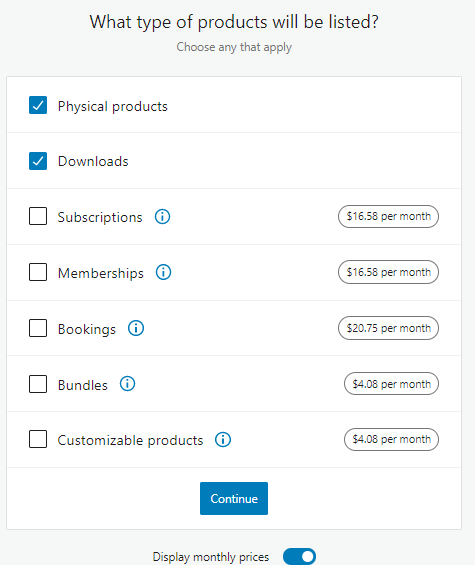
This is where you select the types of your products. Your products can be physical or downloads, or both. Select the ones suitable for your business, and then hit Continue again. The Setup Wizard will then take you to this:
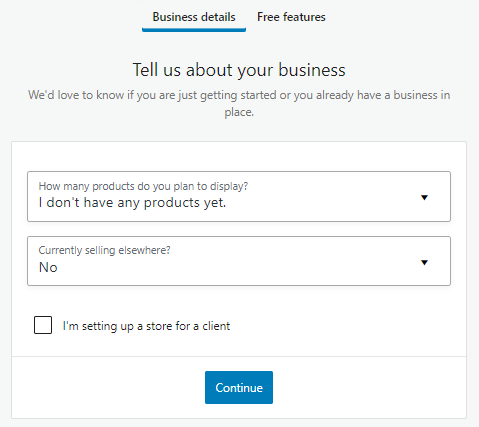
This is another segment of putting information about your business details. After you put all this information, hit Continue again. Then you will find yourself in the Theme selection section.
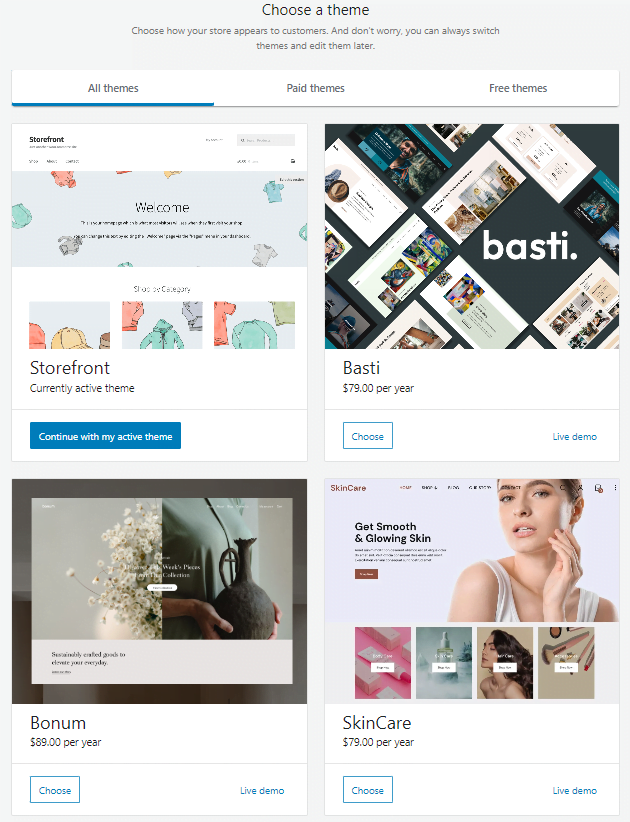
When you are done selecting the theme, you are primarily done providing the most basic information about your online store on WooCommerce.
Step 5: Add Your Products
Here comes the best part! It’s time to add products to your store!
Adding products to your stores is extremely easy, just like the previous ones you have already gone through. What you will need to do is follow these steps:
WooCommerce→Products→Add New
You have the option to give a name to your product, add a description to it and also add a featured image. A product data section will also be there, which you must fill up. It will contain different details like inventory, shipping, and so on.
Besides all these, you will also have to choose your product’s category. Now, when you have completed giving all the necessary information, the only thing left for you is to add the product successfully to your online store. Now all you need to do is click on the Publish button, which you can see on the right side of your screen:
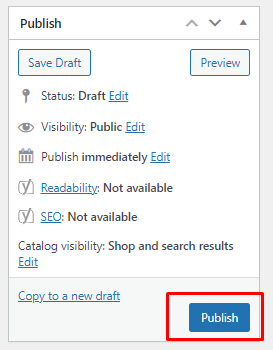
Click on it, and voila! The first product on your WooCommerce store is added!
However, you must have more than one product in your store. Just continue adding all the products to your WooCommerce online store like this one by one. You will have your store ready before long. With WooCommerce, you will also have the opportunity to add WooCommerce grouped products or linked products.
Step 6: Choosing a Suitable Theme
Yes, you had already selected a theme while setting up WooCommerce Wizard. But that was just the default one, which was just to get started with your store. WordPress has hundreds of themes available besides the one you have already selected. There are both free and paid versions.
The theme will determine your store’s appearance in front of potential buyers. And you must want to attract and make them interested in your store, right?
Choosing a unique and attractive theme is the first step to making that happen. Remember, usually, all these themes are customizable. So, you can play with it as per your taste and preference and choose a beautiful theme for your business.
Also, you can choose a suitable page builder plugin to customize any of the pages of your online store.
Do you think why you should bother about it as you already have the default page layout? Well, this is basically to decorate your store and to give your store a more sophisticated look.
That being said, it is also necessary to keep in mind the viewers’ comfort. So do not go for too many vibrant colors or tiny fonts. These can only irritate viewers, and THAT cannot be good for your business!
Step 7: Selecting a Suitable Payment Gateway
This is a very significant step. To sell products to people, you must have a proper payment gateway. WooCommerce allows you to choose from different kinds of payment gateways. You have to follow the steps below for that:
WooCommerce→Settings→Payments
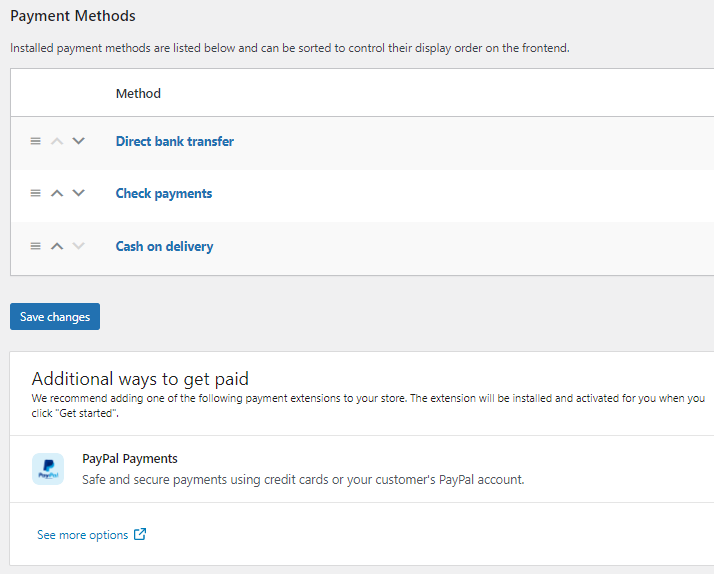
If you would like to have online payments, you have that option. And if you want to give your customers the option to pay upon delivery, there is that option as well. Also, the checks and bank transfer options are available for you to select from.
What is more convenient is that WooCommerce will let you add a Paypal payment option as well, which will be highly convenient for many of your customers.
You will have to click on each one of those payment methods and fill in the details that come after that to ensure a smooth payment system for your online store. Be careful while putting all this information. You might ask why! This is the most intricate activity among the others you have done till now.
Step 8: Install Necessary Extensions
By now, you have already set up your online store. However, there is something else that you can do to make your online store even more effective. And that is installing necessary extensions.
Extensions or plugins are there to make your life easier, and WordPress literally has thousands of them. That is why having a WooCoommerce store will give you the leverage of carrying out each and every business activity with much ease and comfort.
For example, you must want your store’s products to show up on different marketing channels to reach millions of potential buyers, right?
And for that, you will have to make an optimized product feed that you can use to upload your product data and display your products on 100+ marketing channels, including Google, Bing, Facebook, Instagram, and whatnot.
CTX Feed is a WooCommerce plugin that will help you create the most ideal and optimized product feed with the least effort.
Again, your online store will also need invoices and packing slips. Creating those manually will need a lot of your time and labor. So, Instead of doing that, you can install a packing slip generator plugin and make that plugin do the work for you!
Just like this, thousands of other plugins on WordPress can help you in every step of building your online store very easily and without consuming much of your time.
Once you are through all these steps, you have already started your online store. However, you can customize or modify anything you require over the course of time.
To Wrap It Up
As you see, opening an online store using WooCommerce does not require much effort or time. But, it can surely bring a lot of advantages for you.
The dominance of online shopping makes it almost mandatory to have an online presence for every business. And WooCommerce is definitely one of the best options to set a footprint in the digital world for any eCommerce store!
Do let us know if you have found these steps easily understandable.