Do you love traveling and do it often? You can turn your passion into a career!
Starting a travel blog could be your ticket to a life of adventure and excitement. It is not just about sharing your passion. It’s about inspiring others to explore the world. You can even make a fulfilling living by travel blogging.
Don’t worry if you’re new to this – I will guide you through the entire process of launching a travel blog!
To start a travel blog, you need to follow these steps:
- Pick Your Ideal Niche
- Brainstorm A Relevant Name And Logo
- Buy Domain And Hosting
- Choose A Suitable Blogging Platform
- Design And Customize Your Travel Blog
- Prepare Your Footage and Content
- Grow Your Audience And Connect with the Community
- Make Your Travel Blog Profitable
- Follow Other Travel Bloggers for Inspiration
To learn in-depth about each step, keep reading the article.
Key Takeaways
Brainstorm relevant name and logo for your travel blog. Make them unique using different tools and techniques to stand out from the crowd.
Buy domain and hosting considering important factors like reputation, security, features, and customer support.
Design and customize your travel blog with the number 1 Gutenberg Blocks builder plugin PostX. Use its starter sites to bring your blog to life within minutes.
Prepare quality content and footage to serve your audience’s desire perfectly. Follow guidelines to improve your skills and user engagement.
Grow your audience using social media and other platforms. Learn from successful travel bloggers to improve your content. Finally, earn money by promoting products, brands, or selling your travel expertise.
What Is A Travel Blog & Why Should You Start One?
Travel blogging has changed a lot. It’s no longer just about sharing personal stories. People don’t read blogs for entertainment anymore. They use blogs to find specific advice on destinations, such as
- where to go
- where to stay
- what to eat
- what to do
- how to get around.
- how to save money on your trip and more.
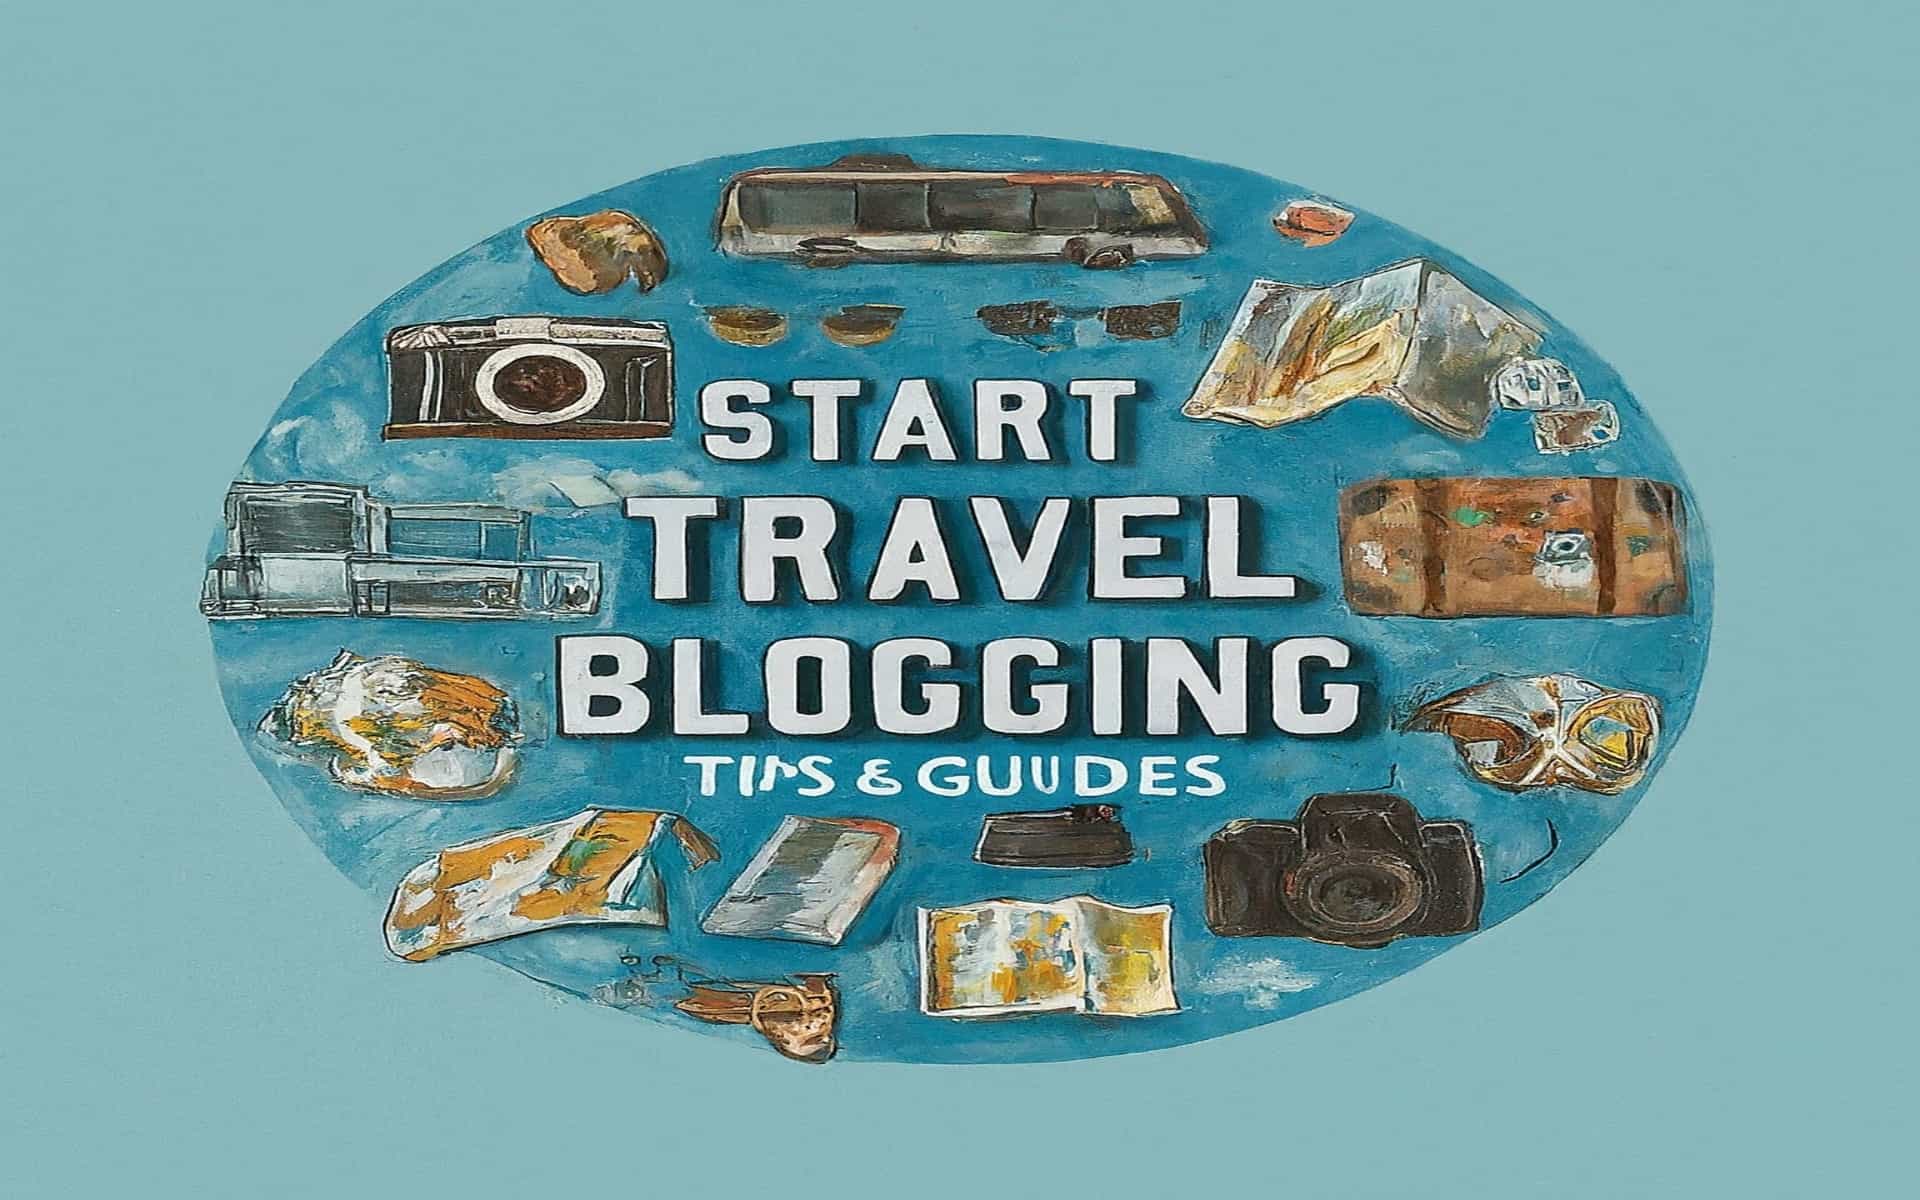
So, today’s successful travel bloggers help people plan their trips instead of just sharing experiences. They position themselves as a travel expert and help readers to explore more of the world.
Now you understand what a travel blog is in today’s world. let’s talk about why you should consider starting one.
- Sharing your passion for travel will help you build a unique personal brand.
- With a strong audience, you can generate a handsome income. Provide advertising opportunities, engage in affiliate marketing, and create sponsored content. You can even sell your travel-related products to maximize earnings.
- You can get opportunities like free traveling or discounted traveling experiences.
- Blogging can help you improve your writing, photography, and digital marketing abilities.
- You can become a valuable resource for travelers and offer practical tips to help them plan more effectively.
How to Start A Travel Blog (Step-by-Step)
Now that you know what a travel blog is, its benefits, and why you should start one, it’s time to provide you with the detailed steps to start. I provided the relevant images for an easier understanding.
Step 01: Choose A Travel Blog Type That Is Ideal for You
Choosing your niche isn’t just about content. It’s about building a community that shares your interests. You can cover any or all, but focusing on a specific topic helps you stand out and attract a dedicated audience.
You will always find your niche in the travel world no matter your passion. So take some time to explore your travel desires and the story you want to share. It will help you engage repeated readers and simplify the money-making process.
There are plenty of niches that you can start with. Here are some ideas:
- Adventure Travel
- Solo Travel
- Luxury Travel
- Budget Travel
- Family Travel
- Travel Hacking
- Experiential Travel
- Festival Travel
- Couples Travel
- Food and Culinary Travel
- Sustainable Travel
Step 02: Brainstorm A Relevant Name And Logo
If you want a unique identity, create a unique name and logo. When brainstorming a relevant name and logo, focus on your brand’s core message and target audience.
Choose a name that’s catchy, memorable, and easy to spell. For the logo, opt for a simple and unique design, Use colors and shapes that align with your brand identity.
Here are some brainstorming Techniques:
- Mind Mapping: Start with the main idea, “travel site.” Draw lines from “travel site” to related words like “destinations,” “adventures,” “hotels,” “flights,” “food,” and “budgeting.” Use these words to think of cool names and pictures for your travel site.
- Word Matching: Match related words side by side to generate a unique name. Try words one by one that start with A to Z.
- Competitor Analysis: Study successful competitors to identify their naming and design patterns.
- Customer Surveys: Gather feedback from potential customers about their preferences and expectations.
Consider the following guidelines when choosing the brand name:
- Brand Identity: Clearly define your brand’s personality, values, and target audience.
- Availability: Make sure the domain name is available. Check social media usernames too.
- Positivity: Avoid negative words and make people feel good.
- Future-proof: Pick a name that will remain modern and appealing over time.
- Relevance: Ensure the name accurately reflects your business or product.
- Memorability: Create a catchy and easy-to-spell name. You can consider your target audience’s culture to generate ideas.
Tips: You can use a free name generator like Namelix or generative AI tools like Chat GPT, or Gemini.
Tips for Creating a Strong Logo:
- Simplicity: A clean and simple design is often the most effective.
- Visual Appeal: Create a visually appealing logo that complements your brand.
- Color Psychology: Choose colors that evoke the audience’s emotions.
- Typography: Select fonts that match your brand’s personality.
- Symbolism: Consider integrating meaningful symbols or images.
- Scalability: Ensure the logo looks good in various sizes.
Remember, both the name and logo should complement each other and work well across various platforms. By following these guidelines and engaging in a creative brainstorming process, you can develop the best ones for your brand.
Step 03: Buy Domain And Hosting
Now, you must pick an ideal domain name and reliable hosting provider. Let’s briefly explain what they are.
A domain name is your website’s address that people type into their browser to visit your site. Usually, it consists of two parts: the name and the extension.
For example, in google.com, “google” is the name, and “.com” is the extension. Domain name transforms complicated numerical IP addresses into simple, memorable formats.
Web hosting is where your website lives, just as your home provides a place for you to live. It provides the space to store all your site’s files and data and ensures accessibility on the internet.
A hosting provider manages server resources, maintains security measures, and ensures your site is always operational.

Secure Your Domain
It’s always a best practice to use a .com extension for your domain as it is widely popular. You might also consider using a .blog extension to make your blog stand out. There are some popular domain providers you can consider purchasing from such as NameCheap, PorkBun, GoDaddy, and more.
Pick A Suitable Hosting Provider
Your journey starts with a reliable hosting provider that meets your specific needs. You must check the reputation and customer reviews of the hosting provider to ensure the best pick. To help you out, here are some factors to consider:
Upgrade Options: As your website grows, so will its demands. Ensure your hosting provider offers scalable upgrade options. Whether it’s moving from shared to VPS hosting or scaling up your server resources, flexibility is key to seamless growth.
Storage and Bandwidth: Evaluate your storage and bandwidth requirements based on your website’s content and expected traffic. Providers should offer ample storage space and sufficient bandwidth to handle your visitors without compromising speed or performance.
Control Panel: It’s essential to have a user-friendly control panel, such as cPanel. It helps manage your website without being a tech expert. To handle domains, databases, emails, and other crucial features with ease, a control panel is a must.
Security: You must choose hosting providers that offer robust security measures. Some of them include SSL certificates, firewalls, DDoS protection, and regular backups. A secure hosting environment protects your data from hackers and prevents data loss.
Uptime: Downtime can harm your website’s reputation and revenue. Choose a hosting provider with a proven track record of high uptime, ideally 99.9% or higher. Reliable uptime ensures your website is accessible to users around the clock.
24/7 Customer Support: Technical issues can arise at any time. Reliable 24/7 customer support is essential to quickly resolve problems. Opt for providers that offer multiple support channels, including live chat, phone, and email, to get assistance whenever you need it.
Refund Policy: A transparent refund policy provides peace of mind. Check if the hosting provider offers a money-back guarantee within a specified period. This allows you to test their services risk-free and ensures you’re not locked into a service that doesn’t meet your expectations.
Additional Features: Look for added benefits that enhance your hosting experience. Features like website builders, free domain registration, email hosting, and automated backups can add significant value and convenience.
By considering these factors, you’ll be well on your way to choosing a hosting provider that ensures your website’s success. Happy hosting!
Step 04: Choose A Suitable Blogging Platform
After purchasing the domain and hosting, the next step is to choose a blogging platform. This platform will let you manage, edit, and publish your site’s content easily.
There are many blogging platforms available but I recommend the WordPress content management system. Creating a travel blog is simpler and more convenient with WordPress compared to other platforms.
But don’t just rely on my words. Let’s find out why WordPress should be your go-to blogging platform.
Why Choose WordPress?
According to Search Logistics, A massive 43.2% of all websites on the internet use WordPress as of June 2024. Also, a total of 63.3% market share of the entire CMS market is owned by WordPress.
Here are a few reasons why WordPress is widely popular:
Easy to Use: WordPress is known for its user-friendly interface. Even beginners with no coding experience can create and manage a website using WordPress. This makes it possible for anyone to jump in and start building a website.
Open Source and Free: WordPress is open-source and free to use. Its large and active community of developers helps keep it up-to-date and secure. The open-source nature allows developers to modify the functionality as required.
Versatility: WordPress started as a blogging platform, but it can be used to create almost any kind of website. With the help of plugins and themes, you can build anything from a simple blog to an online store or even a complex membership website.
Large Plugin and Theme Supports: One of the biggest advantages of WordPress is its vast ecosystem of plugins and themes. Plugins add new features and functionality, while themes control its look and feel. From thousands of free and paid plugins available, you can pick the right one for your website.
SEO Friendly: WordPress is designed to be search engine friendly (SEO) out of the box. Your website is more likely to rank higher in search engine results pages (SERPs) with WordPress. There are many SEO plugins available that can help you further optimize your website.
Scalability: WordPress can grow with your business. Whether you are starting a small blog or a large e-commerce store, WordPress can handle it. As your website grows, you can add more plugins and themes to meet your needs.
Large Community: WordPress has a large and active community of users who can help you with any problems you encounter. There are many online resources available, such as forums, tutorials, and documentation.
Step 05: Design and Customize Your Travel Blog
With WordPress now installed, let’s begin crafting a captivating travel blog that truly stands out.
There are different ways to do it.
- You can use a travel theme and customize its appearance.
- Or, you can use a WordPress travel blog plugin like PostX.
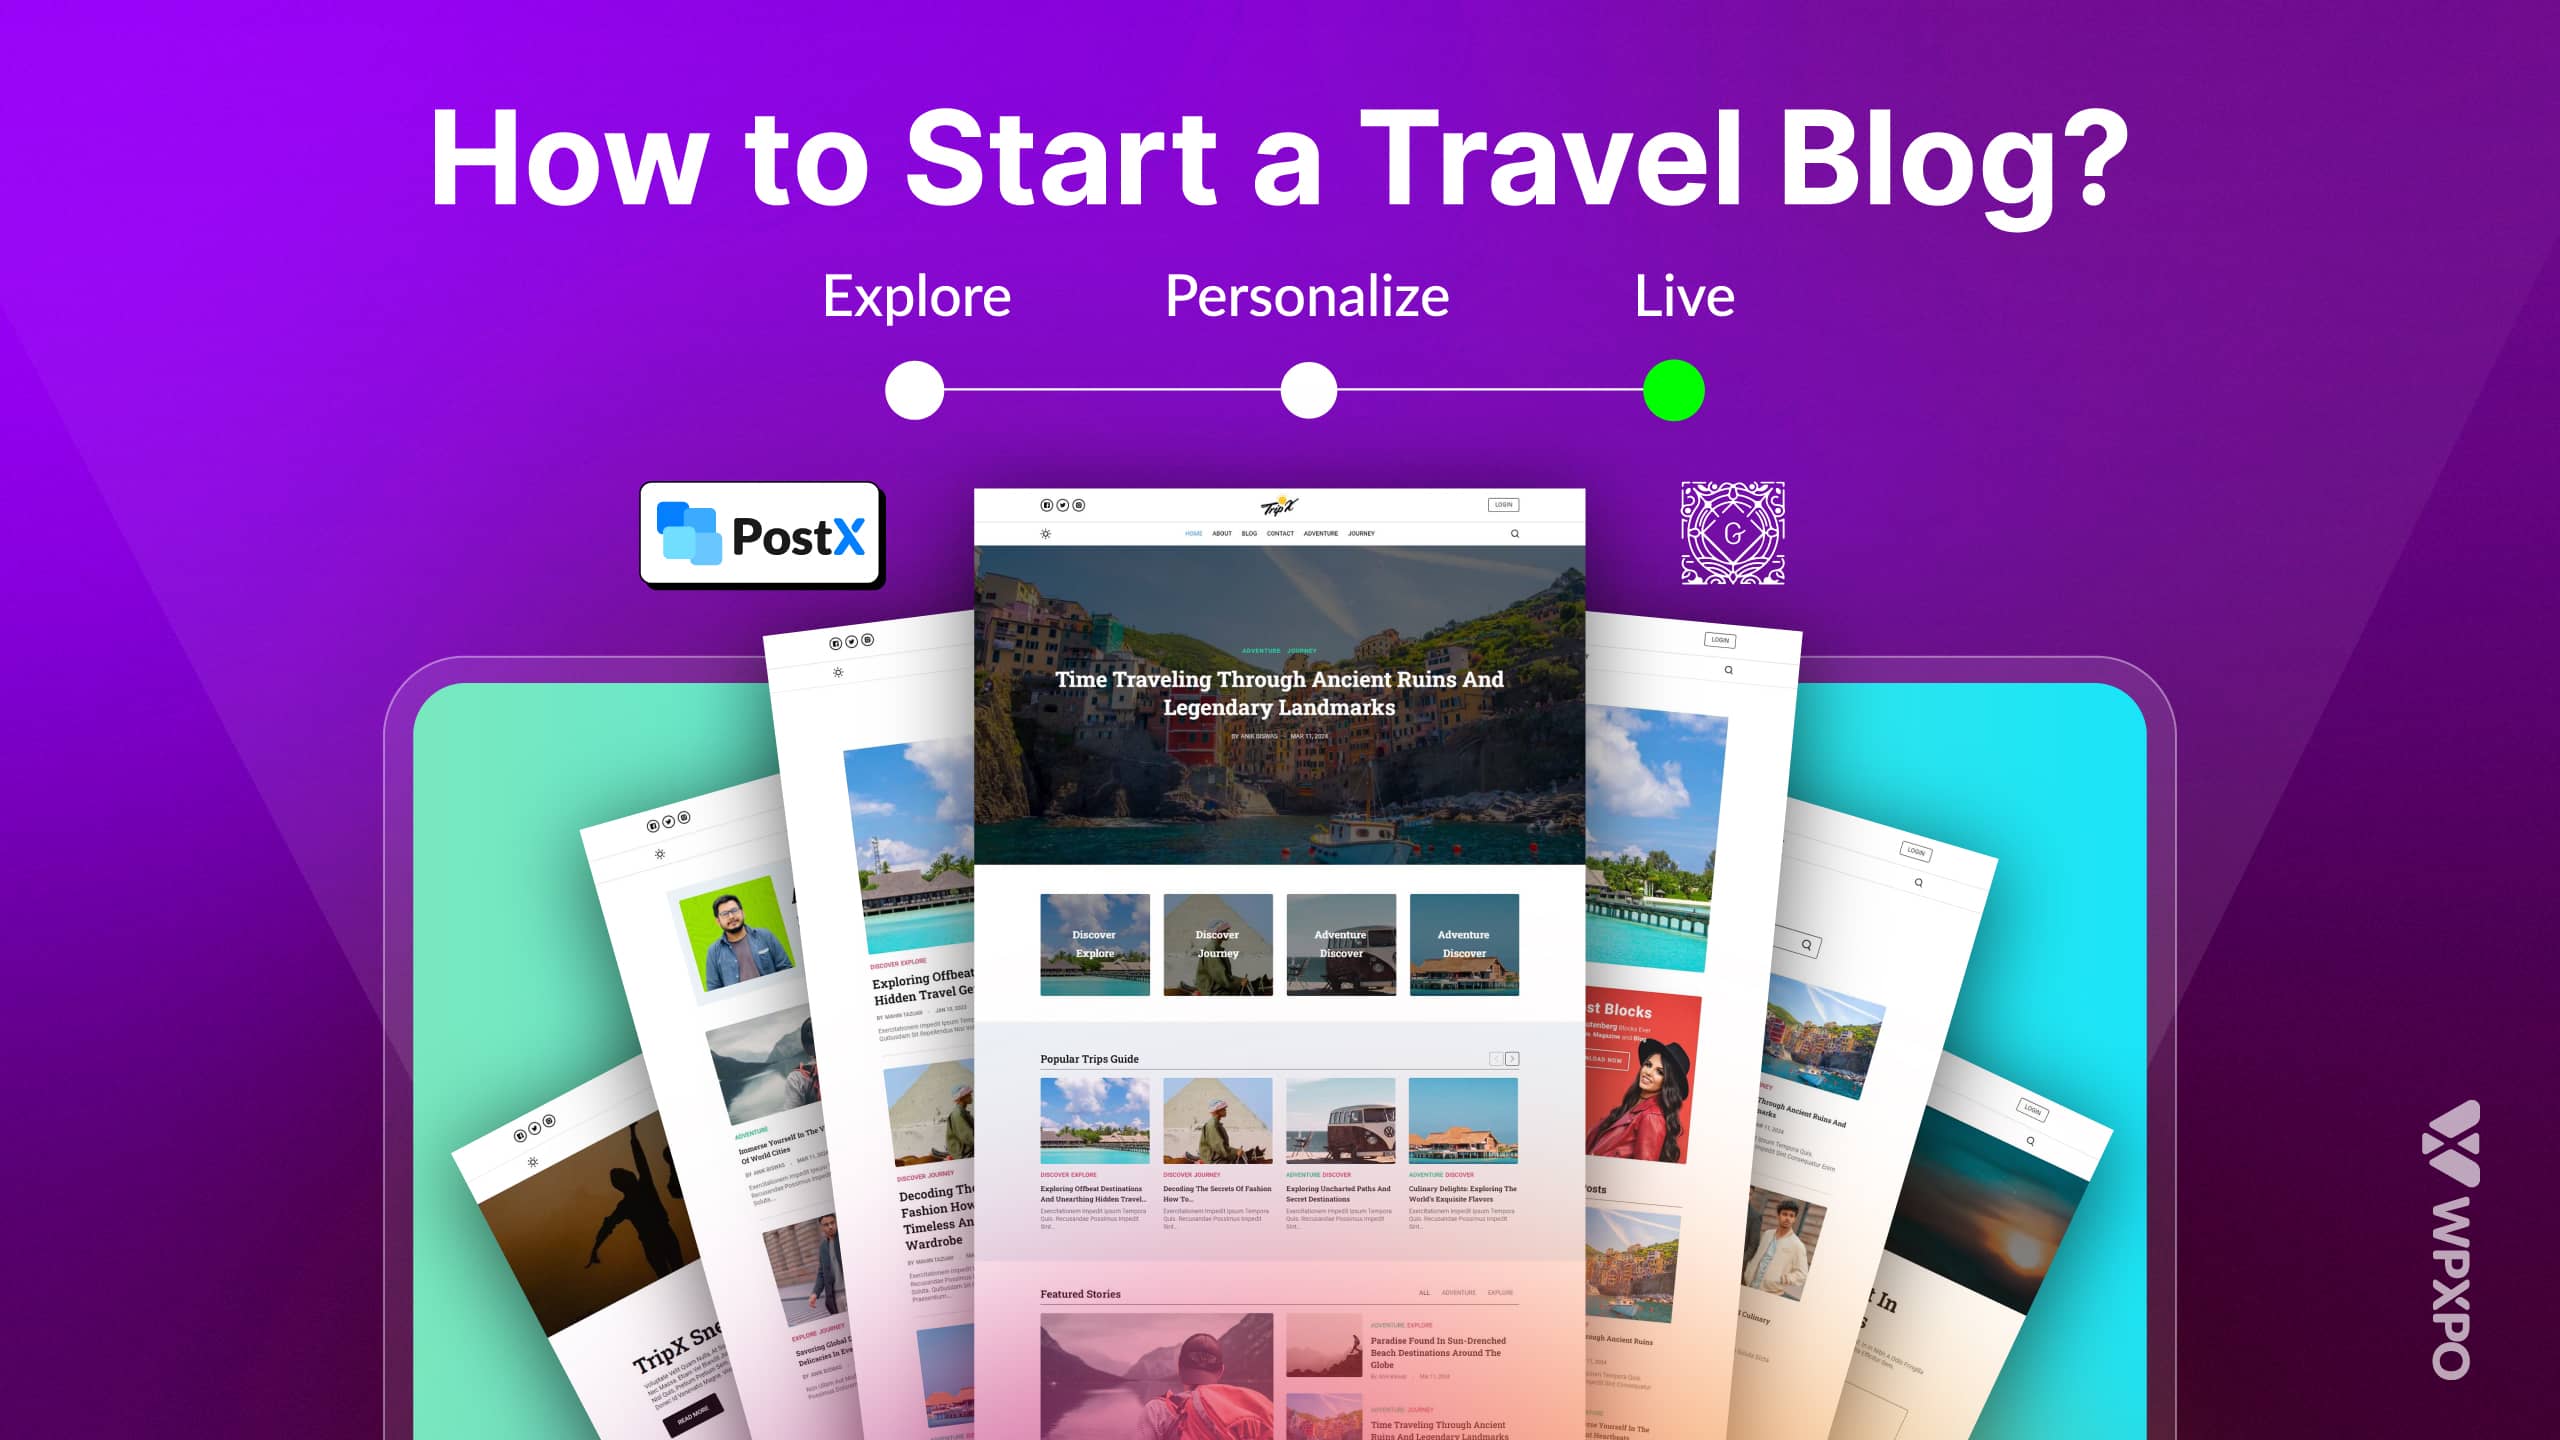
PostX is the number 1 Gutenberg Blocks Builder plugin to bring life to your dull websites. It offers a wide library of pre-made blocks and templates, dynamic site builders, useful add-ons, and much more.
So, I recommend PostX. Let’s create a travel blog together in just three simple steps using its Starter Sites feature.
To get started with the plugin, install the updated version of PostX first. Now, let’s dive into the steps.
I. Pick A Travel Specific Template
Using Starter Sites, you can load a complete site that includes all the necessary pages. It will save a lot of your development time. PostX also has many starter site templates for different niches.
To get started, navigate to PostX > Starter Sites from the Admin Dashboard.
Select the Travel Hub or any other template that best fits your particular niche
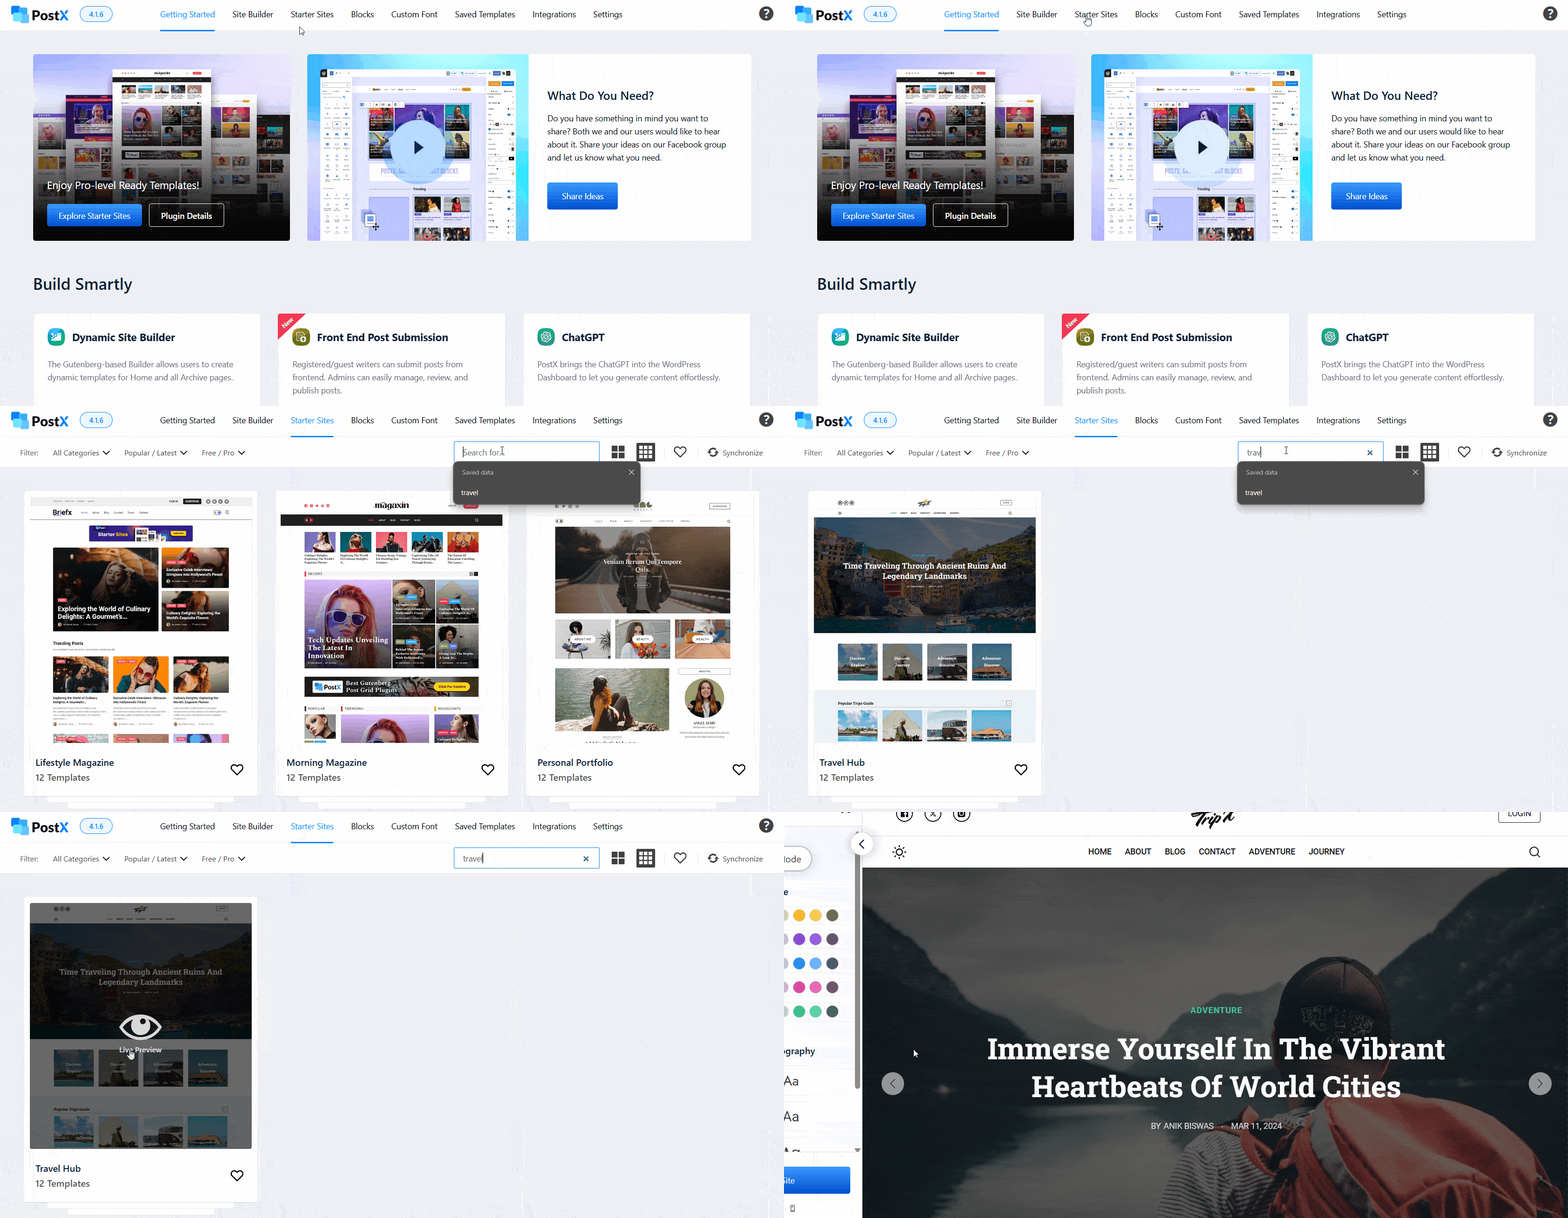
Explore all the fantastic Starter Site templates by visiting the link Explore Starter Sites
II. Personalize the Look
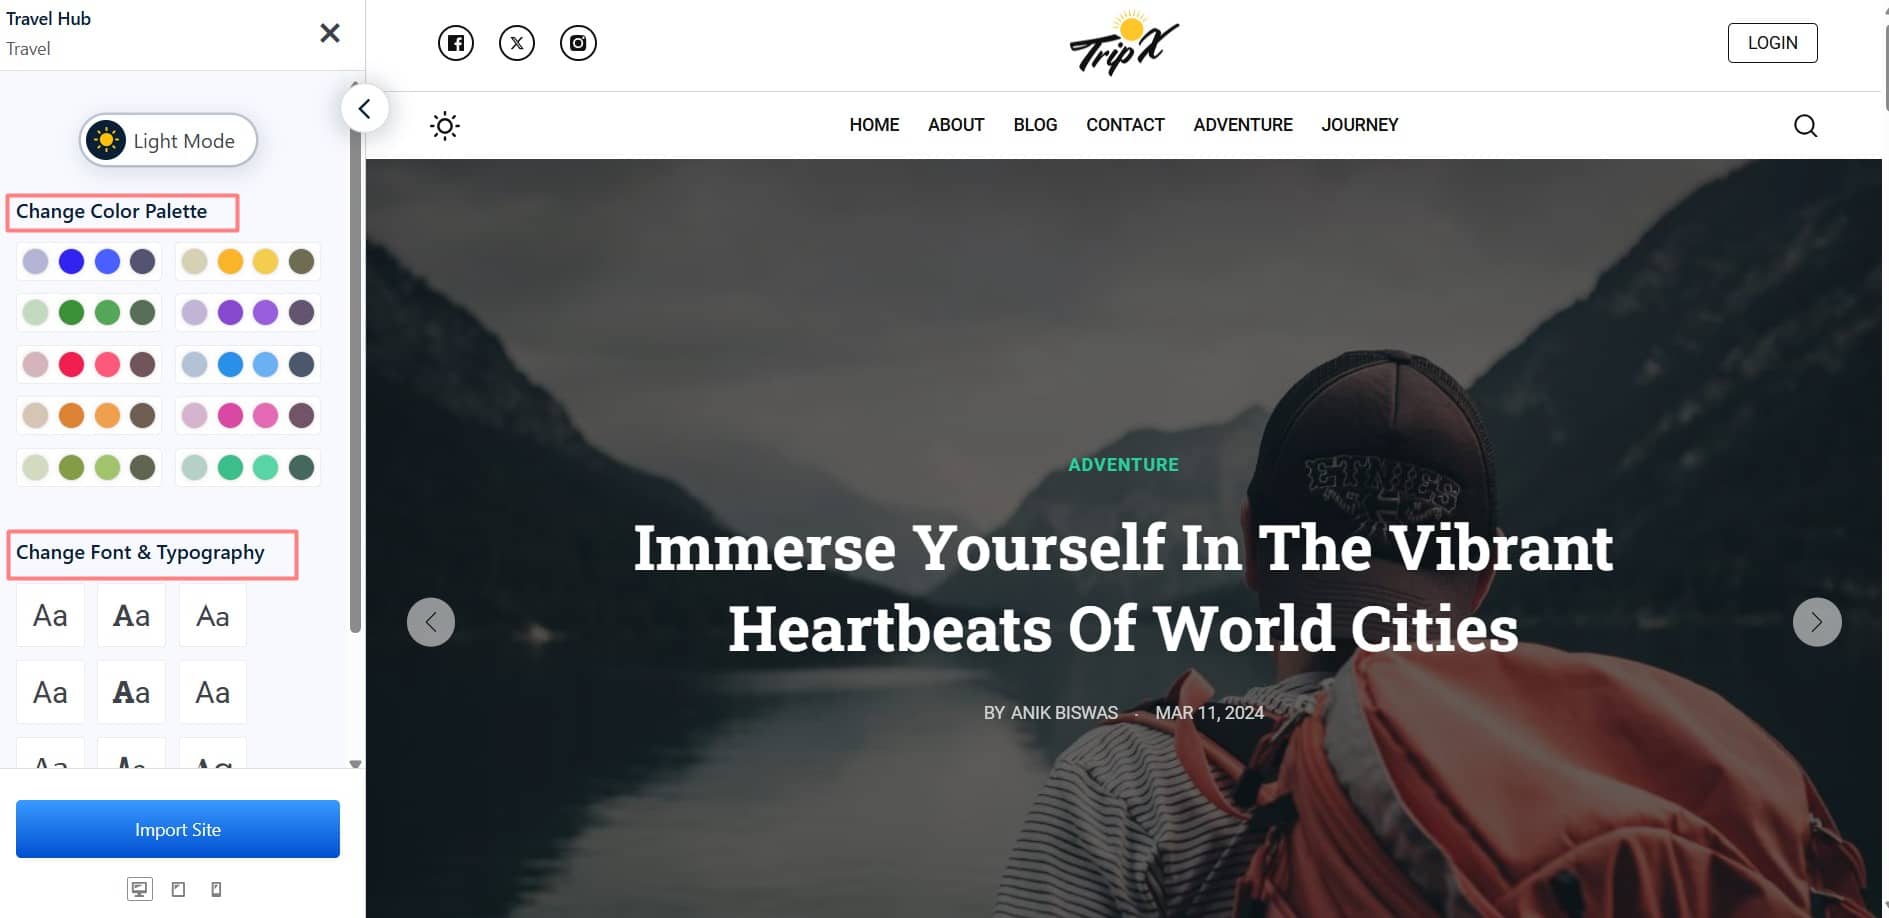
After choosing a template, you’ll see a page where you can pick colors, fonts, and typography.
So, choose a specific color or font and select it from here. You can make your entire travel blog look consistent.
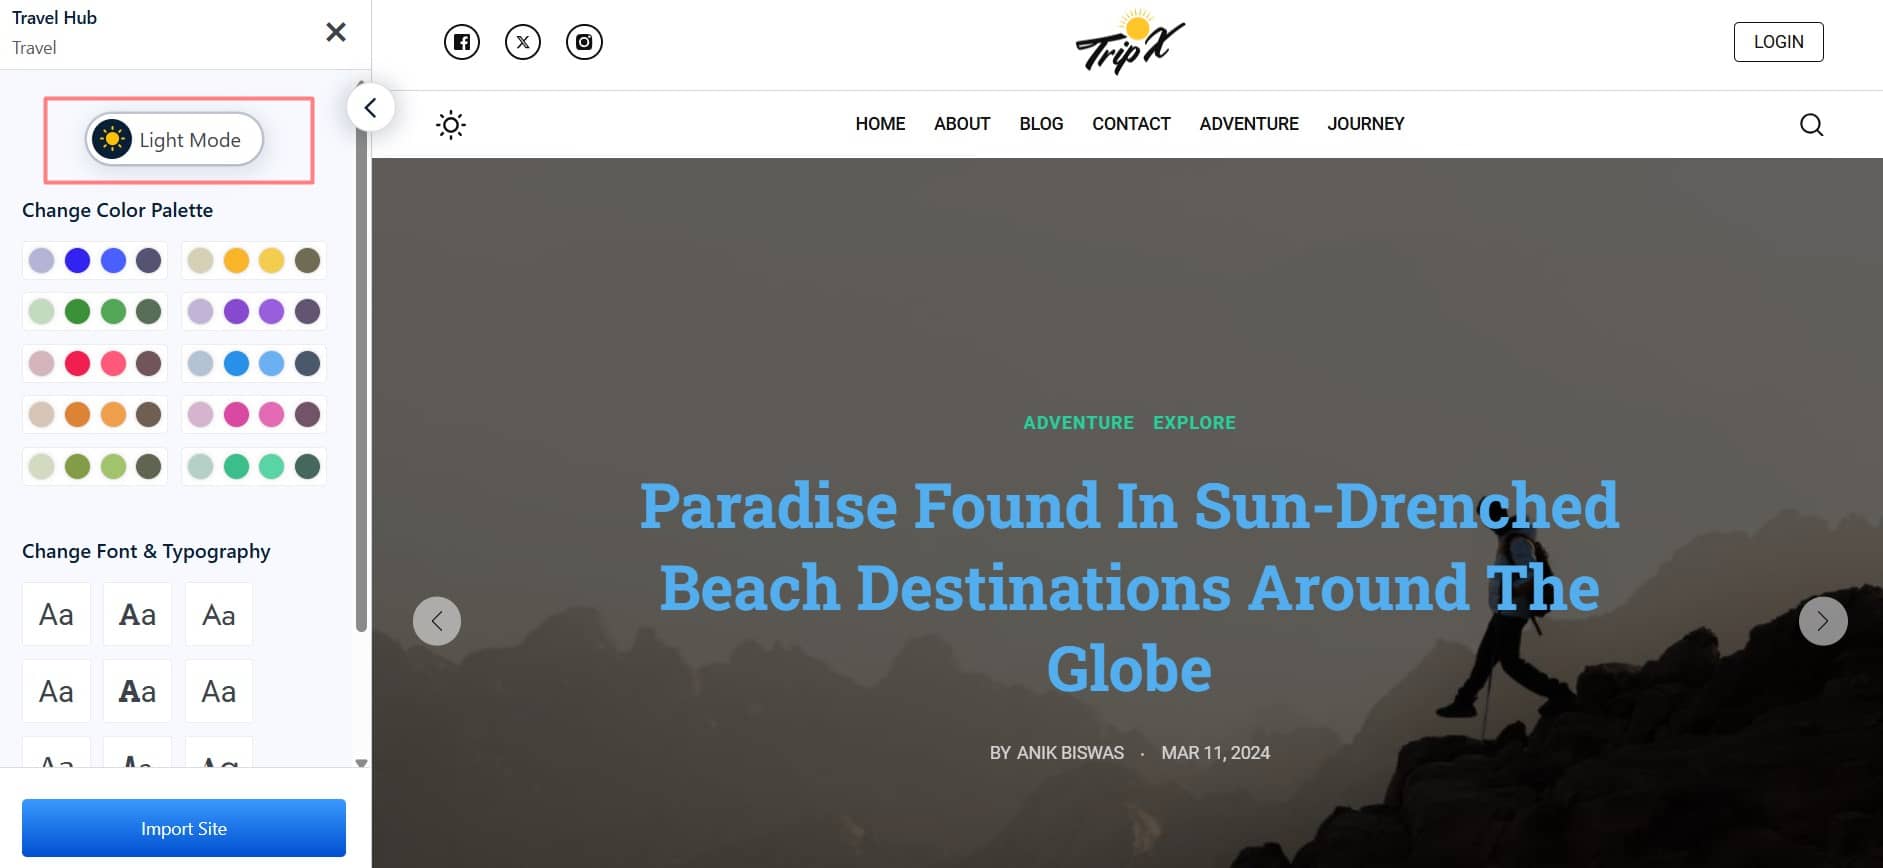
Also, you can enable dark mode for your travel blog with one click. Just click on the Light Mode option to make your site easier on your users’ eyes.
III. Import The Entire Site
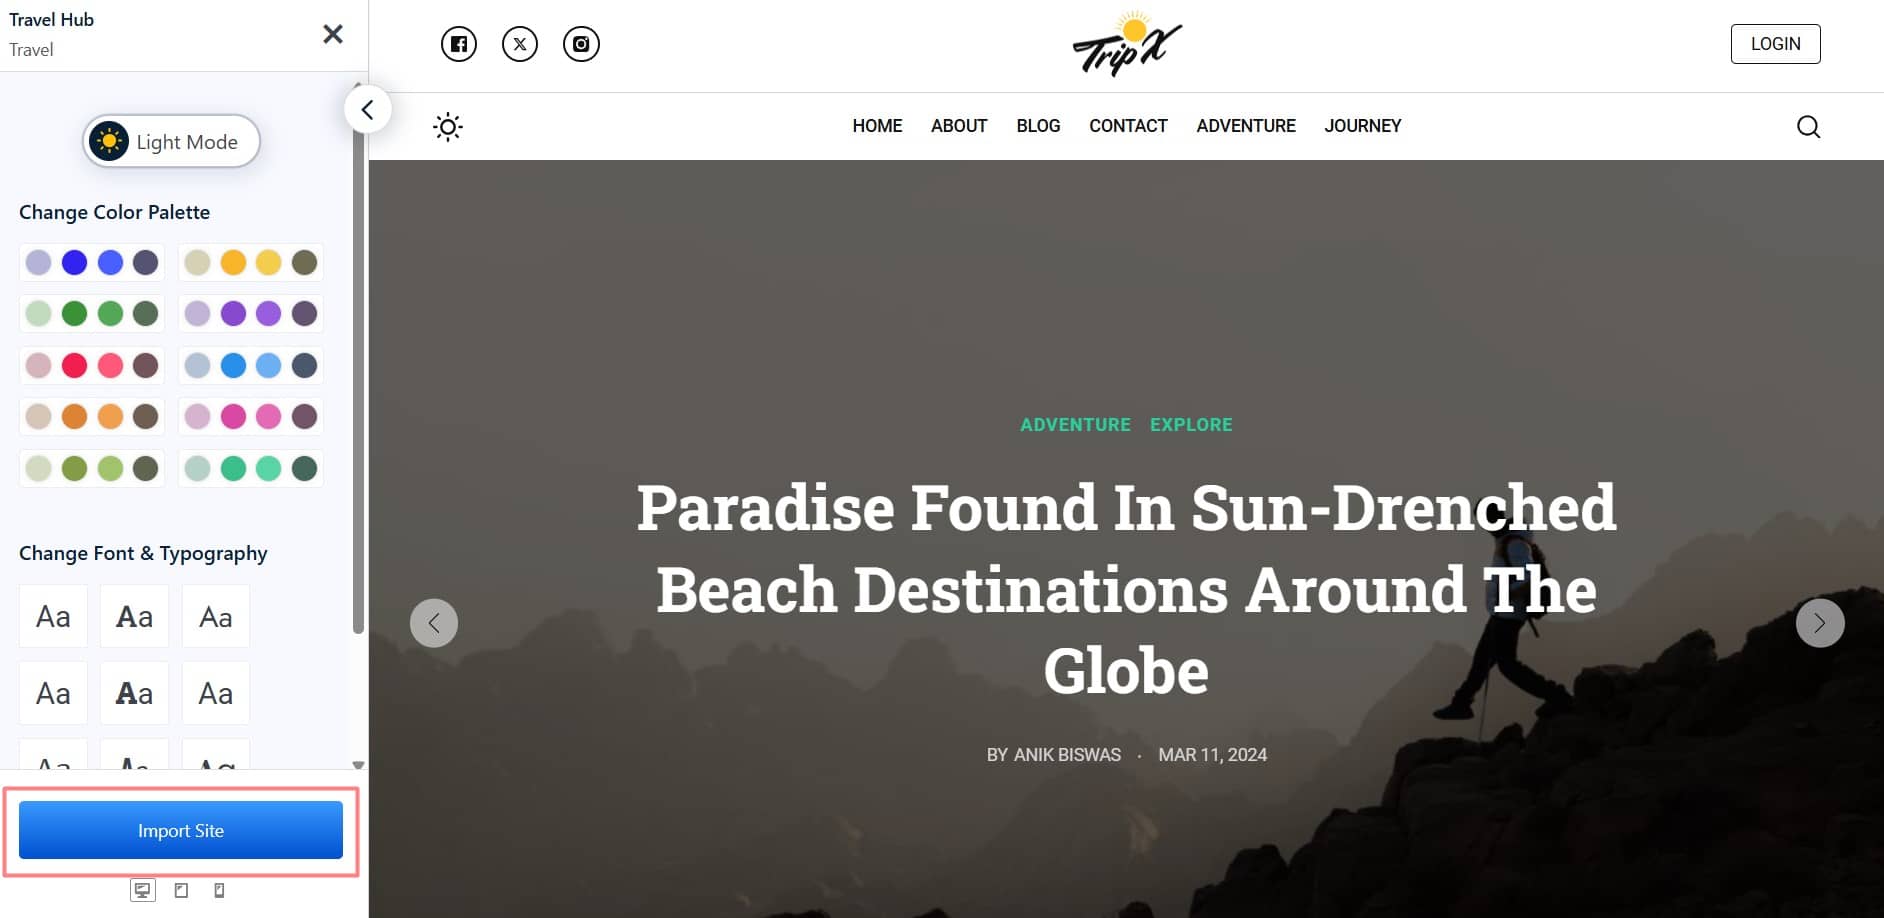
After deciding on the color palette and typography, click on the option named Import Site.
A popup of Import Settings and Template options will appear. In the import settings, you can choose whether to include dummy posts or not. You can remove previously imported sites and install the necessary plugins directly from here.
Next, navigate to Templates/Pages to pick the templates or pages required for your travel blog.
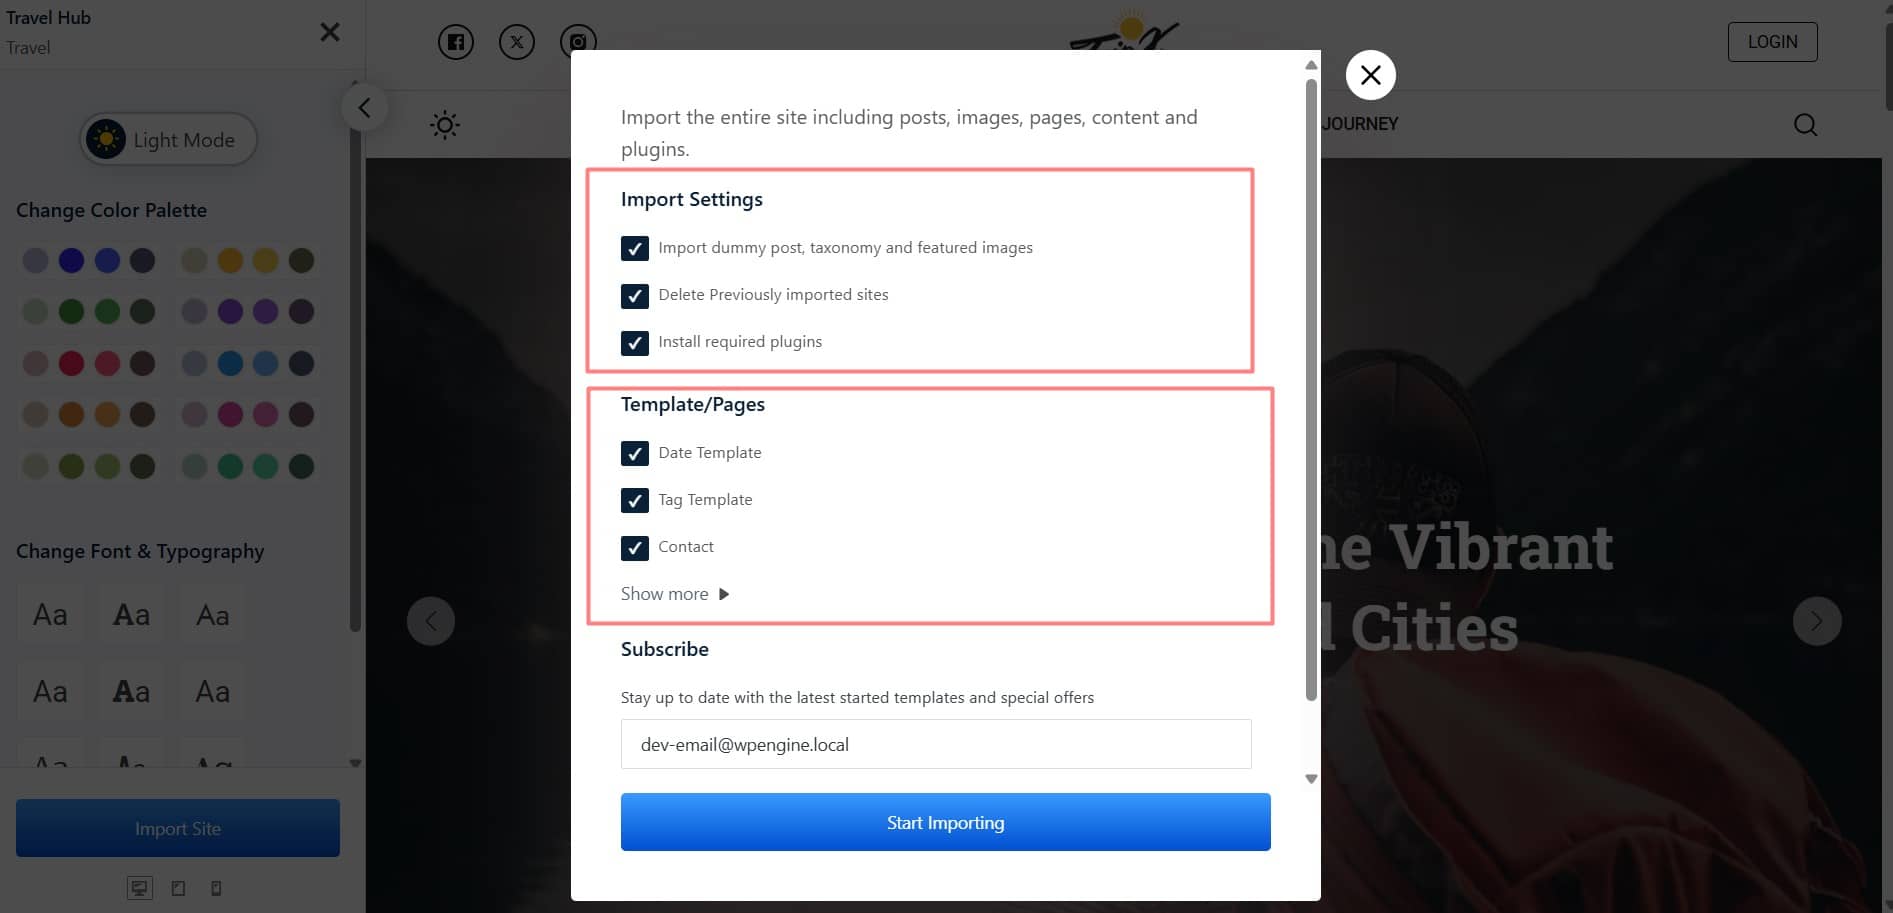
After choosing these options, click “Start Importing.” The process will begin, and you can relax while it is completed. Once done, your site will have all the essential pages ready for you to customize further.
This polished design will surely grab visitors’ attention and make your site look professional and appealing.

Now you can see the pages are already made and look great. It has everything you need. You don’t have to make these pages from scratch. This is the quickest way to start your travel blog in just a few hours.
If you want to see these steps in a video, check out our helpful guide on how to start a travel blog.
Customize Your Travel Blog with Site Builder
Now that you have built your travel blog site with PostX, You can fine-tune each section of a travel site easily with its abundant features.
PostX has many handy features. One of the unique features is Site Builder which allows you to craft custom post templates.
With a custom post template, you can decide how each page on your site looks. If you want to make a special post look different from the others, you can do that too. PostX makes all this easy for you.
Let’s say you want to change how all blog posts look on your travel site. Follow these steps:
- Navigate to PostX > Site Builder > Create Template > Singular in your admin dashboard.
- Choose a premade template or make one from scratch.
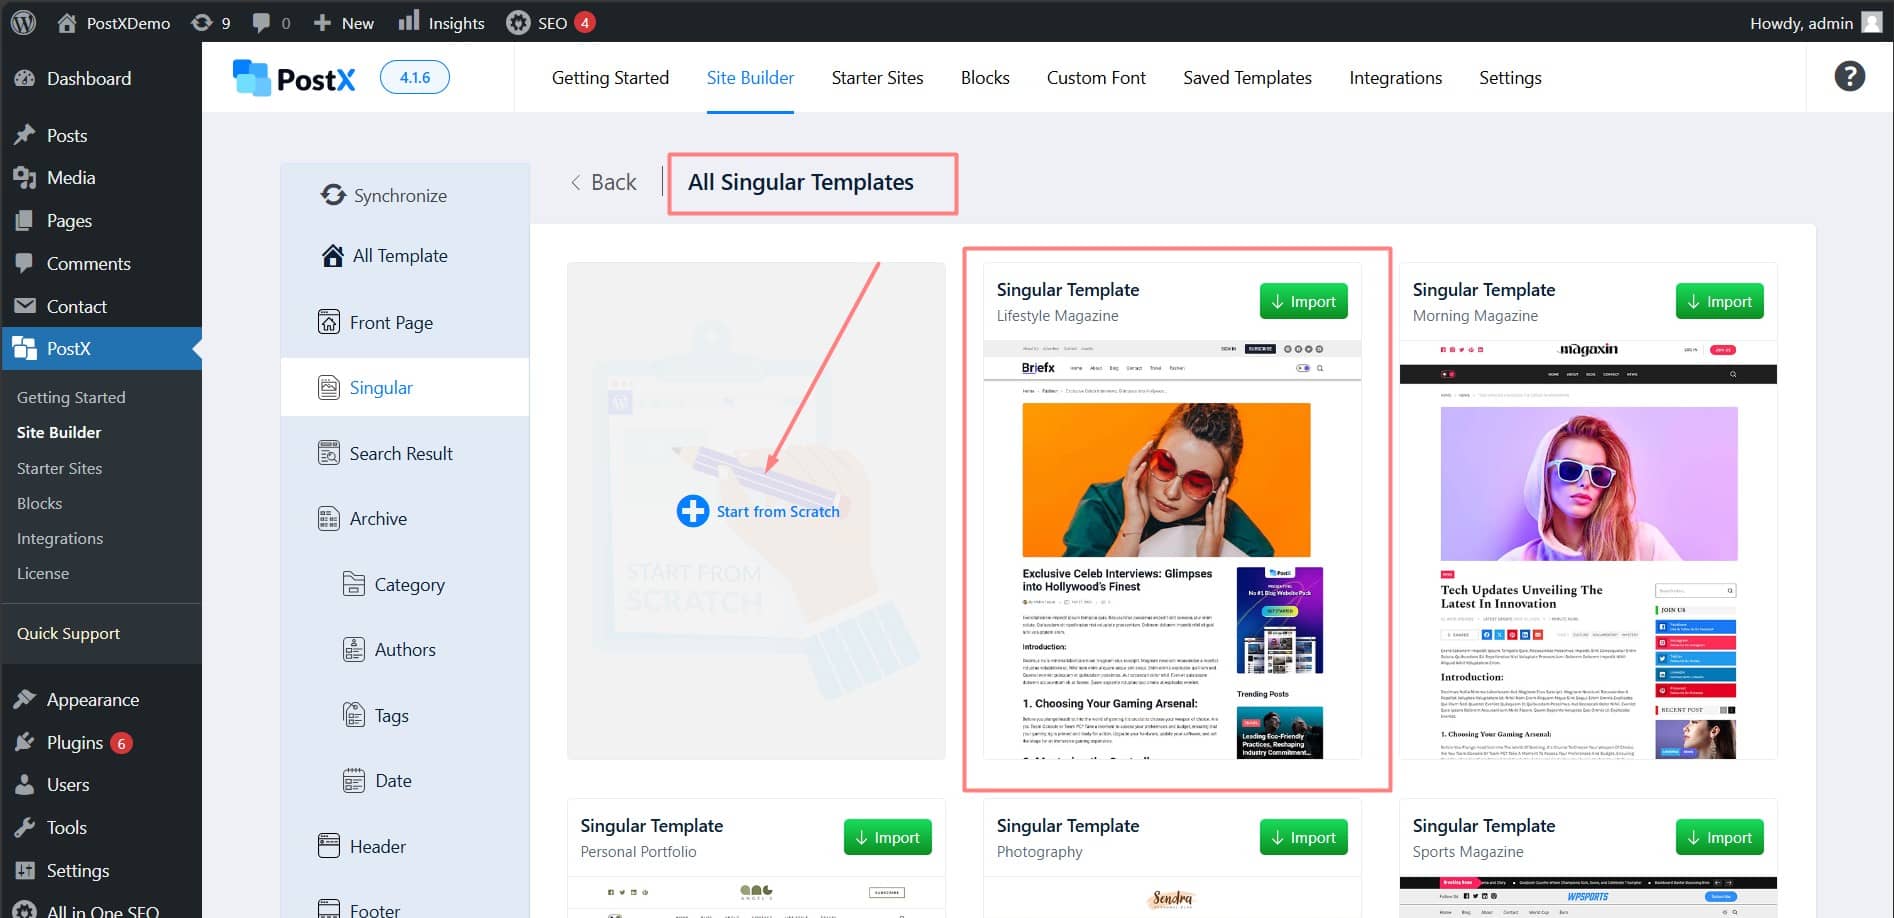
- After you bring in or make a template, you’ll see a section called “Condition.” Here, you can choose which page you want to change the design for.
- For this example, we will pick “Posts” and “All” as the conditions. This means the template will change the look of all blog posts.
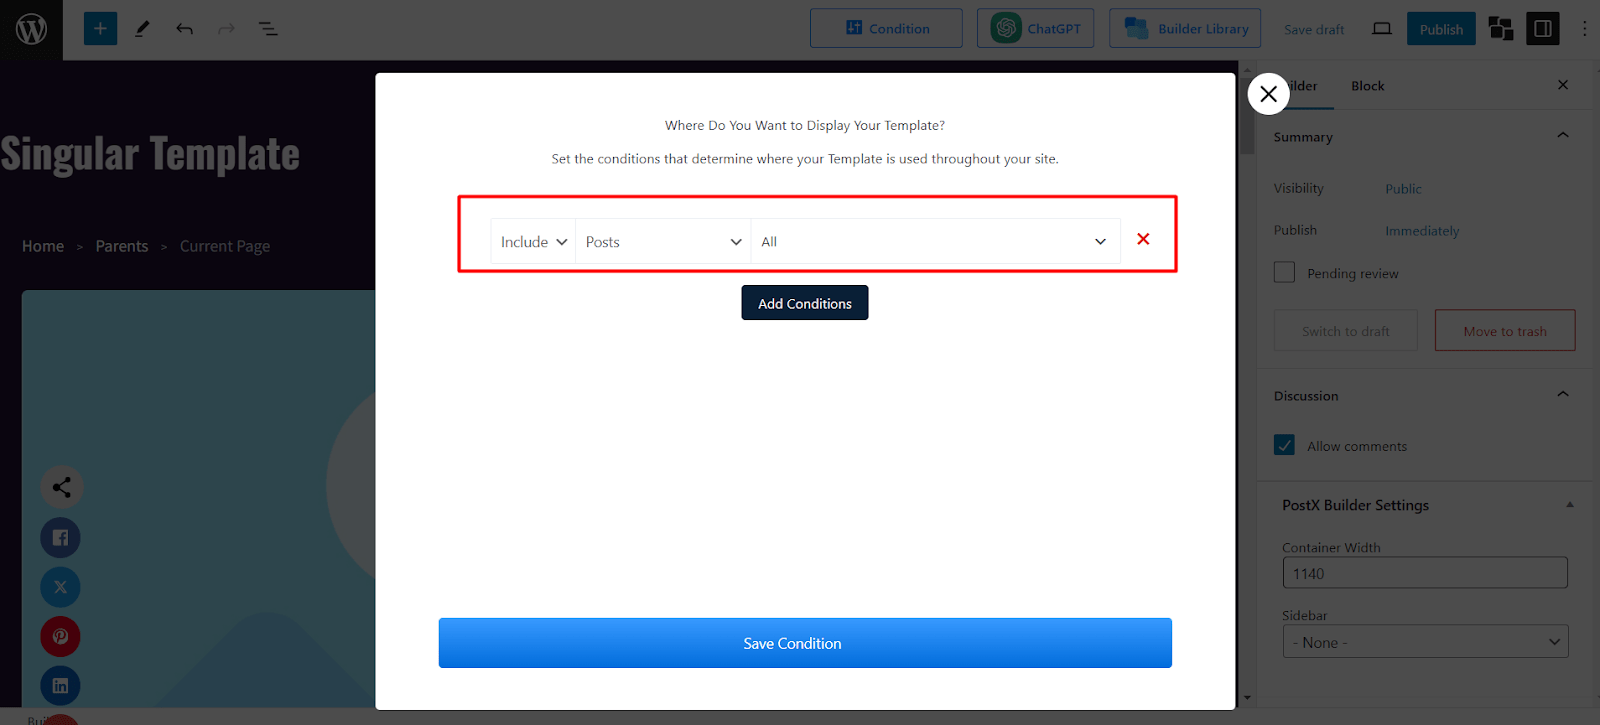
- After selecting the condition, hit the Save Condition button.
- Now, in the editor view, you have the freedom to add or modify blocks however you prefer.
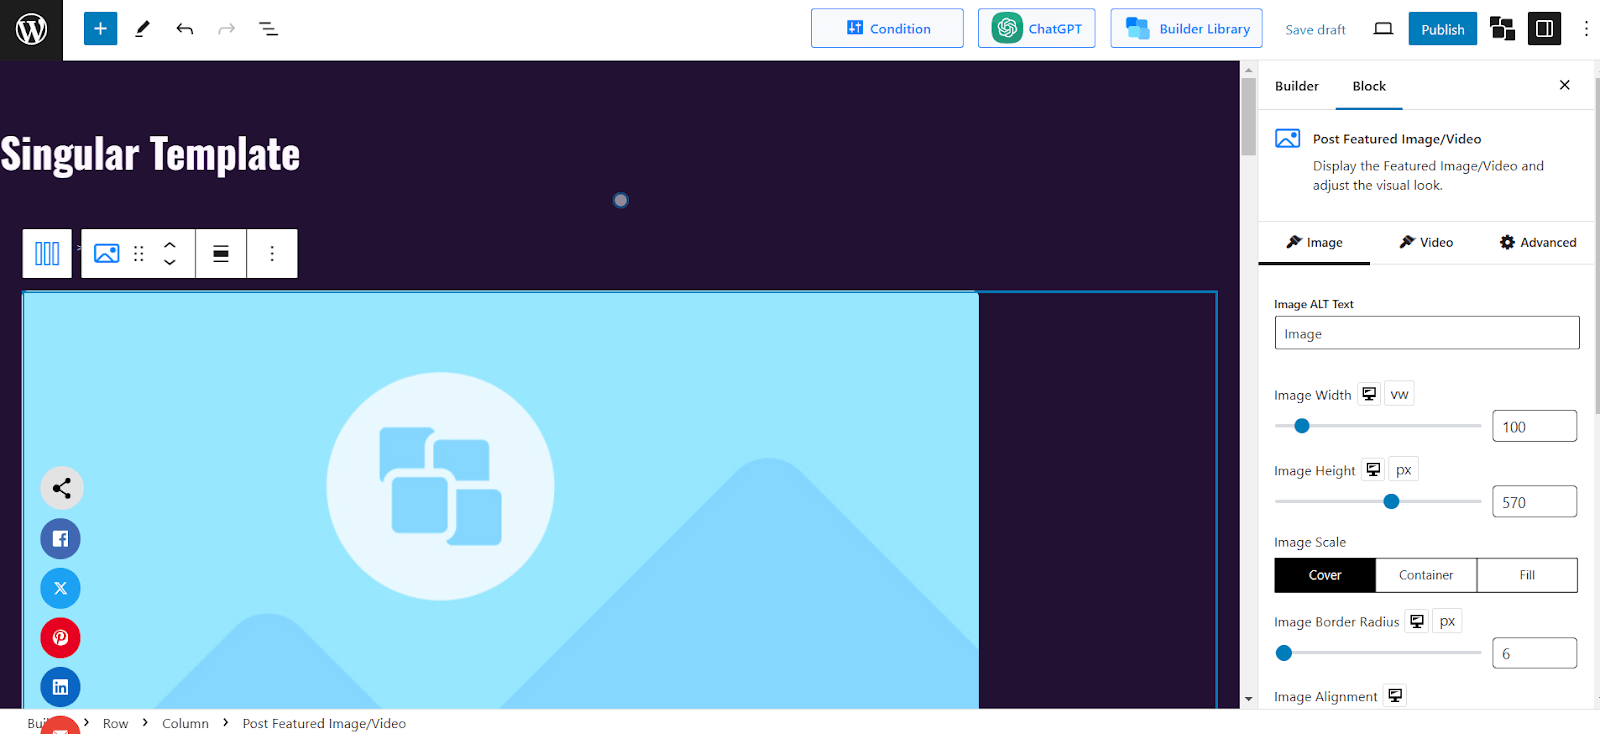
To change the post title color to green, click on the Post Title block. Then, change the color setting to green.
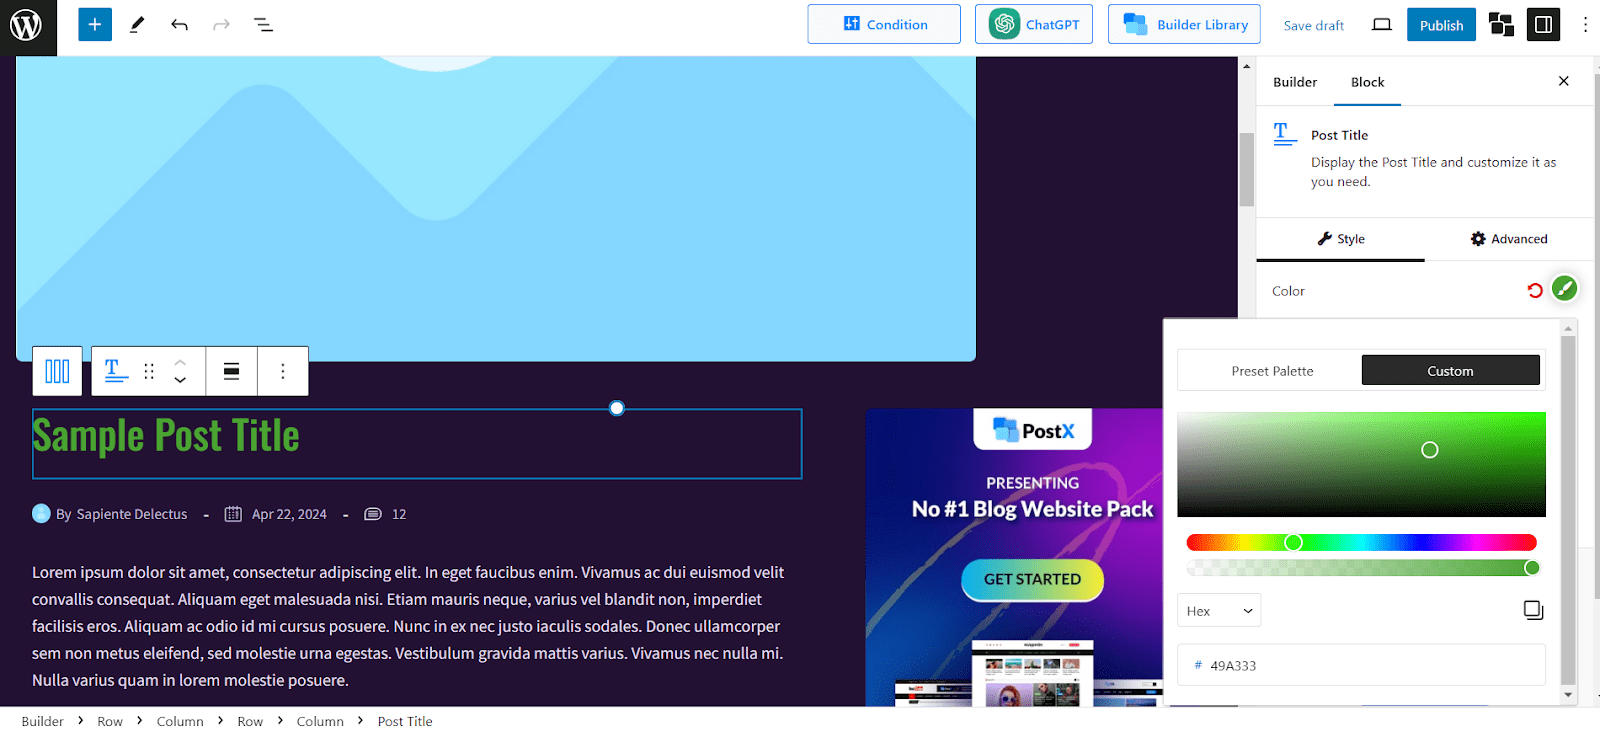
- After you have done with editing, hit the Publish Button to see the changes.
See! We made the blog post title green, as we wanted! You can also change other parts of your travel blog.
PostX is a special WordPress plugin that helps you make your blog look exactly how you like it.
You’ll be surprised by all the great features the plugin offers for you.. To know in-depth, check out the link Explore PostX
Step 06: Prepare Your Footage and Content
Now that your website is ready, it’s time to start blogging! It’s fine to experiment with different styles or topics at the beginning, but it’s important to build trust with your audience. Once you’ve done with your first post, keep on writing. You must maintain consistency, regularity, and quality. Focus on the following:
- Show your personality
- Start with your best stories
- Be friendly and approachable
- Avoid sharing your worst travel stories initially
- Prepare a minimum of 15 to 20 pieces of content before launching
Here are some blog ideas and formats you can consider:
- Top 10 Must-Visit Destinations
- Write a brief description with images for each destination.
- Hidden Gems: Underrated Places in [Country]
- Highlight lesser-known locations with unique stories.
- Budget Travel Tips for [Destination]
- Give practical advice in a numbered list with cost-saving strategies.
- Cultural Experiences: A Day in the Life of [City/Region]
- Publish narrative posts with a focus on local culture and traditions.
- Best Local Foods to Try in [Destination]
- Highlight posts with mouth-watering descriptions and photos.
- Adventure Activities You Must Try in [Destination]
- Action-packed list with tips for thrill-seekers.
- How to Travel Sustainably in [Destination]
- Eco-friendly travel tips and recommendations.
- Solo Travel Tips for [Destination]
- Personal experiences and advice for solo adventurers.
- Best Time to Visit [Destination]
- Seasonal guide with pros and cons for each season.
Prepare Footage
Images and videos are essential for travel blogging. You can not be able to build a connection and boost the emotion of your audience with text alone. In fact, according to OptinMonster, Articles with images get 94% more views than those without and videos are 50 times more effective at driving organic search traffic than plain text.
Here are some guidelines you should consider:
Invest in Quality Equipment: Consider getting a DSLR, drone, tripod, or other gear to enhance your visuals.
Take Travel Photography Courses: Invest in and join quality travel photography courses to improve your capturing skills.
Follow Travel Photography Tips: Check out tips to improve your travel photography skills.
Use Stock Images: Utilize stock images until you capture new content on your next trip.
Edit Your Photos: Consider free photo editing software to filter and adjust your shots.
Create Compelling Videos: Use a free Video Maker to craft engaging videos.
Leverage Photo Tools: Use tools to gather and prepare your content.
Step 07: Grow Your Audience And Connect with the Community
Create About Page: The first thing you should consider creating is an about page. This is the main and highly trafficked page on any travel blog. It tells people about your identity and personality and what they can expect from you. Keep it personal and friendly to showcase your real version.
Use Social Media: In today’s world, social media is the single place where most people gather. You will find like-minded people and your target audience easily on social media. You can also build community and increase your brand value through social media. You can start with all the popular platforms, such as Facebook, Instagram, Pinterest, and YouTube.
Tip: Don’t solely rely on Facebook and Instagram to operate your travel journey. These platforms could easily disappear or be replaced by other platforms in the future. Also, you don’t have any control over these mediums. So, I recommend, creating a website from the very beginning.
Word of Mouth: Start sharing your travel blog with your friends and family. Also, inform people you meet on your adventures about your blog. When people want to know about your job, say how you just started a travel blog and invite them to take a look.
Build A Newsletter: After getting a good amount of visitors, you can motivate them to subscribe to your newsletter. You can start engaging and educating your audience with email campaigns.
Network With Other Bloggers And Communities: You can not grow alone, so engage with like-minded people. You can like and share comments on their posts and also collaborate to build a strong community. Also, it’s a best practice to link other blogger’s posts to your site when possible. Focus on becoming an active member of the travel community.
Pay-per-click ads: You can attract visitors by paid ads to your travel blog. It’s a costly one, but you can get a quality audience with these strategies. But I recommend not to use PPC at the beginning.
Optimize Your Site for SEO: SEO stands for Search Engine Optimization. It’s a free and popular way to gather organic traffic to your travel blog. So, optimize and write helpful travel content to rank on the first page of search engines.
Network with Tourism Partners And Brands: You are not starting your travel blog for your passion only, you need to monetize it to continue. So, a best practice is to connect with brands and tourism partners. You can collaborate with them and earn a good amount of money by promoting their products and services.
Tips to reach out to brands:
- Identify the brand you wish to partner with
- Do thorough research on them to understand their audience’s needs
- Reach out with a pitch of the exchange of services you can provide
Step 08: Make Your Travel Blog Profitable
Once you have enough traffic to your travel blog, you can start monetizing it. A travel blog can be a goldmine for you. It opens up a wealth of opportunities and diverse ways to generate revenue. It ensures you’re not confined to just one source of earnings.
Tip: The more people read your blog, the more money you can make. But it takes time to grow an engaging traffic. So, always focus on building your audience, not money.
You can consider the following:
Publish Sponsored Posts: According to Thrivemyway, a sponsored post is the main income source for travel bloggers and $200 is the average charge for a sponsored post.
For example, a sponsored post about a travel insurance company could focus on the importance of having coverage while traveling. You could share a story about a trip where travel insurance saved the day.
Just remember to include a note that the post has been sponsored to maintain your readers’ trust. ️
Showcase Ads: One of the best ways to monetize your travel blog is to get paid by displaying ads on your site. According to Thrivemyway, 94% of travel blogs sell advertising. You can add Google Adsense or Custom ads for local businesses.
Start Affiliate marketing: You can earn by promoting products from different businesses. You shout out the products on your travel blog and social media using a unique tracked link. When someone buys through this link you will earn a commission.
Here are some common travel affiliate programs to consider: Booking.com, Hostelworld, Agoda, Airbnb, Skyscanner, Expedia, Viator, and GetYourGuide.
Offer Premium content: you can create exclusive content for premium readers. Such as premium guides, digital downloadable, eBooks, or even private consultations.
For example, if you’ve created a PDF guide to the best coffee shops in New York City, you could charge readers $5 to download it.
Take Donation: Taking donations is nowadays common in the content creation world. So, to offer more quality content, you can ask for a donation without hesitation.
Arrange Workshops and Sell Courses: Based on your experience and expertise, you can educate travel lovers. Share your unique tips and tricks in exchange for payments. For example, you could offer a course on how to travel on a budget.
Sell photos and videos: Your travel photos and videos are valuable assets. These unique visual stories aren’t free to create and can be sold at a good price. If they’re high quality, you can easily earn money from them.
Sell Travel-Related Products: You can add an online shop to your travel blog. Sell your products or branded items like luggage, passport holders, sunglasses, and other travel gear. You can also create a dropshipping website.
Step 09: Follow Other Travel Bloggers for Inspiration
Following other travel bloggers is a great way to get inspired for your improvement. By seeing how others explore the world, you can learn and plan your travel blog better. It’s a fun way to stay motivated and connected with travel experts.
Here are some renowned travel bloggers to follow:
Mark Wiens: A food and travel vlogger with a massive following, Mark explores the world one delicious dish at a time

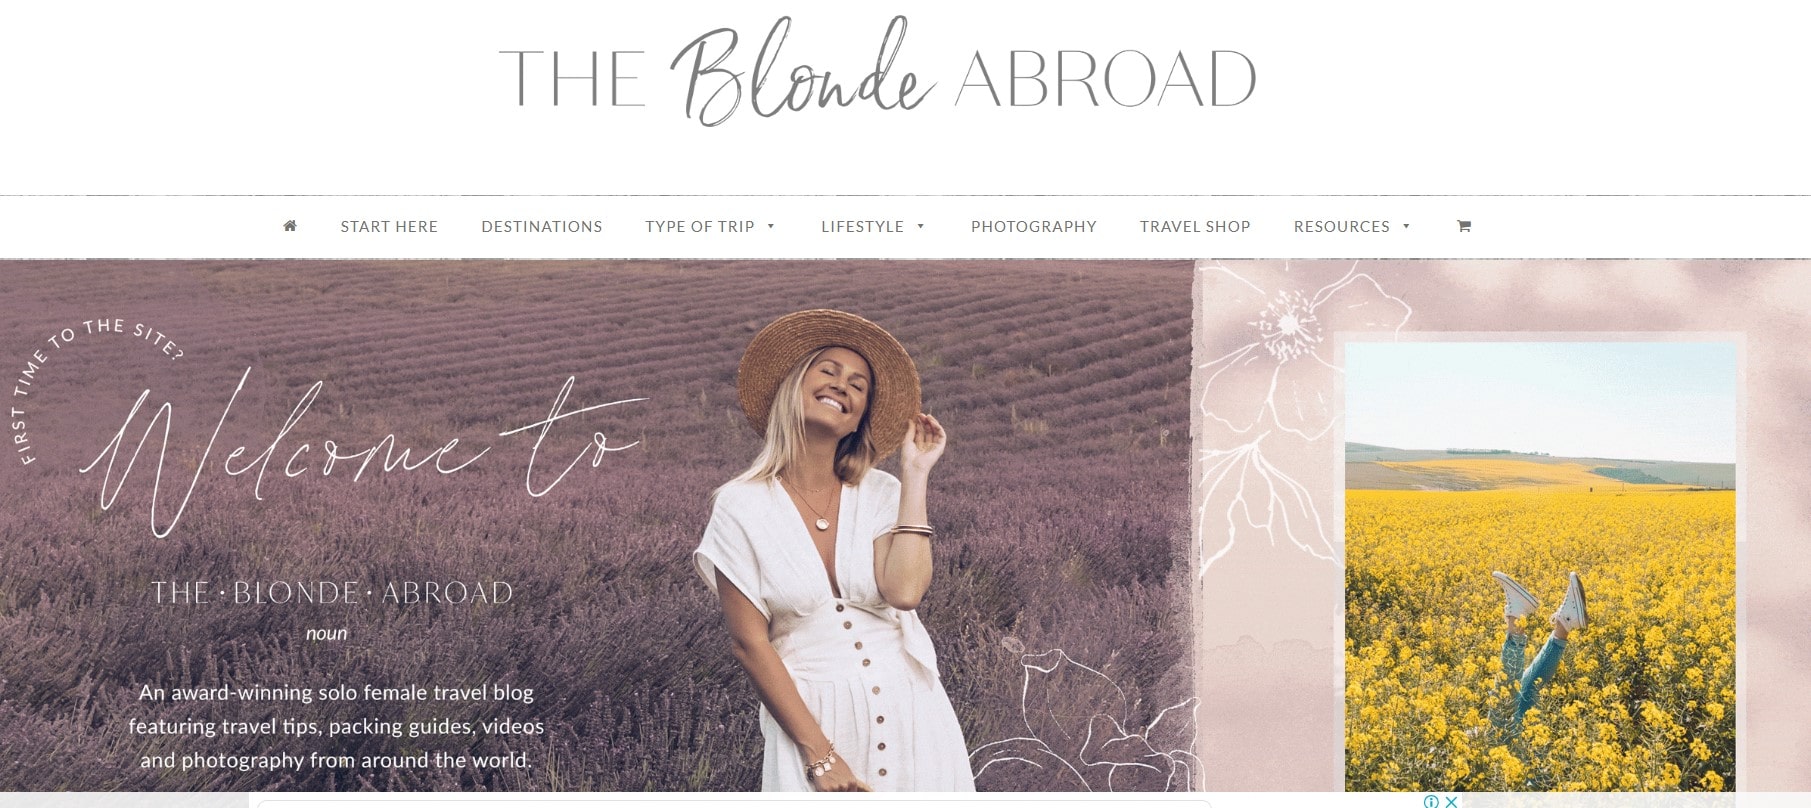
The Blonde Abroad: Kiersten “Kiki” is a globetrotter with a passion for adventure and luxury travel. Her blog is filled with stunning photos and inspiring stories of her journeys around the world.
David Lebovitz: A renowned pastry chef and author, David Lebovitz shares his love for food, travel, and life in Paris.

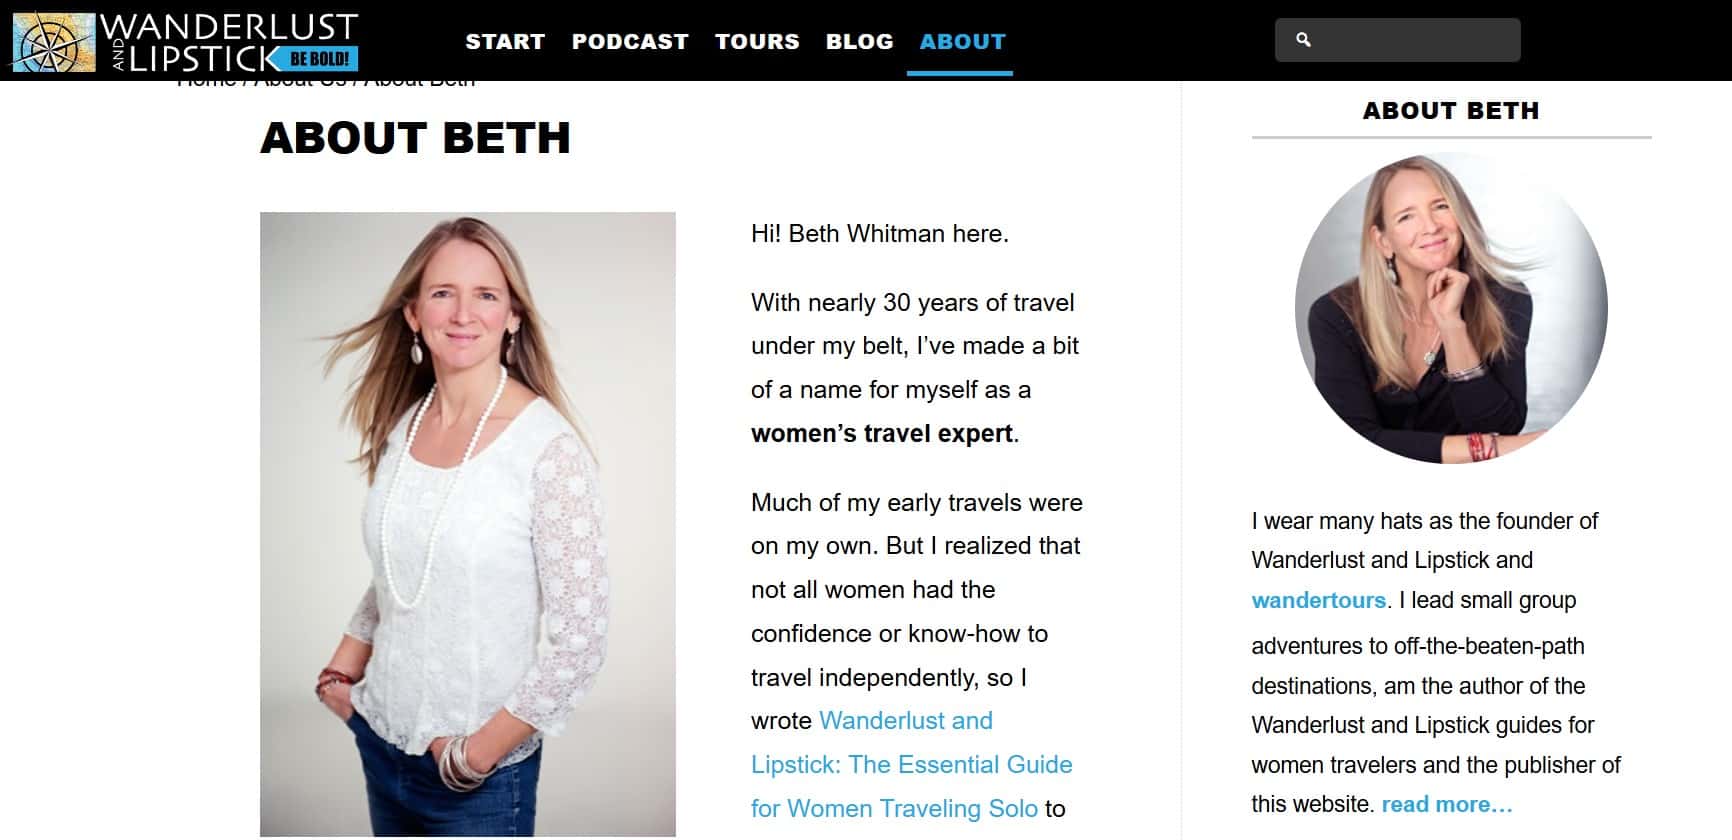
Wanderlust and Lipstick: A fashion and travel blog with beautiful photography and stylish travel inspiration.
Resources You’ll Love
Happy Travel Blogging!
In conclusion, offering a well-organized and helpful travel blog is crucial for the success of your blogging journey. Keep your audience up-to-date about new places, new offers, and adventures they can experience too.
In this guide, I explained the meaning of a travel blog and a step-by-step guide for creating one. I introduced the most affordable and suitable site builder plugin PostX to meet your travel blog’s requirements perfectly. Even with the free version, you can do a lot.
I also focused on the importance of choosing a relevant name and logo for your blog. I recommended factors for selecting the right domain and hosting provider.
Finally, I shared tips on how you can engage your audience and monetize your travel blog.
By following these steps outlined and carefully considering your audience, you can be a successful travel blogger for sure.
FAQs
How can I make money from my travel blog?
You can earn money through various methods: displaying ads, partnering with brands for sponsored posts, promoting products through affiliate marketing, selling your travel-related products, or offering travel planning services.
How much does it cost to start a travel blog?
Starting a travel blog is quite affordable. Your initial costs will mainly be for domain registration, website hosting, and possibly a basic theme.
How much money can I make from it?
Income from a travel blog varies greatly depending on factors like traffic, engagement, and the effectiveness of your monetization strategies. It can range from a small side hustle to a full-time income.
Do I need professional photography skills?
While professional-quality photos can enhance your blog, they aren’t strictly necessary. Engaging storytelling and informative content are equally important.
How often should I post?
Consistency is key. Aim to post regularly, whether it’s weekly, bi-weekly, or monthly. Focus on quality content over quantity.
Do I need any equipment to become a travel blogger?
To start, a laptop or smartphone is sufficient. As your blog grows, you might invest in a camera and other gear to enhance your content.
Can I start a travel blog without traveling?
Absolutely! You can begin by researching destinations, planning itineraries, and creating content based on your travel dreams. Actual travel experiences can come later.
