WordPress site owners, bloggers, and SEO experts always try to highlight featured, popular, and recent posts on the sidebar. But most of them don’t bother about highlighting categories to the sidebar. But categories are also as important as any other posts and pages of a WordPress site, aren’t they?
After empowering thousands of news, magazine, and blogging sites with PostX, we felt the same. So, if you are also wondering how to add categories to the sidebar in WordPress, here is the solution:
In this blog post, we are going to guide you through the three best methods to display categories on the sidebar of your WordPress site.
- Method 1: Use the default List Category block on the sidebar Widget.
- Method 2: Use the Sidebar Template Part if you are using a Block theme.
- Method 3: Use PostX for advanced control and a professional look.
Why Should We Add Categories to the WordPress Sidebar?
Before starting to explore the methods, you may want to know the reasons behind adding categories to the sidebar. However, you can skip this section if you already have your reason.
Improve Navigation
Having a category section in the sidebar improves the site’s navigation by helping visitors explore more content faster and better. It allows the readers to quickly find the blog posts that they might be interested in reading.
Boost Engagement and Reduce Bounce Rate
By encouraging readers to explore more content effortlessly, you can make them visit more pages. And, visiting more pages means the visitor will stay on your site longer. As a result, the bounce rate will be reduced, and dwell time will be increased.
Help Search Engines Understand Your Site
Having various relevant interlinks helps search engines understand the site’s structure. It helps them to crawl more content and index faster. So, chances are your content will rank higher and faster.
Help New Visitors
When a user visits for the first time, they might not know much about your website. So, if the categories are placed in a highlighted way, they can easily understand what type of content you have on your site. It will motivate them to become a regular reader if they find the content interesting.
You may also like to read:
Method 1: Add Categories to Sidebar Using Default WordPress Widgets
First, let’s start with the basic method. If your intention is just to list categories in the sidebar, you can do this with a default WordPress widget. Here’s how:
Step 1: Add a Category List Widget to the Sidebar
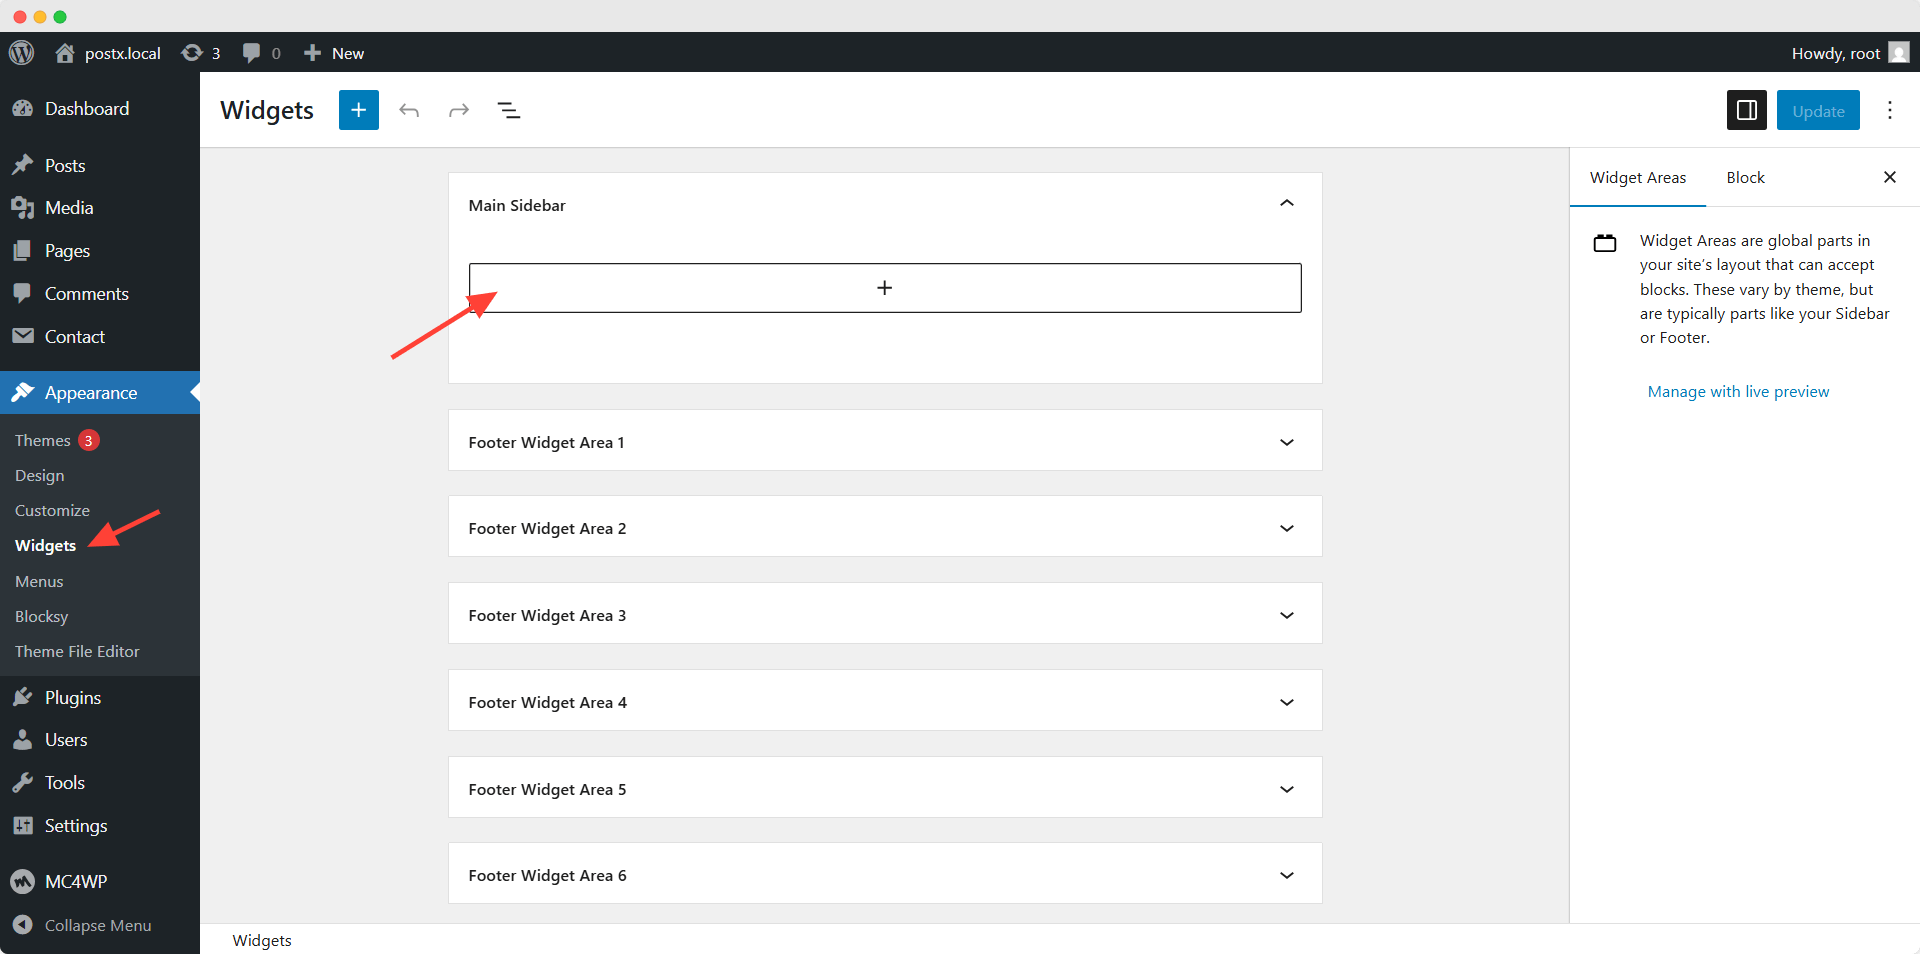
Go to the Appearance >> Widget from your WordPress dashboard and click on the plus icon. Now search for “Category List” and click on it. Here, you can see that all of our categories are listed on the sidebar.
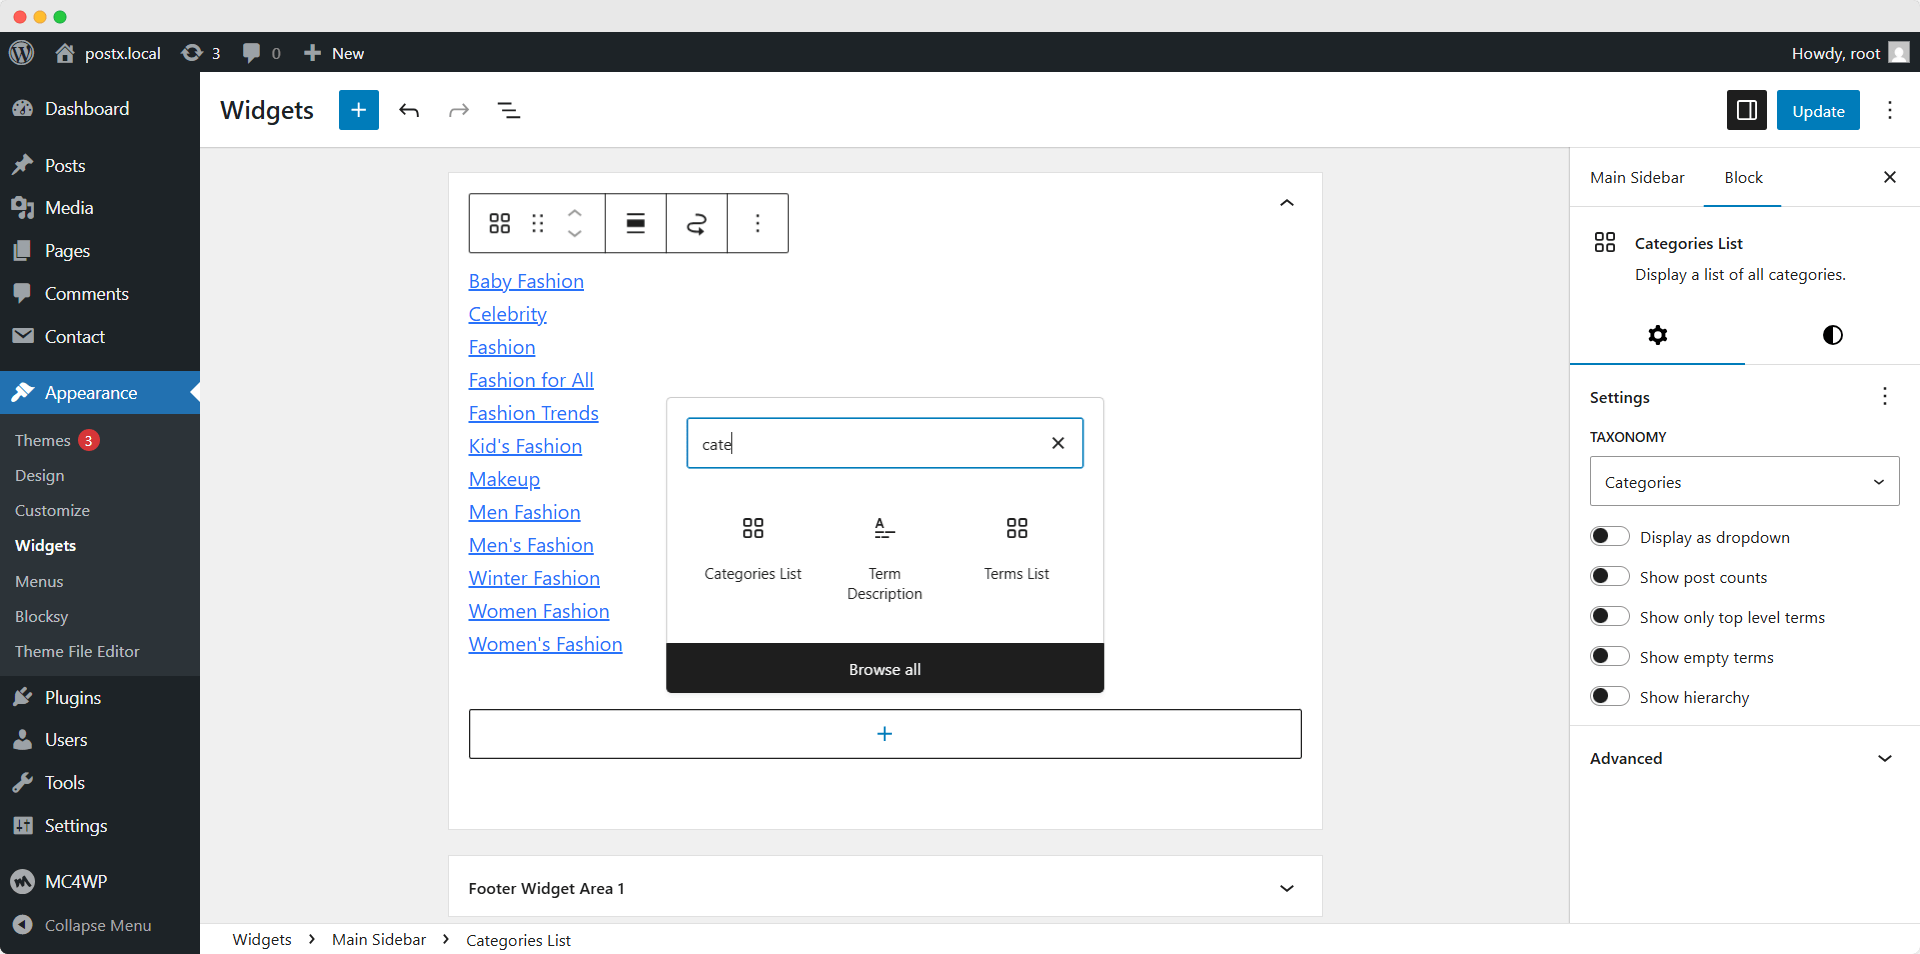
Step 2: Customize as Per Your Requirements
Now, we can also do some customization from the options available on the right side. First, we can see the taxonomy type selection option, from which we can switch between categories and tags. Then, we can enable or disable the following option:
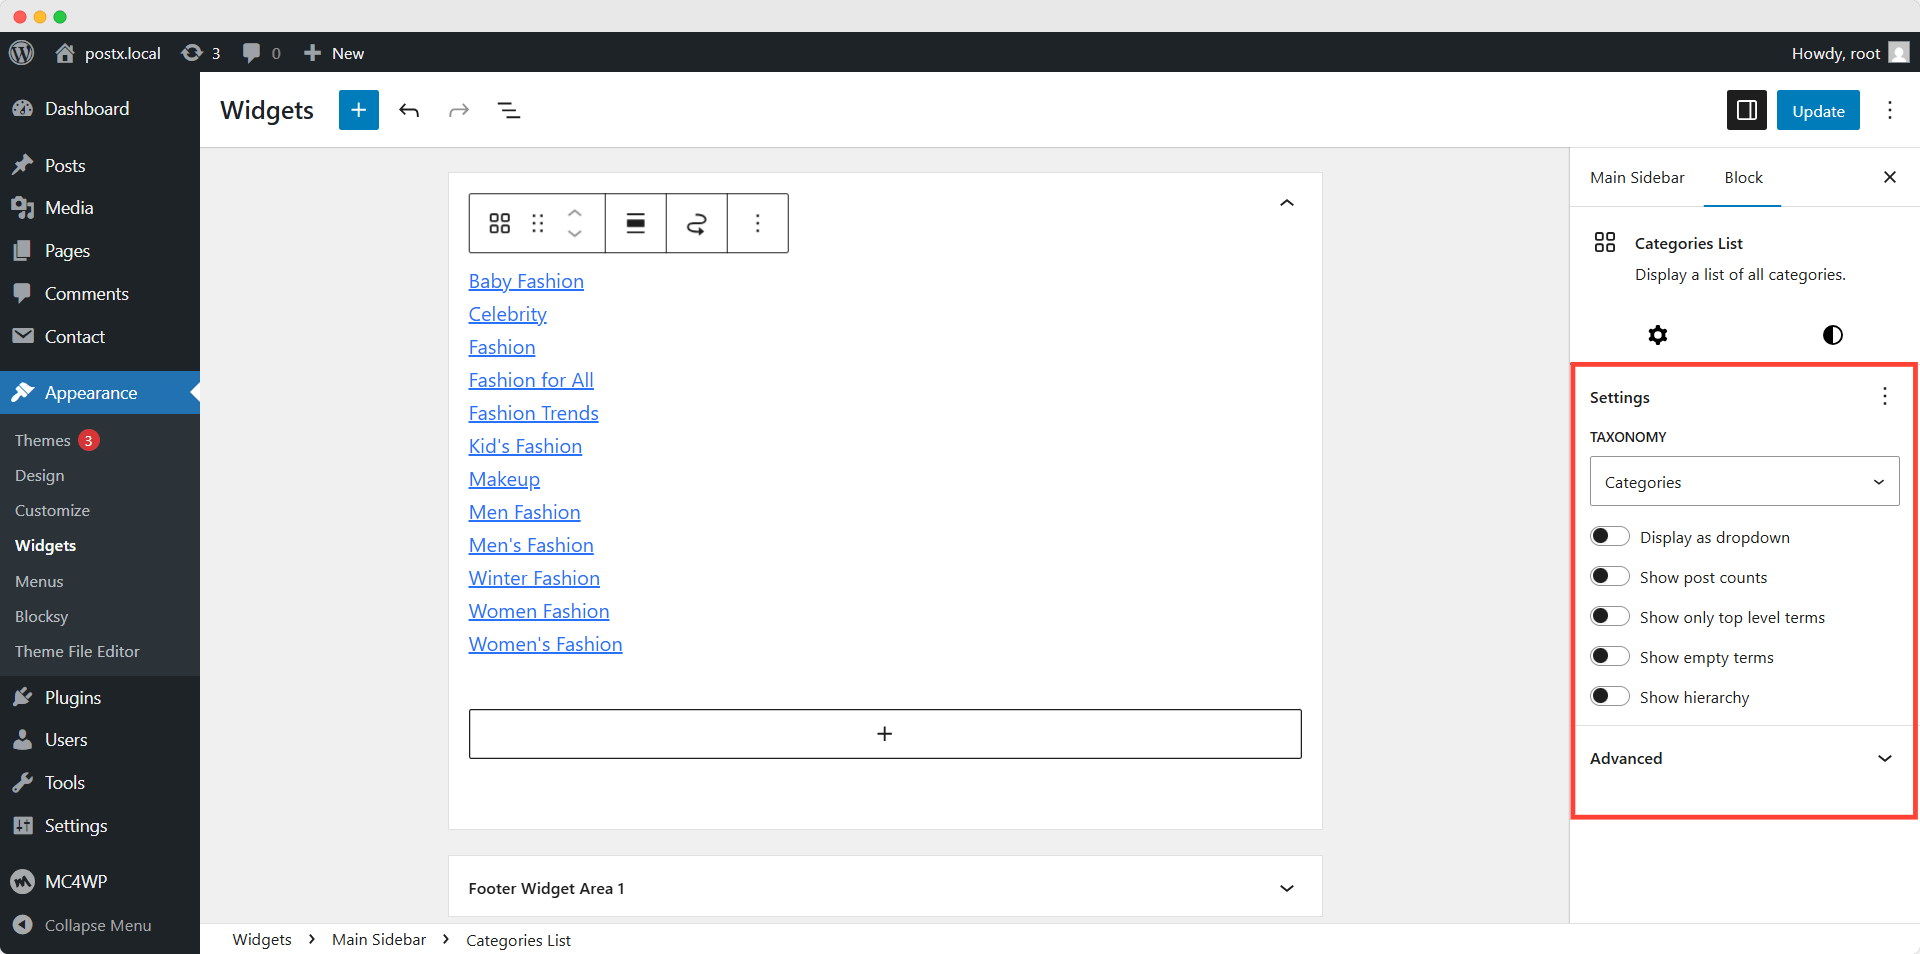
Display as dropdown: With this option, we can display the categories/tags as a dropdown and also hide the label text.
Show post counts: Enabling this option will show the count of posts that are assigned to the categories/tags.
Show only top-level terms: Enabling this option will hide the subcategories and display only the parent categories in the list.
Show empty terms: By default, the taxonomies that haven’t been assigned are hidden, but enabling this option will show those taxonomies, too.
Show hierarchy: This option allows the presentation of the subcategories in an organized way along with their parent categories.
Once we are satisfied with the customization, we need to click on the “update” button and see how it looks at the front end.
Alternatively, we can also add the category list widget from the front end using the theme customizer option. However, we can not customize it as the options are not visible while editing on the front end.
Method 2: Add Categories to Sidebar with Full Site Editing (FSE)
If you are using a block theme, you may know that it doesn’t allow us to use a widget. However, that doesn’t stop us from adding categories to the sidebar. We can do that using the full-site editing feature. Let’s see how:
Step 1: Start Editing Sidebar Template Parts

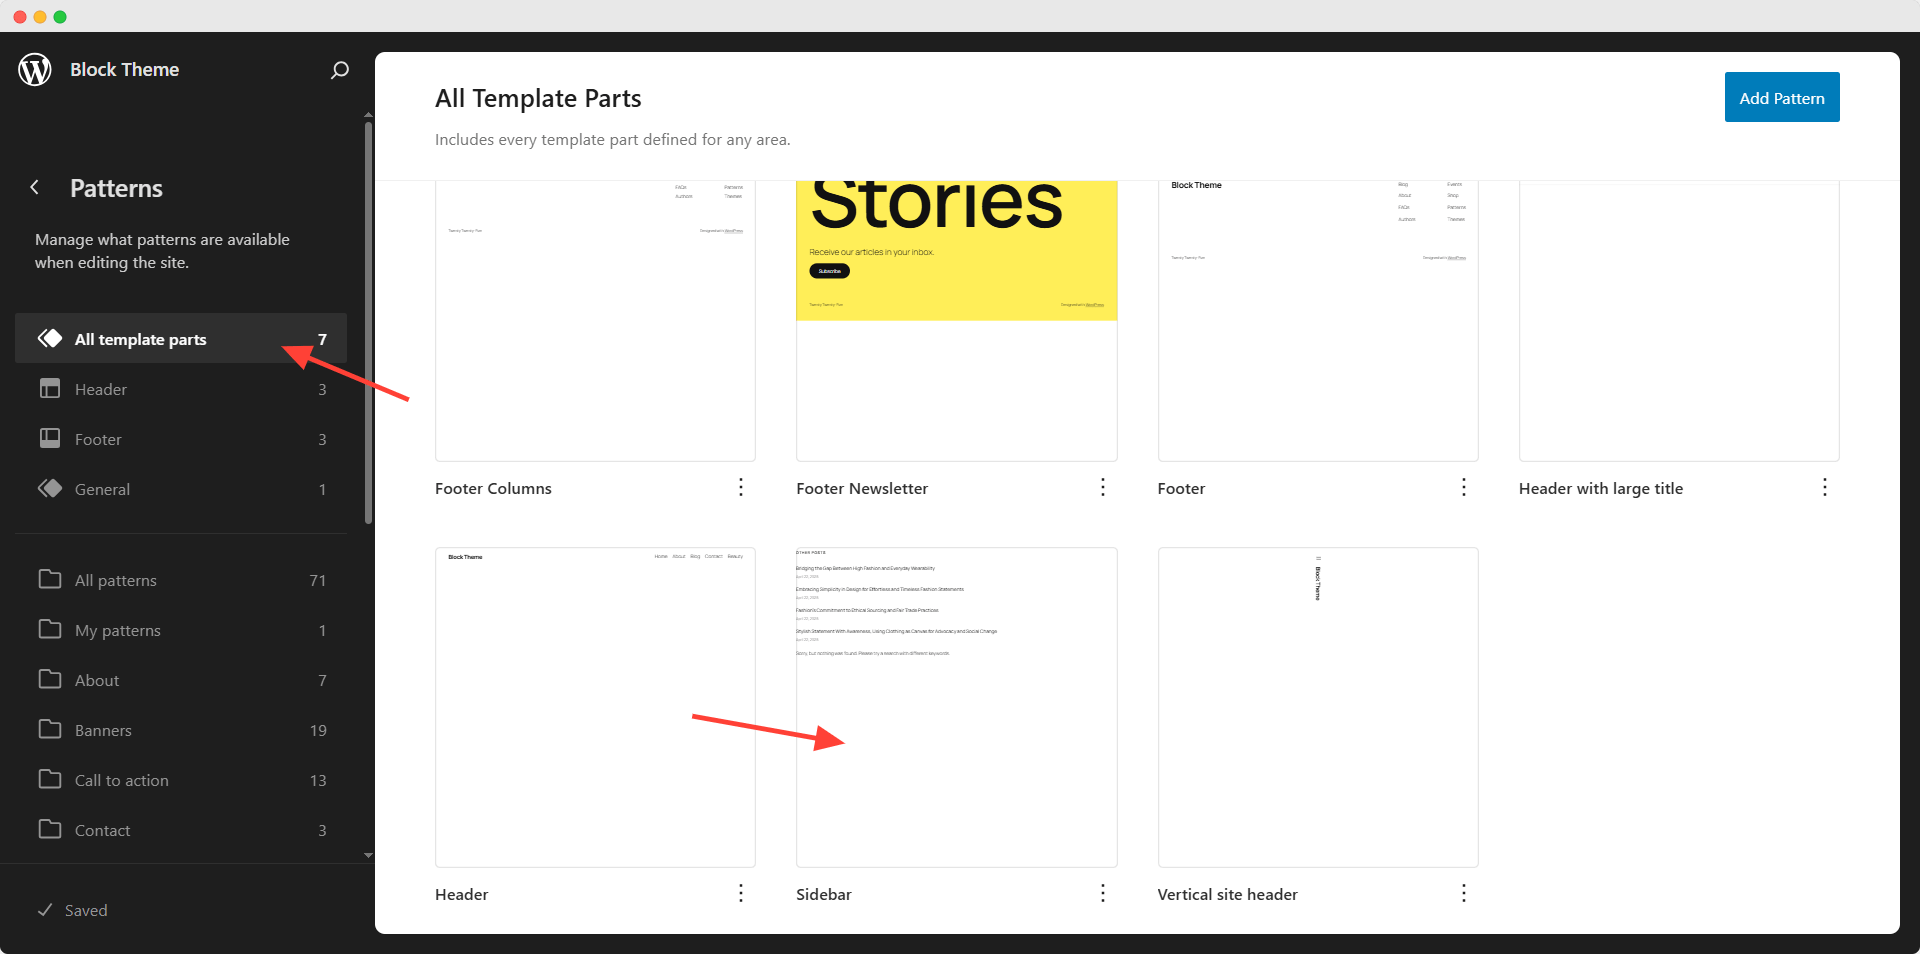
Go to Appearance >> Editor from your WordPress dashboard. Now, click on the “Pattern” section and go to the Templates part section. Here, you will see all available template parts. For now, let’s open the Sidebar template part.
Step 2: Add Categories to Sidebar
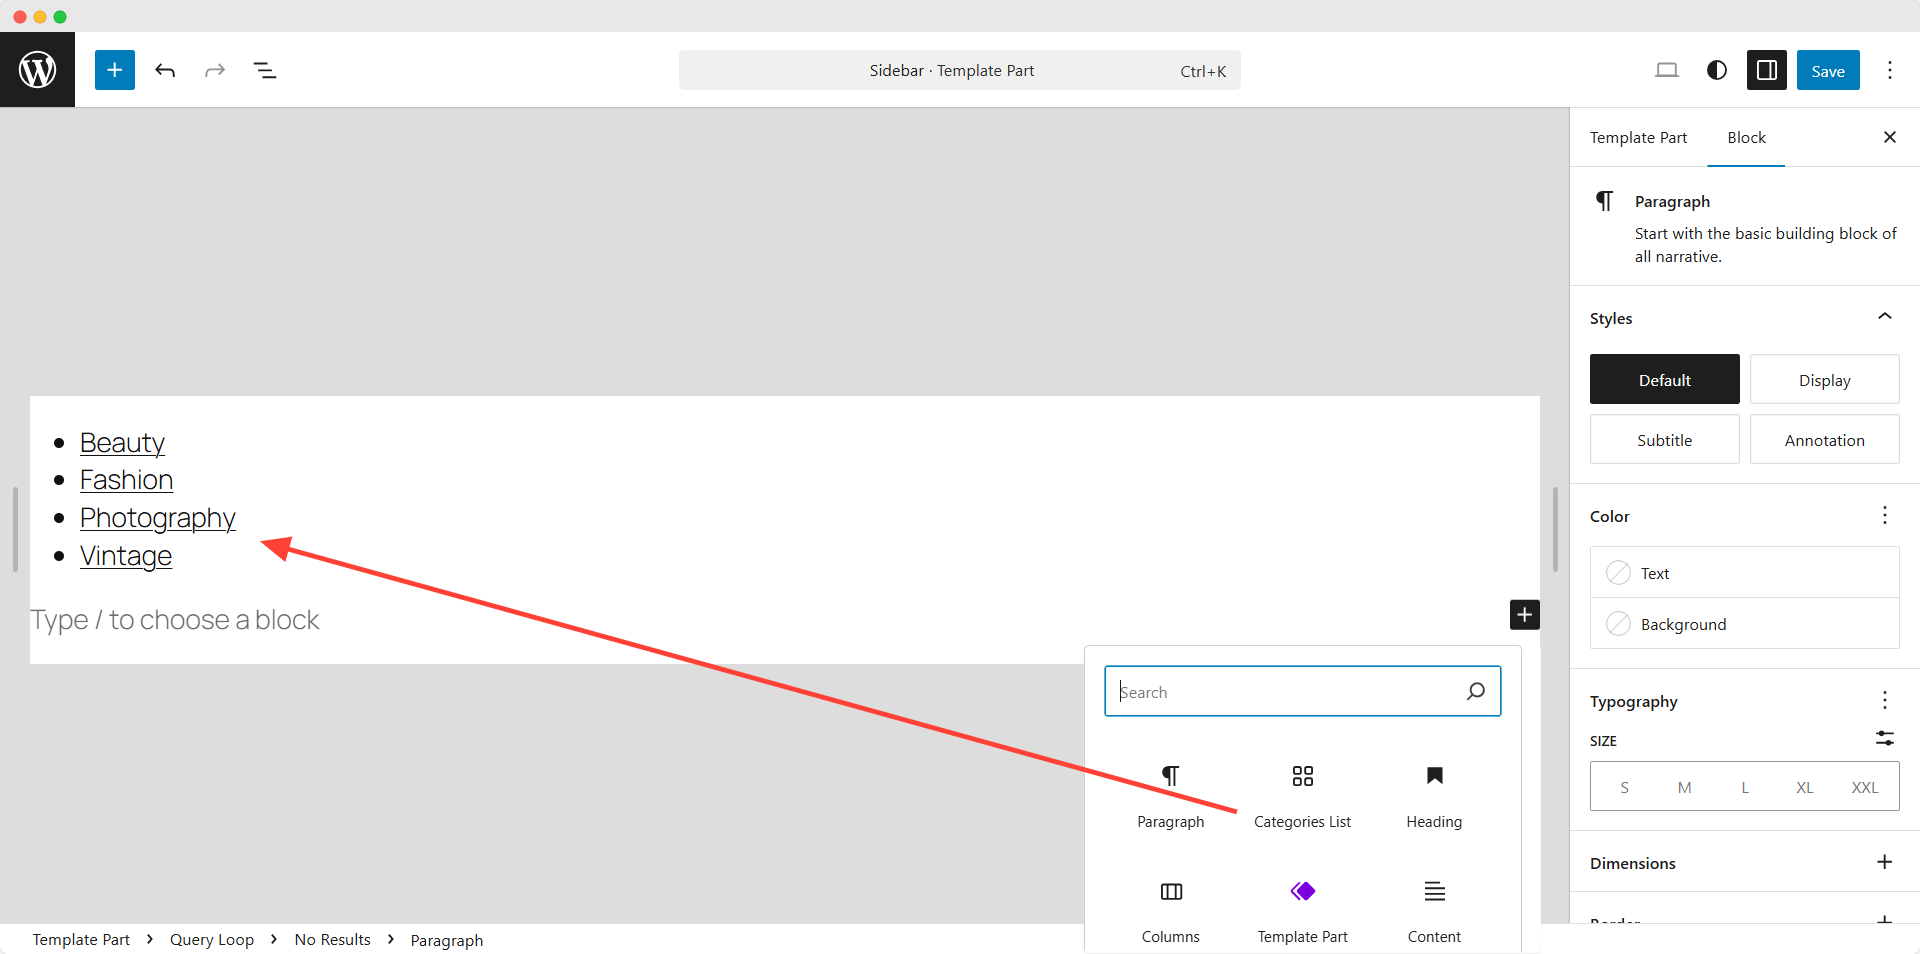
Now, we need to click on the plus icon and add the category list block. All of our categories are displayed here. We can also see the customization option on the right side. We are not explaining this as all the options are the same as we explained earlier. Finally, we need to click on the “Save” button once satisfied with the changes.
Step 3: Add the Template Part to the Single Post Template
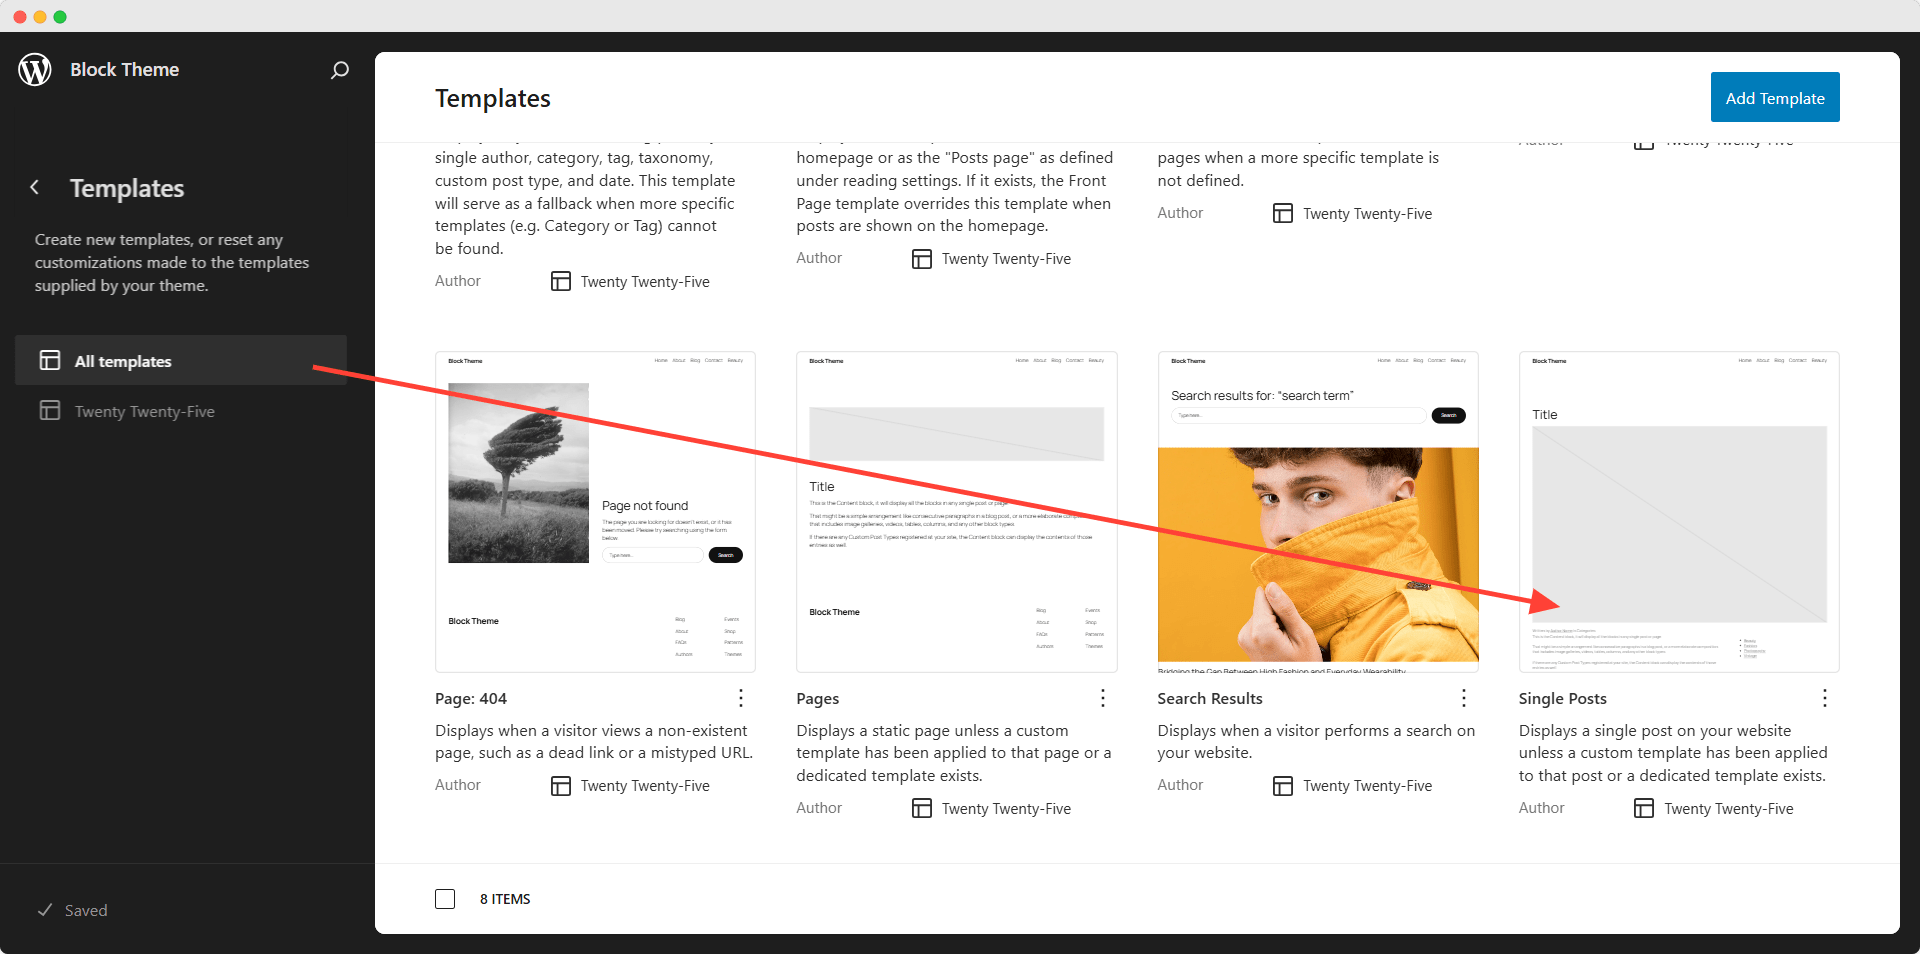
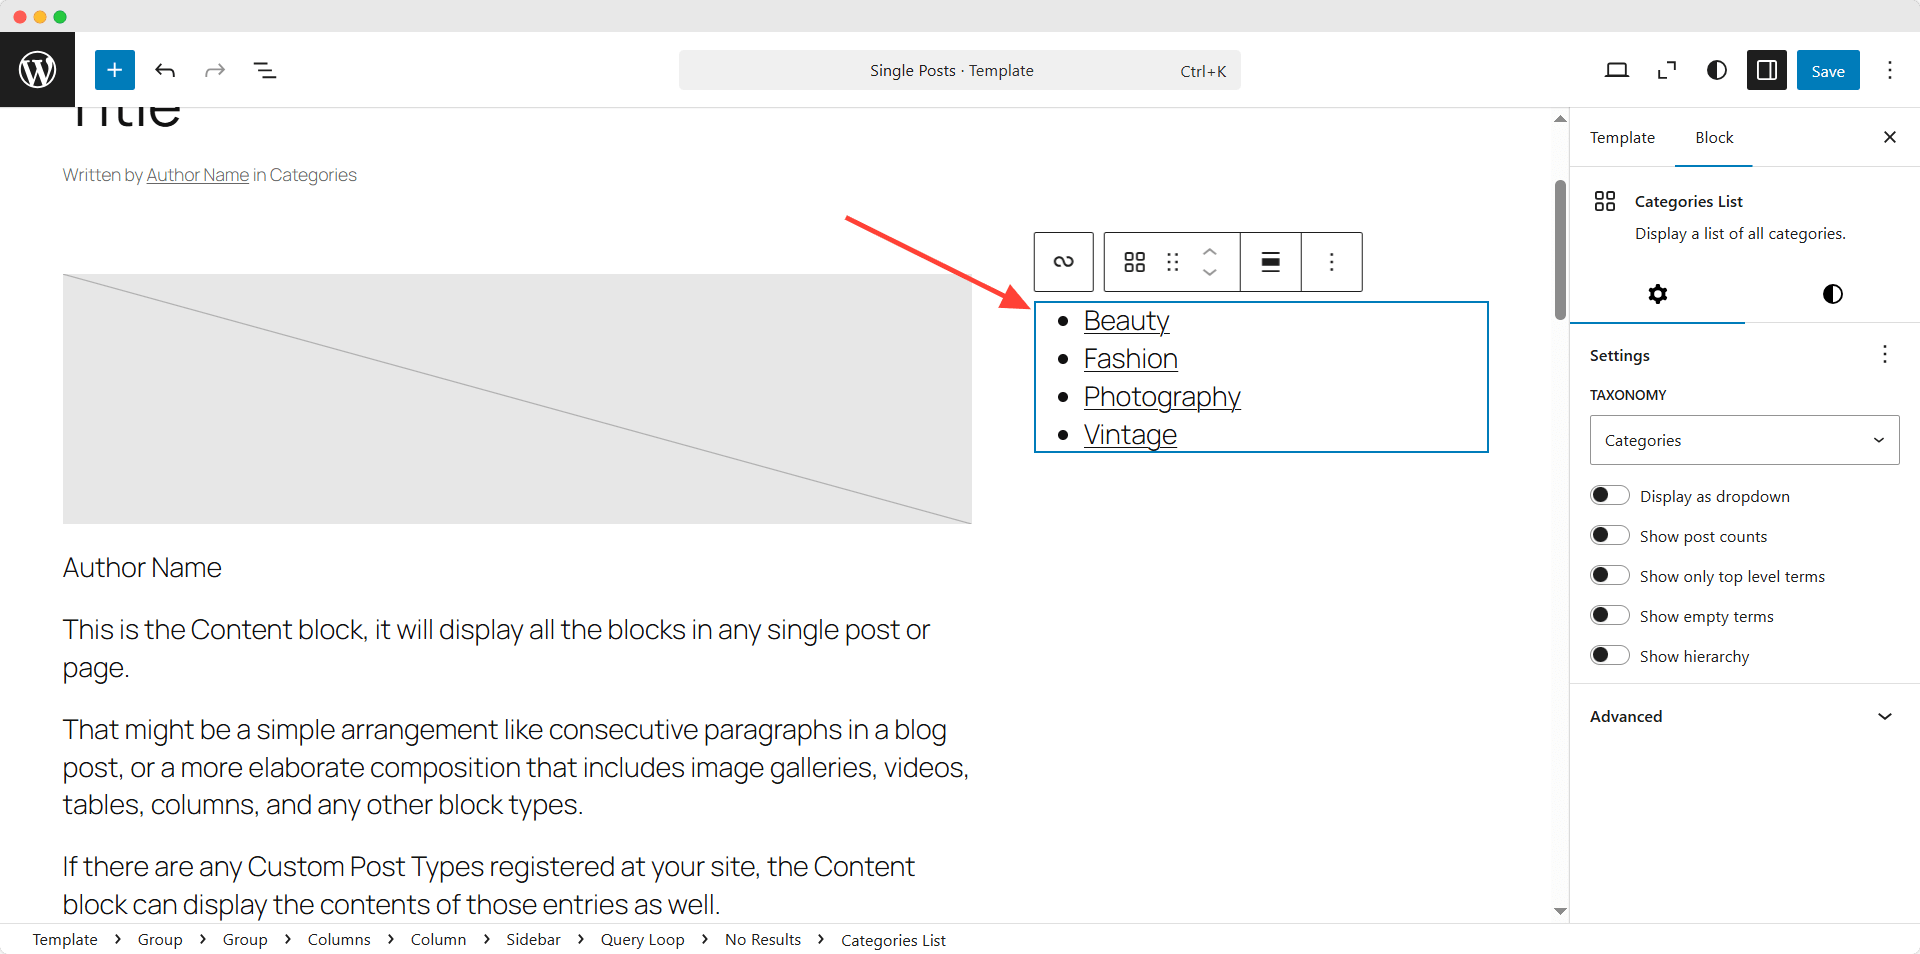
Now, we need to go back to the full-site editor and start editing the single post template. Here, you can see that no sidebar is added to the template. We can do that by adding a column block. First, we need to add a column block and select two columns. Now, we can add the single post blocks on the left side and the sidebar template on the right side. Finally, we can click on the save button and see how it looks on the front end.
Method 3: Using a Plugin (PostX) for Advanced Control
If you are not satisfied with the category list block and need more control over visual presentation, then you can try PostX. Although PostX is an all-in-one blog layout plugin, you can also use its taxonomy block to display tags or categories on the sidebar in a visually appealing way. But before following the steps below, make sure to install the PostX plugin.
Get PostX Pro to unlock all exciting features and make amazing Websites
Step 1: Turn on Taxonomy Image and Color Addon
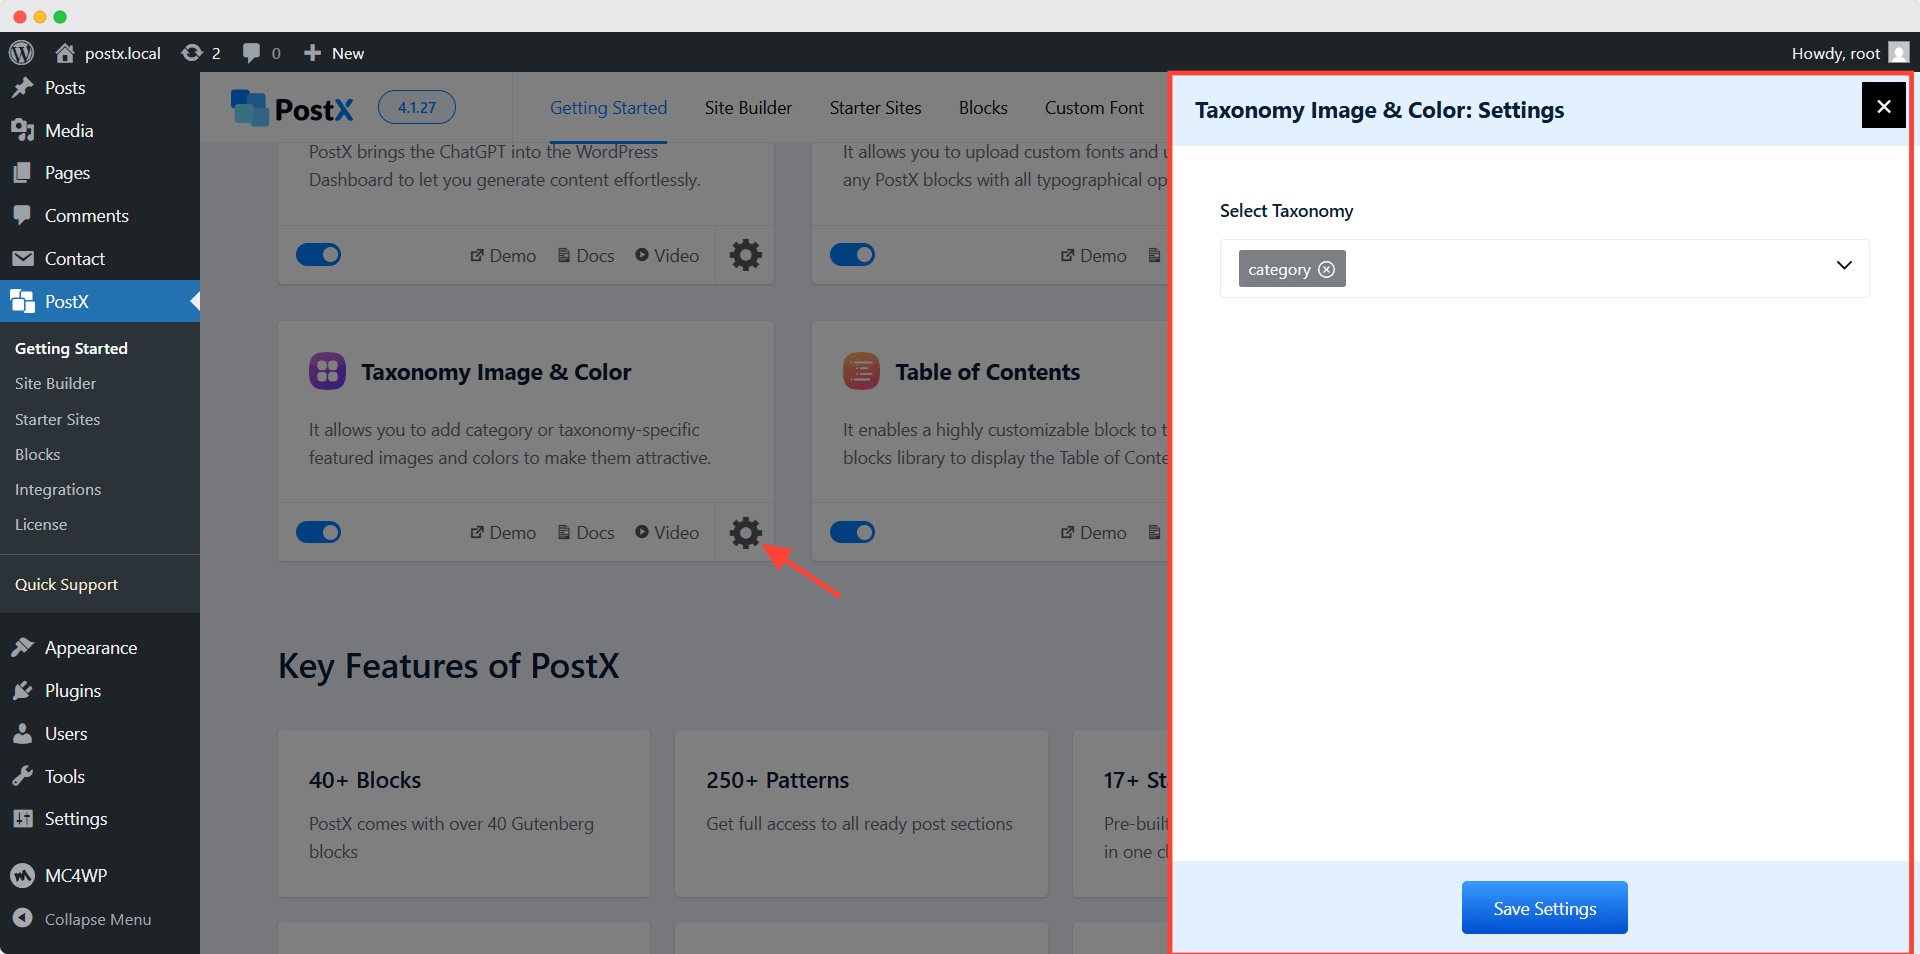
At first, we need to enable the Taxonomy add-on from the Getting Started section of PostX. It helps us to add featured images and specific colors to taxonomies that include both categories and tags.

Upon enabling the add-on, we can click on the settings section and select which type of taxonomies we want to set featured images and colors for. We can select categories, tags, and custom taxonomies. For we are choosing categories only.
Step 2: Style Categories with Featured Images and Colors
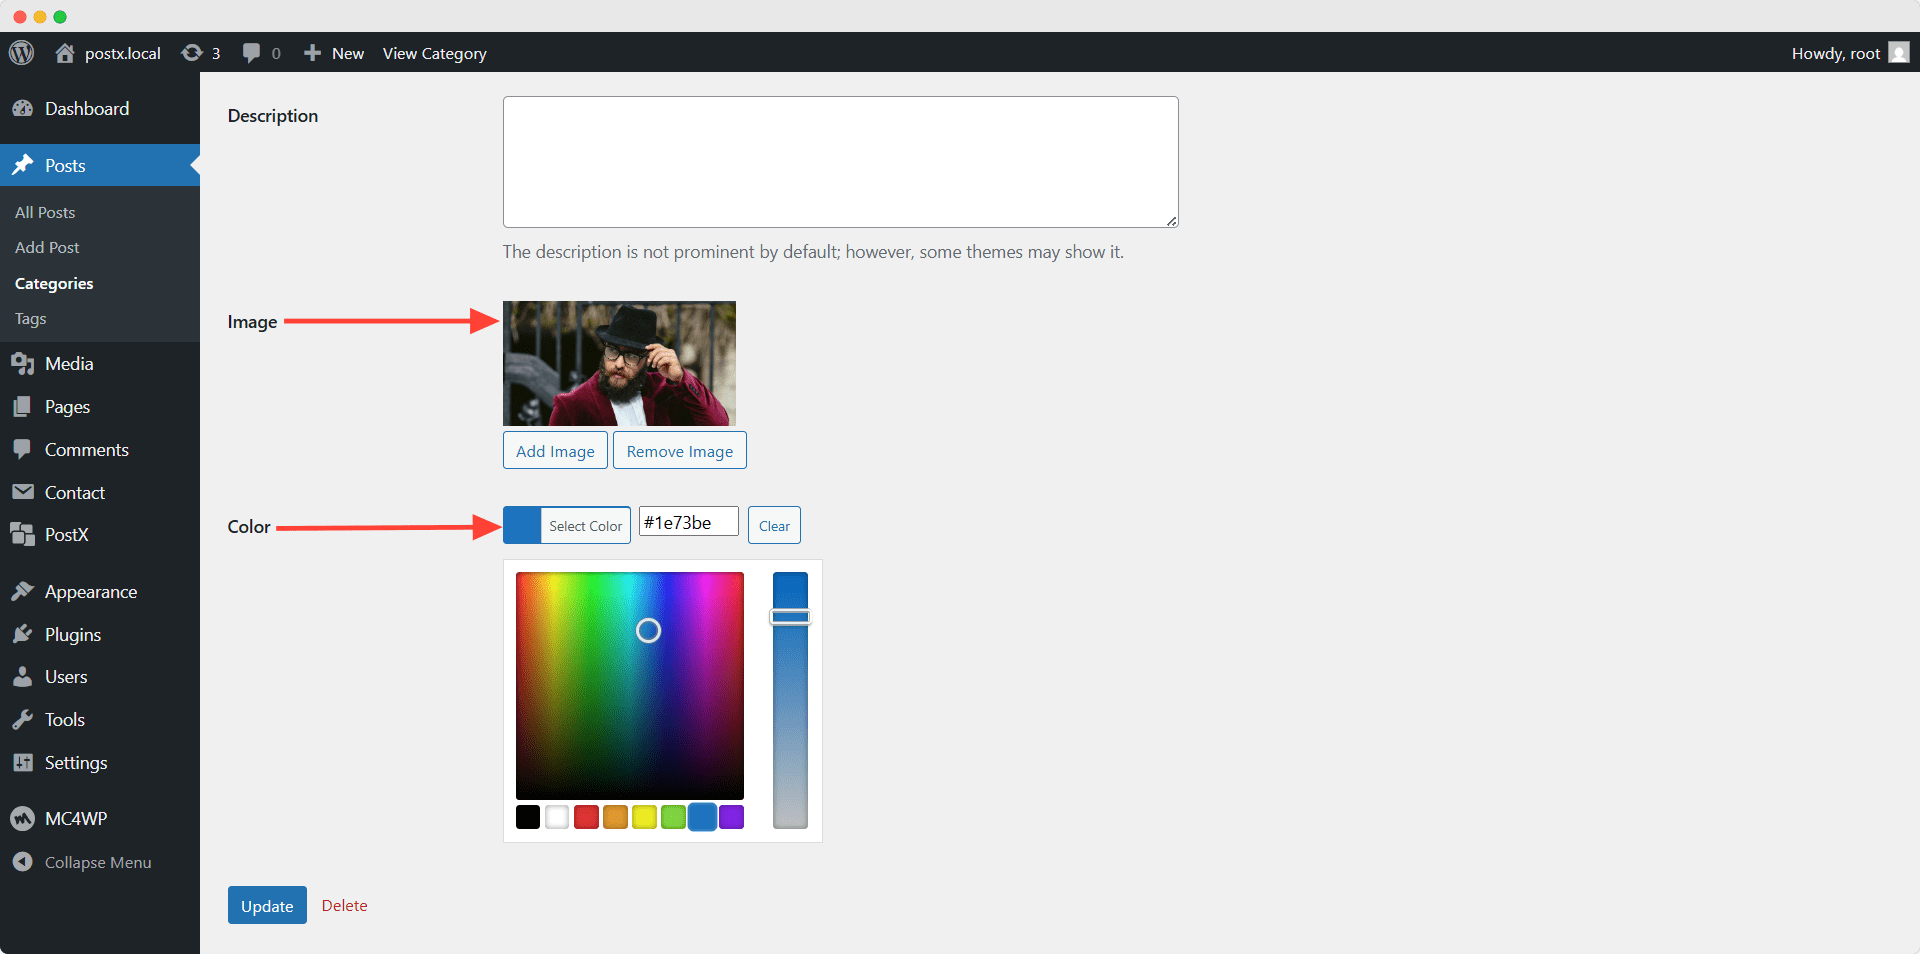
Now, let’s start editing a category. Here, you can see that two new options have been added. We can upload our desired images or choose an existing image from the media library. Moreover, we can choose a specific color for this category. Similarly, we can add images and colors for all the categories that we want to display on the sidebar.
Step 3: Add Taxonomy Block to the Sidebar Widget
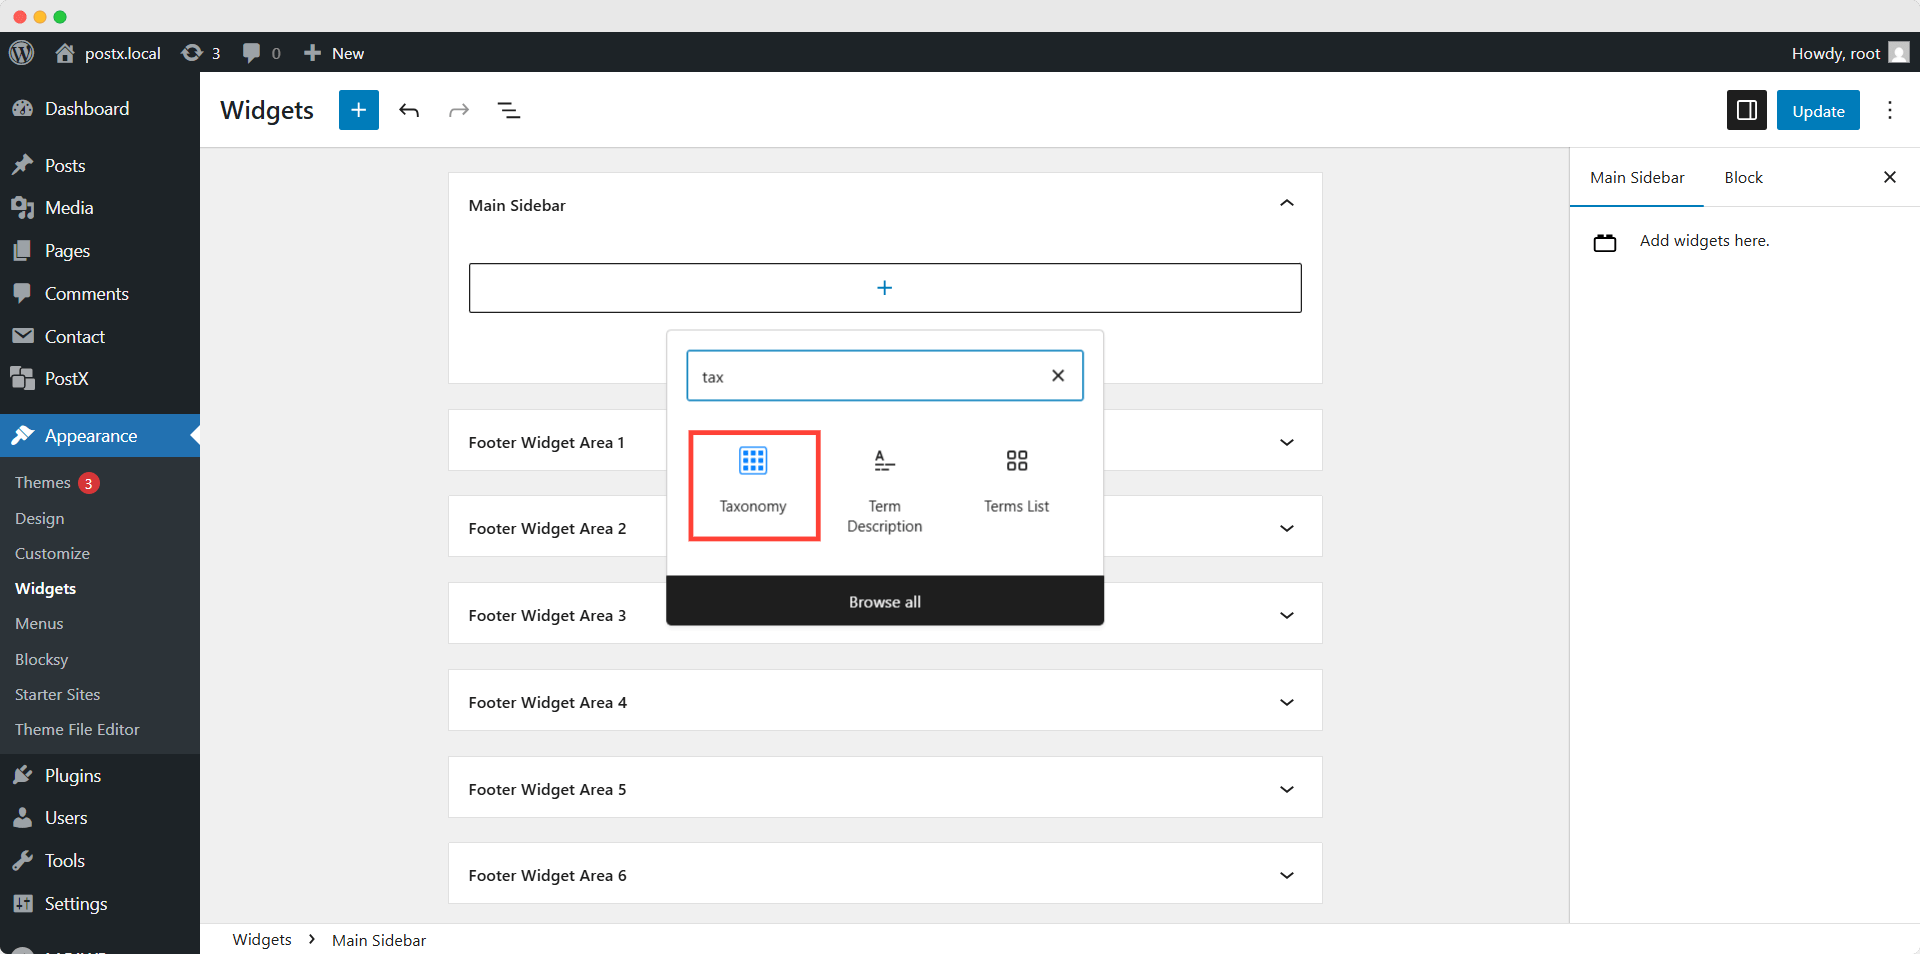
There are two ways to add a widget to the sidebar. We can do it either from the front end or the back end. As we have to do further customization, we have to follow the second method.
So, let’s go to Appearance >> Widget and click on the plus icon. Now, we can search for the Taxonomy block and add it to the sidebar widget. After adding the block, we can see the names of the latest categories displayed on our website.
However, we are going to improve the appearance of the categories by using PostX’s customization capabilities.
Step 4: Customize the Taxonomy Block
PostX offers full customization freedom for all of its blocks. So, let us walk you through the customization possibilities. We can explore the different layout variations to start with. Moreover, we can choose any of the premade templates from the Design library.
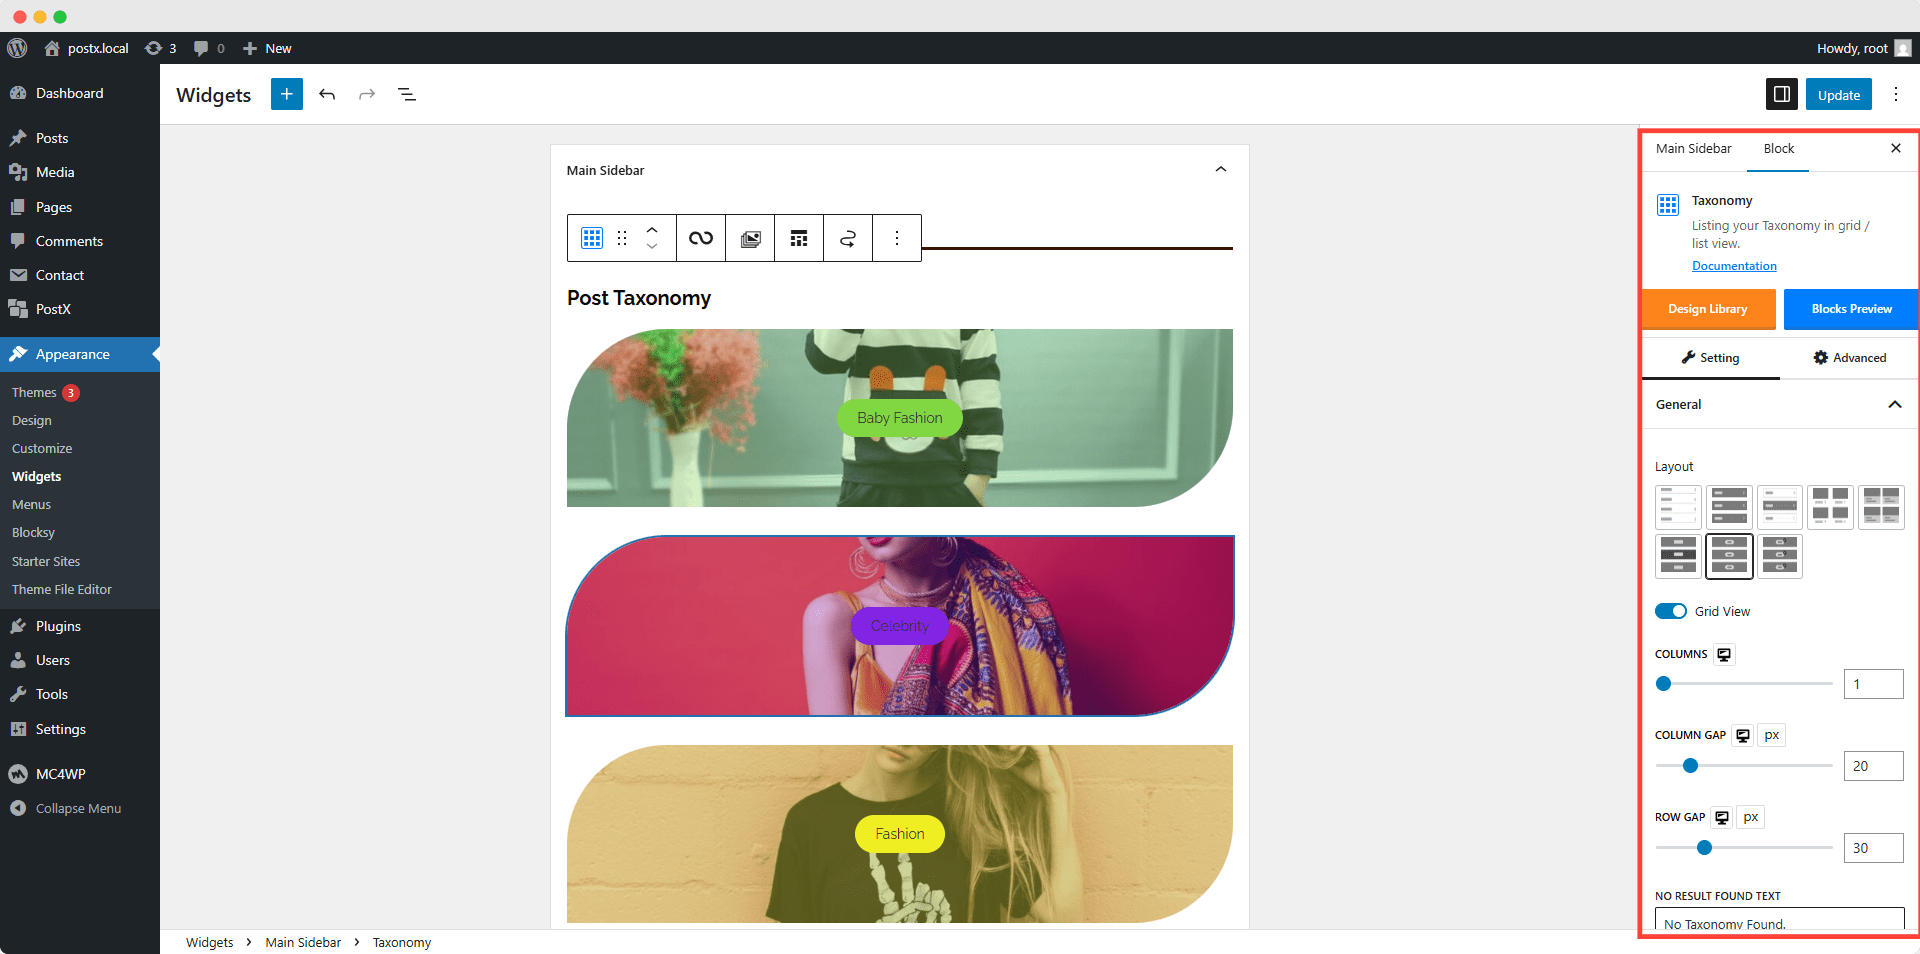
Then, we reduced the column number to 1 as it looked broken. There are numerous customization options available. We can play with column and row caps or add a hover animation and whatnot. PostX gives us full customization freedom.
Furthermore, we can enable or disable the title, excerpt, and post count. And, of course, we can customize every one of these elements. Most importantly, we can use the query sorting option of the taxonomy blocks. It helps us to choose which categories, tags, or custom taxonomies we want to display.
After doing all sorts of customization, we have to click the update button and see how it looks on the front end.
Closing Words
Let us help you out if you are confused about which method you should follow. It depends on your requirements. If your intention is just to display the names of the categories in the sidebar, you can start with the default WordPress block. If you are using a traditional theme, go for method 1, and go for method 2 if you are using a block theme. However, if you want more customization options and make the categories visually appealing, you can definitely try using PostX.
Not just for displaying categories, you can consider PostX to add a whole new professional look to your WordPress site. It can help you to give a complete makeover to your website while keeping your brand identity intact. We would like to know which method you are going for. You can also share your feedback and suggestions in the comment section.
Get PostX Pro to unlock all exciting features and make amazing Websites
FAQs
Can I customize how categories look in the sidebar?
Yes, if you use PostX, you can customize the Look of the categories, no matter where you display them in the sidebar or anywhere else.
Can I display only specific categories in the sidebar?
Yes, you can display only specific categories in the sidebar by using PostX’s Taxonomy Query feature.
How can categories be added to the sidebar only on blog posts and not pages?
To add the categories only to the sidebar of blog posts, you need to create a custom template. You can do this with the full site editing feature of blog themes or using a plugin like Post.

