Before we answer the question on how to use a reading Progress bar WordPress plugin, we need to answer the following:
Why do we need a WordPress Reading Progress Bar in the first place?
Well, research shows that an average user can spend around 45-seconds on a particular website. In general, a user makes the decision to stay on a page within the first 10-seconds of reaching the page.
And Google takes this time very seriously. Google has a name for it as well. They call it ‘Dwell time’, which is essentially a measure of how much time a user is spending on a particular site or page.
In short, it’s a measure of whether marketers and bloggers manage to attract the users’ attention. And that’s very important when it comes to Search Rankings.
We’ll get back to that in the later sections.
So, from the above sections, it should be clear why you need a reading progress bar for your WordPress posts.
Now the question comes: How should you do it?
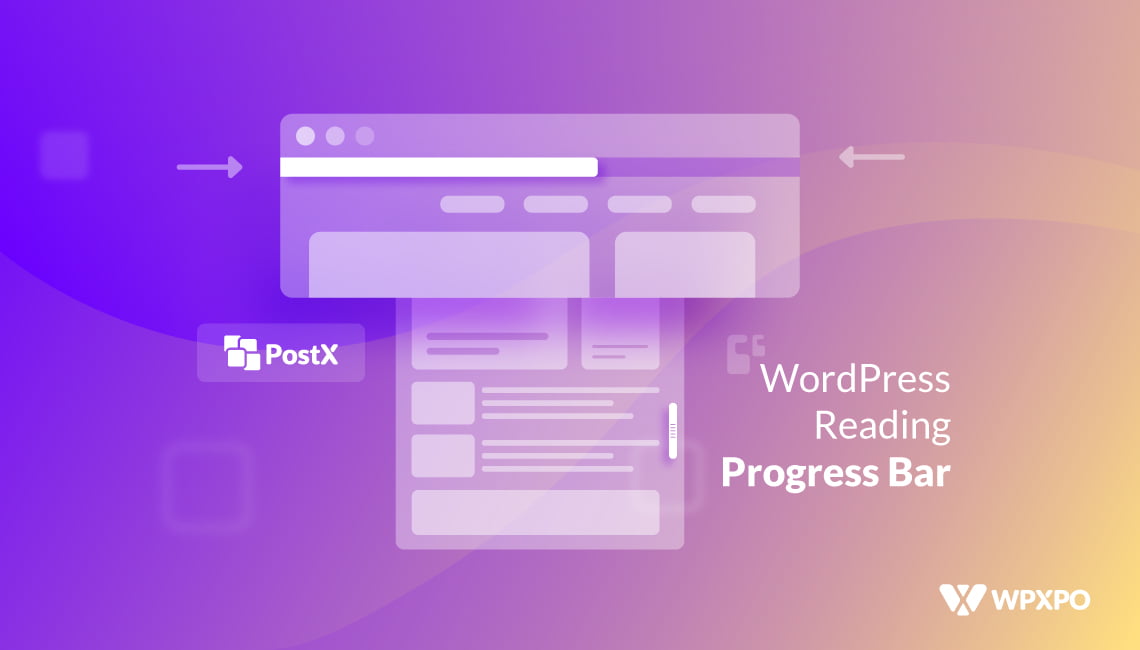
How to Use a Reading Progress Bar WordPress plugin: PostX Demo
It’s been a long-awaited feature, highly sought out by our users. And we’ve managed to come up with a solution.
For today’s demo on using a WordPress reading progress bar, we’ll be showcasing the PostX Gutenberg Blocks Progress Bar feature. It’s a new addon that allows users to add a progress bar to attract the attention of the users while also giving them a sense of achievement.
So, let’s check this newly added feature of the PostX Gutenberg plugin.
Installing PostX Pro
In order to take advantage of the full functionality of the PostX Gutenberg Blocks plugin and its reading progress bar, you’ll need to have the Pro version of the plugin installed on your WordPress site.
*** Take note that you’ll need to have the free version of PostX installed on your site to install and activate the pro license of PostX. You can download and access the license key alongside the Pro version of the plugin from your WPXPO account.
The installation process is fairly straightforward. You can visit the PostX documentation to understand the installation process if you have any difficulties. For now, we’ll be focusing on how to implement the progress bar.
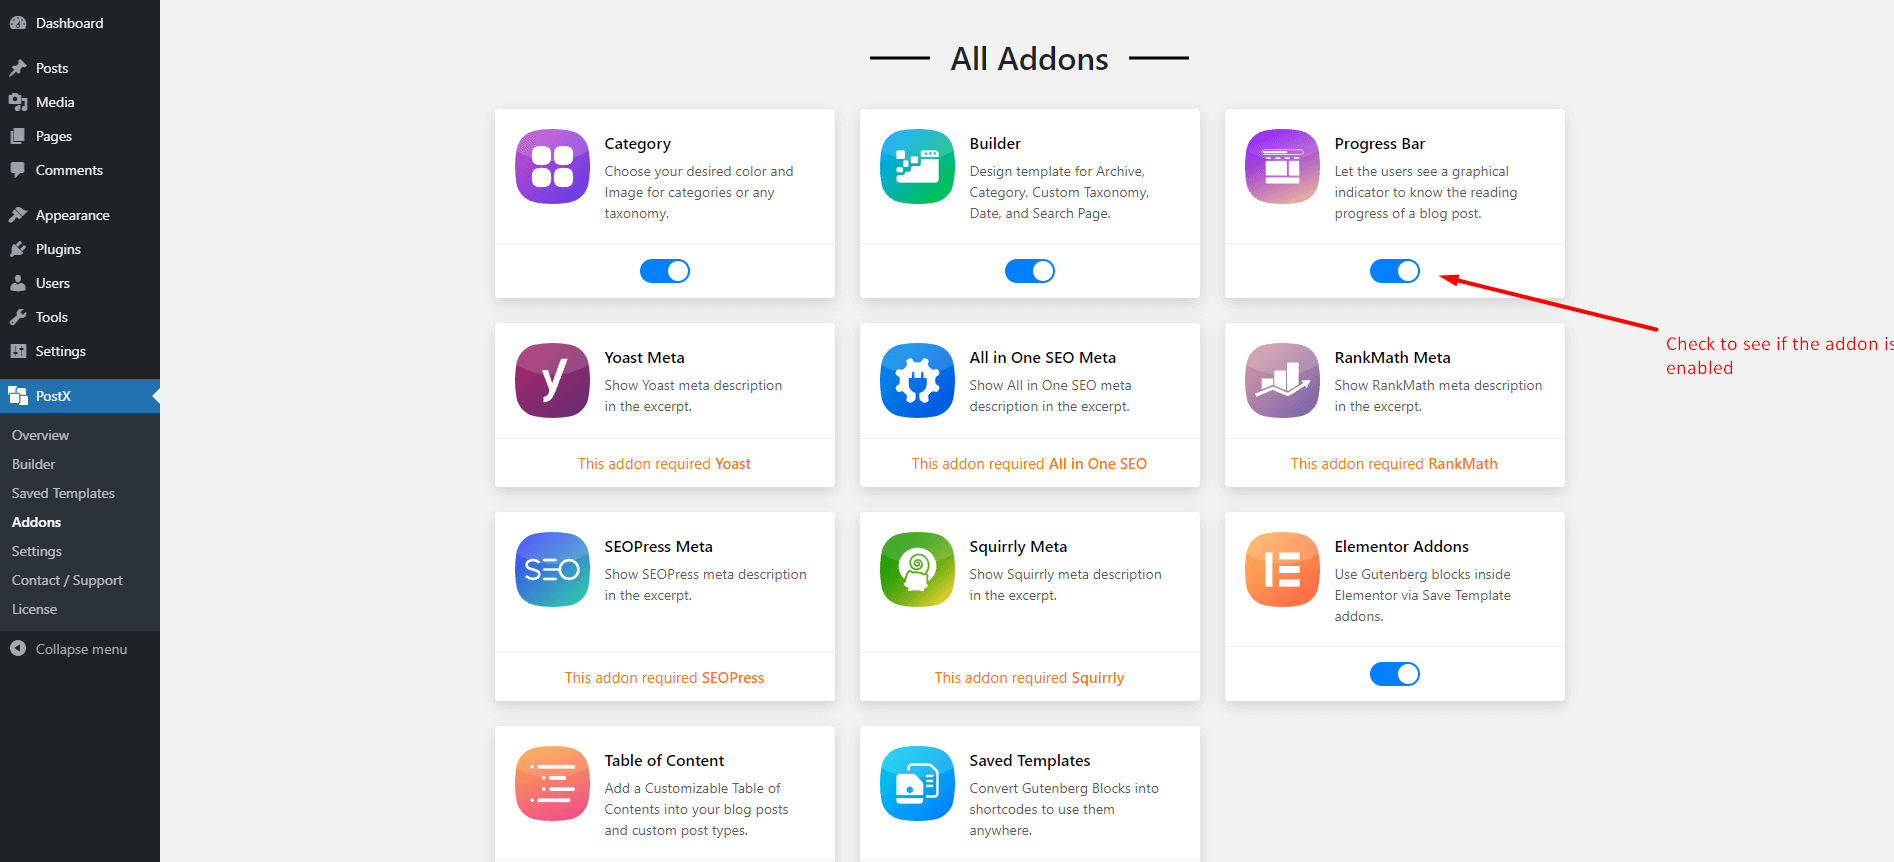
Enabling the ‘Progress Bar’ Addon
Before you can use the reading progress bar, you’ll need to check if the addon is enabled from the PostX Addons menu. To do that:
- Go to the PostX menu from your WordPress dashboard.
- Click on ‘Addons’.
- See if the Progress Bar Addon is enabled. If not, then enable it.
Once you’ve enabled that, you’ll have to navigate to the PostX Settings tab. There, you’ll find the Progress bar settings.
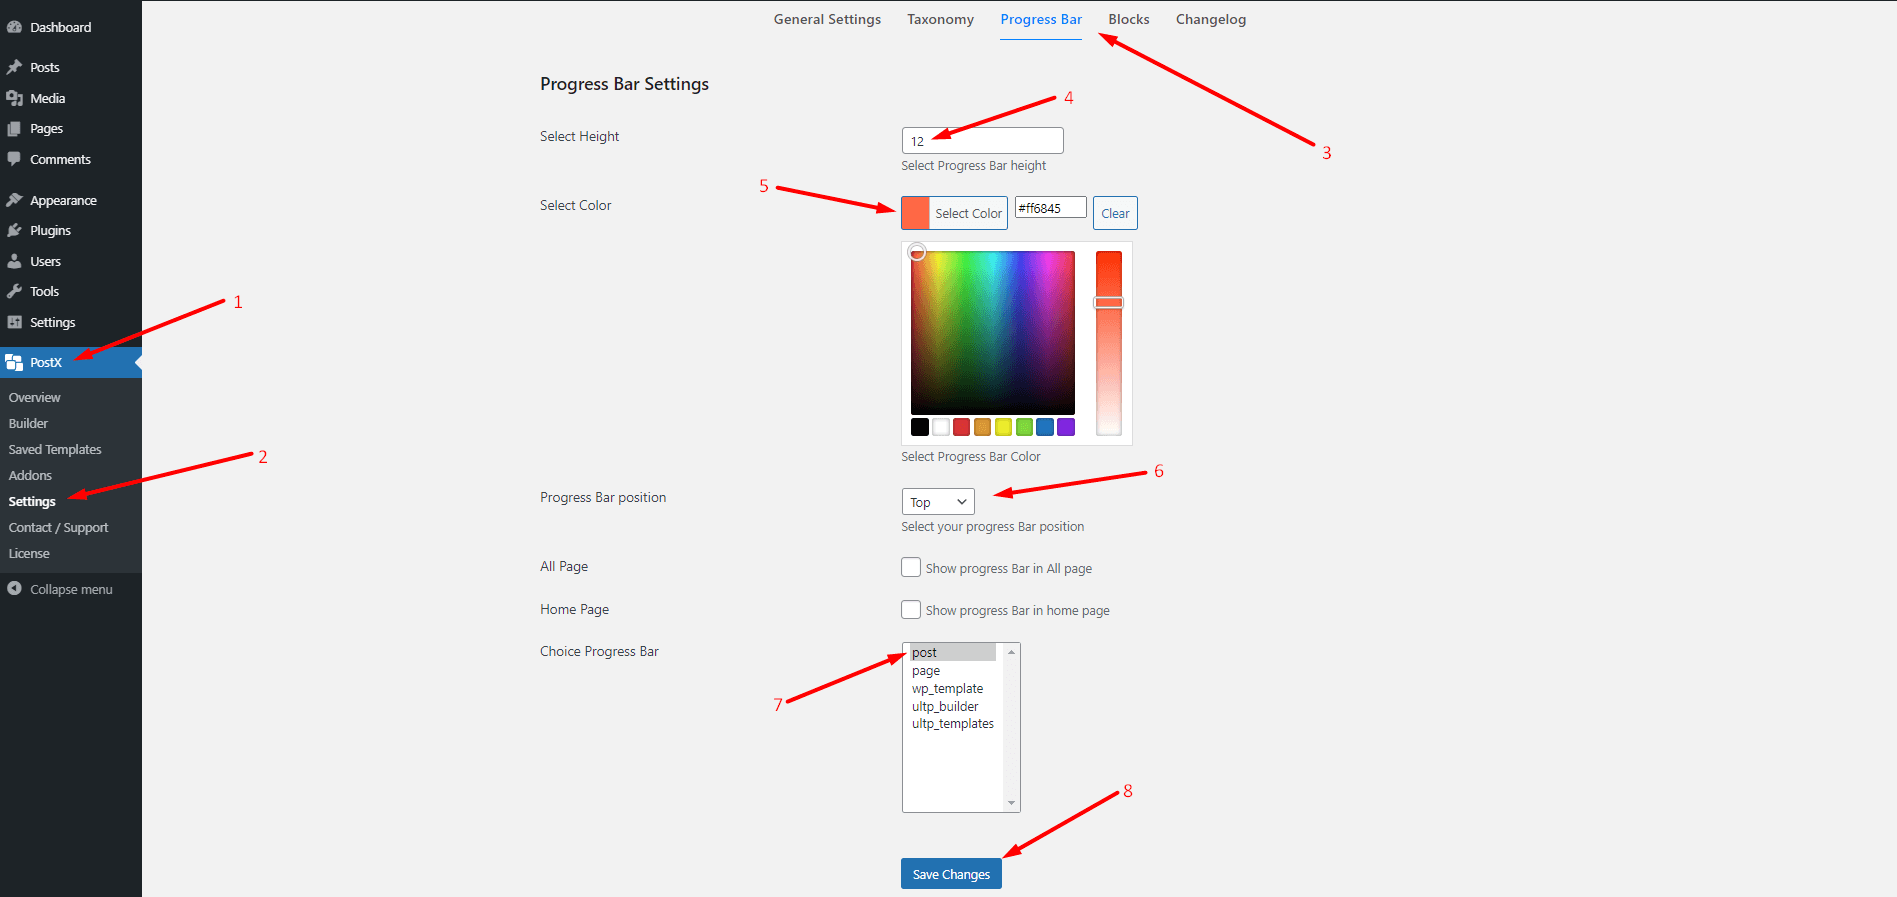
Progress Bar Settings Overview
Before we move to add a progress bar to our WordPress posts, here’s a quick overview of the settings:
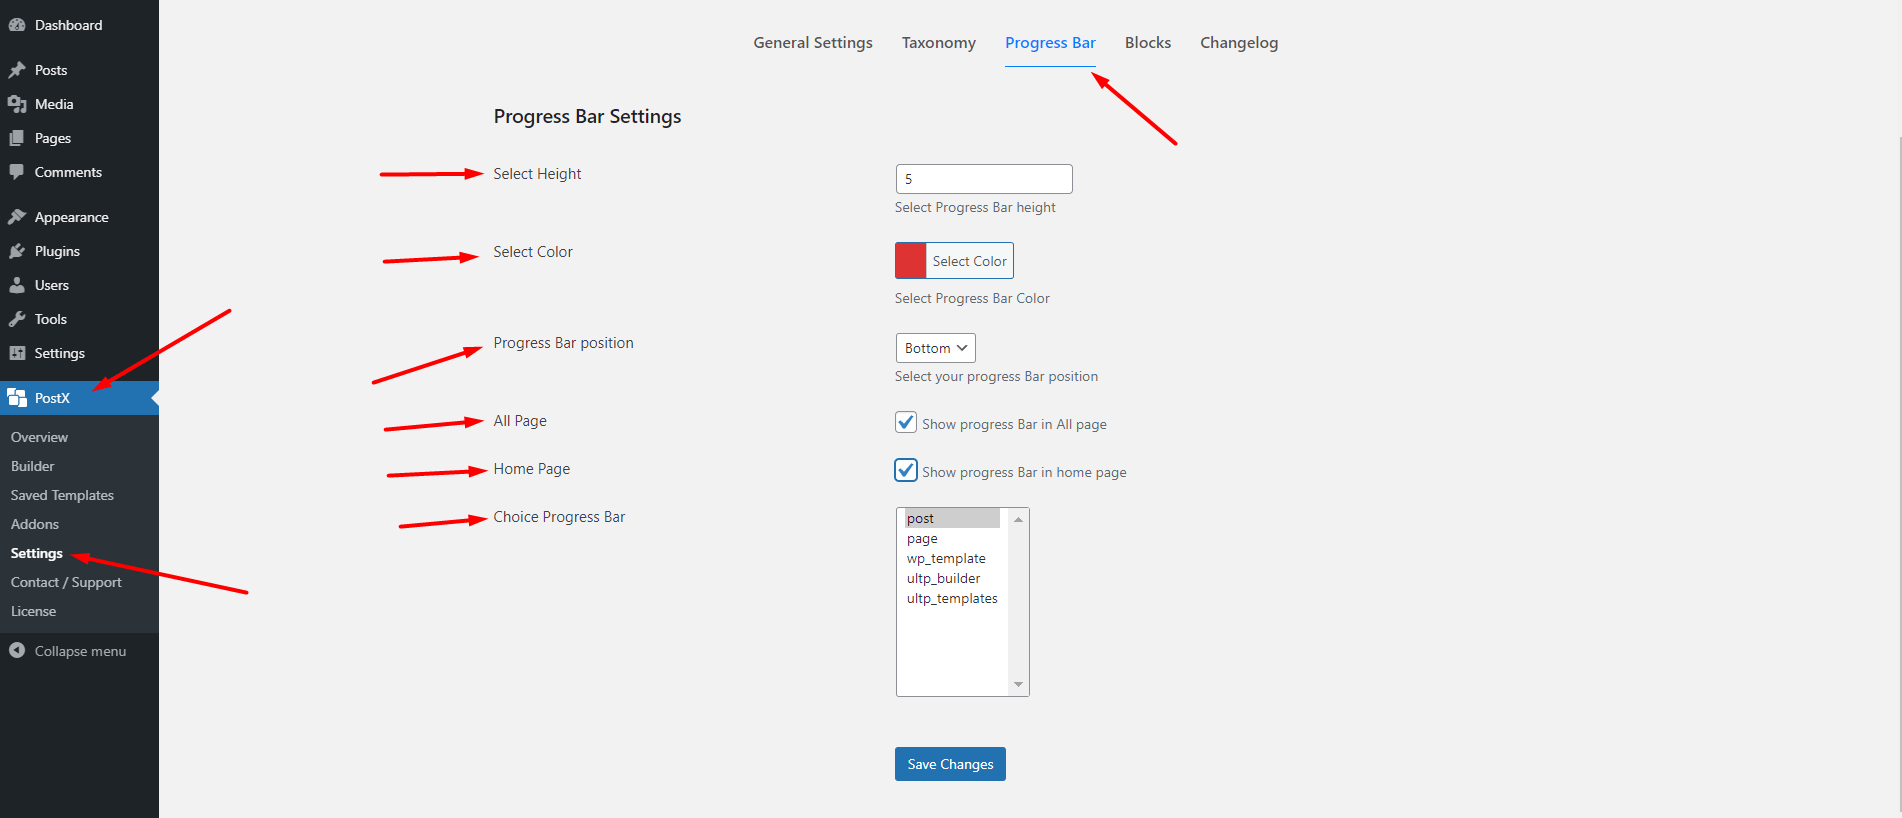
Height Settings
You can use the ‘Select Height’ functionality and change the height of the Progress Bar. It’s a simple selector that allows you to change your bar height with ease.
Color and Positioning
You also have the option to change the bar color and positioning.
You can use the ‘Select Color’ function to change the color of the progress bar. You can change the color directly by choosing or adding a hexadecimal value.
Furthermore, you change the ‘Progress Bar Position’ using the dropdown. You can position the progress bar either on the top or in the bottom of a page.
Enabling on Pages
You can enable the progress bar on your preferred pages.
You can choose to show it on all pages. Also, you can choose to show the progress bar on the Home Page as well. Just tick the boxes to show the progress bar on a single page or on all pages.
Also, you can choose to show the progress on particular pages. For instance, if you want to show the progress bar on ‘Post’ pages only, then choose ‘Post’ from the ‘Choice Progress Bar’ functionality. You can choose multiple options from here as well.
Finally, once you’re done with all your choices, you can save the changes.
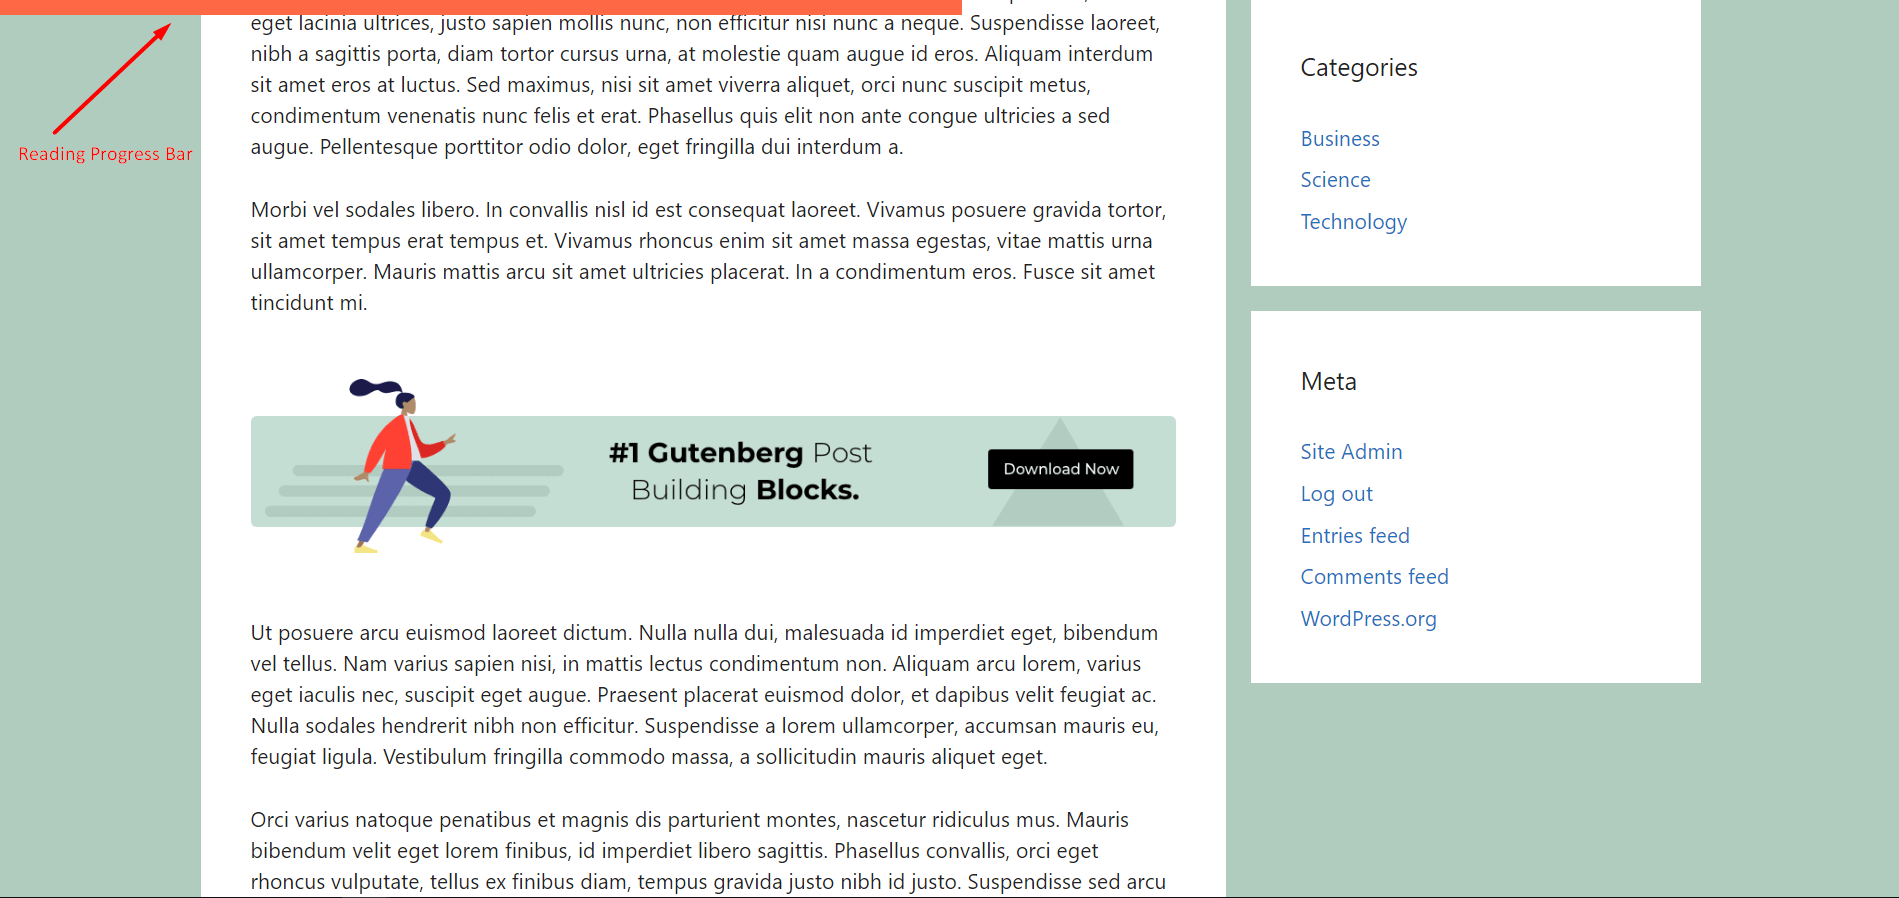
Let’s see a real demo of the reading progress bar in action:
Showing WordPress Progress Bars in Post Pages
In this live example, we’ll show you how to show the progress bar on your post pages. Here are the things we’ll need to do:
- First of all, check to see if the Progress Bar Addon is Turned On in the PostX Addons Settings. Once turned on [if not turned on already], move to the PostX settings menu.
Here are the key changes you need to make:
- Select the height to 12-pixels to set the progress bar height.
- Select the color ‘orange’(orangish!) from the color menu [Hexadeciaml code: #ff6845. It will show up automatically.]
- Select ‘Top’ from the ‘Progress Bar Position’ menu as we want to show the progress bar to the bottom.
- Remove the tick mark from the ‘All Page’ and ‘Home Page’ Settings.
- Then, from the ‘Choice Progress Bar’ setting, choose ‘Post’.
- Finally, save the changes.
Now if you go to your WordPress site and view a post, you’ll see the progress bar just the way you configured it.
Why is ‘Dwell Time’ Important?
Let’s get back to the discussion of dwell time.
From an SEO standpoint, dwell time does hold some importance. As a matter of fact, it has a close relation to Bounce Rate, which is a metric of Google to understand whether or not someone is finding your content useful.
In the end, it all comes to engagement-that is how you hold the attention of your user by offering them something useful.
And the WordPress reading progress bar can help you out in this regard. It gives readers a sense of achievement as they move through the content, boosting the overall engagement metric.
And when a user is tempted to scroll through the complete content, the probability of finding the useful parts gets higher. And that can help improve your search presence as a whole.
So, if you don’t want your users to bug out of your content after 4-6 seconds [that’s really not good!], implementing a progress bar is well worth it.
Final Thoughts
That’s all on how to use a reading progress bar WordPress plugin. You’ve seen how easy it is to use PostX and add a progress bar to your WordPress posts.
Tell us what you think. If you’d like to share some suggestions with us, sound off in the comments section.
See you next time.