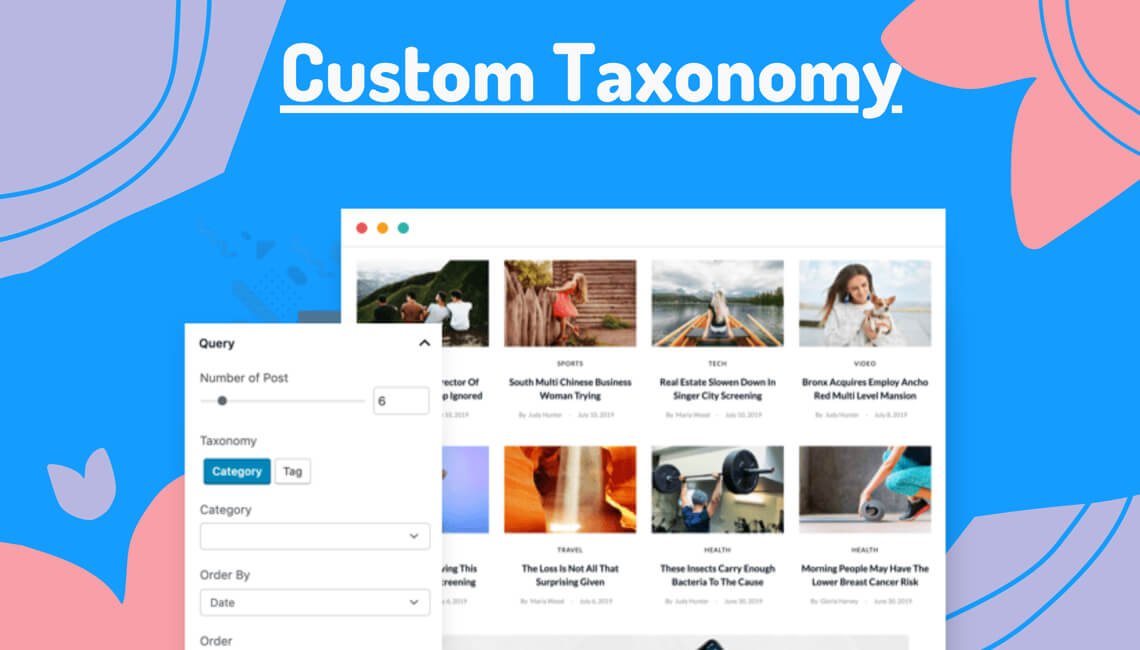
This new year, PostX will offer its customers tons of new features in our Gutenberg Editor. Our brand new custom taxonomy is one of them. Many people might wonder why we are adding this new feature. Let’s discuss that.
At first, let’s discuss why we need taxonomy in the first place. Taxonomy is one of the most important features of WordPress. Category and tag come under the term taxonomy. While you are placing new posts on your website you need to arrange them either by category or tag. It is not an absolute requirement. But categorization makes your post more specific.
When you set “entertainment” as a category of your post, the visitors of your website get a clearer idea of the content you are putting there. As in this case, your content is directly related to entertainment. The same thing goes for tags. Only it makes your posts much more specific.
You may ask why you need a custom taxonomy. There are times when the existing categories and tags might not feel enough. The tags and categories you have in hand are very much generalized in a way. If your website is dealing with a topic that is not very familiar, you will not find a proper taxonomy to specify your posts. What you can do is to add a custom taxonomy to your post. For example, you want to publish a post on “psychology” on your website. You will not find it in the existing taxonomy. In that case, you have to add psychology as a custom taxonomy.
Two things must be mentioned here. First, this brand new custom taxonomy displaying option is available in both our pro and free version. So, our free customers will also be able to bag the opportunity. Second, this new feature is available in version 2.2.0 of our PostX – Gutenberg Post Blocks. So if you haven’t updated yet, do it right now.
Note: PostX can’t help you to create custom taxonomies. To display custom taxonomies using PostX, you have to create them manually by writing code or using a WordPress plugin. To learn more read this blog post.
Now it’s time to discuss how to display the custom taxonomy in Gutenberg editor and how to use it properly.
Custom taxonomy can be used in PostX to build queries and filter your content. You can use one or multiple custom taxonomies to build queries and filter your content. Now, let us take a look at how to use custom taxonomy to develop queries and filter your content.
How to Use Custom Taxonomy to Build Queries
Step: 1
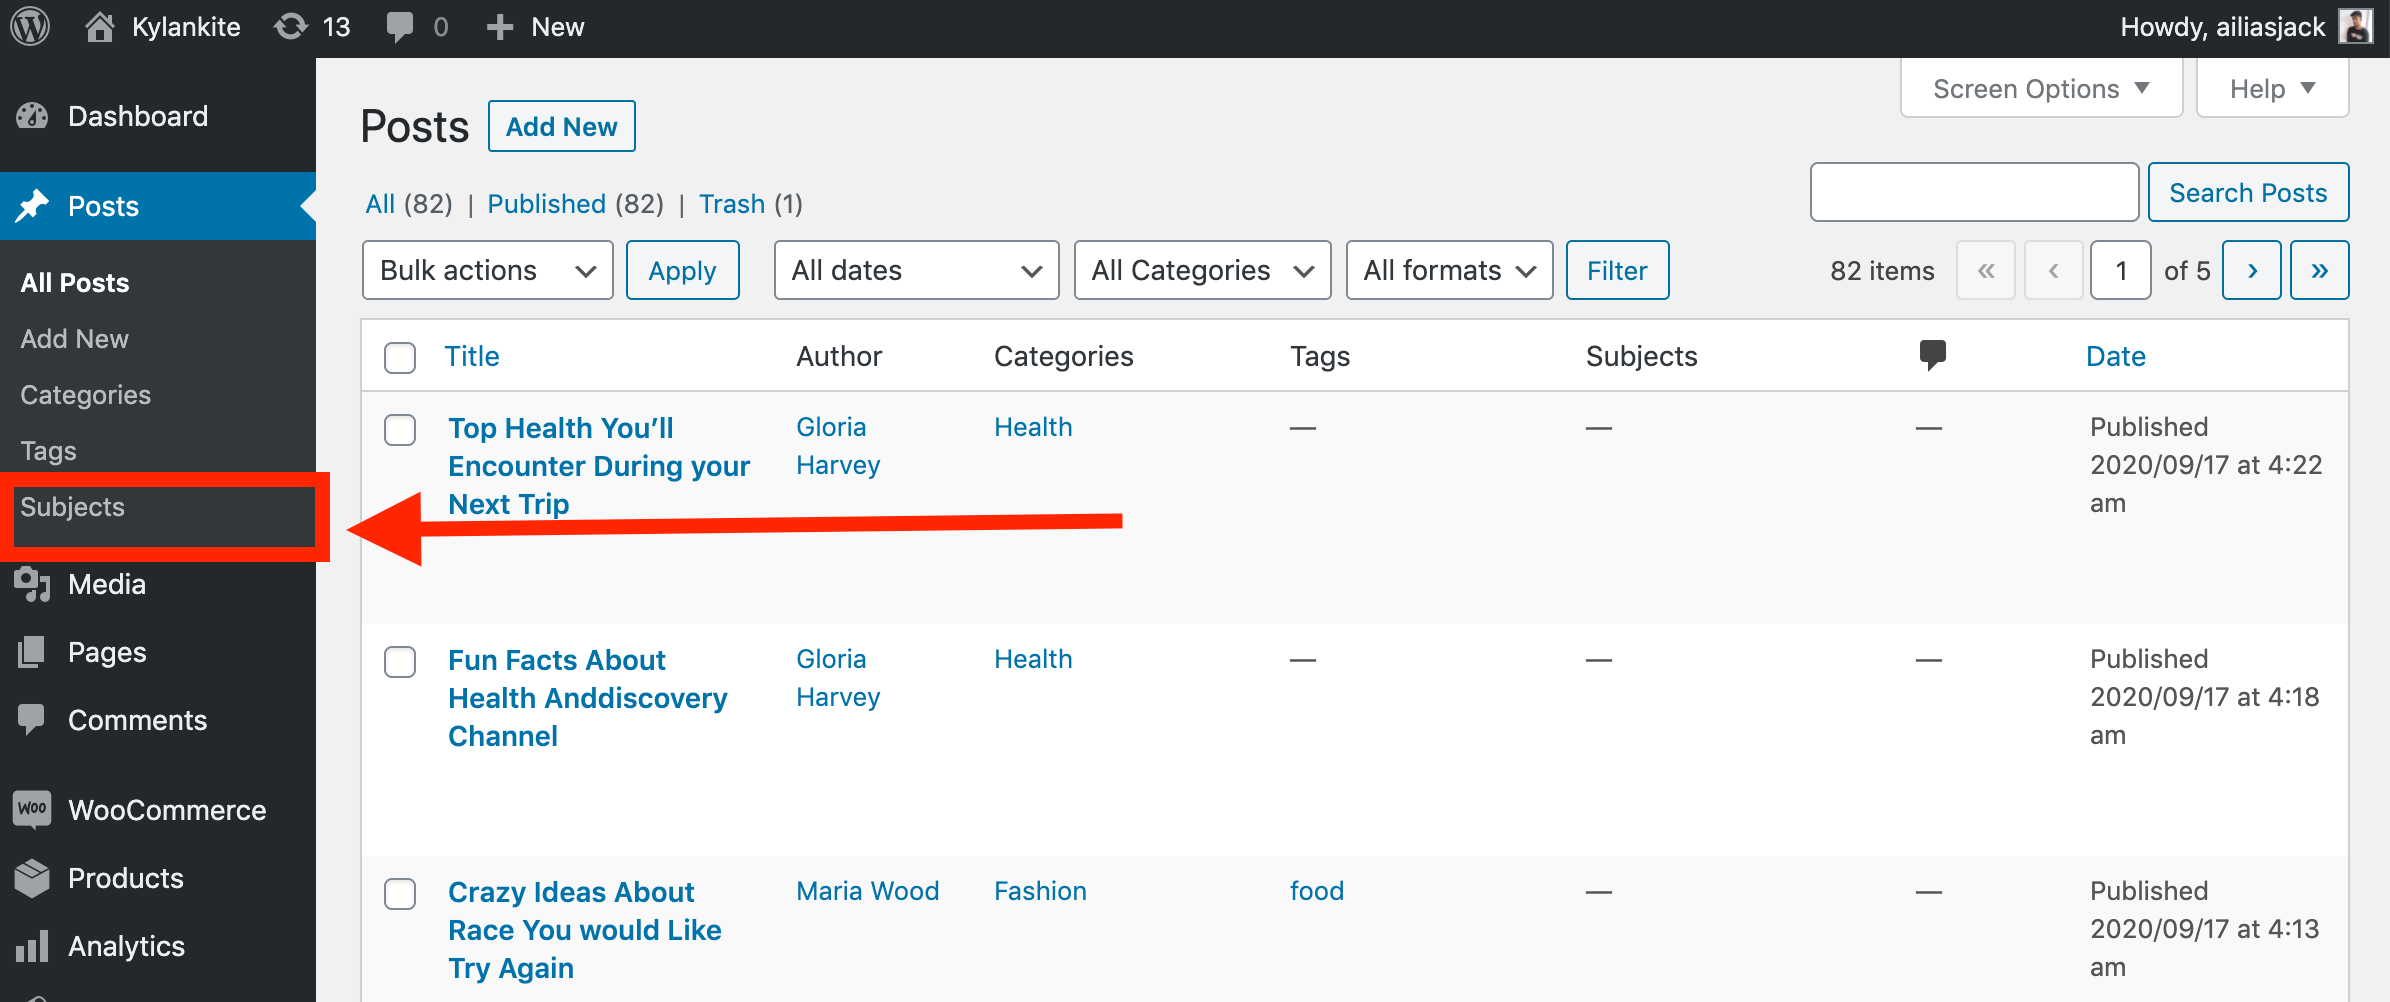
First of all, go to the dashboard. You will see the option “posts” there. When you will click on it, a number of options should appear before you. At the lowest section, you find “Subjects” right under “Tags”. This SUBJECT is our custom taxonomy. You need to click on it. This will take you to a whole new page where you will be able to add your custom taxonomy.
Step: 2
As you have found out the custom taxonomy, it’s time to customize the new taxonomy. After clicking on the subject, you will see some blank boxes that say “name” “slug” “description”.
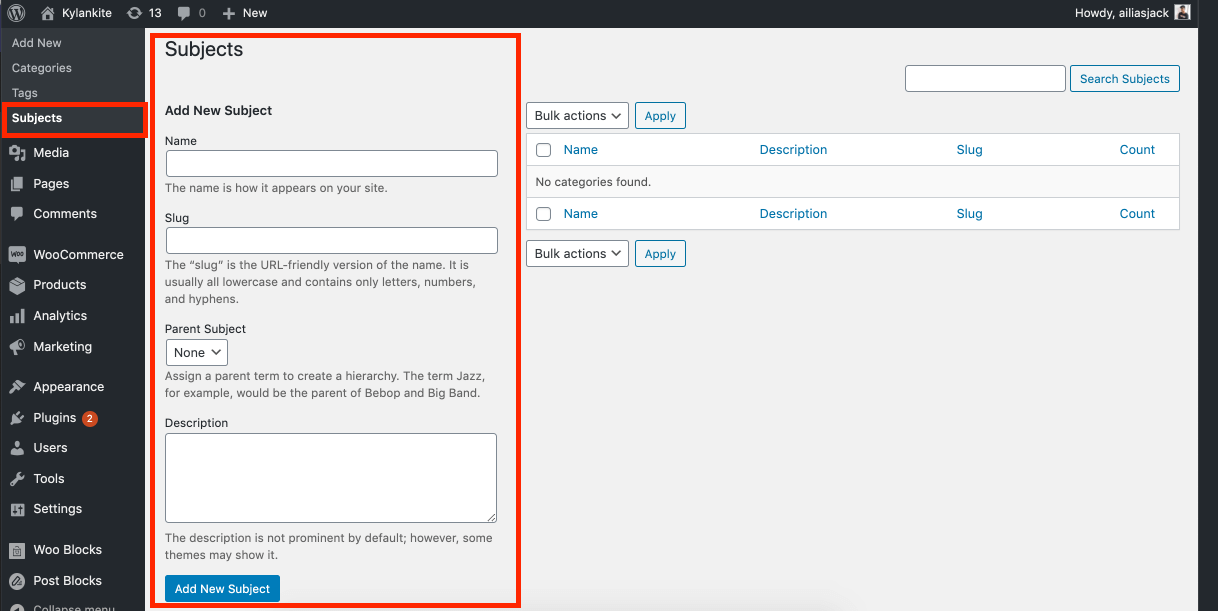
Among those three options, one is to be filled mandatorily. That is “name”. Here you will put the topic you have chosen. If you want to put psychology as a subject of your posts, you can write it in that blank box. The other two options are not mandatory to fill up. If you want to go one step further only then fill them up. After filling up that one mandatory box, move to the option saying “add new subject”. Just click on that and your job will be done.
Step: 3
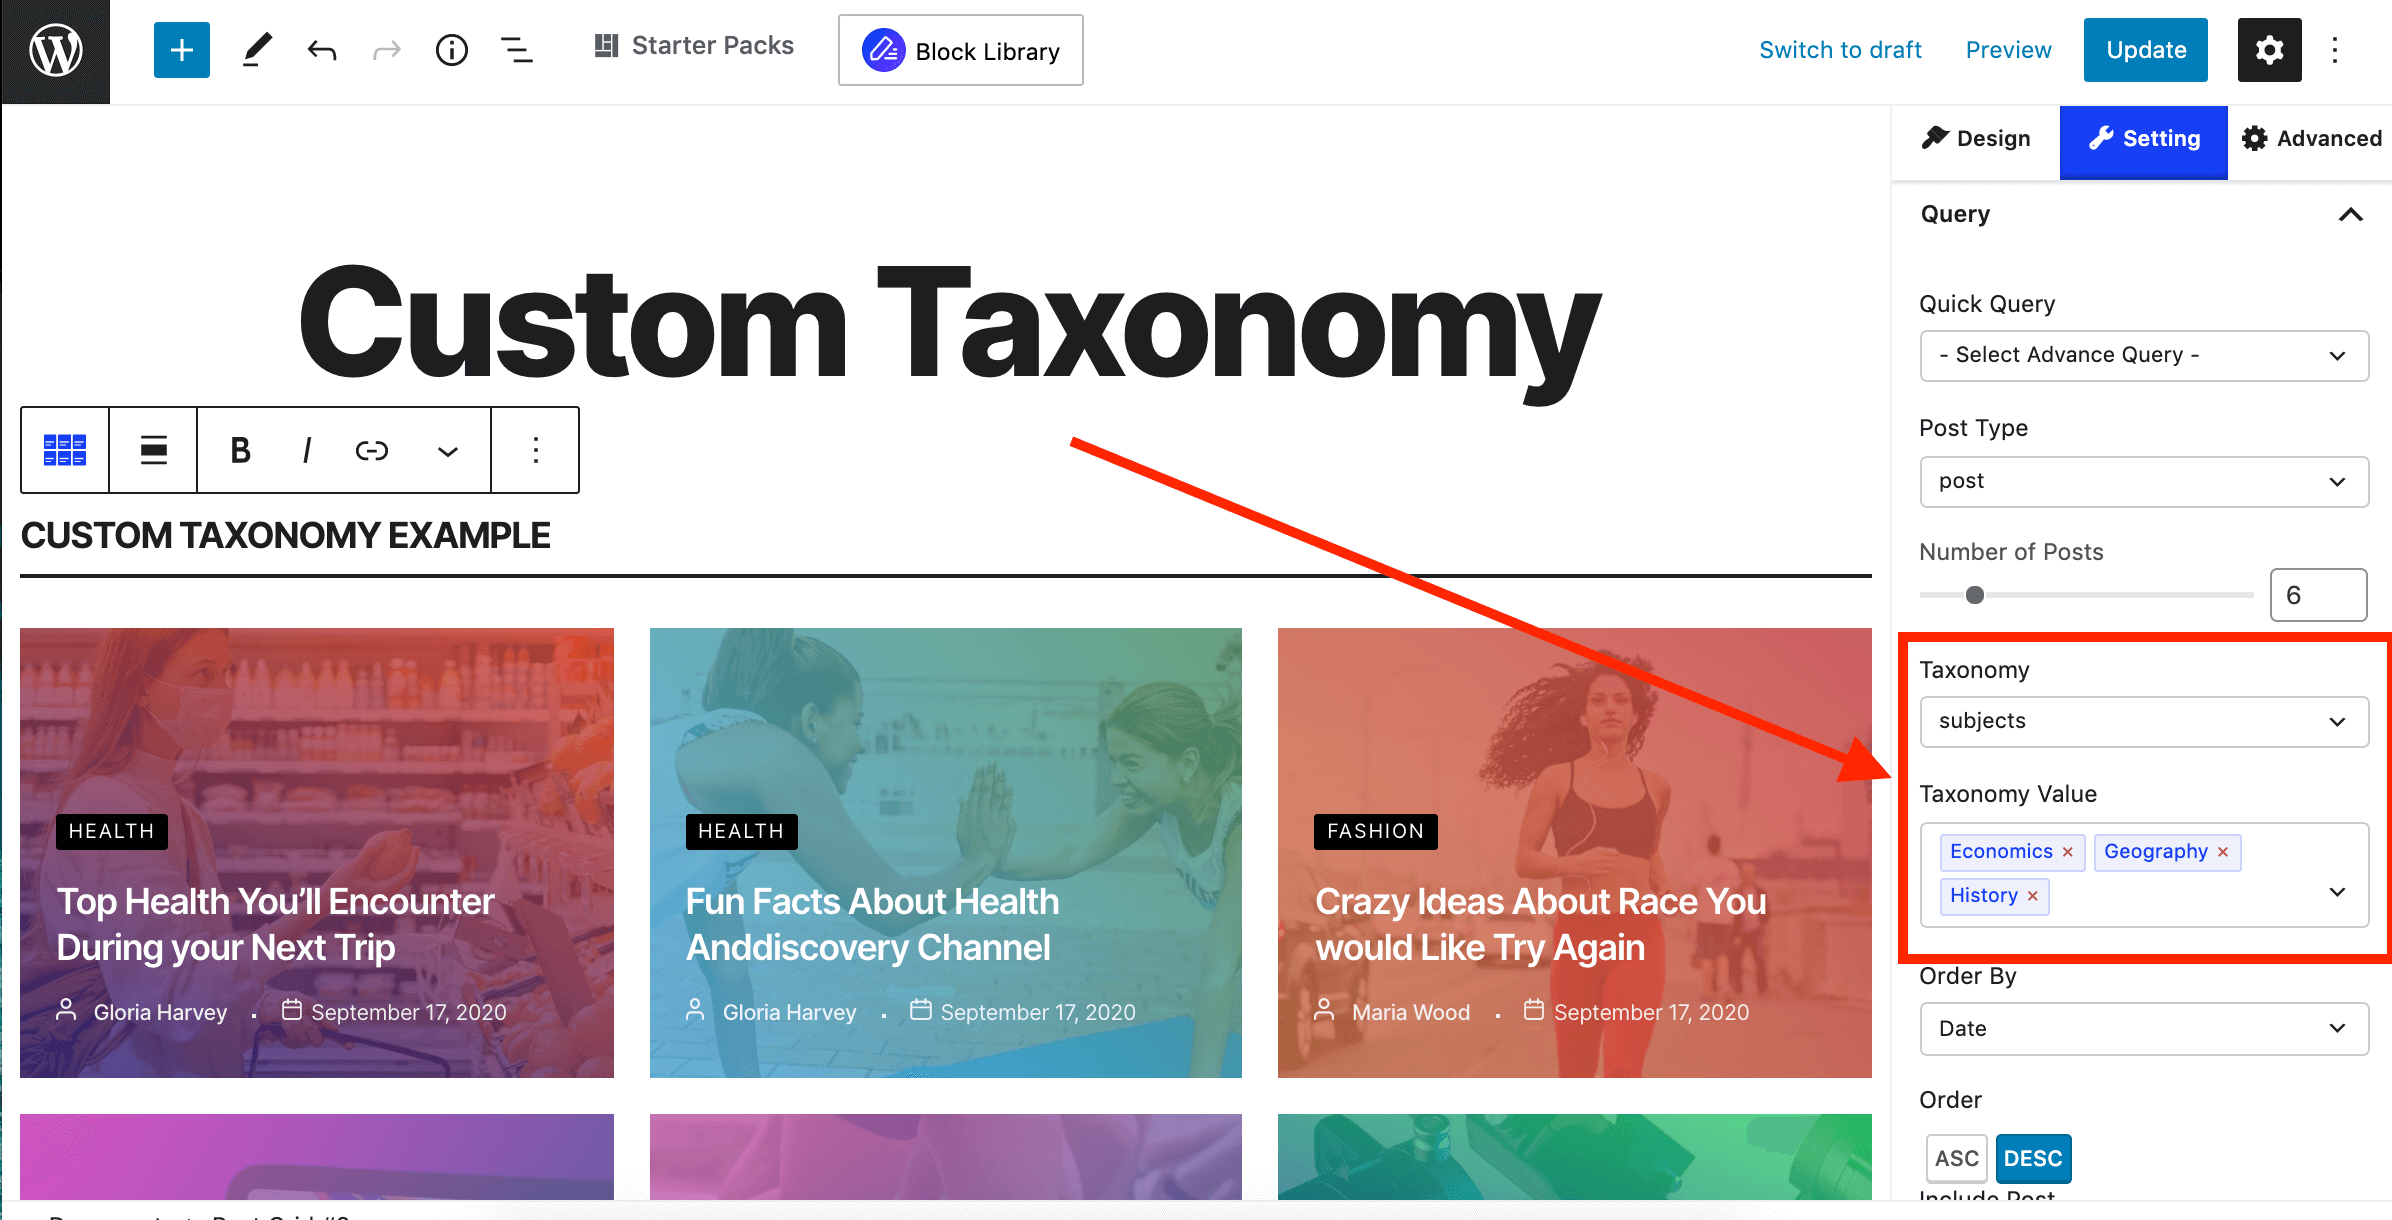
This step is the most important one. Now, it’s time to go back to PostX. First, you need to select the block you want to work with. Then add the block. Next, you need to go to the “settings” option and from there to “query”. When you will click on this option it will open multiple options. Among them, you will find taxonomy. Taxonomy includes category, tags, and other options. Among them, you will see your desired option “subject”. This is the custom taxonomy we are talking about. By selecting “subject” this step will be done.
Step: 4
You also need to change the value of your taxonomy from the “taxonomy value” section. You will find this section right below the “taxonomy”. For example, in the case of “subjects” which is our new custom taxonomy, you will get the name you have put when you added the subject. In this case, you will be able to add multiple subjects. Use our fantastic query builder to create queries by one or multiple subjects to your heart’s content. We dare not hold you back.
How to Use Custom Taxonomy to Filter your Content
Step: 1
First, you need to add a block. After that, you have to go to the settings option. From there you have to go to the general section. Here your job is to turn on the filter.
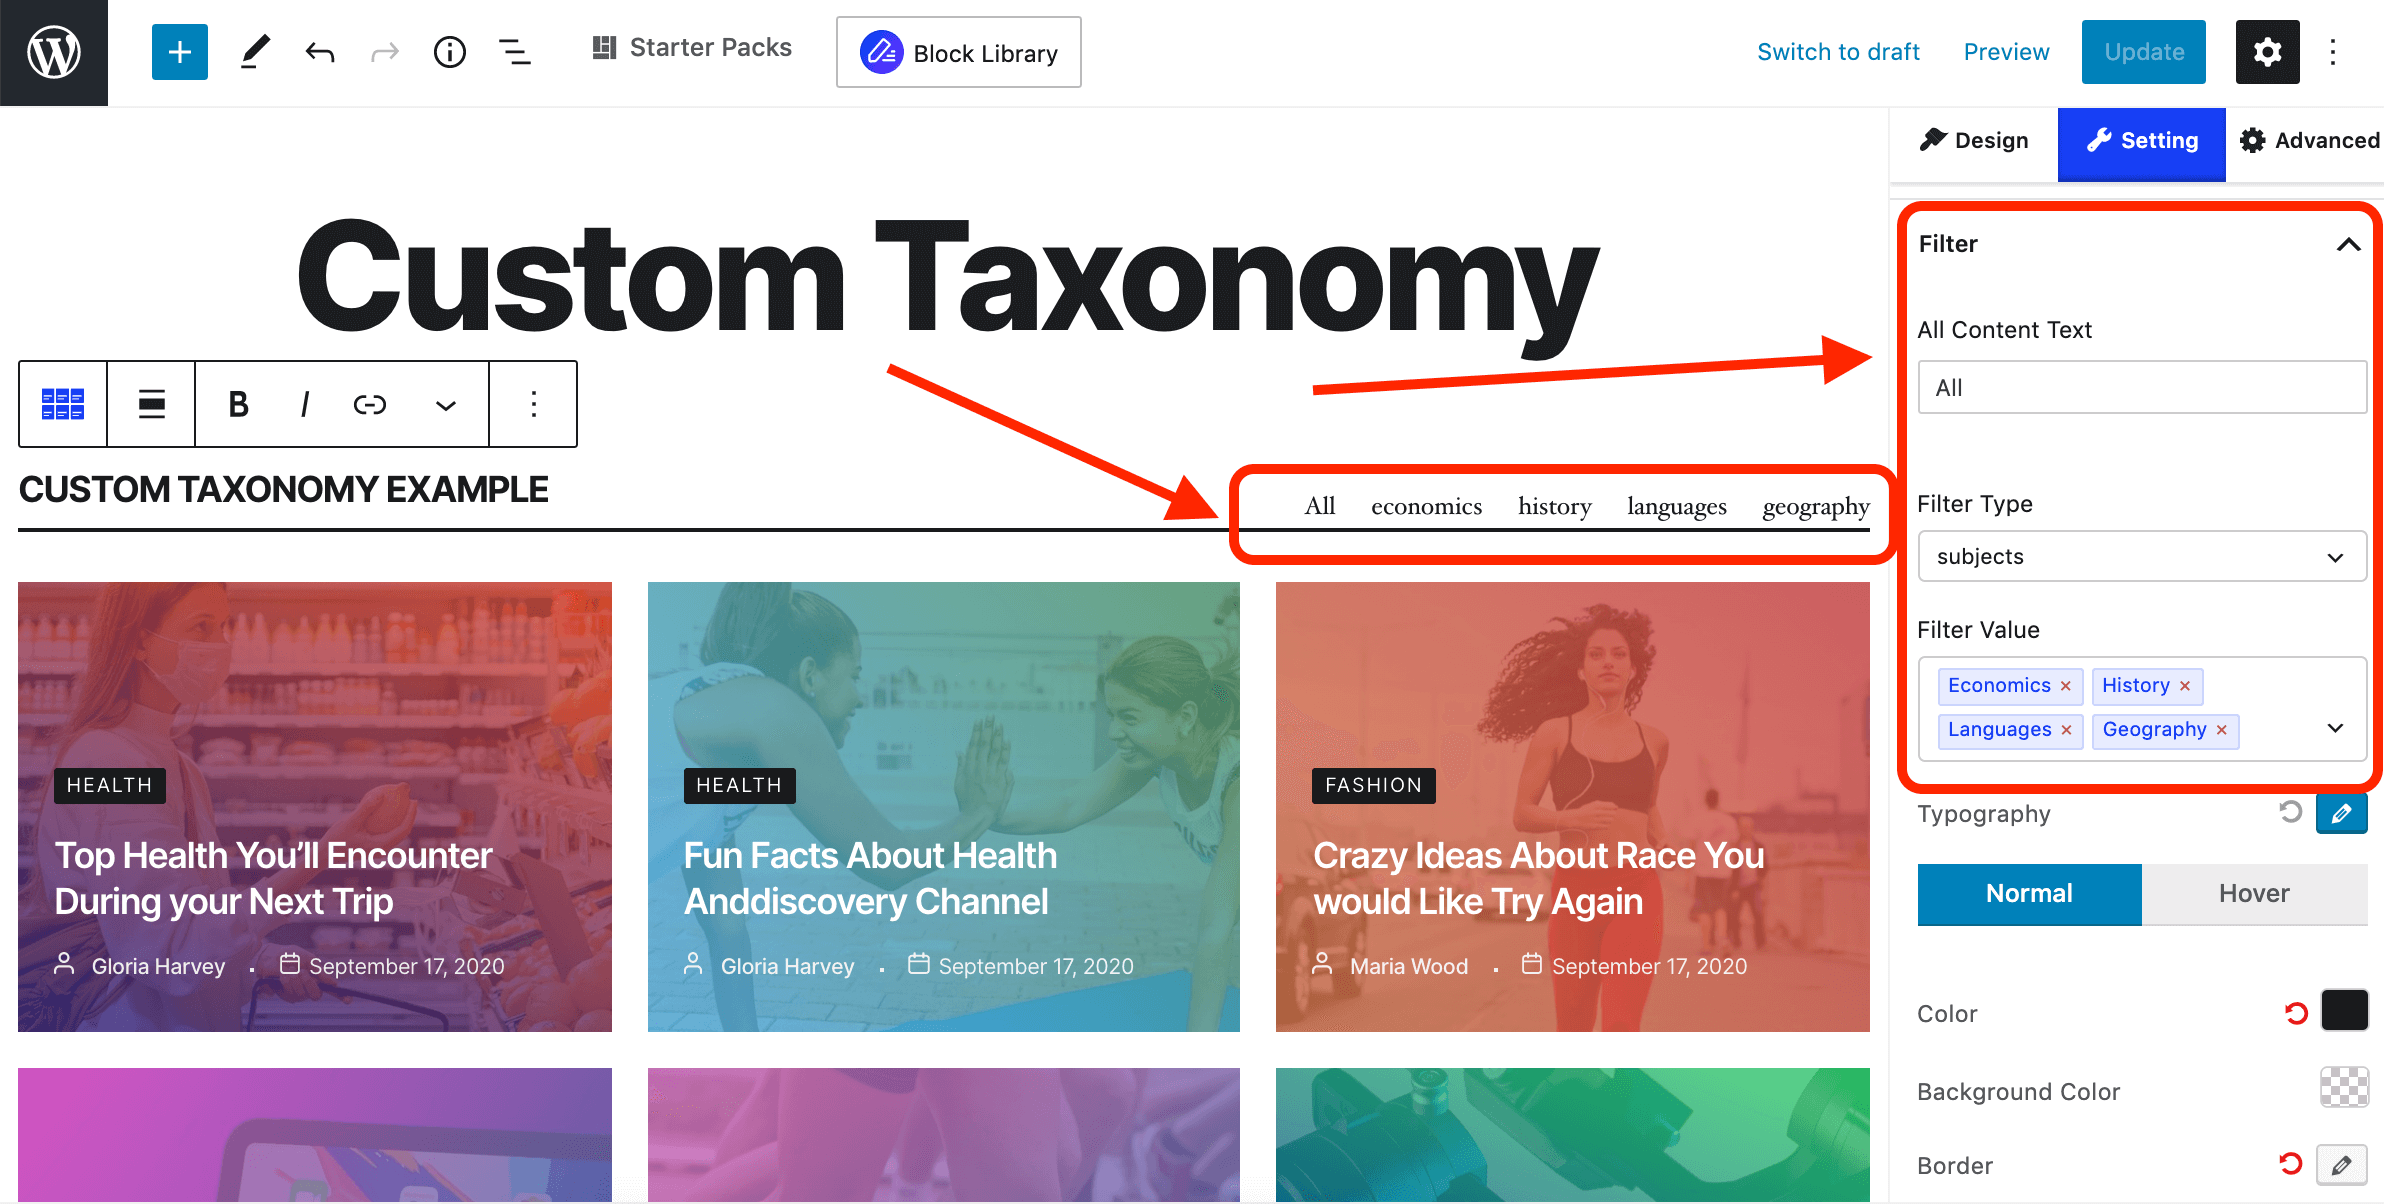
Only if you have turned on the filter, the “filter” settings will appear. Next, you need to head to “filter type”. You will find this section under the “All Filter Text”. Our custom taxonomy “subjects” will be here.
Step: 2
Now, the way you have changed the taxonomy value following the same steps you can change the filter value as well. You can add multiple subjects in the filter value and filter your content accordingly.
And this is how you will be able to and use custom taxonomy in PostX. With the addition of custom taxonomy in PostX, you will be able to say goodbye to vagueness and welcome precision.
PostX has opened up a new gateway for its customers by adding the brand new custom taxonomy “subjects”. Now, our PostX will not offer you only a handful of options to add. With this custom taxonomy, you will get unlimited options at your fingertips. There should not be any more difficulties to add posts on any topics you feel like. Make the best use of this newly created feature to make your website more versatile and vibrant.
