One of the most-asked-for features in WooCommerce is the ability to change the “My Account” page. The “My Account” page of a WooCommerce site is crucial to its smooth operation. It should be well-designed so that users can get the most out of account management, and it can be changed to make more sales or bring back customers.
But making changes to the WooCommerce “My Account” page can be complicated and inconvenient from the default settings. Because of this, we’re here to show you one of the best and easiest ways to customize the WooCommerce My Account page with ProductX.
Why is WooCommerce My Account Page Customization Important?
My account page is a crucial component of WooCommerce stores since our customers may demand more choices on this page. They can also choose to provide payment choices, websites, locations, and other pertinent information.
You can also modify my account page layouts, colors, and text formatting, which is extremely frequent in modern times. However, as many WooCommerce users know, these features are not enabled by default on the WooCommerce platform.
Adding scripts for these and any other modifications is the obvious solution. With one of the WooCommerce My Account page modification plugins, you can also modify the WooCommerce My Account page.
How to Customize WooCommerce My Account Page with ProductX
ProductX is now WowStore! We’re very excited to bring you this experience, packed with exciting features. Please note that the features, blocks, starter packs, etc. all work the same. If you have used ProductX, you’ll feel right at home with WowStore.
ProductX’s newest addition, the “WooCommerce Builder,” can help you create and customize templates like the My Account page. This guide will show you how to customize WooCommerce My Account pages without any code.
Video Tutorial
Before we start the in-depth creation and customization process, we’ve made a video of it. You can check the video for a visual understanding.
Step 1: Install and Activate ProductX
To create and customize the WooCommerce My Account page, you need to install the plugin ProductX.
The steps are very easy to follow:
- Go to your admin dashboard, click on Plugins > Add New Plugin
- Search with the plugin’s name ProductX
- Click on Install Now and wait for a few moments
- Now click on Activate to start using the plugin
Step 2: Turn on the Woo Builder
After installing the plugin successfully, you need to turn on the Woo Builder addon.
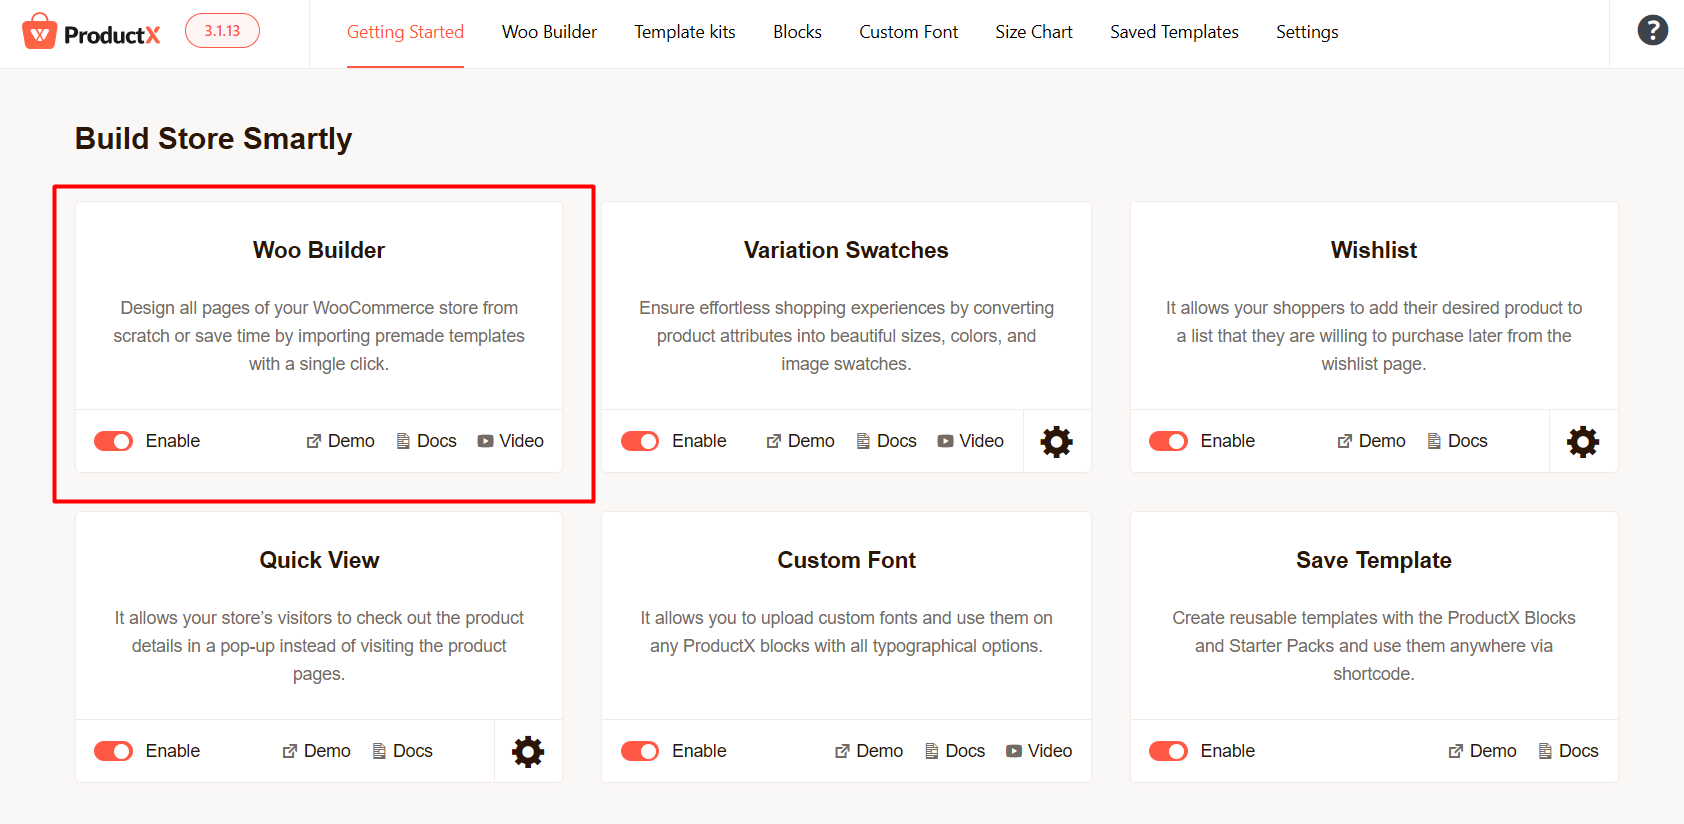
Simply do these steps:
- From the Getting Started page of ProductX, find the Woo Builder addon
- Now click on the Enable button to activate it
Step 3: Create My Account Page Template
After enabling the addon, now you have to create the template for the My Account page.
The steps are straightforward:
- Navigate to the Woo Builder tab of ProductX
- Now click on All Template > Create Template
- Scroll down to find the option saying My Account and click on it
- Choose from existing templates or create a new one
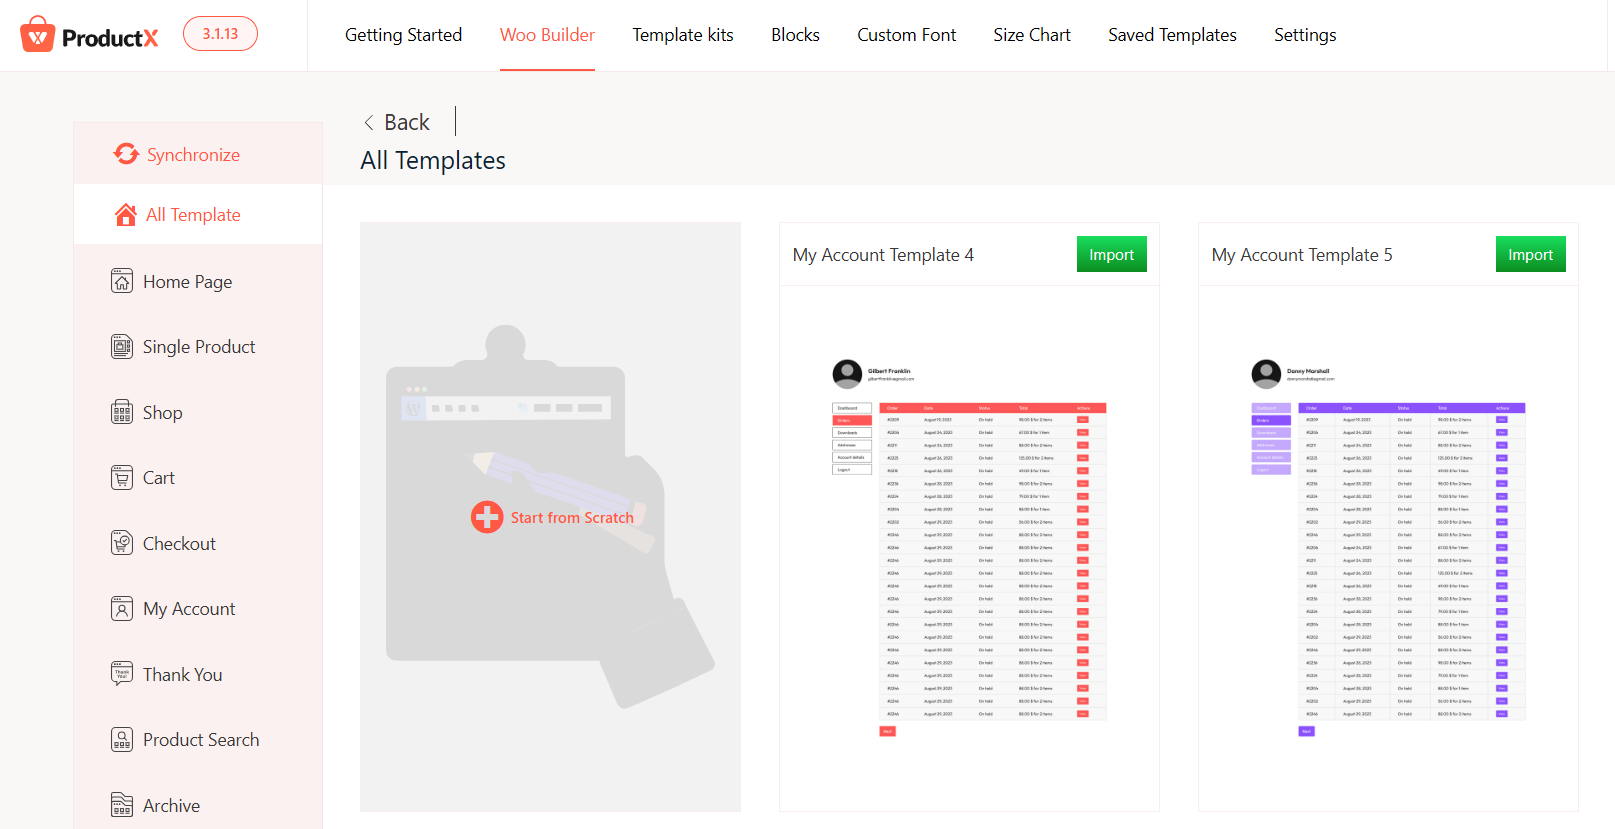
And you have done it. My account page template has been successfully created.
Step 4: Arrange WooCommerce My Account Page
You have created my account page template. Now you must arrange it. This guide will assist you in arranging your WooCommerce my account page by adding just one block.
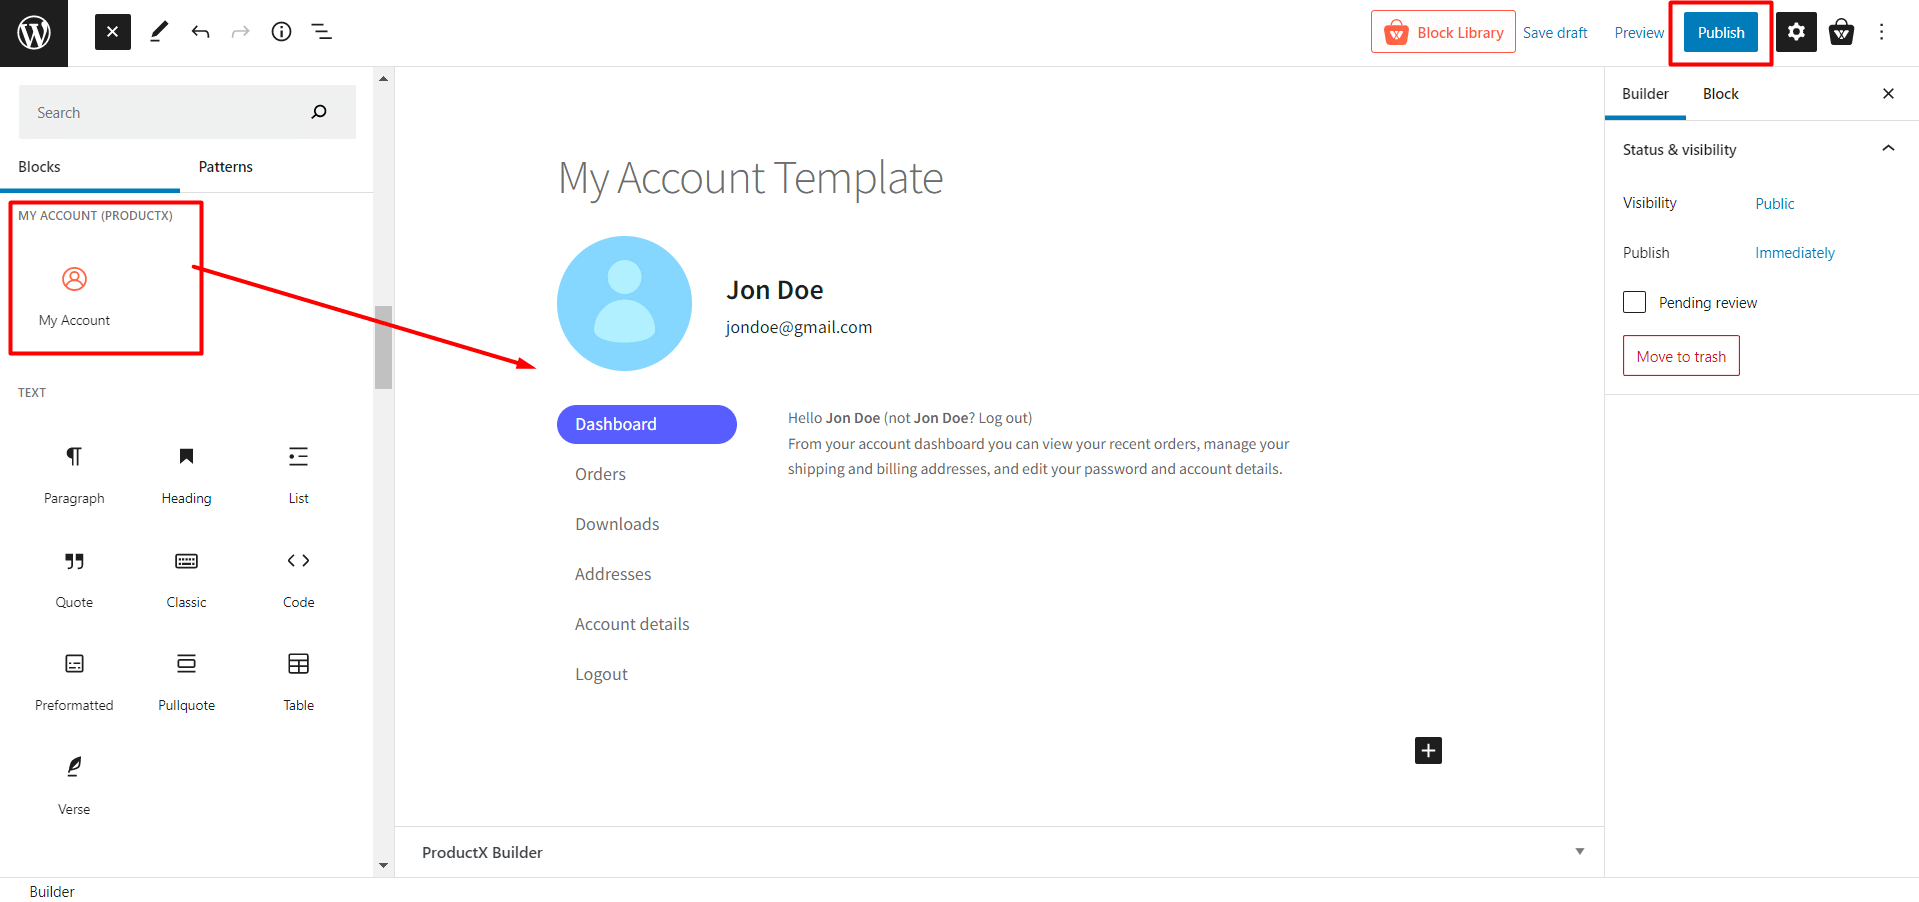
We have specified a section of the block for creating my account page. Which is:
- My Account
You can design your my account page however you want with this block.
Step 5: Customize WooCommerce My Account Page Template
You can customize the My Account page template easily with various customization options. You will learn all about them in this section.
My Account
This block displays the account details of users, including orders, addresses, downloadable products, etc.
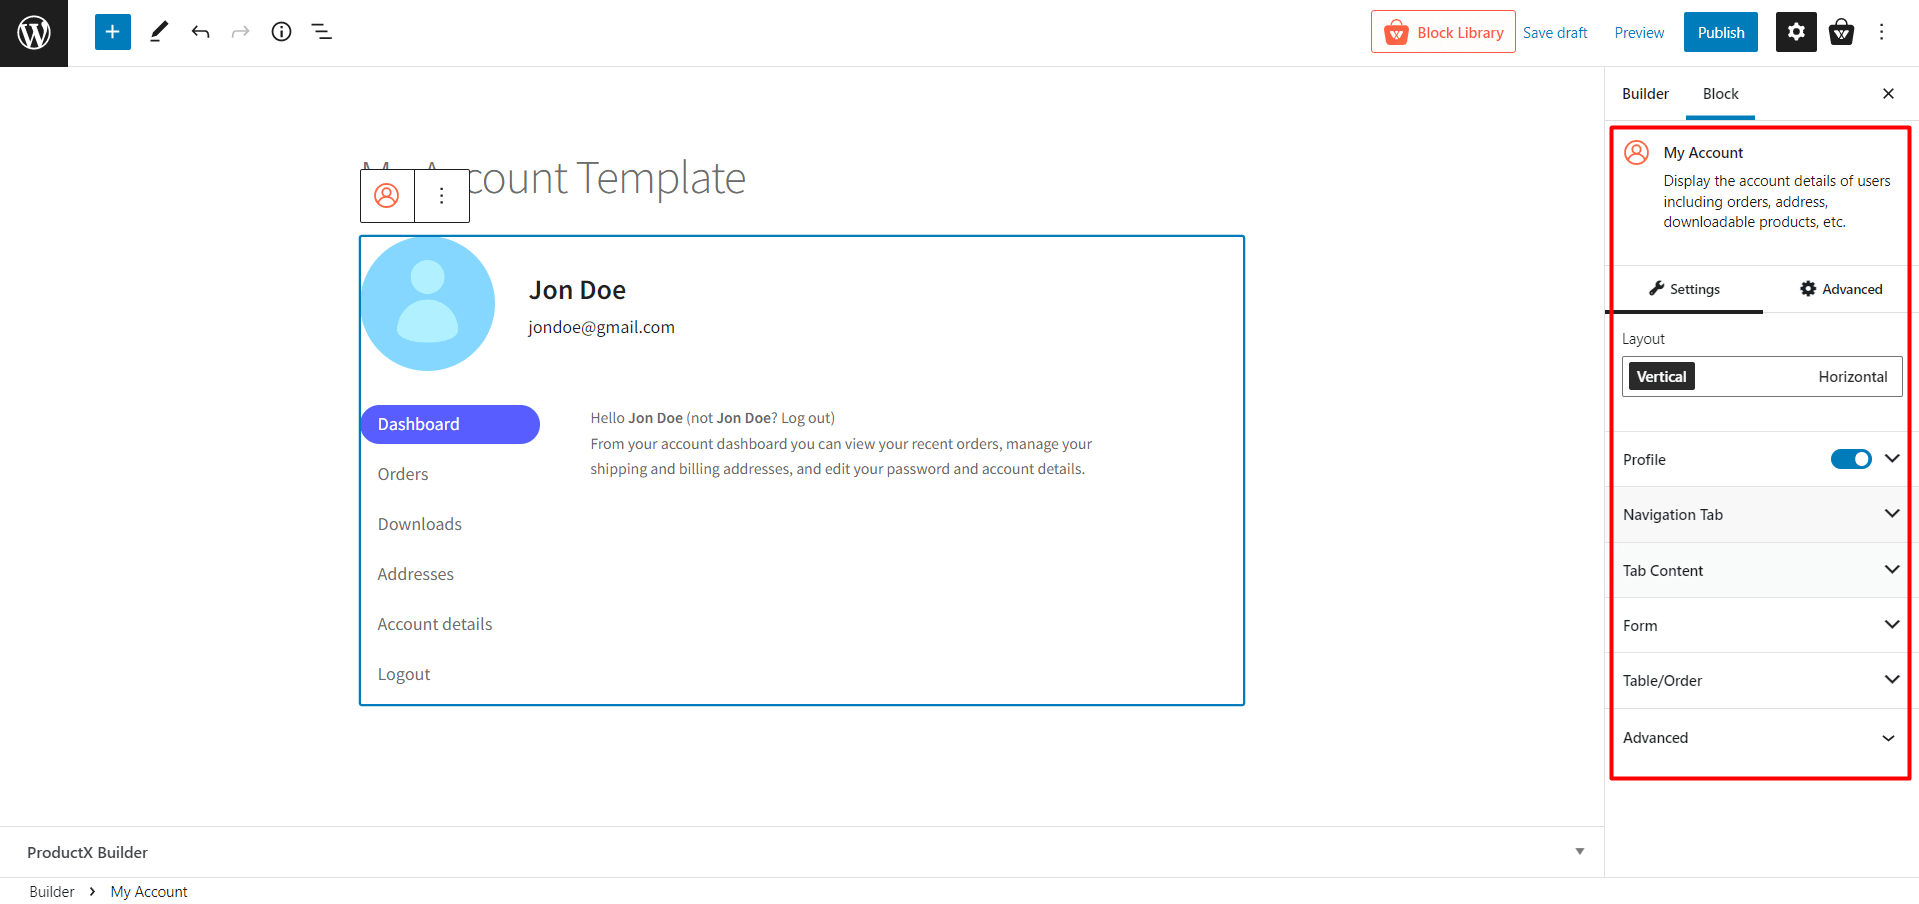
And nonetheless, you’ll get a ton of customization options to go through.
- Layout (Change layout to vertical or horizontal)
- Profile (turn this option on/off; display/hide profile and change all its typographies, including color, height, width, border, and spacing)
- Navigation Tab (Change typographies, width, spacing, list spacing, color, background, border, padding, etc.)
- Tab Content (modify typographies, background, link color, heading, border, box shadow, etc.)
- Form (Customize rows gap, label typography, label color, and all input typography customization)
- Table/Order (Change every table settings like border, padding, the color of heading, body, button, table footer, and more.)
- Advanced (Extra option to customize additional CSS classes.)
Conclusion
Now you know how to customize WooCommerce my account page. We hope this article has provided you with a clear understanding of the WooCommerce my account page customization.
The default WooCommerce My Account page is relatively minimal, although it provides crucial user information. Therefore, by modifying it, you can get an advantage over your competitors and maximize your wooCommerce website.
Check out our YouTube Channel to find helpful tutorials. Also, you can connect with us on our Facebook and Twitter!

