Categories are a very important part of any kind of blogging or news magazine website. So, we always try to optimize the category pages to align with our brands. The category pages separate blog posts and help readers to find the posts they are interested in.
But what about the subcategories?
Yes, subcategories are also important, like the categories. However, the problem arises when we have too many subcategories. Don’t worry: having numerous subcategories is not a bad thing. The problem is that we often forget to display them in front of the readers. An effective solution to this problem is to display them on their parent category pages.
But the question is, how do we show categories on the category page in WordPress?
You can effortlessly display subcategories on their parent category pages by following the steps below:
- Step 1: Create Category and Subcategory Pages
- Sep 2: Create a Custom Template for Category Pages
- Step 3: Add Custom Codes to Show Subcategories
- Alternate Method: Use a Plugin like PostX for a Codeless Solution
What is the Difference Between Categories and Subcategories?
WordPress categories are archive pages in which similar types of blog posts are grouped together to organize them and let the readers find them effortlessly.
Subcategories are the child of parent categories that are used for making niche groups of blog posts. For example, you have a news category, so you can create subcategories like sports news, movie news, gaming news, etc.
Why Should We Display Subcategories on Category Pages?
Most WordPress blogs or websites may only require categories. However, some blogs that have hundreds of posts within the same category are recommended to have subcategories too.
You can easily display the categories on the WordPress menu and sidebar. But what about the subcategories? Yes, you can also display subcategories. But it may be confusing for the readers. So, highlighting child categories under their parent category will be a smart move for you. Here’s why:
Improved User Experience
Subcategories ensure that the readers are able to find the posts they are interested in effortlessly. It reduces the browsing time and encourages readers to read more posts. As a result, you can improve the overall user experience.
Better and Organized Content
If the post count of your website is higher than usual, you must organize them into smaller groups, and subcategories can help you do that.
Increased Page Views & Dwell Time
Chile categories encourage readers to explore the subtopics even if they are not interested in them while visiting the website. It not only increases the number of page views but also improves the dwell time of your website.
Make Google Love Your Website
Google’s crawlers love to crawl and index well-structured websites. So, linking child categories directly from the parent categories will help the crawlers explore more pages. As a result, Google will fall in love with your website, and you will get more visitors.
Professional-Looking Website
You should also try to present the subcategories in a professional way, if possible. It will improve your branding, especially for news or magazine websites.
How to Add Categories and Subcategories in WordPress
Before going to the steps of displaying subcategories, you must ensure that your WordPress website already has parent and child categories. You can ignore this section if you already have them. Or else, you can follow the steps below:
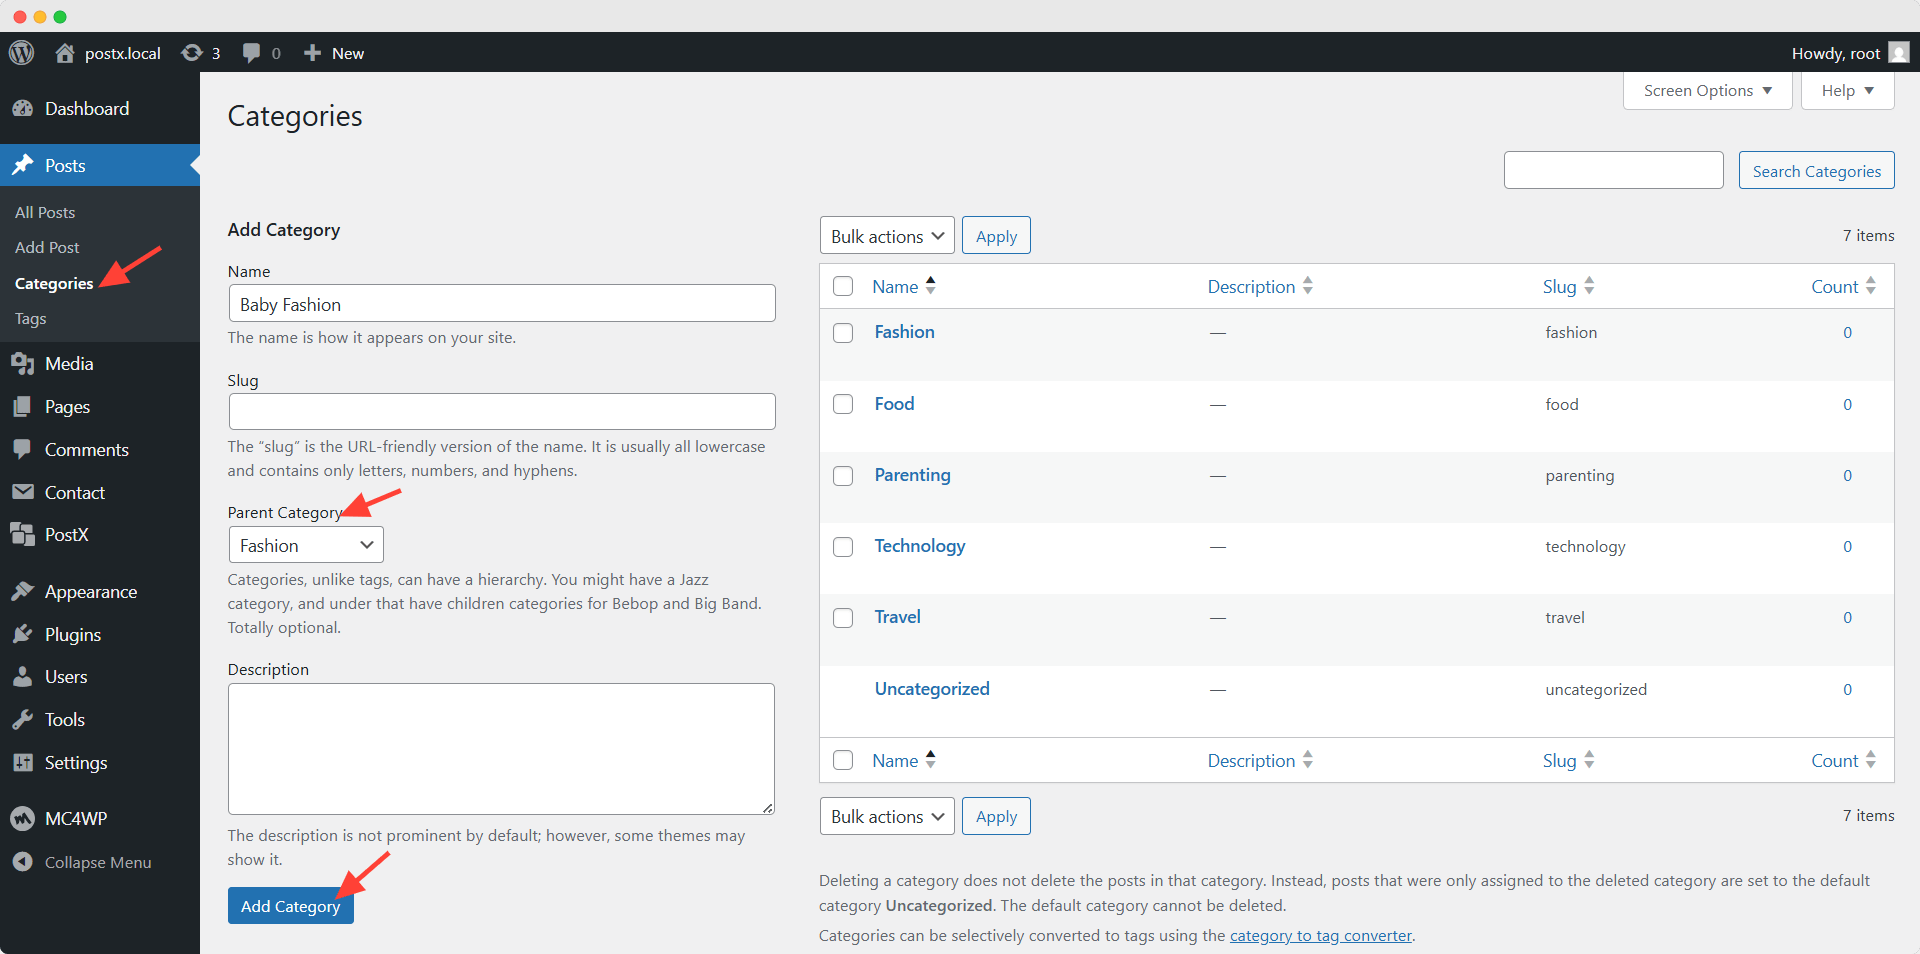
Create Category Pages: First, go to the Posts >> Category section of the WordPress site. Add a name, slug, and description of your category. Then click on the “Add New Category” button.
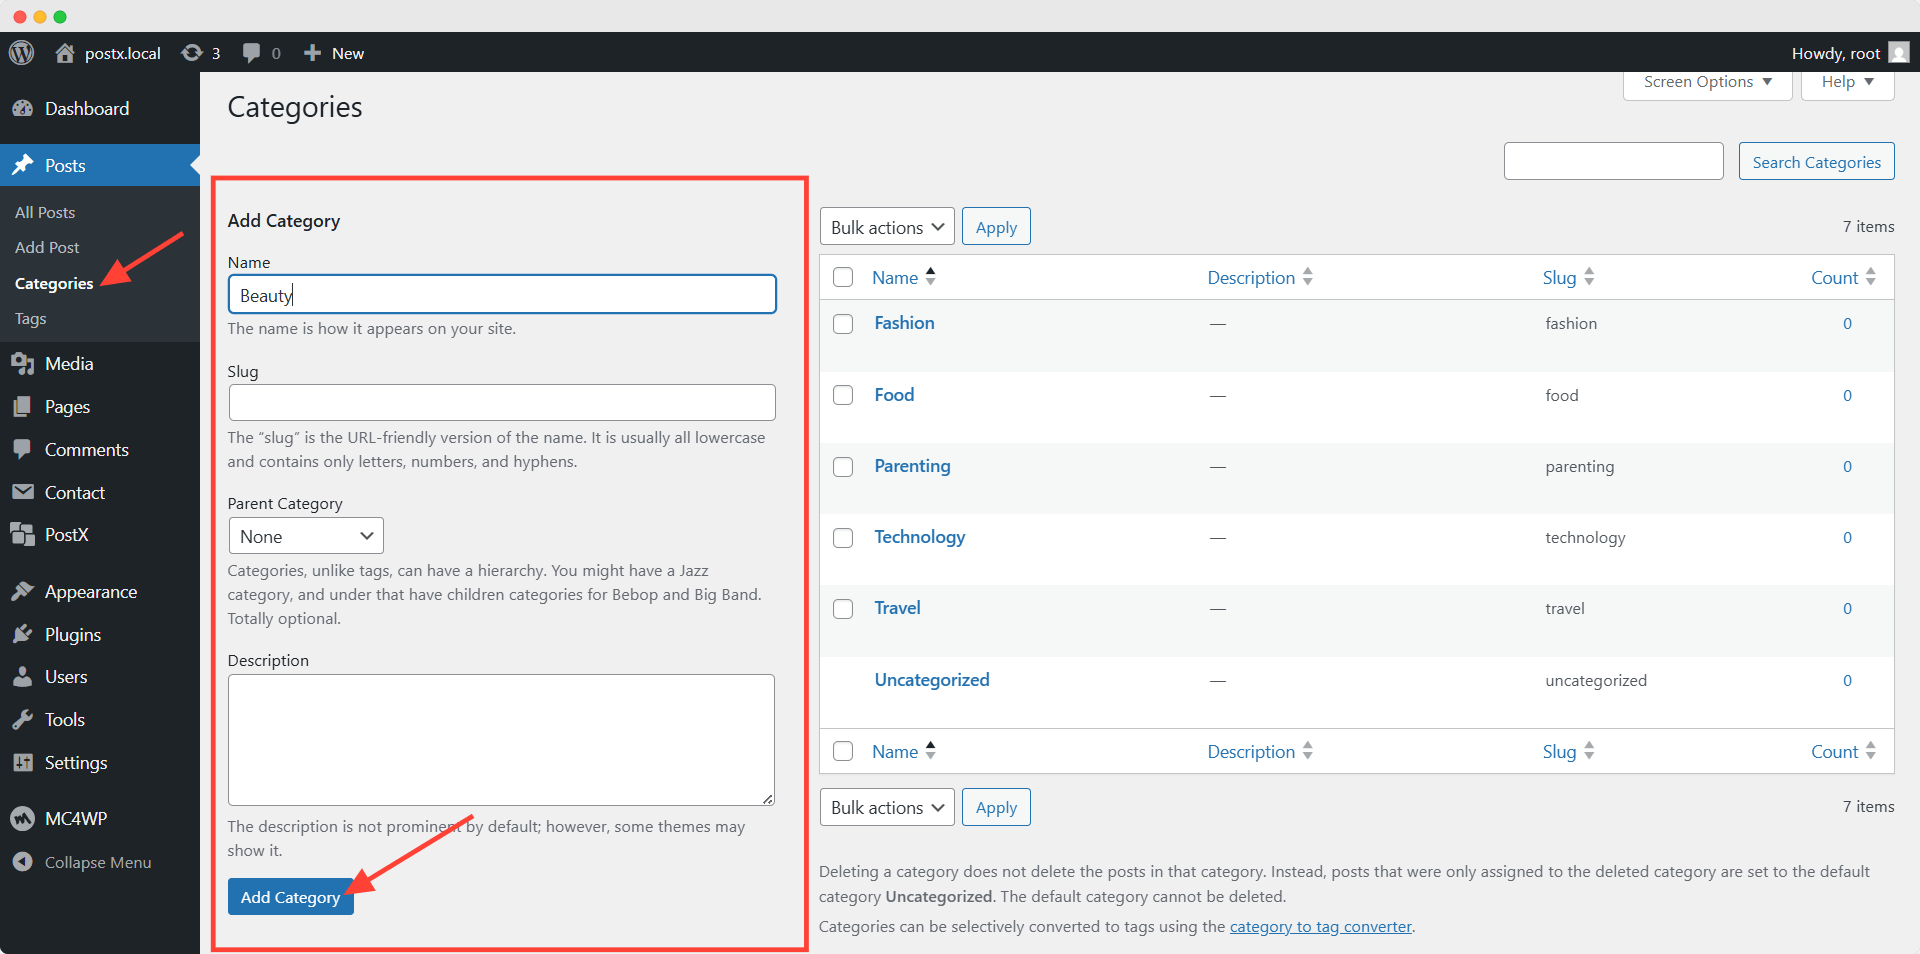
Note: Adding a slug and category description is not mandatory.
Subcategories: The process of adding a subcategory is almost similar to a category. The only difference is that you need to select the parent category.
Method 1: Show Subcategories on Category Pages Using Custom Code (For Developers)
If you are comfortable writing code, you should go for it to keep the plugin count low. You can also get the codes using AI, like ChatGPT. But make sure you have a backup of your websites before making any changes. So, if you are really confident in using code, follow the steps below:
Step 1: Install and Activate the Child Theme
First, you should have a child theme on your website. Otherwise, the additional codes that you will add may get deleted once your theme is updated to the latest version.
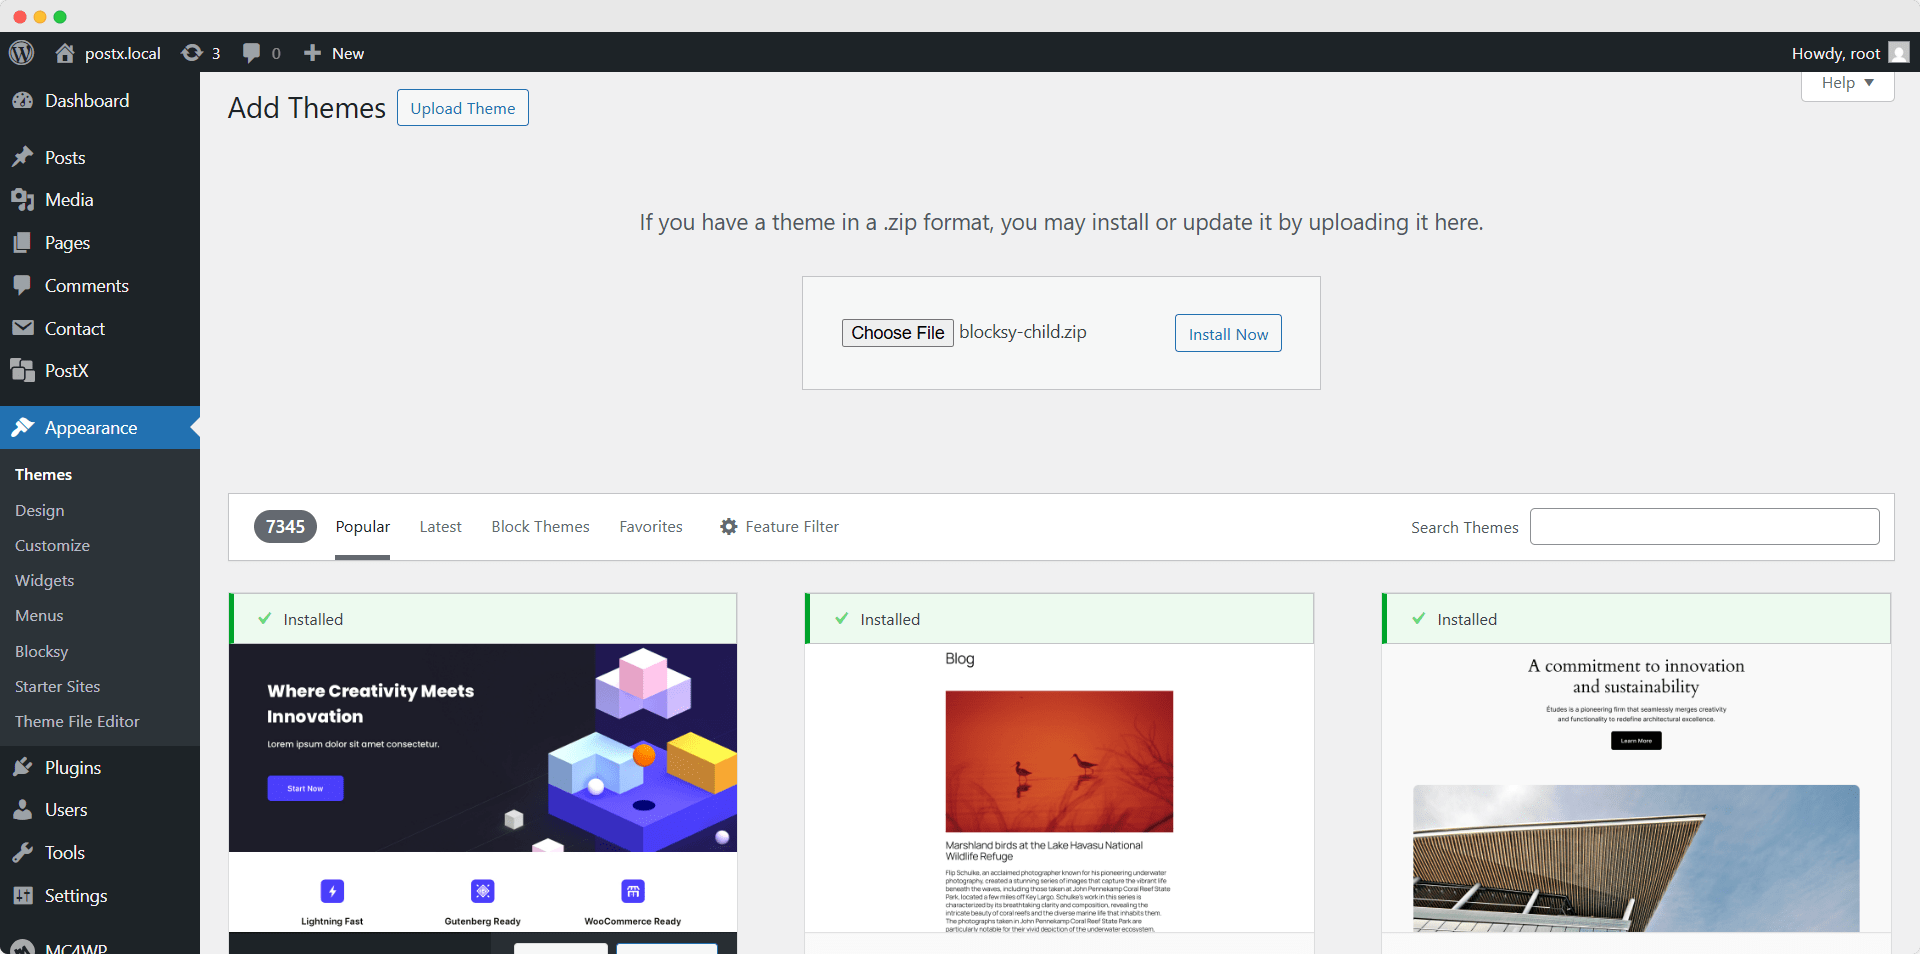
As we are using the Blocksy theme, we have downloaded the child theme from their official site. The installation process of the child theme is similar to the normal theme. If you can’t find the child theme of your current theme, you can also make one from scratch.
Step 2: Create a Template for Category Pages
If you know the WordPress template hierarchy, you should also know that almost all of the themes provide only a single template for Archive pages that includes categories, authors, search results, and tags.
However, as we want to add child categories only to parent category pages, we need to create a separate template. For that:
- Copy the archive.php file from the parent theme
- Paste the file into the child theme
- Change the file name to category.php
Step 3: Add Codes to Display Subcategories
At last, we can add the following code to the new category template to display subcategories.
// Get current category object
$current_category = get_queried_object();
// Get subcategories of current category
$subcategories = get_categories([
'child_of' => $current_category->term_id,
'hide_empty' => false,
'taxonomy' => 'category',
]);
// Display subcategories if found
if (!empty($subcategories)) {
echo '<div class="subcategories">';
echo '<h3>Subcategories</h3>';
echo '<ul>';
foreach ($subcategories as $subcategory) {
echo '<li>';
echo '<a href="' . esc_url(get_category_link($subcategory->term_id)) . '">';
echo esc_html($subcategory->name);
echo '</a>';
echo '</li>';
}
echo '</ul>';
echo '</div>';
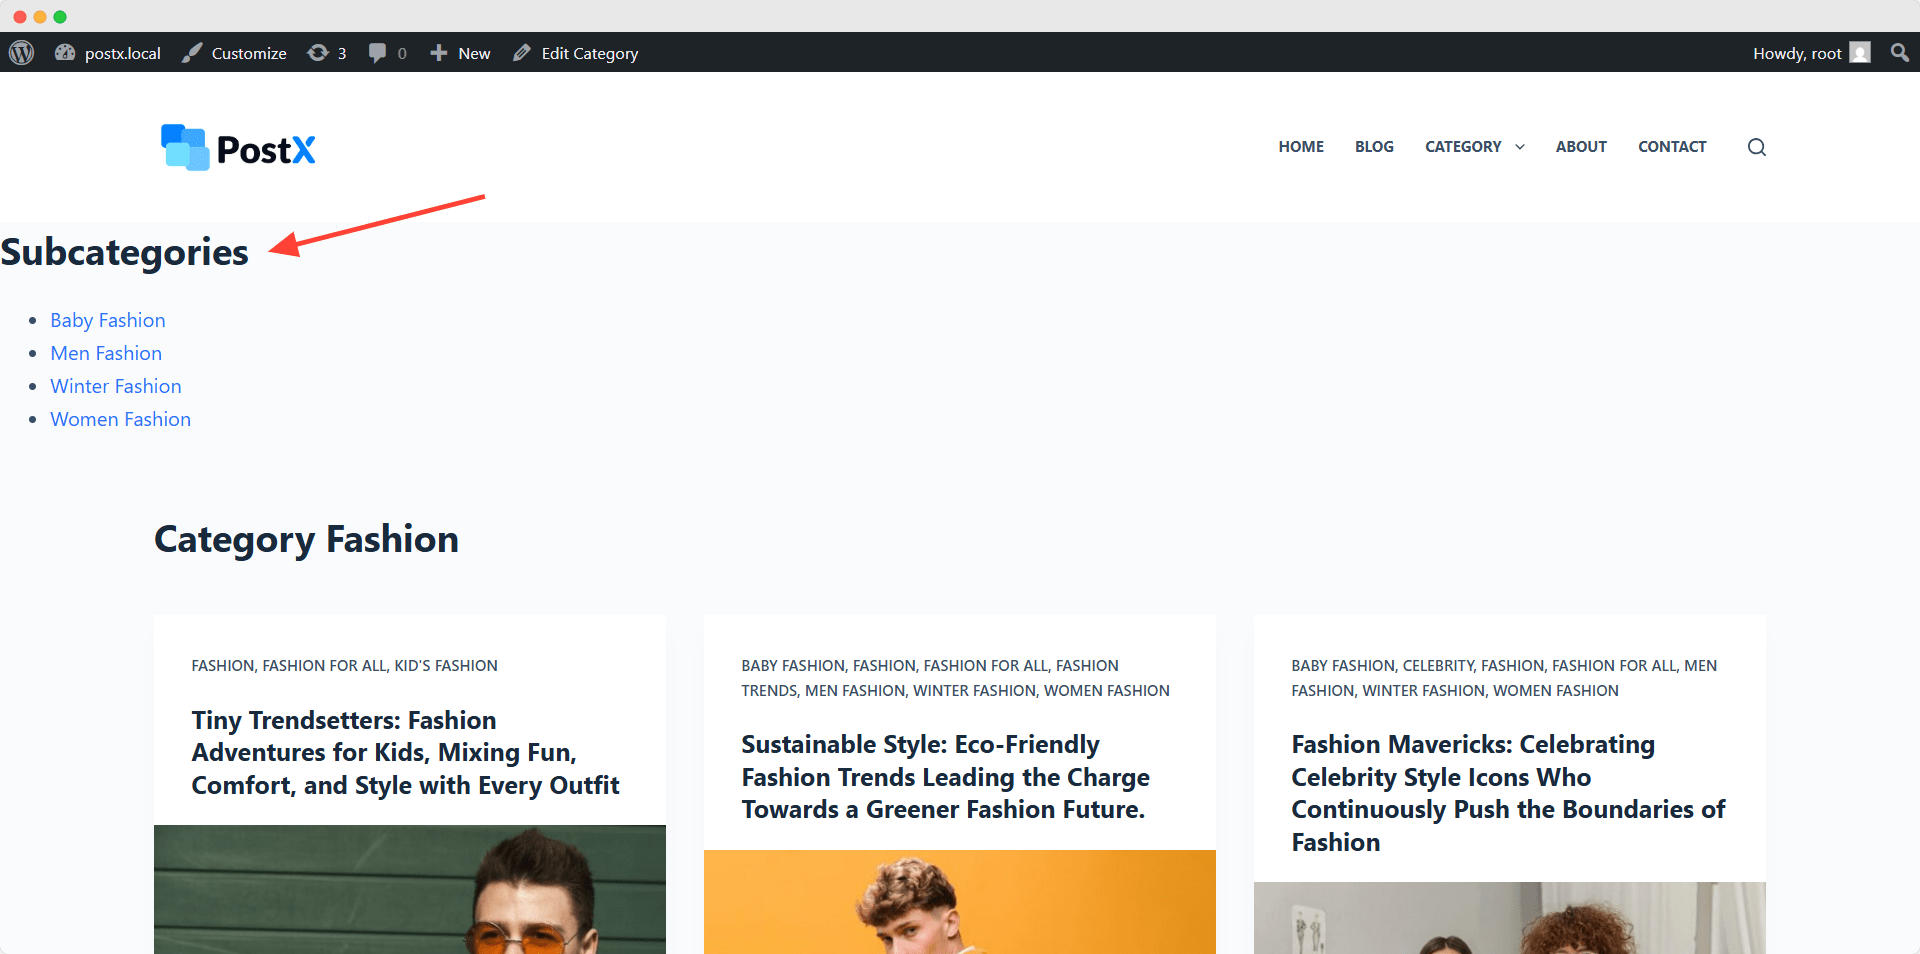
}We have added the code just before displaying the category posts. However, you can also display them after the posts.
Note: The code is written according to the coding structure of the Blocksy theme. So, you may need to make a few changes to use the codes if they do not work with your current theme.
Step 4: Use Additional CSS for Better Presentation
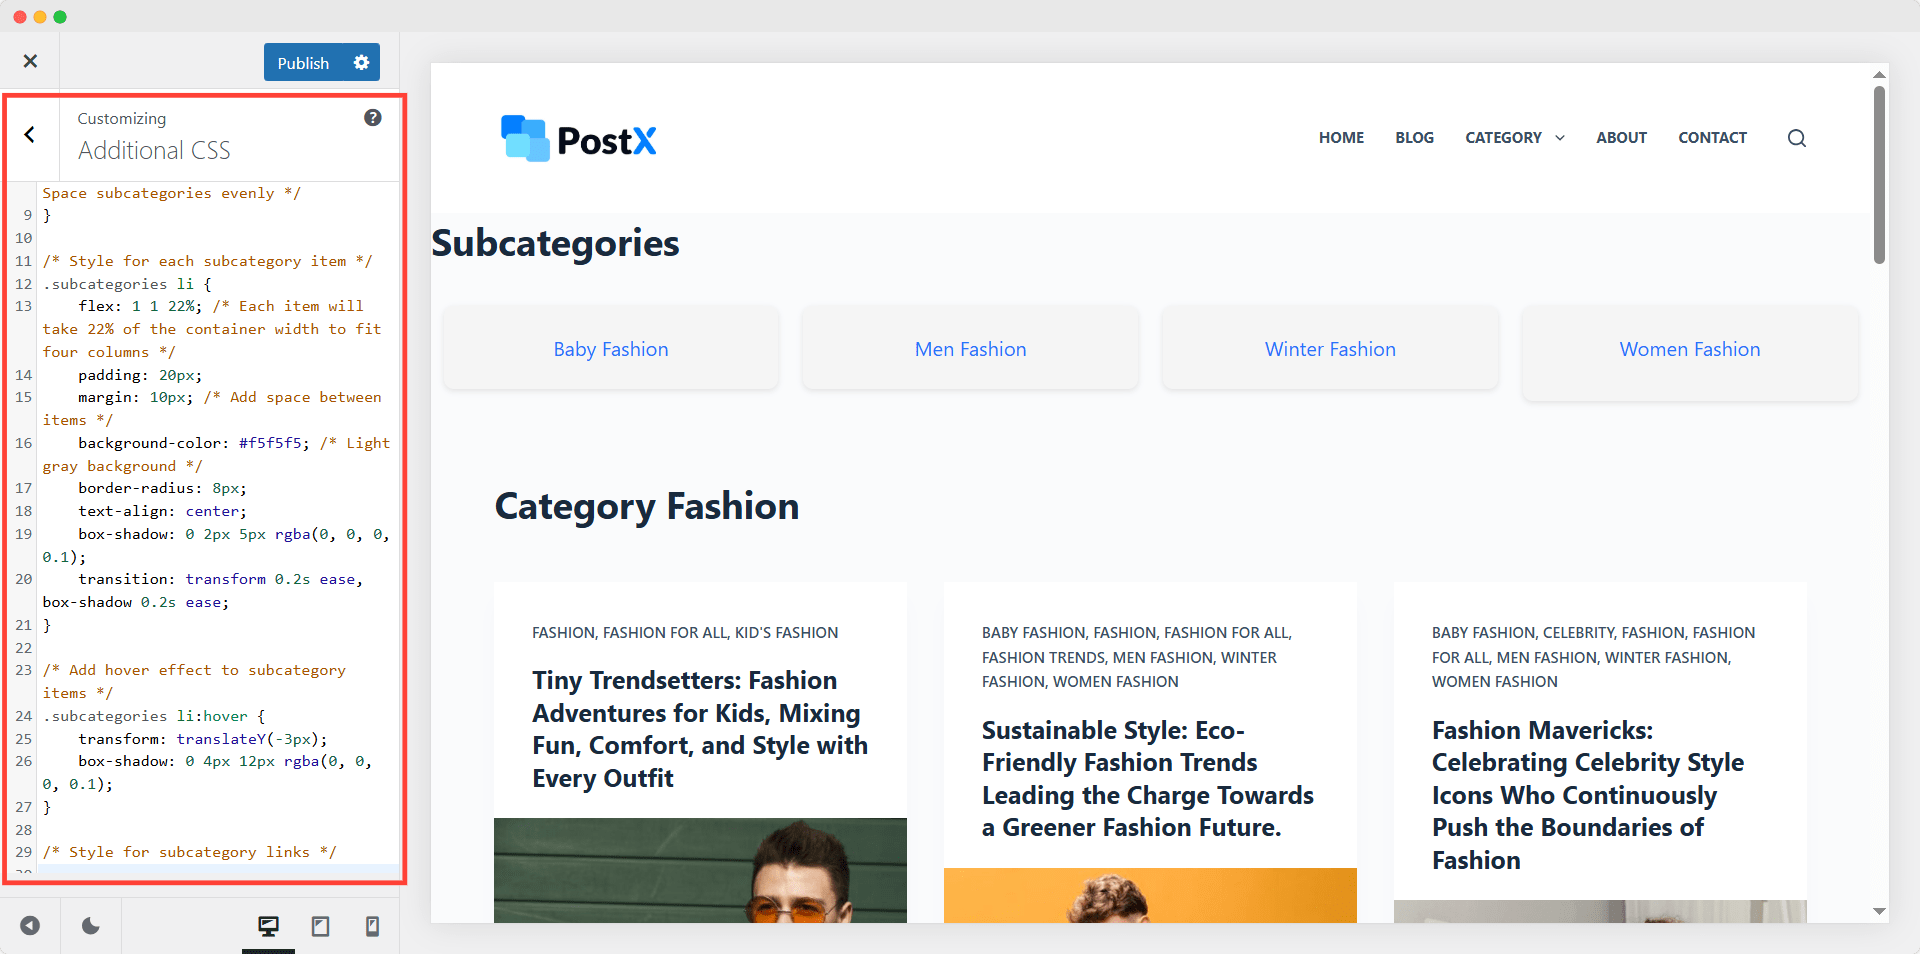
As you can see, the subcategories will show once we have placed the code in the new template. However, the presentation is not good at all. So, let’s add some additional CSS code to make them look better. Now, you can see that the presentation has improved.
/* Remove default list styling */
.subcategories ul {
    padding: 0;
    margin: 0;
    list-style-type: none;
    display: flex;
    flex-wrap: wrap; /* Allow subcategories to wrap */
    justify-content: space-between; /* Space subcategories evenly */
}

/* Style for each subcategory item */
.subcategories li {
    flex: 1 1 22%; /* Each item will take 22% of the container width to fit four columns */
    padding: 20px;
    margin: 10px; /* Add space between items */
    background-color: #f5f5f5; /* Light gray background */
    border-radius: 8px;
    text-align: center;
    box-shadow: 0 2px 5px rgba(0, 0, 0, 0.1);
    transition: transform 0.2s ease, box-shadow 0.2s ease;
}

/* Add hover effect to subcategory items */
.subcategories li:hover {
    transform: translateY(-3px);
    box-shadow: 0 4px 12px rgba(0, 0, 0, 0.1);
}

/* Style for subcategory links */
Pro tips: As I am not an expert coder, I have collected the codes by providing my requirements to ChatGPT. You can also share your requirements and get custom codes no matter which WordPress theme you are using.
Method 2: Show Subcategories on Category Pages Using a Plugin (No Code)
This method is more the WordPress users who are not confident about using custom codes. We are going to use the PostX plugin to accomplish our goal, as it allows us to create custom category page templates and display subcategories with featured images. So, before starting to follow the steps, make sure to install and activate the PostX plugin.
You can also watch the short tutorial video in case you don’t like to read the full content.
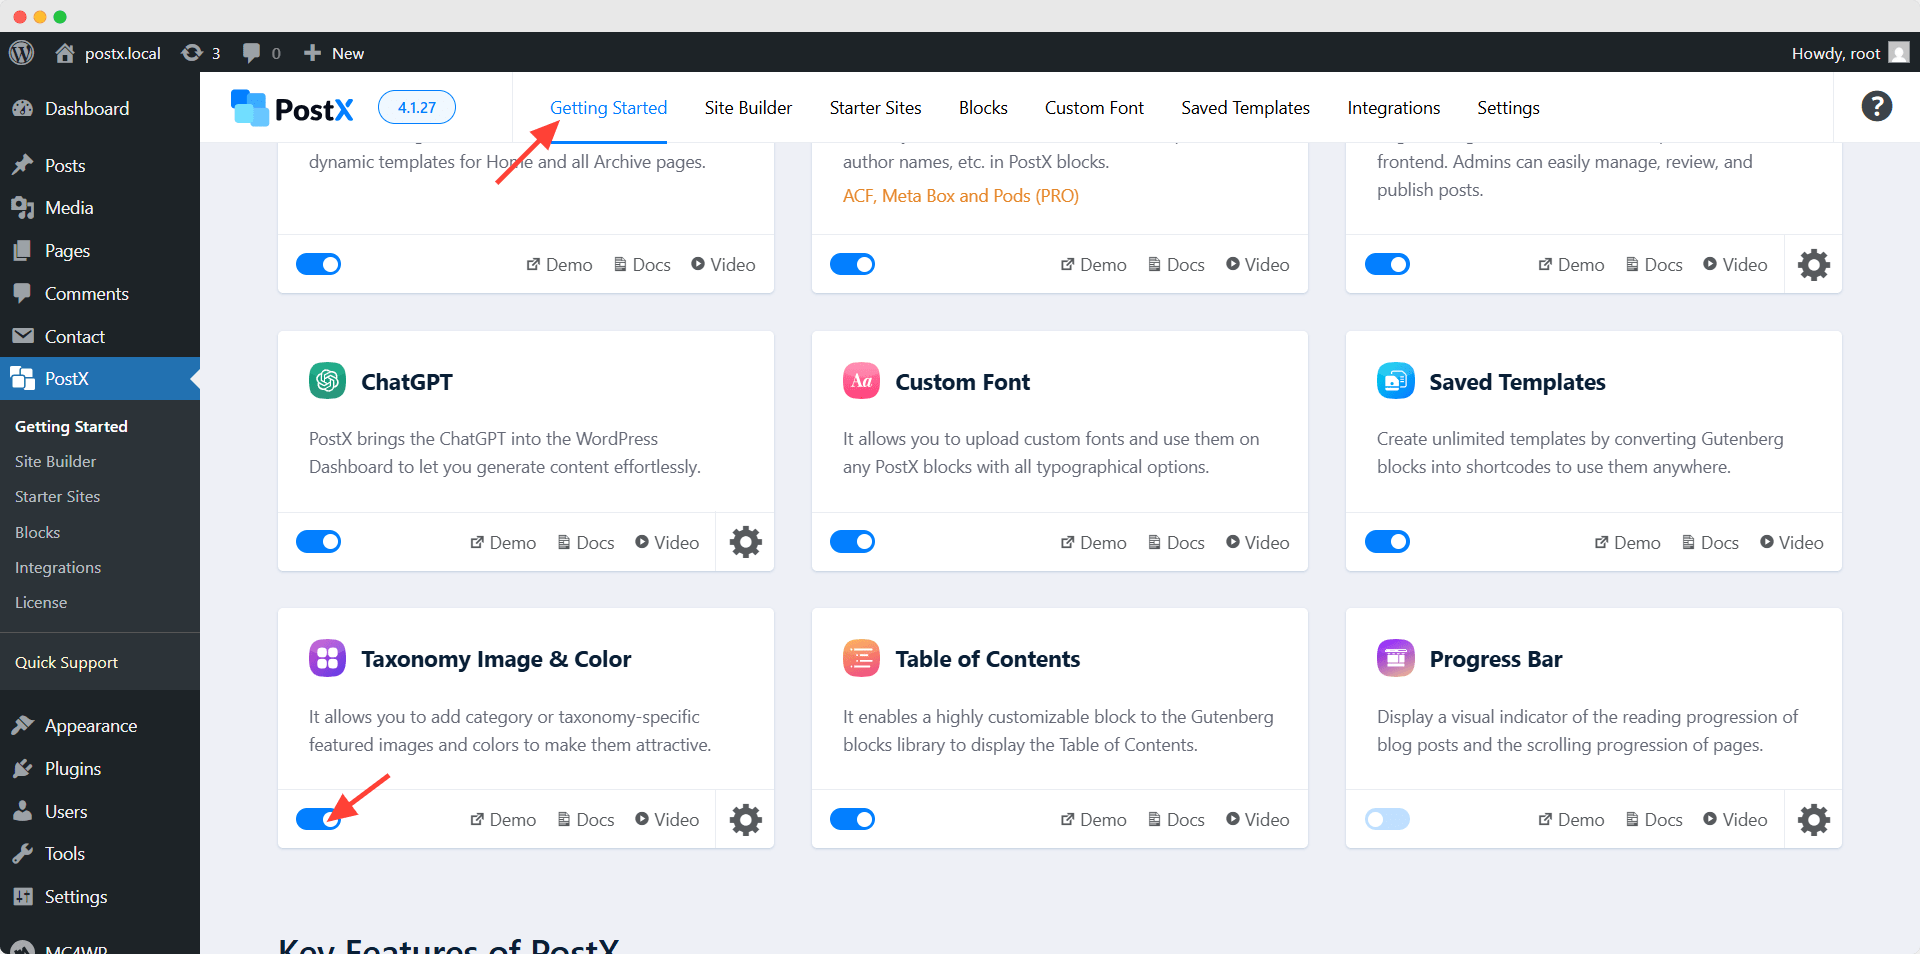
Step 1: Enable the Taxonomy Image & Color and Dynamic Site Builder Addon
For this tutorial, we need to use two add-ons of PostX, so we need to enable them. Here’s how:
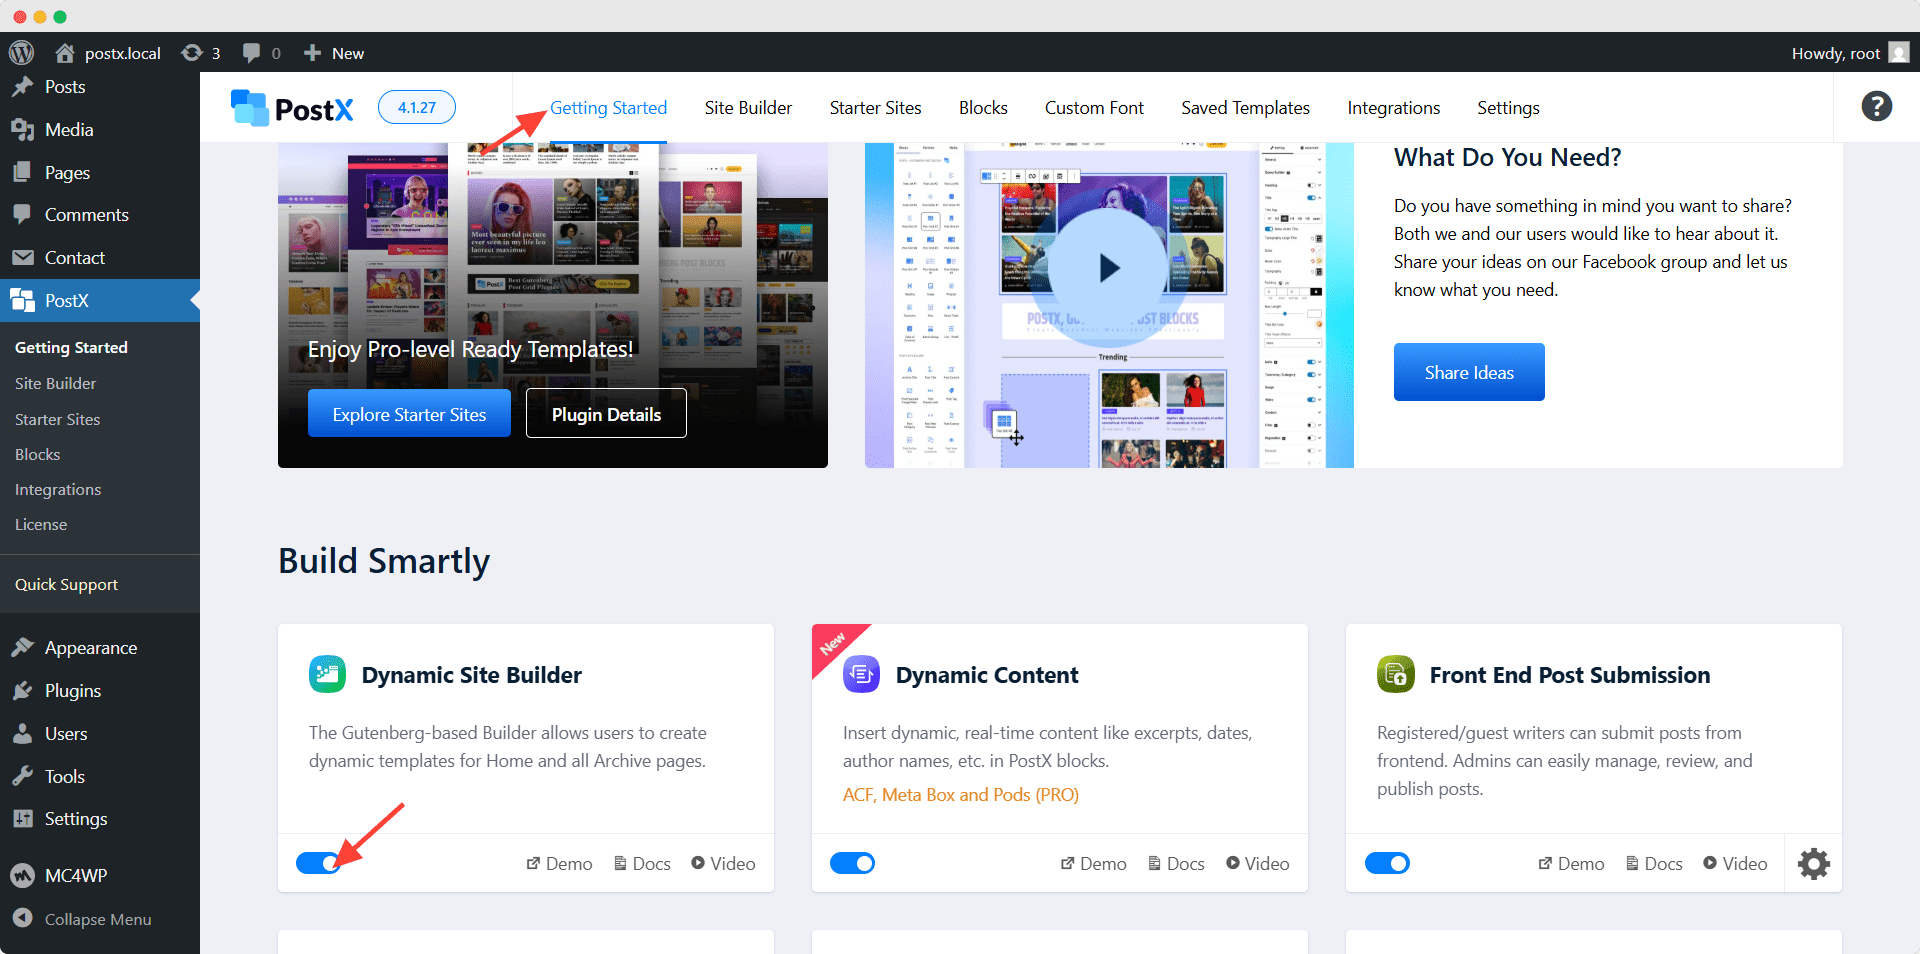
- Go to PostX >> Getting Started
- Enable the Addons
Step 2: Add Specific Featured Image and Color
Upon enabling the addon, we can add our desired images and colors for specific categories. For that, we need to start editing a category. Here, you can see two new fields are showing for uploading our desired image and selecting a color. Let’s add images and colors as per our requirements.
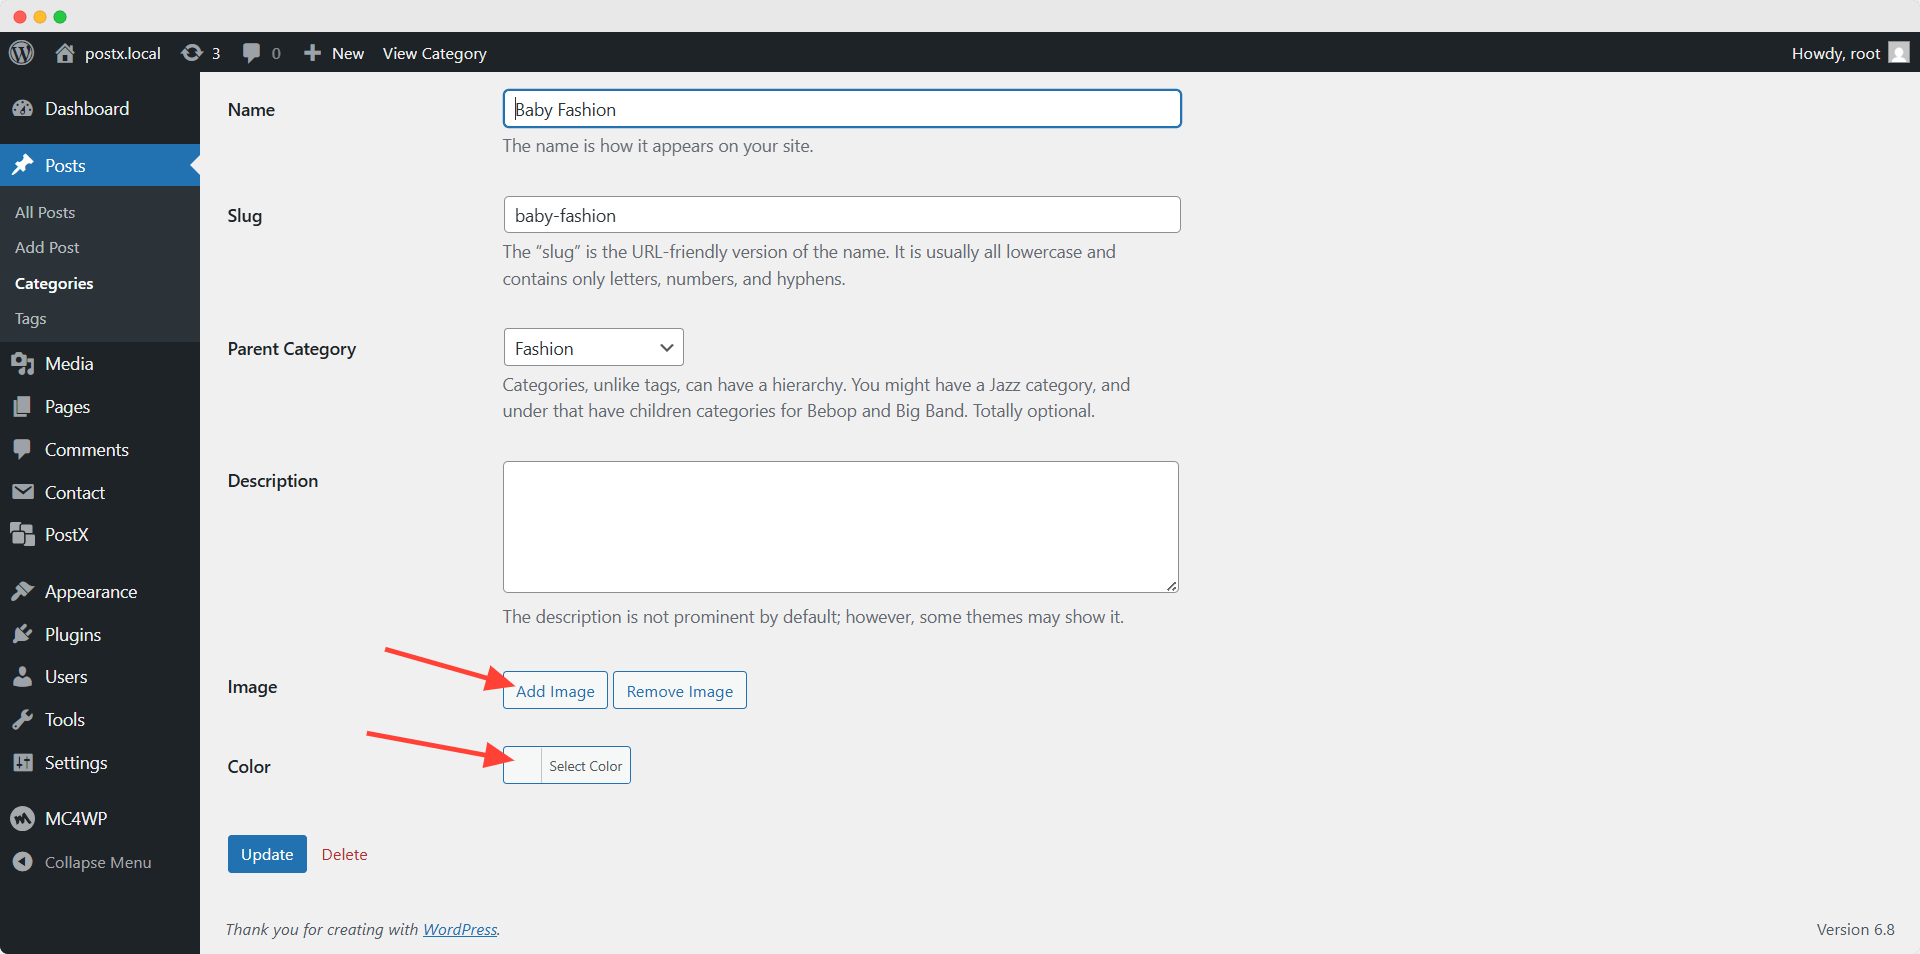
Similarly, we can add featured images and specific colors to any categories or subcategories of our website.
Step 3: Start Creating a Custom Category Page Template
Now, we need to go to the dynamic site builder section of PostX. Here, you can see the template creating an option for all essential WordPress pages. For now, let’s select the Category option, as we want to create a template only for the category pages.
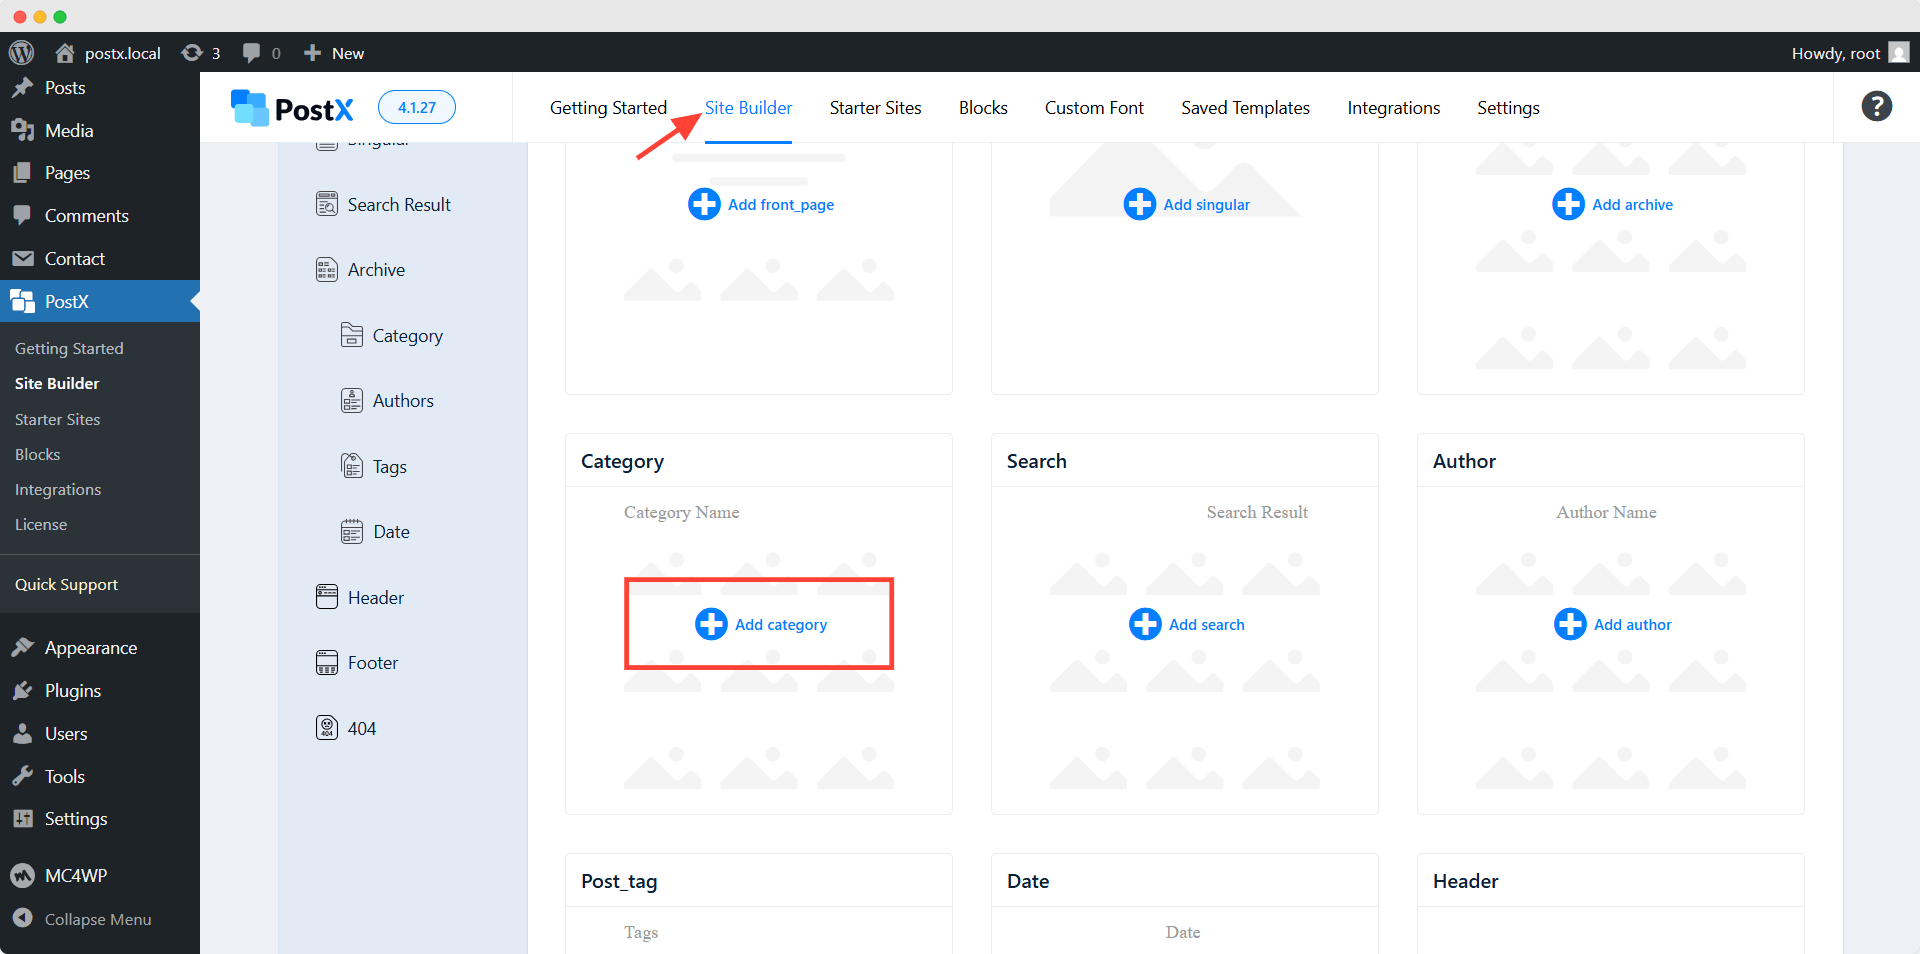
Either we can start from scratch or jumpstart by choosing a premade template. Don’t get confused seeing the different types of post images. It will only use the design and display the posts of your website. We need to click on the Import button to use our desired template.
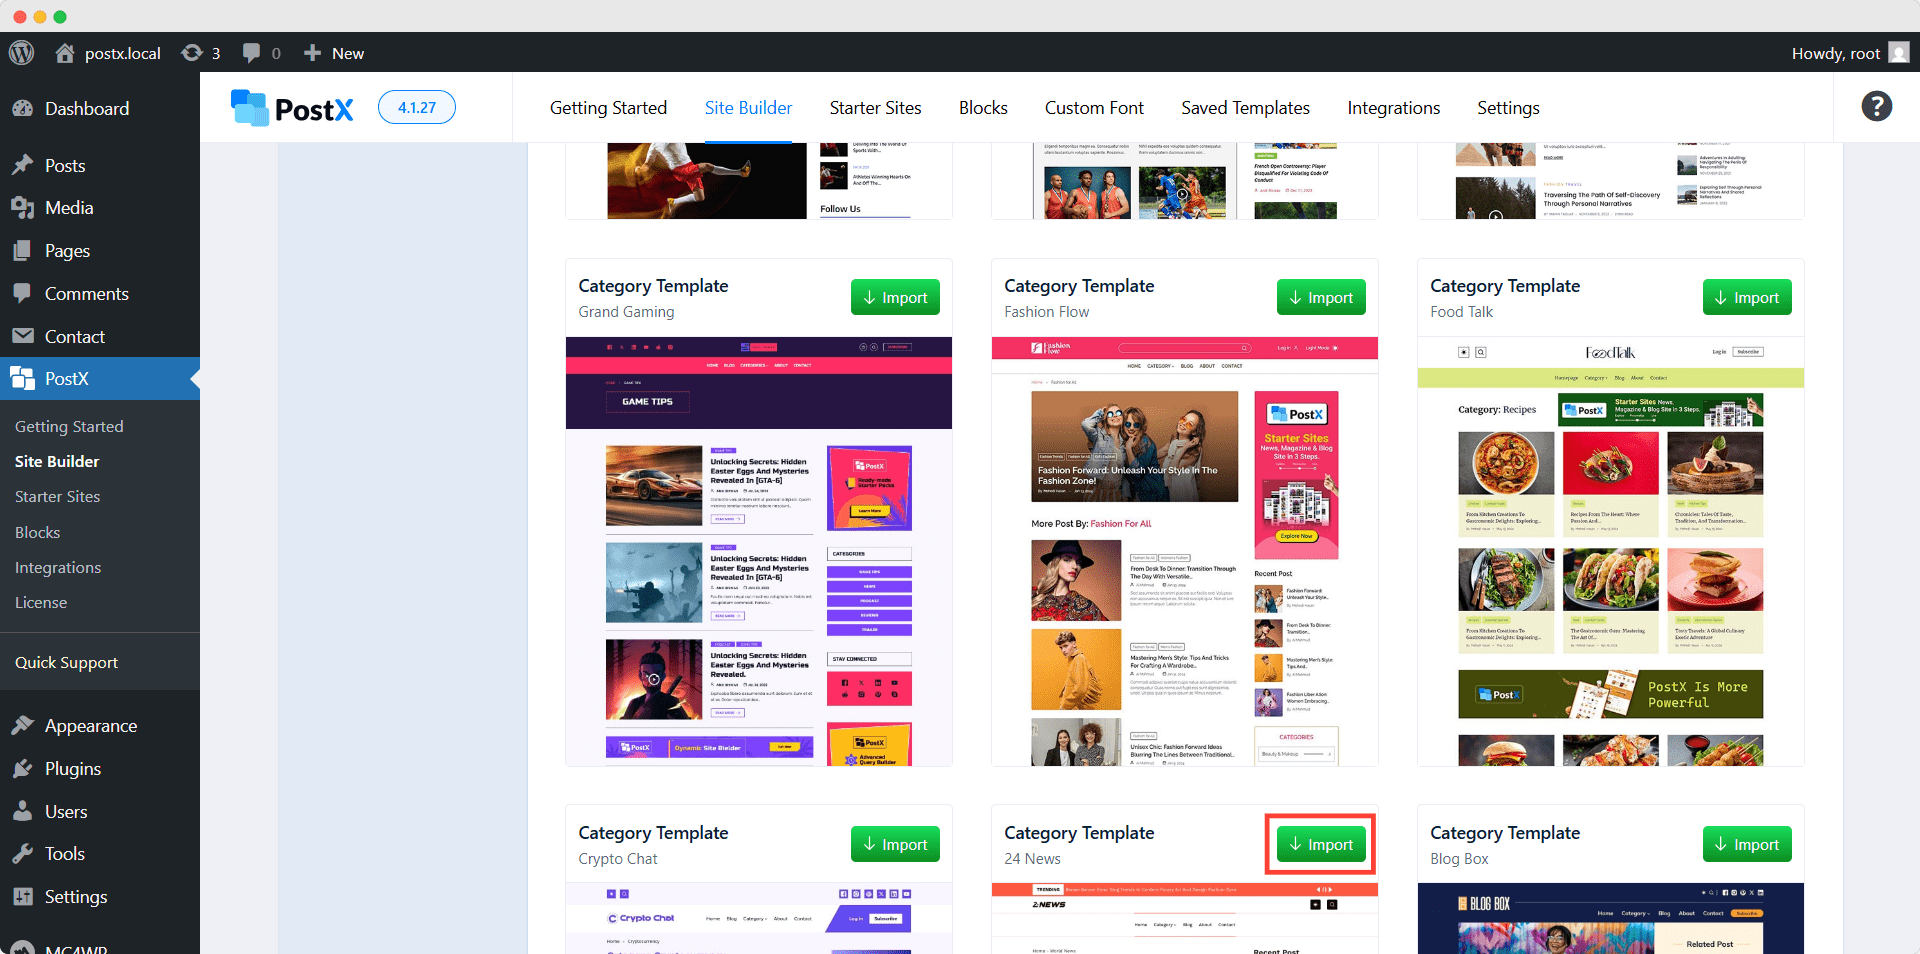
We have a dedicated blog post on how to create custom template for WordPress category pages that you can explore for better understanding.
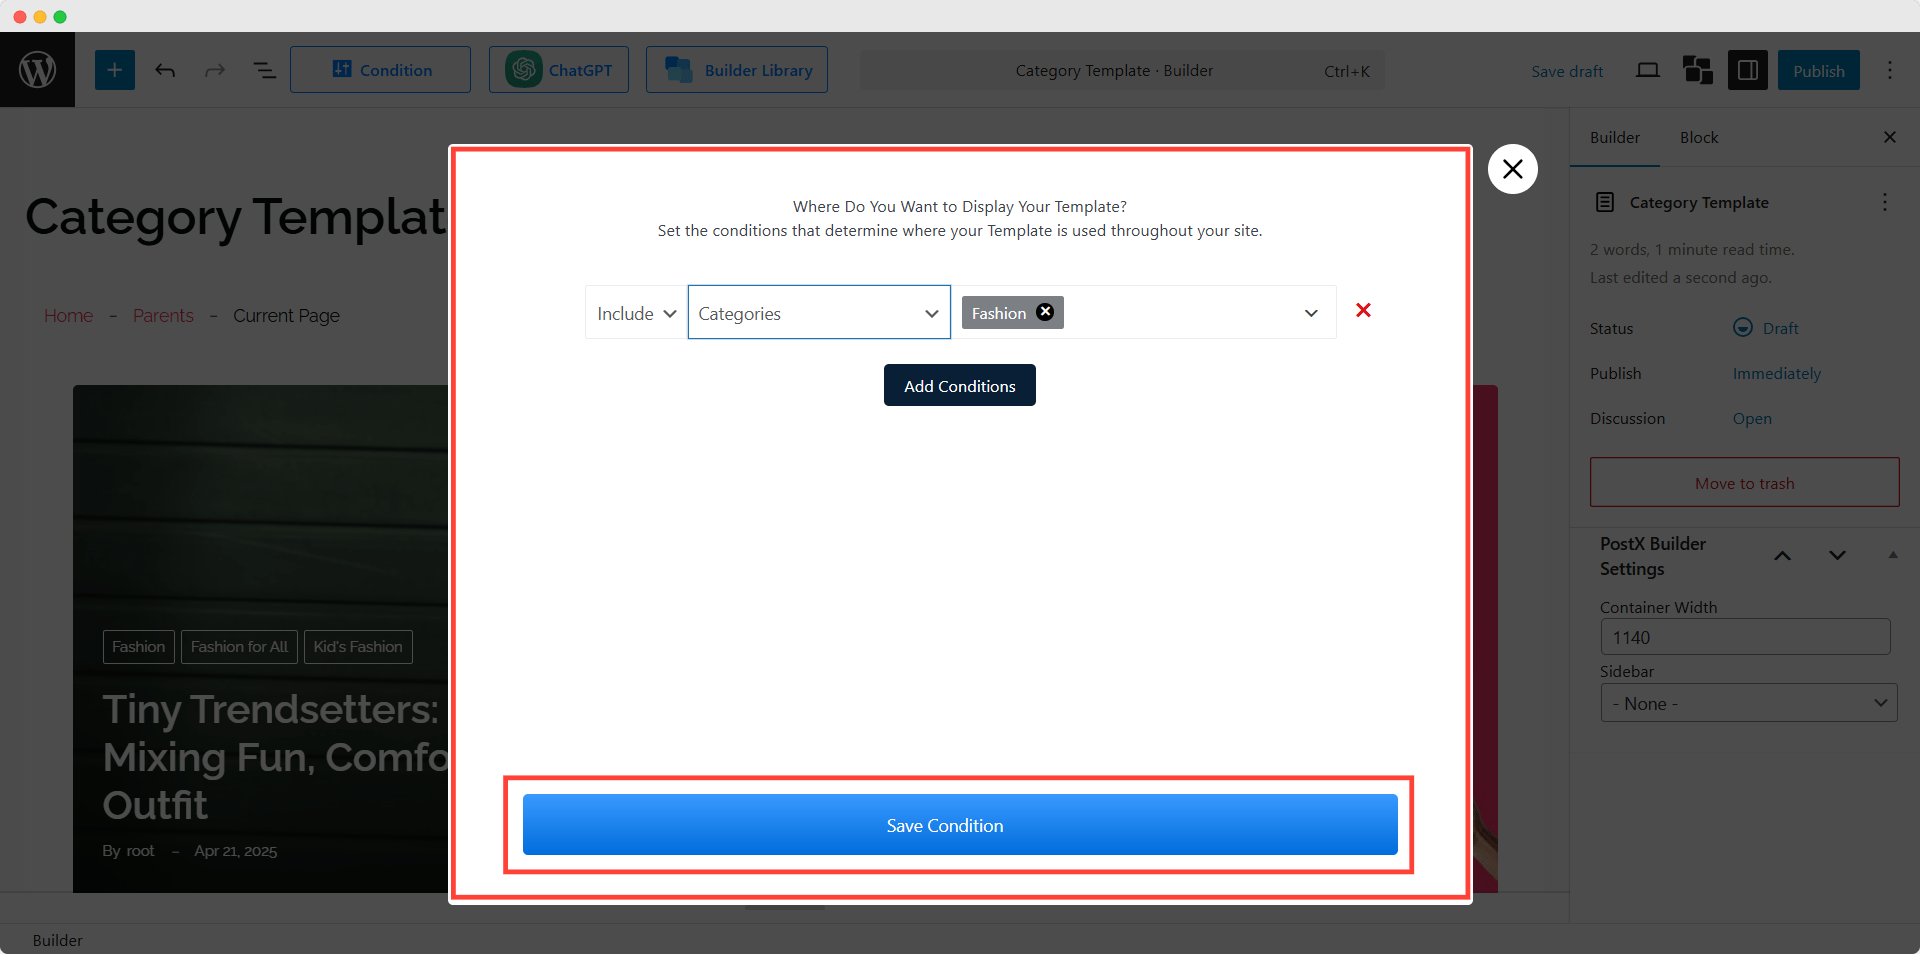
Step 4: Select the Condition for the Template
From this section, we need to select the display condition for the template that we are creating. We need to decide and select whether we want to use a template for all category pages or a specific one. For now, let’s use this template for a specific category by adding the category name to the condition field. Then, we need to click on the “Save Button” and start editing the template.
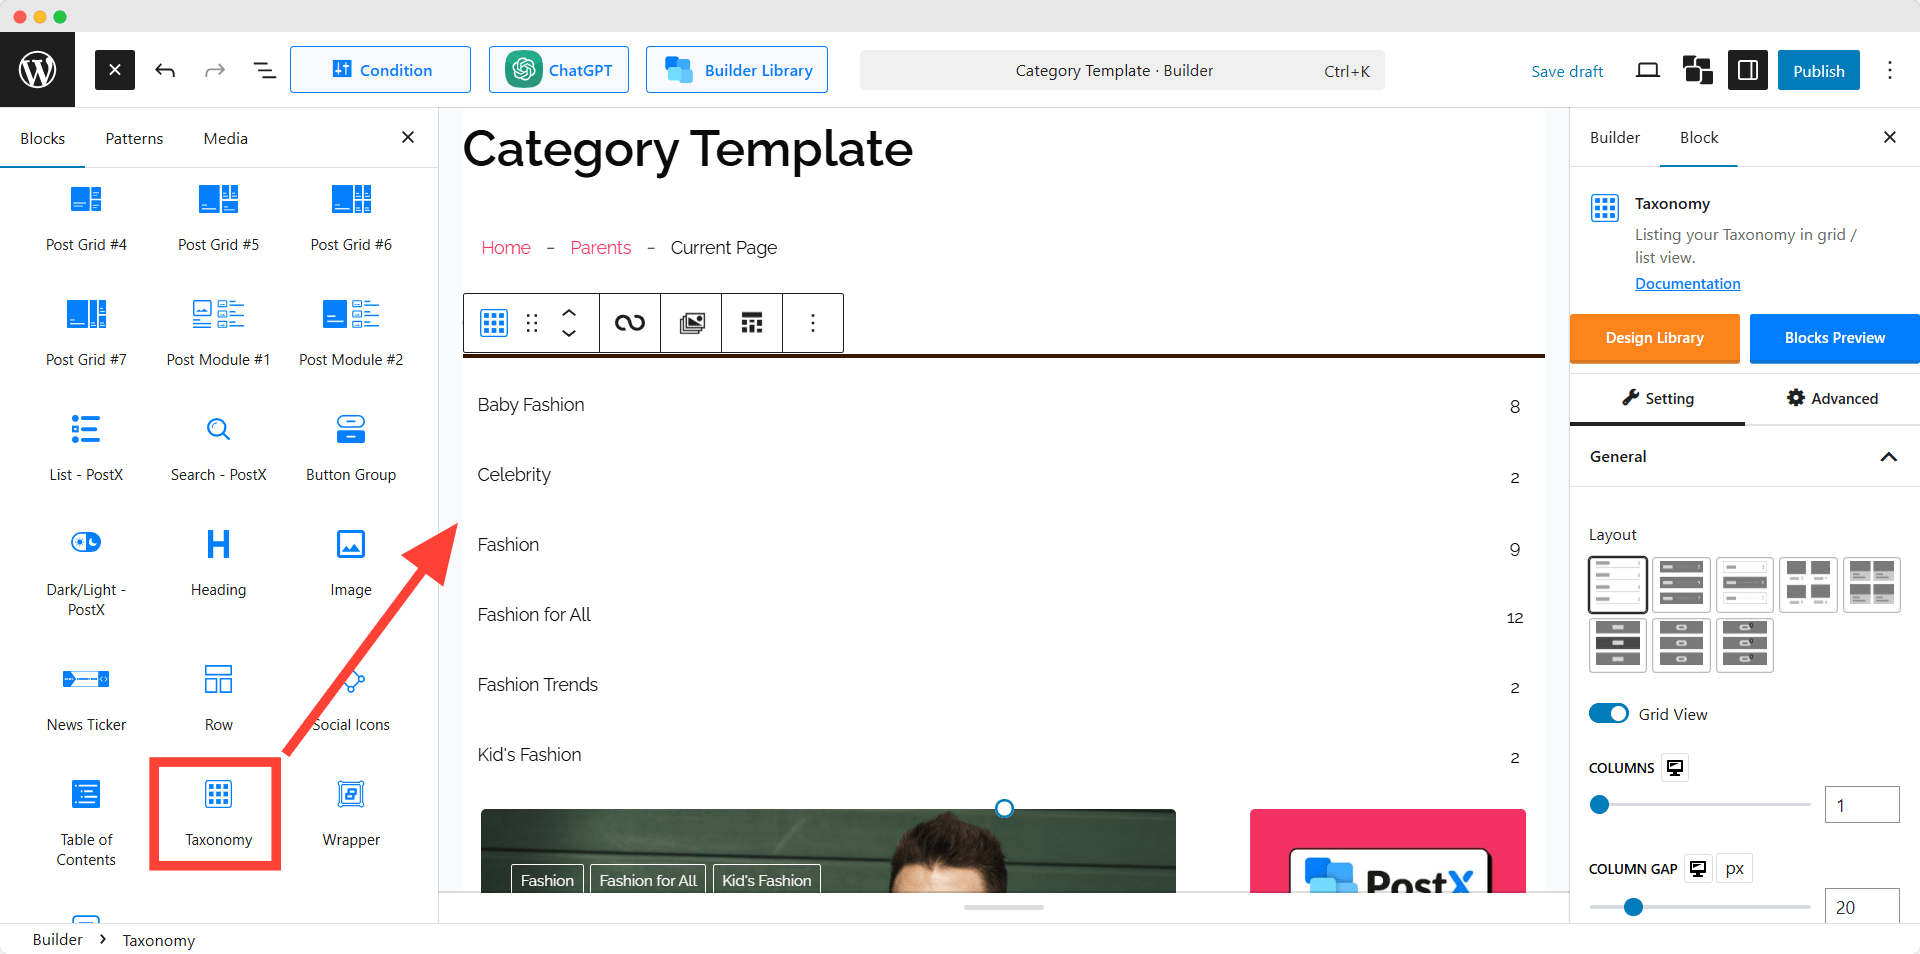
Step 5: Add Taxonomy Block
Now, we need to click on the place plus icon to drag and drop the taxonomy to our desired position. It will help us to display our desired subcategories.
Step 6: Customize the Appearance
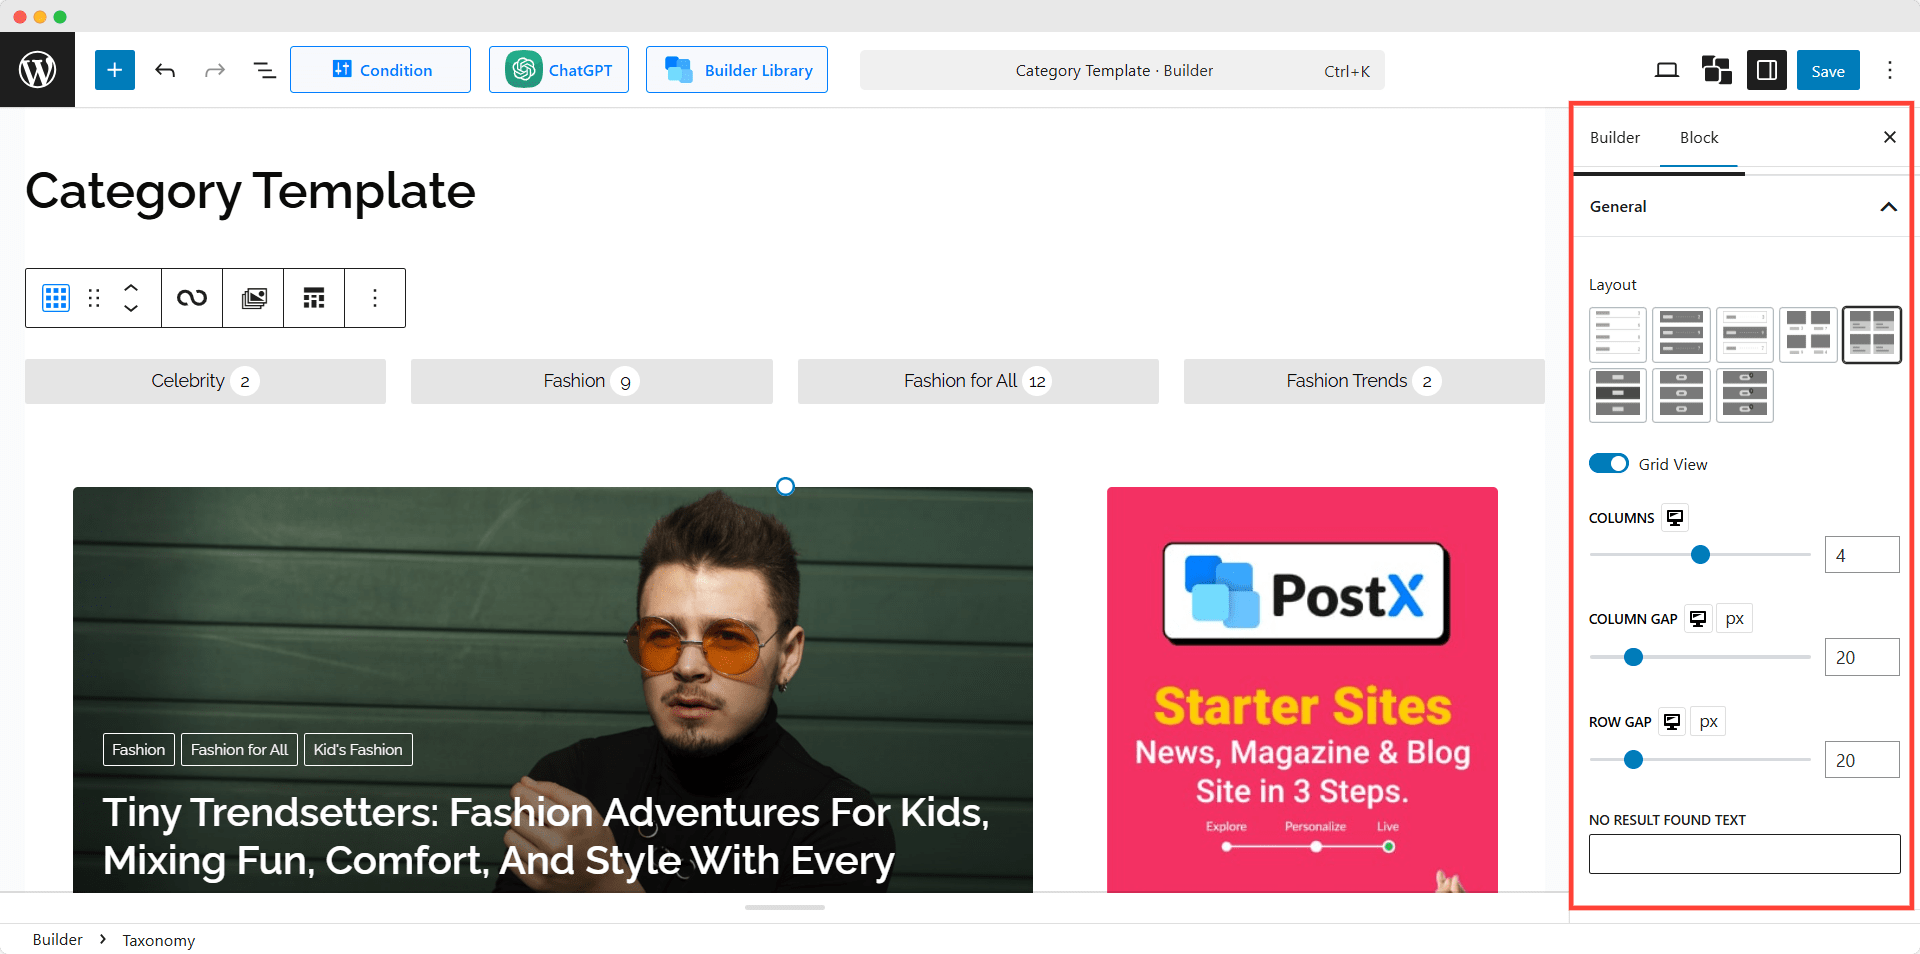
Upon adding the block, we can customize the appearance. Let’s select a suitable layout, enable the grid layout, and increase the number of columns to 4. It will ensure the presentation is organized and aligns with our brand.
As the templates are showing dummy data it is, the images are not displaying for categories/subcategories. But it will be displayed on the front end.
Step 7: Display Subcategories to the Category Page
By default, the taxonomy blocks display the latest categories. However, we can display the subcategories by using the taxonomy query option. Here’s how:
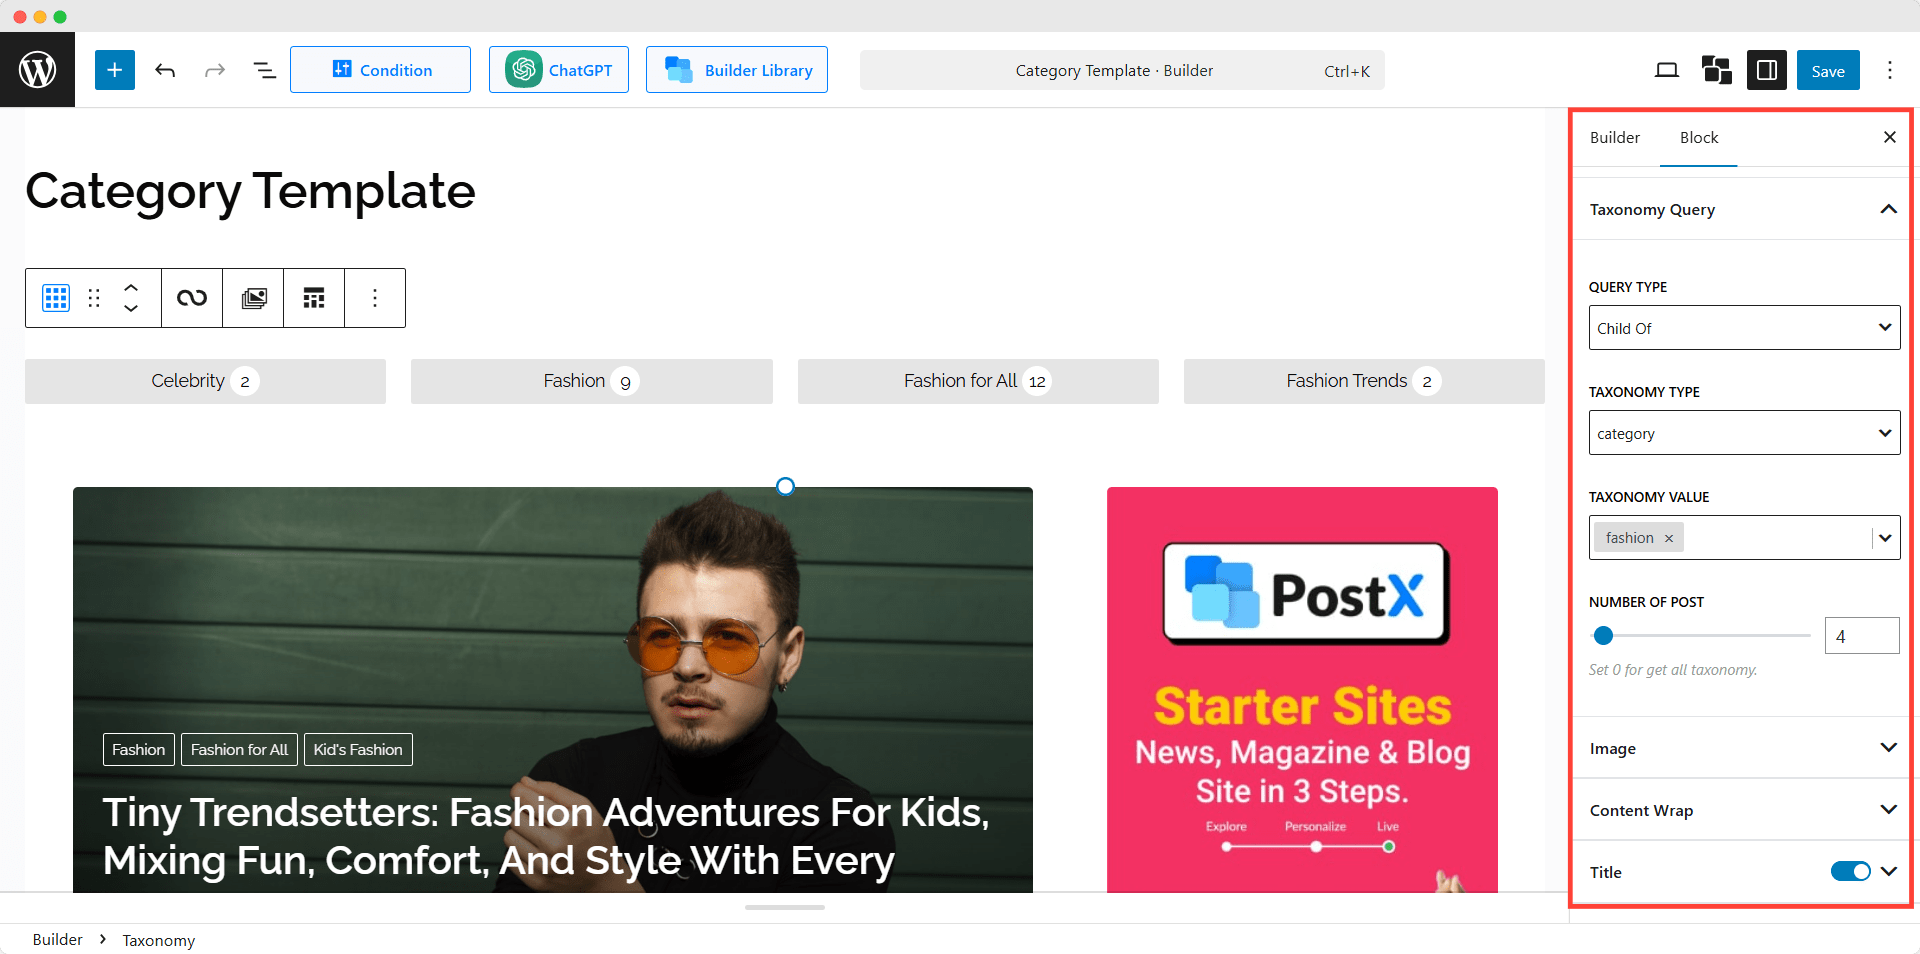
First, we need to select “Child of” from the query type dropdown and then select the parent category. We have selected “Fashion” as the parent category, as we are creating the template for this specific category. So when someone visits this category page, they will see its child categories.
You can also explore the documentation of the taxonomy block to understand the customization possibilities.
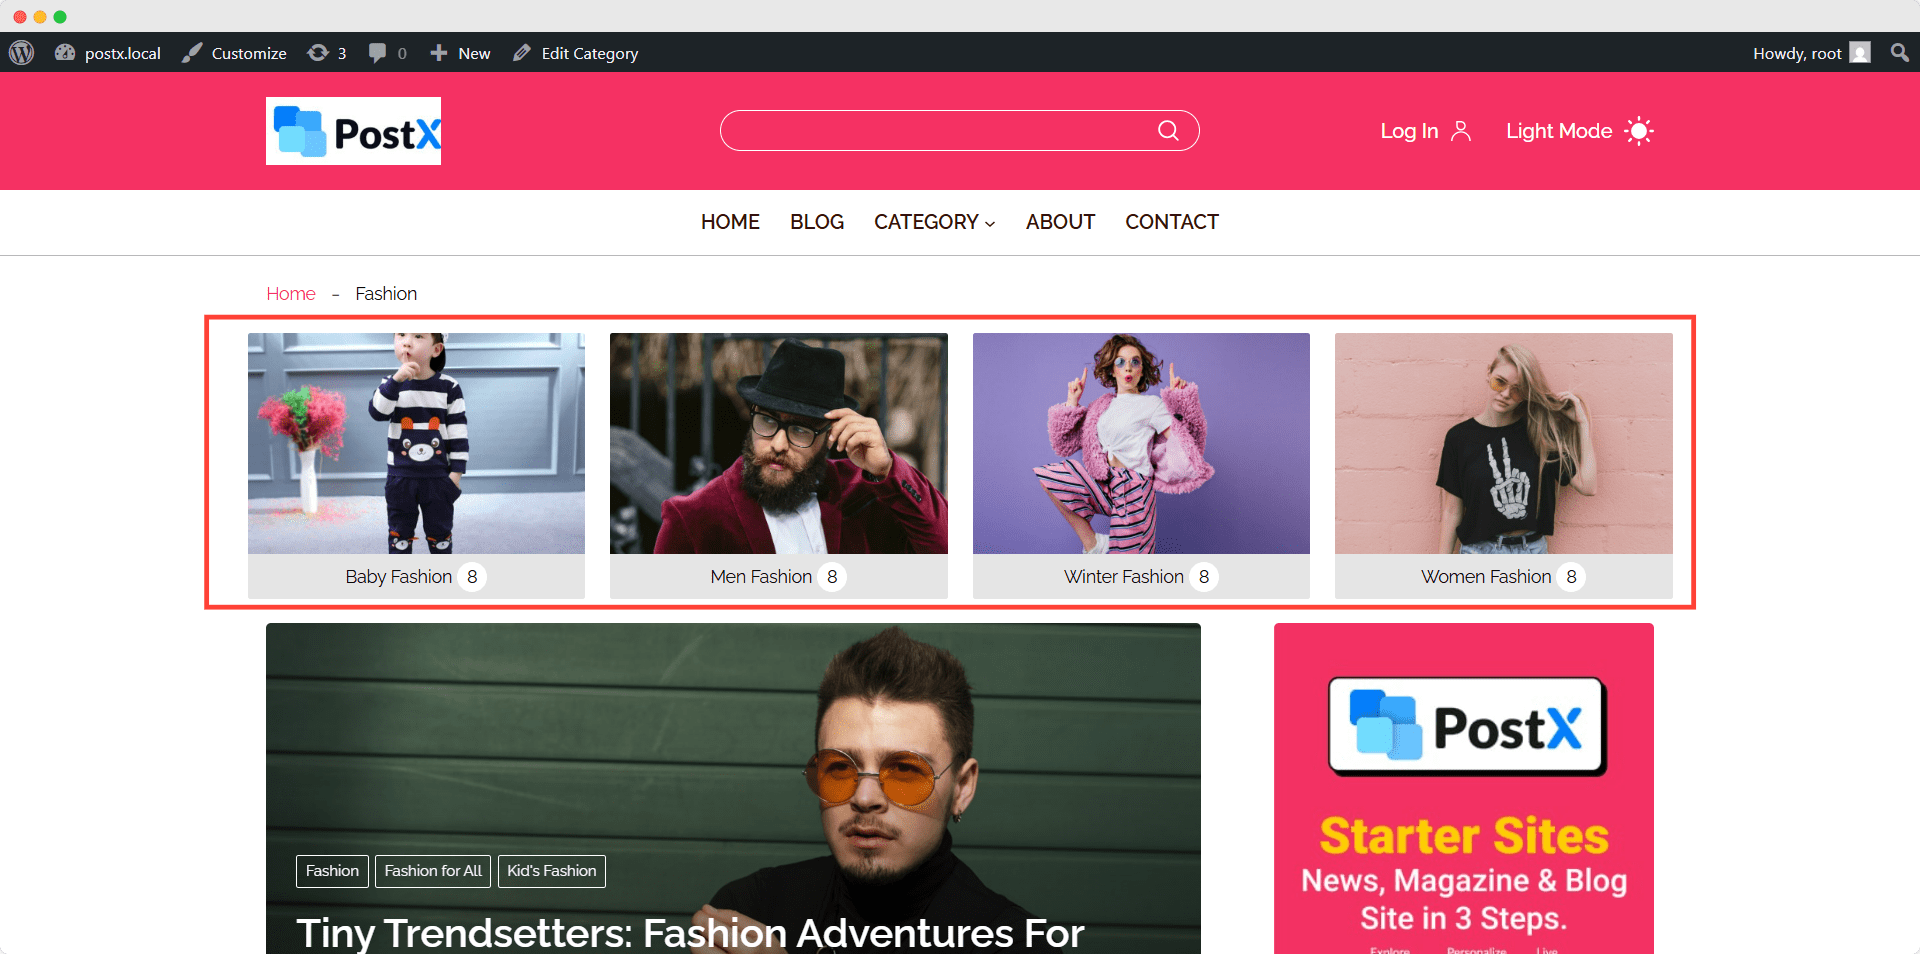
Finally, we can publish the template and see how it looks from a user’s perspective.
Closing Words
We know what you are thinking: you are confused about the two methods. Let us guide you through selecting the best method for you. If your goal is to only display subcategories and feel a bit confident about tweaking the code, you should go for the first method. However, if you want a good visual presentation, then choosing PostX will be a good decision. Please let us know which method you are going for. Also, feel free to share your feedback and suggestions regarding this blog post or PostX.
FAQs
Can I display subcategories with thumbnails in WordPress?
Yes, you can display both categories and subcategories with thumbnails in WordPress by using the PostX plugin.
Do I need a child theme for this?
No, you don’t need to use a child theme if you use the PostX plugin to display subcategories.
Is PostX compatible with any theme?
Yes, PostX is compatible with all WordPress themes. If you face any issues, you can contact our support team directly.