No matter how attractive your online store looks or how low your prices are, you must ensure easy and flexible shipping for customers. Or else, all your efforts might go in vain.
We all understand that poor customer experience leads to minimal profits. So, your top priority should be to establish a proper shipping option. If your store is on WooCommerce, you’re in luck. WooCommerce makes it easy by offering various shipping options and customizations.
Once you know how to set up shipping in WooCommerce, you can easily develop the best shipping strategy for your requirements.
keep reading to learn all about setting up shipping in WooCommerce.
Why Is Setting Up Shipping in WooCommerce Crucial for Your Store?
Before we go through the steps to set up shipping in WooCommerce, let’s understand why shipping is important for your online business.
Shipping can make or break a customer’s buying decision. It can directly impact the user experience and total sales volume. High shipping rates or complicated methods may drive customers away. This leads to cart abandonment and unhappy customers.
On the other hand, competitive shipping rates and a smooth shipping experience boost conversions. This also keeps customers happy.
WooCommerce provides three built-in shipping methods to meet various business needs.
- Flat Rate: You can charge a flat rate for each shipment, no matter how many or heavy the products are. It is ideal for stores selling similar-sized and weighed products. You can also set up different flat rates based on shipping zones, such as local, national, or international.
- Free Shipping: Offering Free Shipping always works like wow. It encourages customers to add more products to their cart. But, you must carefully count that you still secure your profit with a free shipment. Some Plugins like WowStore’s Free Shipping Progress Bar can be effective. It will encourage customers to add more items to their cart to qualify for free shipping.
- Local Pickup: If you have a physical store or warehouse for your online shop, you can offer a local pickup option. This can reduce shipping expenses and offer a convenient choice for local customers.
How To Set Up Shipping in WooCommerce: A Step-By-Step Guide
Now you know the different shipping options available in WooCommerce. You can choose the perfect one based on your customer base and business type.
Let’s configure WooCommerce shipping with a step-by-step guide.
Step 01: Create Shipping Zones
Creating shipping zones is the first step in setting up shipping in WooCommerce. Shipping zones allow you to define specific geographical areas where shipping methods and rates apply. To create a new shipping zone, follow these steps:
- Login to your WordPress dashboard and navigate to ‘WooCommerce → Settings.’
- Click on the ‘Shipping’ tab.
- From the ‘Shipping zones’ section, click the ‘Add shipping zone’ button.
When creating a shipping zone, you must provide a name for the zone and select the region to which it applies. You can define regions based on countries, cities, states, or even specific zip codes. Repeat this process to create multiple shipping zones based on your business needs.
Step 02: Add Shipping Methods to Your Zone
After creating your shipping zones, the next step is to add shipping methods to each zone. Shipping methods define how you calculate shipping rates. They also determine the type of shipping service provided.
To integrate shipping methods into a zone,
- Go to the ‘Shipping’ tab in the WooCommerce settings from the WordPress dashboard.
- Click ‘Edit’ on the shipping zone to which you want to add a shipping method.
- Click on the ‘Add shipping method’ button.
- Select your shipping method from the available options: flat rate, free shipping, or local pickup.
Let’s understand each of them one by one.
Free Shipping: It works based on coupons and minimum spending. You can offer a special coupon, a minimum spending rule, or both. If you want you can offer free shipping to your customers without any requirements.
To set up:
- Give a name for the free shipping method or keep the existing name.
- Choose the requirements and hit the “Create and Save” button.
Remember, you can check “Apply minimum order rule before coupon discount” to calculate the minimum order amount before discounts. This means the pre-discount total is used to decide if the order qualifies for free shipping.
Pro Tips
You can notify visitors about a free coupon with an eye-catching popup. WowOptin lets you control exactly where and how the popup appears. Offering a coupon discount through a popup is a proven way to motivate visitors, drive action, and boost your sales!
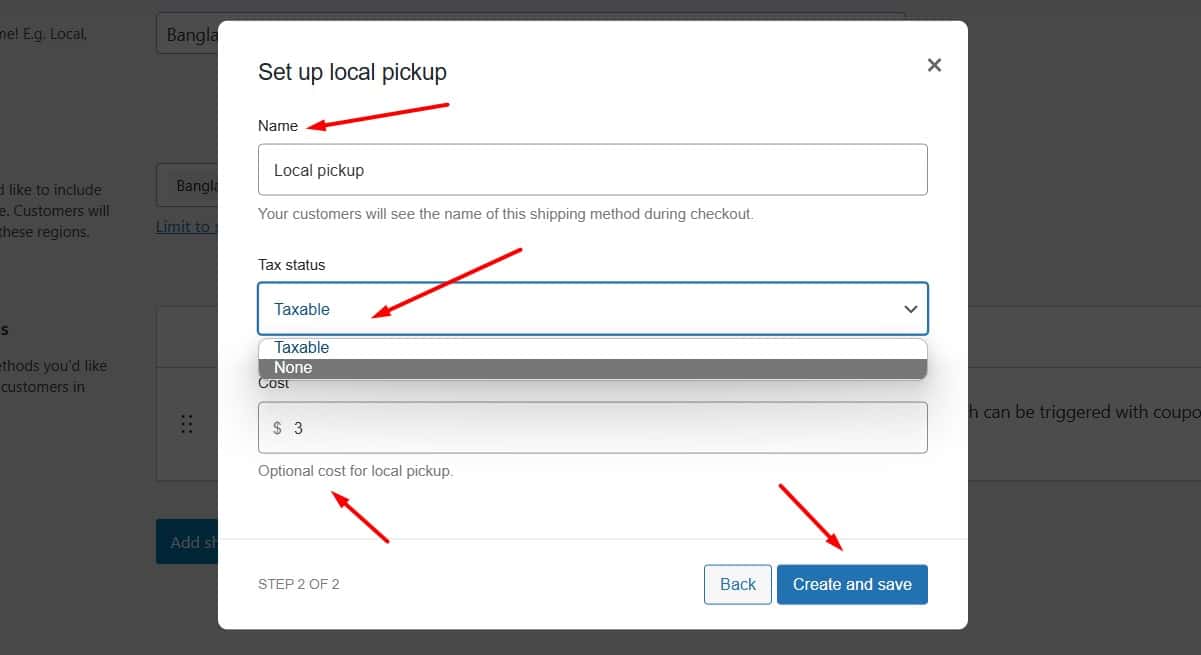
Local Pickup: It enables customers to pick up their orders in person. By default, Store base taxes will apply for local pickup, regardless of the customer’s address.
To set up:
- Give a name for the Local Pickup method or keep the existing name.
- Select tax status: taxable, none. and optional cost.
- Now hit “Create and Save”.
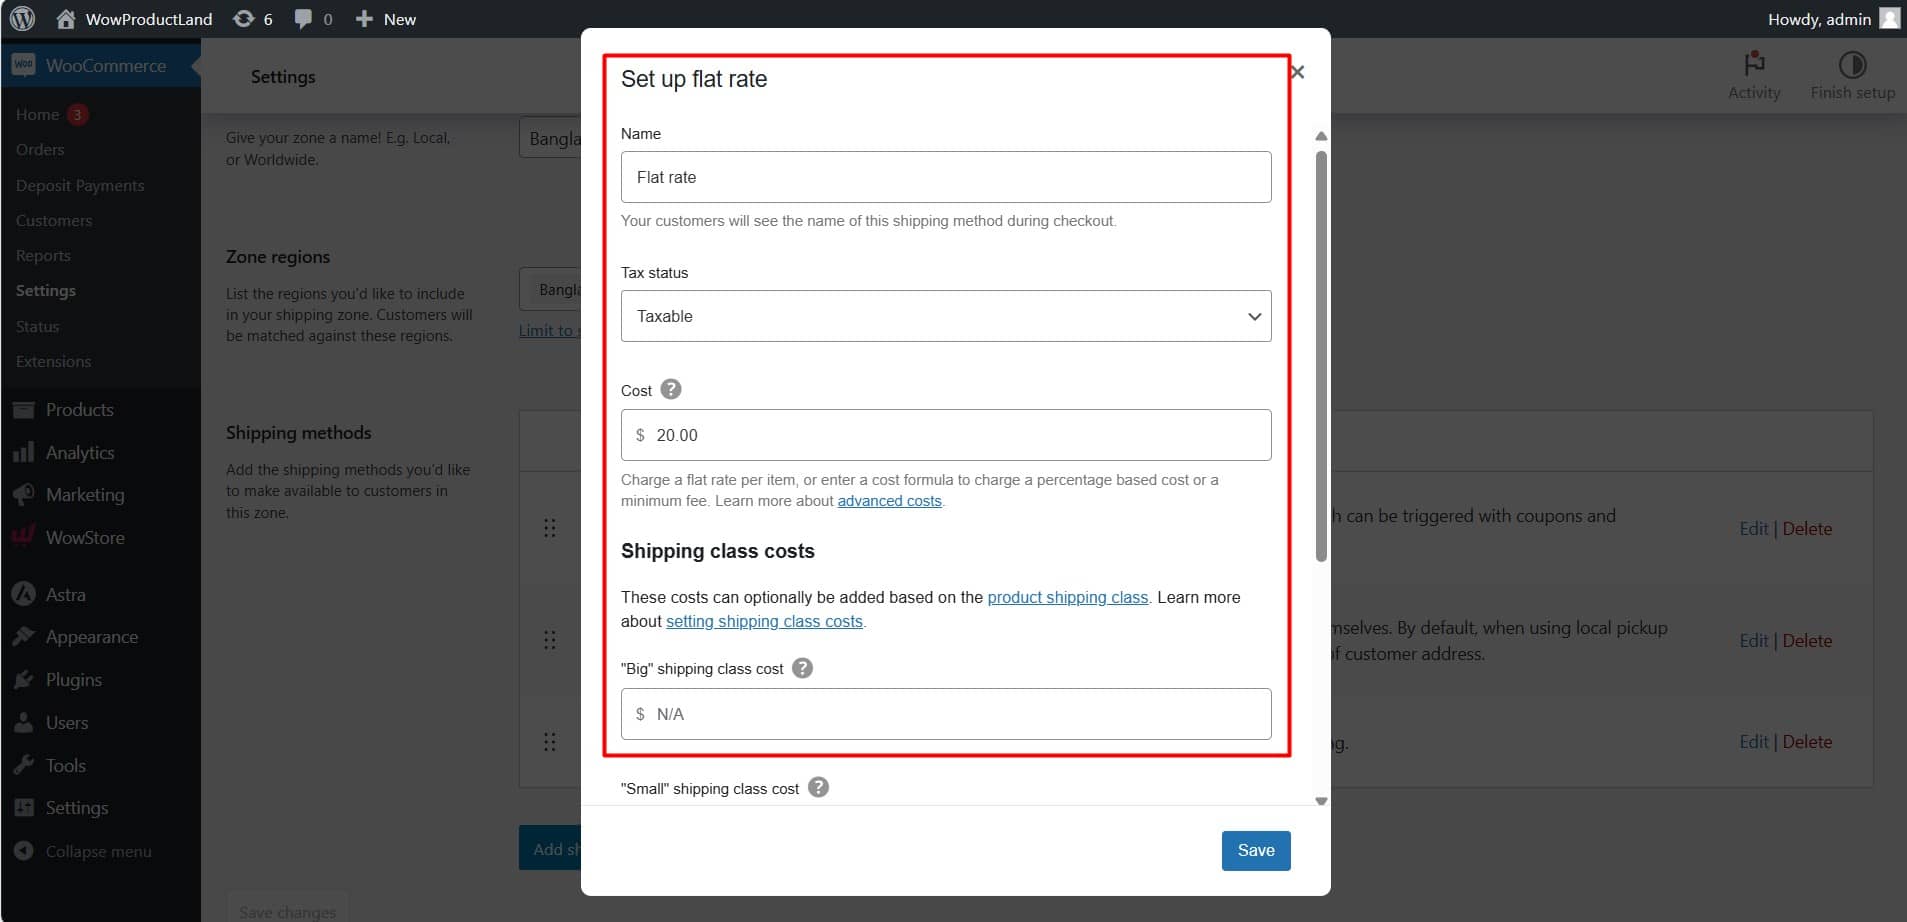
To set a Flat Rate follow these steps
- Give a name for the flat rate method or keep the existing name.
- Select tax status: taxable, none. and set the cost.
- Now hit “Create and Save”.
Use the format 10.00 * [qty] to enter a cost (excluding tax) or a sum. The [qty] represents the number of items, while [cost] denotes the total cost of the items. For percentage-based fees, use the format [fee percent=”10″ min_fee=”20″ max_fee=””]. This lets you specify the fee percentage and set minimum and maximum fee limits. This approach ensures accurate cost calculations and fee management in your transactions.
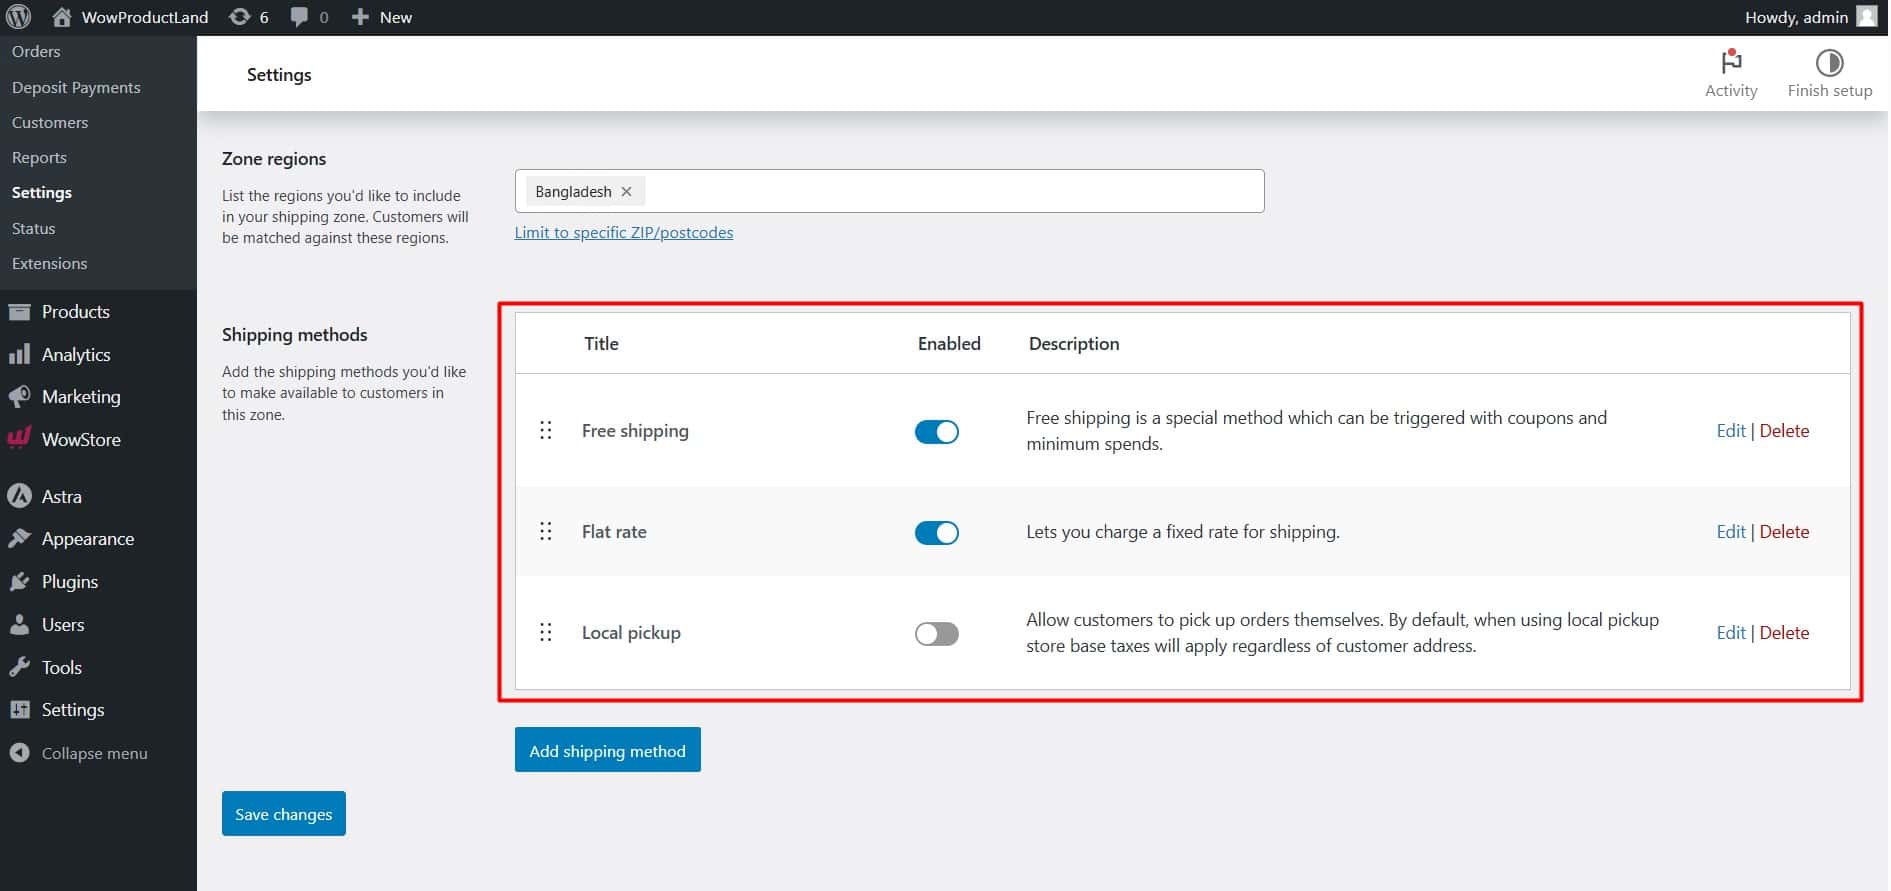
Once you add all three shipping methods, you can now choose which methods you want to enable for your shipping zone. You have the freedom to choose any or all.
Once done, hit the ‘Save changes’ button.
Step 03: Configure Shipping Classes
Shipping classes allow you to make groups for your products and assign specific rates for each group.
This is particularly helpful if your products have different sizes, weights, or shipping needs.
To set up WooCommerce shipping classes
- Navigate to the ‘Shipping’ tab in the WooCommerce settings.
- Click on the ‘Classes” tab and hit the ‘Add shipping class’ button.
- Enter a name, slug, and description for each shipping class.
For example, you could create shipping classes for lightweight, bulky, or perishable goods.
After creating your shipping classes, you can assign them to individual products in the ‘Edit product’ screen.
Step 04: Test Your WooCommerce Shipping Set Up
Now it’s time to make sure everything is working perfectly. You should check and fix issues before going live.
Here are some key areas to test:
- Place demo orders with various shipping addresses to verify that the shipping methods and rates are displayed accurately.
- Test any specific rules or conditions you have set up, such as minimum order amounts for free shipping.
- If you use third-party shipping plugins or integrations, ensure they work accurately.
- Go through the entire checkout process to make sure everything works perfectly. Ensure that there are no issues or errors left.
Want your checkout to feel effortless?
With WowShipping, customers sail through shipping choices, making it easier for them to hit “Place Order.”
Boost Sales with WowStore’s Free Shipping Progress Bar
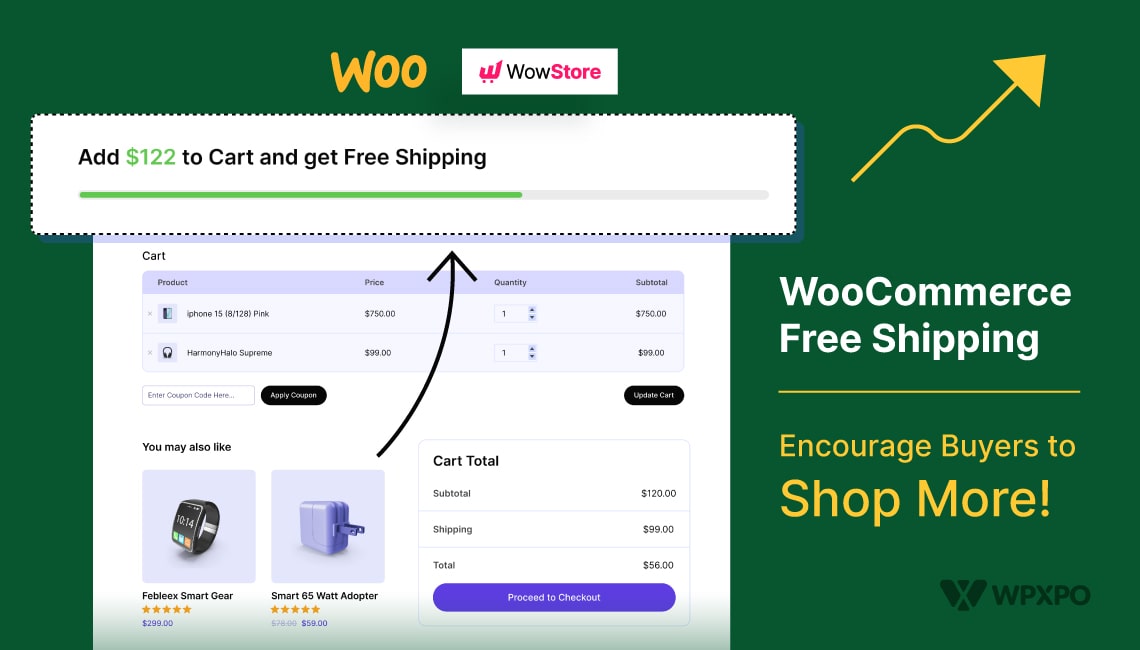
While the default WooCommerce free shipping is a good start, it lacks a progress bar. WowStore’s Free Shipping Progress Bar fills this gap. It motivates customers to make extra purchases and qualify for free shipping.
Offering Free Shipping has become a popular strategy to attract more customers and drive more sales. WowStore’s Free Shipping Progress Bar enhances the shipping experience with a visually appealing progress bar.
You can customize the bar’s appearance and placement. You can further adjust the look and feel, from colors to fonts. Change the text before and after the progress amount to match your brand.
Here’s how to set it up and why it can be a winning tactic.
Start Setting Up Shipping in WooCommerce!
In conclusion, offering a well-defined shipping strategy is crucial for the success of your WooCommerce store.
In this guide, I showed three built-in shipping methods and their importance. Then I provided a step-by-step guide for setting up shipping in WooCommerce. I added how you can boost conversions and sales with WowStore’s Free Shipping Progress Bar.
By following the steps outlined and carefully considering your customers, you can establish both a user-friendly and sale-focused shipping system.

