
WowInvoice lets you create a proforma invoice for an existing WooCommerce order. Use it to share the order items, charges and expected total with a customer before issuing the final invoice. You can also add a payment link so the customer can proceed to payment from the document.
Configuration
In your WordPress dashboard, go to WooCommerce → WowInvoice → Overview. Find Proforma Invoice, click Configure and open the Configure tab in the builder sidebar.
To review the store details used on the document, click Store Information under Global Settings. This section contains shared details such as your store name, address and logo. Global Store Information
Step 1 — Set the layout and automatic creation rules
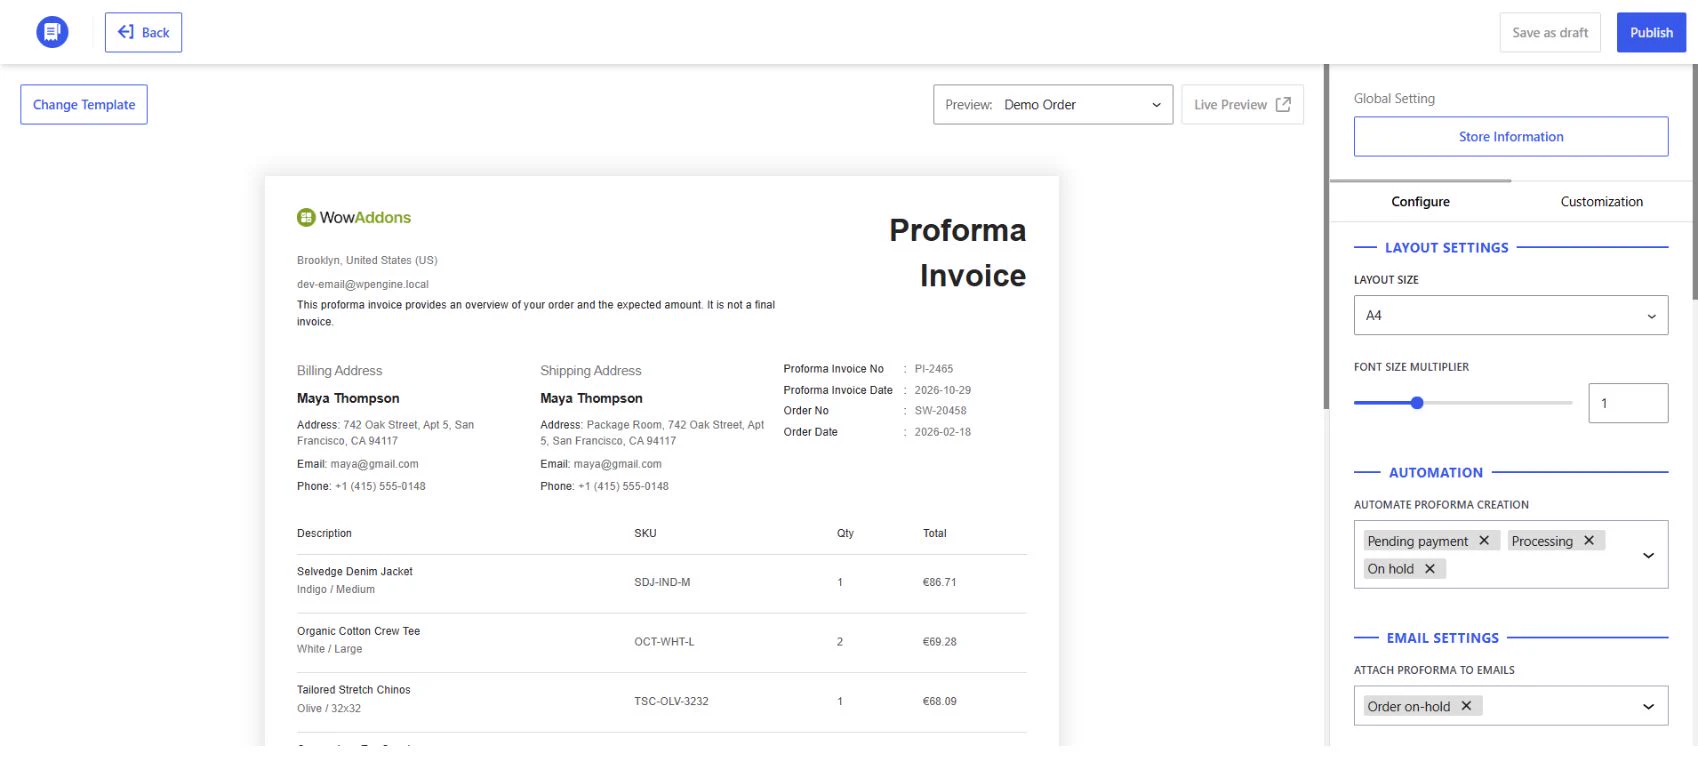
Under Layout Settings, choose A4, A5 or Letter. Use Font Size Multiplier to adjust the text size. To choose a different design, click Change Template above the document preview and select one of the four templates.
Under Automation, use Automate Proforma Creation to select the WooCommerce order statuses that should trigger document creation. The available statuses are Pending payment, Processing, On hold, Completed, Cancelled, Refunded, Failed and Draft.
For example, if you want to prepare a proforma invoice when an order is placed on hold, select On hold here. Then choose Order on-hold in the email settings if you also want to attach the PDF to that email.
Step 2 — Configure email attachments
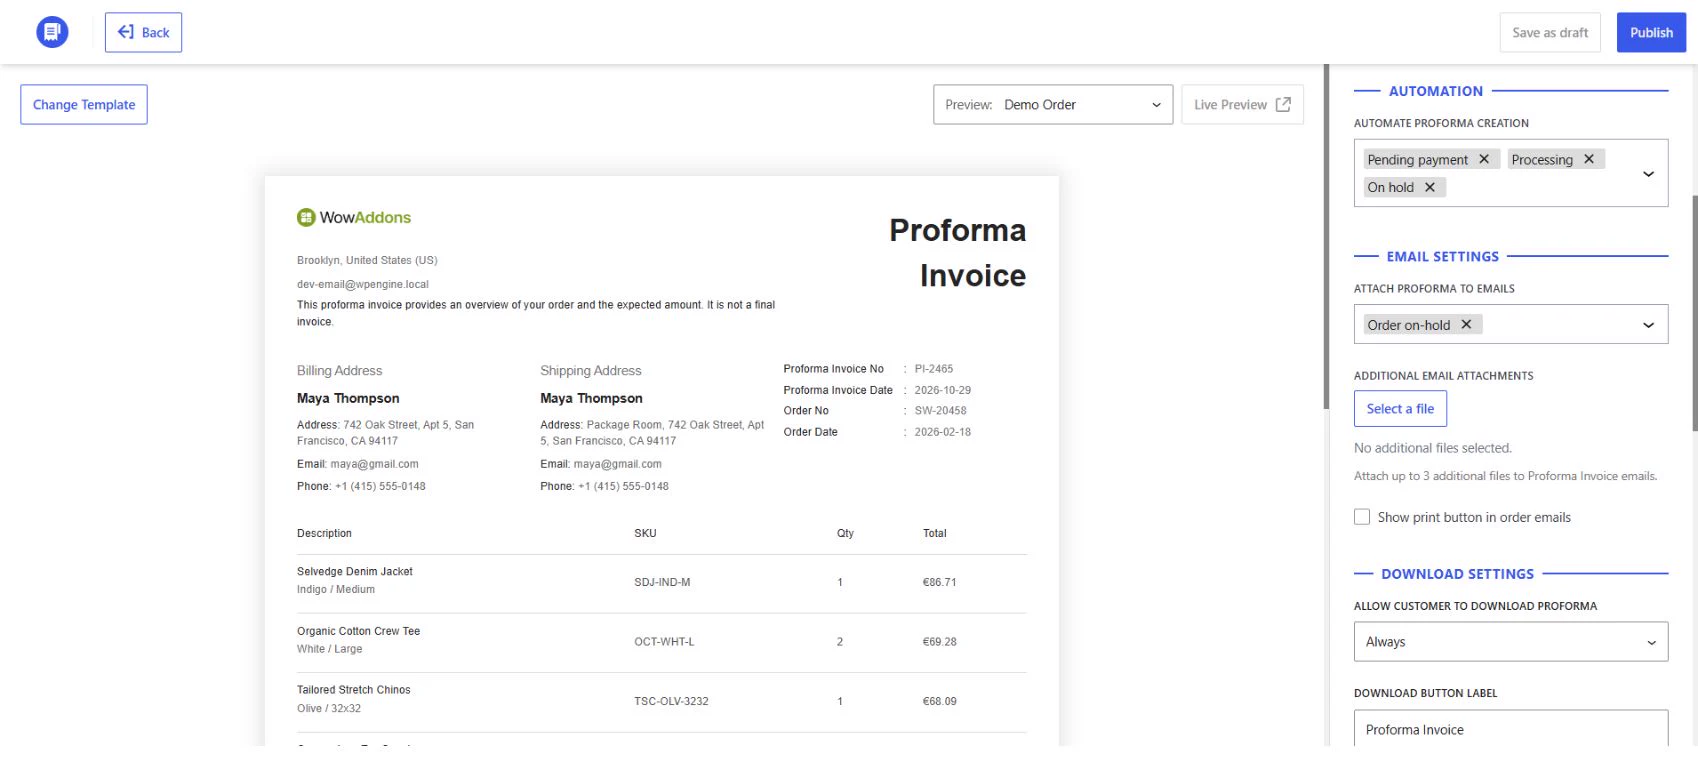
Under Email Settings, use Attach Proforma to Emails to choose which WooCommerce emails should include the proforma invoice PDF.
You can choose from New order (Admin email), Cancelled order, Failed order, Order on-hold, Processing order, Completed order, Refunded order, Order details (Manual email) and Customer note.
Use Additional Email Attachments to add up to three supporting files. Enable the Show print button in order emails if you want to include a print button.
Step 3 — Set customer download permissions
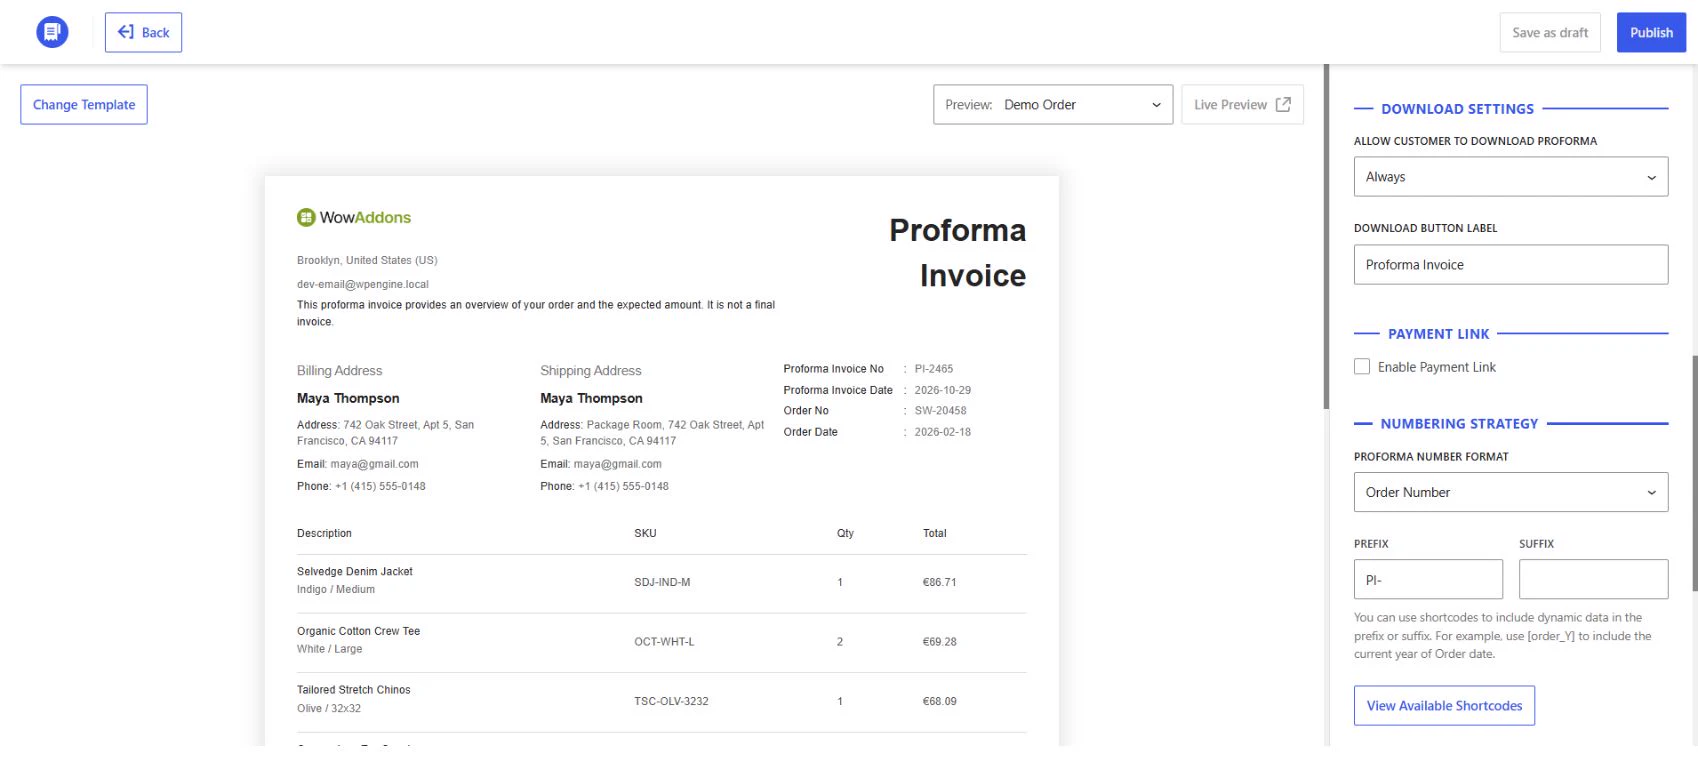
Under Download Settings, choose an option in Allow Customer to Download Proforma.
- Always allows customers to download an available proforma invoice regardless of order status.
- Specific order statuses limits downloads to the statuses you select.
- Never disables customer downloads.
Use Download Button Label to change the text customers see on the download button.
Step 4 — Add a payment link
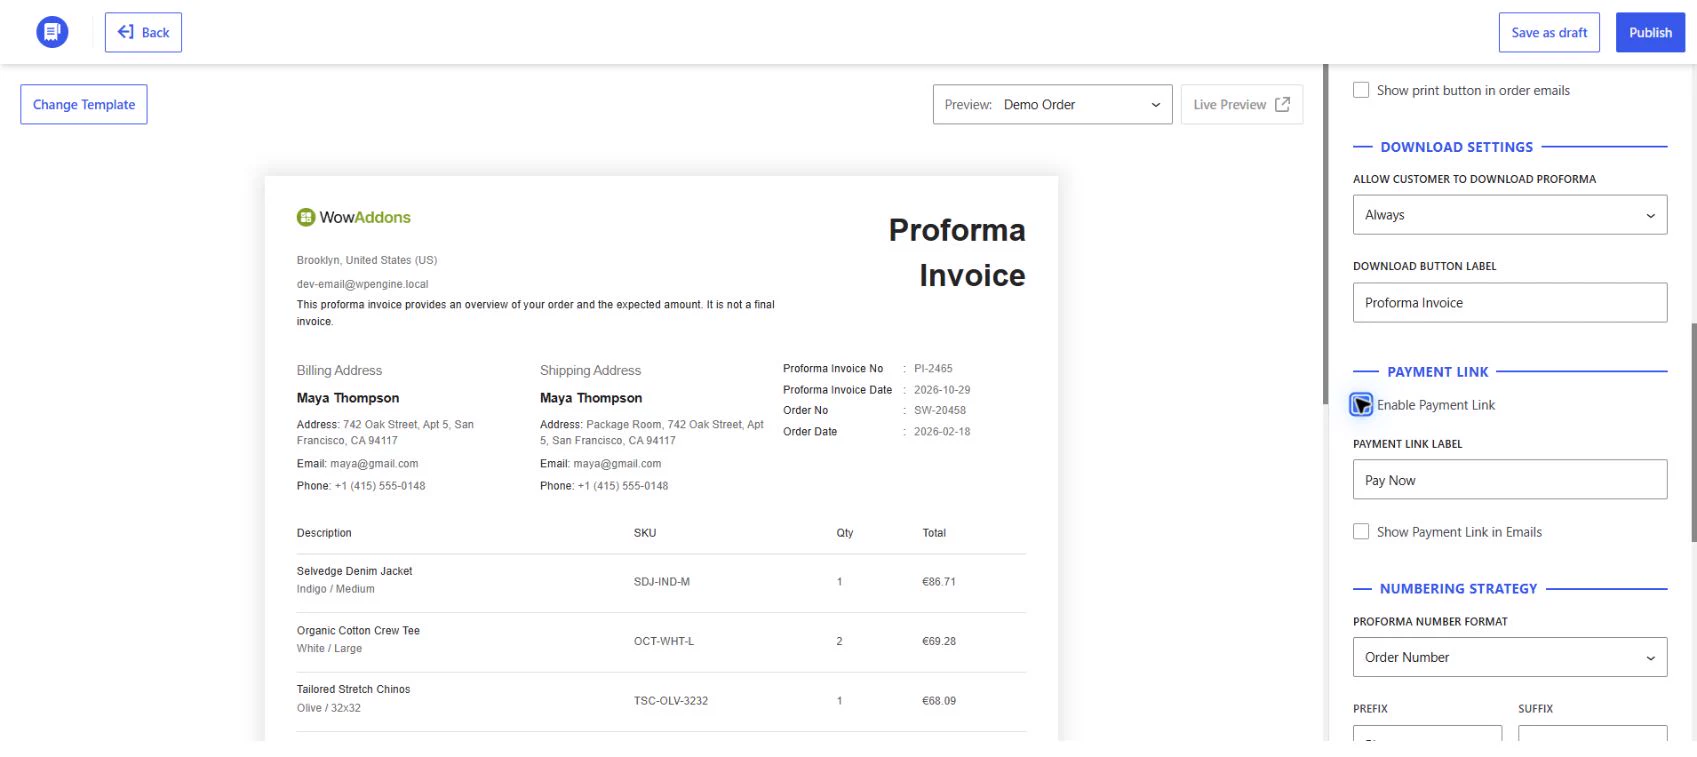
Under Payment Link, turn on Enable Payment Link to add a payment link to the proforma invoice. Use Payment Link Label to change the link text. The builder starts with Pay Now.
To display the link in emails as well, enable Show Payment Link in Emails. Attach Proforma to Emails controls which emails carry the PDF.
Step 5 — Configure proforma numbering
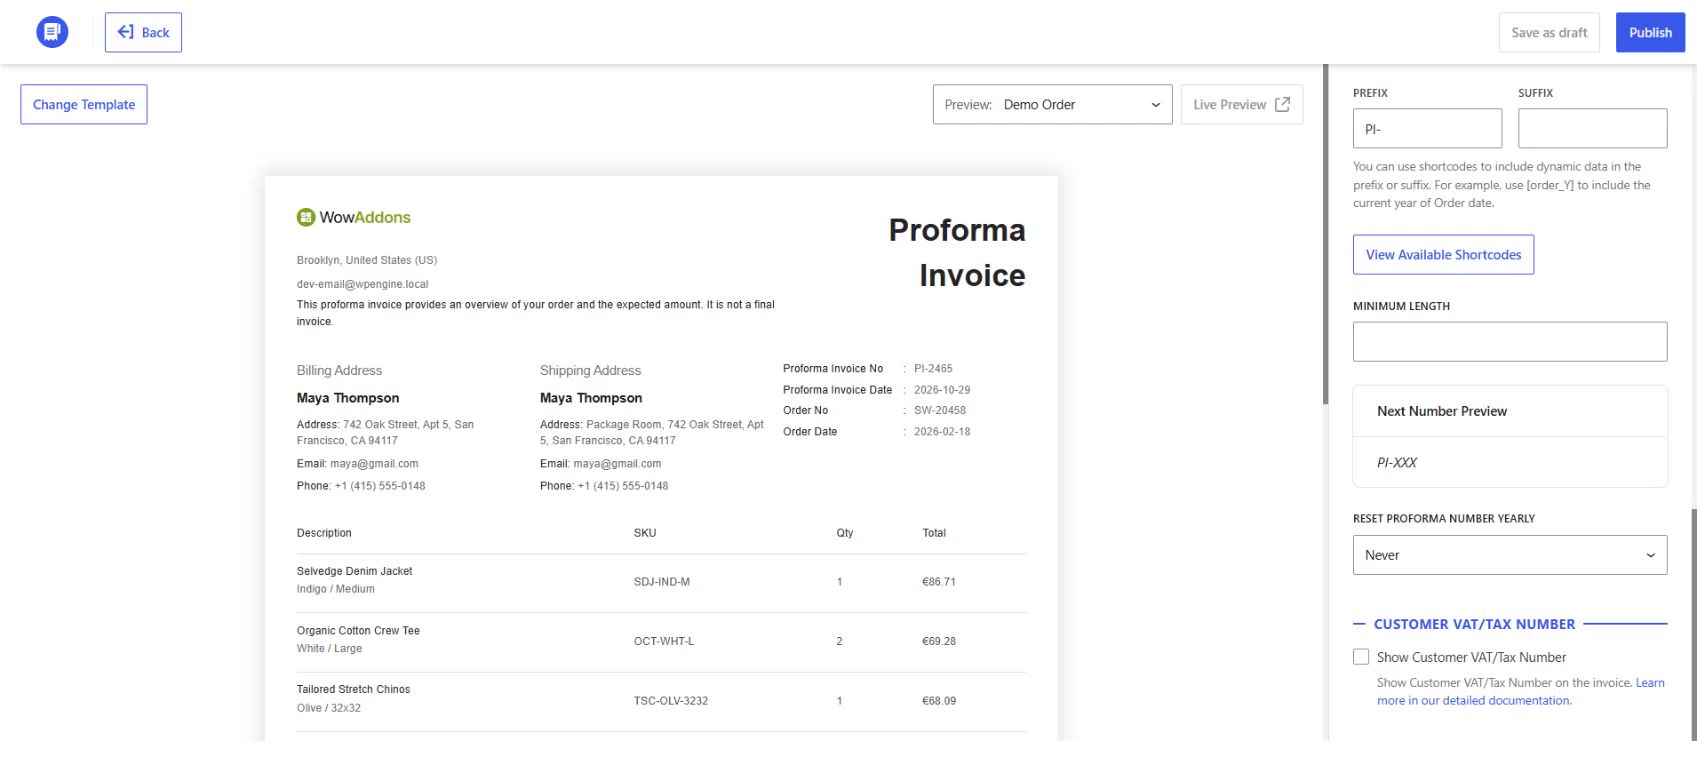
Under Numbering Strategy, open Proforma Number Format. Choose Order Number to base the document number on the WooCommerce order number or Proforma Number to use a separate proforma numbering sequence.
- Prefix adds text before the number, such as PI-.
- Suffix adds text after the number.
- Minimum Length sets the minimum length of the number.
- Next Number Preview shows how the number will look with the current settings.
- Reset Proforma Number Yearly lets you choose a reset month or select Never.
You can use date shortcodes in the prefix or suffix. For example, PI-[order_Y]- adds the year from the order date, while PI-[doc_Y]- uses the year from the document date. Click View Available Shortcodes to see and copy the supported formats.
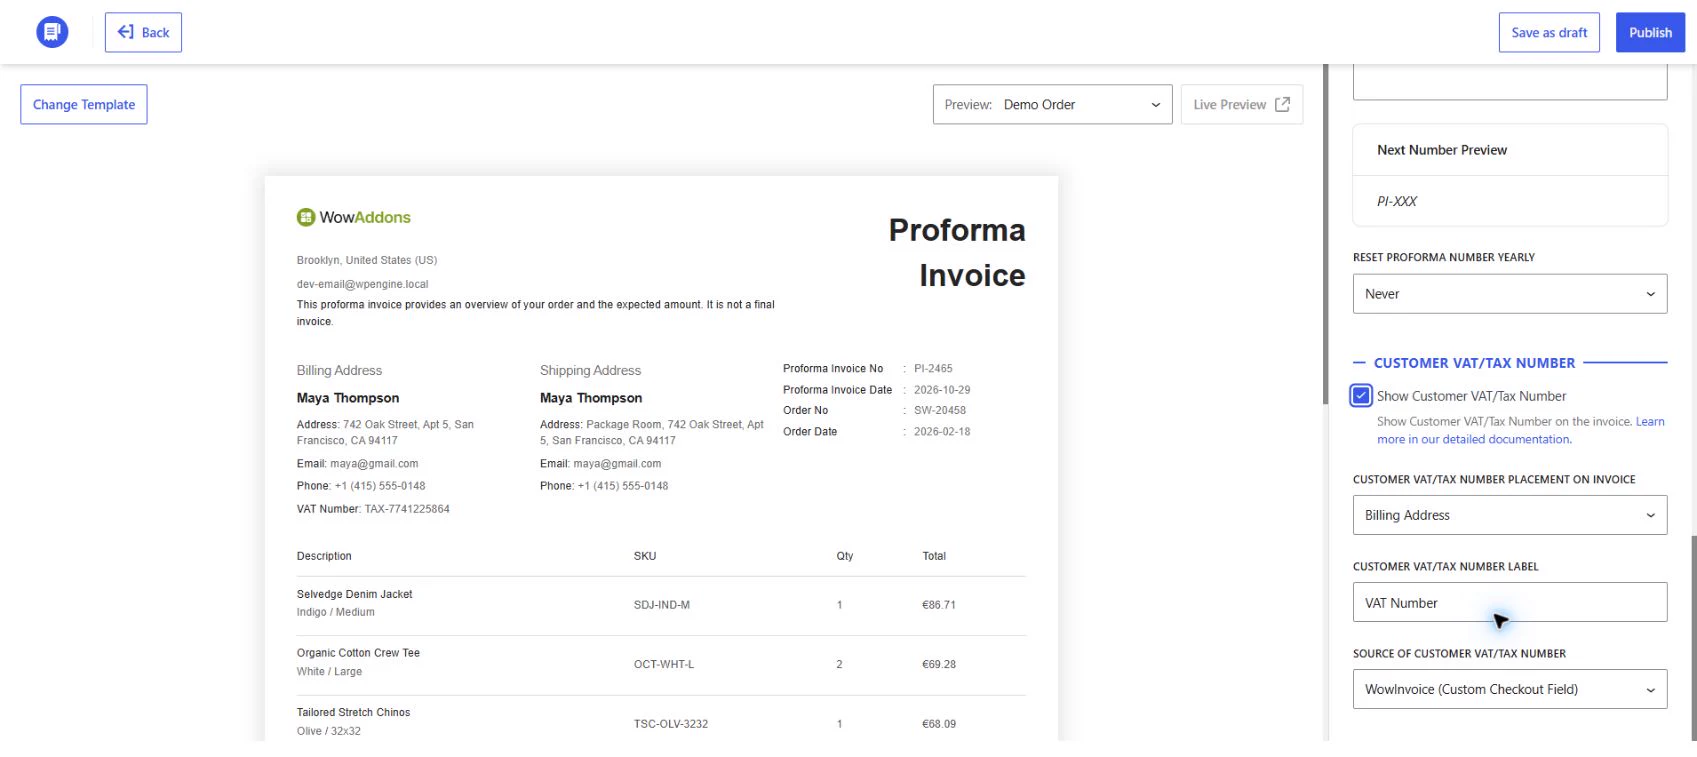
Step 6 — Display the customer’s VAT or tax number
Enable Show Customer VAT/Tax Number to include the customer’s tax ID on the document. Choose Billing Address, Shipping Address or Both for placement, then edit the label if needed.
Use Source of Customer VAT/Tax Number to choose where WowInvoice gets the number. The menu lists WowInvoice (Custom Checkout Field), supported VAT plugin integrations and Other. For background on WowInvoice’s VAT settings, see the EU VAT Support guide.
Customization
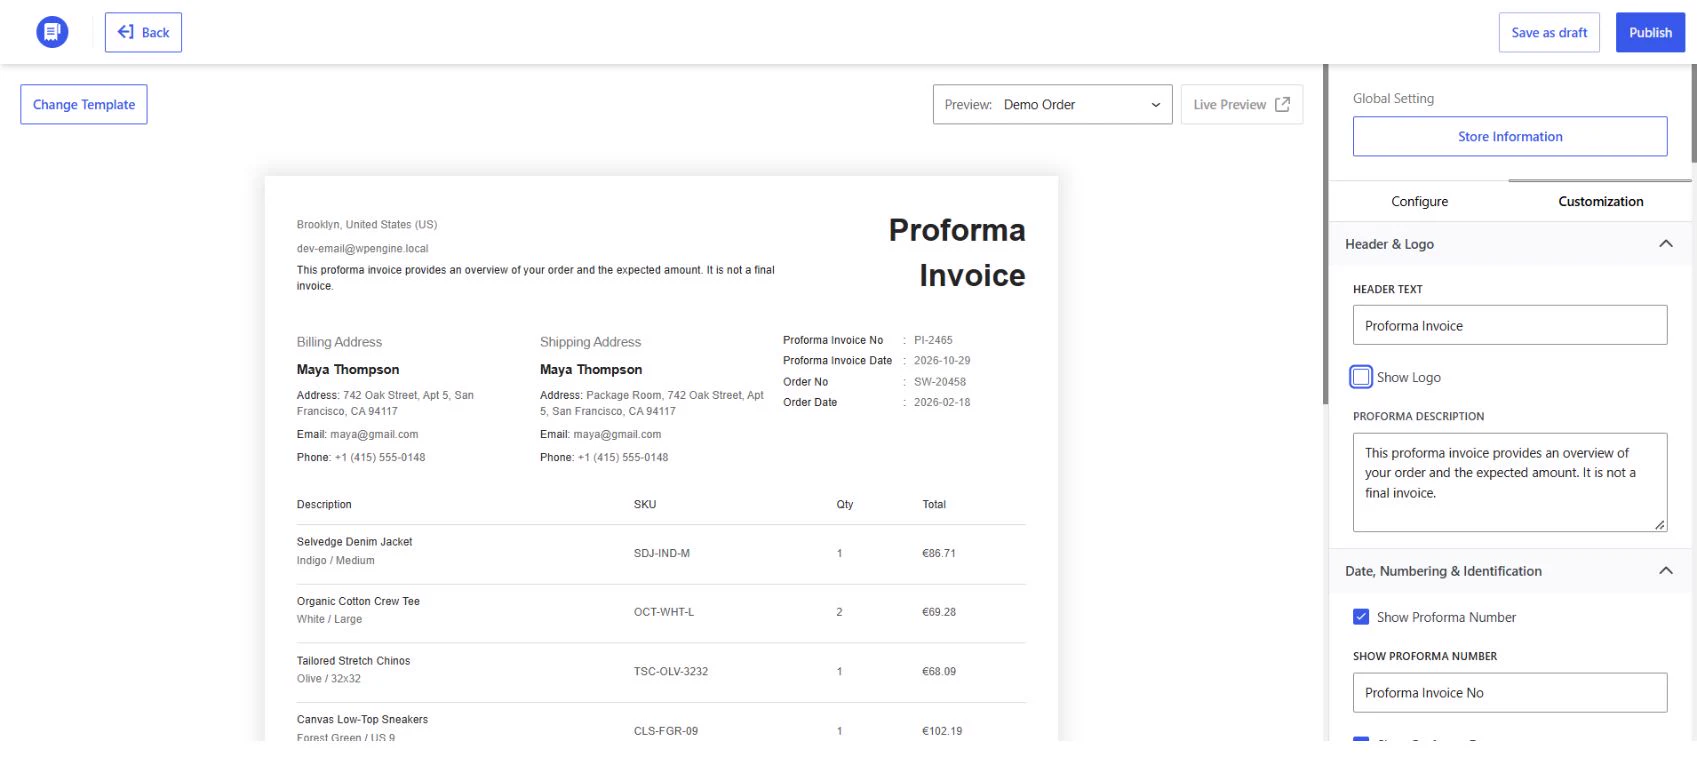
Open the Customization tab in the builder sidebar to choose what appears on the proforma invoice and how it is labeled.
Header & Logo
Use Header Text to change the document title. Turn Show Logo on or off and use Logo Size to adjust its size. The Proforma Description field lets you add a short message near the top of the document, such as an explanation of why the customer is receiving it.
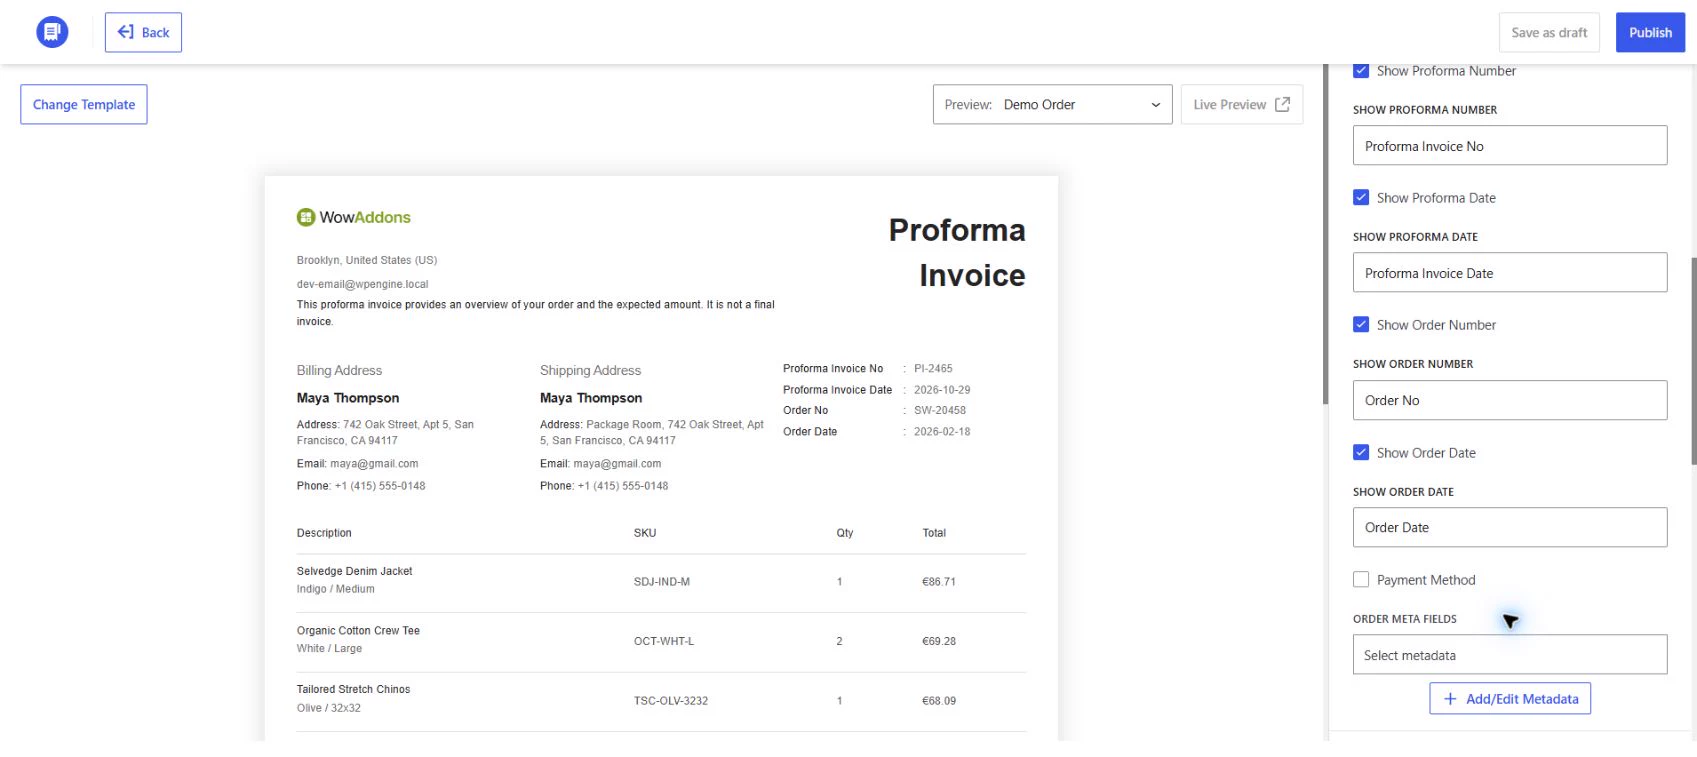
Date, Numbering & Identification
Choose whether to show the proforma number, proforma date, order number and order date. Each field has an editable label. You can also display the payment method and use Add/Edit Metadata under Order Meta Fields to include other order data.
Billing & Shipping Address
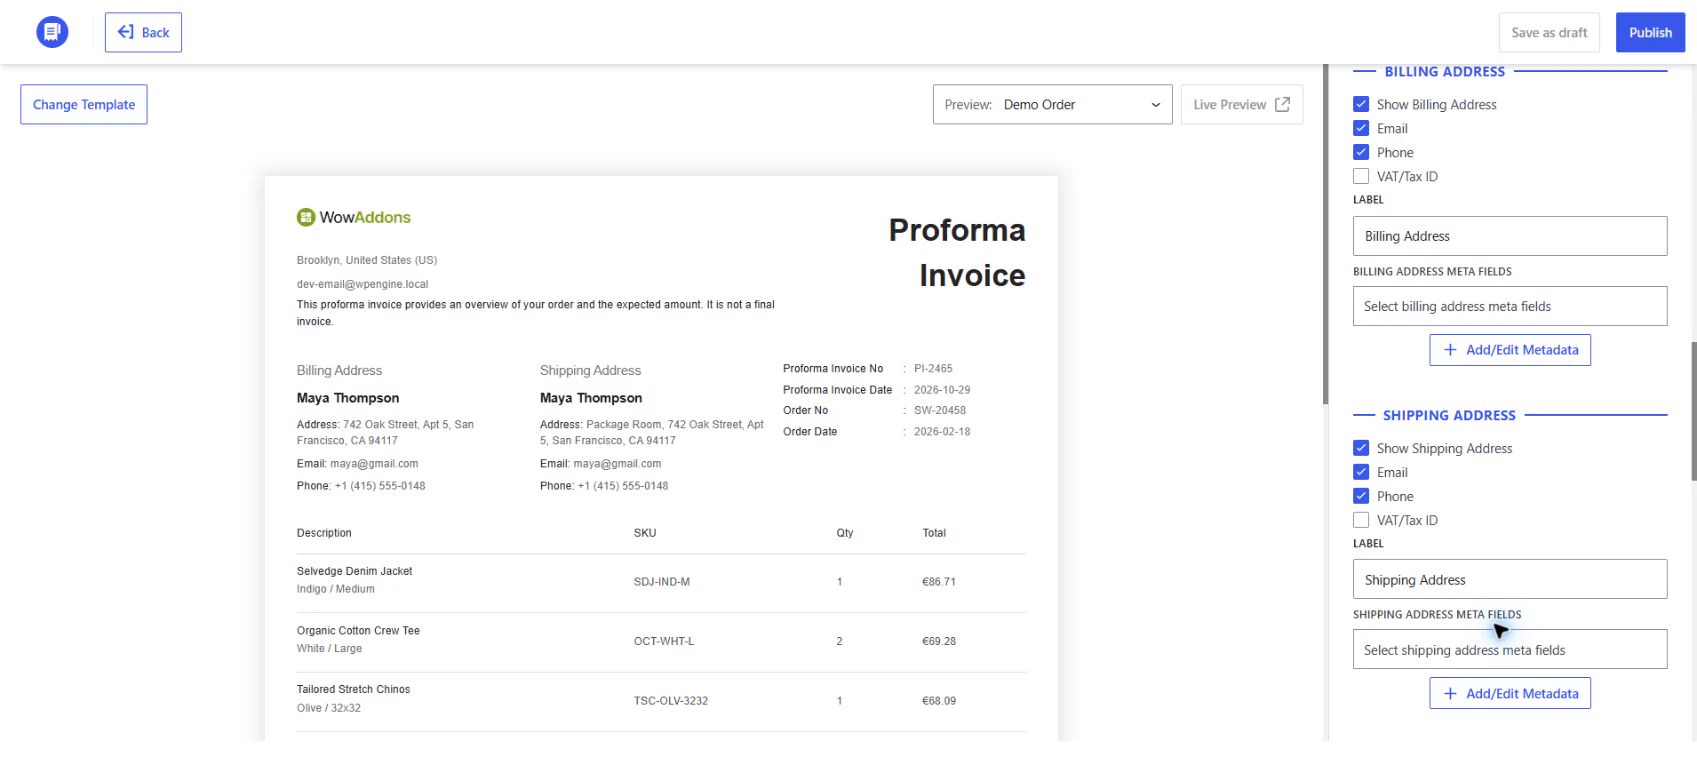
The billing and shipping sections each have controls for the address, email, phone and VAT/tax ID. You can rename either section and add metadata to each address separately.
Under Labels, edit the field names for Address, Email, Phone and VAT/Tax ID.
Product Table
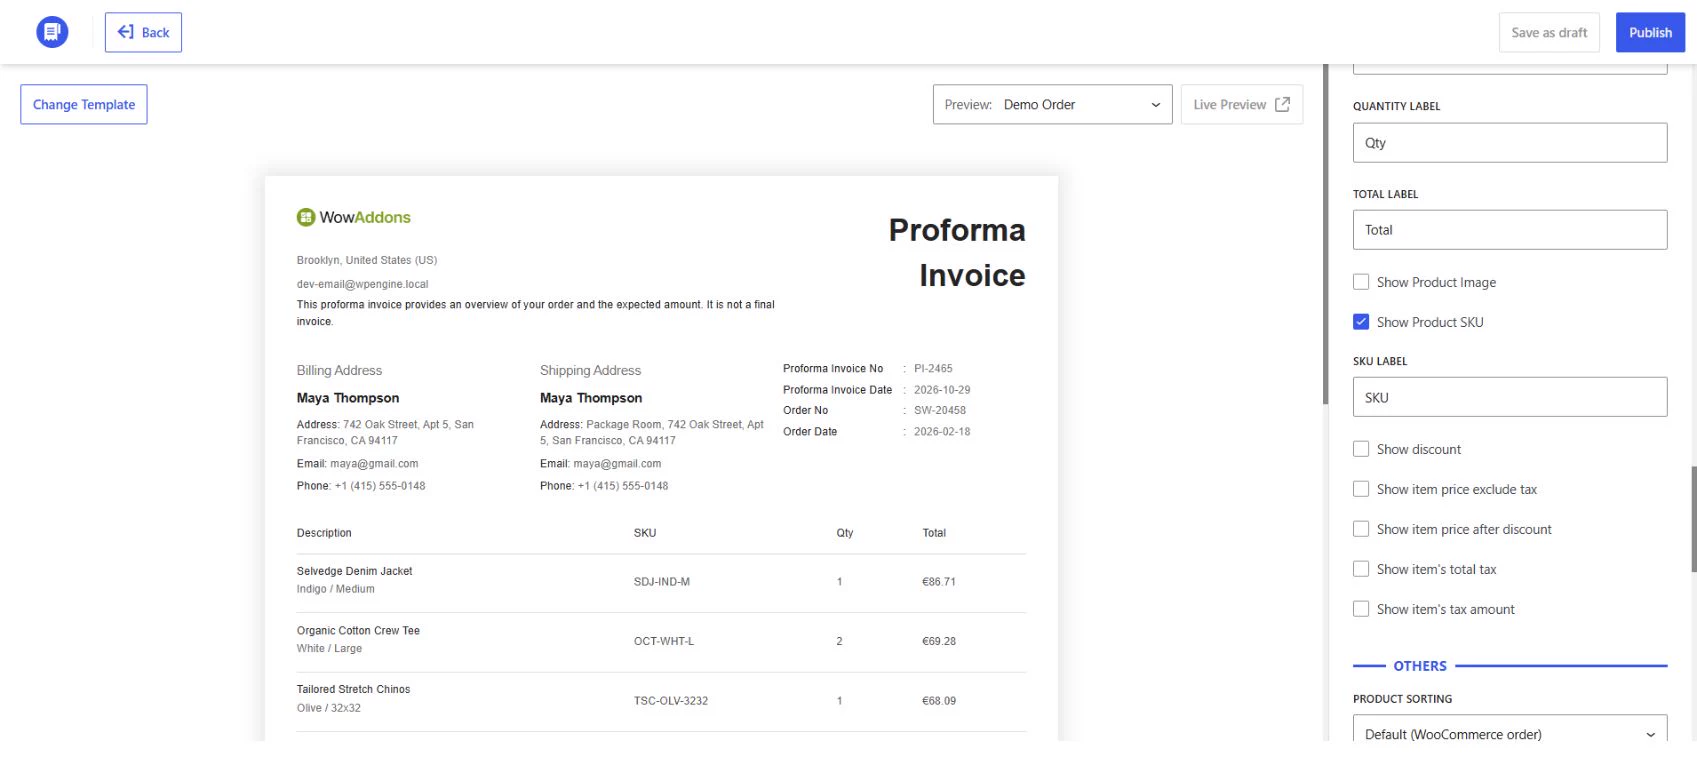
Edit the Description, Quantity and Total column labels. You can show product images and SKUs and rename the SKU column. The table also has options for line-item discounts, prices before tax, prices after discounts and item tax details.
Under Product Sorting, keep the WooCommerce order or sort by product name or SKU in ascending or descending order. Use Add/Edit Metadata to display additional product information. Enable Show free line items to include items priced at zero.
Totals & Financial Breakdown
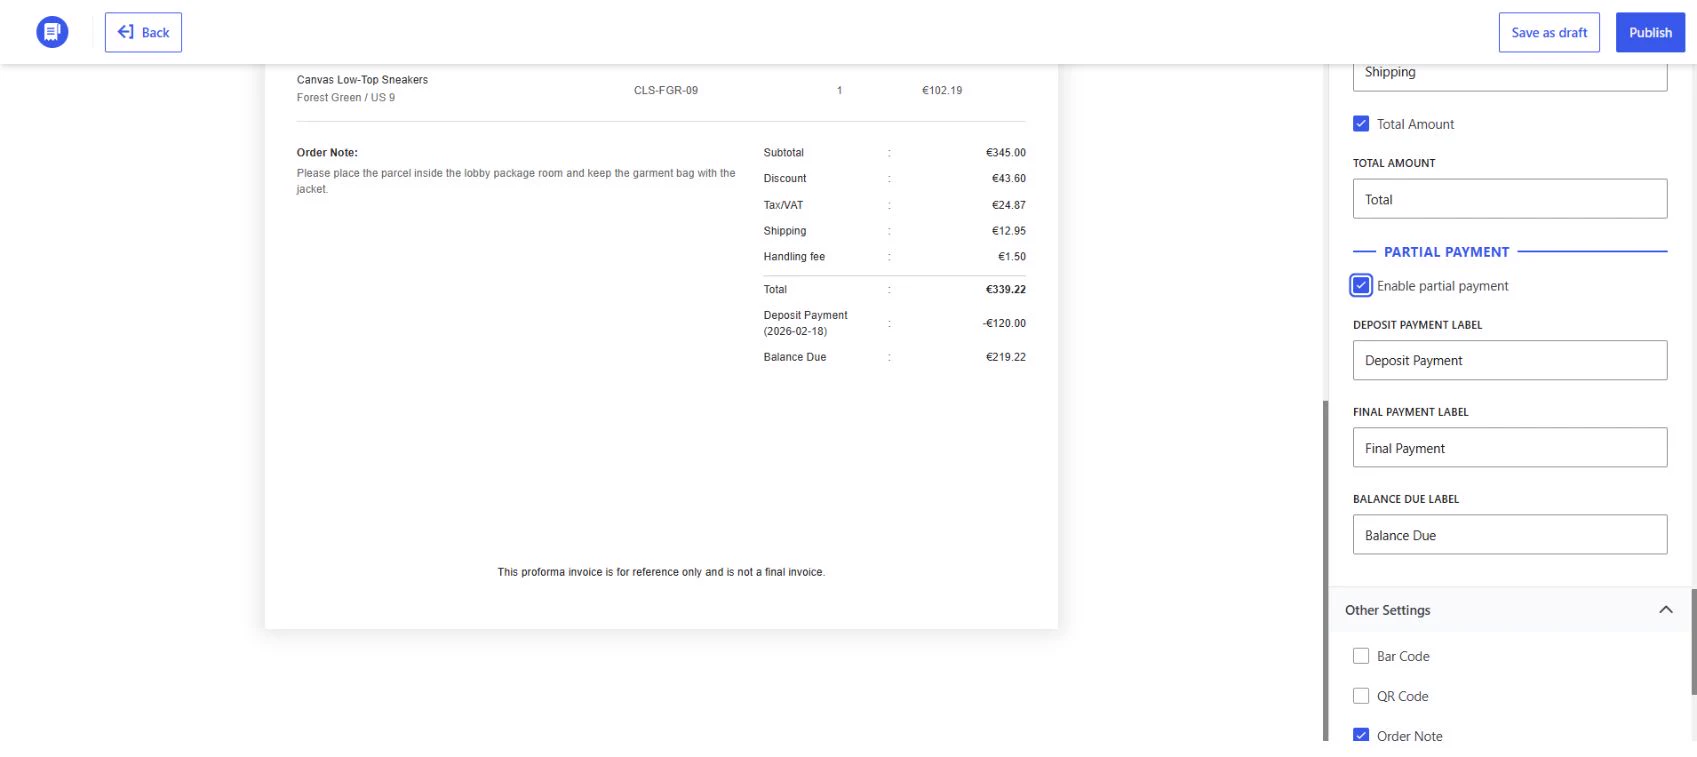
Choose which figures appear in the totals area and edit their labels. The available fields include Subtotal, Discount, Tax/VAT, Shipping and Total Amount.
If your orders contain partial-payment data, enable Partial Payment to show deposit, final-payment and balance-due information. You can edit the Deposit Payment Label, Final Payment Label and Balance Due Label.
Other Settings
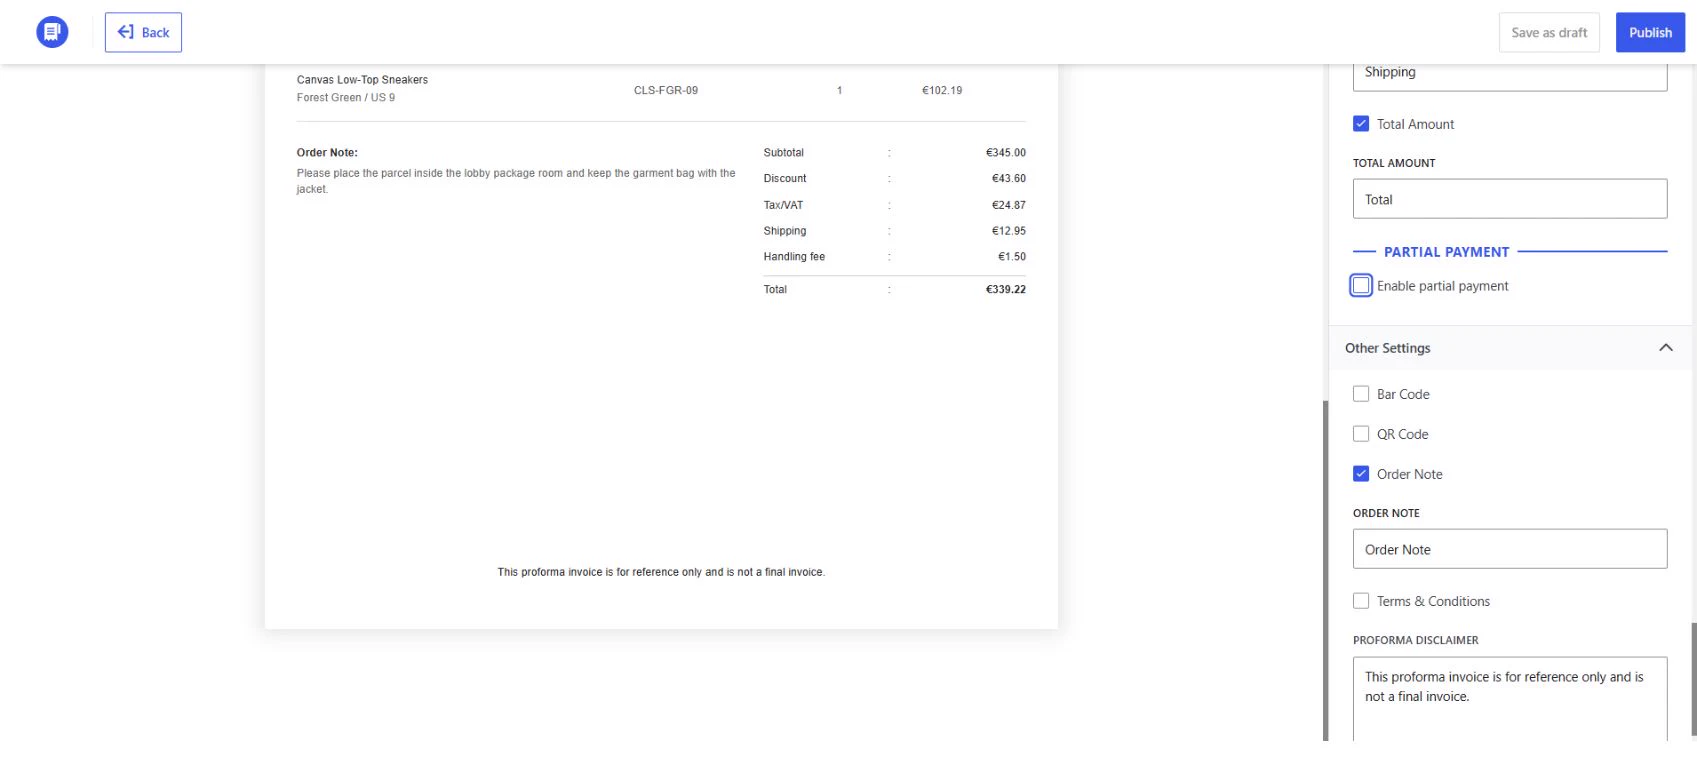
Choose whether to show a barcode, QR code or order note. You can change the order note label. To add your terms, enable Terms & Conditions and enter the label and text you want to display.
Use Proforma Disclaimer to edit the notice at the bottom of the document. The default notice explains that the proforma invoice is for reference and precedes the final invoice.
Preview and publish
Use the Preview menu above the document to select Demo Order, Last order or Search for an order. Select a store order to use Live Preview. Check that the document shows the correct dates, numbers, line items, totals and any payment or tax details you enabled.
When the configuration is ready, click Publish. Use Save as draft if you want to return to the builder before publishing.