Facing WordPress errors is bad but finding them manually is frustrating. Don’t worry, in this blog post, I will explain how to enable error reporting in WordPress?
You don’t need to be an expert WordPress user to do that. Just follow my steps and paste the codes accordingly and the job will be done in no time.
How to Enable Error Reporting in WordPress (using Cpanel)
To enable WP Debug mode you have to add a few lines of PHP codes into the wp-config.php file. Keep reading to understand why and how to add the codes to enable debug mode along with all companions.
WP_DEBUG
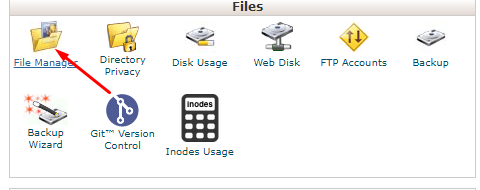
To enable error reporting you need to have Cpanel access. First of all login to the Cpanel of the hosting of your site. Then look for the file manager and click on it.
Go to the Public_html area and start editing the wp-config.php file.
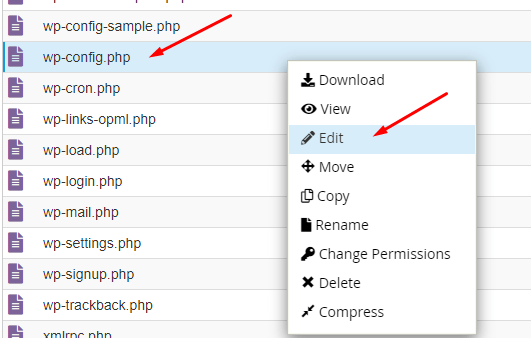
Find the WP_DEBUG code section. By default, it will be defined as (‘WP_DEBUG_LOG’, false); You have to replace the text “false” with “true”.
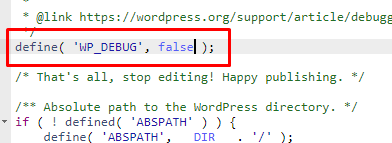
define('WP_DEBUG', true);WP_DEBUG_LOG
If you want to send a log file to someone who can check and fix the error or to your hosting service support team you have to add the following line just below the WP underscore debug line.
define('WP_DEBUG_LOG', true);You can find all the error notifications in the debug.log located inside the wp-content folder.
***NOTE: Please note that you will only notice this file when you see any errors. So, it only shows up when something is written inside of it.
But make sure the folders and files information is correct. (644 – for files; 755 – for folders).
WP_DEBUG_DISPLAY
If you want to restrict the errors that appear on the website you will have to add the following line just below the WP underscore debug line.
define('WP_DEBUG_DISPLAY', false);SCRIPT_DEBUG
It forces WordPress to load the developer versions of core CSS and JavaScript files instead of the minified versions. For that, you need to add the following code below the WP underscore debug line.
define('SCRIPT_DEBUG', true);SAVEQUERIES
It saves the database queries to an array and lets you analyze whether there are any errors or not. To display the queries need to add the following code below the WP underscore debug line.
define( 'SAVEQUERIES', true );You may also like: How to Use WordPress Custom Shortcode
How to Enable Error Reporting in LocalHost
If you want to enable the reporting in Localhost then you need to follow a different way but the codes are the same. Go to the Xamp folder and click on htdocs and then click on your localhost site name. After that locate and open the wp-config folder with Notepad. At last copy the below code and replace it with define(‘WP_DEBUG’, false);
define('WP_DEBUG', true);
define('WP_DEBUG_LOG', true);
define('WP_DEBUG_DISPLAY', false);
define('SCRIPT_DEBUG', true);
define( 'SAVEQUERIES', true );
Conclusion
That’s all on how to enable error reporting in WordPress. But don’t forget to remove the disable the debug mode after solving the errors. For that, just change the debug line text “false” to true and remove other codes under the WP_DEBUG line.