Let me guess – you’re running a WooCommerce store, orders are coming in, and somewhere between “customer placed an order” and “package shipped,” things get messy. Warehouse staff is guessing which products go where. Wrong items slip through. Customers get annoyed. Returns pile up.
I’ve been there. And honestly, the fix is simpler than most people think. It starts with something called a picklist.
In this article, I will discuss what picklist is and how to create one with ease with a WooCommerce plugin. Let’s get started!
Before moving on..
You can also check out our video on creating a picklist:
What Is a WooCommerce Picklist (And Why Should You Care?)
A picklist is a straightforward document that tells your warehouse staff what products to grab off the shelves for each order. Product names, quantities, SKUs, variation details – all are nicely shown in one document, so nobody has to guess.
That’s it. It’s not fancy. But if you’ve ever shipped someone a medium blue t-shirt when they ordered a large red one, you already understand why this document matters.
Here’s the number that should grab your attention: roughly 25% of all eCommerce returns happen because the customer received the wrong item.
Not damaged goods. Not late shipping. Wrong item. That’s a picking and packing problem, and picklists are the solution most store owners overlook until it starts costing them real money.
Now, you might be thinking – “My store is small, I only get a few orders a day, I don’t need this.” And sure, if you’re literally packing boxes at your kitchen table, maybe not.
But if you’ve got even one other person helping with fulfillment, or if your order volume is growing toward 20-30+ orders a day, a picklist stops chaos before it starts. It takes maybe an hour to set up the plugin and pays for itself within the first week.
What Goes into a Good WooCommerce Picklist
A WooCommerce picklist should include the essential details warehouse staff needs to locate and collect products accurately.
These typically include the product name, SKU, quantity, and order number.
As your fulfillment process grows, you can add more information to make picking faster and reduce mistakes:
- Order number – helps staff identify which order the picked items belong to.
- Product image – helps staff visually verify they’re picking the correct item.
- Product variations – displays important details like size, color, or material.
- SKU – makes it easier to identify products with similar names.
- Weight and dimensions – optional, but useful when the same document is also used during packing.
The exact information you include depends on your workflow. A small store may only need the basics, while larger operations often customize picklists with additional details.
Step-by-Step Guide: Creating a WooCommerce Picklist
Here’s the thing about WooCommerce — it’s great at selling stuff. But out of the box, it has basically zero support for warehouse operations. There’s no picklist button. No picking workflow. You have to bring your own solution.
Let me walk you through the whole process.
Step 1: Installing the Right Plugin
There are several WooCommerce plugins that let you create and print picklists. Some are quite popular in the WordPress plugin repository. However, not many of them provide the best value for money.
WowInvoice is an advanced PDF invoice plugin that also lets you create picklists, alongside other essential WooCommerce store documents such as packing slips, credit notes, and shipping labels – making it one of the best value-driven tools.
The installation is really simple: simply find WowInvoice from the plugin section of the WordPress dashboard. Install and activate it just like any other plugin.
And once it’s activated, you’ll see a new WowInvoice section under your WooCommerce settings.
Step 2: Configuring General Settings
Once you land on the plugin’s dashboard, you will see options to create Invoice, Packing Slip, Delivery Note, Picklist, Credit Note, and Shipping Label.
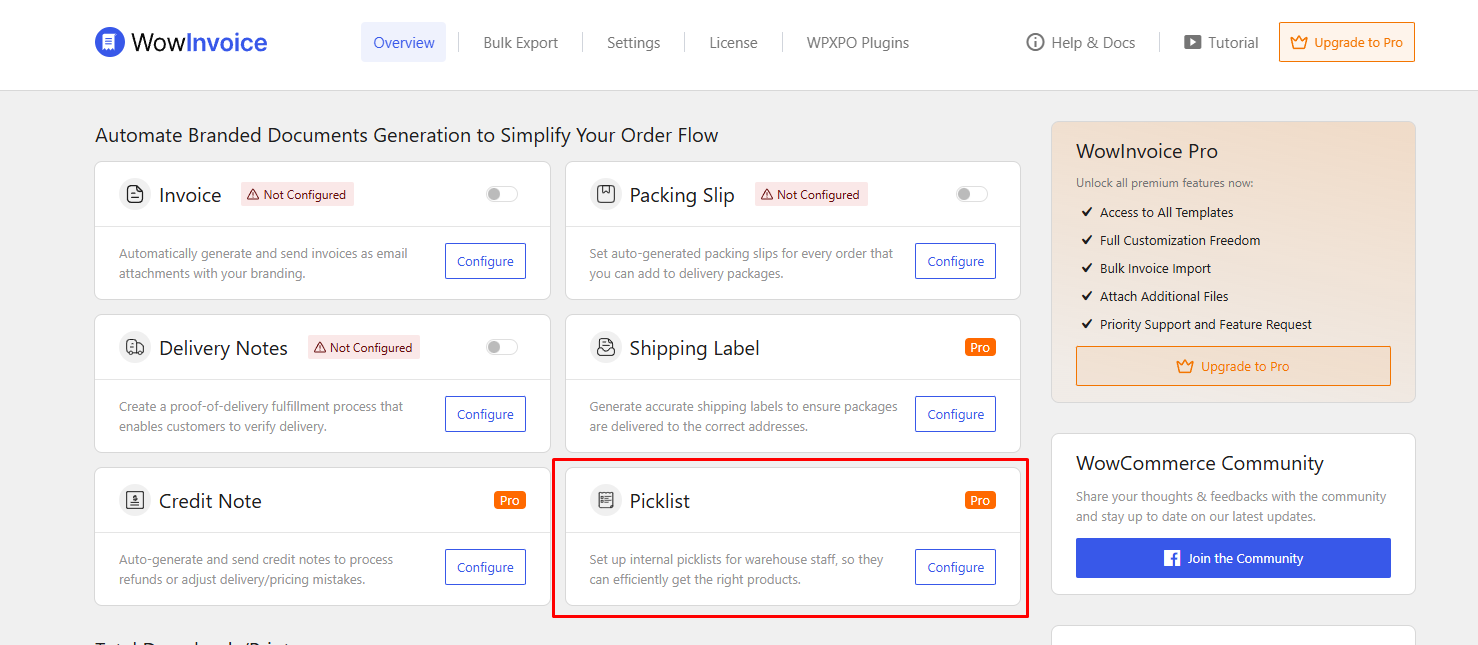
From here, simply click on Configure for the document Picklist. This is where the magic happens.
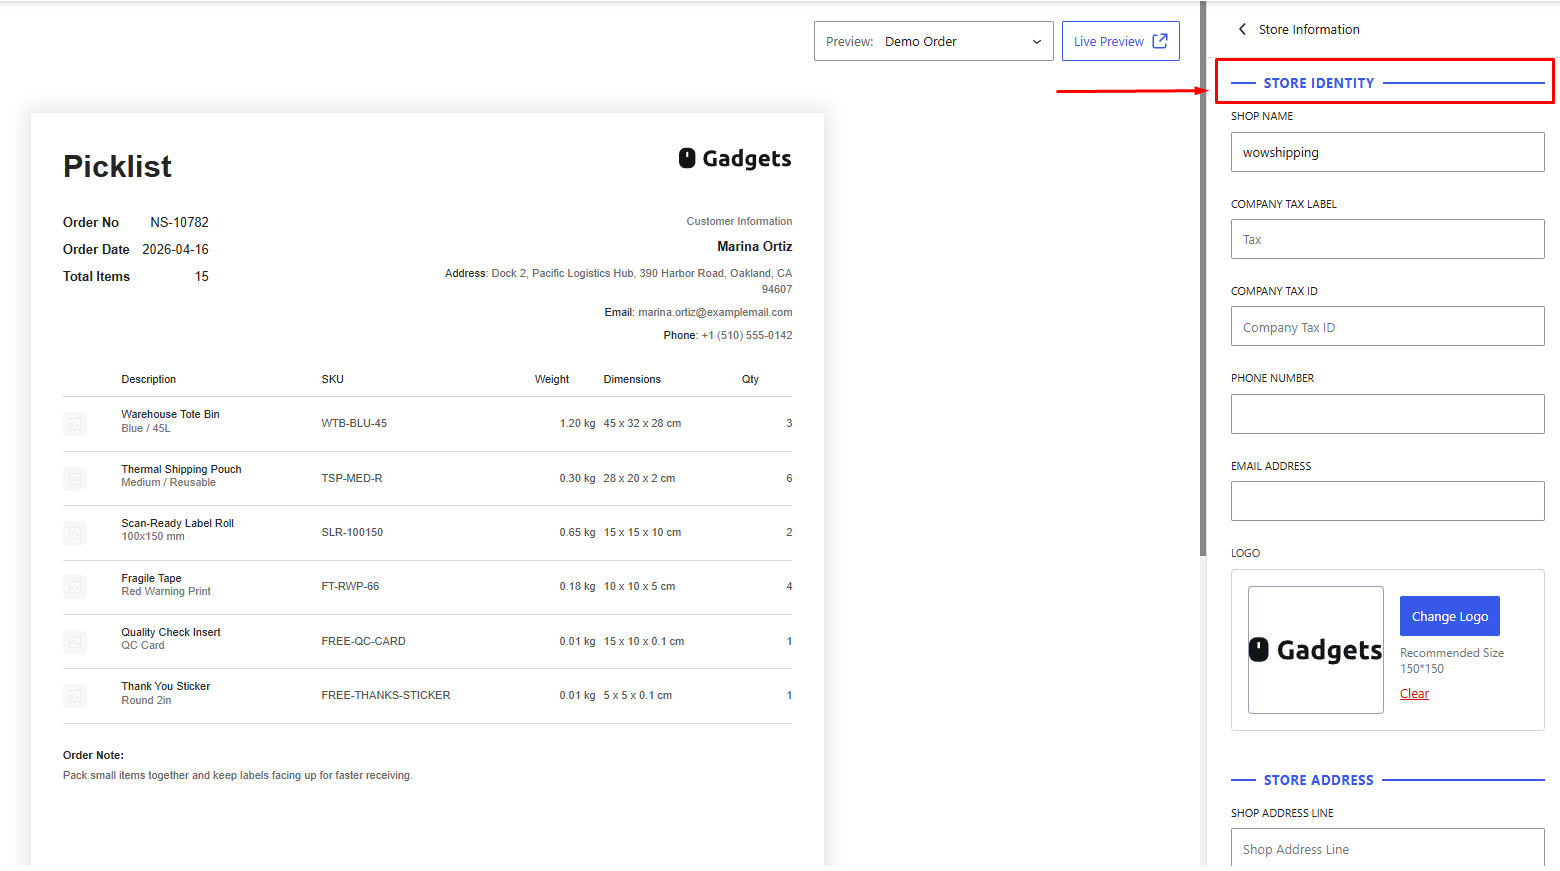
Now, you will land on the Picklist Builder view. Here’s what you need to configure:
Store Settings: If you haven’t already, check whether your store information is set up properly – it includes your Store Name, logo, address, and other important information like tax id.
Layout Size: Next, choose the layout size of the Picklist – WowInvoice supports A4, A5, and Letter sizes. Pick whatever matches your printer setup. If you’re printing on standard thermal printers in a warehouse, A4 is the safe default.
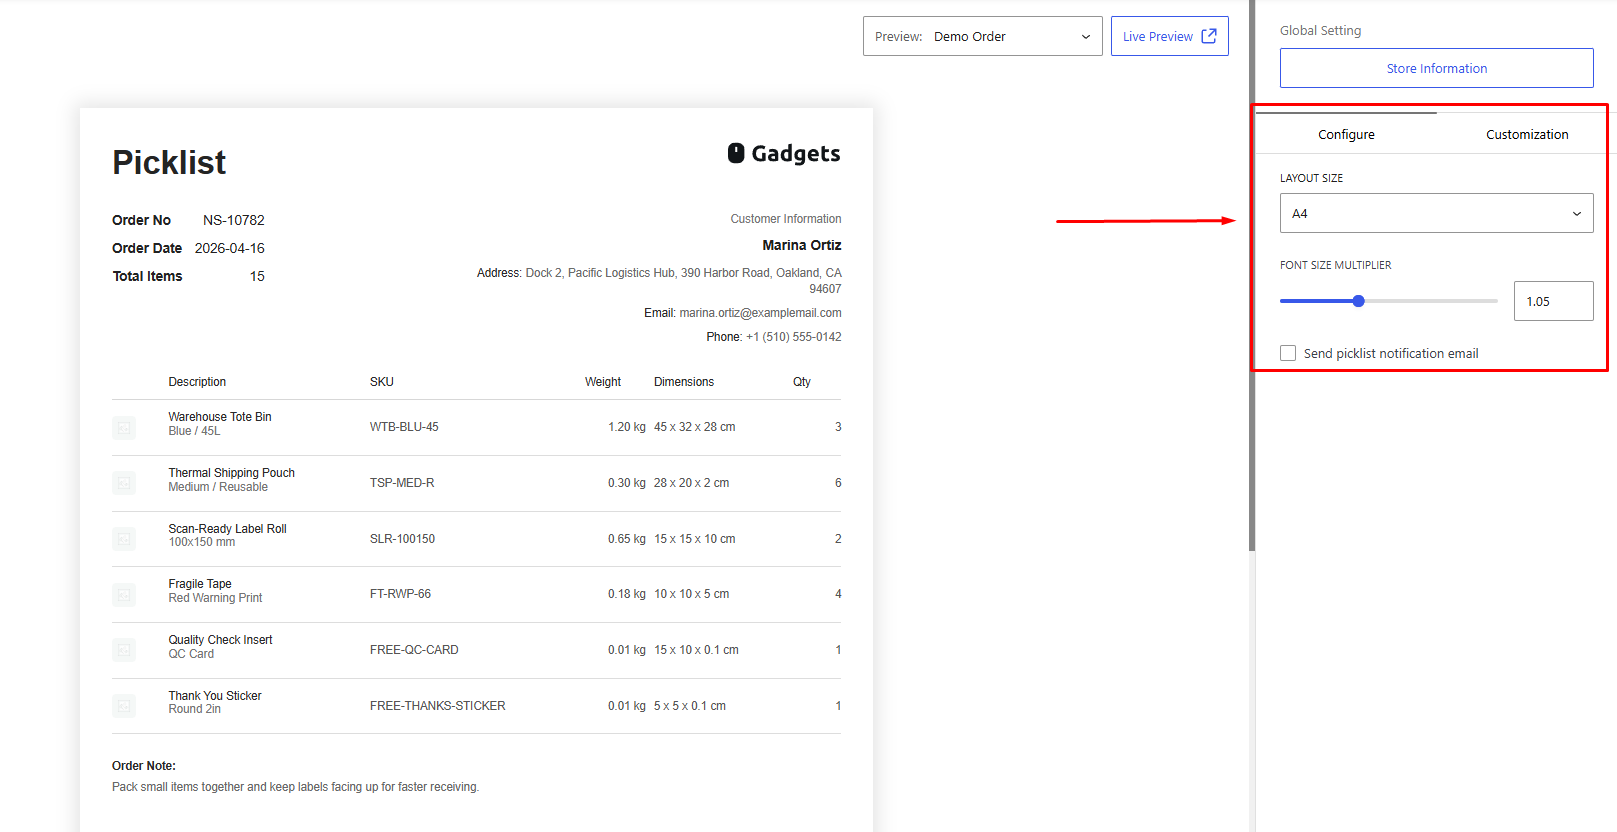
Font Size: You can also set the overall font size that is being used in the Picklist document. Simply use the slider Font Size Multiplier to customize this.
Step 3: Setting Up Automatic Email Delivery
WowInvoice lets you automatically attach picklists to WooCommerce order emails based on order status. So when an order hits “Processing” (or whatever status you choose), the picklist PDF gets generated and sent out to the warehouse – no manual intervention needed.
Here’s how to set it up:
1. In the Picklist configuration, go to the email notification settings.
2. Enable Send Picklist Notification Email option.
3. Choose which order statuses trigger the email. You’d typically want “Processing” or “On Hold” – statuses where the order is confirmed but not yet shipped.
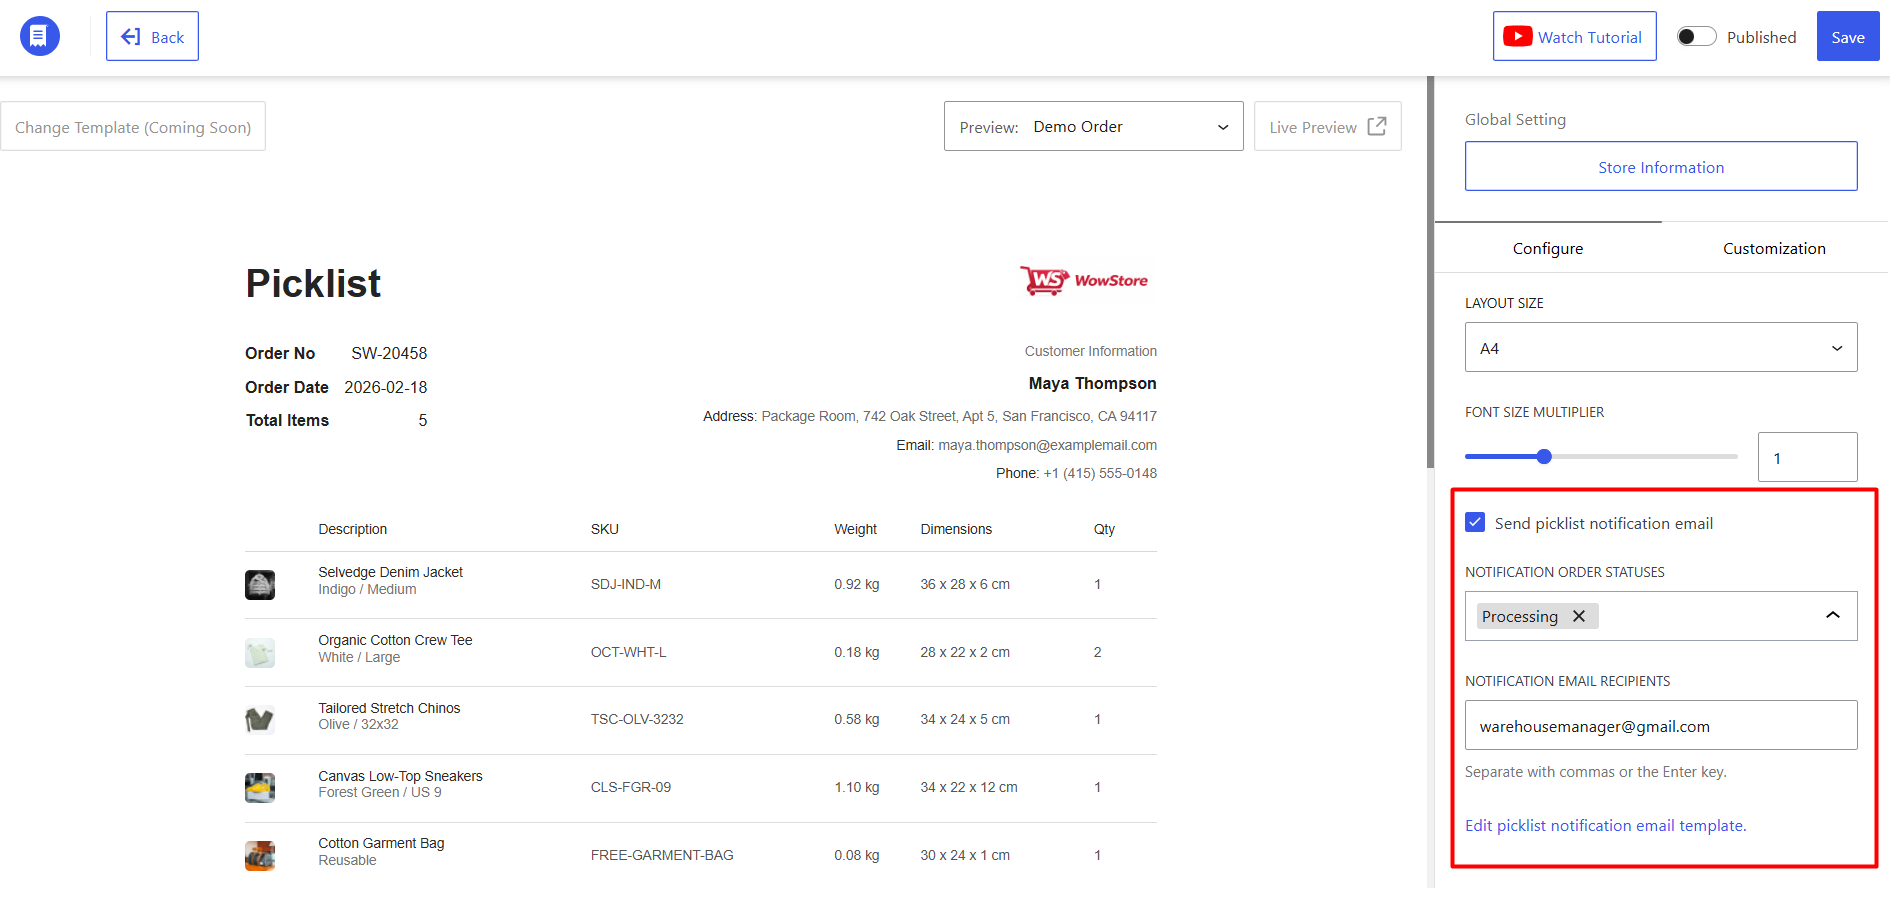
4. Add your email recipients. You can enter multiple email addresses separated by commas – warehouse manager, fulfillment partner, whoever needs to see the picklist.
5. Optionally, customize the email template using the email template editor so the notification matches your store’s branding.
The beauty of this is that the picklist lands in someone’s inbox the moment an order is ready to be picked. No logging into WordPress. No manually generating PDFs. It just happens.
Step 4: Customizing Your Picklist Template
Now that the picklists are generating and sending – let’s make them actually useful on the warehouse floor. WowInvoice’s customization panel lets you control every section visually, with a live preview so you see exactly what prints before you commit.
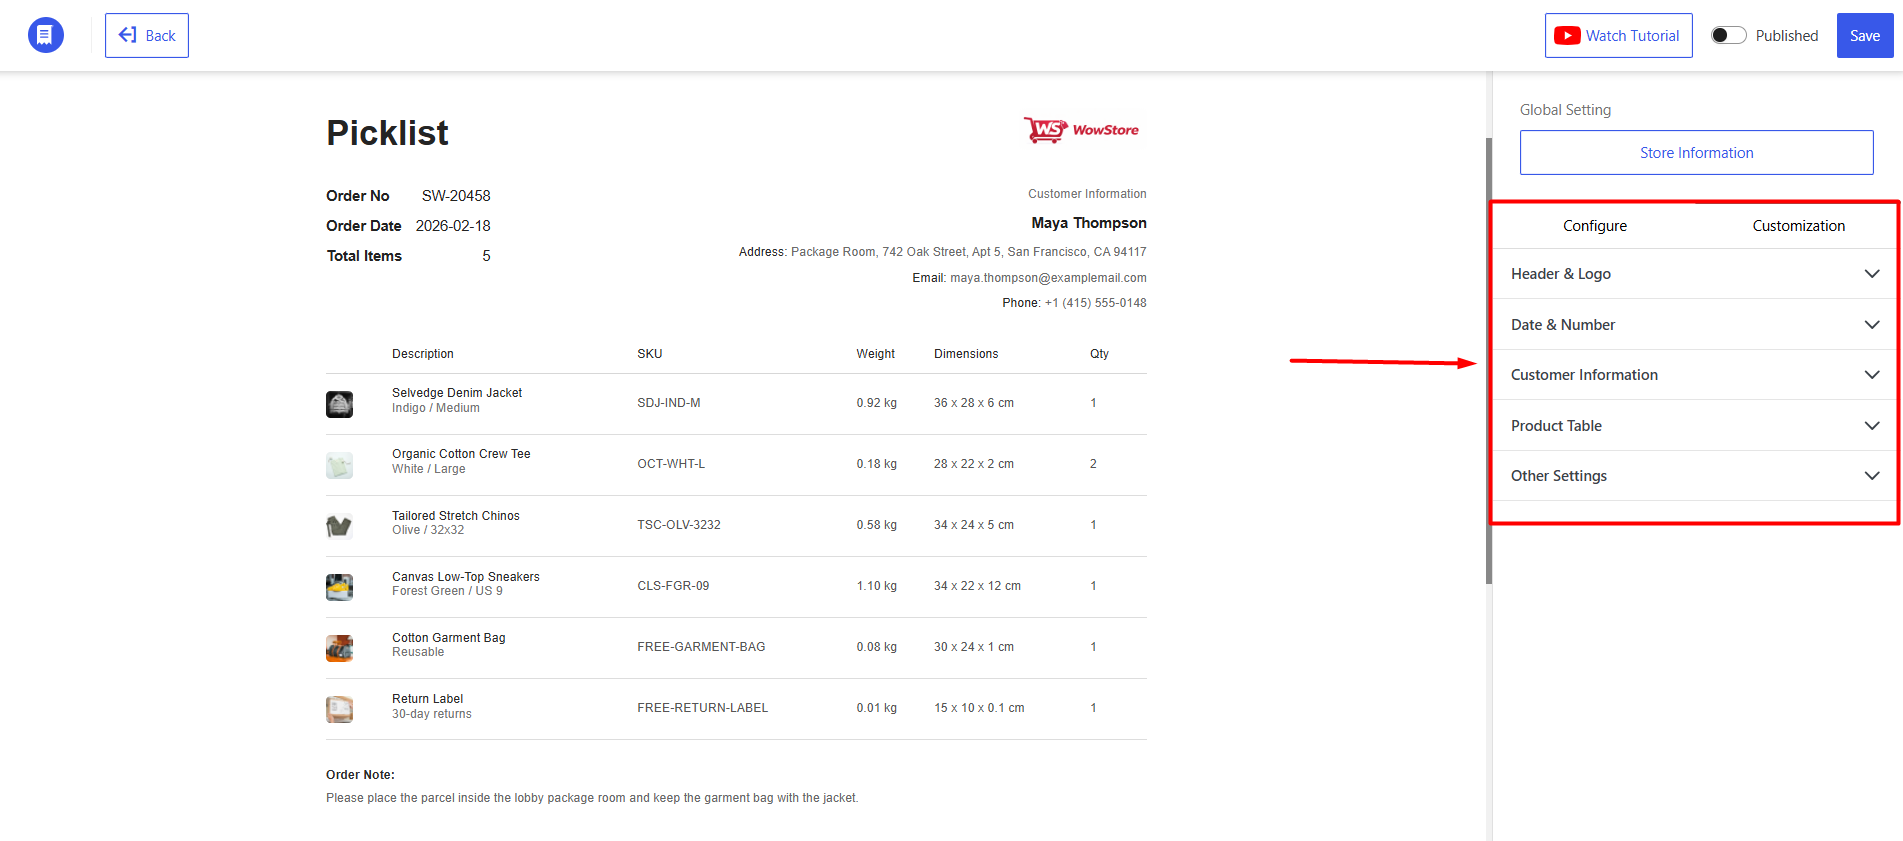
WowInvoice provides advanced customization options for Picklist. The following table shows the kind of changes you can make to the Picklist template. You don’t have waste time everytime a picklist is generated, the process is automated. You make the changes here and the template is used across every WooCommerce order.
| Section | What to Adjust |
Header & Logo | Upload your store logo, set its dimensions so it doesn’t dominate the page, toggle visibility on/off. |
Date & Number | Show/hide order date (customize the label text), order number, and total item count. Pull in custom order meta fields via meta keys if you need extra data. |
Customer Information | Toggle name, email, and phone individually. Rename any label — e.g., change “Email” to “Customer Email” for clarity. |
Product Table (the heart of the picklist) | Toggle product thumbnail on/offShow/hide SKU, price, weight, dimensions per columnRename column headers (e.g., “Description” → “Item”)Set product sort order (by name, SKU, category, or custom)Show product metadata under each line itemAdjust Description and Quantity column labels |
Other Settings | Add a scannable barcode (order ID or custom), show/hide customer order notes, customize the “Order Note” label. |
A clean picklist isn’t about showing everything – it’s about showing exactly what the picker needs, in the order they need it.
After finalizing the changes, make sure to Publish the document to start the document being generated automatically.
Picklist vs. Packing List vs. Invoice: What’s the Difference?
When setting up your WooCommerce store, it’s easy to confuse picklists, packing lists, and invoices. They all relate to orders, but each serves a different purpose.
Here’s a simple breakdown:
Picklist
A picklist is used by warehouse staff or anyone responsible for preparing orders. It shows which products need to be collected from inventory before packing.
Purpose: What to pick
Packing List
A packing list helps verify that all the correct items have been packed into the shipment. It can be used internally by your team and is sometimes included inside the package for customers.
Purpose: What to pack
Invoice
An invoice is the official document for the customer. It contains pricing information, taxes, payment details, and a record of the purchase.
Purpose: What was purchased and paid for
A simple way to remember it is:
| Document | Used By | Main Purpose |
| Picklist | Warehouse staff | Collect products from inventory |
| Packing List | Packing team / Customer | Verify items before shipping |
| Invoice | Customer | Record of the transaction |
Each document plays a role at a different stage of the fulfillment process. Using the right document at the right time helps reduce mistakes and keeps operations running smoothly.
Common Picklist Mistakes (and How to Avoid Them)
Setting up picklists is straightforward, but there are a few mistakes that can slow down fulfillment or cause picking errors.
Including Virtual Products
If you sell digital products such as ebooks, software licenses, or online courses, they don’t need to be picked from inventory.
Make sure your picklist settings exclude virtual products. Otherwise, staff may waste time looking for products that don’t physically exist.
Leaving Out Product Variations
For stores that sell different sizes, colors, or styles, variation details are essential.
Imagine a customer orders a Large Navy Blue T-shirt, but the picklist only shows “Classic T-Shirt.” That’s an easy way to send the wrong item.
Always display variation information clearly on your picklists.
Using the Wrong Order Status
Many store owners automate picklist generation, but choosing the wrong trigger can create problems.
If picklists are generated too early, you may end up printing documents for unpaid orders. If they’re generated too late, fulfillment gets delayed.
In most cases, generating picklists when an order reaches the Processing status is the safest option.
Not Organizing Products Efficiently
As order volume grows, the way products are displayed on a picklist becomes more important.
Grouping products by category, warehouse location, or picking route can help staff move through inventory more efficiently and reduce unnecessary backtracking.
Skipping Testing
Before using picklists in your daily workflow, generate a few test documents and review them carefully.
Check that product names are easy to read, variation details are visible, and the layout makes sense for your team. A few minutes of testing can prevent a lot of confusion later.
Summing Up
A WooCommerce picklist may seem like a small detail, but it can have a big impact on your fulfillment process.
Instead of checking orders one by one, your team gets a clear document showing exactly what needs to be collected. This reduces mistakes, speeds up packing, and makes order fulfillment more organized.
The best approach is to start simple. Include the essentials such as product name, SKU, quantity, and order number. Once your team is comfortable, you can add extra details like product images, barcodes, or custom fields as needed.
Don’t want to miss our latest articles ?
✨ Add WPXPO to Your Preferred SourcesTakes 3 seconds • Helps our posts reach you faster


