WordPress automatically displays the latest posts on the home page in reverse chronological order. But what if you want to display recently updated posts instead of published ones? And what if you want to display recent posts from a specific category?
Displaying recent posts on a site or Blog can benefit in many ways. For example, with the help of the recent posts widget, visitors can easily navigate through newly published content after reading older posts. But make sure to display them with thumbnails for an attractive and professional look.
Now the question is, how can we showcase the recent posts widget with thumbnails?
Fortunately, we can effortlessly display recent posts in the following way:
- Step 1: Add the Latest Post Block to the Widget.
- Step 2: Enable the Thumbnails to Blog Posts.
- Step 3: Sort Posts and customize the Appearance
- Alternate Method: Use a Plugin Like Postx for More Control.
SEO Advantages of Recent Posts
The reasons behind showcasing recent posts are not only to impress the visitors. It also has a deeper connection to On-Page Seo.
So, instead of spending hundreds of hours finding collaboration opportunities and sending thousands of emails to acquire backlinks, you can make the best use of displaying recent posts to rank higher on Google. What I meant by displaying posts is not only true for recent posts.
Any type of post, such as popular posts, related posts, featured posts, most discussed posts, etc, can bring similar results for you.
You Can Check Out the Following Guides for Others Types of Posts:
✨ How to Add Featured Posts in WordPress?
✨ Showcase Popular Posts in WordPress (Top 3 Ways)
✨ How to Show Related Posts with Thumbnails in WordPress?
I recommend displaying all these types of posts in different places on your Blog. So that you can get the following benefits:
Interlinking
All bloggers know that internal links are one of the most important ranking signals. That’s why we always add internal links to the older posts on our Blog. But what about recently published posts?
Suppose you add the recent posts widget to the sidebar or the footer. In that case, these posts will dynamically be added to all the pages with a sidebar and footer. And as a result, the latest posts will get internal links from all those pages.
Faster Indexing
The method of displaying recent posts not only adds numerous backlinks but also indexes the posts faster than usual. Now, you might ask, how?
If you properly know how Google search works, you should know that the spiders and crawlers (Software generated by Google) follow links to explore pages. And these spiders often come to the posts/pages on a site that gets regular traffic from Google Search.
So, having links from those pages can surely help to index recently published posts faster. And, of course, it boosts rankings.
Dwell time
Dwell time refers to the average time spent by visitors. Showcasing recent posts can encourage users to click on the links and read more blog posts, increasing the average time on site.
I would not need to explain how increasing dwell time can help increase post ranking on the SERP.
Bounce Rate
Bounce rate refers to the percentage of visitors who leave the site after viewing only one page.
Why is my bounce rate higher? If you have the same question, the answer is simple: you’re not offering anything else after reading a blog post.
So, to decrease the bounce rate, we need to encourage the users to explore more posts on our site. Showcasing recent posts can be one of the most effective ways to do that.
Method 1: Display Recent Posts Using the Default WordPress Widget
Now, let’s start the step-by-step tutorial. For now, we are going to add the recent posts to the sidebar. Let’s see how:
Step 1: Add the Latest Post Block to the Widget
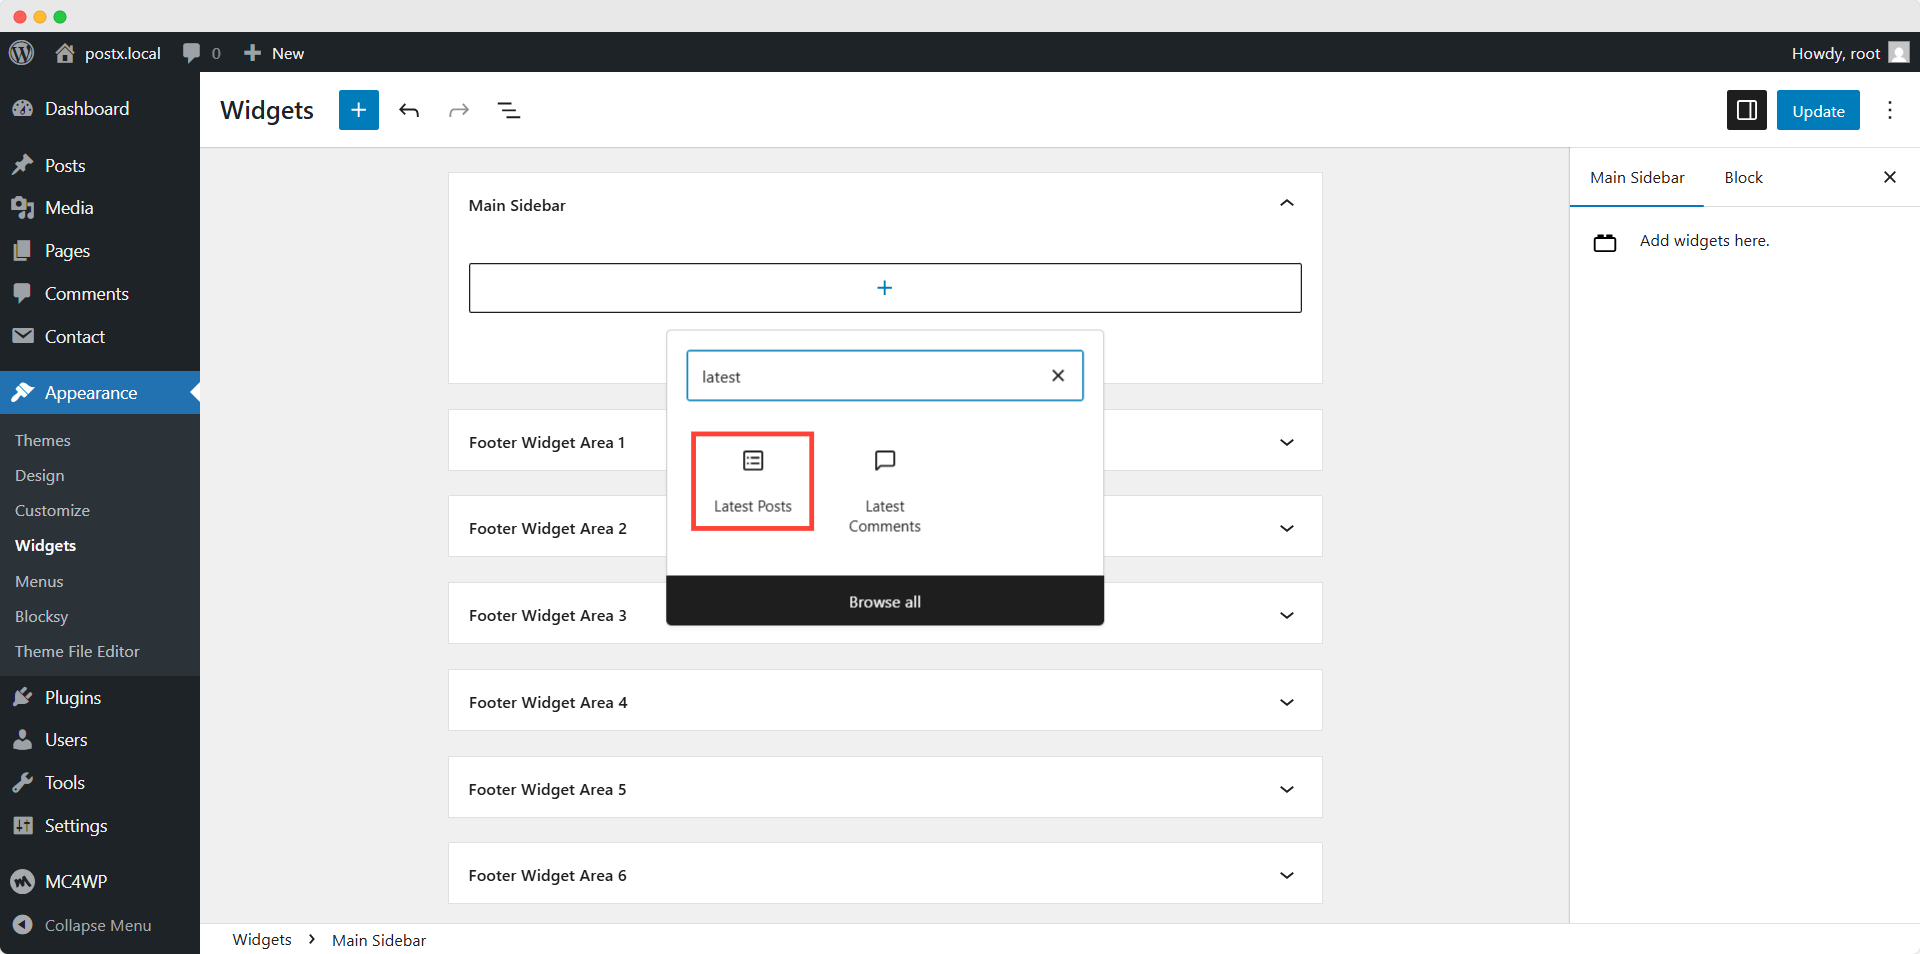
At first, we need to go to Appearance >> Widgets. From where, we can add widgets with our desired features, forms, or content. Here, you can see multiple widget areas. For now, let’s start adding a widget to the sidebar by clicking on the plus icon.

Upon clicking the icon, we can search and add any of the available blocks. For now, let’s add the Latest Posts block.
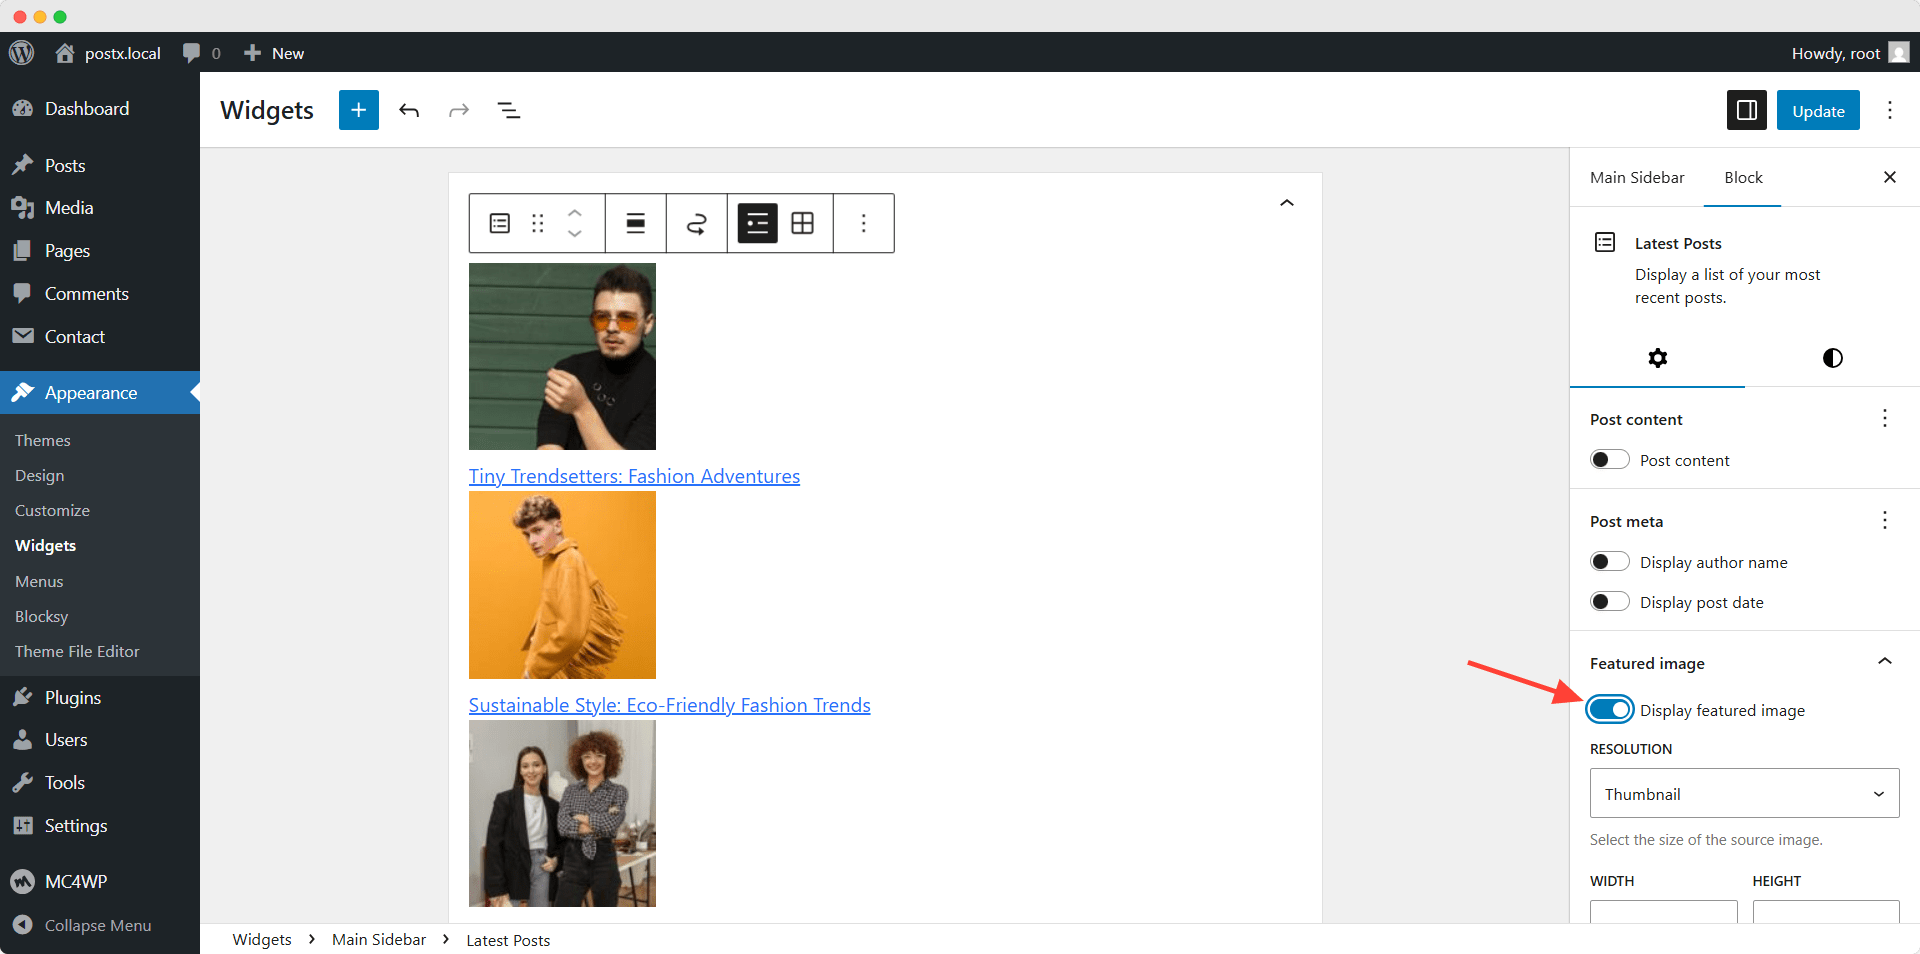
Step 2: Enable the Thumbnails to Blog Posts
Here, you can see the recently published posts. However, we also want to display the thumbnails. For that, we need to enable the “Display featured image” option from the settings section.
Step 3: Sort Posts and Customize the Appearance
Here, you can see that the recent posts are now displayed with thumbnails. However, the posts are not looking good. So we need to customize the Appearance using the settings section on the right side. Let’s explore the possibilities:
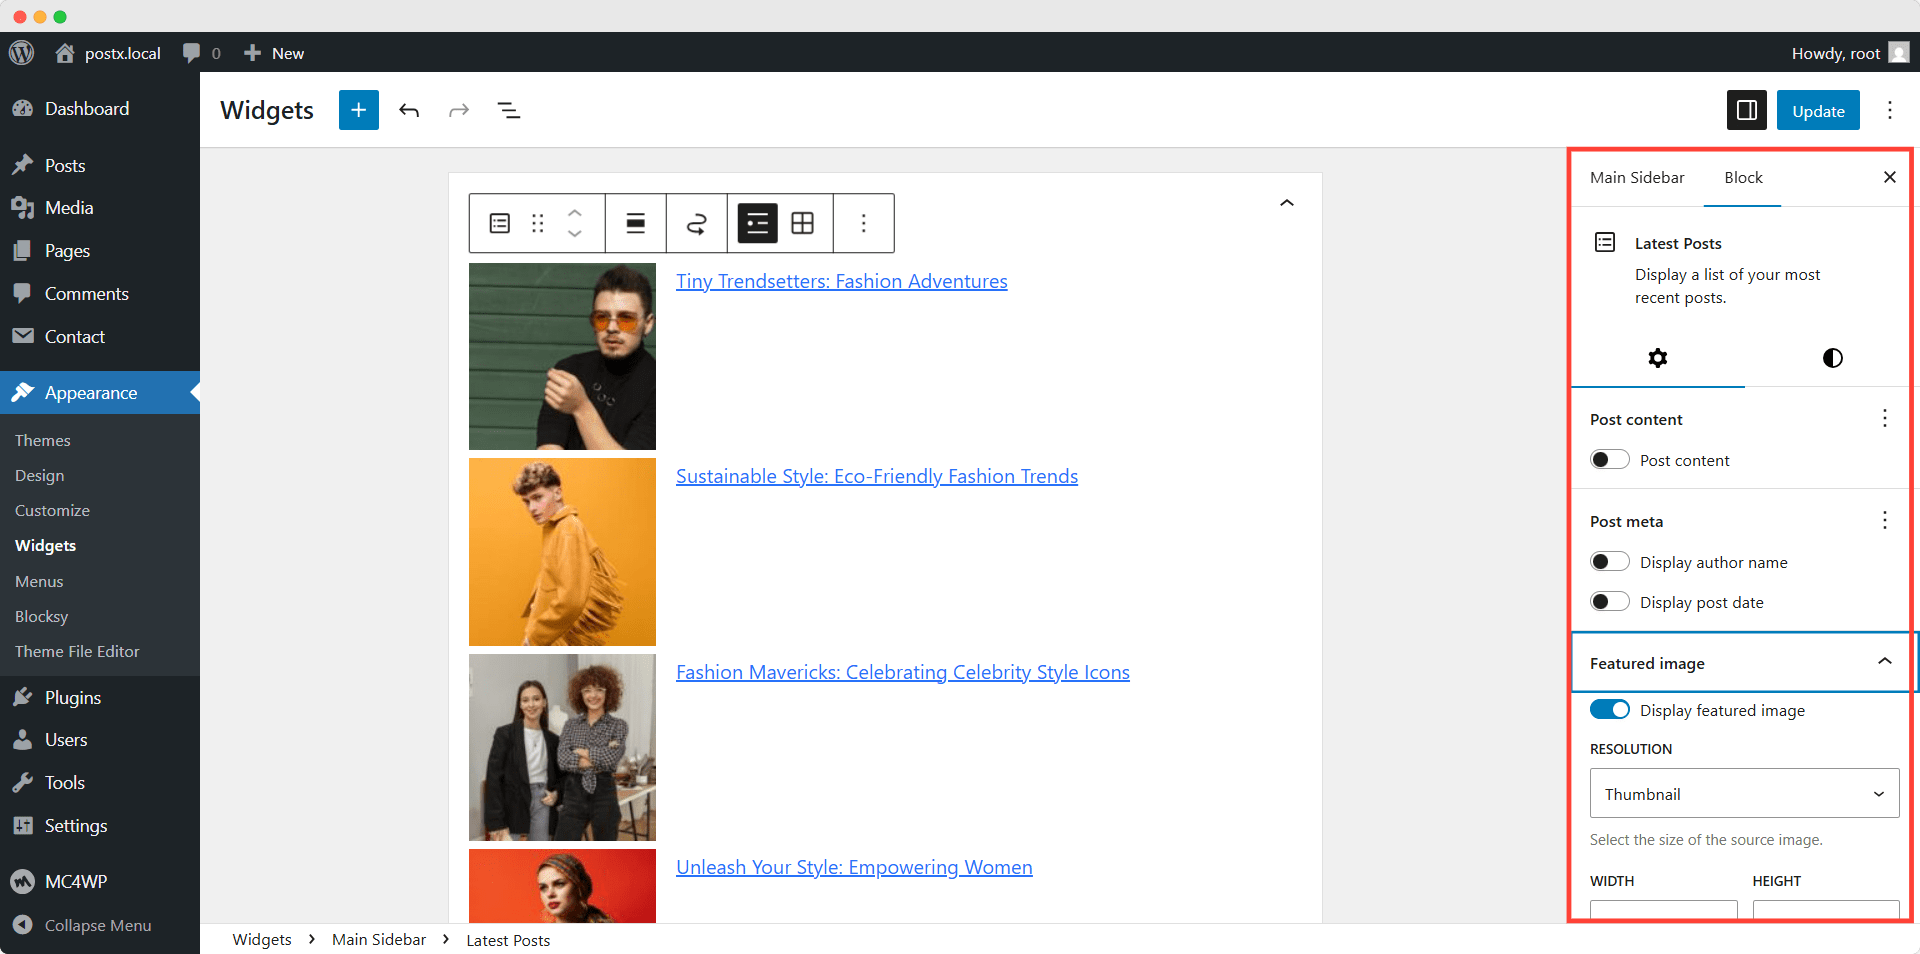
Post Content: By default, the Latest Block only shows the titles. However, you can enable the content and display posts’ excerpts and full content (not recommended) as well. You can also control the word count of the content.
Post Meta: This section helps us to display the author’s name and the publish date of the blog posts.
Display featured Image: Upon enabling the featured images, we can customize the Appearance and add links to the images.
Sorting and Filtering: From this section, we can reorder the blog posts by Newest to oldest or Oldest to newest. Moreover, we can sort posts by categories and author. Furthermore, we can increase or decrease the number of posts.
Method 2: Display Recent Post Using the PostX Plugin
If you want more control over the recent posts widget, you should go for a plugin like PostX. It is the most advanced plugin that offers a better post presentation and sorting using its query builder. So, if you want better control over your recent start, follow the steps below.
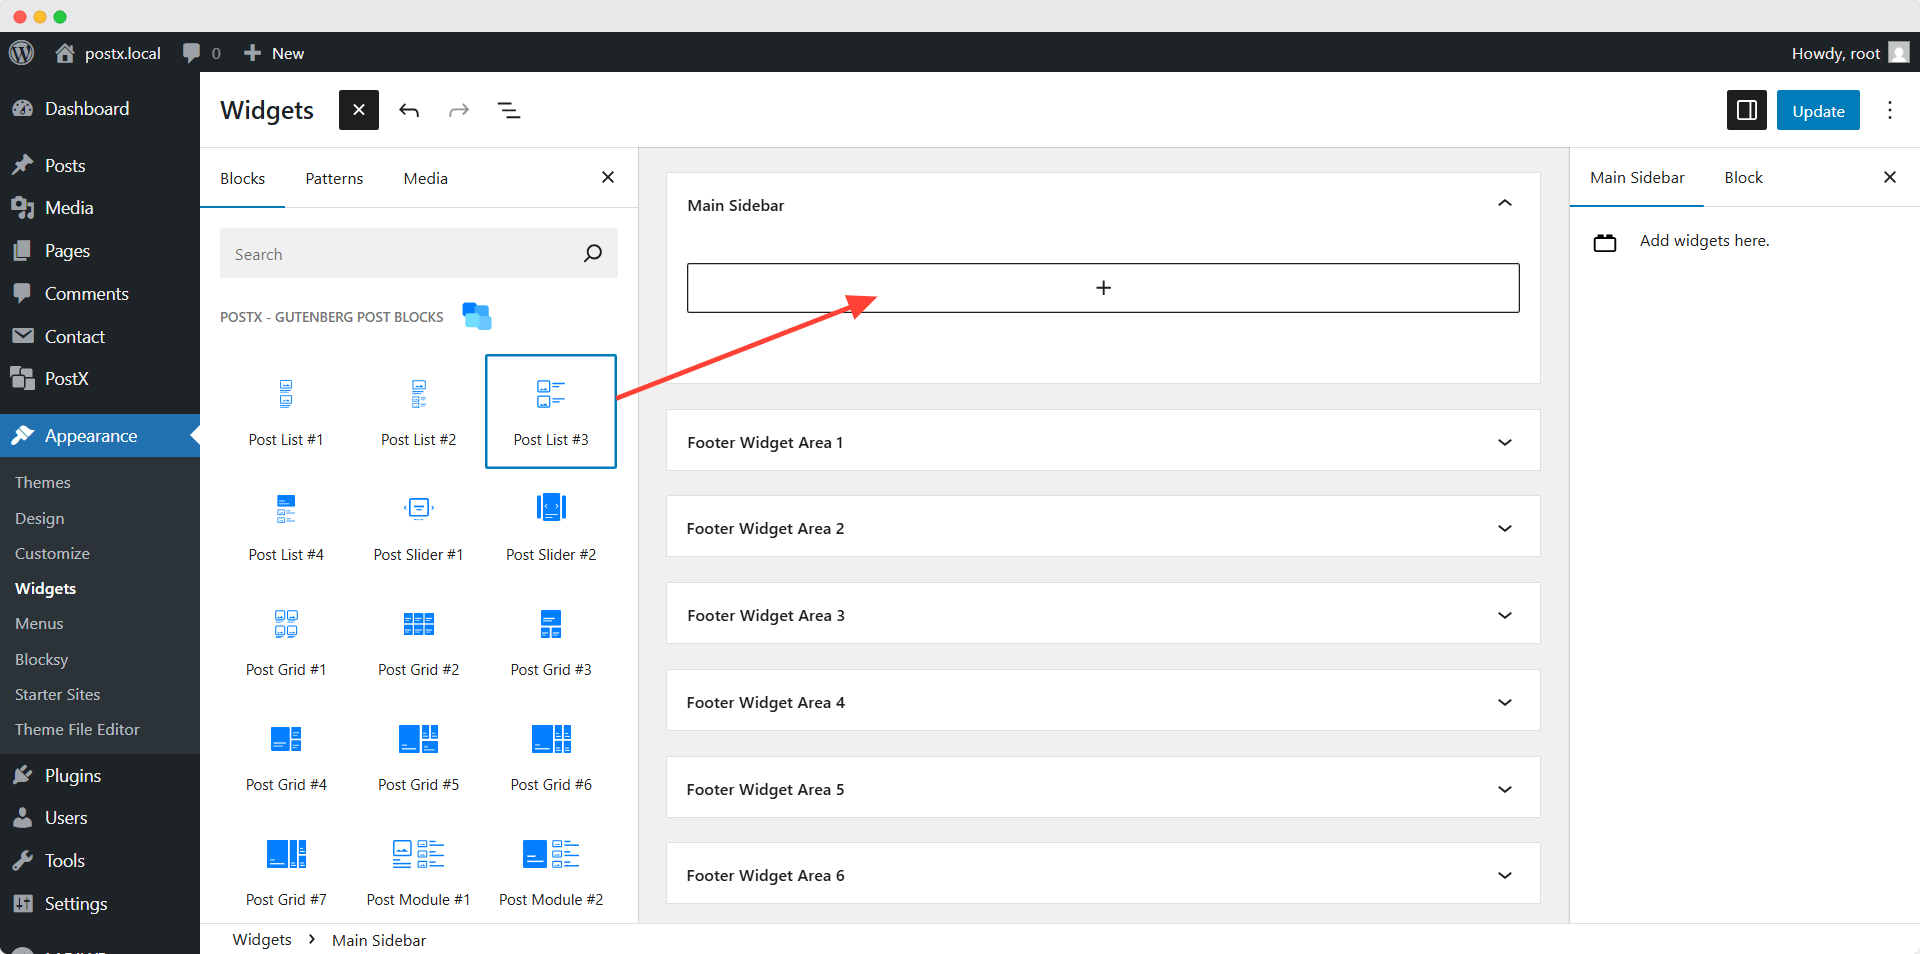
Step 1: Add PostX’s Post Block to the Widget
Similarly to the previous method, we need to go to the Widget area from our WordPress dashboard. Then, we need to click on the plus icon and add a post block. For now, let’s add the Post List 3 block.
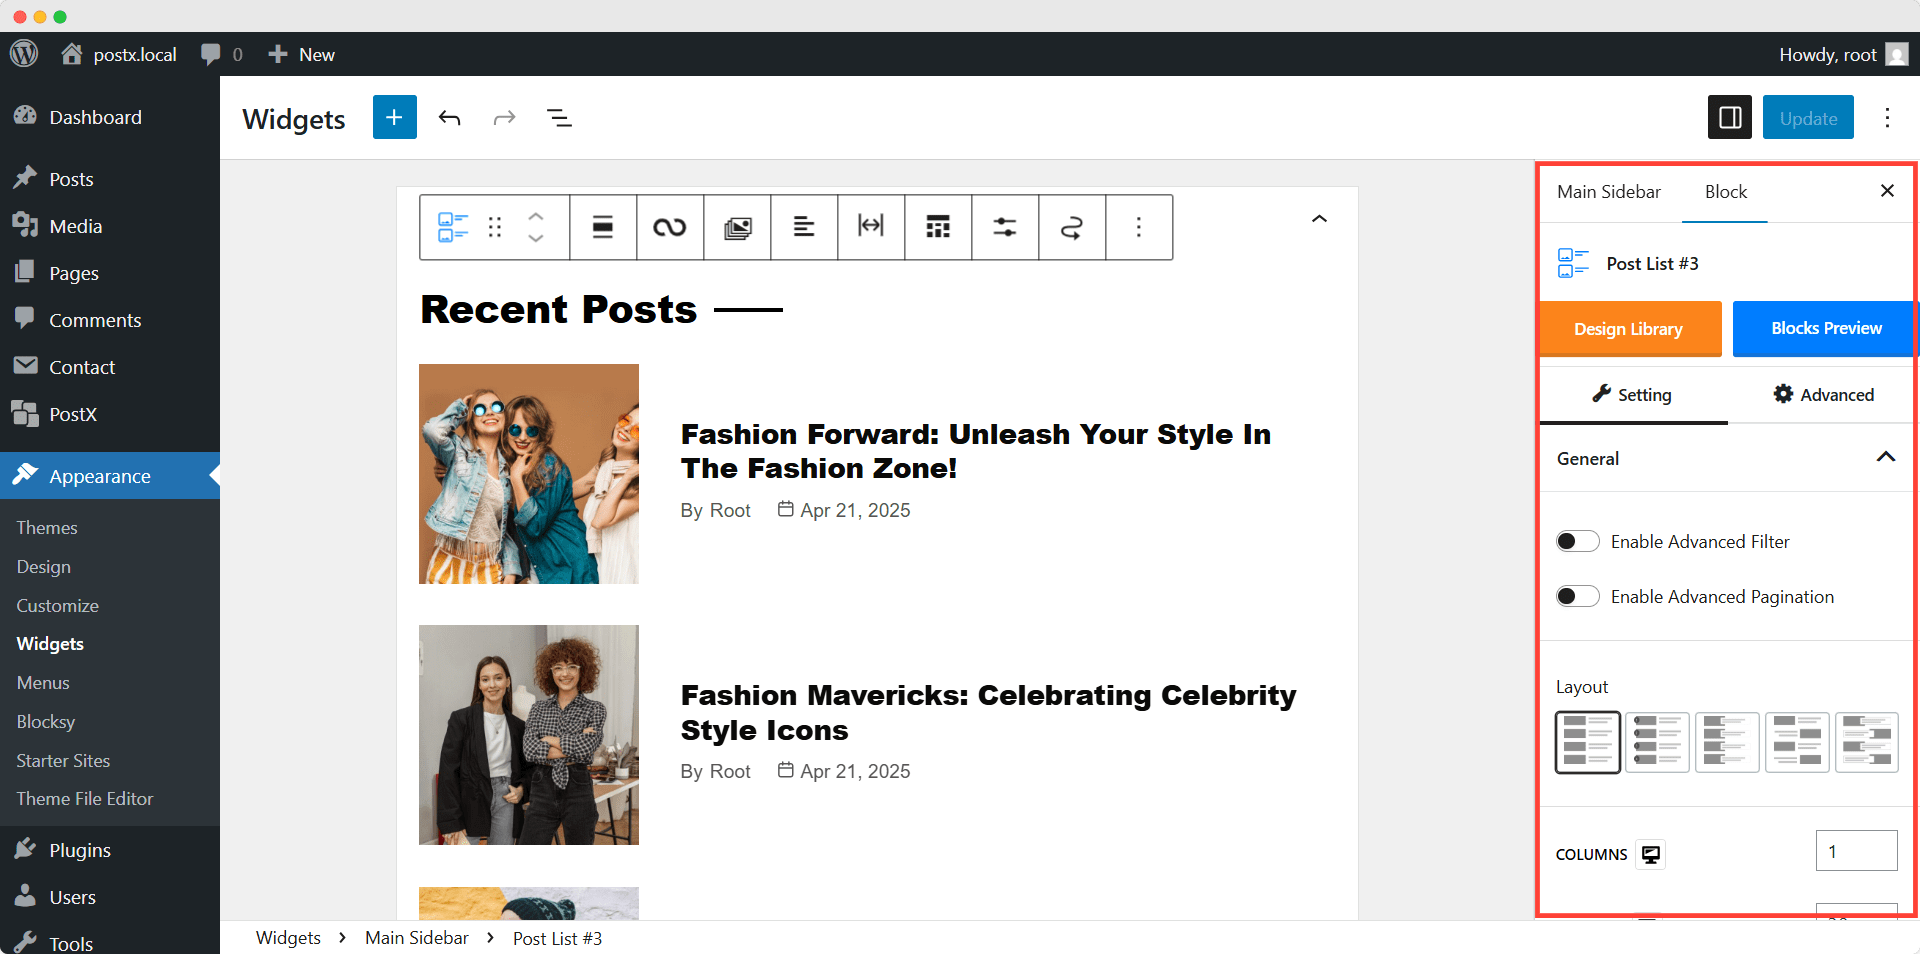
Step 2: Customize the Appearance
Here, you can see that the latest posts are automatically displayed along with all post elements. Now, we need to make the best use of the customization flexibility. Let’s start with hiding unnecessary elements.
Then, we can choose any of the premade layouts or a ready template from its design library. However, we can also customize each of the elements as per our requirements.
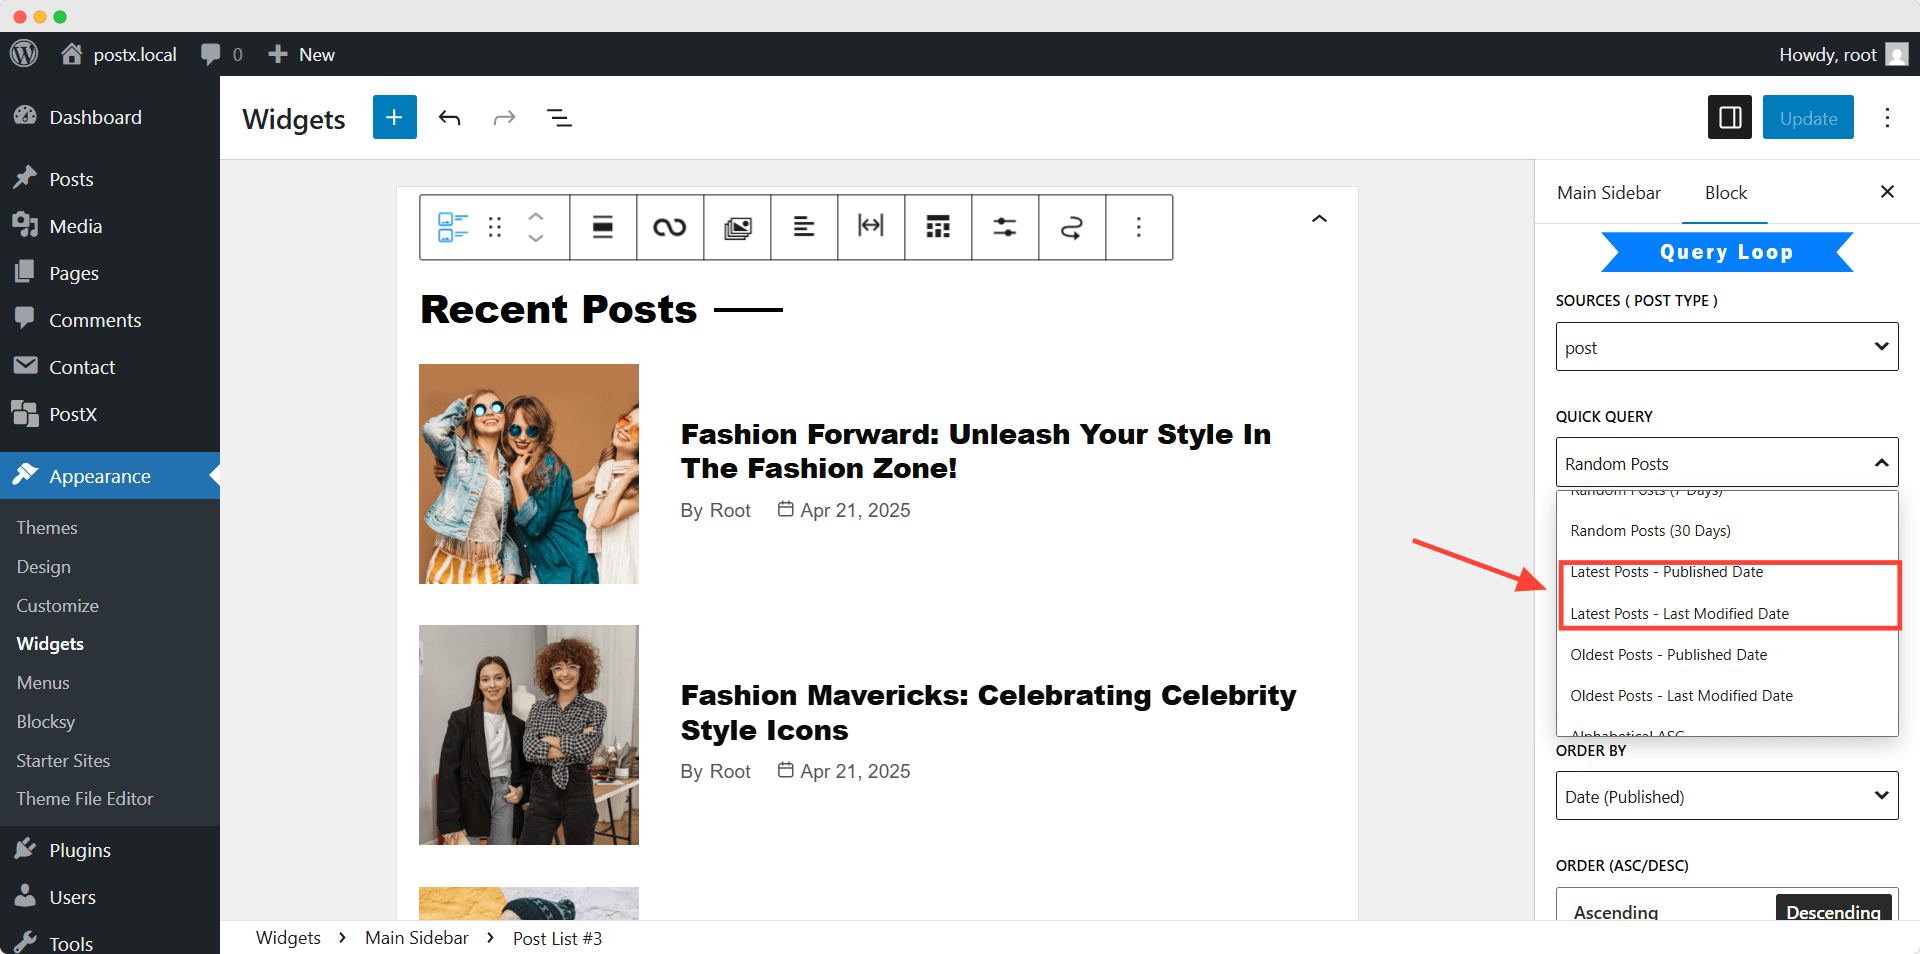
Step 3: Sorts Posts Using the Query Builder
Although the posts block displays the latest post by default, PostX has all the essential sorting criteria. Regarding the recent post, PostX has two options. We can display the latest post based on its publish date or update date. Let’s display the latest post based on the updated date.
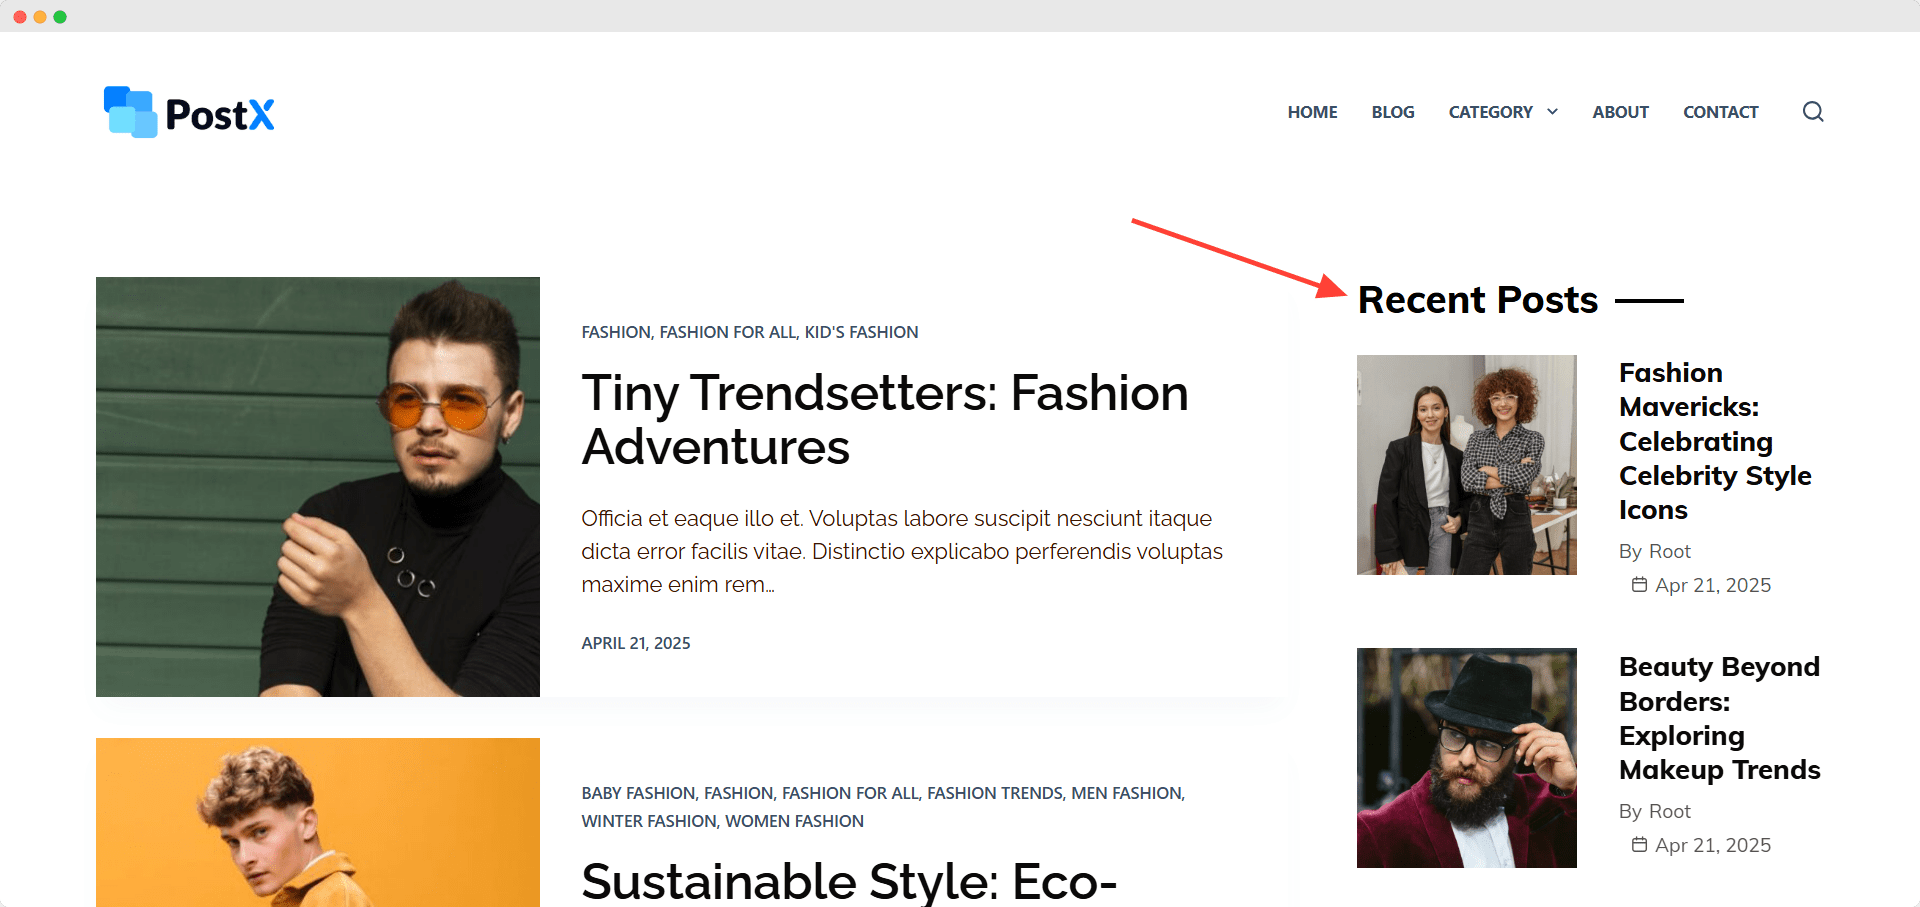
As we are satisfied with customization, let’s click on the update button and see how it looks at the front end.
Where to Place Recent Posts for Maximum Impact
Displaying recently published or updated posts is beneficial from both an SEO and user experience perspective. However, displaying them in the right position can bring the best results. It will not only make your visitors happy but also increase engagement. So, let’s explore the most effective placement opportunities:
Sidebar
The sidebar of your blog posts and category pages is the most crucial place. Readers usually notice elements while scrolling or reading blog posts. So, you should consider displaying the post on the sidebar. Yes, we know you may want to display ads on the right sidebar. But trust us, displaying fresh content might increase the ad revenue instead of bringing a negative impact.
After Post Content
Do you know why your bounce rate is increasing and dwell time is decreasing? You might not have anything to do after reading a blog post. A well-organized section of the latest posts can surely help you bring a positive impact on your website’s metrics.
Footer
If you want to show recent posts to all of your visitors, then you should consider displaying them in the footer section. It ensures that your fresh content is visible no matter which posts or pages the readers are visiting.
Homepage Sections
If you create a custom home page, then having a recent posts section is a must. It is a great way to highlight fresh content and make it trending. It will create a positive impression in front of your customers as you are publishing the latest content.
Conclusion
That’s all about WordPress’s recent posts. We hope you can now choose your desired method and display the latest fresh content in your desired position. Let us guide you if you are confused while choosing the method. If you want to display your recent post, try the default Gutenberg blocks. It will fulfill most of your basic requirements.
However, if you find it hard to align with your branding, you should try PostX. It gives you full creative freedom while customizing the appearance. And you will fall in love with its post-sorting features as it allows you to display posts based on any criteria you can think of.
PostX is not just about displaying posts. You can create complete News Magazine sites or any kind of Blog with just three simple steps. So don’t forget to explore PostX’s amazing offerings.
We are eager to know which method you are following. You can also share your thoughts and feedback on both this blog post and PostX. Also, contact our support team if you face any issues while using PostX.

![WordPress Robots.txt [How it all Works]](https://www.wpxpo.com/wp-content/uploads/2021/12/Wordpress-banner-jpg-1.jpg)