Blog Post meta data is essential information about your posts, such as the publishing date, author’s name, categories, tags, and other information.
But how do you display blog post meta data in WordPress?
To add blog post meta data in WordPress, simply follow these steps:
- Install and active the PostX plugin
- Create a singular post template using its site builder feature
- Find the Advanced Post Meta block from the block library
- Add the block to the template to showcase blog post meta data
What is Blog Post Meta Data in WordPress?
Blog post meta data is information about a blog post that is not included in the actual text. This provides details like the post’s date, author, categories, tags, and custom taxonomies.
Depending on the WordPress theme, this information can appear in several places. For instance, after the post’s title, after the content, in the sidebar, etc.
This information aids your visitors in gaining a deeper understanding of the stuff they are reading.
Your post meta data, when appropriately utilized, can enhance the user experience, make your website seem more professional, and even boost page views.
However, showing excessive post meta data might make your website seem amateurish and cluttered.
Depending on your website, you can add or delete post meta information to make it more appealing and informative.
How to Add Blog Post Meta Data in WordPress
PostX is a leading Gutenberg site builder that offers a customizable Blog Post Meta Data block, which gives you complete freedom to show meta data for your posts.
To add or customize the block, first, you need to create a post template using PostX. And not only this one, but PostX also offers 17 other blocks that you can fine-tune across different parts of your site with the help of a post template.
To add blog post meta data in WordPress, simply follow these steps:
- Install the PostX plugin and activate it
- Create a post template using the dynamic site builder feature from PostX
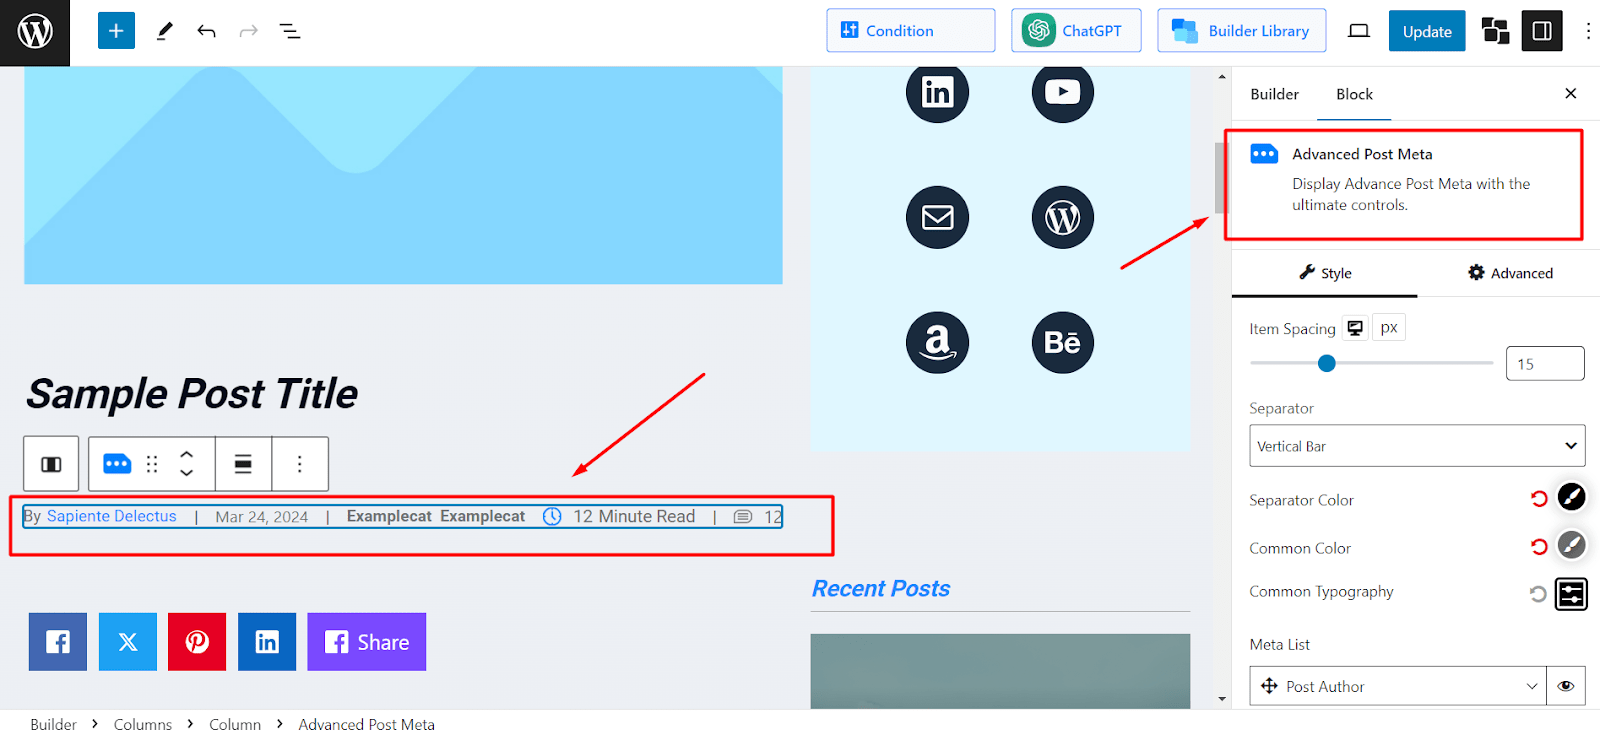
- Go to the edit view of a template, and click on the “+” icon to search for the Advanced Post Meta block
- Add it to the template and now you can use this post meta data across different sections of your site.
How to Customize Blog Post Meta Data in WordPress
After adding the Advanced Post Meta block to your blog posts, you can further customize it to your liking. Simply select the block and start editing the settings to give it a unique look.
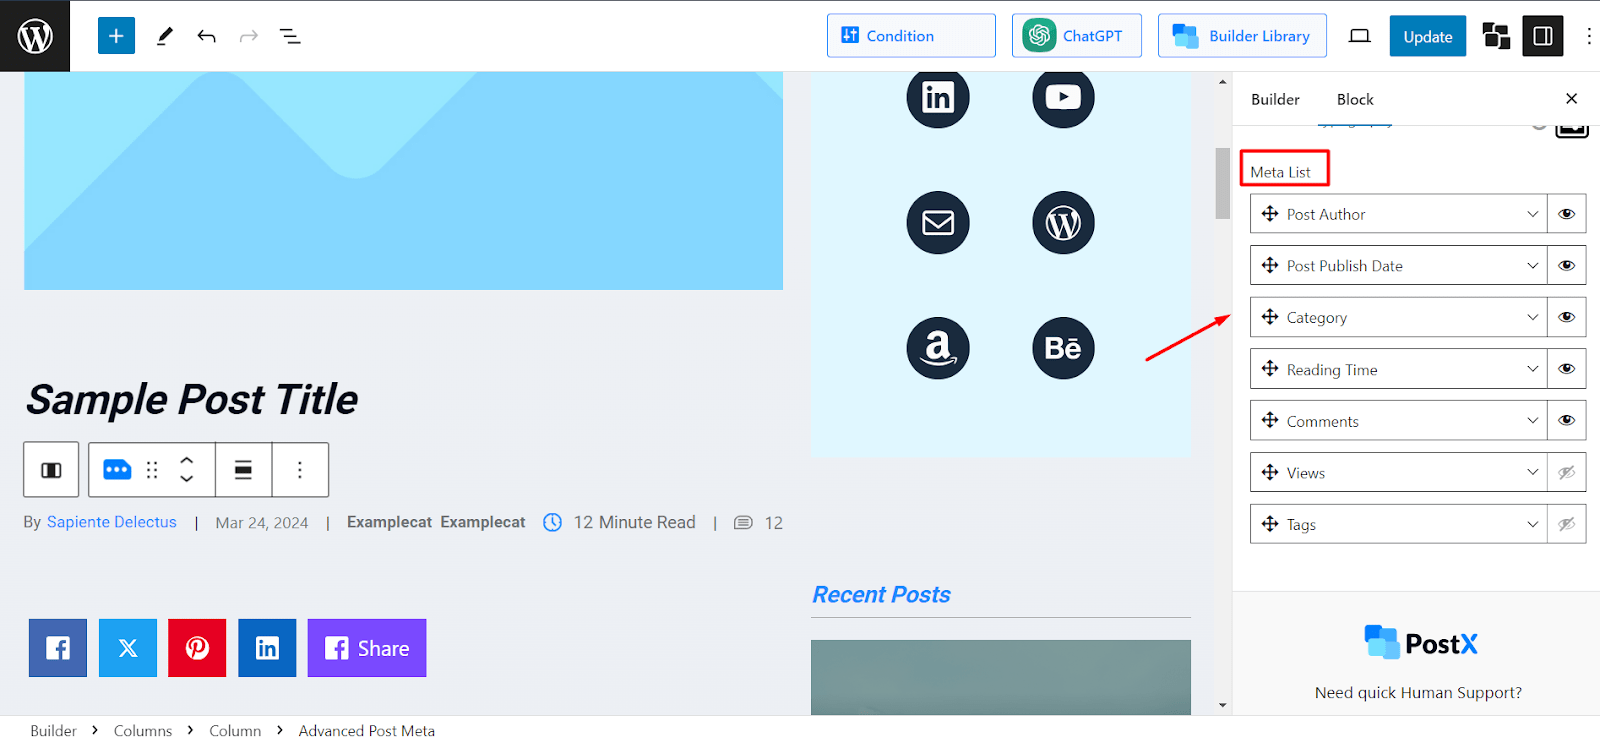
You can select the type of information you are going to show in the post meta data. Scroll down the settings section and find the option that says “Meta List”. Here you can pick what data you are going to show and what not.
Show important information such as Post Author, publish date, category, reading time, and so on.
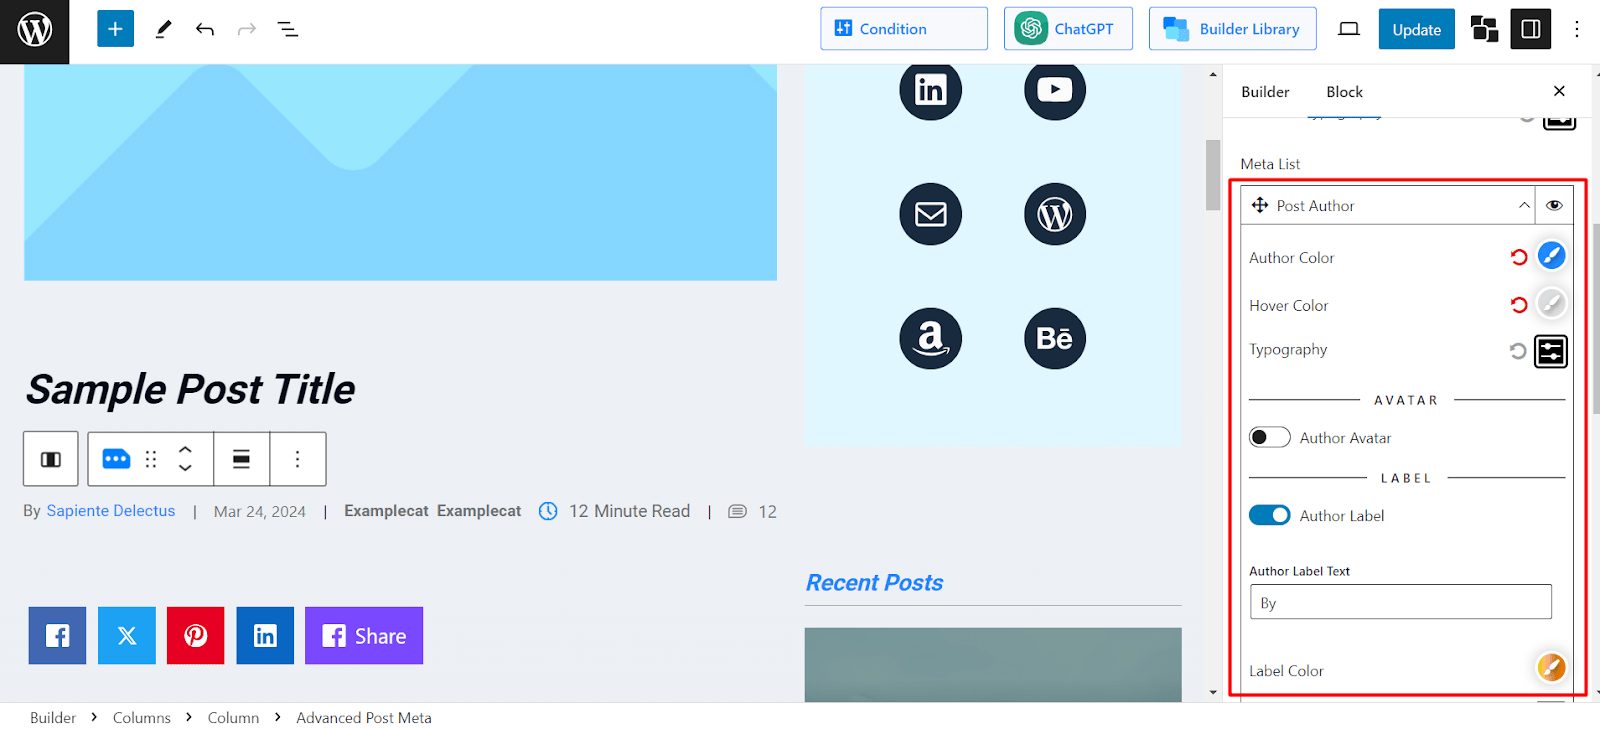
Also, with PostX, you have enhanced customization options for each type of post meta data. For example, for Post Author, you can select unique color, hover color, typography, label color, and many more options.
How to Customize Blog Post Meta Data Using WordPress Themes
You can also use WordPress themes to customize post meta data for your blog posts.
Based on the type of theme, the customization process of blog post meta data will vary.
For instance, if you use a traditional theme like Blocksy, you can customize the post meta data in the theme customizer setting.
Follow these steps if you want to change blog post meta data settings in WordPress traditional themes:
- On your admin dashboard, go to Appearance > Customize
- This will show the theme customization options
- Under Post Types, click Single Post
- Click on Post Title to bring up its settings
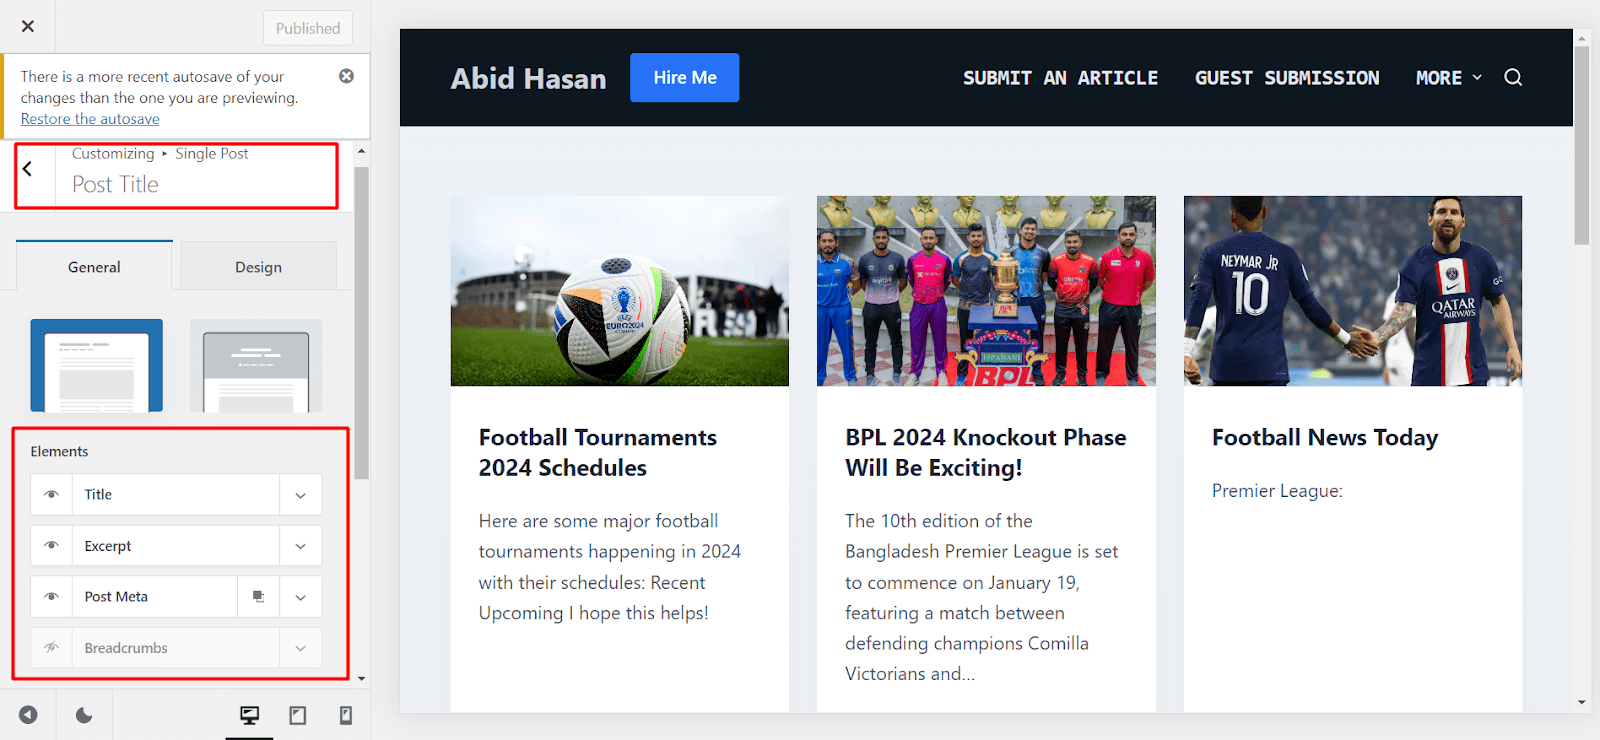
- From here, expand the options for Post Meta. This will show different customization options for post meta data such as Author, Published Date, Taxonomies, and Comments.
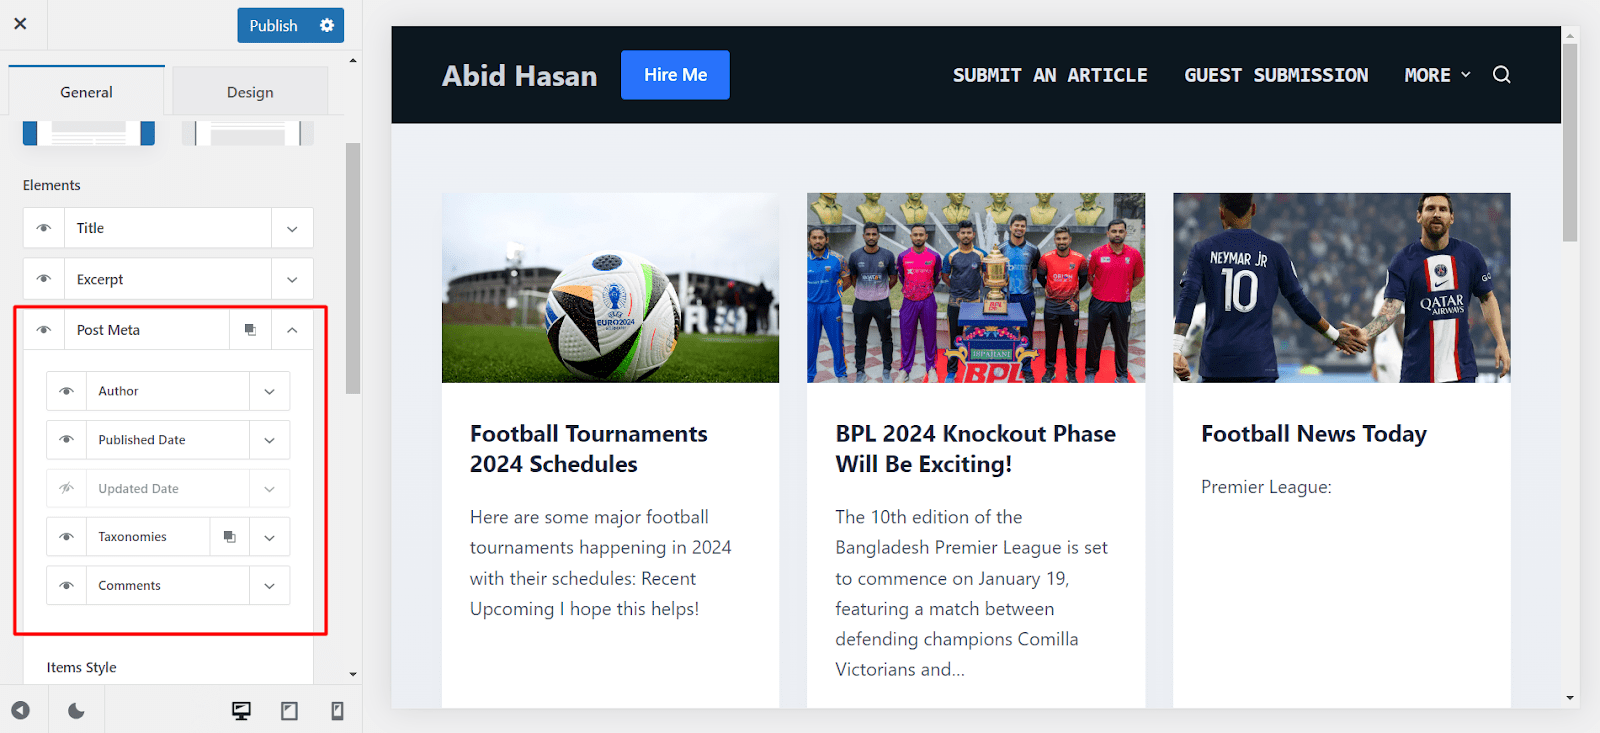
Now make changes to the settings as you like.
If you use a full site editor theme such as Twenty Twenty Three, the steps are easy to follow too.
Follow this procedure to add and customize blog post meta data using WordPress FSE themes:
- On your admin dashboard, click on Themes > Editor
- This leads to the site editor view. Now go to Templates > Single Posts
- Click on the Pencil icon to start editing template settings
- Click on the “+” sign to search for the block called “Post Meta” and add it to the template
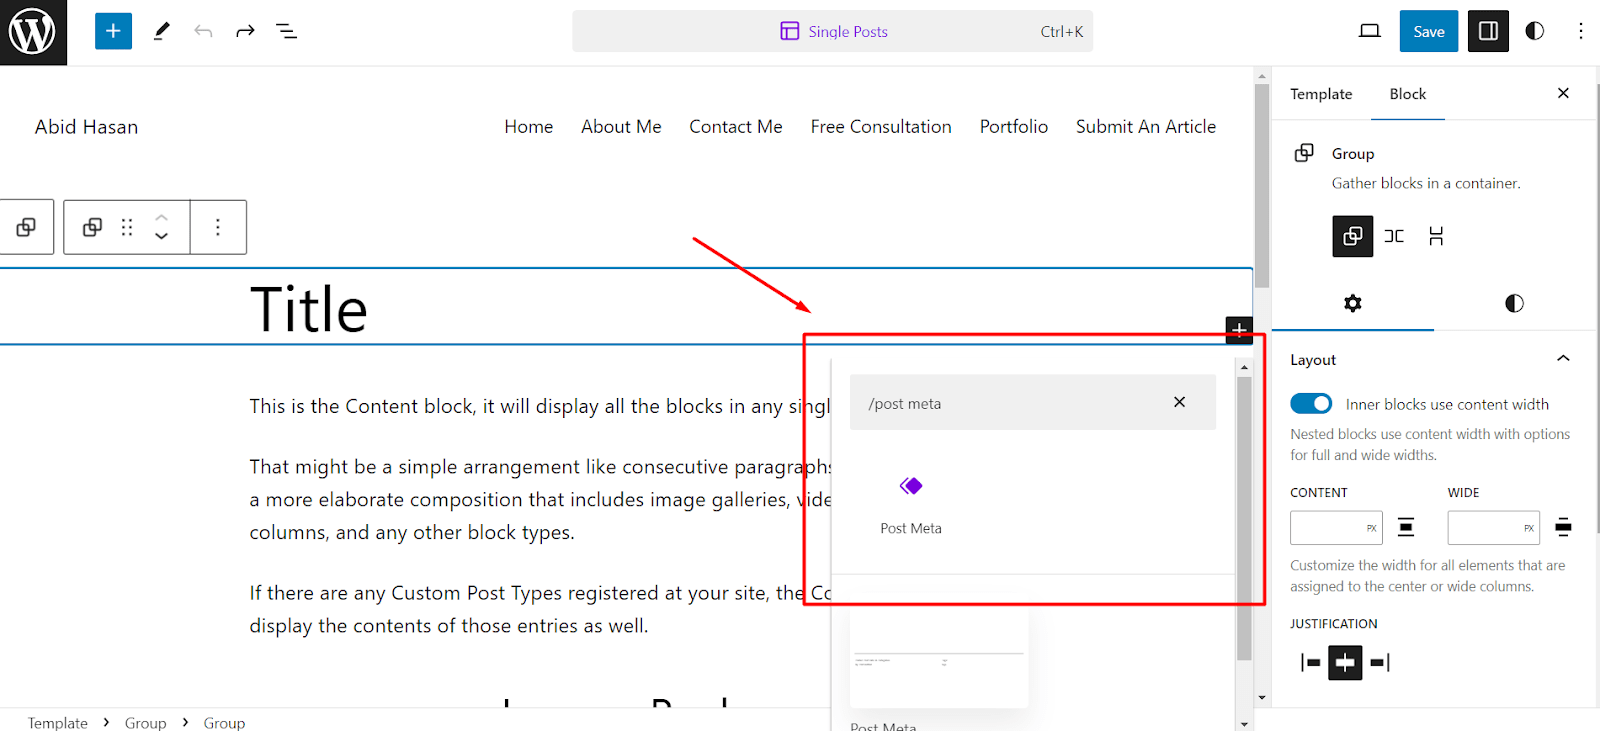
This will add the blog post meta data for all the blog posts.
If you want to customize the settings, simply select the Post Meta block and click on Edit.
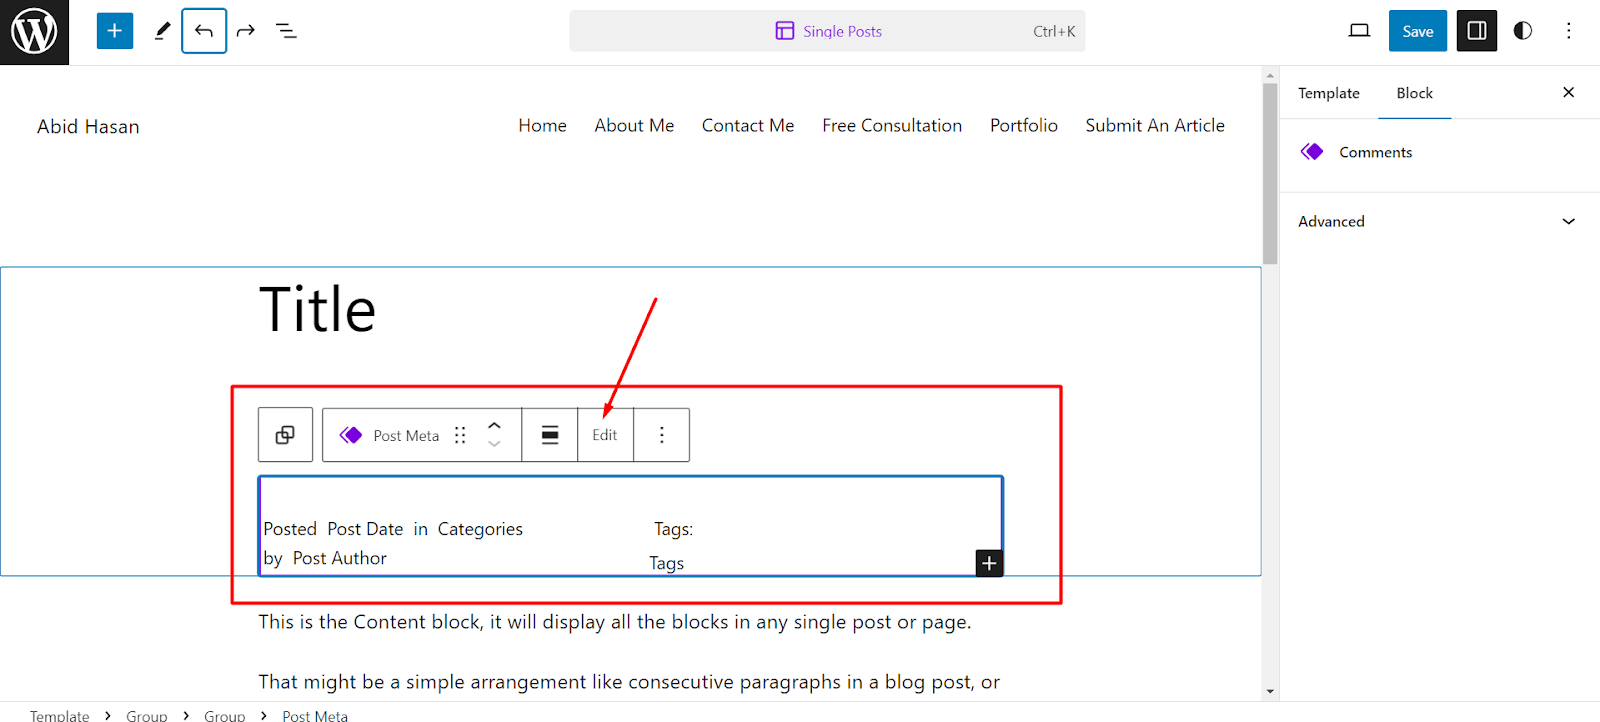
Now, you can edit settings to your preferences.
Conclusion
The blog post meta data can explicitly enhance the user experience when they visit a blog post. So, your site can benefit from adding blog post meta data. PostX brings you a full-on customizable Gutenberg block. So, enhance your site and user experience at the same time. Let’s go, and let’s get it!
