When it comes to letting customers pick product options, the basic fields (a number field, a dropdown, or a quantity selector) can do the job!
But if you’re looking to offer something more modern and user-friendly (something many might not even consider), then a range slider is your secret sauce.
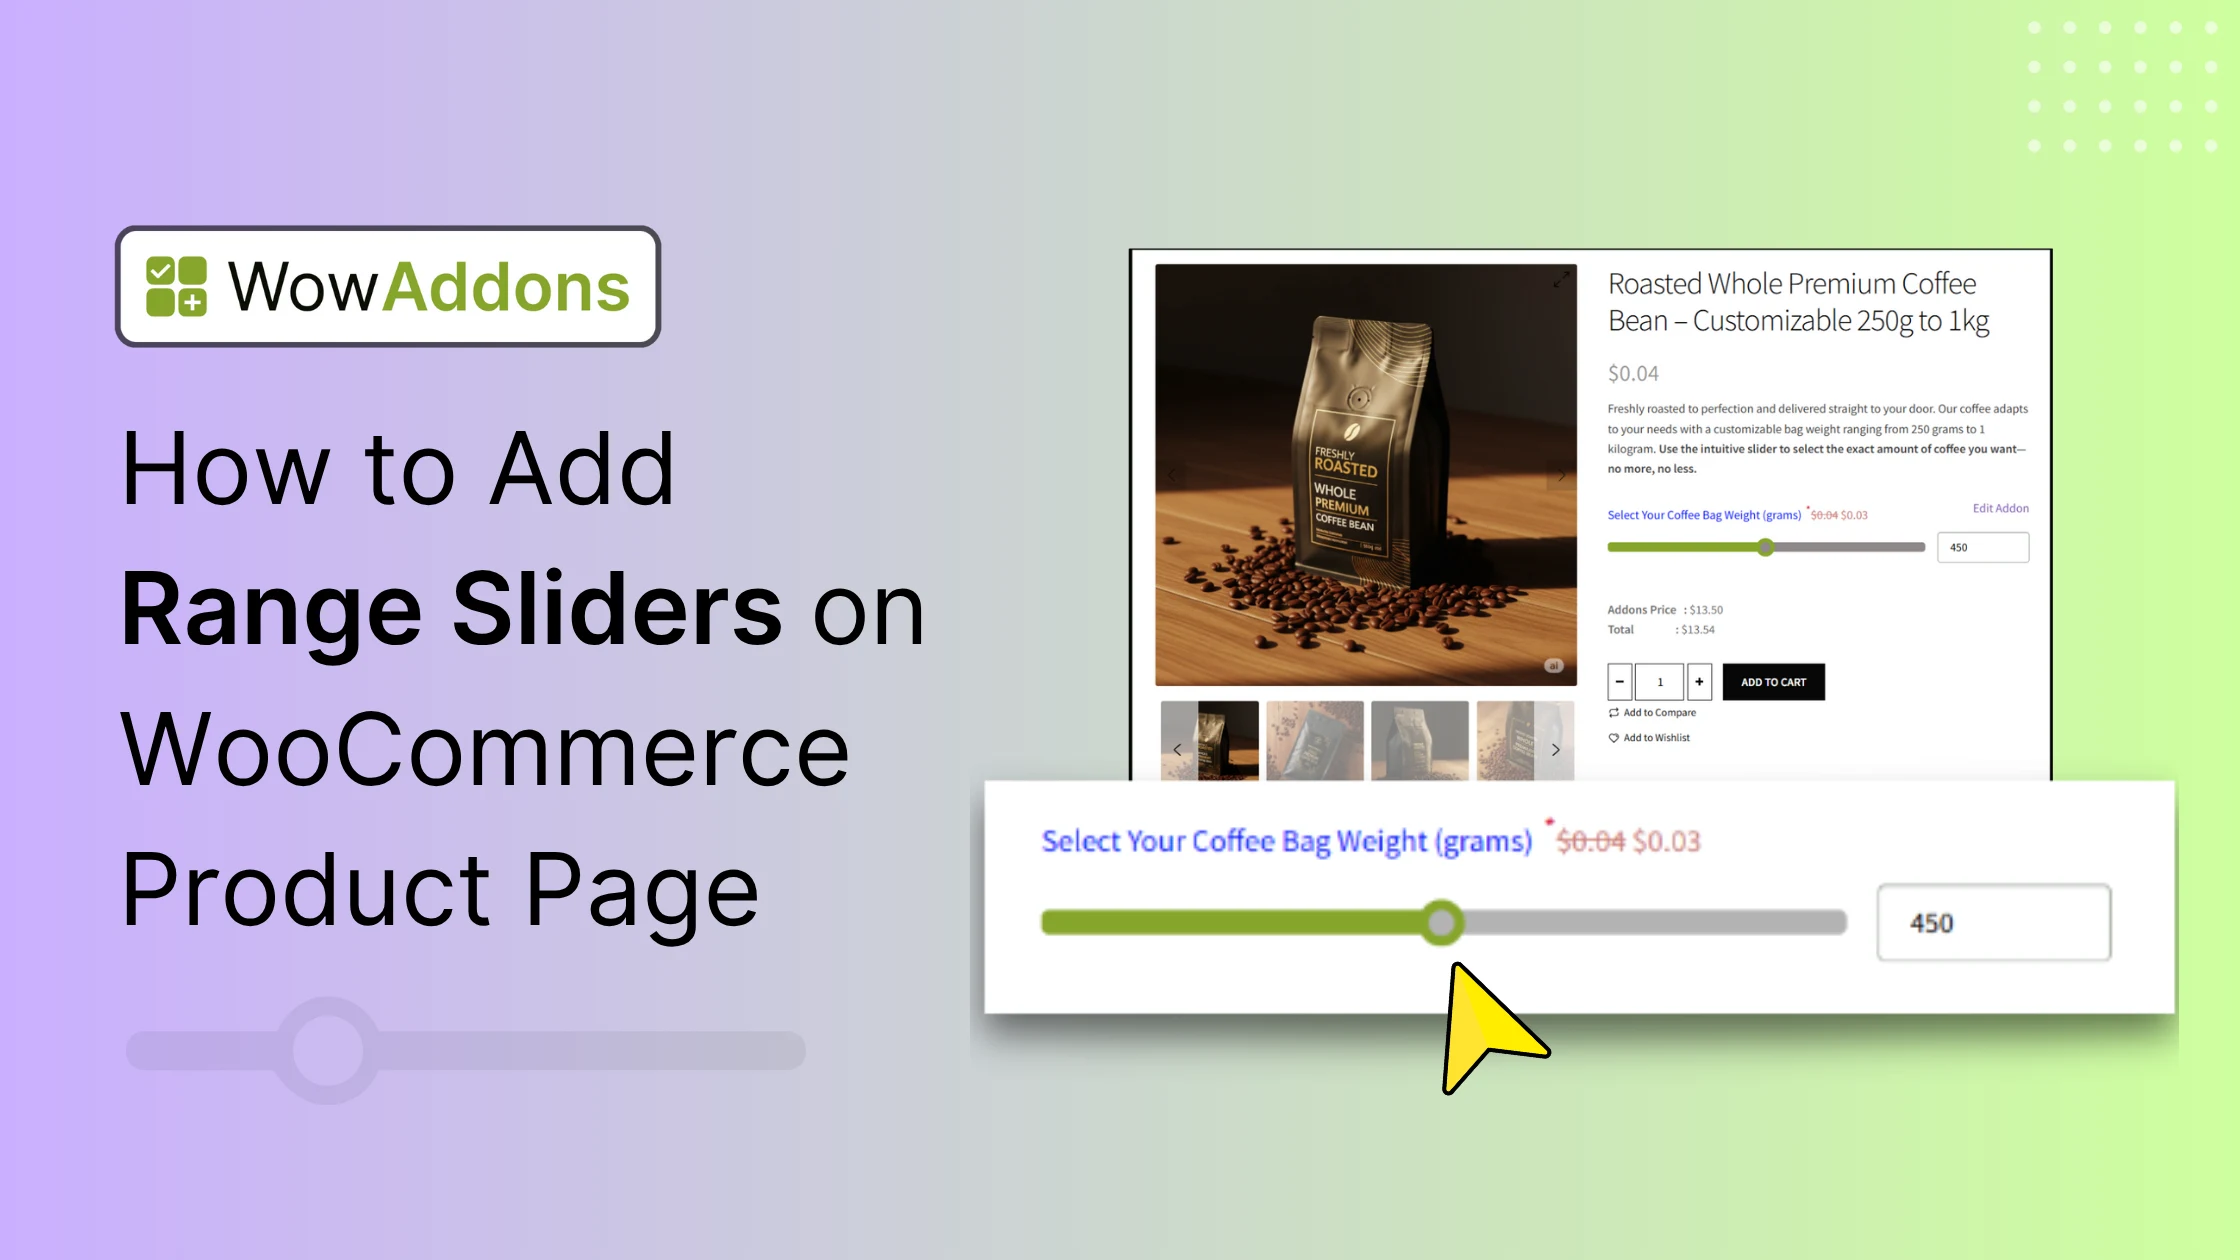
It’s an intuitive way for customers to select product options, and can significantly enhance their shopping experience. In this guide, I’ll show you how to add range sliders on your WooCommerce product pages. Let’s get started!
What Exactly Is a Range Slider Field?
A range slider lets your customers pick a value (from a range of values) by sliding a little handle along a bar. It’s interactive, visual, and way more fun than typing numbers into a box. It works perfectly for products sold by weight, size, or quantity. For example:
- Let’s say you’re selling custom-made curtains, and you want shoppers to choose the length they need – say, anywhere between 50cm and 300cm. Instead of typing in the number, you can ask them to slide the handle to their desired length.
- Or maybe you’re offering personalized gift boxes, and customers can select how many items they want in the box using a slider.
It’s all about making things easier and more engaging for your customers!
Why Use Range Sliders on Your Product Page?
Here are some reasons why adding a range slider can be a big improvement for your store:
✅ User-Friendly: Sliders are intuitive. Customers don’t have to guess or manually type numbers; they just slide and see the value update instantly.
✅ Customization Power: You can set minimum and maximum limits, step intervals (like increments of 5 or 10), and even display the selected value in real-time. This gives you total control over what options are available.
✅ Perfect for Variable Products: If you sell products where size, quantity, price, or other attributes vary, a slider is a great way to let customers explore those options.
✅ Reduced Input Errors: Eliminates typing mistakes common with manual number entry.
✅ Visual Appeal: A slider adds a modern, sleek touch to your product page. It makes the shopping experience feel smoother and more interactive.
Picking the Perfect Plugin for a WooCommerce Range Slider
Before adding a range slider to your WooCommerce product pages, selecting the right plugin is crucial. Here are the top 3 WooCommerce product addons plugins that deliver real results:
1. WowAddons
WowAddons stands out as a powerful and comprehensive WooCommerce product add-ons plugin. It provides 25+ dynamic custom fields available for free with some limitations, including checkboxes, radio buttons, text inputs, file uploads, formula fields, and more.
Why WowAddons is the Superior Choice:
✨ Visual Drag-and-Drop Builder: Features an intuitive visual builder that’s unmatched by competitors in the market, making customization effortless even for beginners. All of it provides outstanding value for money.
✨ Unlimited Custom Fields for Free: Create unlimited custom fields without restrictions in the free version, while competitors limit field creation or charge for this essential feature.
✨ Intuitive Conditional Logic: An Advanced conditional logic system that shows or hides fields based on customer selections, creating smart and dynamic product pages.
✨ Dynamic Addons Pricing: Sophisticated pricing engine that automatically calculates costs based on selected options, supporting multiple pricing methods including flat rates, percentages, and custom formulas.
✨ Dedicated Upsell and Cross-Sell Fields: Includes specialized product fields designed specifically for upselling and cross-selling opportunities.
✨ Global Styling and Responsiveness: WowAddons offers comprehensive customization controls to style every aspect of your addons. Also, addons are fully responsive and optimized for mobile, tablet, and desktop devices.
2. WPC Product Options
WPC Product Options enables store owners to add 18+ custom field types to simple products with flexible pricing adjustments. The plugin offers three pricing methods: flat fee, quantity synced, and custom formula calculations.
Why WPC Product Options Are Notable:
18+ Field Types: Supports various custom fields, including text inputs, dropdowns, checkboxes, and radio buttons for product customization.
Three Pricing Methods: Offers flat fee, quantity-synced, and custom formula pricing with fixed or percentage-based options.
Quantity Integration: Automatically adjusts addon prices when customers change product quantities for accurate totals.
Simple Product Focus: Designed specifically for simple products, ideal for stores with straightforward product structures.
Custom Formulas: Supports advanced mathematical calculations for complex pricing scenarios.
Compare WowAddons and WPC Product Options to choose the best fit for your needs.
3. YITH WooCommerce Product Add-ons
YITH WooCommerce Product Add-ons lets you add customizable options like checkboxes, dropdowns, and text fields to your products. Create unlimited paid or free add-ons for all products or specific categories. The plugin supports both paid and complimentary add-ons.
What Makes YITH Product Add-ons Stand Out:
Unlimited Customization – Build as many option sets as needed and deploy them across your entire store or fine-tune them for individual products and categories.
Diverse Input Options – Leverage multiple field formats, including radio selections, dropdown lists, text entries, and checkbox arrays to match your specific needs.
Smart Pricing Features – Configure each option with custom pricing, offer complimentary upgrades, or apply discounts when customers select certain choices.
Targeted Control – Roll out options store-wide for consistency or apply them selectively to specific items and product groups for maximum flexibility.
Revenue Enhancement Tools – Boost average order values by seamlessly integrating premium services like warranties, insurance coverage, expedited shipping, and personalization options directly into your product pages.
Compare WowAddons and YITH Product Addons to choose the best fit for your needs.
How to Add Range Sliders on WooCommerce Product Page
Since we’ve already covered the top three plugins, I’ll be using WowAddons for this tutorial. First things first – head over to your WordPress dashboard and navigate to the Plugins section. Click on Add Plugin and search for “WowAddons” in the search bar.
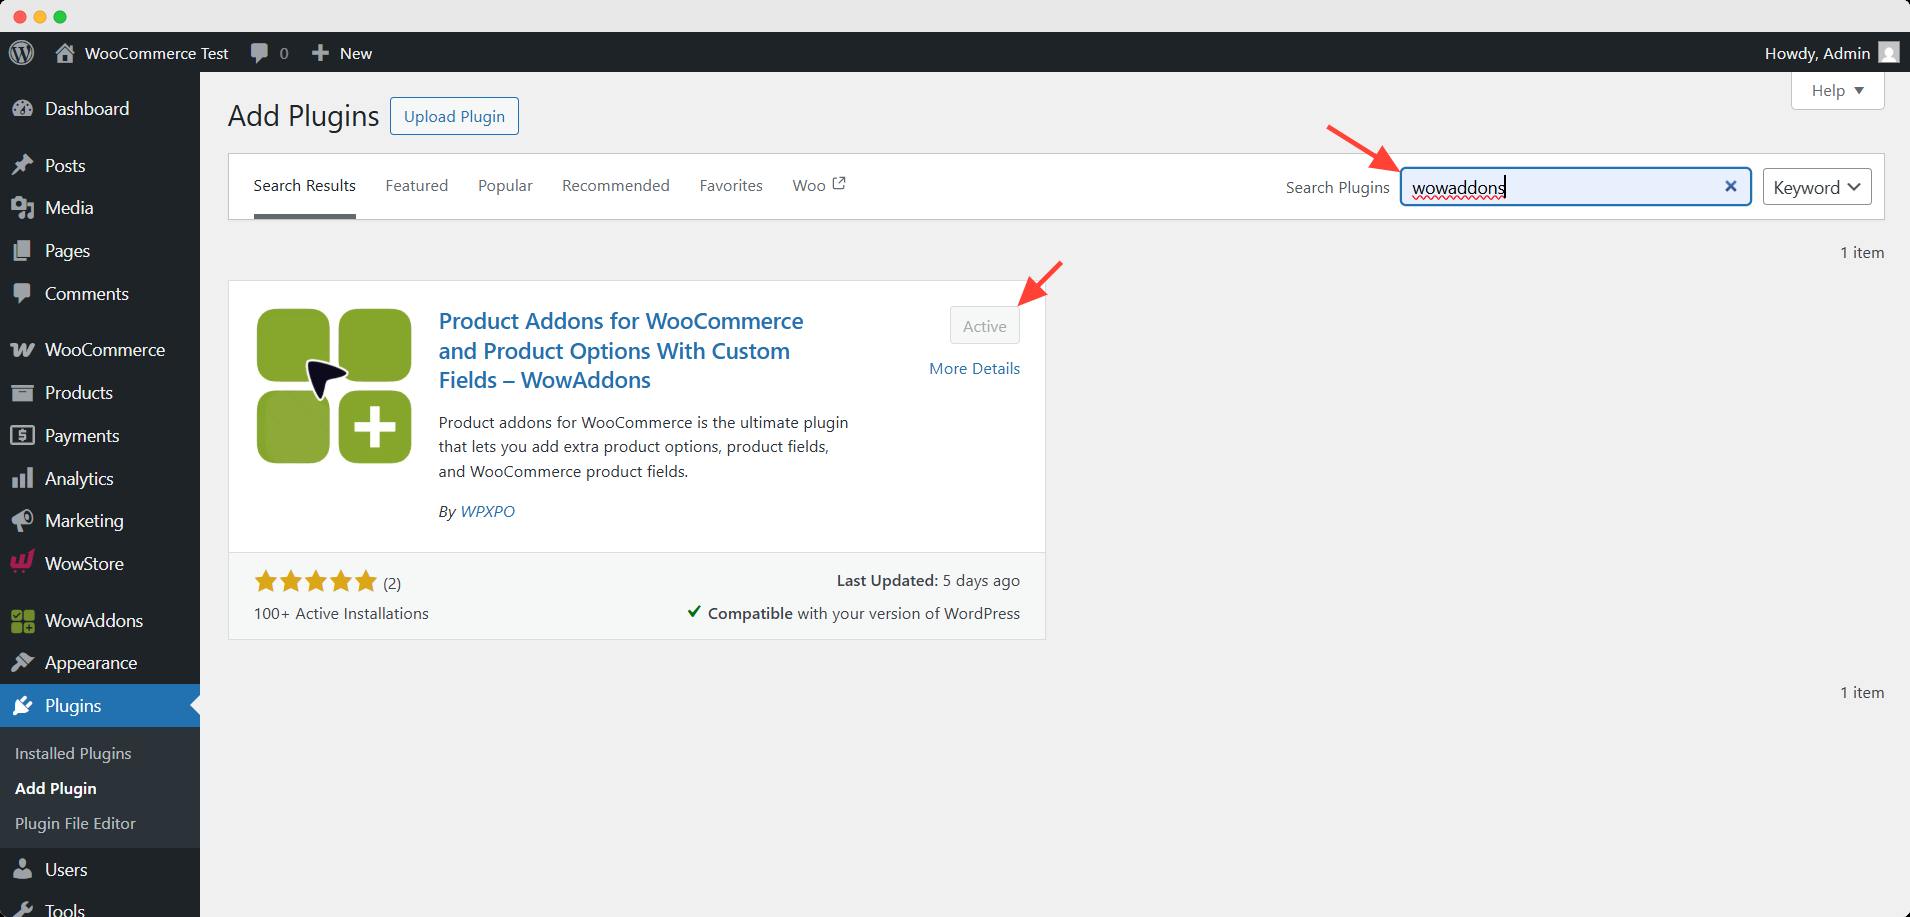
Then hit Install and Activate it. This plugin is your gateway to creating professional-looking product customization options without any coding.
Step 1: Create Your First Addon
Once activated, you’ll notice WowAddons appears in your dashboard menu. This is where all the magic happens!
Click on Create Addons to launch the visual builder. This intuitive interface makes creating custom product options a breeze – no technical skills required.
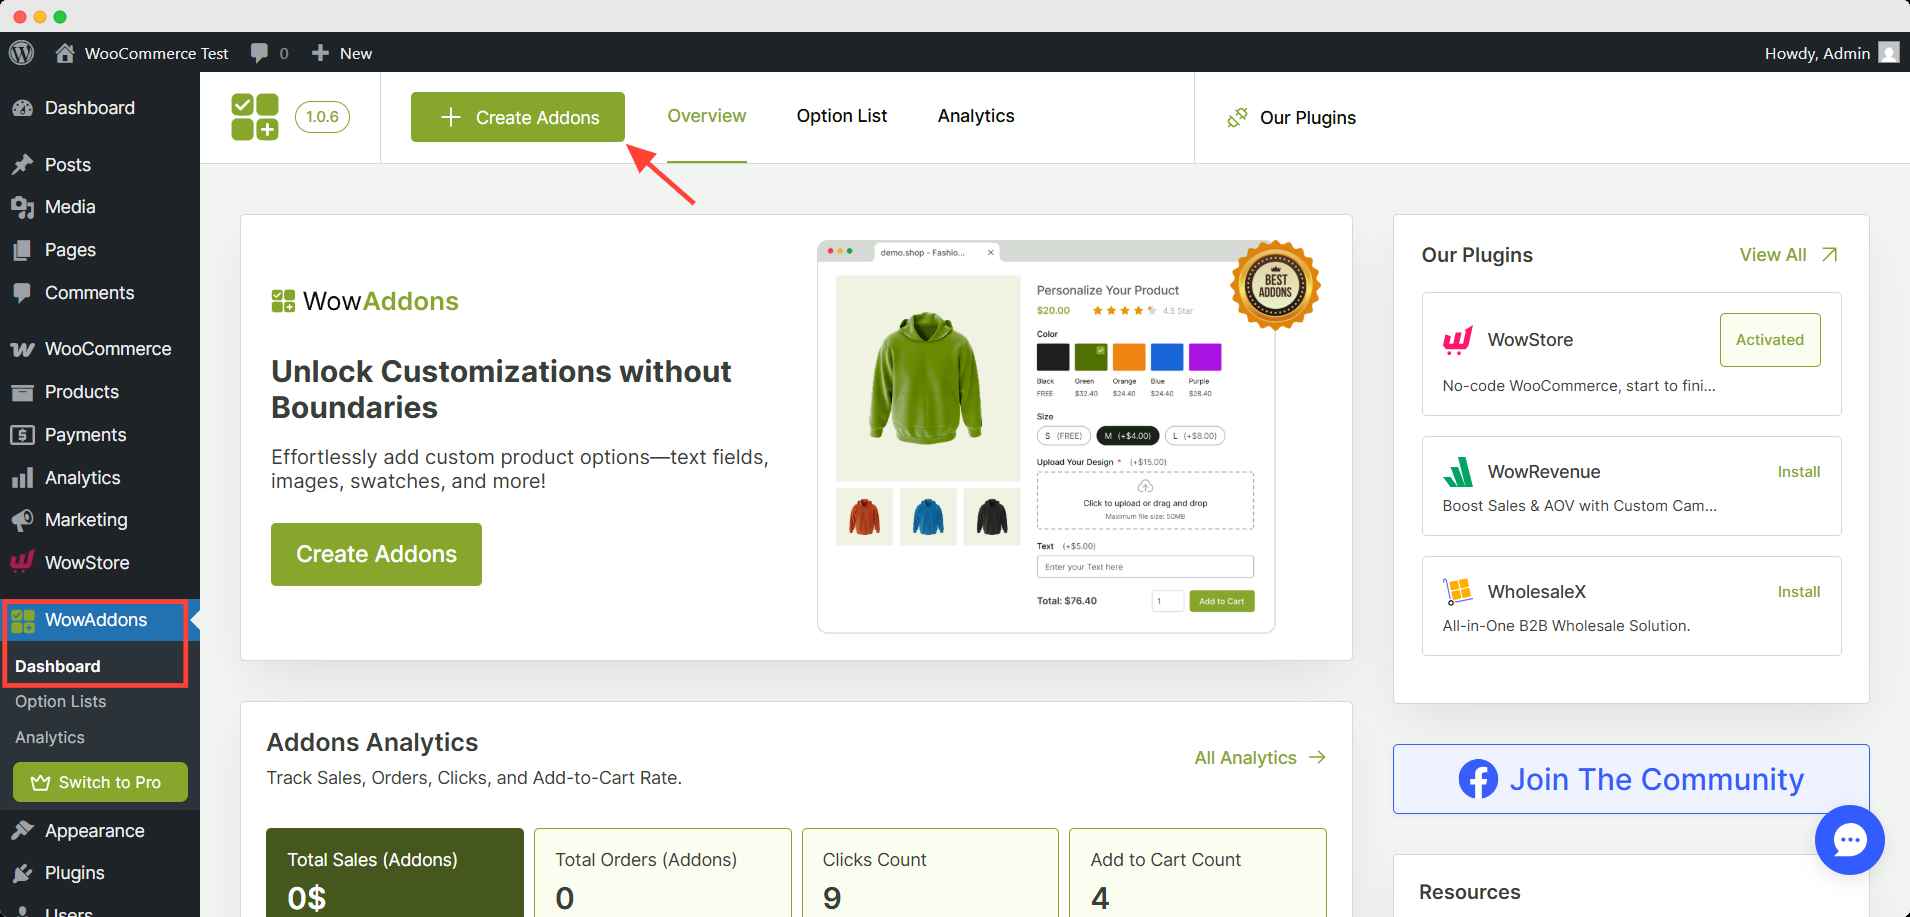
Give your addon a descriptive name that you’ll easily recognize later. For example, if you’re selling coffee, try something like “Coffee Weight Selector” or “Custom Portion Picker.” This name is just for your reference, so make it clear and memorable.
Step 2: Select Target Products
Before proceeding, make sure your products are already added to WooCommerce. Next, determine which products should feature this functionality based on your store’s needs.
Selection Flexibility
The range slider can be applied with complete flexibility – target all the products, individual products, entire categories, tags, or brands. You also have the option to exclude any item from your selected category, tag, or brand when necessary.
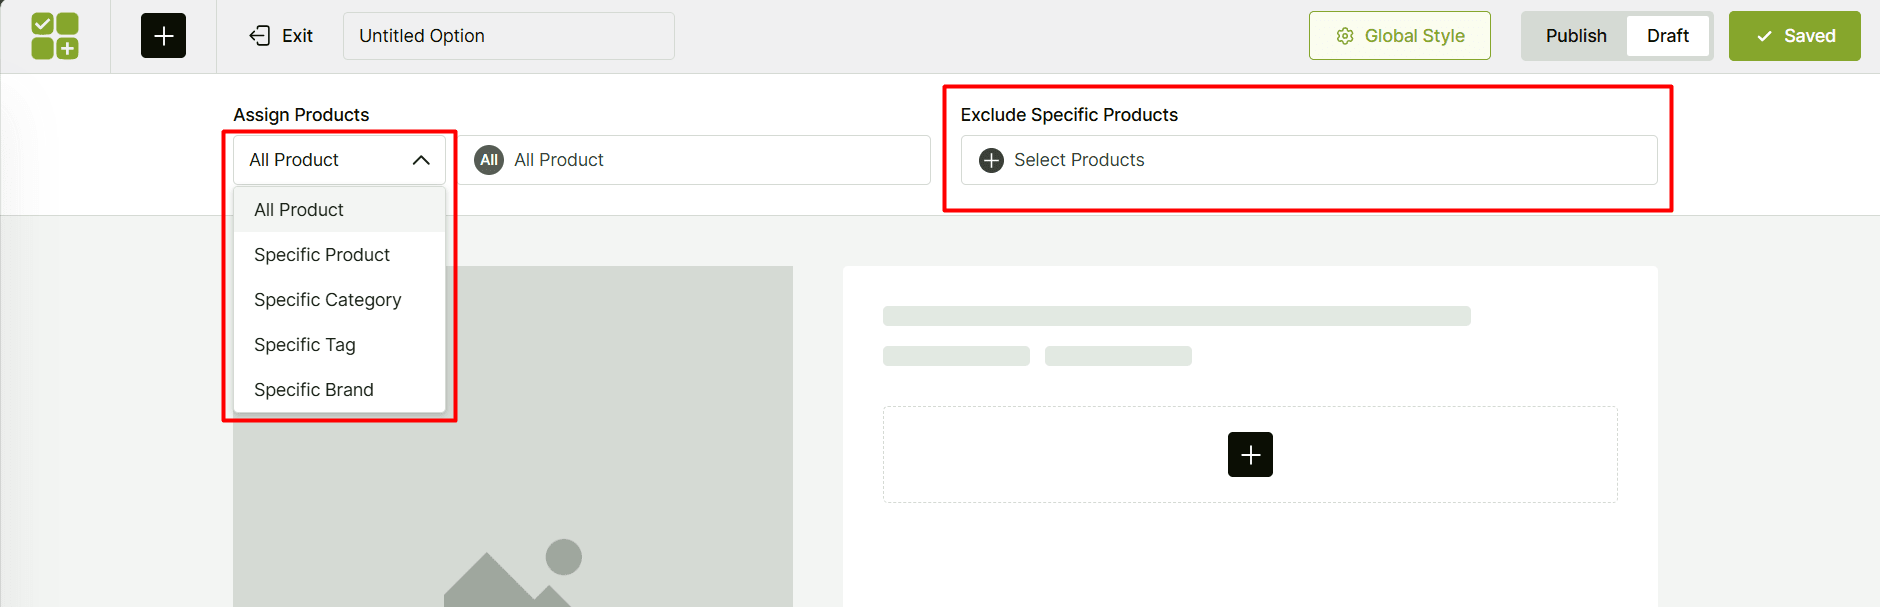
WowAddons offers five distinct approaches for product targeting:
- All Product
- Specific Product
- Specific Category
- Specific Tag
- Specific Brand
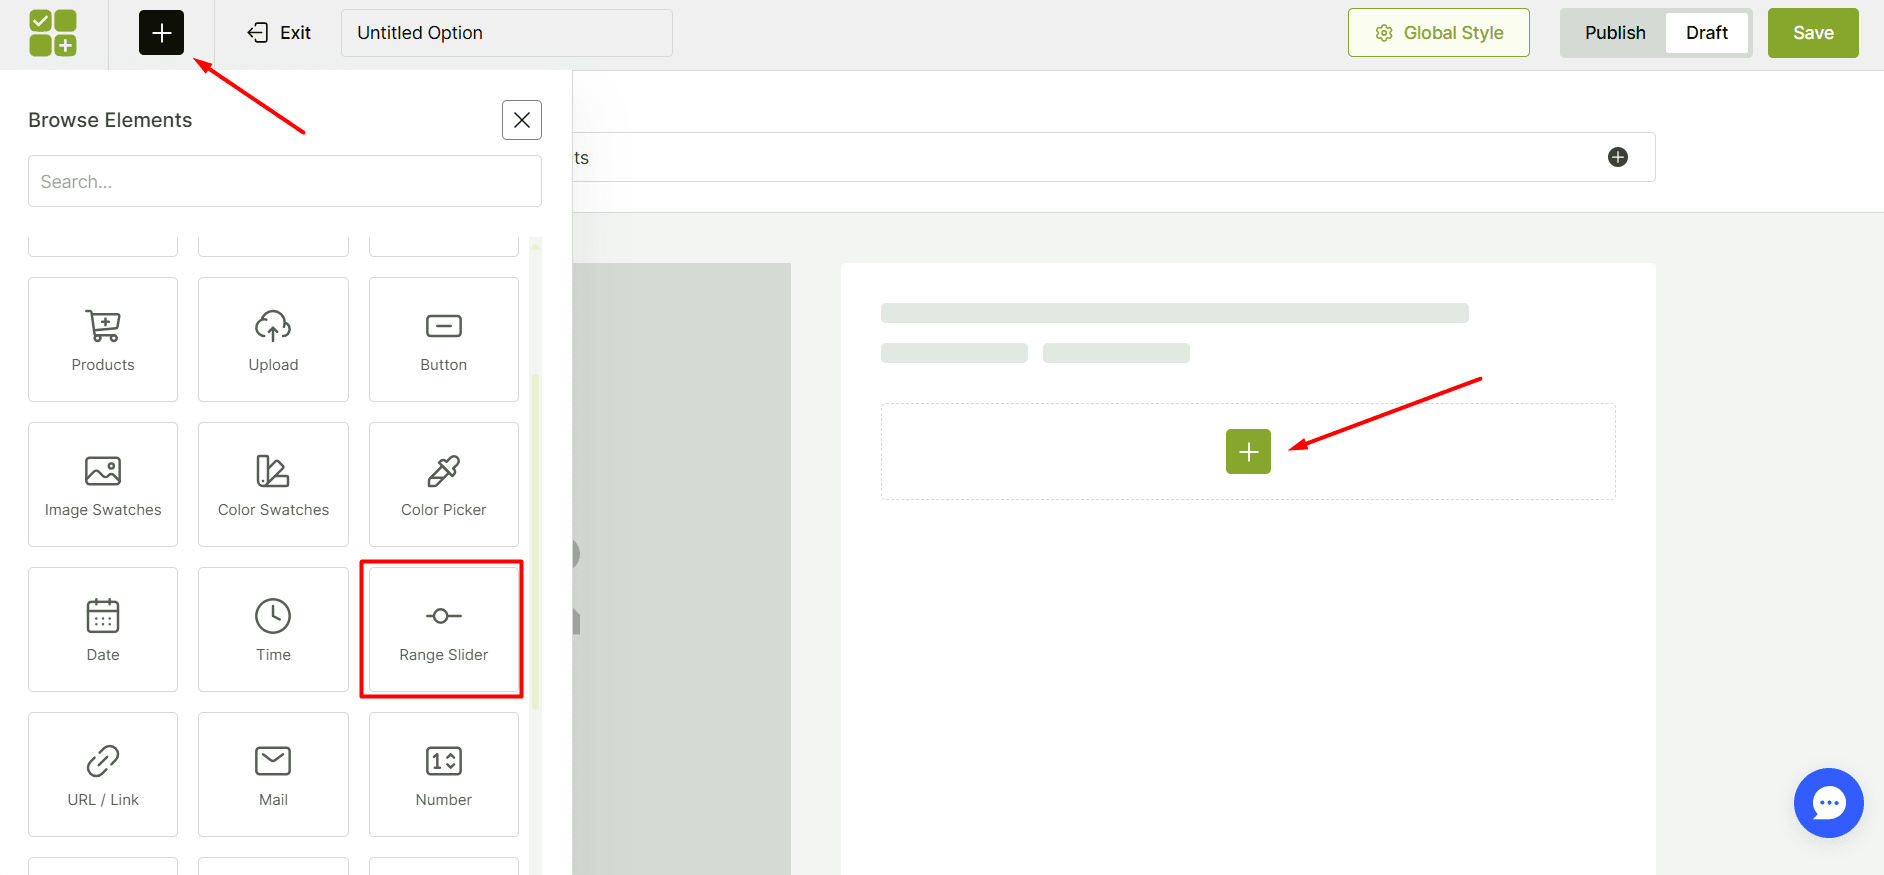
Step 3: Add and Customize the Range Slider Field
Now for the exciting part! Click on any of the plus icons to see all available field types. Scroll down until you find the Range Slider and select it. This is the field type that will give your customers that interactive sliding experience.
Customize the Range Slider Field
Let’s set up the essentials:
- Mark as Required: Turn this option on if you’d like to ensure customers make a selection before they can complete their purchase.
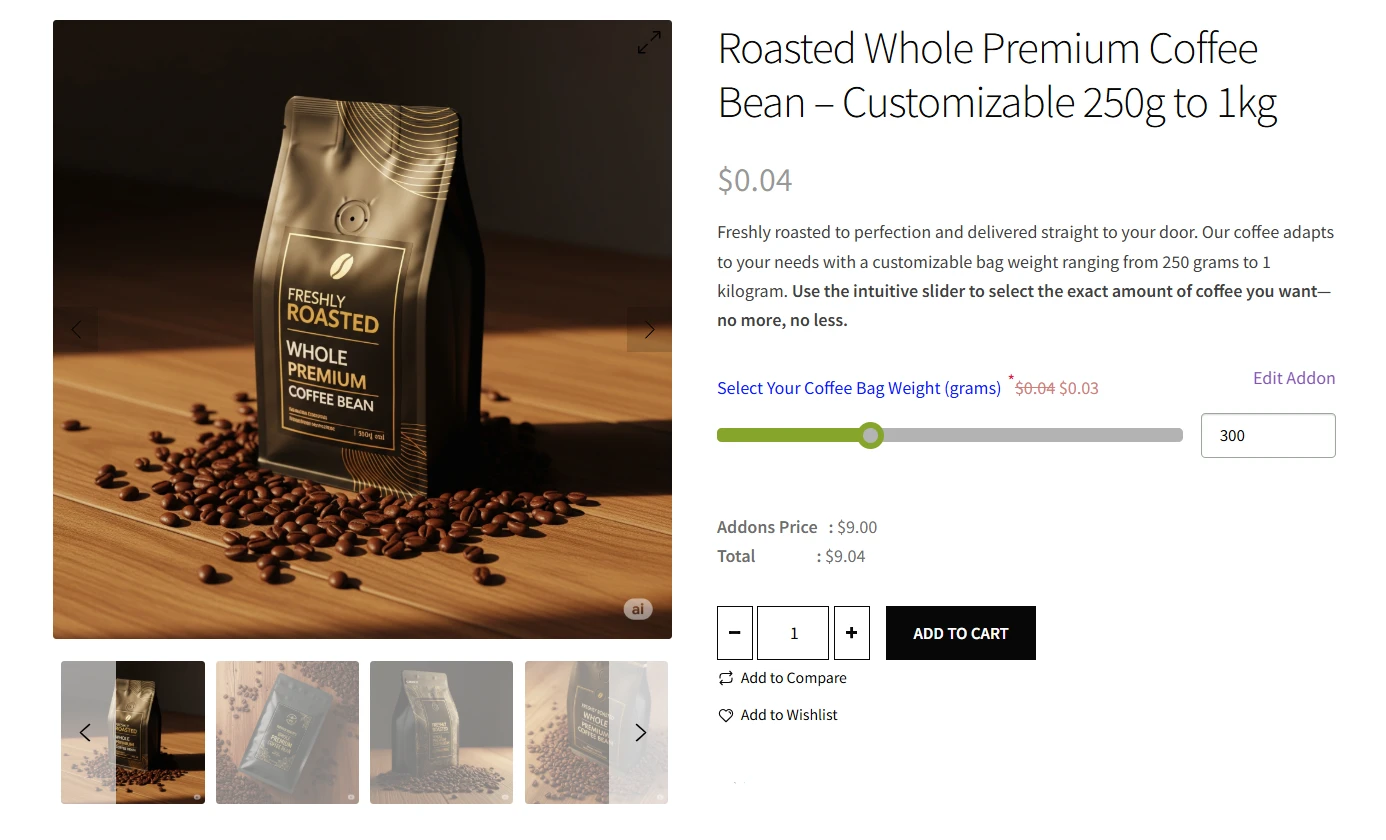
- Field Title: Add a clear and descriptive label, such as “Choose Your Coffee Bag Weight (grams),” or hide the title entirely for a cleaner appearance.
- Minimum Value: Define the lowest selectable value (e.g., 250 grams).
- Maximum Value: Set the highest selectable value (e.g., 900 grams).
- Default Value: Pick a popular or recommended option to serve as the pre-selected choice for customers.

Set the Step Value
The step value determines how the slider moves. For example, setting the step value to 50 means the slider will move in increments of 50 (e.g., 250, 300, 350, 400, etc.). Choose a step value based on your offerings and customer demands.
Step 4: Configure the Addon’s Pricing
Your range slider becomes profitable at this crucial step! In the pricing dropdown, you’ll see four options:
- Fixed: Same price regardless of selection
- Percentage: Price based on a percentage of the base product
- No cost: Free addon
- Per unit: Price multiplied by the selected amount
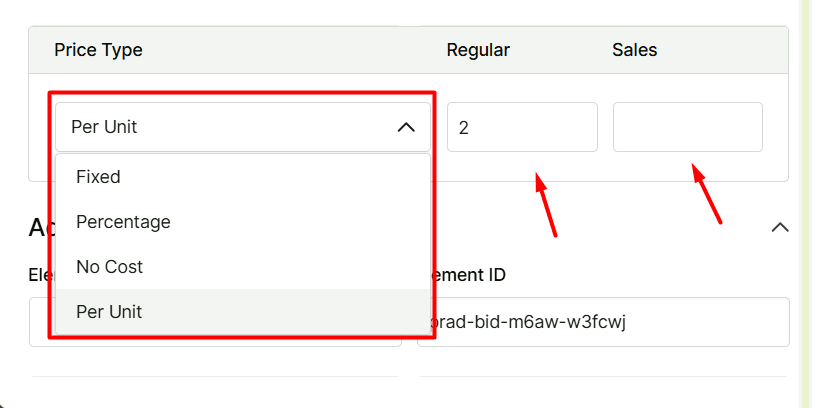
For weight-based products like coffee, choose per unit. Enter your per-gram price in the regular price field, and add a sale price if you’re offering discounts. Watch as the total price updates automatically when customers move the slider!
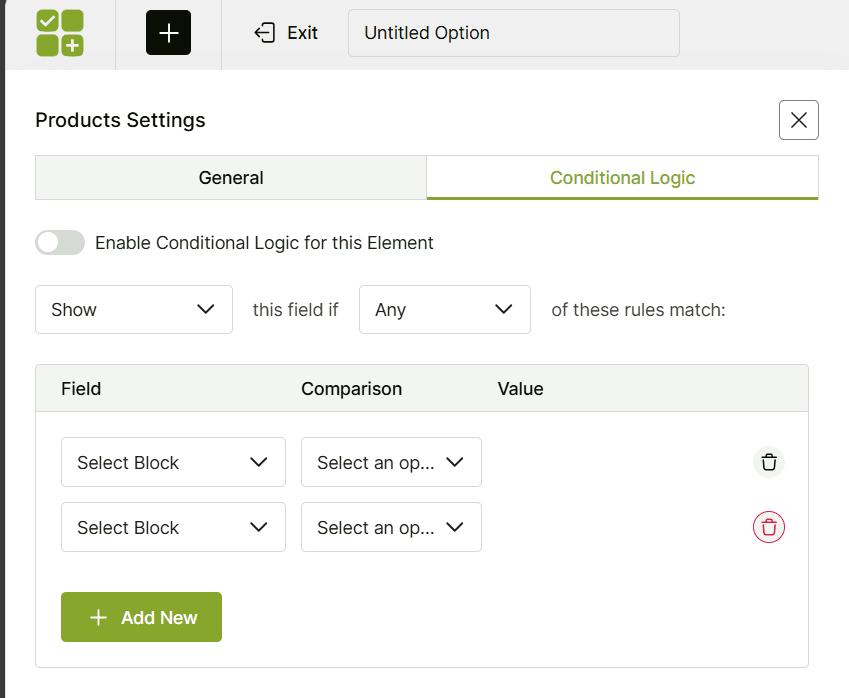
Step 5: Set Up Conditional Logic (Optional)
You can also combine range sliders with other WooCommerce features to create even more dynamic experiences. This is an optional setup, but it can be very handy in some cases. You can learn it better from the official documentation fully. I’ve provided the link below to make it clear to you.
Learn aboutr WowAddons Conditional Logic feature effortelessly.
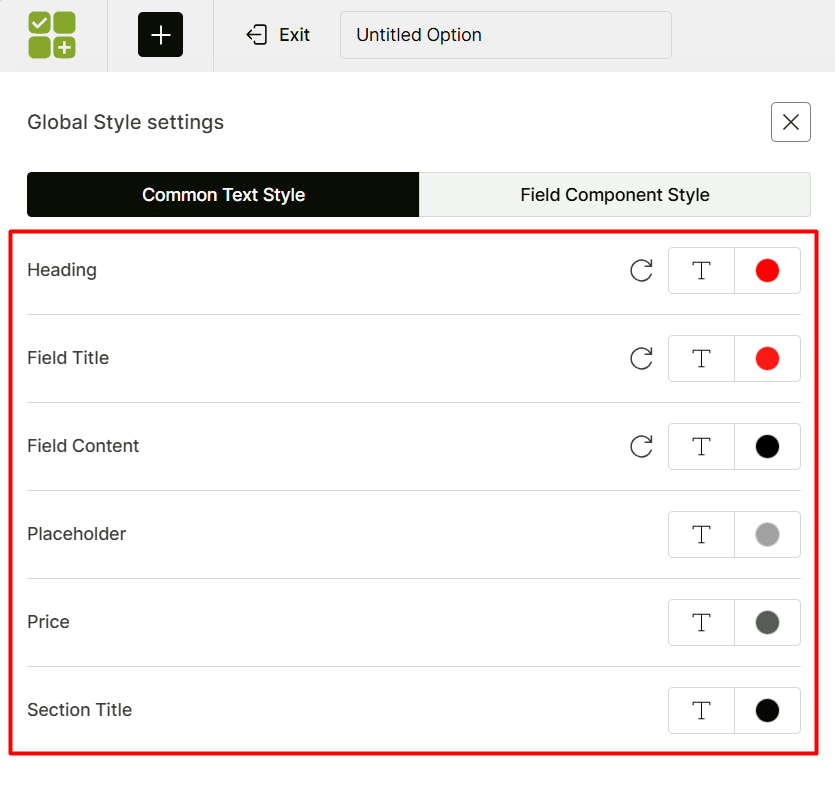
Step 6: Style Your Range Slider
To make the Range Slider look amazing, WowAddons offers a very minimalistic but effective global styling option. To access this option, you have to look at the header area and click on the Global Style button. There are two tabs included:
Universal Styles Section
In this tab, you can control everything from fonts, colors, to spacing that affects all fields simultaneously.
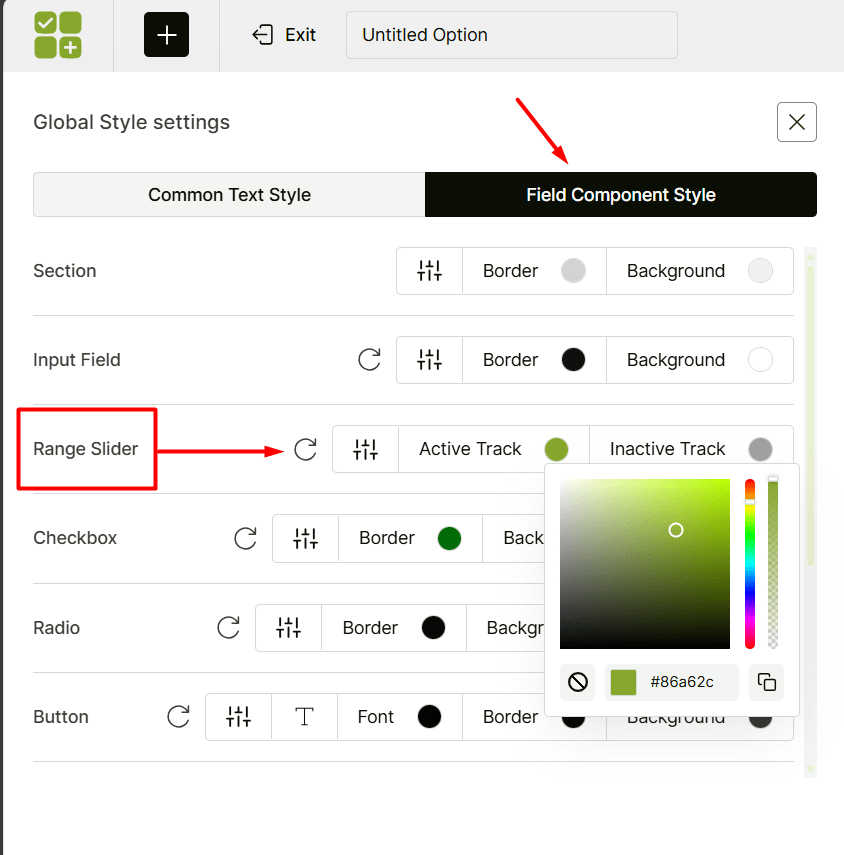
Field-specific Style Section
This section is for field-specific design customization. The Range Slider field has three styling options. They are:
- Slider/bar height customization for better visibility.
- Active track (the filled portion) color adjustment to highlight the slider.
- Inactive track (the unfilled portion) color to differentiate it from the active portion.
Match these colors to your brand for a cohesive look that feels like a natural part of your store.
Finally, toggle the Publish switch to make your range slider live, then click the Save button. Now, test the functionality on the front-end by moving the slider and watching the price update in real-time.
And that’s it! You’ve successfully added an interactive Range Slider to your WooCommerce Product page.
🌟 Practical Applications of Range Sliders on Product Page
Range sliders are incredibly versatile and can be used in so many creative ways to enhance your WooCommerce store. Let’s dive into some specific examples where a range slider can make a big difference:
☑️ Time-Based Inputs
When offering services or products tied to time (e.g., booking appointments or renting equipment), range sliders can be highly effective.
For instance, a cleaning service could allow customers to slide and select anywhere from 2 to 6 hours of service. This approach provides clarity and helps customers easily understand pricing tiers.
☑️ Predefined Number Selection
It may not always be obvious what the acceptable range is without a clear instruction. For example, a customer needs to choose values within a specific range or predefined options, such as donation amounts ($10, $20, $50).
A slider eliminates confusion by visually intuitively presenting the available options.
☑️ Frequency-Based Inputs
Fixed intervals may not suit every customer’s needs. For a subscription ecommerce, fixed intervals like weekly, bi-weekly, or monthly subscriptions may feel restrictive.
Instead, a range slider allows customers to select flexible intervals (e.g., every 2 weeks to every 6 weeks), providing a more personalized experience.
☑️ Wide Range of Numeric Options
When you have a wide range of numeric options (e.g., selecting a quantity from 1 to 100), a slider can make the selection process faster and more visually engaging.
Instead of scrolling through a dropdown for “Number of Tickets,” customers can slide to choose between 1 and 20.
☑️ Quantity Selectors
Incremental buttons (e.g., clicking “+” repeatedly) can feel tedious when jumping from low to high numbers, such as ordering 10 items. Additionally, small input boxes may be difficult to use on mobile devices.
A slider offers a seamless alternative, allowing customers to instantly select their desired quantity without repetitive clicks.
☑️ Customizable Product Attributes
When product attributes vary continuously (e.g., brightness, temperature, or strength), a slider provides a smooth and flexible selection process.
Instead of choosing from preset levels (Low, Medium, High), customers can slide to set their preferred level, such as 40%.
☑️ Better Replacement for Number Input Fields
Manually typing numbers into input fields can lead to errors (e.g., typos or out-of-range values). Sliders offer a more accurate and user-friendly solution.
For example, families purchasing concert tickets can slide to select 4 tickets instead of manually entering the number. This speeds up the process and minimizes mistakes caused by manual input.
By incorporating range sliders into these scenarios, businesses can enhance usability, streamline decision-making, and improve the overall customer experience.
Bonus: When Not to Use a Range Slider
Range sliders are not a one-size-fits-all solution. Avoid using them when:
- Precision is critical: Sliders are great for approximate values, but may frustrate users who need pinpoint accuracy.
- The range is very small: When the range size is between 1–5, radio buttons or dropdowns might work better.
- You Serve Older Users: Some may find sliders harder to use than traditional input methods, especially if the audience includes people unfamiliar with digital interfaces.
Start Using Range Sliders!
Here’s the thing – range sliders aren’t just a fancy feature; they’re a simple way to make your customers’ lives easier. Think about it: would you rather fumble around typing numbers or just slide to exactly what you want? Your customers feel the same way.
I’ve shown you how WowAddons makes adding these sliders super straightforward – no tech headaches, no complicated setup. Just a few clicks and you’ve got a more modern, interactive store that actually helps people buy what they need.
Ready to upgrade your customer experience? Install WowAddons now and start creating interactive product pages that convert better and keep customers coming back for more!
FAQs about Adding Range Sliders on WooCommerce Product Page
Here are the answers to some common queries:
1. How do I add a range slider for product attributes (like size or weight) on WooCommerce product pages?
You can easily add a Range Slider for attributes on the product page using plugins like WowAddons in minutes. Unlike other plugins that offer this feature only in their pro versions, WowAddons allows you to create it for free.
2. How does Range Sliders Work on a WooCommerce product page?
When you add a range slider to your product page, here’s what happens:
– The slider appears as part of the product form, usually below the product description or near the “Add to Cart” button.
– Shoppers move the slider to select their preferred value (like size, quantity, or budget).
– Once they’ve made their choice, the selected value gets added to the cart along with the product details.
For instance, if someone slides to choose a curtain length of 200cm, that info will show up in the cart so you know exactly what they ordered.
3. Can I use this range slider to filter products by price or other numeric values?
Product customization plugins, including WowAddons, are mainly intended to add custom product options and fields to individual product pages. They are not specifically designed for filtering products on the catalog or shop pages.
There are other plugins available that focus on providing filtering functionalities for product catalogs or shop pages, rather than being dedicated solely to product customization.
4. Can I add multiple range sliders for different attributes on the same product page?
Yes, with WowAddons, you can add multiple range sliders for different attributes (such as size and weight). You can also set conditional logic between them.
5. Is it possible to add a range slider for non-numeric attributes?
No, range sliders only work with numeric attributes. Non-numeric attributes like text labels cannot be used with range sliders in WooCommerce. For this, there are other fields, such as, dropdowns, text fields, and so on.
6. Will the range slider work on mobile devices?
Range sliders (especially those provided by reputable plugins like WowAddons) are responsive and work well on both desktop and mobile devices.


