Quick Checklist to Start Your WooCommerce Print-on-Demand Business Today
- Choose a specific niche audience (avoid generic stores).
- Buy a domain name and reliable hosting.
- Install and set up WordPress and WooCommerce.
- Connect a print-on-demand supplier (Printful, Printify, Gelato).
- Publish your first few products with good mockups and descriptions.
- Add customization options with a product options plugin.
- Set a profitable pricing strategy after calculating all costs.
- Start marketing through SEO, social media, and email.
These are the gist of the entire process.
But you might have a lot of questions. For example, do you always need to come up with your own designs? Do you need a print partner like Printful or Printify? Can you print products yourself?
This guide answers all of those questions and more. I will break down what print-on-demand really means, why WooCommerce is a powerful platform for building a POD business, and how you can set up your own store step by step.
Let’s get started!
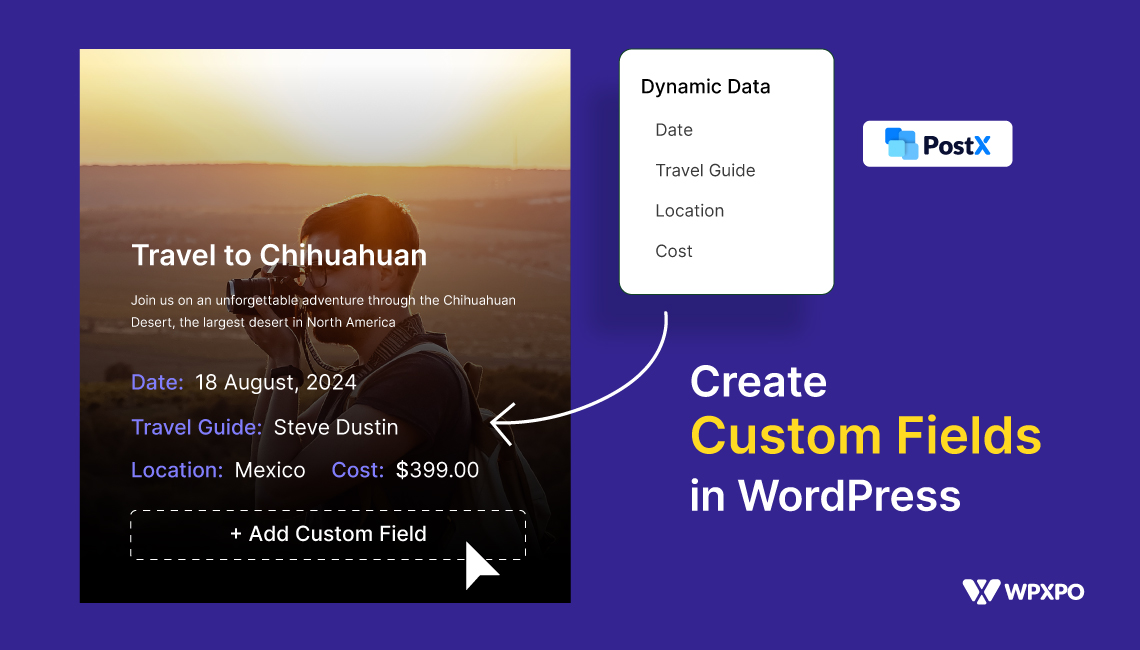
Use 25+ custom fields to fully customize your product page today! 👇
Understanding the Concept of Print on Demand
Let’s start with a clear definition.
Print on demand (POD) means a product is only printed after a customer places an order.
That’s the core idea.
You don’t print in bulk.
You don’t hold inventory.
You don’t invest in hundreds of units hoping they sell.
Instead, you produce one unit at a time, only when someone pays.
That’s the “on demand” part.
Why Is Print on Demand Growing So Fast?
The numbers tell a clear story.
The global print-on-demand market was valued at over $10 billion in 2024, and projections suggest it could surpass $80 billion by 2033.
Why is it expanding so rapidly?
Because it solves three big problems:
- Inventory risk
- Upfront investment
- Storage and logistics complexity
Two Types of Products in Print-on-Demand Businesses
Now, in most cases, when talking about print-on-demand businesses, people consider products that are already pre-designed, but there’s actually more than one type of product involved.
Let’s see the two common types of products for POD businesses:
Pre-Designed Products
This is the most common version.
You showcase already designed products in your store. Customers browse your catalog and choose what they like.
For example:
- A funny dog t-shirt
- A motivational quote hoodie
- A niche hobby mug
Once someone orders, the product gets printed.
Most beginner POD stores start here.
Custom Designed Products
In this model, customers share their own artwork, logo, or design.
Examples:
- A company uploads its logo for branded shirts.
- A couple uploads artwork for wedding cards.
- A pet owner uploads a photo for a custom hoodie.
This product personalization often helps increase the average order value and leads to more satisfied and recurring customers.
Why WooCommerce – not Shopify, Etsy, or Amazon?
As a business owner, you should ask important questions. For example, why should you not use other platforms to do POD business, and why WooCommerce?
So let’s be honest about the trade-offs – and see the comparison with other platforms.
Etsy is a marketplace, not a store. It’s a great place to get your first few sales because the traffic is already there. But here’s the thing — you’re not building a business on Etsy, you’re renting a stall in someone else’s market.
Amazon has the same problem, amplified. The traffic is enormous, but so is the competition. You’re often competing directly against Amazon’s own products or cheap overseas alternatives. Your brand has the risk of being invisible; customers buy from “Amazon”, not from you.
Shopify is genuinely good, and it’s worth being fair about that. It’s fast to set up, well-designed, and has strong POD integrations. But it costs money every single month – plans start at $39/month and go up from there.
WooCommerce is different in one fundamental way: it’s yours.
WooCommerce is a free plugin that turns a WordPress website into a full online store. You install it on hosting you pay for and control. That means no one can shut your store down because they changed their terms of service.
You own the store. You own the customer data. You own the email list. You own the brand.
Is there a trade-off? Yes, and it’s worth being upfront about it. WooCommerce requires a bit more setup than Shopify or Etsy. You’re responsible for your own hosting, security, and maintenance. You’ll need to choose and install plugins rather than having everything built in.
How to Start a Print on Demand Business in WooCommerce – Step by Step
A print-on-demand WooCommerce store isn’t just a store. It’s a system:
- a niche that attracts the right people
- products that make sense for that niche
- designs that print well
- a setup that doesn’t break at checkout
- and marketing that doesn’t feel forceful
So let’s do this properly – step by step.
Step 1 – Pick a niche before you pick a product
If you pick a product first, you’ll almost always end up copying what everyone else is doing.
And that’s how you become “another t-shirt store.”
Instead, pick a niche first. A niche gives you direction. It tells you what to design, what to write, how to market, and what your customers actually want to buy.
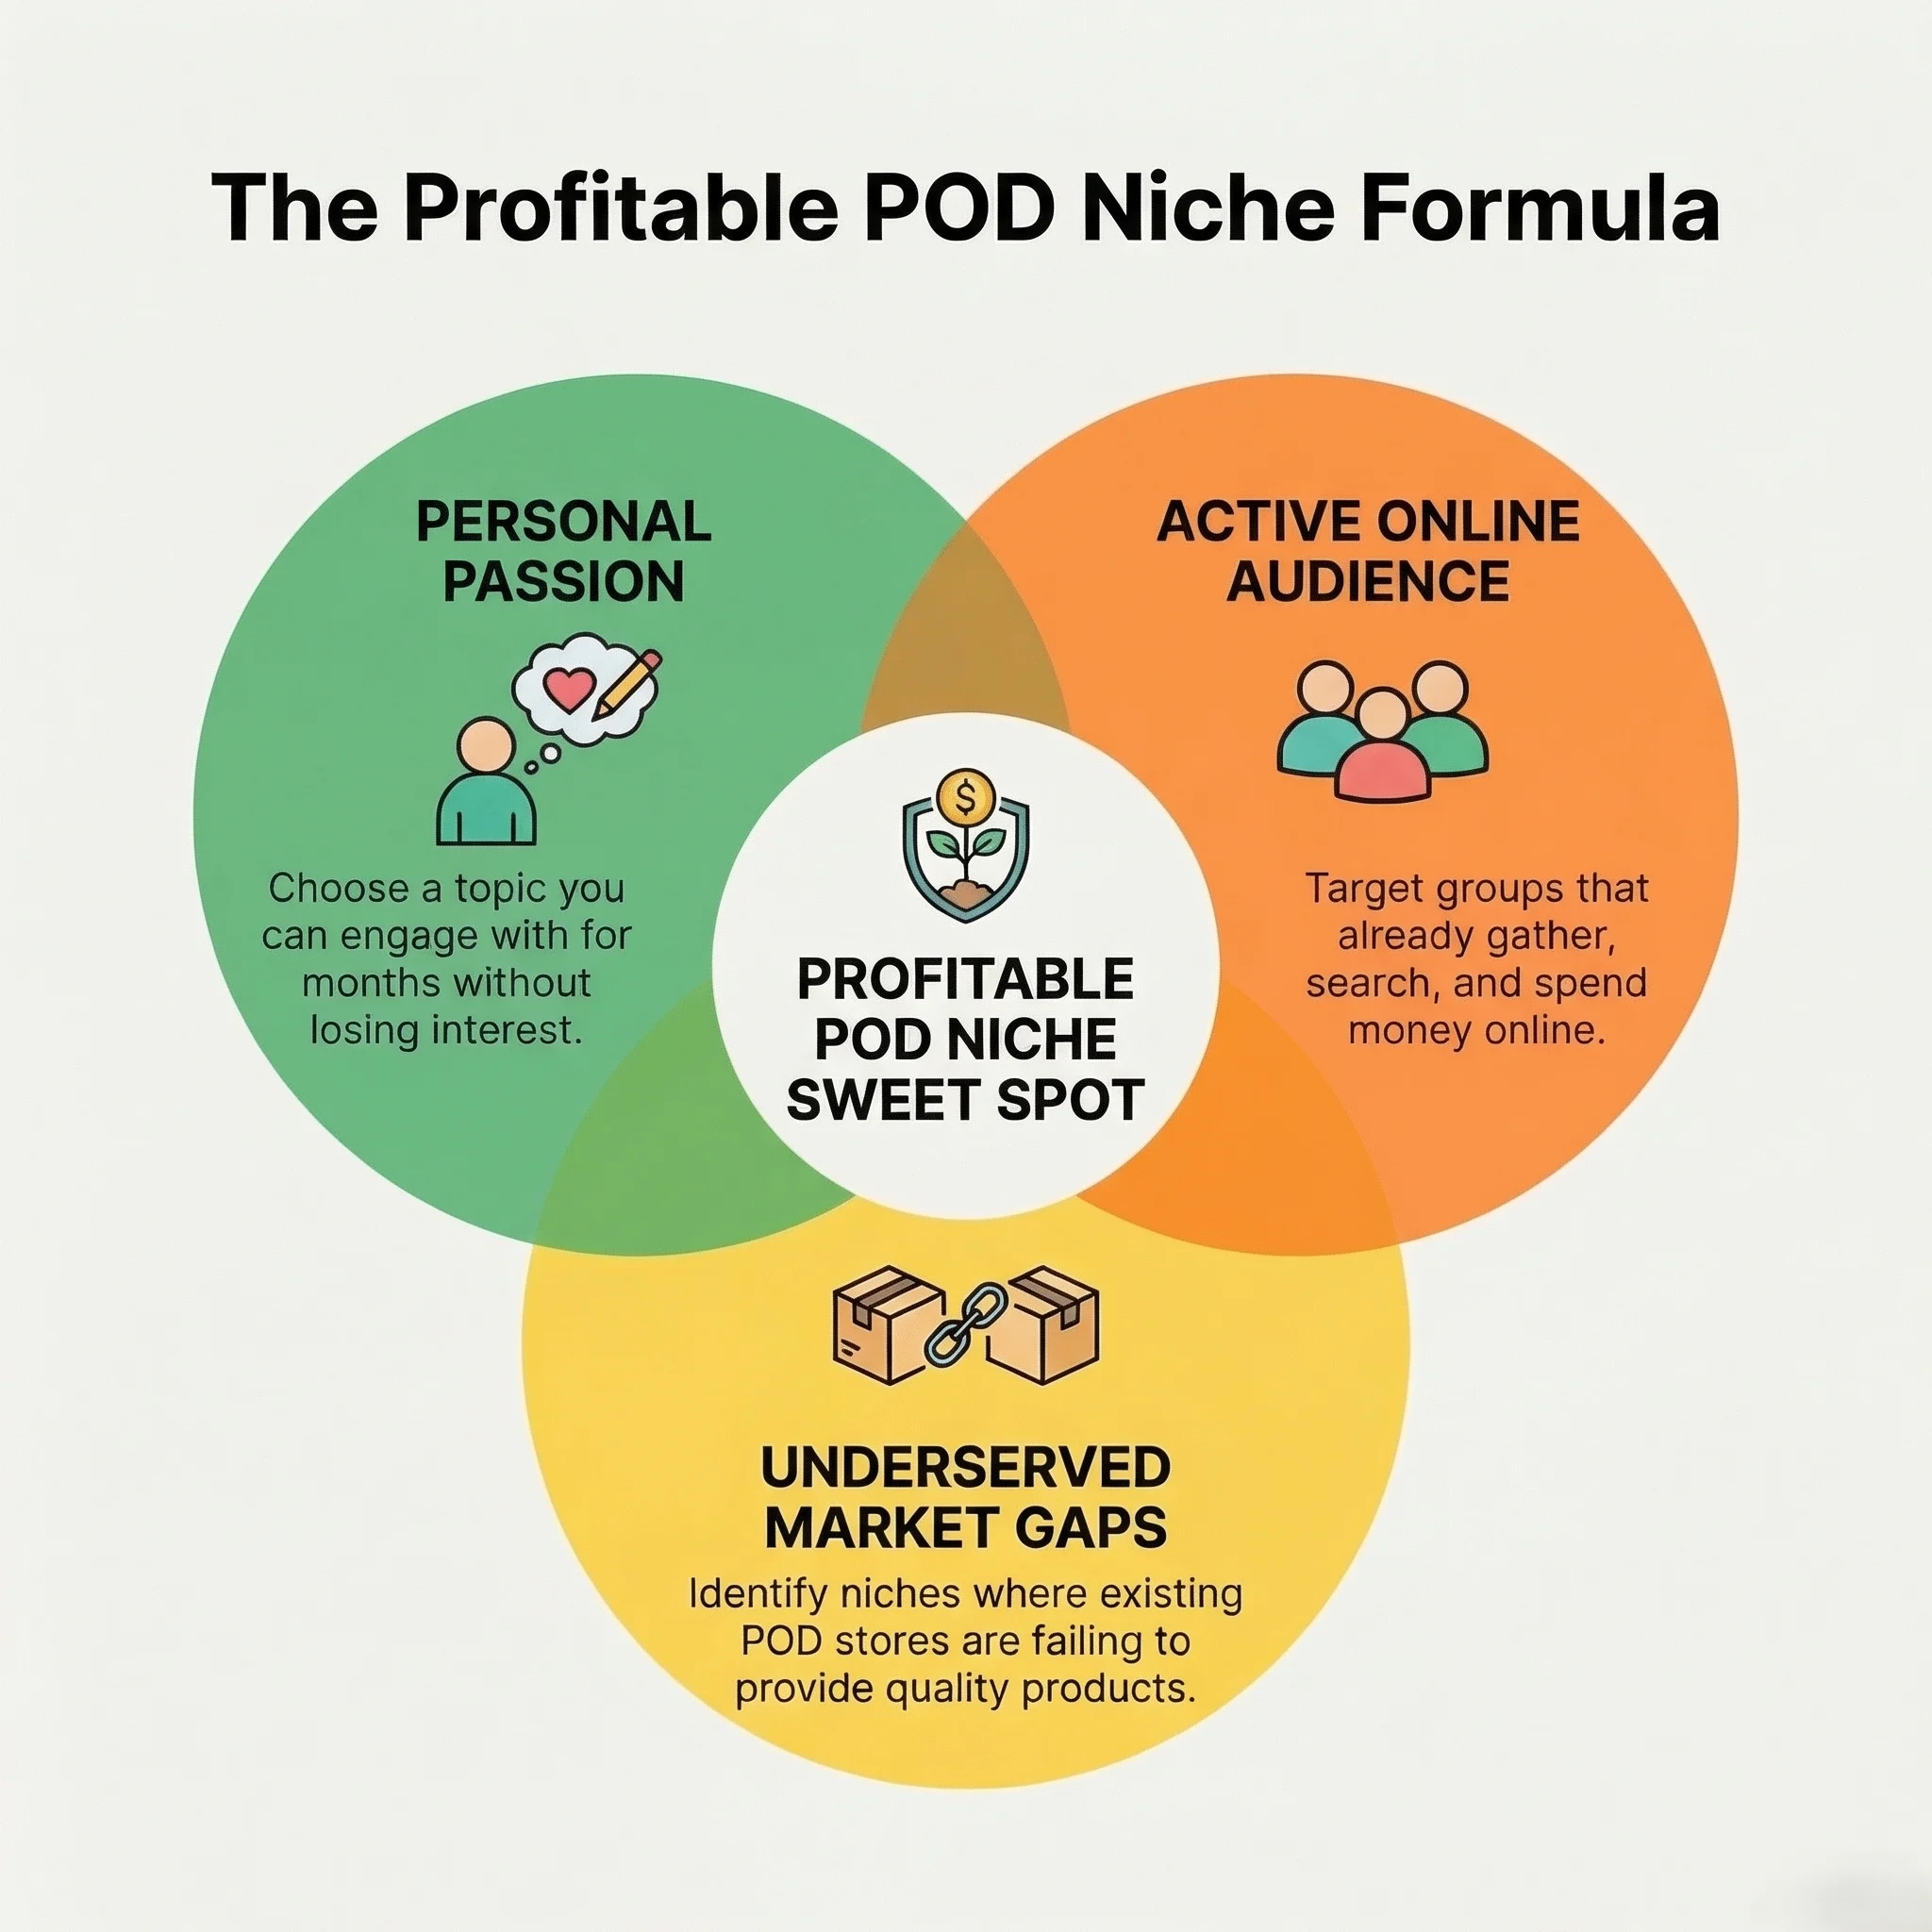
Use the 3-circle method
A good POD niche sits at the intersection of three things:
(a) What you’re passionate about: Not in a cheesy way – just something you can talk about for months without getting bored.
(b) What has a real audience online: meaning people already gather around it. They search for it. They post about it. They buy things related to it.
(c) What’s underserved in existing POD stores: This is the secret sauce. Look for niches that have underserved products. That way, you will stand out fast.
Think of it like this:
You don’t need the biggest audience.
You need the most specific audience that buys.
Validate niche demand before designing anything
You don’t need paid tools to do this.
Use these free platforms to check if your niche has real-life:
- Google Trends: Type your niche idea and see if interest is steady or seasonal. Seasonal niches can still work – but you need to plan launches.
- Etsy search: Search your niche phrase. Check out the autocomplete suggestions; those are real buyer searches.
- Reddit communities: Search with your target terms, such as “gym moms,” and look into different communities that come up in the search results.
- Facebook groups: These are gold for niche language. Watch how people talk. You’ll find phrases that can become your best-selling designs.
Step 2 – Set up WordPress + WooCommerce
Once you have decided on the niche, you need to build the store’s foundation.
This part isn’t “fun,” but it matters. A POD store can fail just because the site is slow, confusing, or the checkout breaks.
Prerequisites: domain, hosting, SSL
Start with the basics:
i. Buy a domain: Choose something easy to remember and spell. If your niche is very specific, you can include niche keywords in the name.
ii. Choose reliable hosting: POD stores rely heavily on product images. Bad hosting makes your store slow, and slow stores lose sales.
iii. Enable SSL: This is the “https” lock symbol. It’s non-negotiable because customers will enter payment details.
Install WordPress and WooCommerce
Most hosting providers offer one-click WordPress installs. Once WordPress is live, do these simple steps:
- Install WooCommerce
- Follow the setup wizard
- Set store location and currency
Even if you plan to sell globally, start by selecting your main selling region so taxes and payments work properly.
Choose and customize a WooCommerce theme
Your theme matters more than people think.
A POD store is mostly images + trust.
So, look for a theme that is:
- Mobile responsive (most traffic is mobile)
- Fast loading (speed impacts conversion and SEO)
- Clean product pages (clear size/color selection, clear buttons)
You want customers to make a decision quickly.
If you add too many fancy elements, your store becomes slower and more confusing.
Configure store settings
This part is easy to skip, but it’s where painful scenarios happen later.
Set up:
Currencies: Pick your default currency.
Taxes: You can start simple. But don’t ignore tax, especially if you’re selling internationally.
Payment gateways: Choose what your audience uses (Stripe, PayPal, local gateways).
Shipping zones: Even if a POD supplier handles shipping, your store still needs zones and rules. Make sure shipping costs show correctly at checkout.
Create your product listings properly
A POD product page isn’t just a title and image.
You need:
- Clear product title (not clever, clear)
- Description that answers questions
- Size chart
- Shipping/production time info
- Good mockups
And since POD products are produced after purchase, you usually set inventory as:
“No stock management” / unlimited stock.
Because you’re not limited by physical inventory.
Step 3 – Create your designs (even if you’re not a designer)
You don’t need to be an artist to run a successful POD store.
However, you must ensure high-quality designs to present your store. Now how to do it? Let’s find out.
Print the file requirements you need to know
Most POD suppliers want:
High resolution: A safe minimum is 300 DPI.
DPI matters because a design can look sharp on your phone but blurry on fabric.
Correct file formats: Most suppliers prefer –
- PNG for designs (often with transparent background)
- Sometimes SVG for simple vector graphics
- PDF for certain print workflows
Correct canvas size: Different products need different design dimensions.
For example:
- A t-shirt front design needs a larger canvas than a mug wrap
- All-over printing requires huge, precise files
Suppliers usually publish recommended dimensions. Follow them.
Free and beginner-friendly tools
Now, there are many beginner-friendly and free tools that you can use to create high-quality visuals even if you are not a designer.
Canva: Great for typography designs, simple graphics, and fast mockups. Canva also has templates that work well for POD layouts.
Adobe Express (free tier): Good for quick social and product design.
Kittl: More advanced, especially for vintage typography and professional-looking designs, without great skills.
Gemini: Gemini’s Nano Banana is great for creating high-quality product visuals and mockups – it’s very easy to use and free.
Step 4 – Choose your print-on-demand supplier and connect it
This decision impacts your entire customer experience.
A POD supplier affects:
- print quality
- shipping time
- customer satisfaction
- refunds
- repeat purchases
So, don’t pick based only on “cheapest.”
Print-on-demand platforms to check out
While choosing a print-on-demand supplier, pay attention to print quality, shipping speed, reliability, and how well it connects with WooCommerce, because that directly affects your customer experience.
Here are three recommended platforms you should check out:
Printful: Printful is known for strong quality control and premium branding options like custom packing slips and labels. Its WooCommerce plugin automatically syncs products and orders, then Printful handles printing, packing, and shipping from its global fulfillment centers.
Printify: Printify offers a huge catalog (1,300+ products) and lets you choose from 140+ print facilities worldwide, so you can compare pricing and locations. It connects easily to WooCommerce, auto-syncs orders, and routes them to the print provider for fulfillment.
Gelato: Gelato focuses on local production in 32 countries – which means products are printed closer to your customer for faster delivery. Its WooCommerce integration lets you publish products, sync orders automatically, and have Gelato manage production and shipping.
Compare suppliers using this checklist
You don’t need to overthink multiple options. Choose the one based on:
- WooCommerce plugin availability
- Product range (what can you sell?)
- Fulfillment speed (how fast do they produce?)
- Shipping locations (where do they print from?)
- Return policy (who pays when something goes wrong?)
- Minimum order requirements (usually none, but confirm)
- Branding options (pack-ins, labels, white-label packaging)

How to Connect a Print-on-Demand Supplier (Example: Printful)
The exact setup process can vary slightly between suppliers, but most integrations follow a similar workflow. Here’s how it typically works using Printful as an example.
First, make sure your WordPress site is running WooCommerce and your domain is connected with an active SSL certificate (HTTPS). Then create a free Printful account and install the Printful Integration for WooCommerce plugin from your WordPress dashboard.
After activating the plugin, connect your WooCommerce store to Printful by authorizing the integration inside the plugin settings. This allows Printful to communicate with your store and automatically receive new orders.
Next, create products inside the Printful dashboard. Choose an item from the product catalog, upload your design, generate mockups, and set the retail price. Once everything is ready, you can publish the product directly to your WooCommerce store, where it will appear with images, variants, and product details.
Before launching your store, place a test order to confirm that everything works correctly. When the integration is active, new orders from your WooCommerce store are automatically sent to Printful, where the product is printed, packed, and shipped directly to the customer.
For a detailed explanation, you can check out this helpful video:
Step 5 – Add custom product options (optional but recommended)
This step is where you can separate your store from 90% of POD shops.
Because most POD stores only sell:
- standard sizes
- standard colors
- fixed designs
But when you let customers personalize products, two things happen:
- Your conversion rate can improve
- Your average order value often increases
So, how to add extra product options for personalization?
If you want customers to upload designs or add text, you will need a product addons plugin.
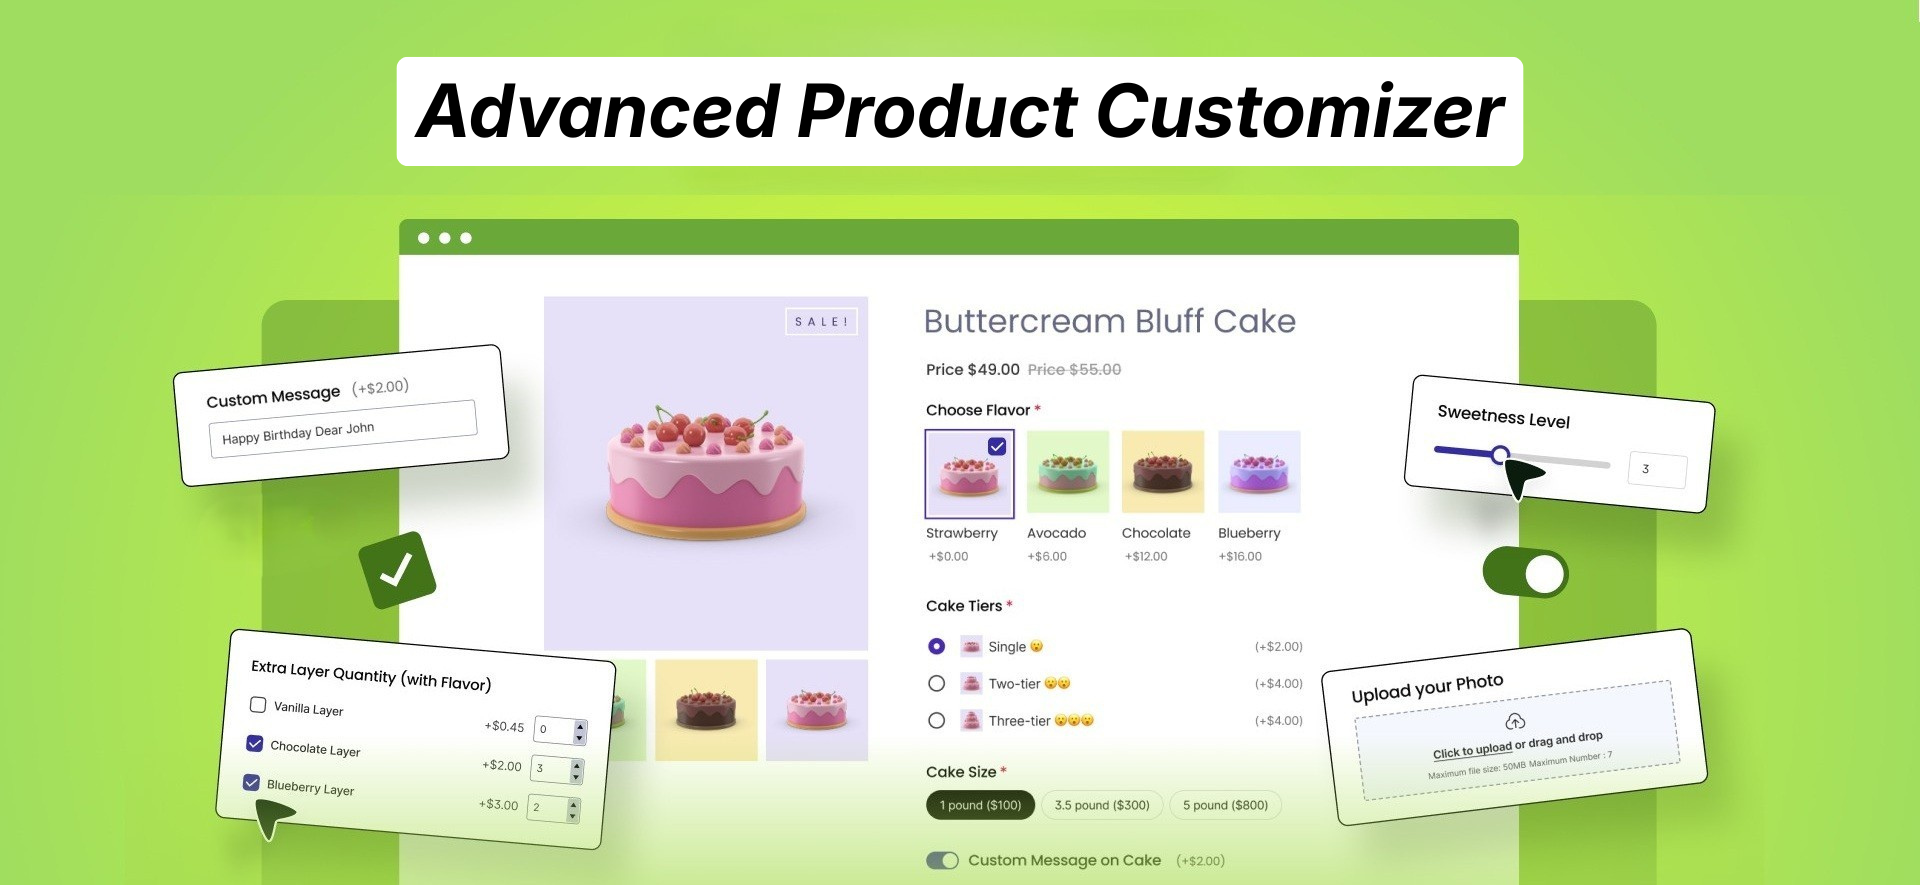
This is where WowAddons comes in. It is a complete product options plugin that comes with 25+ custom fields, letting store owners personalize the product page.
Now, using a product options plugin like WowAddons is pretty simple.
Follow these easy steps:
- Go to your WordPress dashboard and from the Add New Plugin section search for WowAddons. Install it for free.
- After installation, find its dashboard and click on the Create Option button.
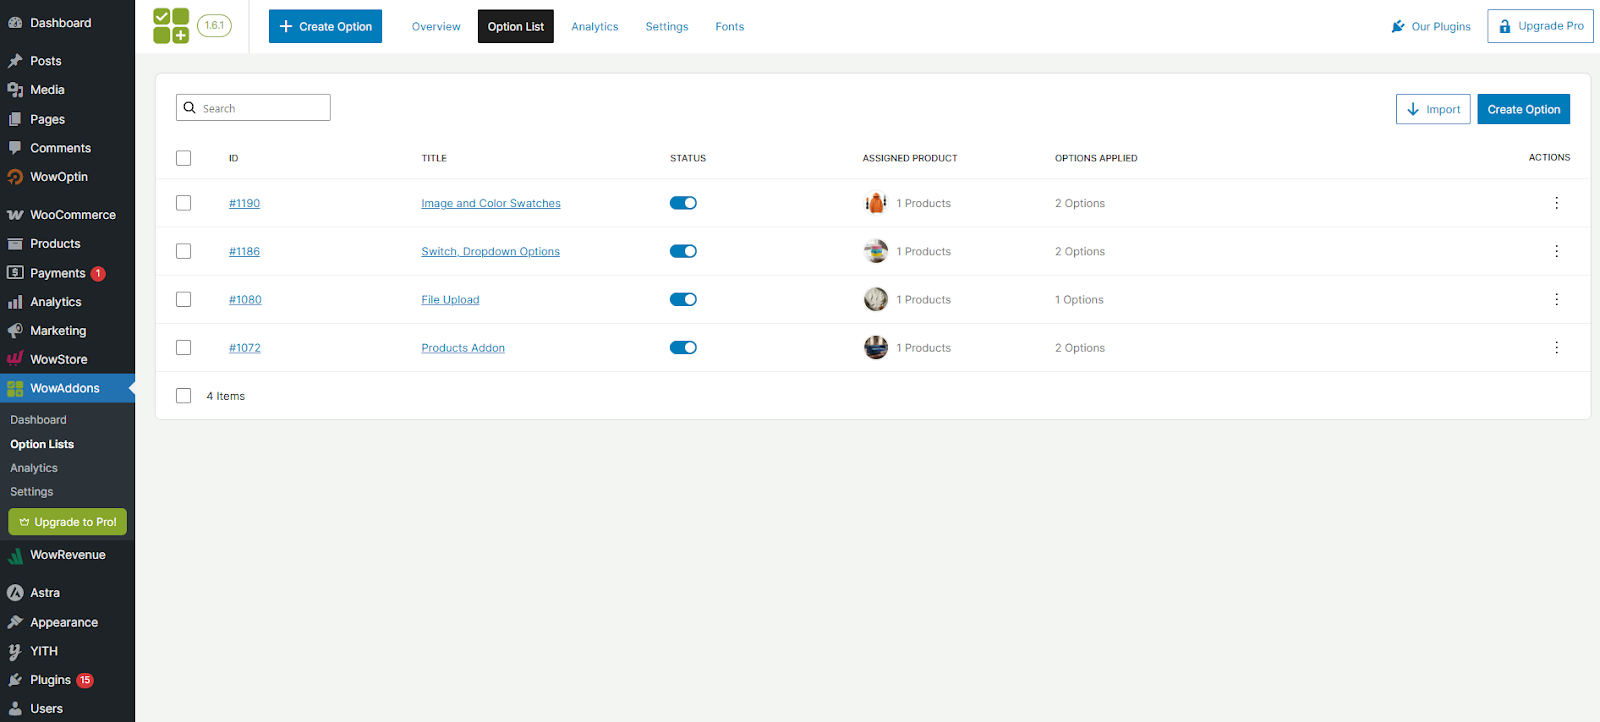
- You get a nice addon builder interface. Choose the custom fields you want to show on the product page – it can be image swatches, color swatches, upload field, and much more. But for this article, our goal is to allow customers to share design so, so we will focus on adding the upload field.
- Now your customers can directly share their custom designs on the product page.

Check out this WowAddons case study on how niche businesses are ensuring product customization.
Step 6 – Set Your Pricing and Protect Your Profit Margins
Before setting your price, calculate the true cost per product. Don’t only consider the base item price from your supplier. Make sure you account for all costs involved in fulfilling an order, including:
- Base product cost from the supplier
- Printing fees
- Shipping costs
- Payment processing fees
- Any platform or transaction charges
Small costs add up quickly, and even a small miscalculation per order can significantly reduce your profits over time.
In print-on-demand, standard products usually operate within 20-40% profit margins. This is normal because you’re paying for on-demand production and avoiding inventory risk.
However, personalized products often allow higher pricing because customers value uniqueness and customization.
Step 7 – Market Your Print on Demand Store the Smart Way
Okay, you have launched your store and set up the POD partner – now you must market it to bring in customers and take orders. How do you do it effectively?
Start with Search Engine Optimisation (SEO)
SEO helps people discover your store without paying for ads. Use clear product titles that describe what the product is and who it’s for, and optimize your meta descriptions, URLs, and image alt text.
Publishing niche-focused blog content can also attract visitors who are already interested in your topic.
Build an Email List Early
Email marketing helps you stay connected with customers and bring them back to your store. Add a simple signup form and offer something small in return, such as a discount or early access to new products. Use email to introduce your brand, share updates, and build relationships instead of constantly pushing promotions.
Test Paid Advertising Carefully
Paid ads can help scale your store, but they should be tested carefully. Start with a small budget, test a few designs, and experiment with simple visuals or short videos. Retarget visitors who didn’t purchase, since they already showed interest in your store. Increase your ad spending only after you see consistent results.
Focus on Community and Brand Building
Successful print-on-demand brands don’t just sell products; they connect with a specific audience. Speak your niche’s language, share stories, and encourage customers to share their experiences. When people feel connected to your brand, they’re more likely to return and recommend your store to others.
Dropshipping vs Printing In-House: Which Model Is Right for You?
When starting a print-on-demand business, one important decision is how your products will actually be produced and shipped.
Most sellers either use a dropshipping-style POD partner or print the products themselves. Both approaches can work well, but they offer different advantages and challenges.
We already discussed the step-by-step process of doing it using a POD partner, but let’s discuss and compare both options here.
Dropshipping with a Print-on-Demand Partner
This is the most common approach for beginners. In this model, you connect your WooCommerce store to a print-on-demand provider such as Printful, Printify, or Gelato. When a customer places an order on your website, the order is automatically sent to the supplier.
The supplier then prints the product, packs it, and ships it directly to the customer on your behalf.
This model is popular because it removes most of the operational work. You don’t need printing equipment, storage space, or shipping logistics. You can focus on designing products, building your brand, and marketing your store.
However, there are a few trade-offs. Because the supplier handles production, your profit margins are usually lower, and you have less control over product quality and shipping speed. Still, for most new entrepreneurs, this is the easiest way to start.
Printing Products In-House
The second option is producing the products yourself. Instead of relying on a print provider, you invest in printing equipment such as a DTG printer, heat press, sublimation printer, or embroidery machine.
When an order comes in, you print the product yourself, package it, and ship it to the customer.
The biggest advantage of this model is higher profit margins and full control over quality. You can experiment with different materials, packaging, and branding to create a more unique customer experience.
However, printing in-house also requires more responsibility. You must manage equipment, maintain supplies like ink and blank products, and handle the production process for every order. This makes the business more hands-on and harder to scale quickly.
Choosing the Right Approach
Both models can be successful depending on your goals. If you want to start quickly with minimal upfront investment, using a print-on-demand partner is usually the best option. It allows you to test designs and validate your niche without high costs.
If your store grows and you want more control over production and profit margins, printing in-house may become a good long-term strategy.
Many successful brands actually combine both approaches – using POD suppliers to handle most orders while producing certain products themselves for higher margins or special collections.
Frequently Asked Questions About WooCommerce Print on Demand
Which print-on-demand platforms integrate with WooCommerce?
Popular print-on-demand platforms include Printful, Printify, Gelato, CustomCat, and SPOD, all of which allow you to design products, publish them to your WooCommerce store, and automatically send orders for fulfillment. When connected, these platforms handle printing, packaging, and shipping while WooCommerce manages your storefront and customer orders.
Do I need a plugin to run print-on-demand on WooCommerce?
No, you don’t strictly need a plugin to run a print-on-demand store on WooCommerce, but using one is the easiest and most common way to connect your store with a fulfillment provider. Most platforms like Printful, Printify, or Gelato offer official WooCommerce plugins that automatically sync products and send orders to the supplier for printing and shipping. Without a plugin, you would need to handle orders manually.
What are the best WooCommerce plugins for product personalization in print-on-demand?
Some of the best WooCommerce plugins for product personalization in print-on-demand include WowAddons, Customily, and WooCommerce Product Options. These plugins allow customers to customize products by adding text, uploading images, or sharing other files, which is essential for personalized POD products.
How much does it cost to start a WooCommerce print-on-demand store?
Starting a WooCommerce print-on-demand store usually costs $50–$200 initially, depending on your choices. Typical expenses include domain registration, hosting, and possibly a premium theme or plugins. The print-on-demand platform itself usually has no upfront cost; you only pay the product and printing costs after a customer places an order.
What products sell best for WooCommerce print-on-demand stores?
Some of the best-selling print-on-demand products include t-shirts, hoodies, mugs, phone cases, tote bags, and posters. These items are popular because they are affordable, easy to customize, and work well for niche designs. Apparel and gift items tend to perform especially well because customers often buy them for personal expression or special occasions.
Summing Up: Building a Successful WooCommerce Print-on-Demand Store
Starting a WooCommerce print-on-demand business is one of the most accessible ways to enter e-commerce today. Because products are only created after a customer places an order, you avoid large upfront investments, inventory risks, and complicated logistics.
Instead, you can focus on choosing the right niche, creating designs that resonate with your audience, and building a store that delivers a smooth shopping experience.
WooCommerce makes this model even more powerful because you fully control your store, your brand, and your customer data. By combining reliable print-on-demand suppliers, smart pricing, and consistent marketing, you can gradually grow a store that generates steady sales.
The key is to start simple. Test your niche, launch a few well-designed products, learn from your early customers, and improve over time. With the right strategy and tools, a WooCommerce print-on-demand store can grow from a small experiment into a sustainable online business.