Changing the featured image size in WordPress can be done in three reliable ways: by adjusting the default image dimensions in the Media settings, customizing the size using a Full Site Editing (FSE) theme, or using a plugin to define and apply custom sizes.
Each method gives you control over how featured images appear across your posts, helping you maintain a consistent design and improve visual presentation.
In this blog, I will discuss all the methods step-by-step so you can choose the one that fits your needs best.
What Is WordPress Featured Image?
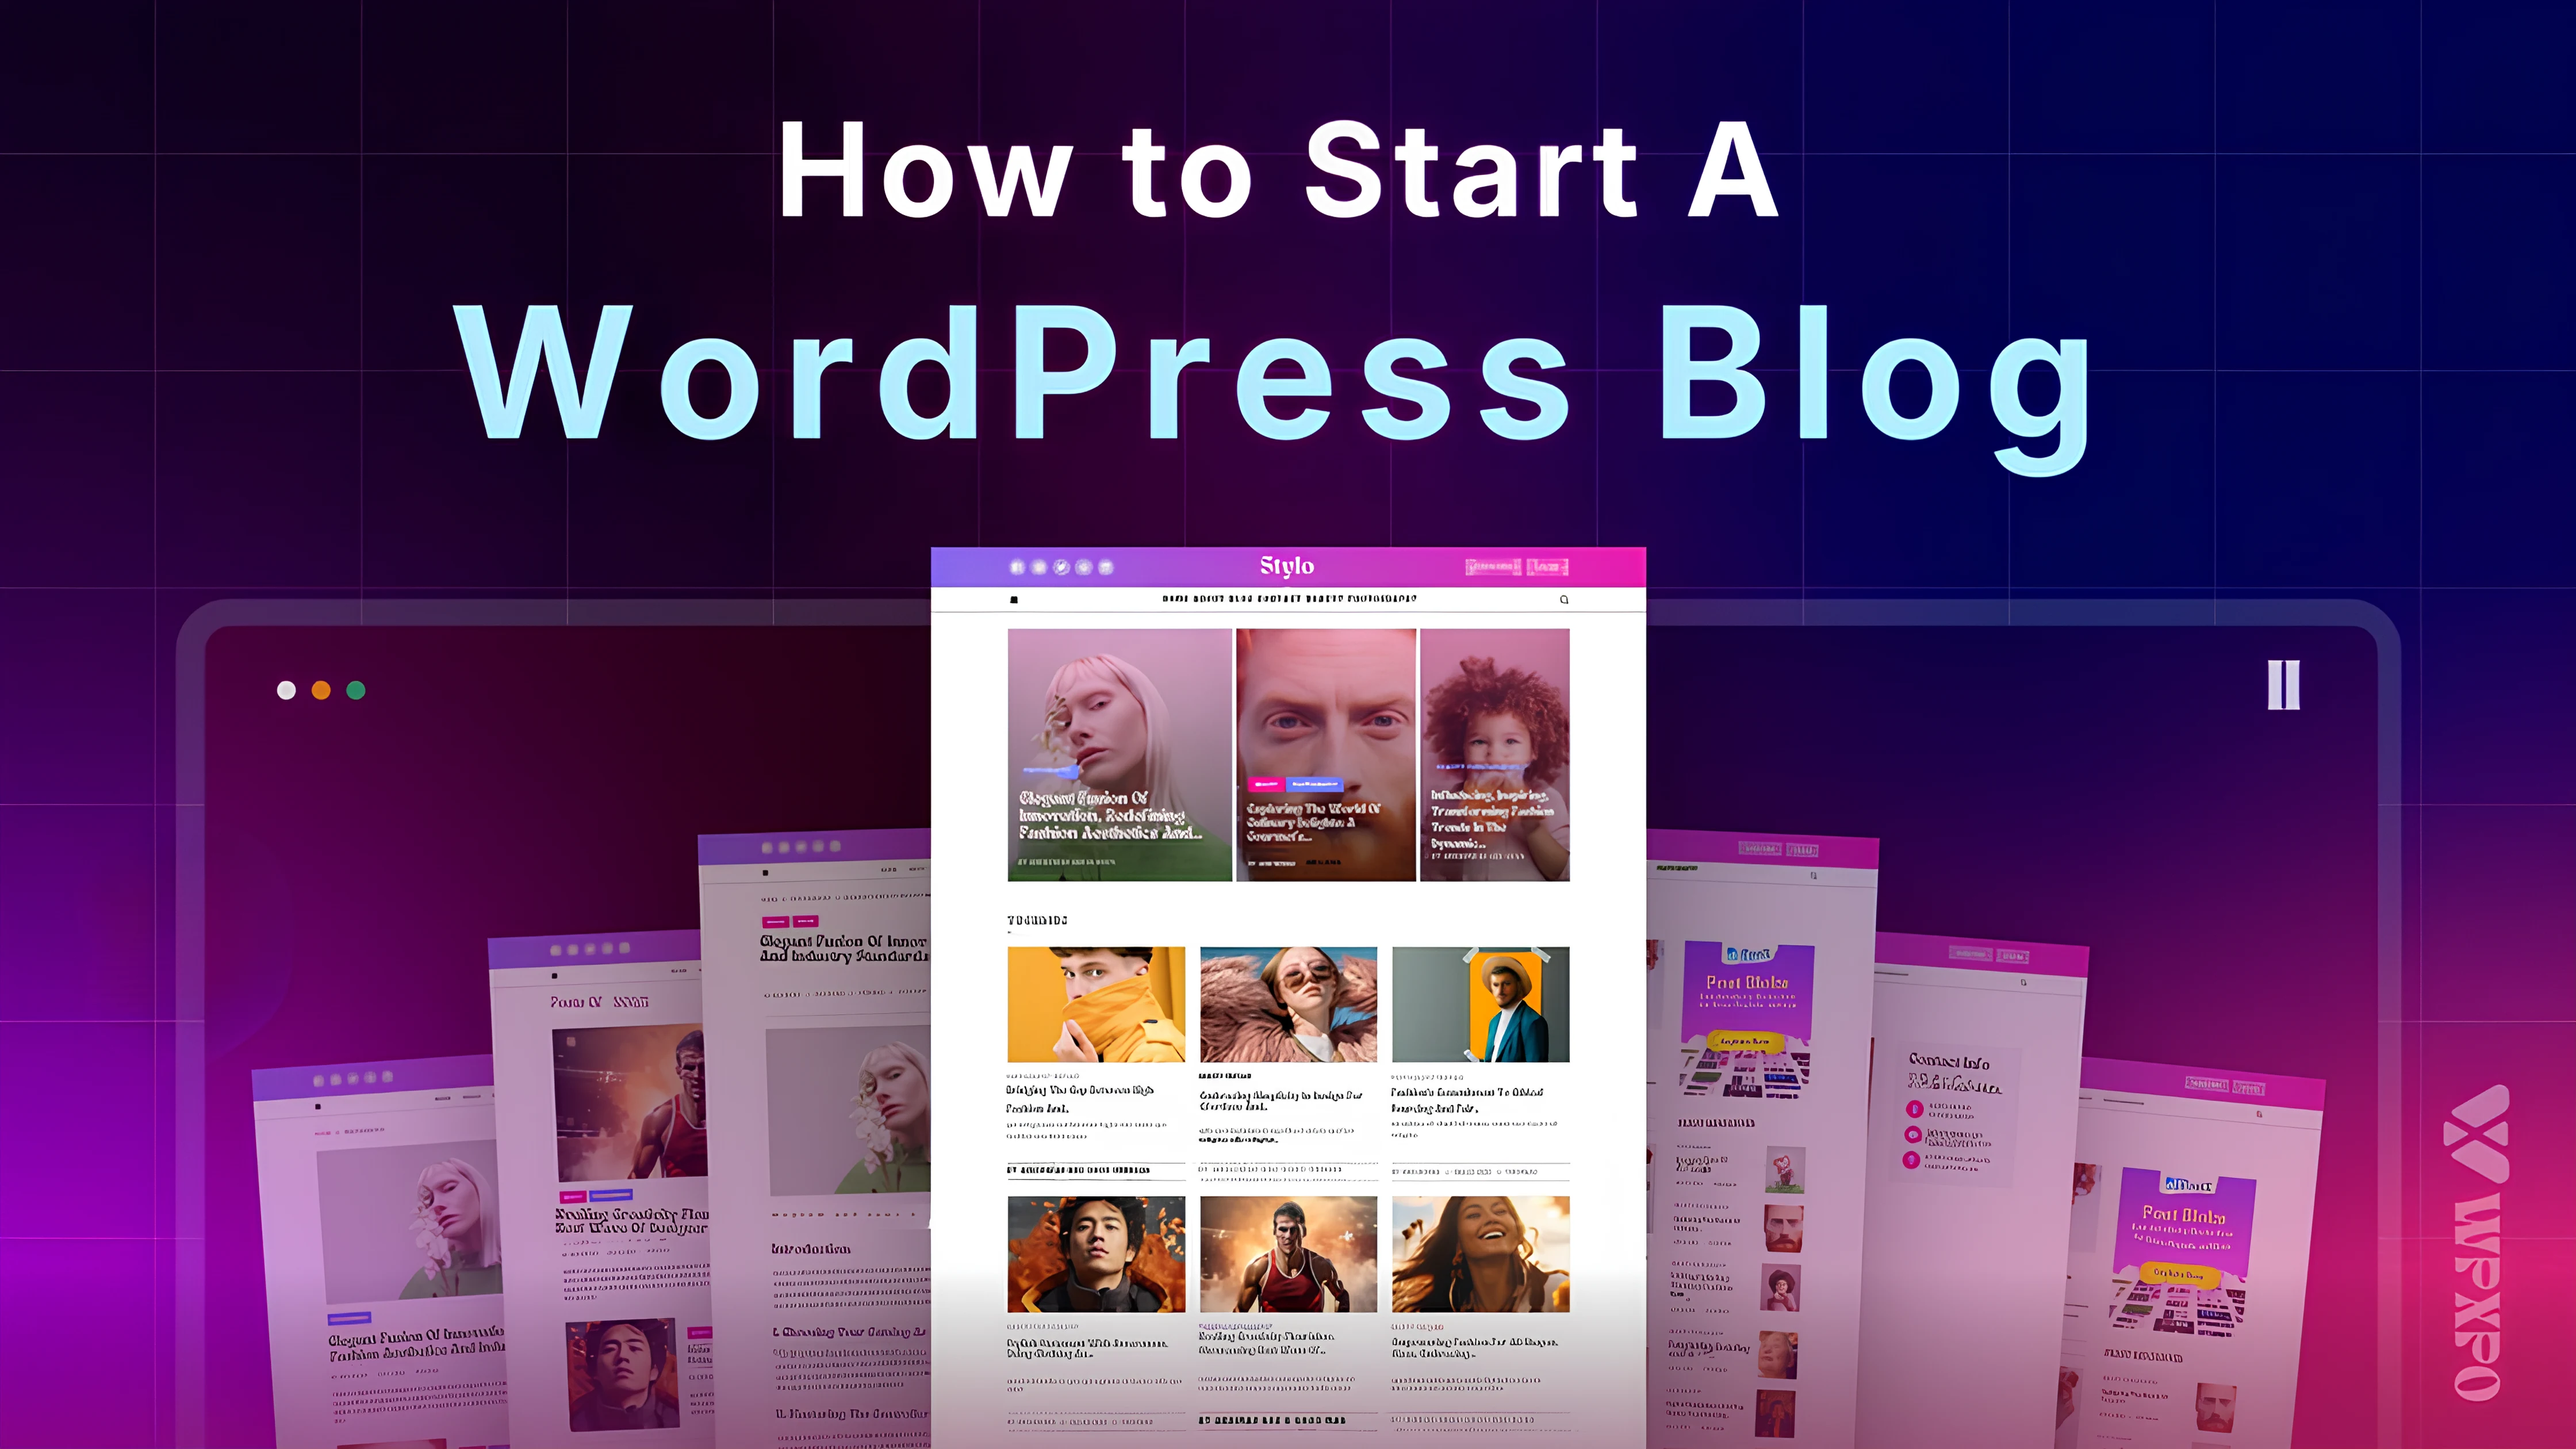
A featured image refers to a noteworthy image that represents the main idea or theme of a post, page, or other form of content on your WordPress website.
You can generally see featured images:
- At the top of a blog post
- As cover images in the list of posts
- As thumbnails when a post is shared on other platforms
Think of the feature image as the first impression of a piece of content. Choosing the right featured image size in WordPress can have a major impact on how your posts look. And how your audience engages with them.
Therefore, you should be careful of how you present the featured images on your WordPress site.
Importance of Featured Images For Your WordPress Site
Featured images are an integral part of any website. Even though you may not pay special attention to them at times, they provide great value to your users.
Here’s why featured images are important for your WordPress site.
- Represent Content: Featured images are the representatives of your content. They highlight what a post is about and give a signal to users whether they should care. So, based on the featured image, sometimes a user may decide if he wants to click on an article or not.
- Increase Visual Appeal: A good featured image enhances the overall visual of a website. When you design featured images using best practices (discussed in the next section), users will have a better experience exploring your site leading to increased engagement.
- Impact SEO: Featured images can have an impact on your site’s SEO performance. When users see engaging featured images, they tend to click more on posts. This leads to increased dwell time. Also, when your posts are shared online, the featured images work as thumbnails. interesting thumbnails can easily lead to increased click-through rates.
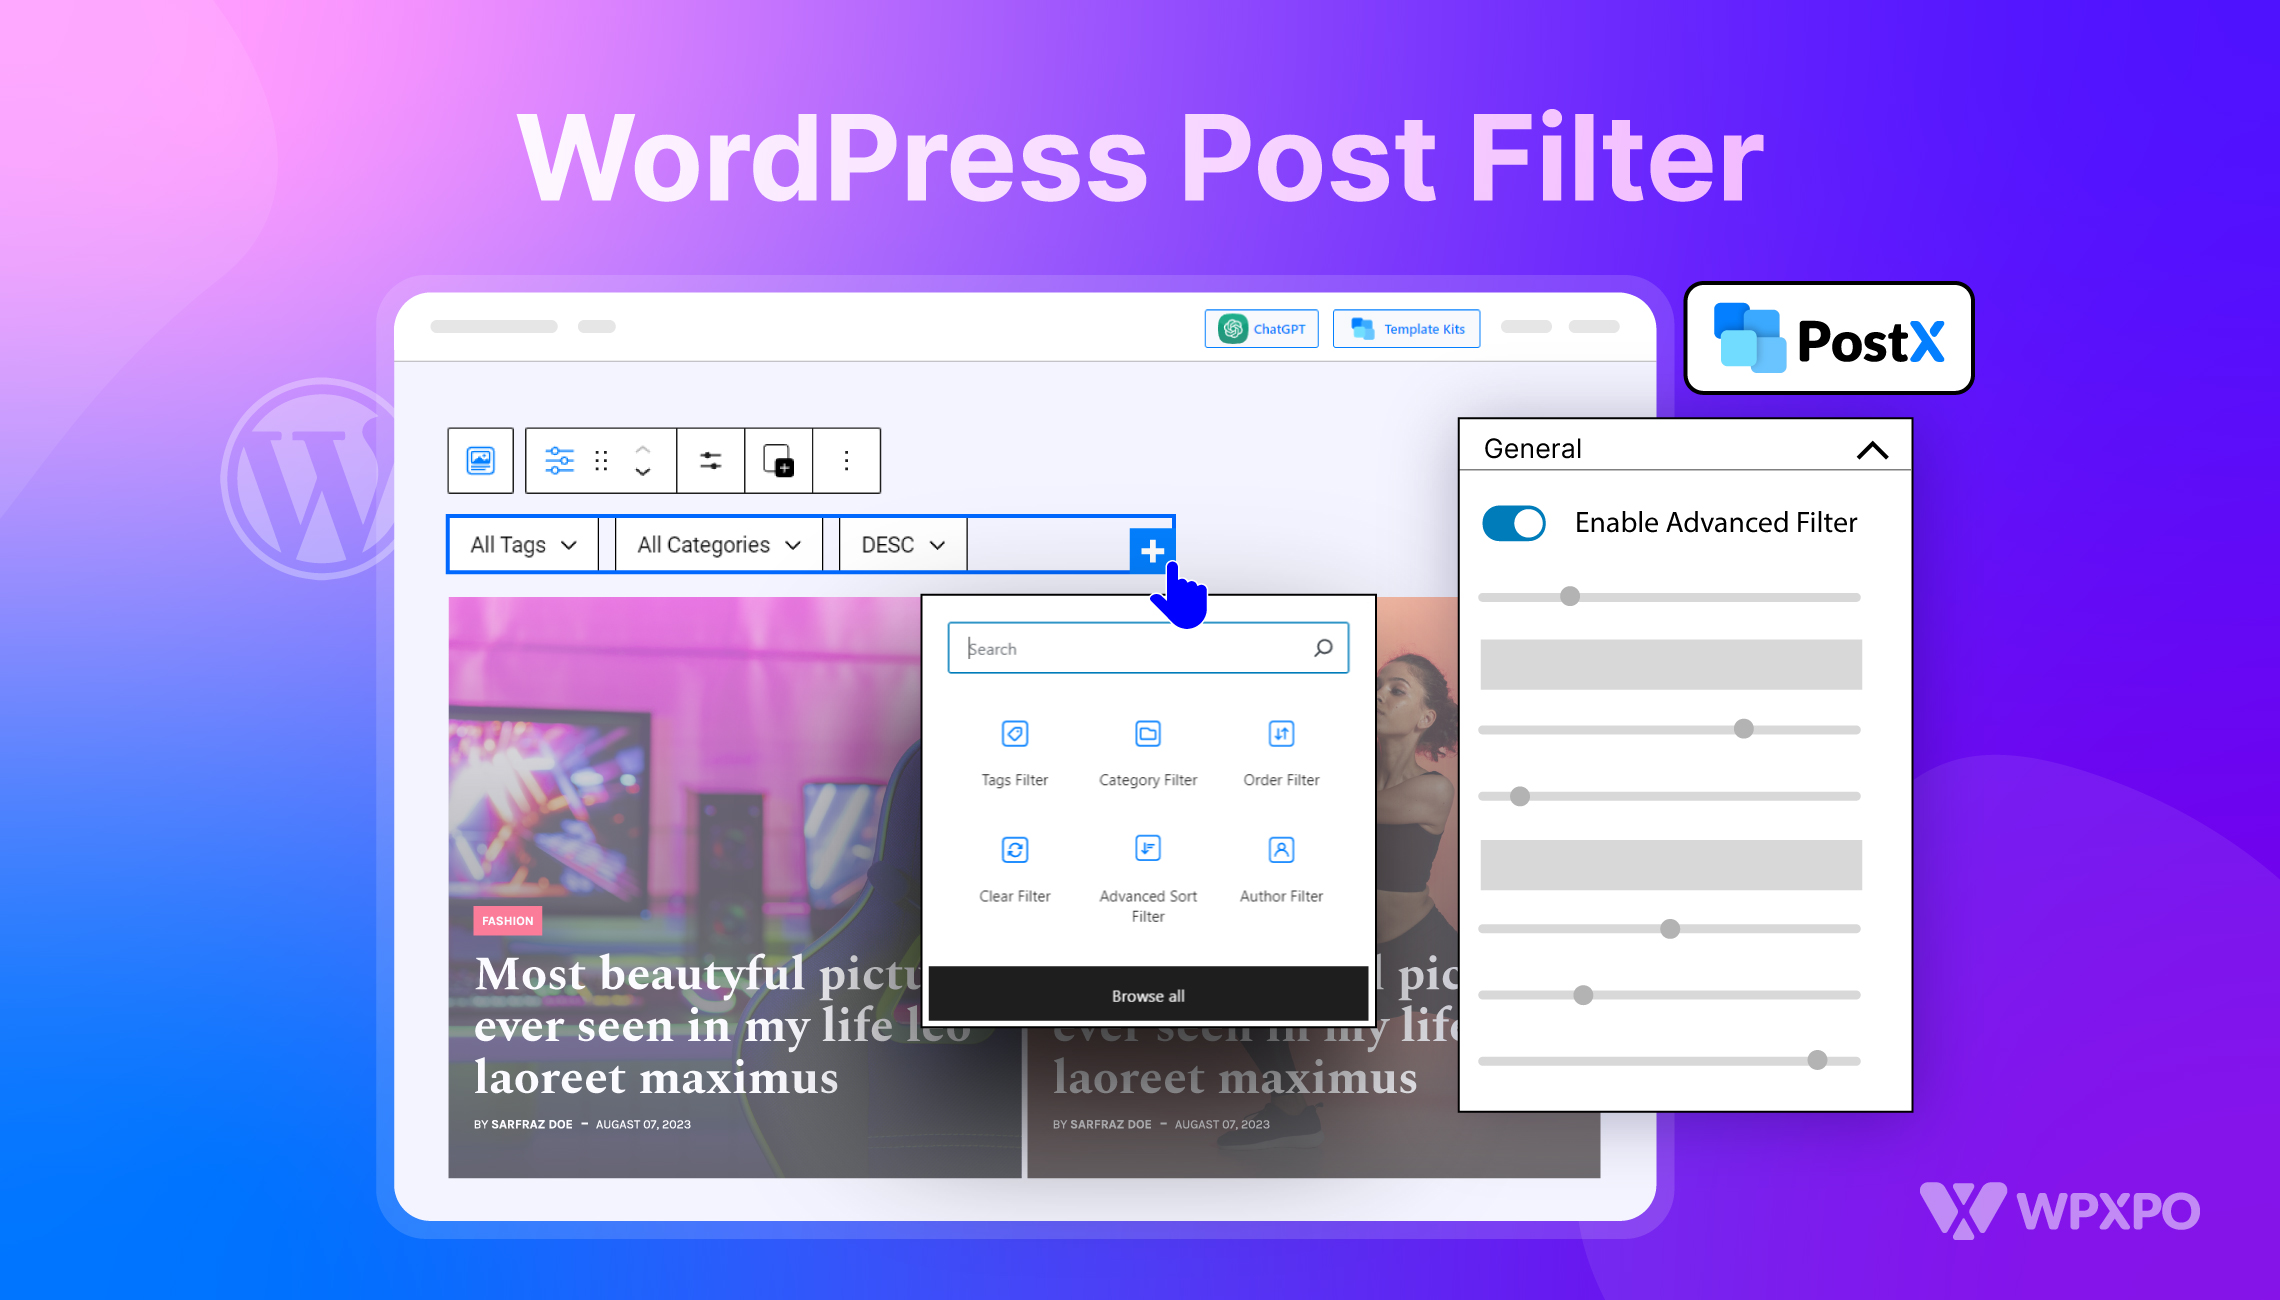
Method 1: Change Featured Image Size Using WordPress Plugin
One of the easiest and most efficient ways to change the featured image size in WordPress is by using a WordPress plugin.
Now, there are many page builder plugins in the market, but PostX is a dynamic Gutenberg site builder that offers a visual, no-code way to customize almost every part of your site – including featured images.
So, we will use this plugin’s powerful feature, Site Builder, to create fully customized featured image sizes. We will use custom post templates and define different featured image sizes for specific posts, pages, or categories.
Here’s how you can do it step-by-step:
Step 1: Install and Activate the Plugin
Simply go to your WordPress dashboard.
- Navigate to Plugins > Add New.
- Search for PostX.
- Click Install Now and then Activate the plugin.
For more information on installation, check out the official documentation.
Step 2: Use the Site Builder to Create A Template
After installation, go to the PostX dashboard and navigate to PostX > Site Builder.
Click on Create Template to start designing a custom layout.
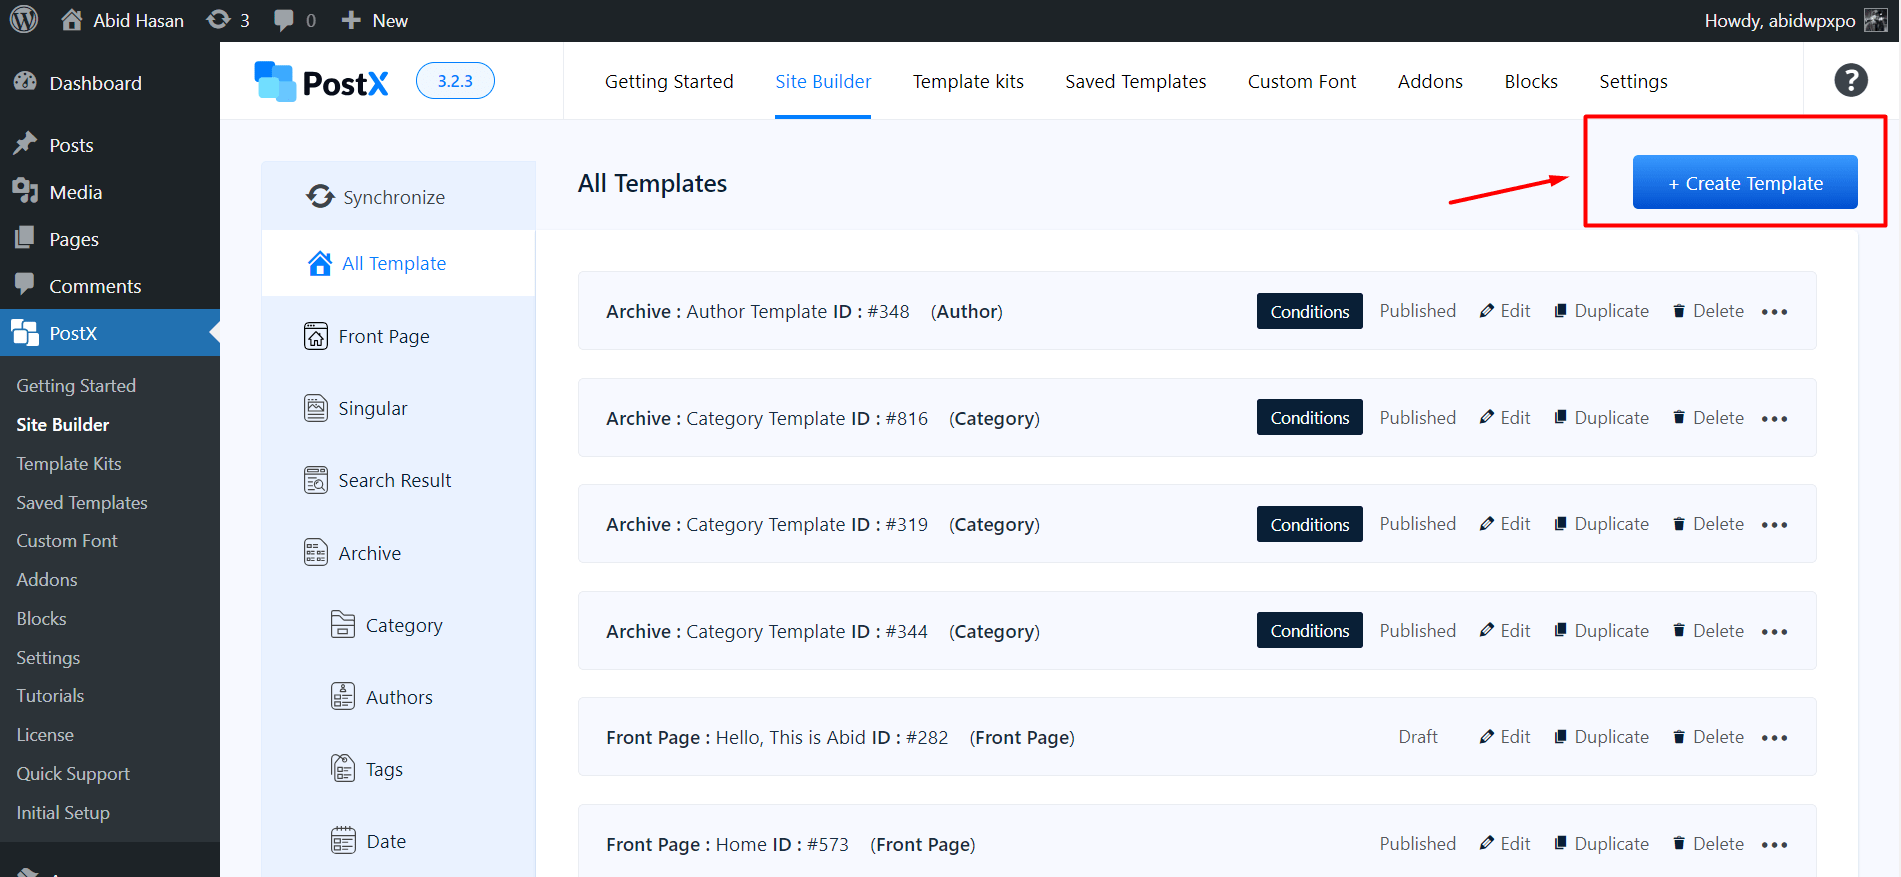
Now, you can choose a premade template or start creating one. I recommend starting with a premade template.
As we are interested in changing the featured image for WordPress posts now, we will choose the “Singular” template type.
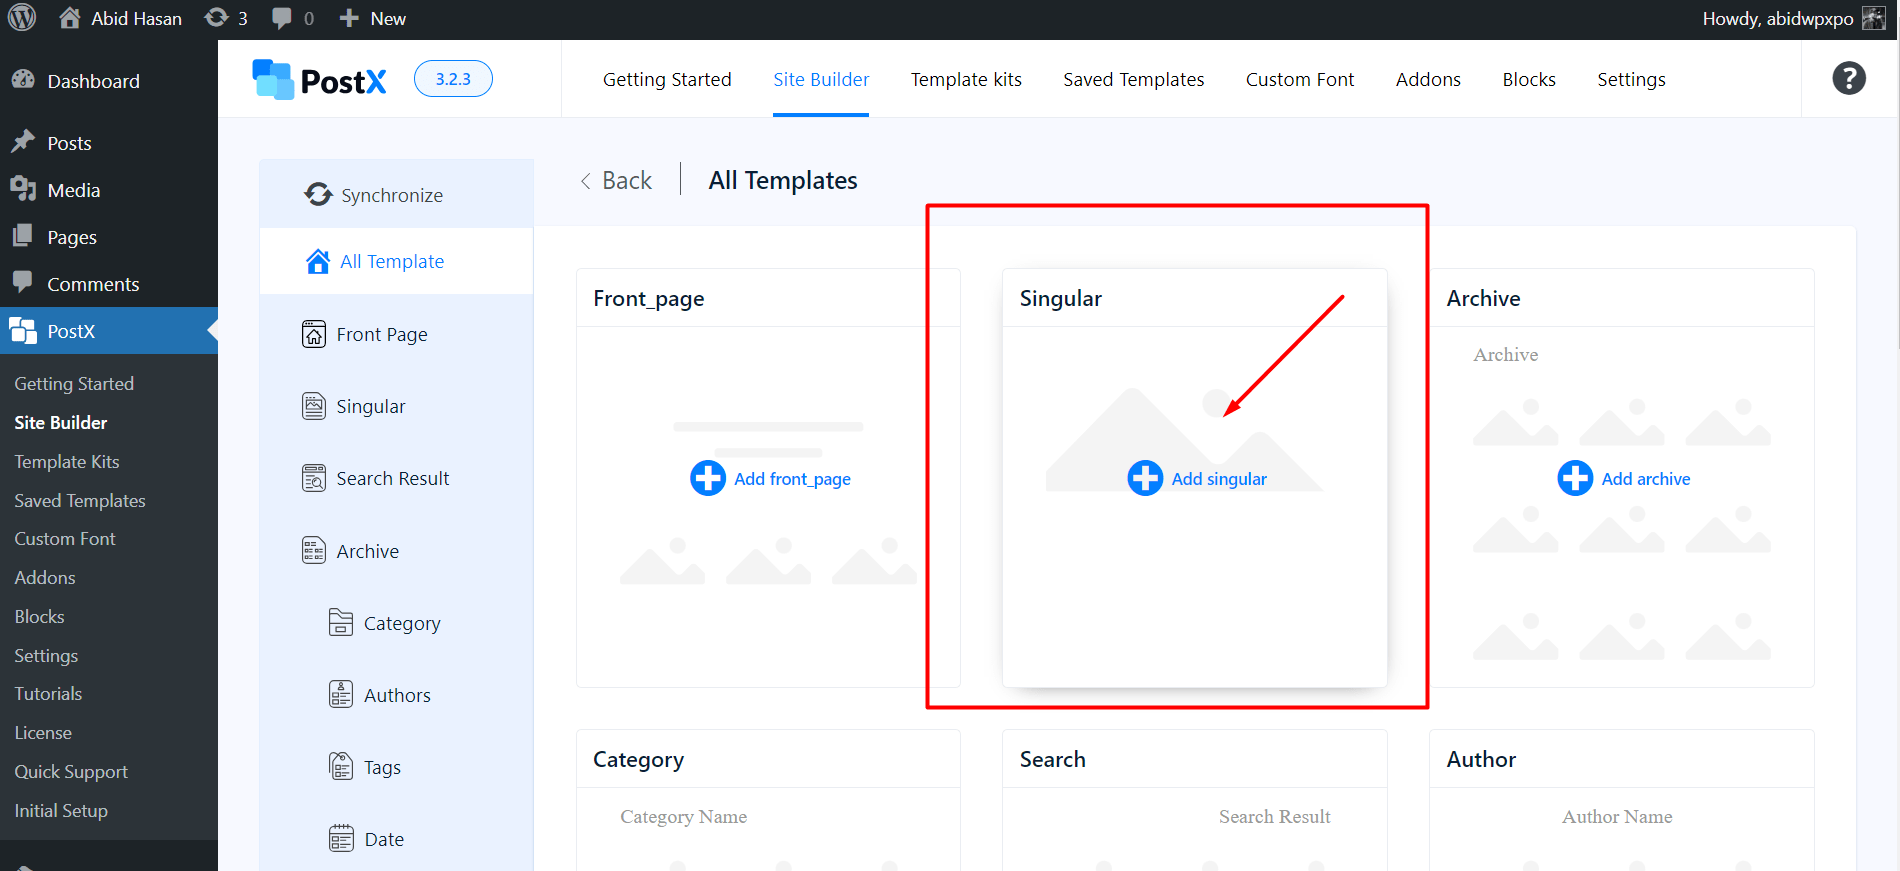
This is used for customizing individual posts, pages, or custom post types.
Step 3: Set Custom Conditions for the Template
After selecting a template, it will direct you to the Gutenberg editor, and you should see the Conditions tab.
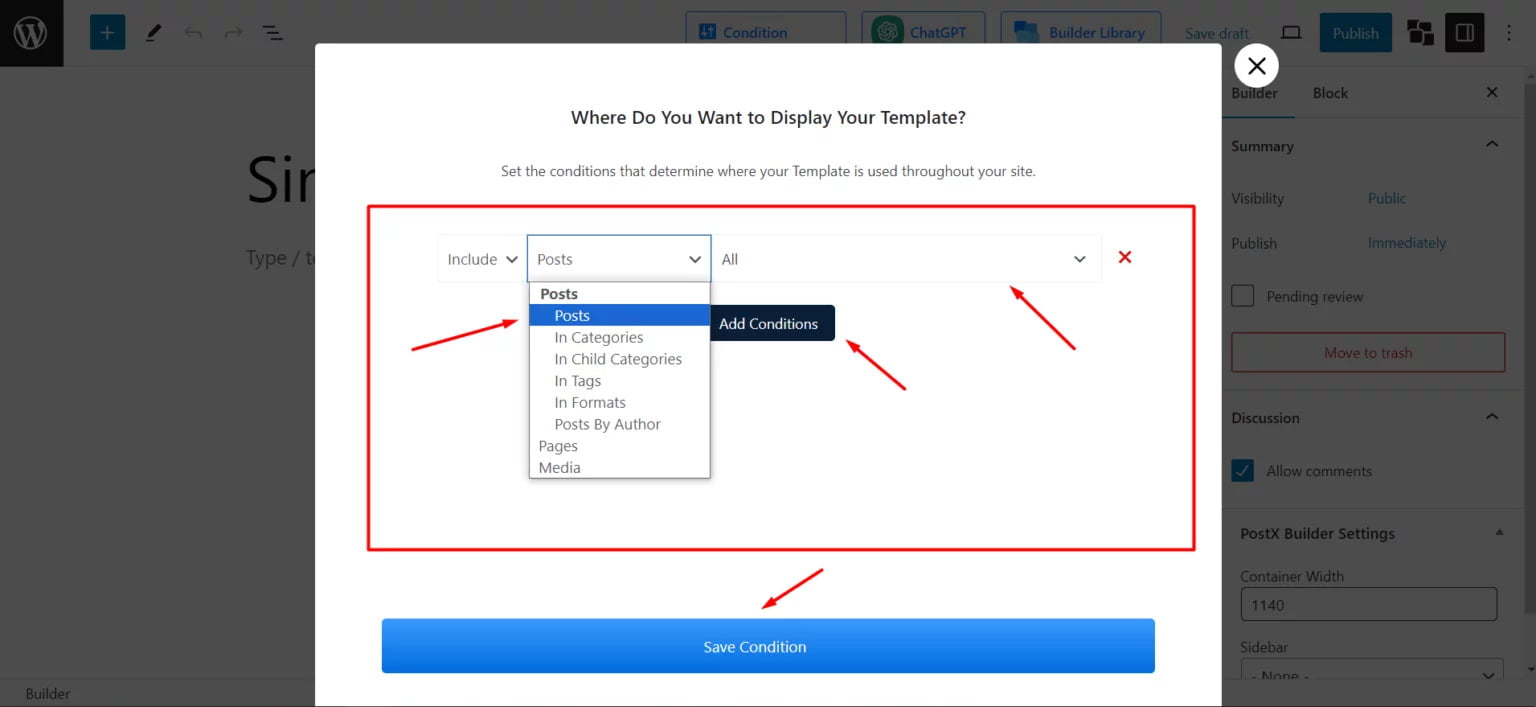
Here, use the dropdown menus to define where this template should apply — to all posts, specific posts, specific pages, or certain categories.
For now, I will choose All Posts as I want to maintain the same featured image size for all my blog posts (but you can customize this too, which I will discuss).
Click on Save Condition to apply your rules.
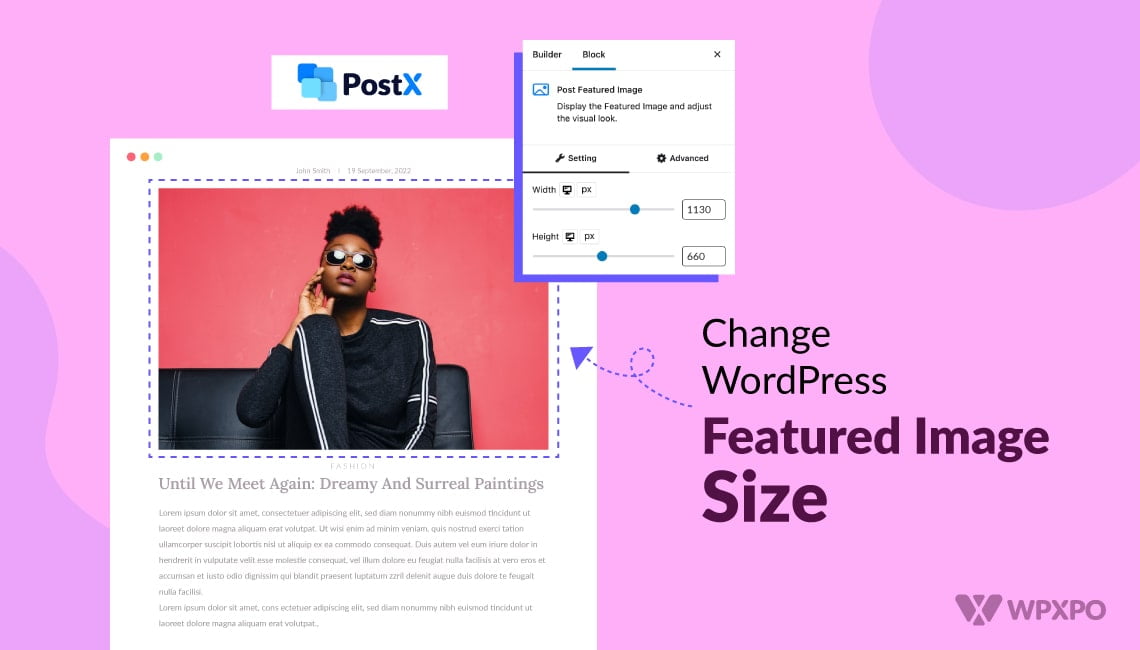
Step 4: Customize the Featured Image Size
Once you’re in the editor view, locate and select the Post Featured Image/Video block.
If not found, click the “+” icon to bring up the block library. From here, search by the block’s name, and it should appear.
From the block settings panel, you can customize the: Width, Height, Border Radius, Alignment, and much more for the featured image.
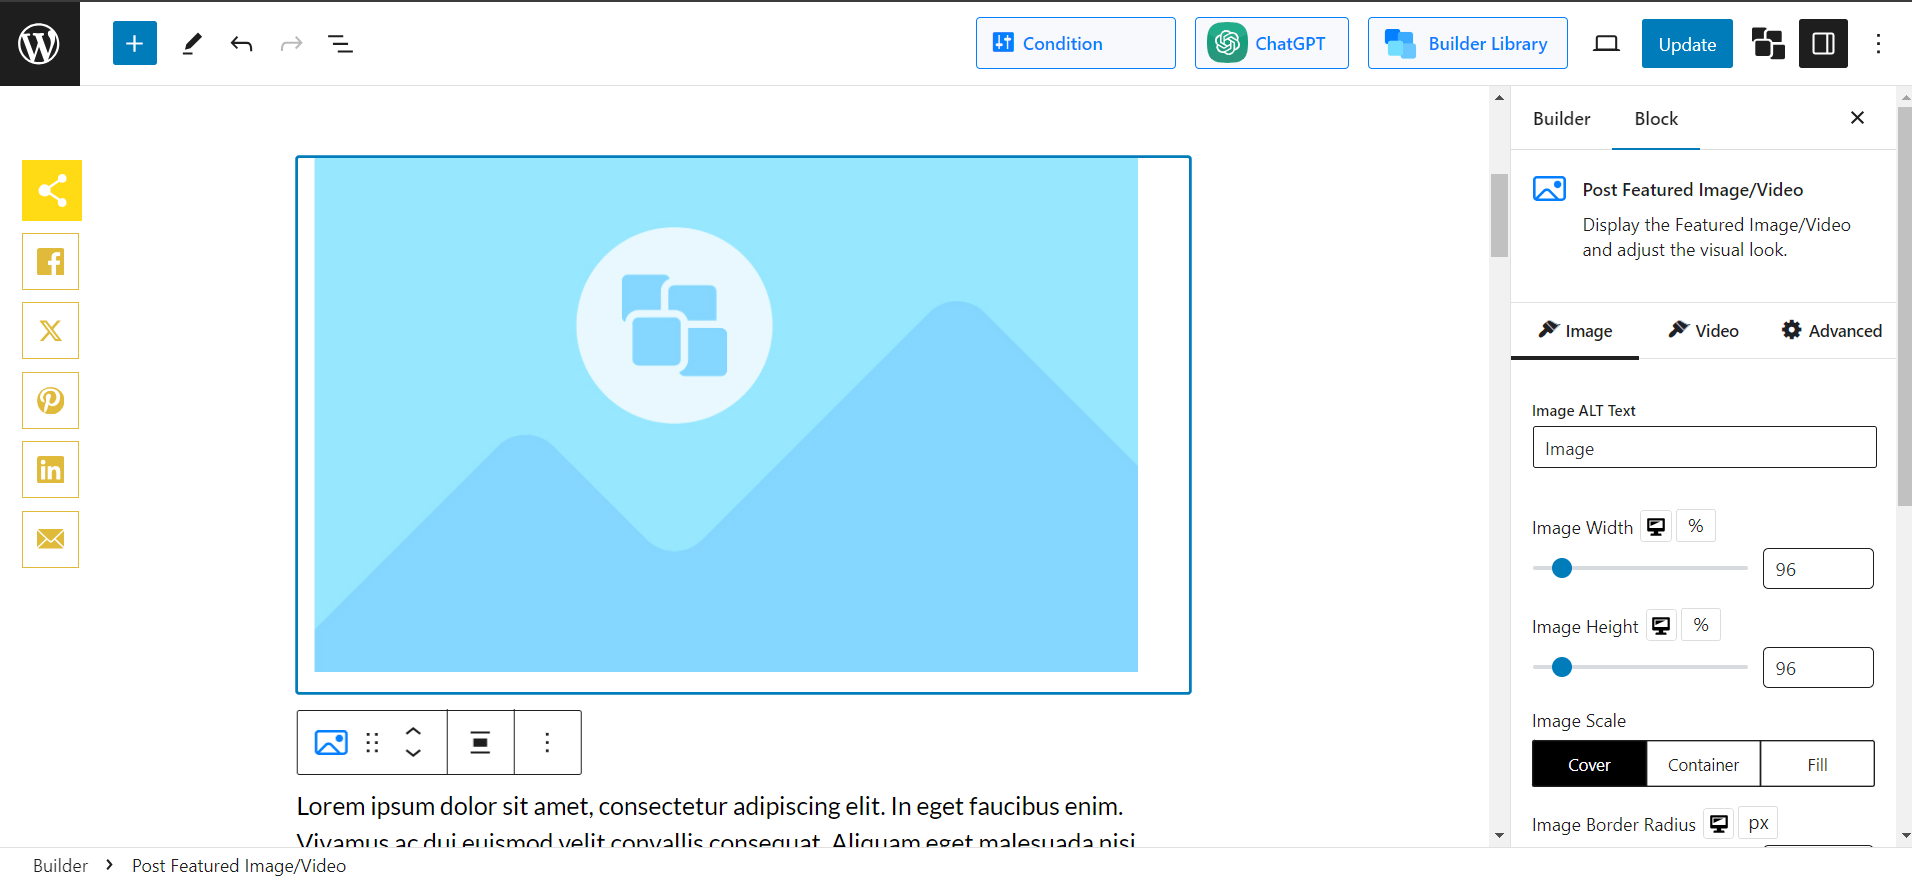
You can also fine-tune advanced options like: Margin, Padding, Box Shadow, etc.
Once done, save your changes. The new template with a customized featured image size will now display across your selected posts, pages, or categories.
🧩 Use Cases: Set Featured Image Sizes for Specific Content Types with PostX
One of PostX’s biggest advantages over other methods is the flexibility it offers through its condition-based site builder. Let’s explore some targeted use cases:
i. Change Featured Image Size for a Specific Post
On the Conditions screen: Select Posts from the first dropdown.
In the second dropdown, search for the specific post you want to target and select it. Save the condition.
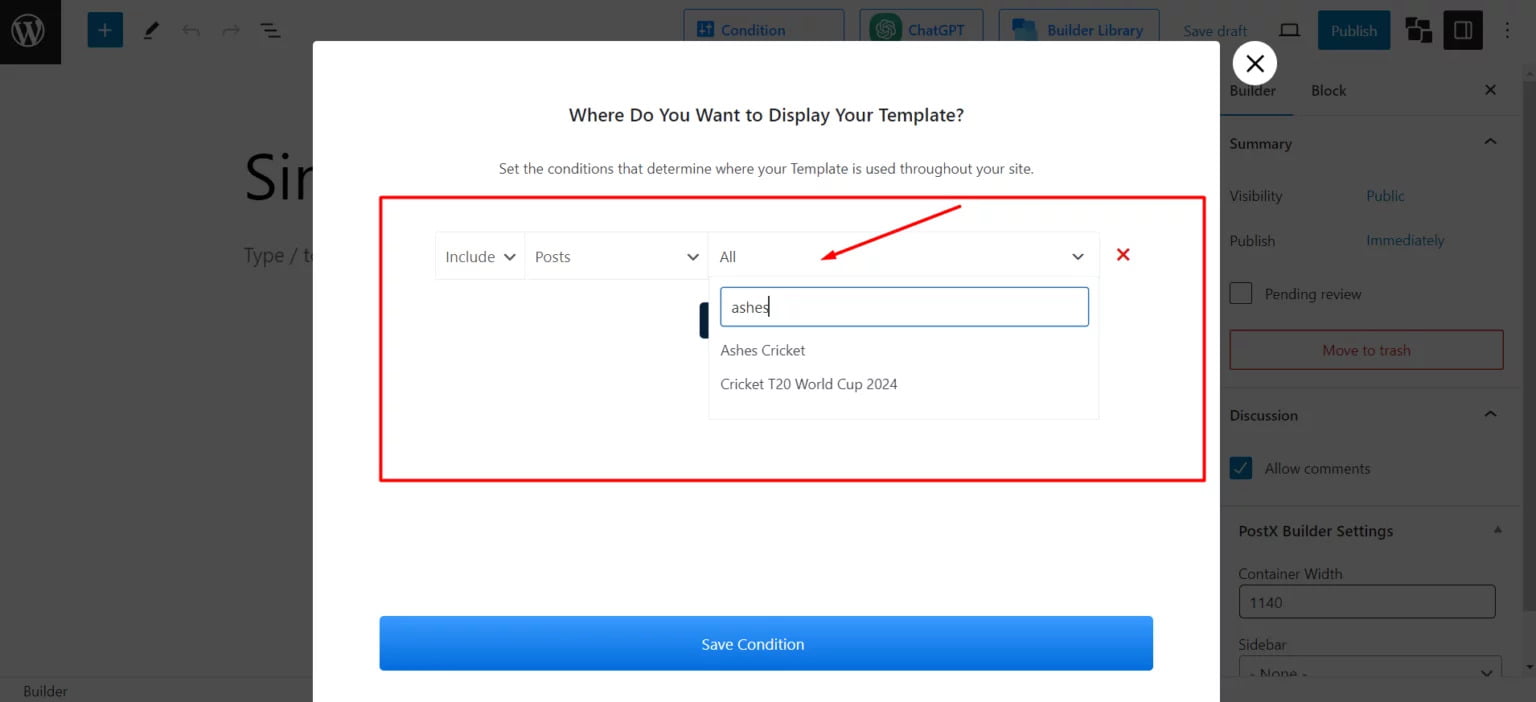
Now, you can apply unique featured image settings just for that single post — it will not affect featured images for other posts.
ii. Change Featured Image Size for a Specific Page
In the Conditions tab:
- Choose Pages from the dropdown.
- Search and select the specific page (e.g., “About Me”).
- Save the condition.
This gives you a fully custom featured image size for that particular page.
iii. Change Featured Image Size for Posts from a Specific Category
In the Conditions tab: Select In Categories from the dropdown.
Choose the desired category (e.g., “Football”, “Cricket”)and Save the condition.
Now, each category can have its own template with a distinct featured image size, allowing for highly customized visual branding across your site.
💡 Bonus: Display a Featured Video Instead of an Image
PostX also supports featured videos, enabling you to set a video as the main media for your post instead of a static image.
This is a powerful way to boost engagement, especially for multimedia content.
Here’s a helpful video to get you started:
Method 2: Change Featured Image Using FSE Theme Settings
If you use an FSE (Full Site Editor) theme like WordPress’s popular Twenty Twenty Three, you can change the featured image size of single posts, pages, and many other sections by editing the theme settings.
Now, you should keep in mind that you need to use Theme Templates to make changes across several sections of your WordPress site simultaneously.
In case you need a refresher, Templates are a powerful feature offered by WordPress FSE themes. You can use these templates to create a unique structure and layout for pages, posts, and specific types of pages.
For example, in the Twenty Twenty Three theme, you can create templates for Pages, Single Posts, Blog Home, Page 404, All Archives, and so on.
In the next two sections, you will see how to change featured image size using the power of templates.
i. Changing Featured Image Size for Blog Posts
Here are the detailed steps on how to change the default featured image size for blog posts in WordPress themes:
- Go to Appearance > Editor > Templates > Single Posts
- Click on the Pencil icon to open up the edit view.
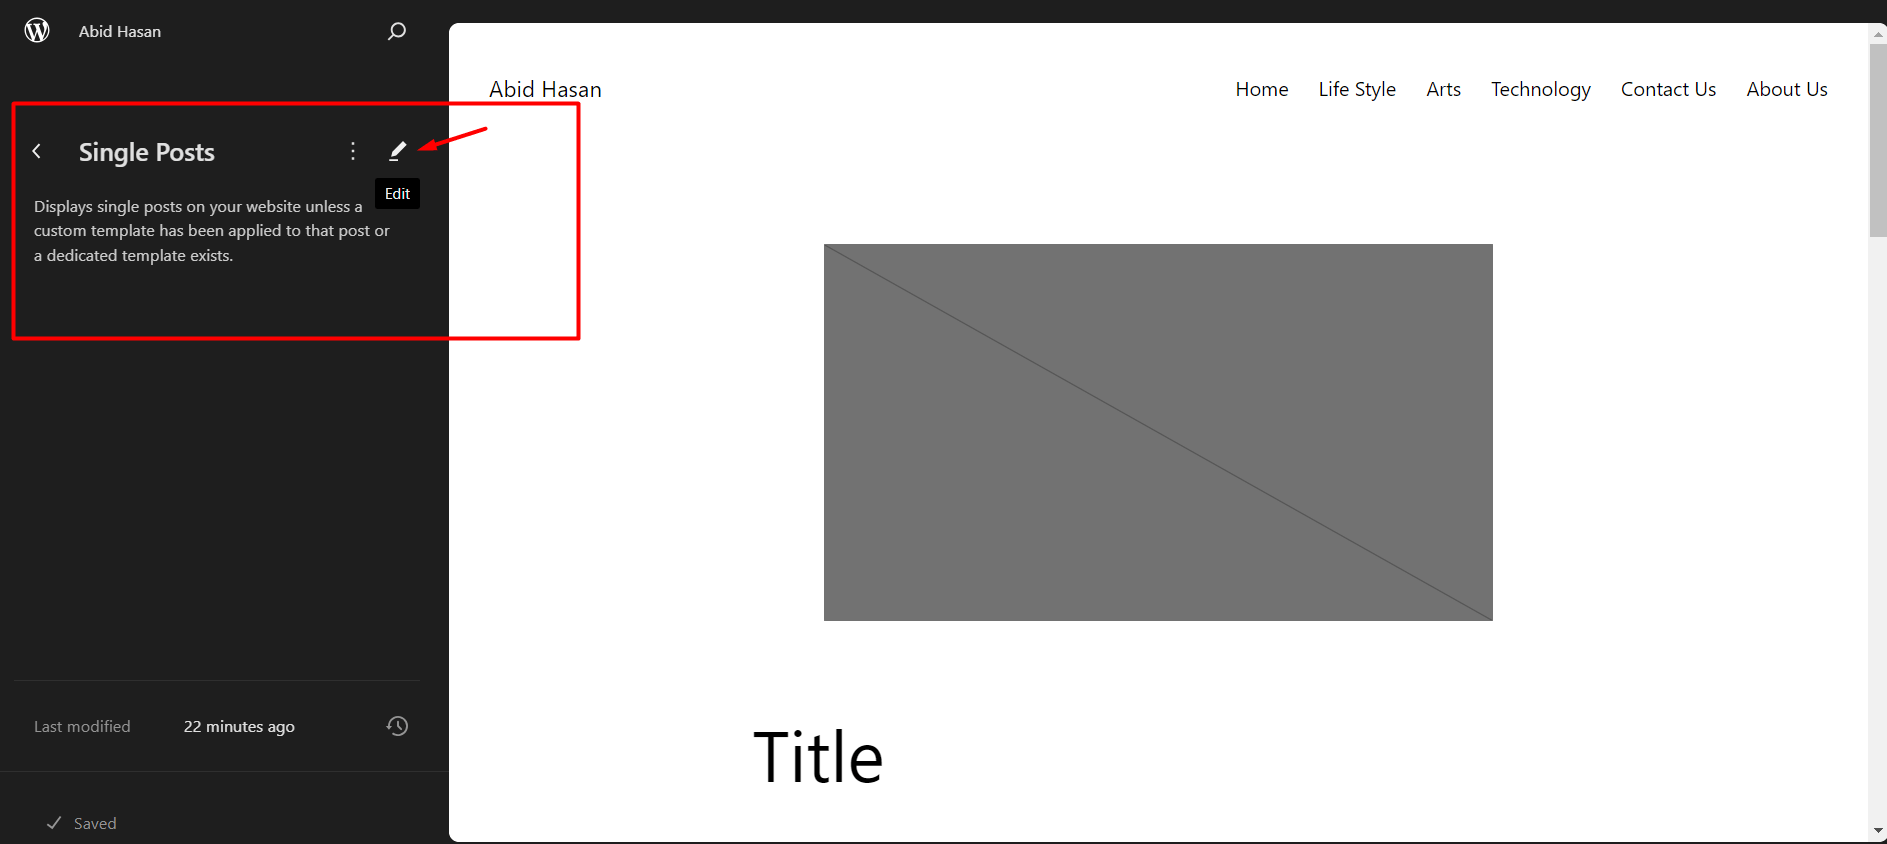
- Now select the Featured Image block to edit its settings.
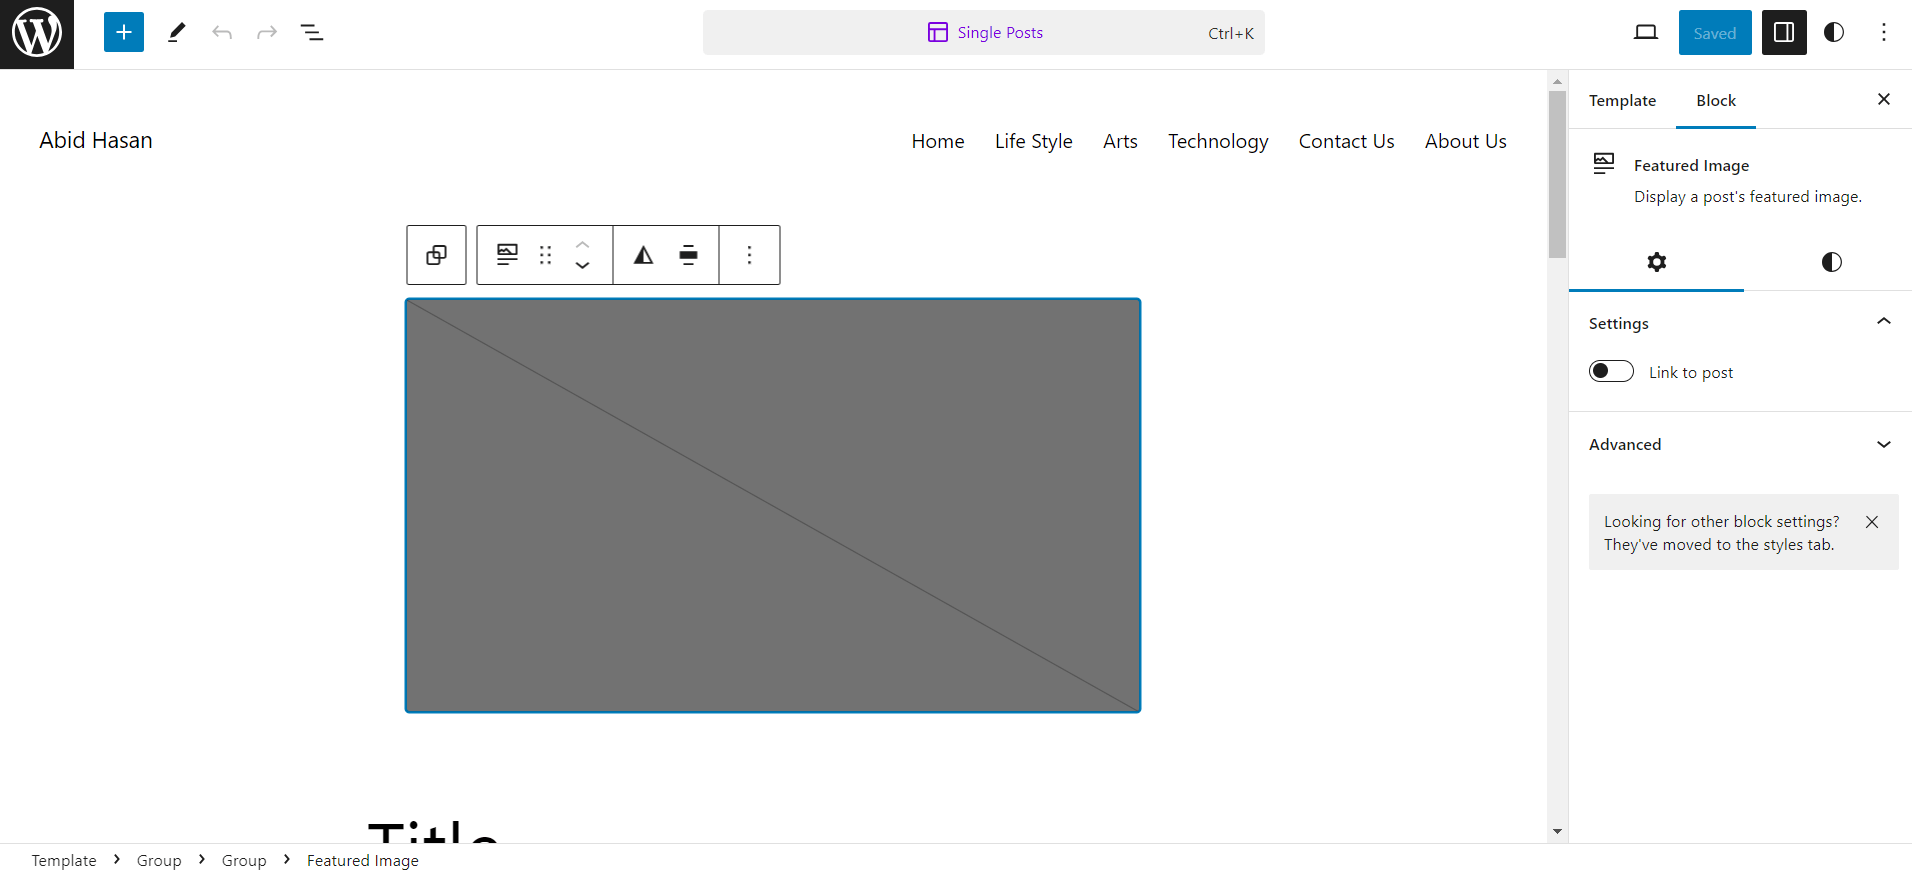
- Click on the Styles section to see all the editing options for the image.
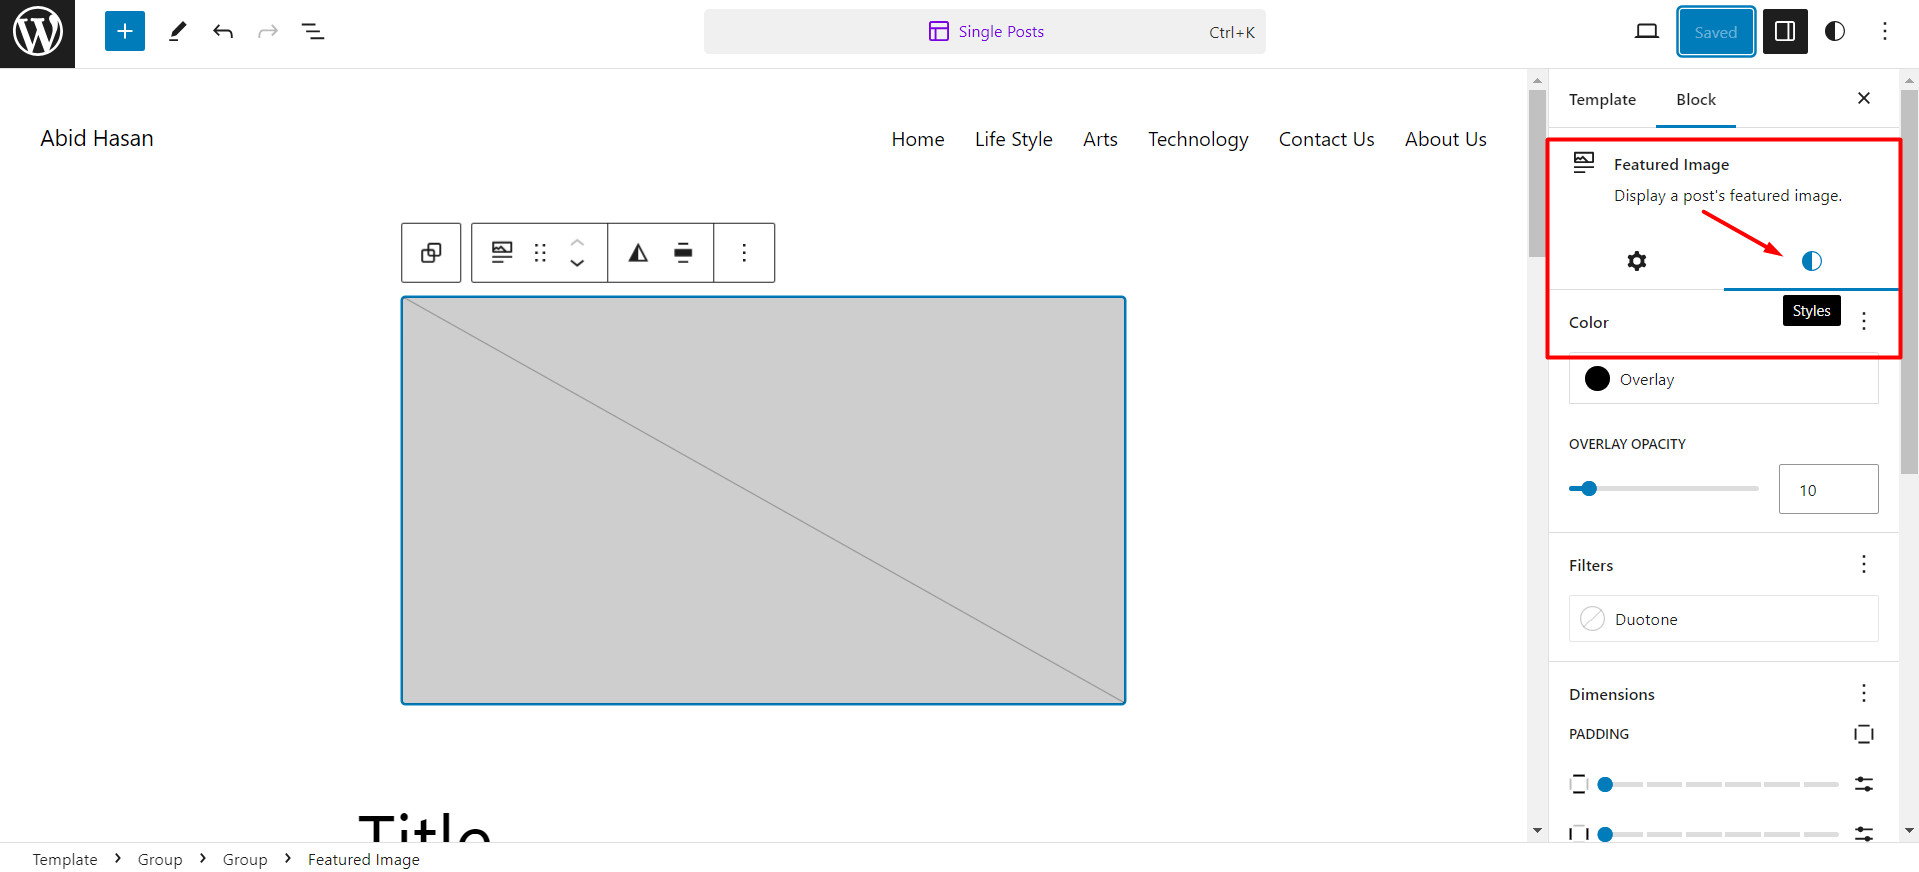
- Change the Aspect Ratio, Height, Width, or the Scale of the featured image to your liking. Also, you can change other settings as you need.
Following these steps, you can easily change how the featured image looks across all of your blog posts. Whether you want to show a full-size image or want a square shape, now you can do so.
ii. Changing Featured Image Size For Pages
In addition to single posts, you are also able to customize featured images for your WordPress pages. The steps are quite similar to the ones mentioned above.
To change the default featured image size for pages in WordPress themes:
- Go to Appearance > Editor > Templates > Pages
- Click on the Pencil icon to open up the edit view
- Select the Featured Image block to edit its settings, and Click on the Styles section
- Edit the Aspect Ratio, Height, Width, Scale, and other settings based on your preferences
This will change the featured image for all pages on your WordPress site.
Method 3: Change Featured Image Size Using Thumbnail Settings
If you wish to change the featured image size in WordPress without the help of a plugin or a theme, you can do so using the default thumbnail image setting of WordPress.
Whenever we upload an image to our WordPress site, WordPress creates three copies of the same image so that it can be used in different sections of the website. This avoids the need to resize the image every time a specific page loads.
WordPress provides three types of sizes for images. These are Thumbnail, Medium, and Large.
The thumbnail images are shown as cover images for your blog posts. So, thumbnail images are often considered as featured images.
Now, here are the steps to change the default thumbnail image size of WordPress:
- On your WordPress Admin dashboard, go to Settings > Media
- Under the Image Sizes section, find the Thumbnail size option
- Put in the desired Width or Height based on your needs
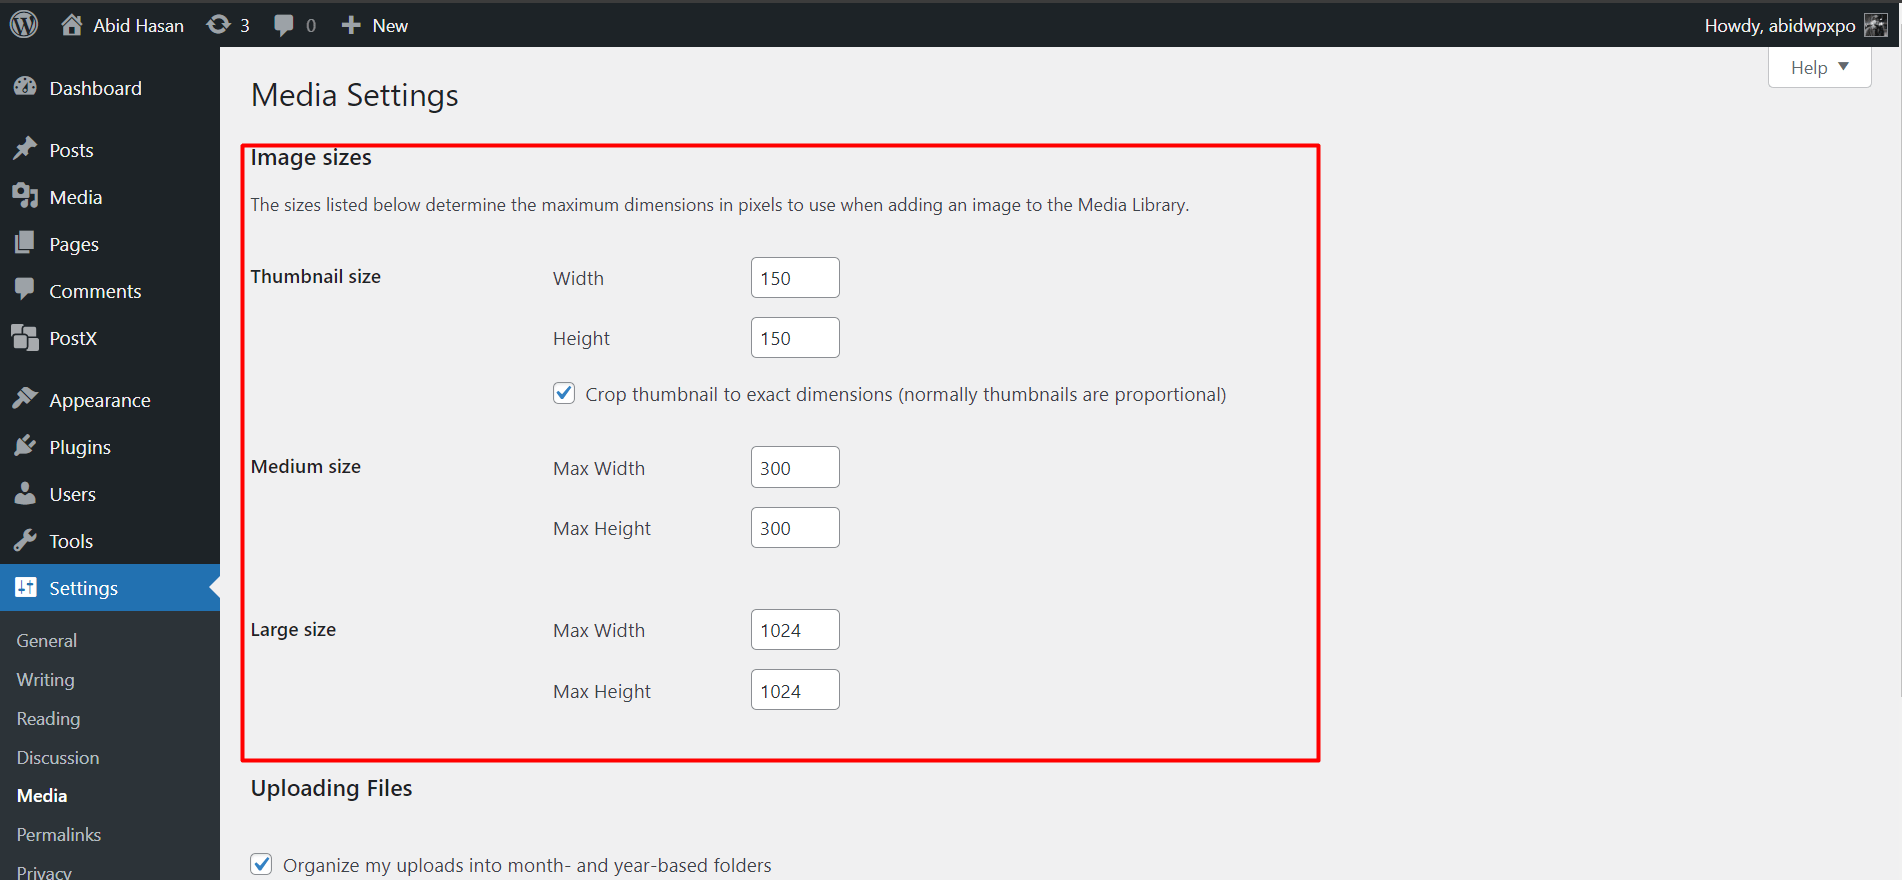
- Click on Save Changes to see the changes in effect
Note that you will only see the changes for the new images you upload. For the existing images in the media library, you may want to replace the images with new ones.
Why Should You Change Default Thumbnail Image Size in WordPress?
The default thumbnail image size in WordPress is 150 x 150 px. This size may not be appropriate for all types of content on your site.
For instance, if your post requires high-quality images to provide more details, setting the default thumbnail will lead to poor user experience.
For that reason, you may need to change the thumbnail size to something larger to show better image quality for posts across different sections of your site.
6 Tips to Select The Best Featured Images
Want to know how to pick the best featured image for WordPress post?
Here are the 6 best practices you should follow:
Highlight The Post Properly
You should always choose a featured image that highlights the main theme of a post. It will give users a clear idea about what the post is about. So, make sure to use a featured image that is relevant and to the point.
Use Appropriate Size
Choosing the right size for a featured image is crucial, as you have already realized reading this article. Pick the dimension and aspect ratio that best suits your posts or pages. Also, optimize the images to make them more SEO-friendly (more on that later).
Maintain Consistency
You should maintain consistency for the featured images. If you use different styles for different featured images, it might look out of place when users visit your site. So, use the same style with the same fonts and colors while creating featured posts for your blog posts.
Use Your Brand Color And Logo
Using your brand color and logo in the featured image is a great way to increase the appeal of a blog post. It shows authenticity and uniqueness that users will love while exploring your site.
Use High-Quality Images
The use of high-quality image sources for featured images can greatly increase user engagement. On the other hand, if you use low-quality or blurry images, chances are users will not click on a post.
Use Copyright-Free Images
Make sure you only use image sources that you are allowed to use. The use of copyright-free material ensures the credibility of your content.
How to Optimize WordPress Featured Images for SEO
Image is an essential aspect to consider when applying SEO best practices to your site. So, you may wonder whether the featured images also hold the same importance.
Does WordPress Featured Image Impact SEO?
Yes, WordPress featured image does impact SEO. Featured images can be beneficial considering several factors such as:
- Featured images can help reduce bounce rates. When users see high-quality featured images, they are more likely to click on a post and stay on the website for a longer time.
- Image size directly impacts Page Speed. So, customizing the featured image size accordingly is very important.
Featured Image SEO Optimization Tips
So, how do you ensure your featured images are SEO-optimized? These 3 tips will get you on the right track:
Relevant Title & Alt Text
Use appropriate titles and alt text for your featured images. This will ensure search engines can find and relate the image to the appropriate topic.
Use Supported Format
Use website-friendly image formats such as PNG, JPEG, and WEBP. This will help in maintaining high-quality images without requiring massive file sizes.
Compress Images
Compress images with the help of online tools. This leads to optimized files and increased page speed leading to better SEO results.
FAQs
How to Hide Featured Images In WordPress?
To hide featured images in WordPress, you can follow these methods:
- Go to the Edit View on a post, select the featured image block, and simply remove the photo to hide the feature image for that post.
- To hide featured images for all posts or pages, go to the Site Editor of your theme. Select Templates > Single Posts > Featured Image Block. Delete the block to hide images from all posts or pages.
- To hide a featured image for posts from a specific category, use a plugin like PostX.
What to Do If Your Feature Image Size Is Too Big?
If your feature image size is too big, try these methods:
- Change the default thumbnail setting by going to Settings > Media > Image Sizes in your admin dashboard.
- Go to Appearance > Editor > Templates > Single Posts in your theme settings. Select the Featured Image block and change its aspect ratio to suit your needs.
- Alternately, you can use a plugin like PostX to fine-tune the feature image size.
How to Fix Blurry Featured Images in WordPress?
To fix blurry featured images in WordPress:
- Upload an image with better resolution and size. If the target area has a dimension of 1000 x 1000 px but you upload an image of 600 x 600 px, it can result in a blurry image.
- Go to Settings > Media and Uncheck the “Crop thumbnail to the exact dimensions”. This will ensure
Conclusion
Hopefully, now you know everything about how to customize WordPress featured image size.
As already discussed, featured images hold great importance in increasing the visual appeal of your site. Make sure to follow best practices while choosing the images.
Feel free to refer to this article, if you are ever in doubt about the customization process of featured image size for WordPress.