

Creating product recommendations for a WooCommerce store usually sounds simple:
“Show accessories with laptops.”
“Recommend similar products.”
“Display products customers are likely to buy.”
But turning these ideas into actual recommendation rules can become complicated when you need to define products, conditions, sorting, and where those recommendations should appear.
WowRecommend gives you multiple ways to create recommendation logic based on how much control and automation you need.
You can build rules manually, follow guided setups, or use AI to create and refine recommendations through natural conversations.
In this guide, we will explore all three methods and show when each approach works best.
If You Prefer Video Guide:
Method 1: Create Recommendation Rules Manually
Best for: Store owners who want complete control over their recommendations.
The manual recommendation builder gives you full control over every part of your recommendation logic.
You decide:
- Which products should be recommended
- Which customers should see them
- How products should be sorted
- Where recommendations should appear
Step 1: Choose Where Recommendations Should Appear
First, select where you want to display your recommendation.
WowRecommend allows you to add recommendations across different parts of your WooCommerce store, including:
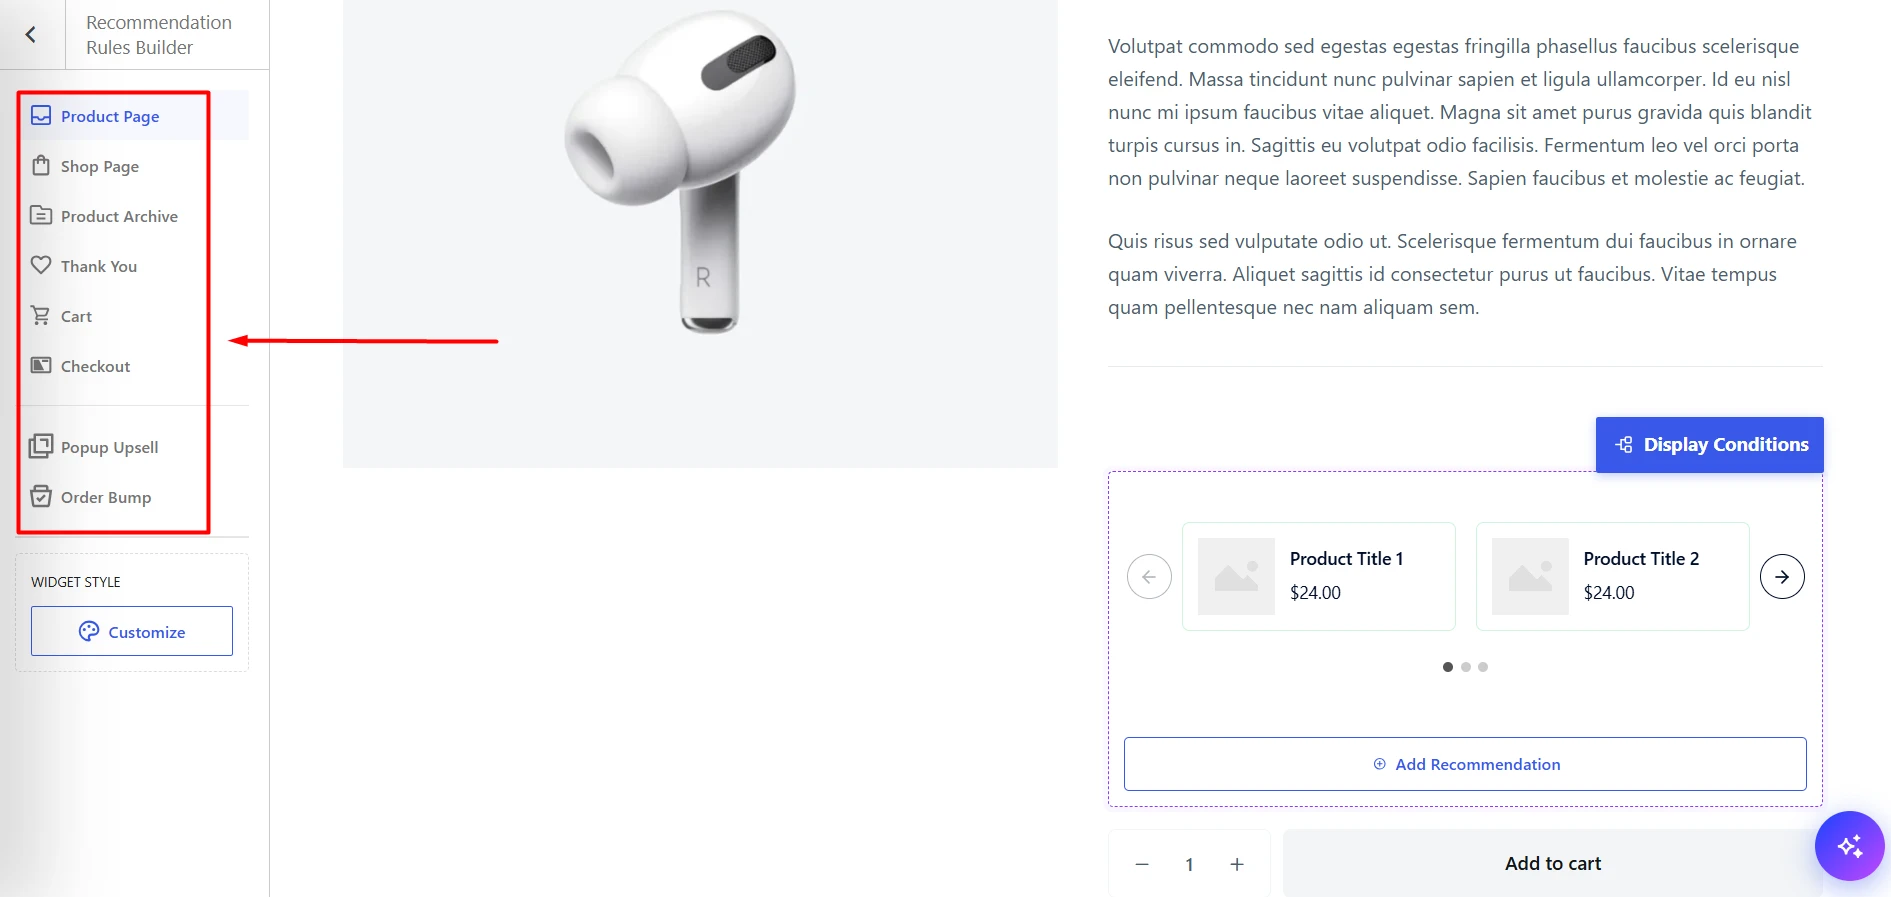
- Product pages
- Shop pages
- Product archives
- Cart page
- Checkout page
- Thank you page
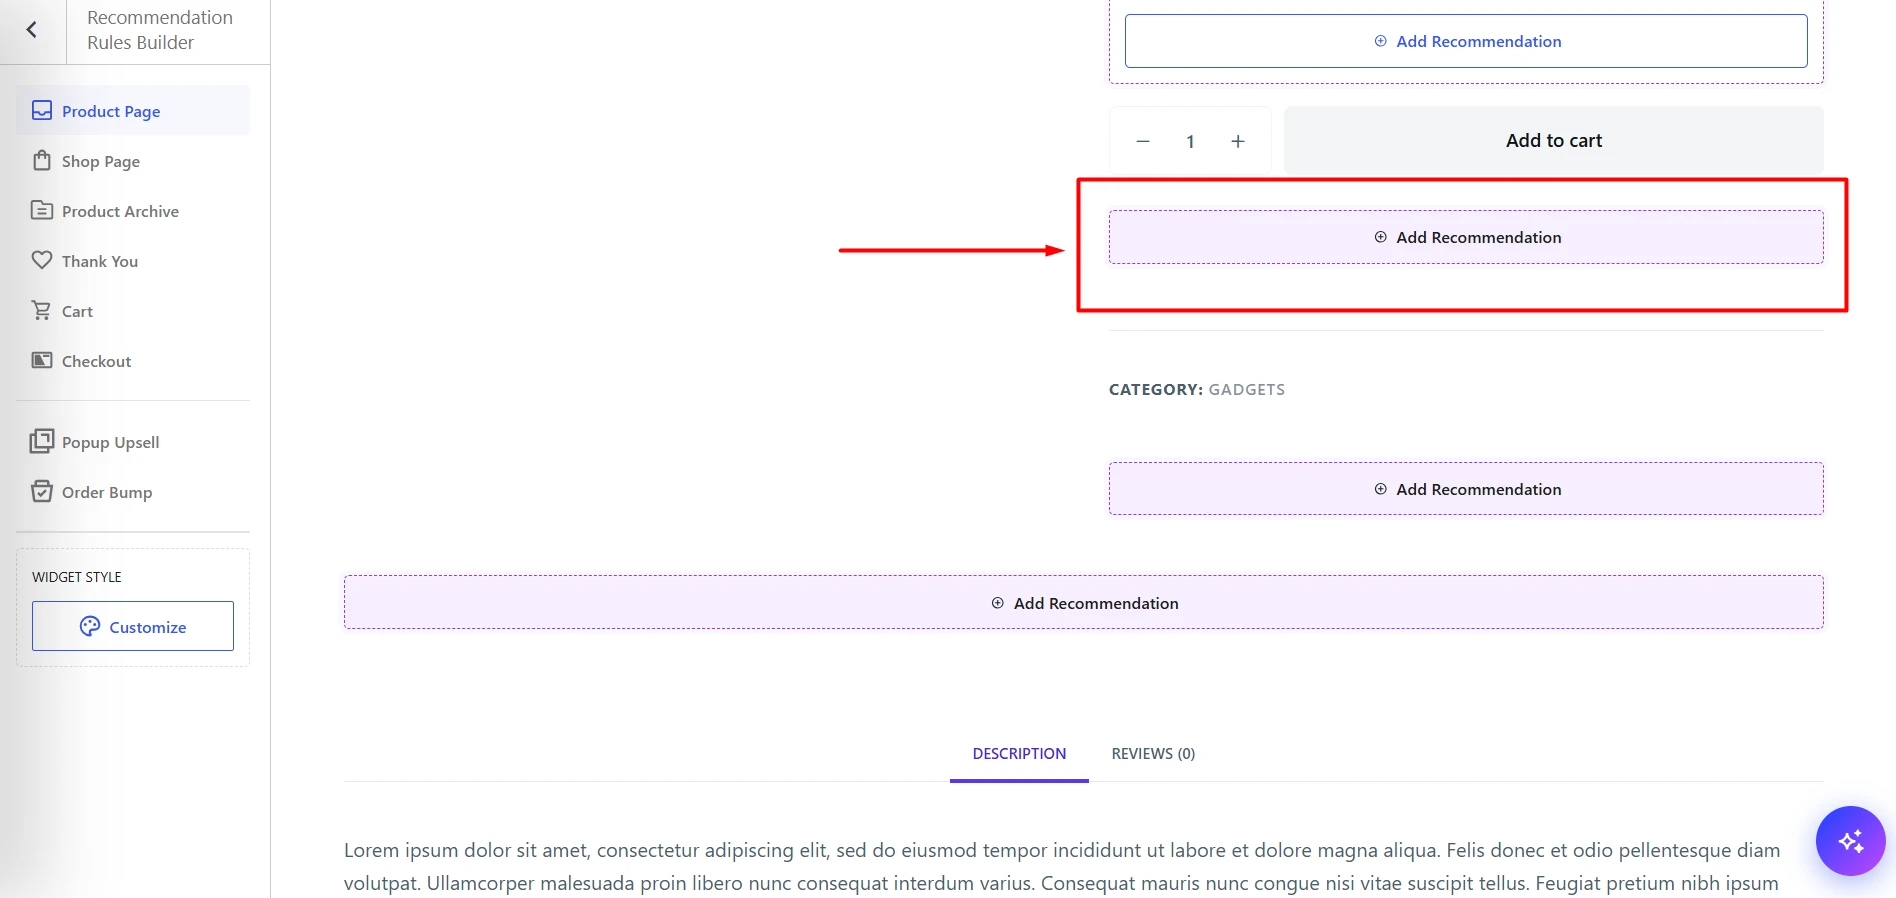
After selecting the page, choose the exact recommendation placement. For example, on the product page, you can choose from 5 placements – for example, before add to cart button, after add to cart button and so on.
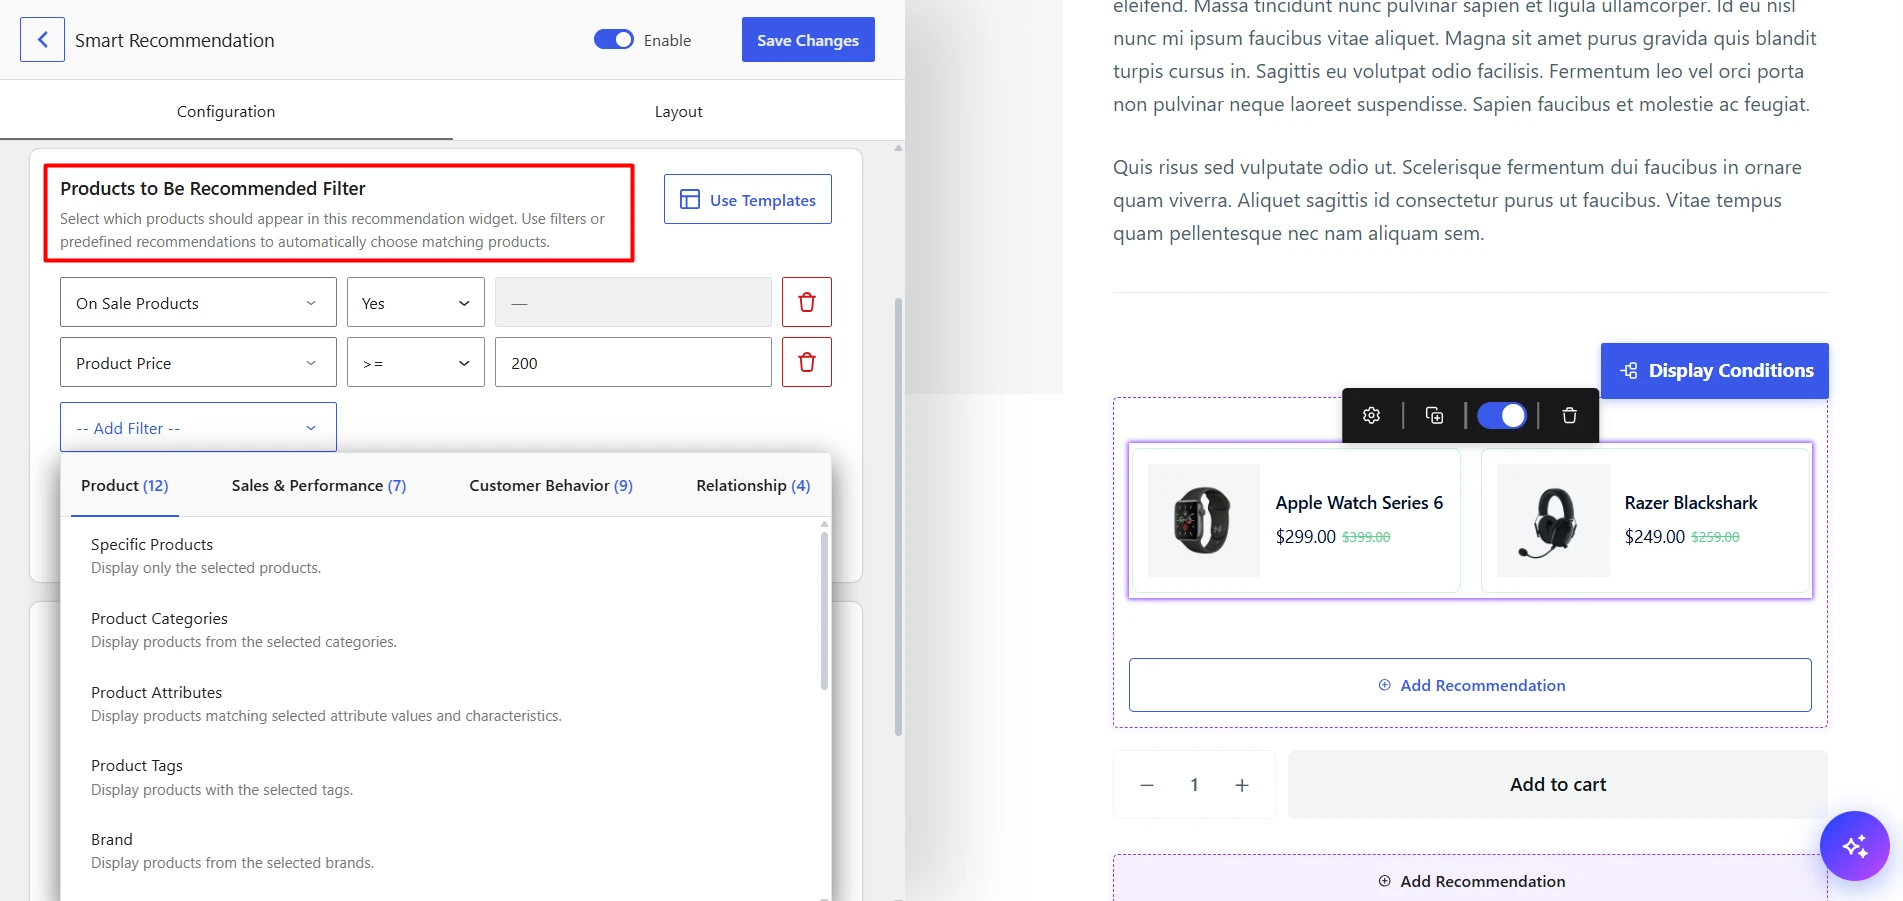
Step 2: Add Products Using Recommendation Filters
Next, decide which products should appear in the recommendation. To do that, select the recommendation filter – WowRecommend currently offers 32 recommendation filters organized into 4 categories.
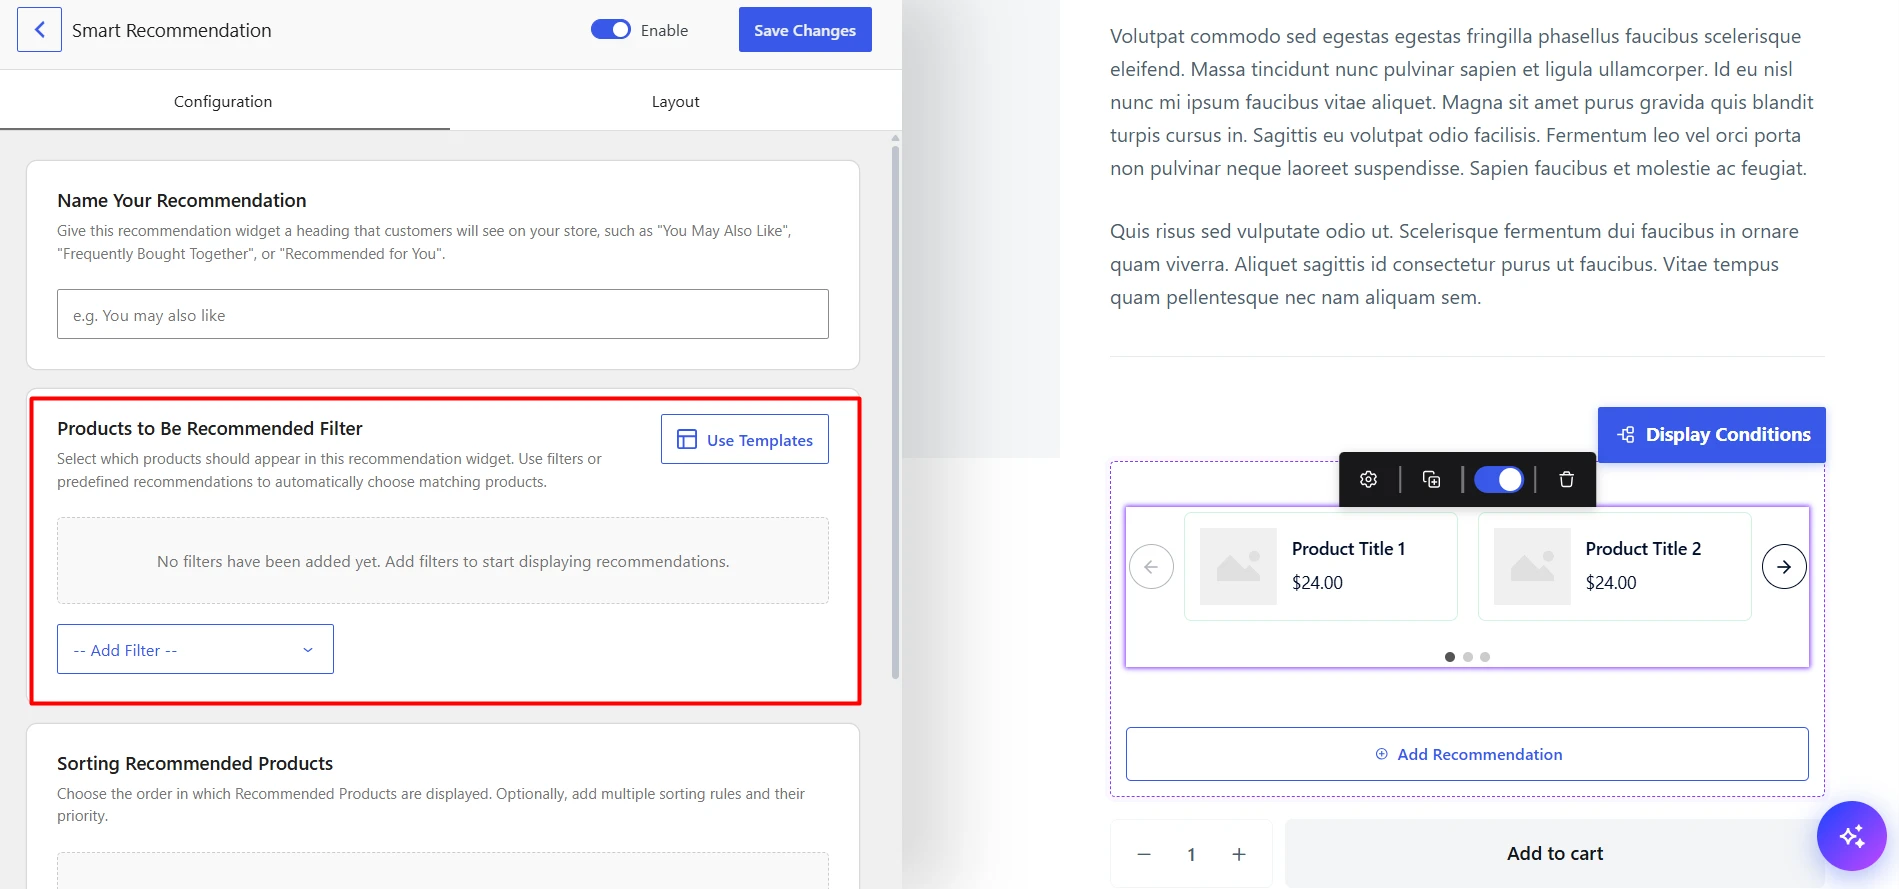
For example, you can recommend products based on:
- Product category
- Product tags
- Attributes
- Brands
- Sales performance
- Customer behavior
And so on.
You can stack multiple filters to further pinpoint exactly which products to recommend.
Step 3: Sort Recommended Products
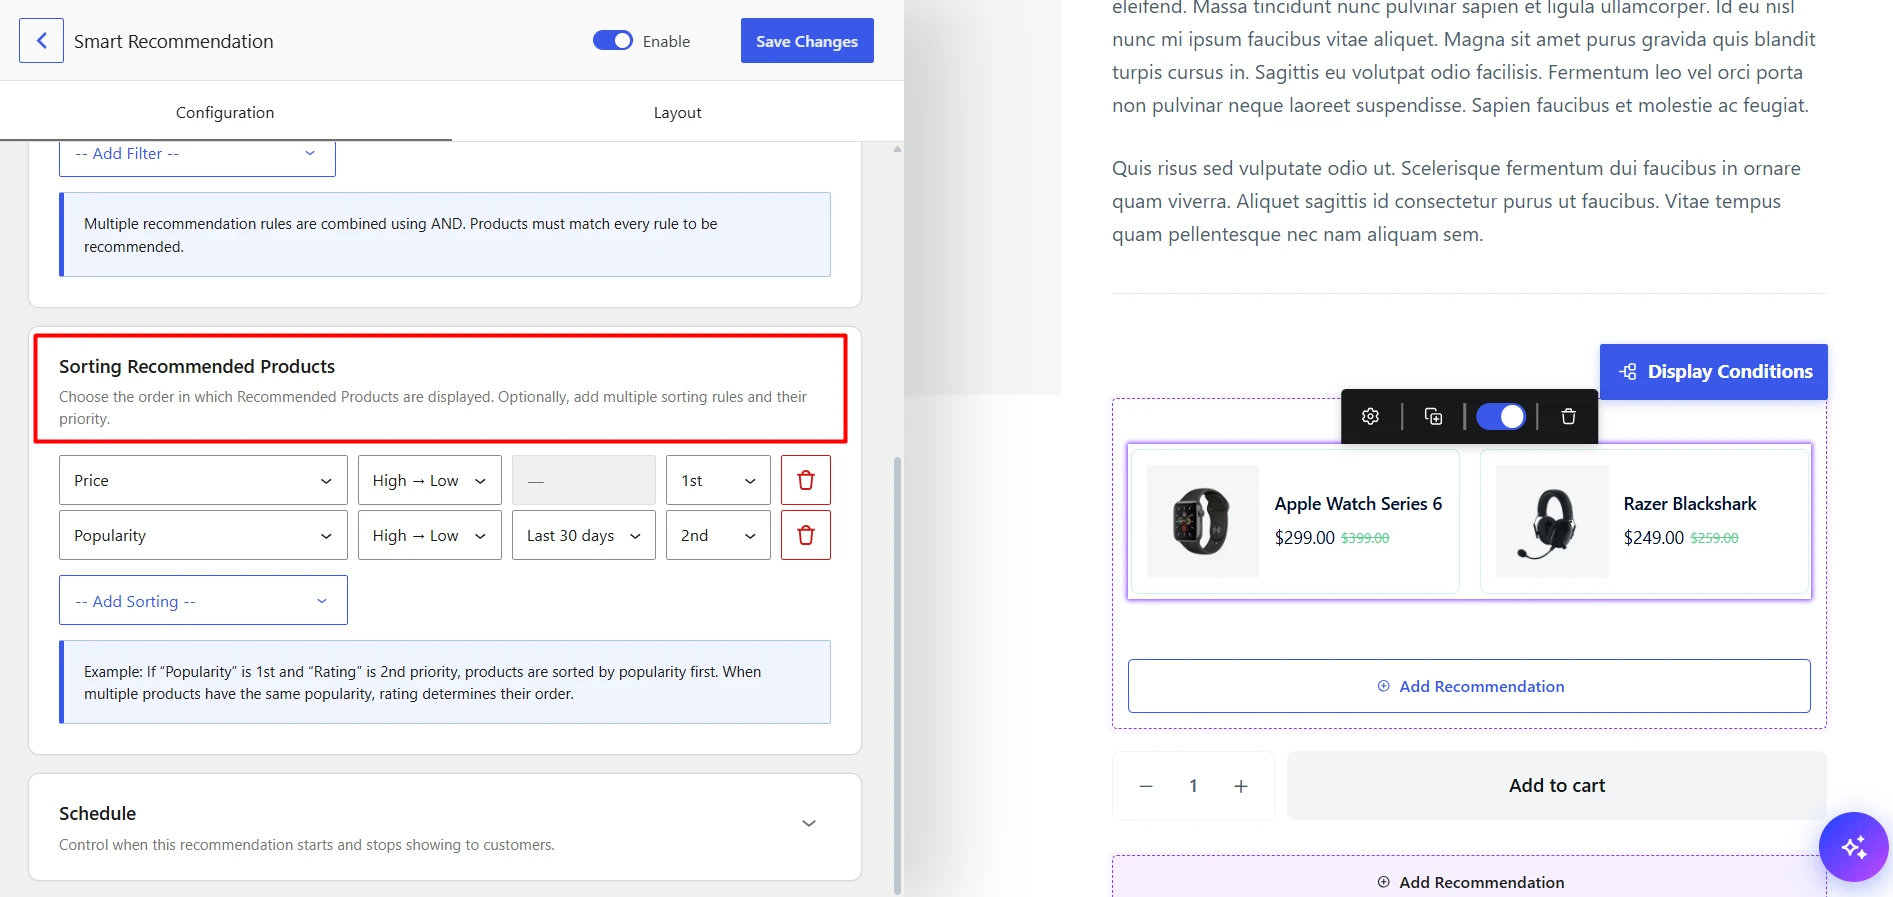
After deciding which products qualify, control the order in which they appear.
You can sort recommendations based on factors like:
- Popularity
- Conversion
- Freshness
- Price
- Rating
Step 4: Configure Additional Settings
Finally, customize how the recommendation appears.
You can control the display settings:
- Set when multiple recommendations are active, which recommendation will be shown instantly, after a delay or page reload.
You can control the visual:
- Recommendation heading
- Layout style
- Number of products displayed
- Products shown per row
- Product information visibility
Once everything looks correct in preview, publish the recommendation.
Method 2: Use Guided Steps to Create Recommendations Without API Setup
Best for: Beginners who want to create recommendations quickly without configuring AI services.
With Guided Steps, WowRecommend walks you through creating recommendations using predefined setups. You do not need an external AI API key for this method.
Instead of writing rules manually, you simply choose what type of recommendation you want to create and follow the guided process.
Step 1: Open AI Rule Builder Chat
From the WowRecommend recommendation builder, open the AI chat and you will see a set of Guided Steps.
This gives you a simplified recommendation creation workflow.
Step 2: Choose Your Recommendation Goal
Select the type of recommendation you want to create.
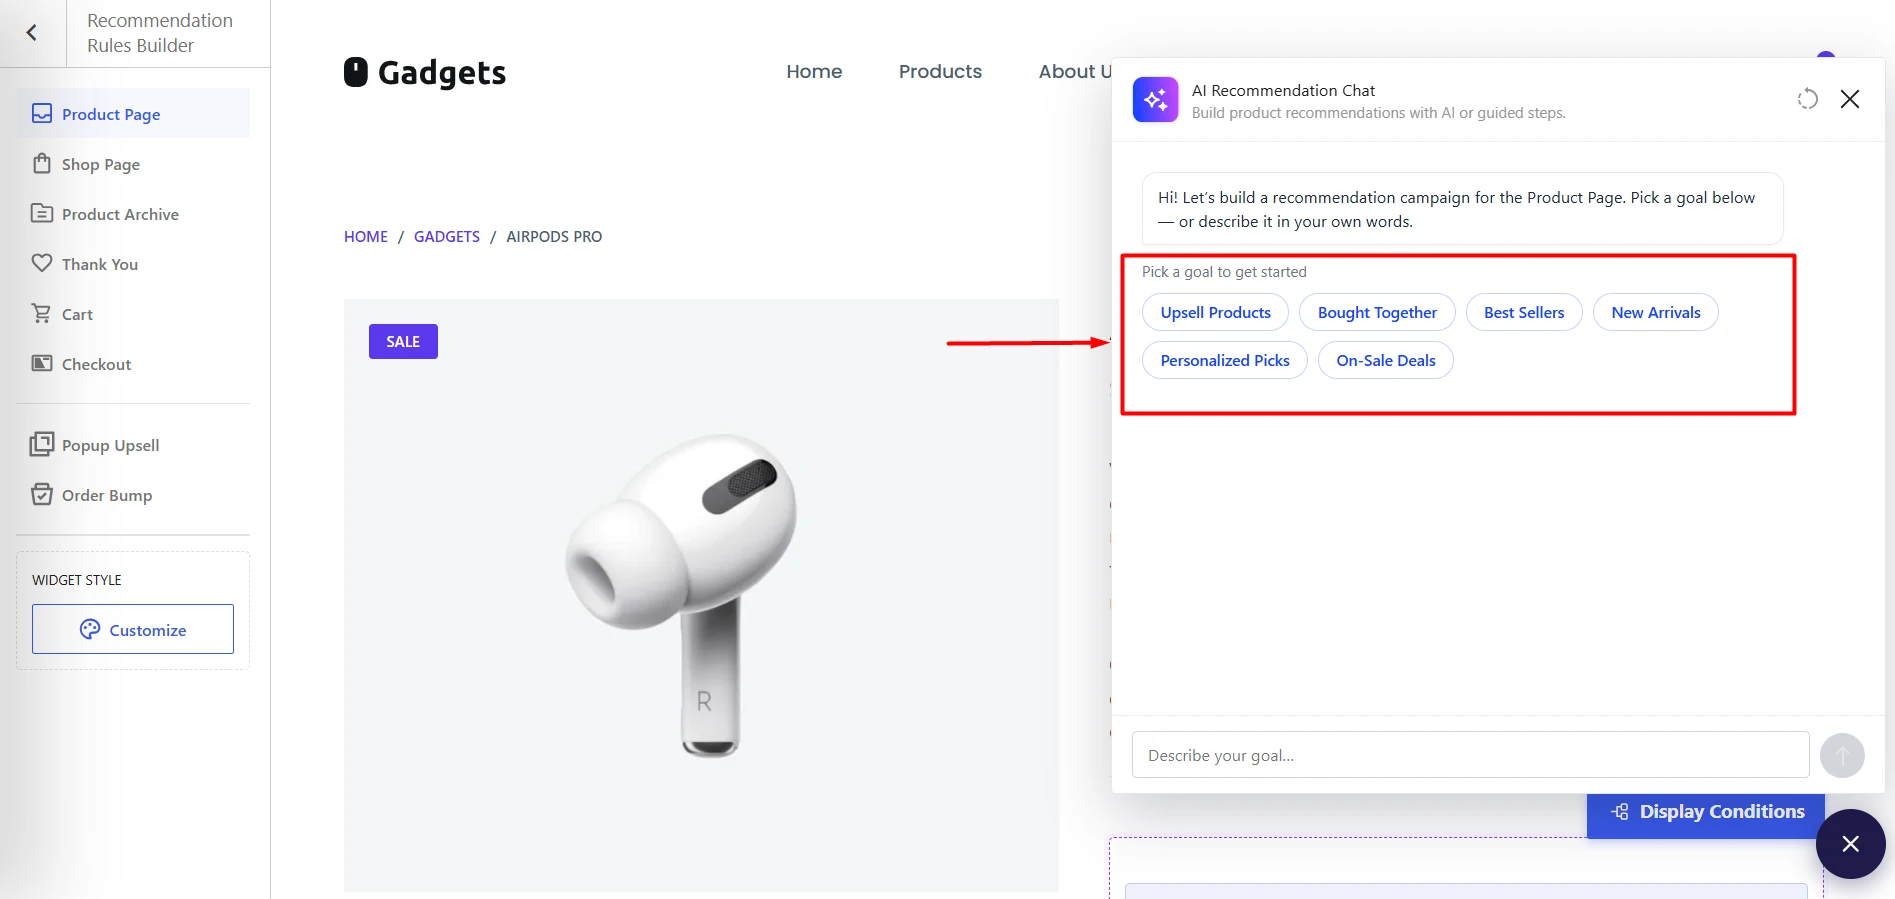
Right now you have these set of premade Guided Steps:
- Upsell Products
- Bought Together
- Best Sellers
- New Arrivals
- Personalized Picks
- On-sale Deals
Choose any of the goals.
Next, choose the placement of the recommendation.
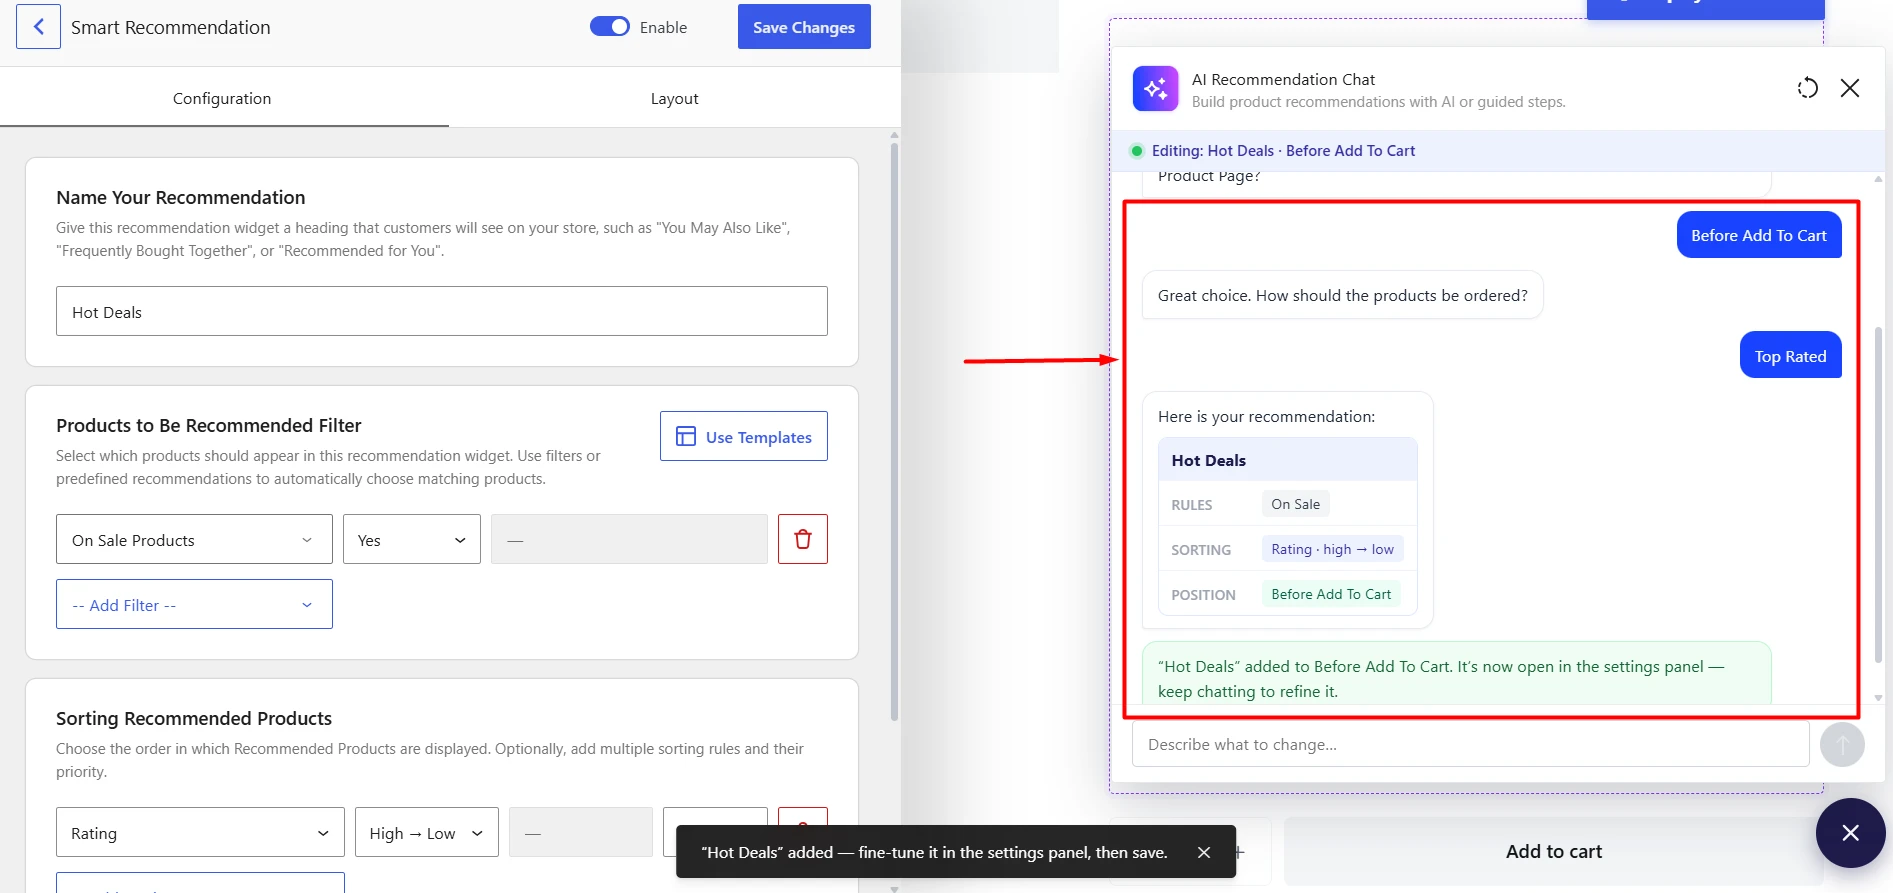
Then, select the sorting option.
And voila! The recommendation is set up automatically.
Step 3: Review, Customize and Publish
You can publish the recommendation as-is but you have the freedom to customize the filters, sorting, labels, design and so on.
Method 3: Create Recommendation Rules Using AI Chat
Best for: Users who want to create complex recommendation logic super fast with the help of AI.
AI Chat gives you the fastest way to create advanced recommendation rules.
Instead of manually selecting every option, you describe what you want.
For example:
“Show best-selling headphones under $50. Exclude products that are out of stock.”
AI understands the requirement and creates the recommendation logic for you.
Step 1: Connect an AI Provider
Unlike Guided Steps, AI Chat requires an AI provider connection.
You need to connect an AI model using an API key through the WordPress connector.
You can use providers such as:
- OpenAI
- Claude
- Gemini
You can use both Free and Pro APIs – you can use Gemini’s free tier to use the free API key. Also, there are many other free APIs available on platforms like OpenRouter.
For more details, please check our documentation on setting up API keys.
Step 2: Describe Your Recommendation
After the API is set up through the WordPress connector, come to the WowRecommend rule builder and click on the AI chat icon.
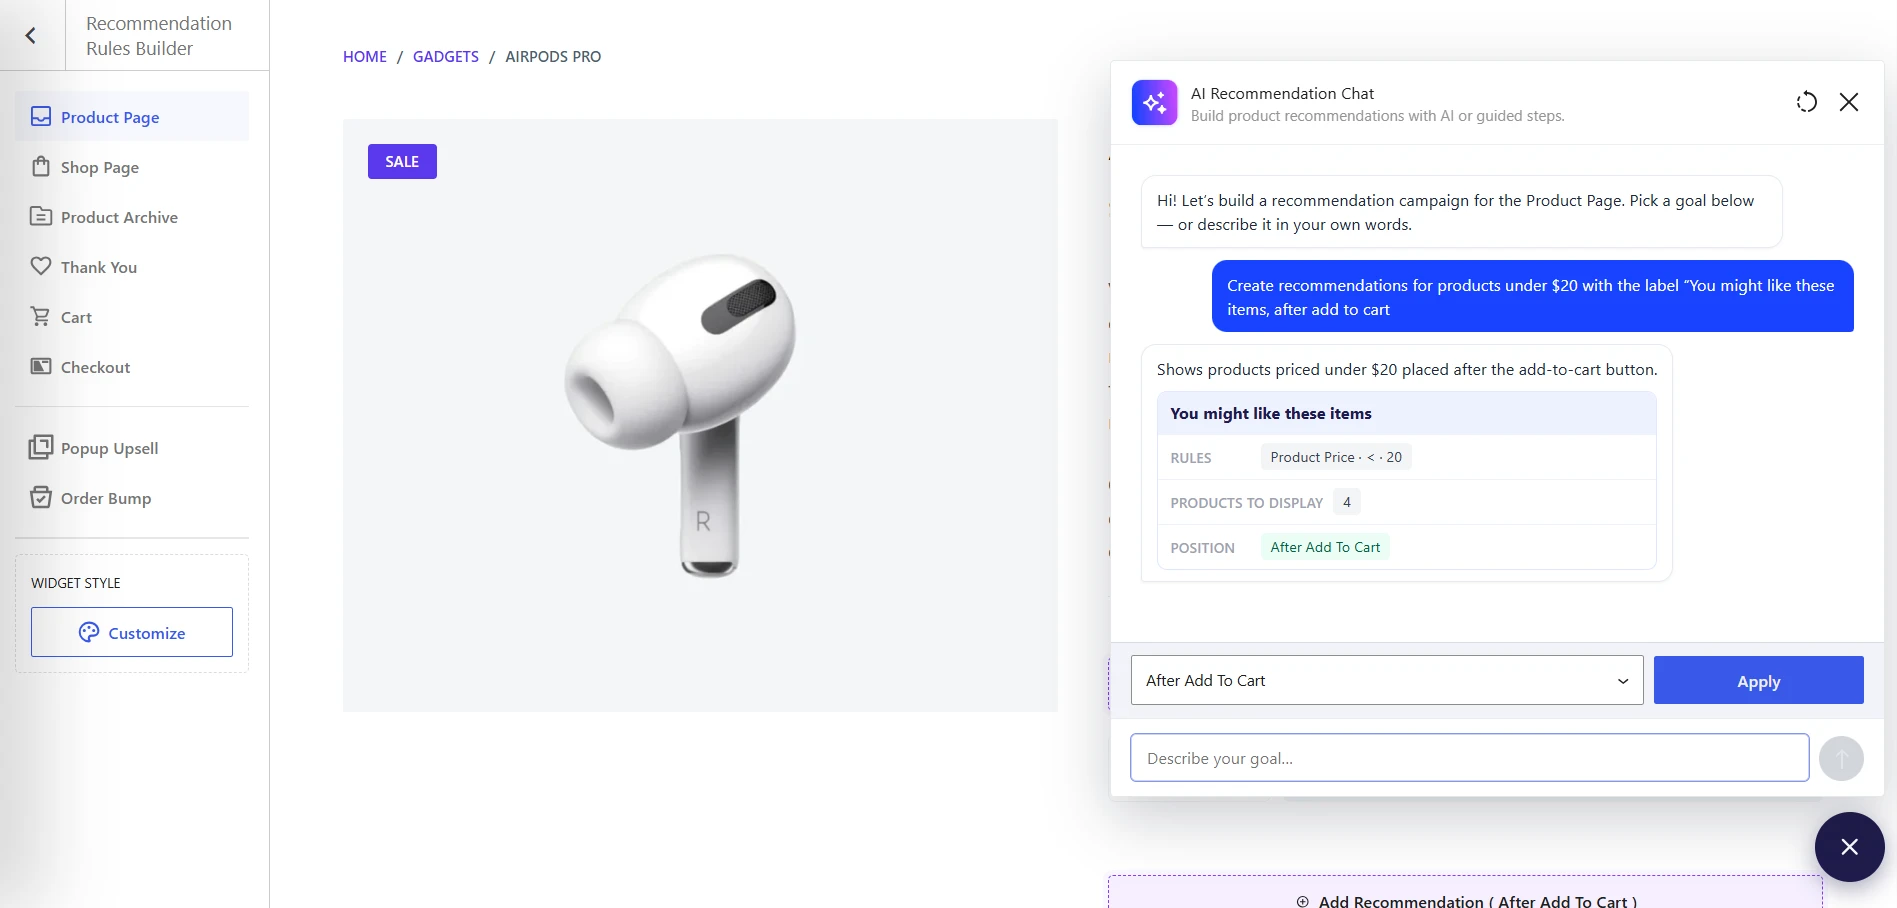
Now, simply type your recommendation requirements.
Examples:
“Create recommendations for products under $20 with the label “You might like these items””
AI converts your instructions into a structured recommendation rule.
Step 3: Review the Recommendation and Make Changes
You can continue improving the rule without rebuilding everything.
For example:
Initial request:
“Recommend laptop accessories.”
Refinement:
“Only show accessories under $75.”
Another refinement:
“Exclude products with less than 4-star ratings.”
AI updates the recommendation logic based on your instructions.
Summing Up
WowRecommend gives WooCommerce store owners three flexible ways to build recommendation logic.
Use manual setup when you want full control. Choose Guided Steps when you want a faster workflow without technical setup. Use AI Chat when you want to create complex recommendations by simply explaining what you need.
No matter which method you choose, the goal remains the same: show customers more relevant products at the right moment and create a better shopping experience.