
Blog post metadata refers to the extra information about your post – like who wrote it, when it was published, what category it belongs to, and more.
While it may not be part of the main content, it plays a great role in improving user experience, content structure, and even SEO.
But how exactly do you add or customize blog post metadata in WordPress?
In this article, I’ll walk you through two simple methods to display and customize blog post metadata:
- Using the WordPress plugin, PostX, for full customization with the Advanced Meta block
- Using your WordPress theme’s post customization options
In this blog post, I will explain both methods in more detail. Based on your specific setup and requirements, you can apply any option. So, without any further ado, keep on reading!
What is Blog Post Metadata in WordPress?
Blog post metadata is additional information about your post that helps readers and search engines understand the content better. This provides details like the post’s date, author, categories, tags, and custom taxonomies.
Depending on the WordPress theme, this information can appear in several places. For instance, after the post’s title, after the content, in the sidebar, etc.
This information helps your visitors gain a deeper understanding of the content they are reading. However, showing excessive post metadata might make your website seem amateurish and cluttered.
Common Types of Blog Post Metadata
There are many types of blog post metadata, but here are some of the most common ones:
Post Author: Tells the reader who wrote the article.
Publish Date: Shows when the post was published or last updated.
Categories: Helps organize content into broad topics.
Tags: Adds more specific labels to help with post discovery.
Reading Time: Helps users know how long it takes to read an article
Comments Count: Shows how interactive or popular the post is.
Some Use Cases for Blog Post Metadata
Now, let’s learn about some usual use cases for showing blog post metadata. It will provide you with a better idea about how to use the metadata:
- If you have a news site, you can highlight the publishing date to show article freshness.
- For a multi-author blog, it is necessary to show author metadata to spotlight contributors and build credibility.
- For a recipe or travel blog, it is important to categorize posts by specific types, making metadata essential for browsing.
- A tech blog can display tags like “beginner-friendly” or “how-to” to help readers find the right post faster.
Method 1: Add & Customize Blog Post Metadata Using WordPress Plugin
If you want full control over how your blog post metadata appears, you will need to use a dedicated WordPress post plugin. PostX is an advanced blog plugin that lets you fully control how you show blog post metadata on your site.
It offers a dedicated Advanced Post Meta block and many customization options that help you display information like author name, publish date, categories, reading time, and more – just the way you want.
Let’s learn the step-by-step process to do this:
Step 1: Install and Activate the PostX Plugin
To get started, first install the PostX plugin from the WordPress plugin directory. Here’s how:
- From your WordPress dashboard, go to Plugins → Add Plugin.
- Search for “PostX”.
- Click Install Now and then Activate.
Once activated, navigate to the PostX dashboard, and you’ll find the Site Builder option. In the next step, we will use this feature to create a post template.
Step 2: Create a Post Template with the Site Builder
Before you can use the Advanced Post Meta block, first, create a post template:
- Go to PostX → Site Builder.
- Navigate to the Singular template section
- Click on Create Singular Template or edit the existing one
This template will serve as a layout for all your blog posts, giving you consistency across your website.
Step 3: Add the Advanced Post Meta Block
You can add or remove specific blocks to create your ideal single post layout.
If you are happy with the design, you can add the blog post metadata block.
If you chose a premade template, you will already have the Advanced Post Meta block by PostX.
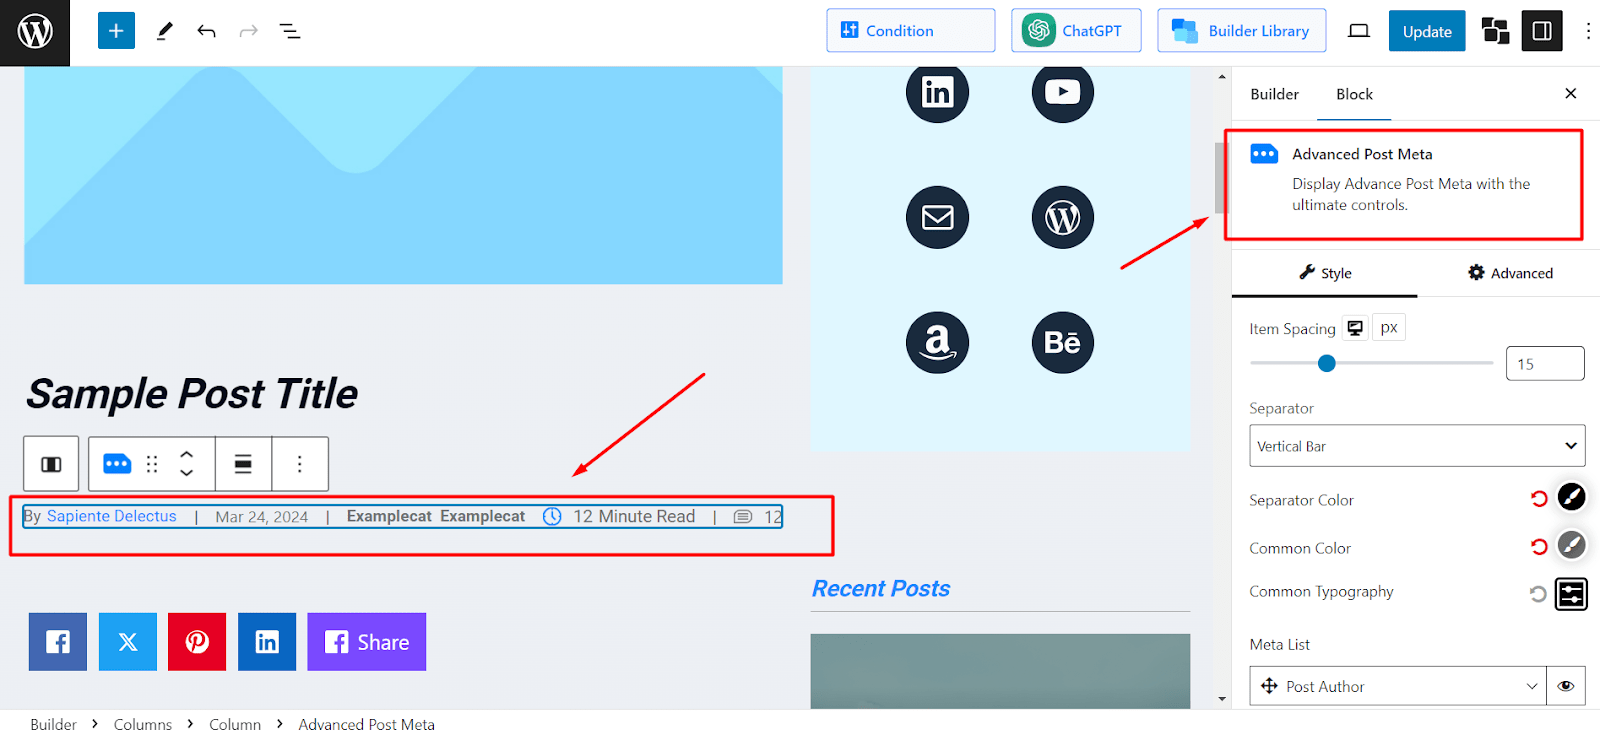
But if you started from scratch, click on the “+” icon in the Gutenberg editor and search for “Advanced Post Meta”. Click to insert the block into your single post layout.
This block allows you to display post metadata wherever you place it – top, bottom, or between other content blocks.
Step 4: Customize Blog Post Metadata
Once the block is added, you can customize it in detail:
Click on the Advanced Post Meta block to access its settings in the sidebar.
From here, you can customize item spacing, alignment, separator, and more options.
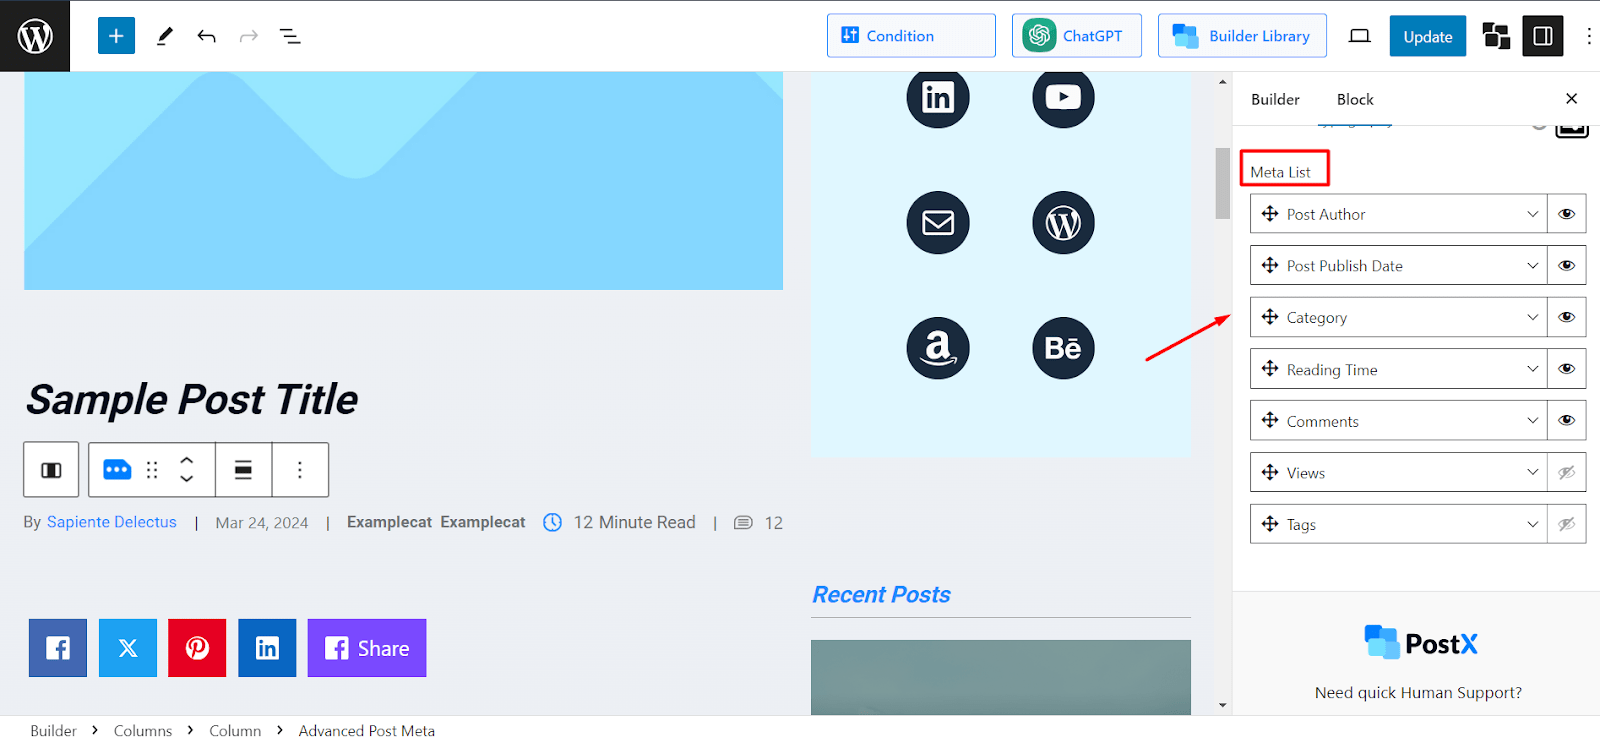
Now, scroll down to find the Meta List settings. This is where you can decide which metadata to show or hide.
You can enable or disable any of the following:
- Post Author
- Publish Date
- Category
- Tags
- Reading Time
And more!
This gives you complete flexibility to show only the most relevant information to your readers.
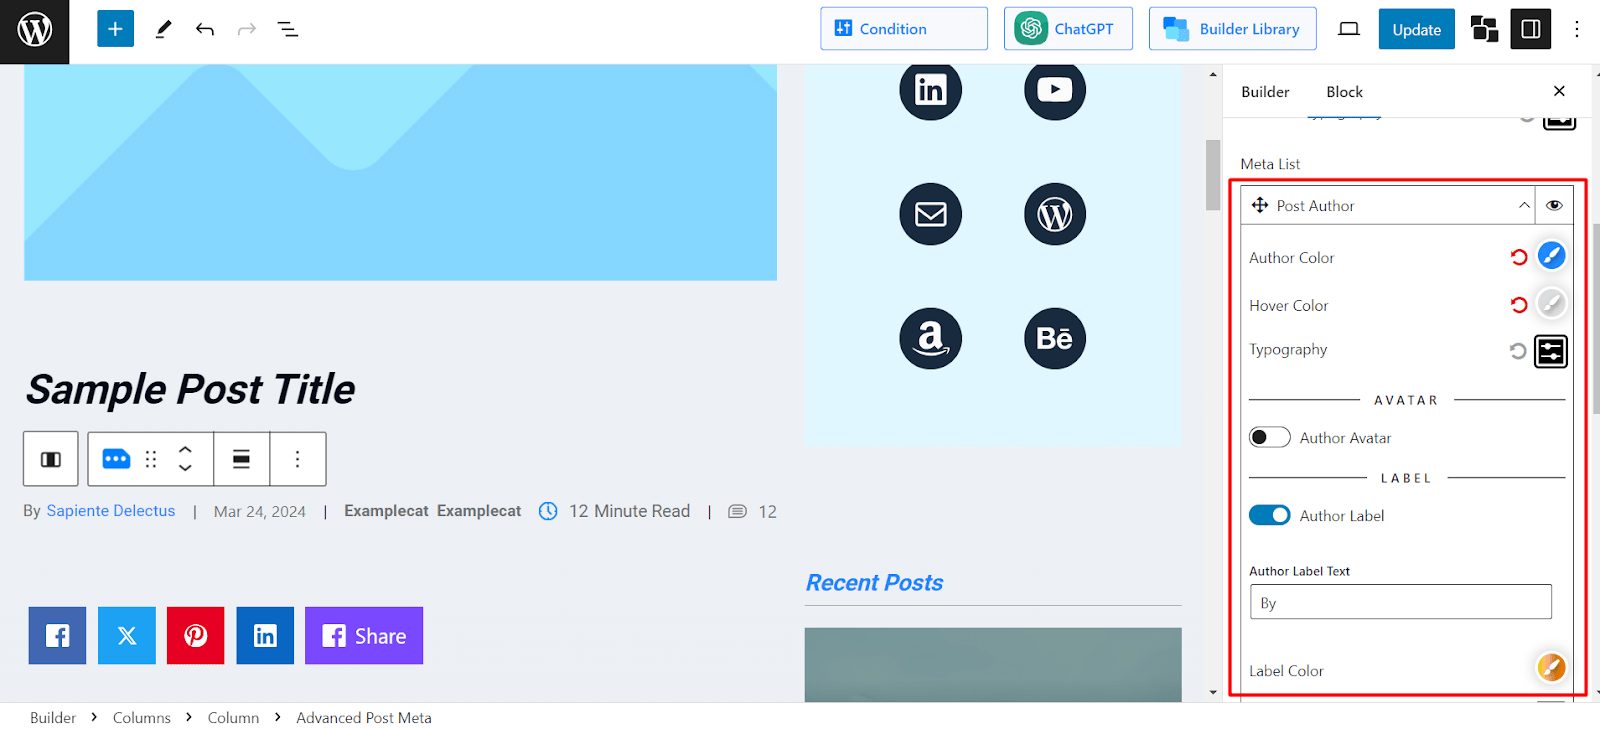
Step 5: Style Each Metadata Element
PostX doesn’t stop at just showing metadata – it lets you style each element individually.
For example:
Post Author: Set the text color, label color, hover color, and typography.
Post Published Date: Customize date formats, colors, and typography.
Category: Choose label placement, colors, and icons.
With these styling options, you can make the post meta match your site’s branding and layout perfectly.
Method 2: Add & Customize Blog Post Metadata Using WordPress Themes
You can also use WordPress themes to customize post metadata for your blog posts.
Based on the type of theme, the customization process of blog post metadata will vary.
For instance, if you use a traditional theme like Blocksy, you can customize the post metadata in the theme customizer settings.
Follow these steps if you want to change blog post metadata settings in WordPress traditional themes:
- On your admin dashboard, go to Appearance > Customize
- This will show the theme customization options
- Under Post Types, click Single Post
- Click on the Post Title to bring up its settings
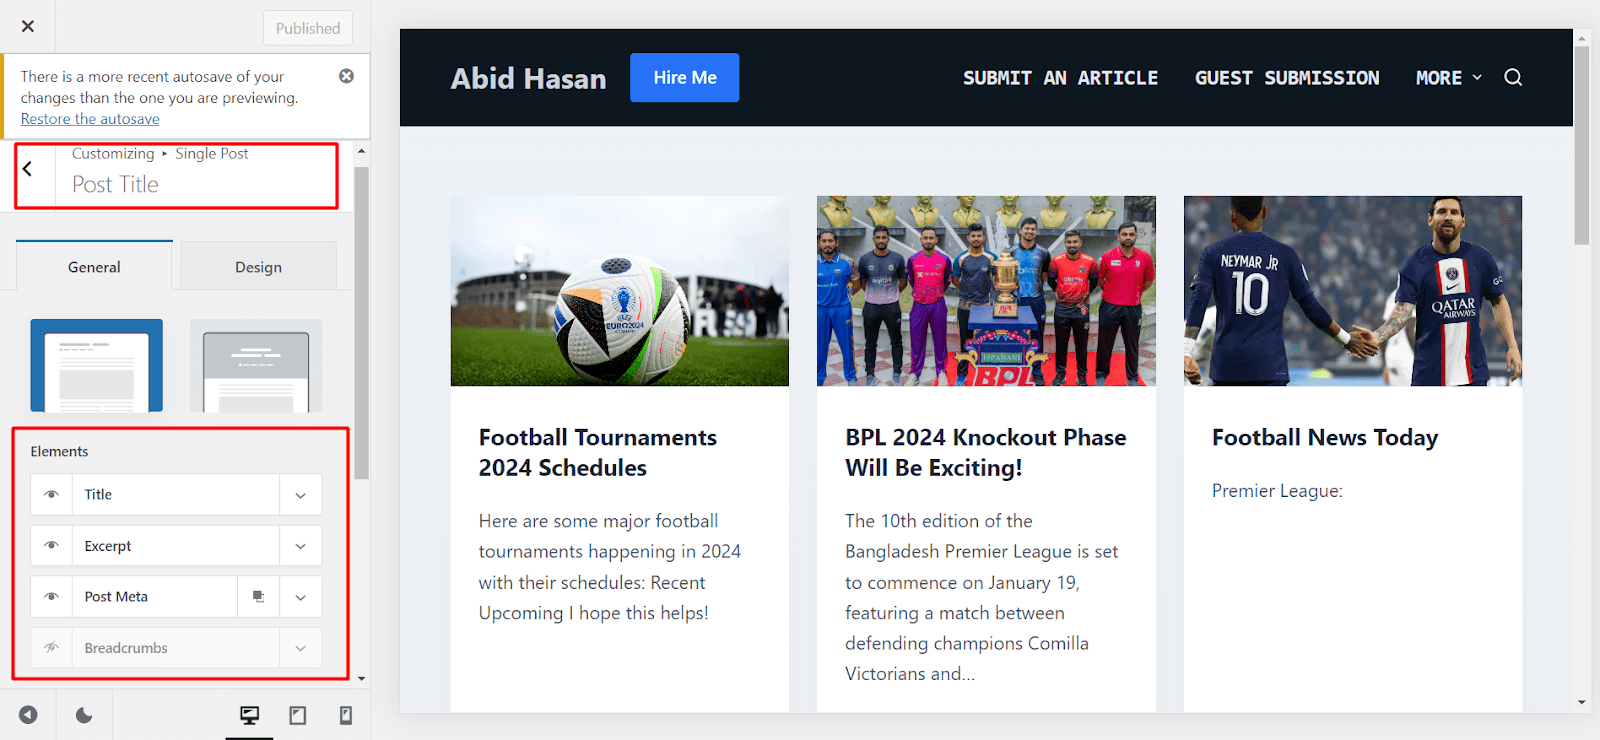
- From here, expand the options for Post Meta. This will show different customization options for post metadata, such as Author, Published Date, Taxonomies, and Comments.
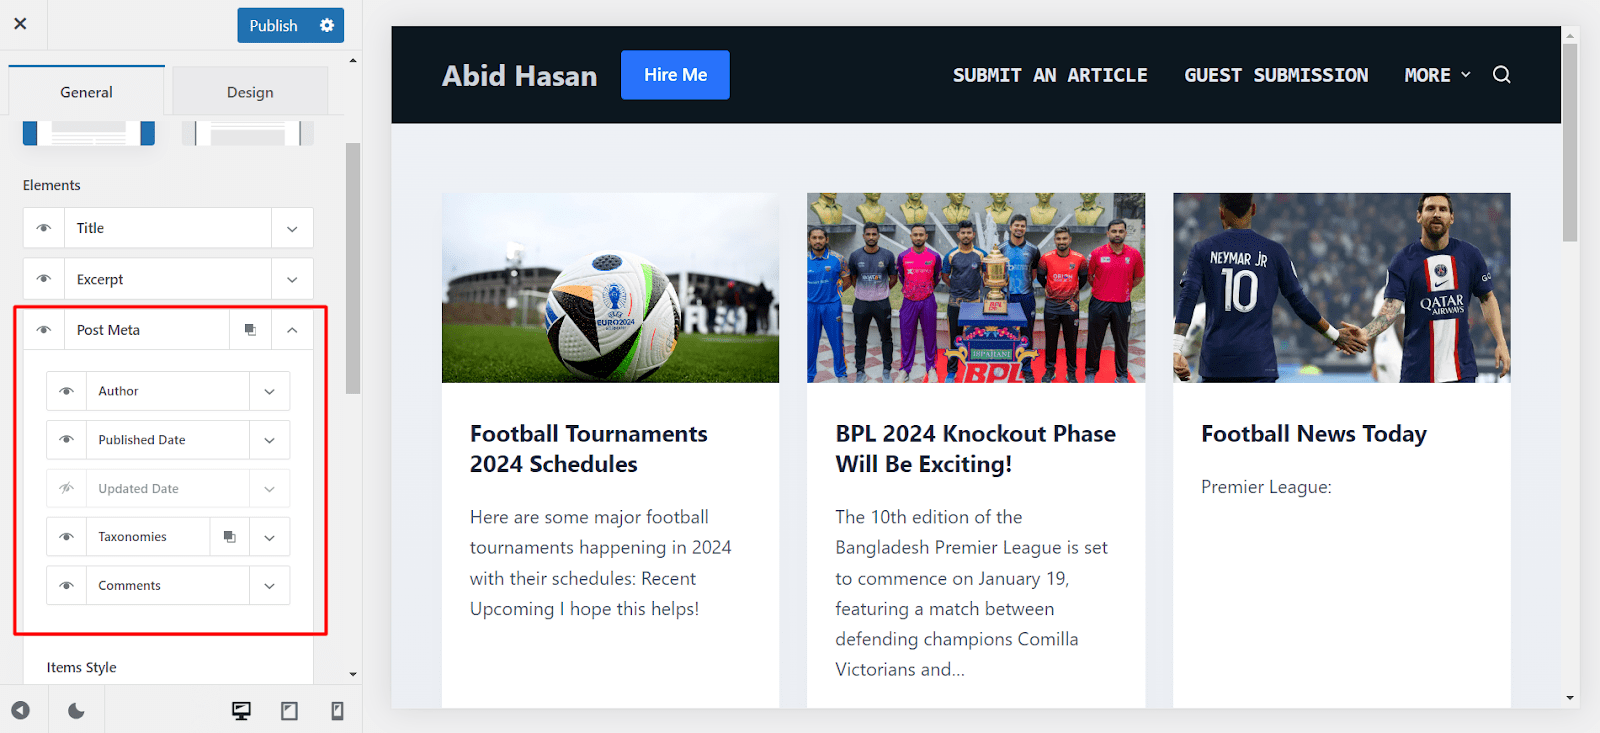
Now make changes to the settings as you like.
If you use a full site editor theme such as Twenty Twenty Three, the steps are easy to follow, too.
Follow this procedure to add and customize blog post metadata using WordPress FSE themes:
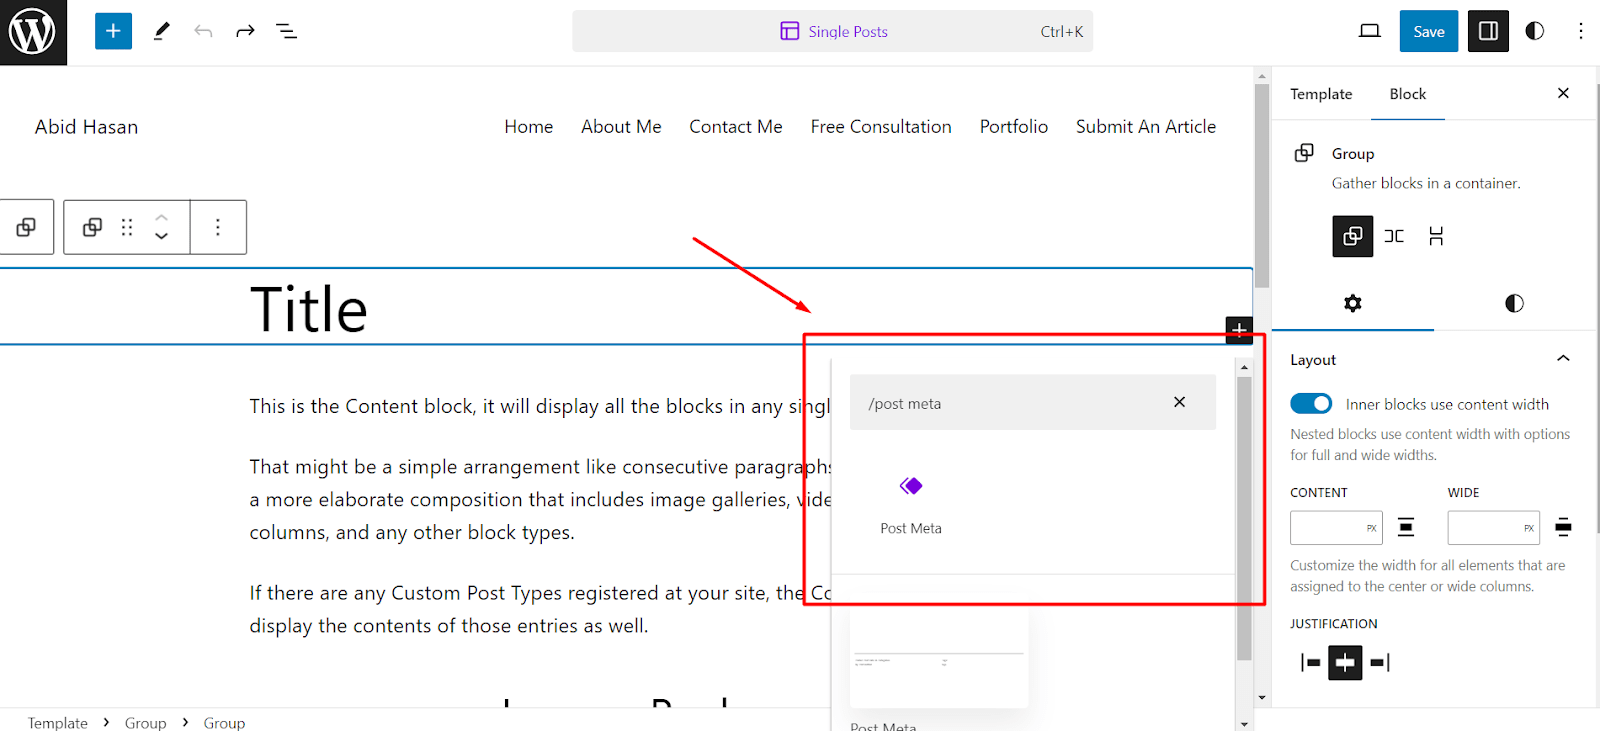
- On your admin dashboard, click on Themes > Editor
- This leads to the site editor’s view. Now go to Templates > Single Posts
- Click on the Pencil icon to start editing template settings
- Click on the “+” sign to search for the block called “Post Meta” and add it to the template
This will add the blog post metadata for all the blog posts.
If you want to customize the settings, simply select the Post Meta block and click on Edit.
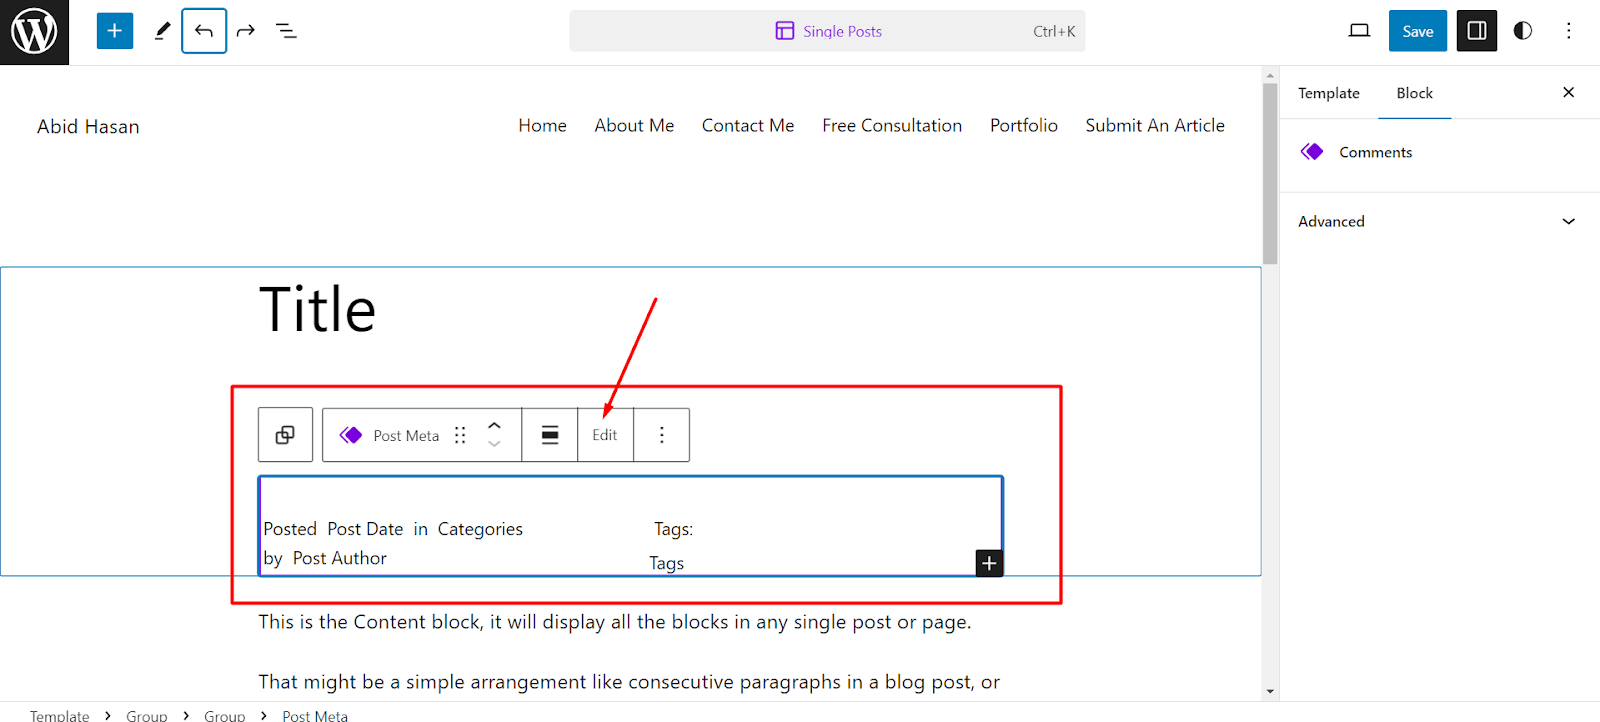
Now, you can edit the settings to your preferences.
Benefits of Showing Custom Blog Post Metadata
Adding custom blog post metadata isn’t just about filling space – it plays a big role in how your content looks, feels, and performs. Let’s explore four key benefits that show why metadata matters and how it helps your readers and your site.
Helps Readers Understand the Context Instantly
Imagine landing on a blog post and having no idea who wrote it, when it was published, or what topics it covers. That can be confusing, right?
By showing the author’s name, publish date, and categories right at the top or bottom of a post, you’re giving your readers some quick context:
Is this content fresh or outdated?
Is it written by a trusted expert?
This little bit of information helps visitors decide if the content is worth reading.
Improves Trust and Credibility
When your blog shows clear author names and post dates, it builds trust. People are more likely to trust content that feels transparent and professional.
Think about it: if a post is missing a date or author, it may come across as generic or even suspicious.
On the other hand, having visible metadata shows that real people are behind the content and that you’re keeping things up to date.
Boosts User Navigation and Engagement
Metadata like tags and categories act as mini-guides for your readers. When someone clicks on a category (like “SEO Tips” or “WordPress Tutorials”), they’re taken to more related posts instantly.
This keeps visitors on your site longer because they can easily find more of what they’re interested in – without having to search manually.
It’s a great way to reduce bounce rate, increase page views, and offer a better browsing experience overall.
Supports SEO and Search Visibility
Here’s something most people don’t realize: blog post metadata can help your SEO too.
Search engines like Google pay attention to things like publish dates, modified dates, and even author names (especially if the author has authority in that niche).
When metadata is structured properly, it gives search engines a clearer idea of what your post is about.
Summing Up
So, adding blog post metadata is a small but impactful way to improve your site’s usability, professionalism, and SEO performance.
In this guide, I covered:
- What blog post metadata is, the different types, and how it’s used
- The key benefits of using metadata on your blog
- Different methods to manage post metadata
Whether you want full control with PostX or prefer a theme-based approach, both methods will help you create a better reading experience and a more structured site.
So choose the method that fits your requirements and start enhancing your posts today!

